For more information on spokeshaves, see our beginner site Common Woodworking.
Restoring and preparing the cutting iron and the cap iron
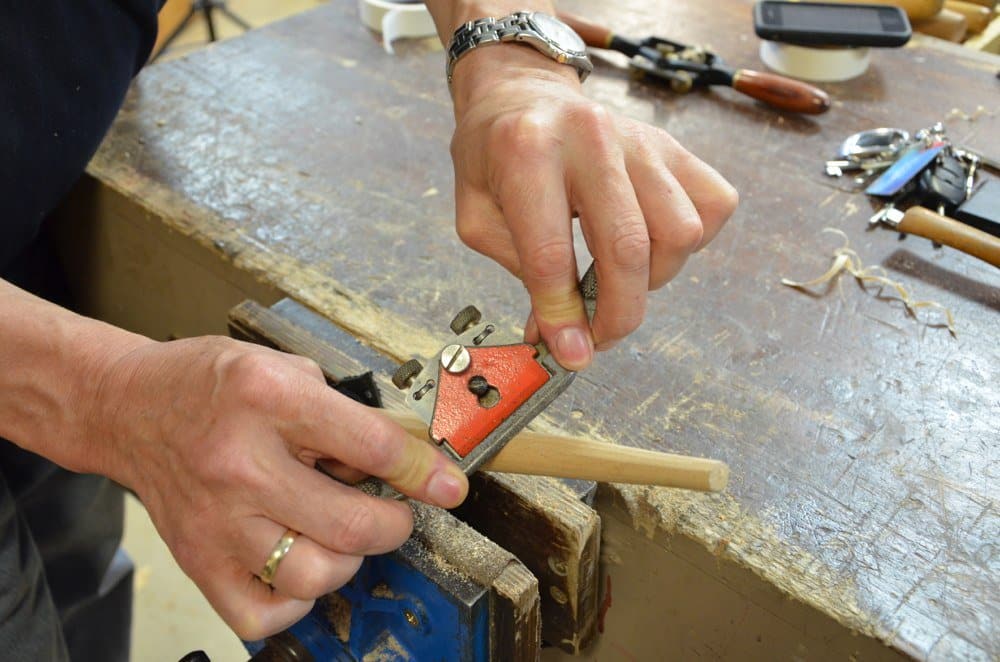
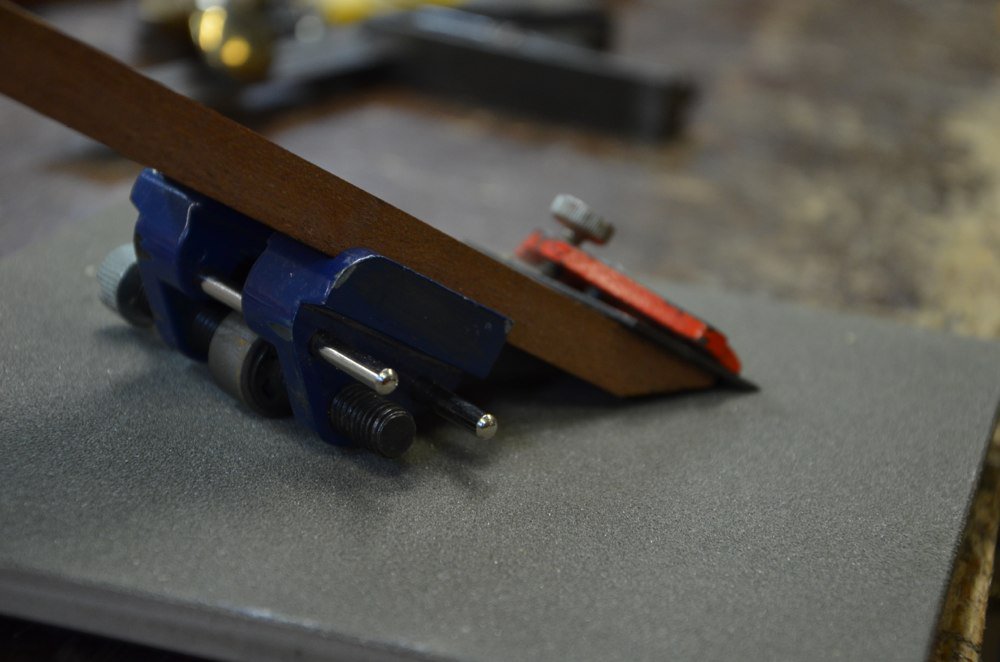
The #151 flat-bottomed spokeshave is now the commonest of all spokeshaves in use for general woodworking and the traditional wooden pattern from 17th century origins is no longer a production model because it generally ceased being produced in the 1920s because of the #151 success. Buying them new or secondhand usually requires some remedial work to different parts of the tool. The following will show you the important steps to making any #151 spokeshave work beautifully regardless of the work you do with it. It’s almost always best to dismantle all of the parts of any tool and remove all of the components. This is good advice provided you know how to reverse the steps and put it all back in the right way. A problem occurs if the seller puts the parts together without actually knowing which things should be where. The most common problem I encounter with the #151 is that the blade almost always arrives with the cutting iron the wrong way round. No matter what you do with the spokeshave assembled incorrectly it will never take a shaving. The photos given here show the different parts assembled correctly. Study them and keep them close to hand when your spokeshave arrives to compare what you have. It’s not a bad idea to still take a picture to recall how things arrived anyway regardless of right or wrong. Degrease and derust the blade and cap as necessary using the same tools we used in the previous blog post for restoring the body of the spokeshave. The blade will flex to flatness in the extender holder when you cinch down the cap iron but flipping the bade over to remove the burr and polish the flat face cannot usually be flexed to flatness by hand and so hopefully the blade is indeed close to flatness. We will assume it is flat as in 99% of cases that are indeed flat. If yours is not flat and you are using the extender holder you should flatten both sides of the blade so that it is not flexed in the holder when holding the bevel to the abrasive otherwise the bevel can be curved along its length when removed from the holder. Establishing the bevel at 25-
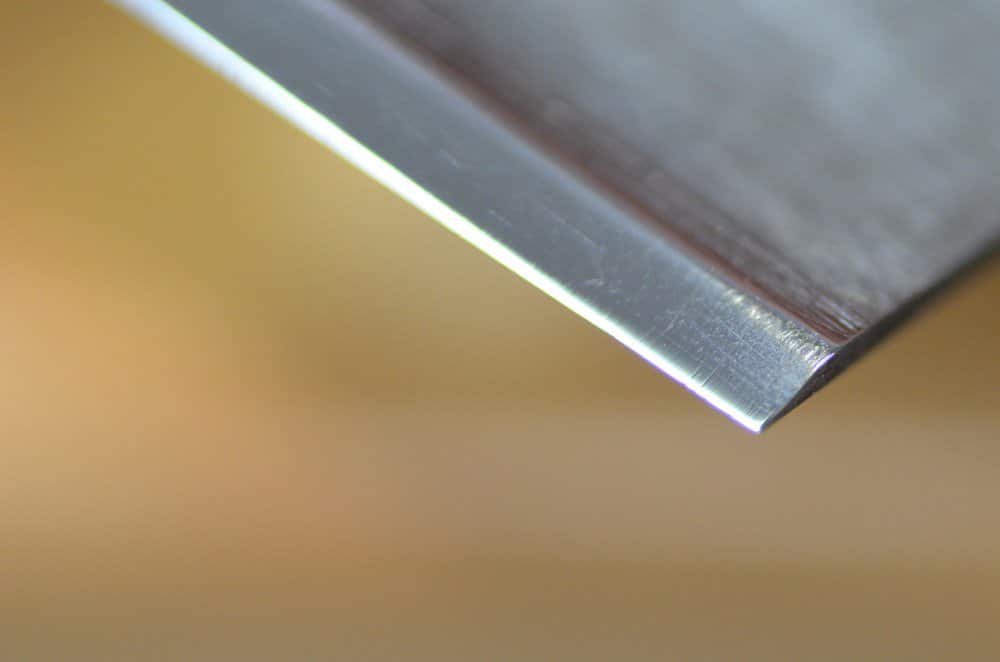
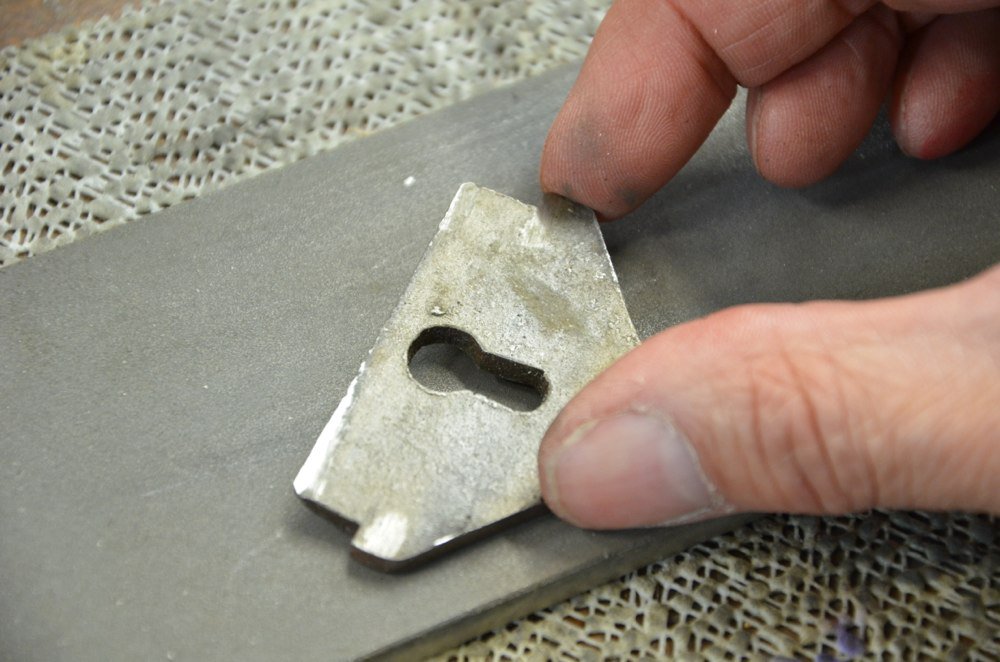
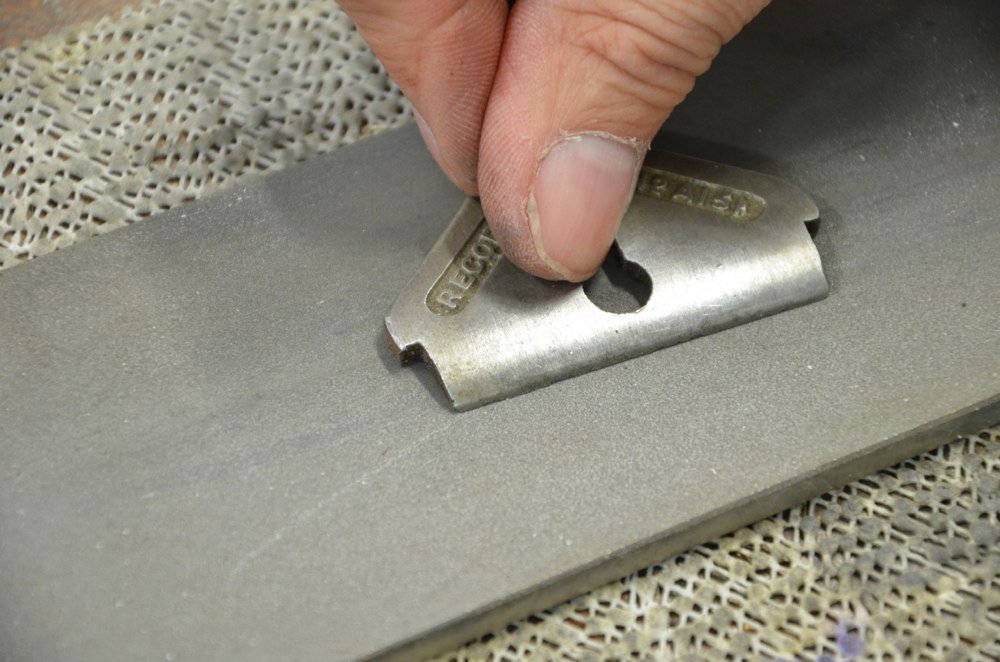
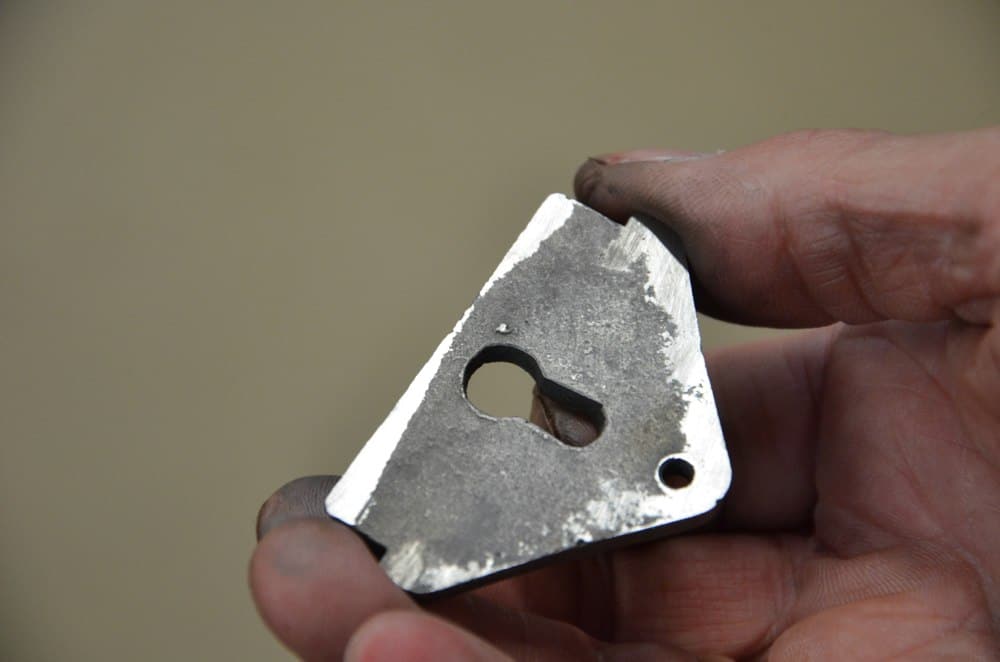
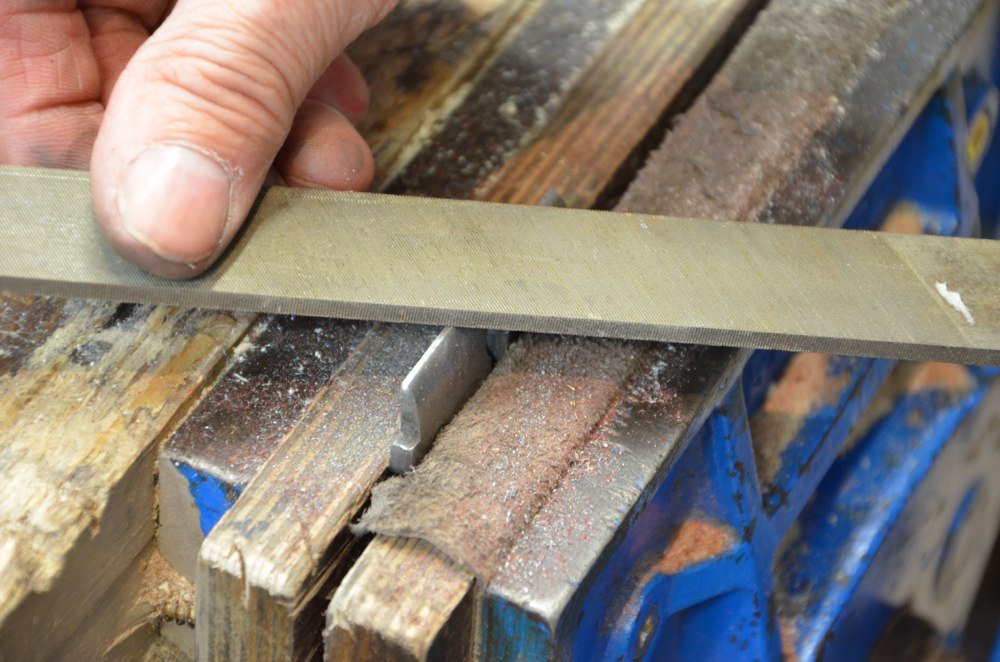
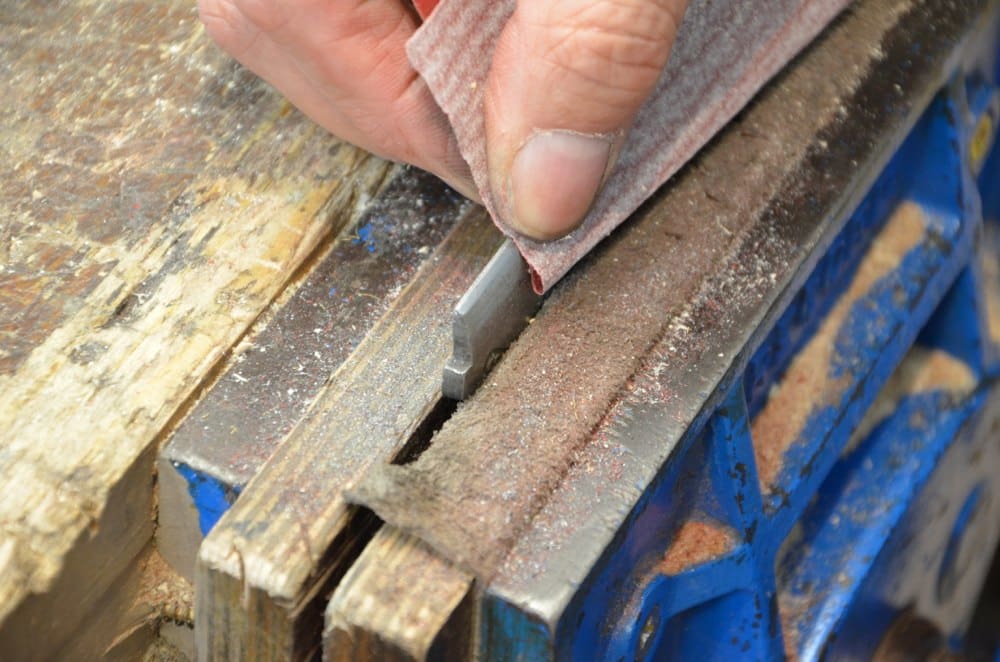
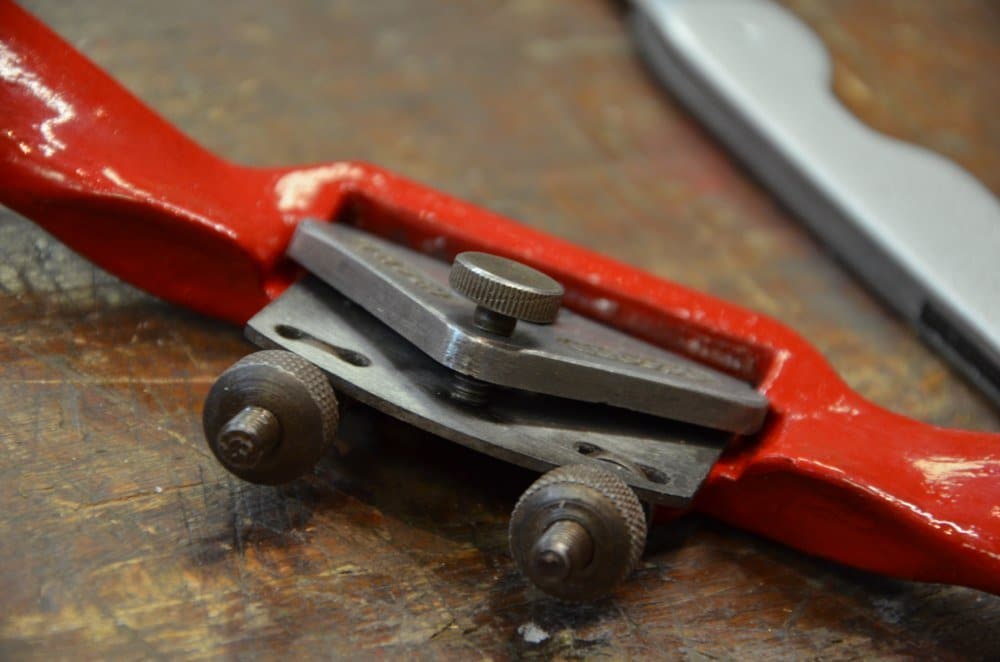
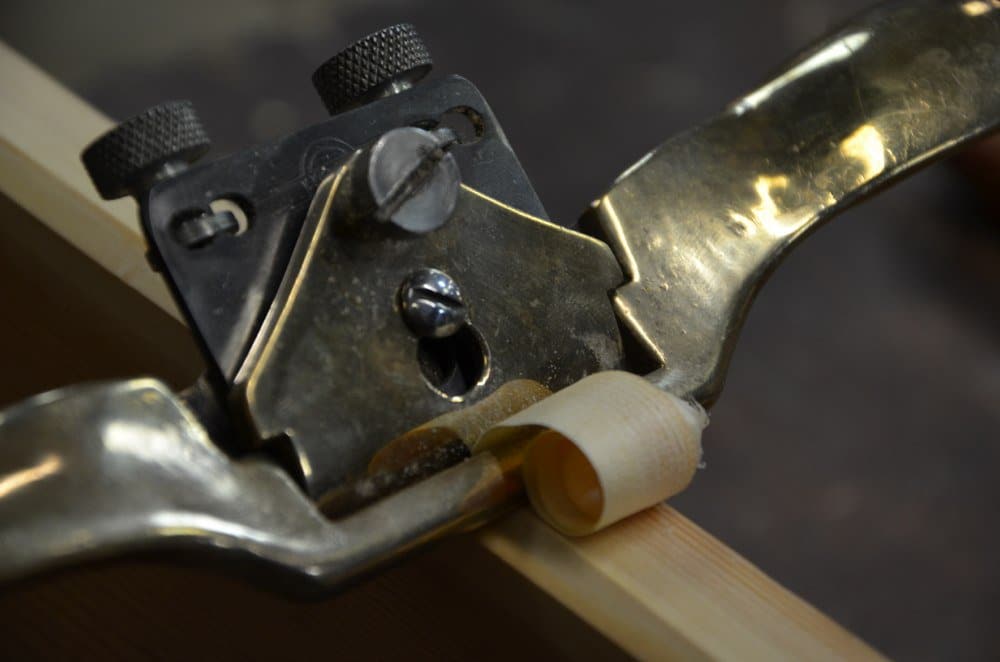
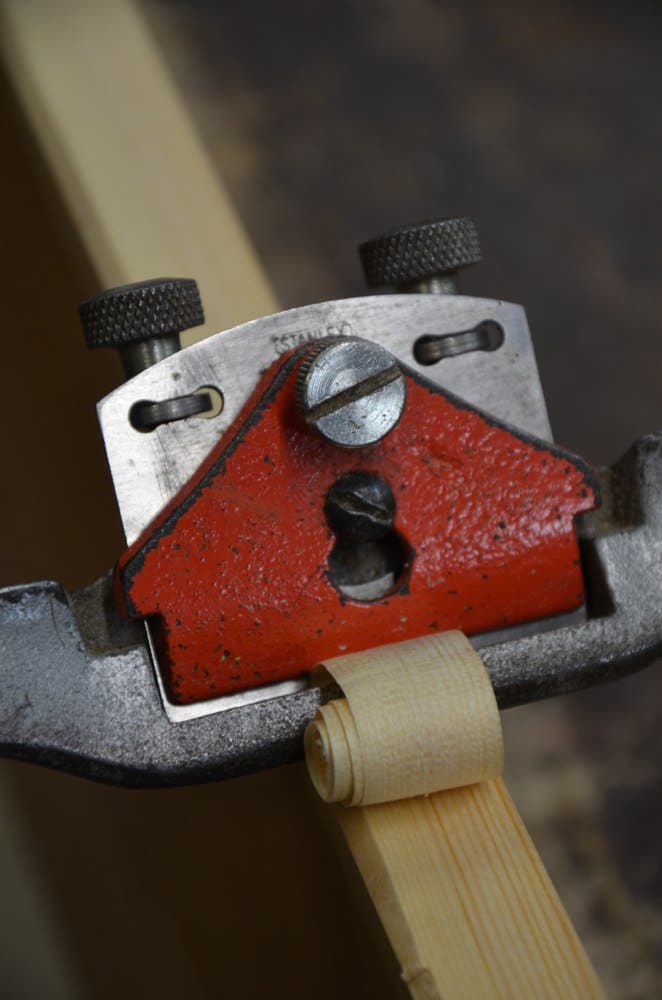
degrees begins with the coarsest abrasive at 250-grit. One advantage of installing the blade in the extender is you can use the 25-degree angle of the extender to guide you for the bevel angle if you are sharpening freehand. You can also use this extender in a honing guide of you prefer. I find one important advantage of using the guide and extender in tandem with one another is one, the amount of pressure you can apply and two, it virtually guarantees a square result almost without thinking. With the bevel established at 25-degree we can further hone with a few strokes at a slightly elevated angle, usually up to but never more than 30-degrees. The 30-degree cutting edge is now refined on a 600-grit and then a 1200-grit abrasive. Doing this effectively ‘thickens’ the cutting edge to an acceptable and effective working cutting edge. The band width width of this 30-degree secondary angle or bevel is best around 2-3mm only. This creates a strong enough edge to maximise resistance against edge fracture. Finishing at 1200 is usually a fine enough cutting edge for 95% of work. Removing the extender from the honing guide allows you to draw the bevel in the extender on a strop charged with abrasive chromium oxide. Working the flat face is the same as a plane iron except it is not as essential to create a dead flat face unless you want to. You should remember that polishing the bevel is only half the sharpening. The flat face should always be finished to the same level as the bevel, so if you went to chromium oxide abrasive, which is around say 15,000, then the large flat face should be the same. The extender does not allow work on the flat face but it’s not necessary anyway. Abrade, hone and strop the flat face. The flat face is best polished out on a flat piece of hardwood such as maple or beech. Apply the abrasive compound directly to the wood and trail the cutting away from the abrasive rather than pushing the edge into the abrasive and the wood. Now the cutting iron is ready for installing and using. Its important to check the inside face of the cap iron. The above two pictures show the result of introducing the cap to the coarse plate and then further abrading until the whole edge is flattened. It must be flat or flattened along the very edge where it will meet the large flat face of the cutting iron. Flatten it on the coarse abrasive only. It’s not the whole face that needs to be flat, just along the cutting edge. Along the end edge of the lever cap, the face-edge that leads and faces into the throat of the spokeshave, file a straight edge with an 80-degree (or thereabouts) back bevel along it. You can soften this rake with abrasive 250-grit abrasive taking care not to round the underside of the edge formed as an gap will provide a leading edge for shavings to lodge and cause clogging in the throat. With the blade in the spokeshave and registered on the adjusters feel in the mouth (carefully) for the cutting edge and advance or withdraw the iron unit it feels somewhat even or flush with the rims of the throat. Now install the cap on the centre setscrew and advance the adjustment screw at the top of the cap until it feels relatively tight but not fully cinched. Often times you will find the setscrew in the centre cinched down, which people feel is the way to lock the blade in place and that can easily seem right because the blade is indeed tight and immoveable. Cinching the cap onto the cutting iron this way negates the ability to adjust the blade but also causes other important elements to be non functional too. The centre setscrew is there to use as a fulcrum point to transfer pressure to right behind and along the cutting edge with the lever cap. Adjusting the setscrew so that a reverse fulcrum takes effect necessitates a precise setting of this setscrew. We work both the centre setscrew and the cap setscrew in unison until the proper distance is set for the centre setscrew. To establish this we look at the gap at the top of the cap. That’s the silver cap with the setscrew adjustment passing through. Look at the gap . The larger the gap without bottoming out the adjustment screw at the top of the cap, the nearer the cap iron marries to the blade at the cutting edge and the greater the pressure where it’s really needed. This translates into a vibration-free assembly capably engaging the work.
More images of #151
I have used three different types of #151 spokeshaves in this series to show that they are very similar and have the same basic constituents.
10 Comments
Hi Paul,
You say: “To establish this we look at the gap at the top of the cap. That’s the red component.” Unfortunately, on my view of the page this lies below a picture of your Record A151 with the red body and plain steel cap iron. I think you meant it to refer to the final picture of the Stanley 151 with the red cap iron.
Otherwise, this is an excellent article on the metal spokeshaves, and many thanks for your views earlier about the use of the wooden ones. I still prefer the feel of the wooden spokeshaves, but agree they are not ideal for smooth curves on furniture with square edged finishes, where the steel one comes in to it’s own.
I see that and I have added an additional picture that shows the gap more clearly.
Paul,
A lot of detail and instruction here. I’m sure this took patience and precision as with your other work. I was commenting to my wife how your instruction and comparisons help ignorant awe inspired people like myself to think more clearly about what we are doing and how we spend our time and cash. Thanks!
I will be coming back to this when I finish up my rehab of a spoke shave I neglected that belonged to my dad.
I love my old Prestons
Paul thank you for these series, I have several older Stanley spokeshaves and now I know how to sharpen and restore these tools. I haven’t ever used one that much but now I will, I can defiantly see the advantages. Also your sharpening jig is a brilliant idea, especially for some one like myself who have kinda big paws to hold onto the blade comfortably.
Steve
Just sharpened my 151 all as the tutorial, it now works a treat. Also the same goes for my round sole spokeshave.
Thank you Paul for your time taken to explain.
This may be a silly question, but why isn’t the spokeshave sharpened with a convex bevel, similar to a chisel or plane iron?
Mostly because with so short a sole and the tendency to create too much curve to the bevel because of the shortness of the blade, sometimes the heel or the spot just behind the cutting edge along the bevel rides the wood and often prevents the cutting edge from reaching the wood to do its work. You can freehand it and have a convex bevel, but just don’t let it go too far.
With all this good info, they key part is not clear to me: Bevel up or bevel down?
Second: How do you adjust/check for a parallel edge with the two screws?
Thanks!
I’m amazed (and a bit late reading this blog, obviously). I picked up three Stanley 151 spokeshaves at a sale this weekend and they were old and used and dirty and in need of sharpening. But I tried them out anyway to see how they were and they bumped and jumped over the wood. I sharpened one and put it back and it still jumped along the wood. I thought I needed new blades, so I looked onlne and found this blog. I went back and looked and all three, used for years as they were, had the blades in backwards. I put them in the right way, and, although still not particularly sharp, they all shaved cleanly. Thank you for sharing your knowledge.
Comments are closed.
Privacy Notice
You must enter certain information to submit the form on this page. We take the handling of personal information seriously and appreciate your trust in us. Our Privacy Policy sets out important information about us and how we use and protect your personal data and it also explains your legal rights in respect of it. Please click here to read it before you provide any information on this form.
Want a roundup of Paul’s latest posts each week? We’ve got you covered.

Hi Paul,
You say: “To establish this we look at the gap at the top of the cap. That’s the red component.” Unfortunately, on my view of the page this lies below a picture of your Record A151 with the red body and plain steel cap iron. I think you meant it to refer to the final picture of the Stanley 151 with the red cap iron.
Otherwise, this is an excellent article on the metal spokeshaves, and many thanks for your views earlier about the use of the wooden ones. I still prefer the feel of the wooden spokeshaves, but agree they are not ideal for smooth curves on furniture with square edged finishes, where the steel one comes in to it’s own.
I see that and I have added an additional picture that shows the gap more clearly.
Paul,
A lot of detail and instruction here. I’m sure this took patience and precision as with your other work. I was commenting to my wife how your instruction and comparisons help ignorant awe inspired people like myself to think more clearly about what we are doing and how we spend our time and cash. Thanks!
I will be coming back to this when I finish up my rehab of a spoke shave I neglected that belonged to my dad.
I love my old Prestons
Paul thank you for these series, I have several older Stanley spokeshaves and now I know how to sharpen and restore these tools. I haven’t ever used one that much but now I will, I can defiantly see the advantages. Also your sharpening jig is a brilliant idea, especially for some one like myself who have kinda big paws to hold onto the blade comfortably.
Steve
Just sharpened my 151 all as the tutorial, it now works a treat. Also the same goes for my round sole spokeshave.
Thank you Paul for your time taken to explain.
This may be a silly question, but why isn’t the spokeshave sharpened with a convex bevel, similar to a chisel or plane iron?
Mostly because with so short a sole and the tendency to create too much curve to the bevel because of the shortness of the blade, sometimes the heel or the spot just behind the cutting edge along the bevel rides the wood and often prevents the cutting edge from reaching the wood to do its work. You can freehand it and have a convex bevel, but just don’t let it go too far.
With all this good info, they key part is not clear to me: Bevel up or bevel down?
Second: How do you adjust/check for a parallel edge with the two screws?
Thanks!
I’m amazed (and a bit late reading this blog, obviously). I picked up three Stanley 151 spokeshaves at a sale this weekend and they were old and used and dirty and in need of sharpening. But I tried them out anyway to see how they were and they bumped and jumped over the wood. I sharpened one and put it back and it still jumped along the wood. I thought I needed new blades, so I looked onlne and found this blog. I went back and looked and all three, used for years as they were, had the blades in backwards. I put them in the right way, and, although still not particularly sharp, they all shaved cleanly. Thank you for sharing your knowledge.