On Closing the Spokeshave Series – Last One for Now
For more information on spokeshaves, see our beginner site Common Woodworking.
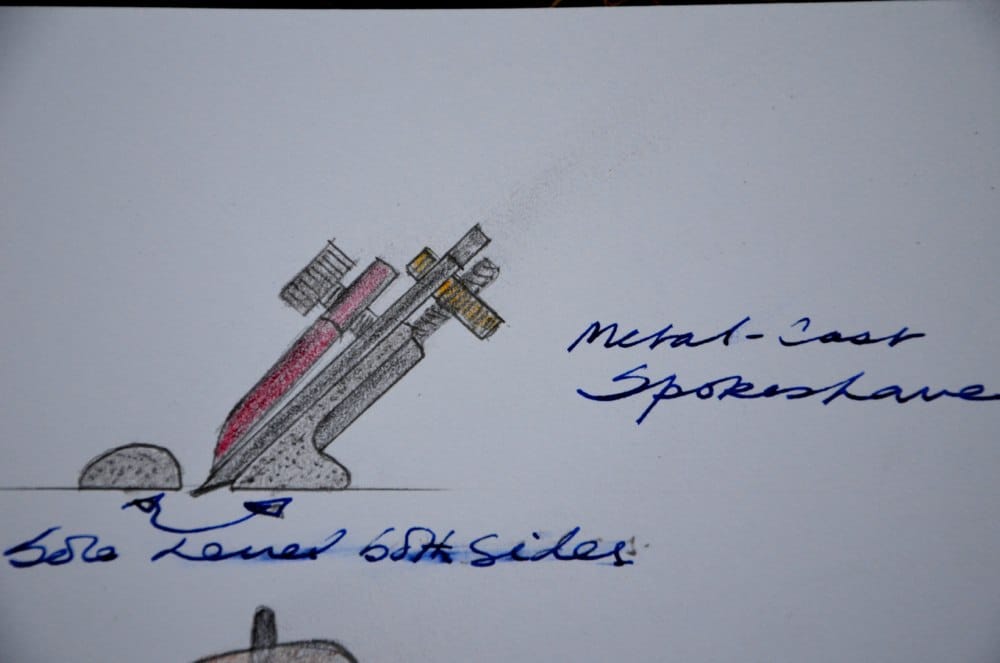
A difference between cast-metal spokeshaves and wooden spokeshaves is the dynamic of bevel-up and bevel-down cutting iron presentation to the wood I spoke of in an earlier post in this series and earlier blogs. The two differences may possibly appear to present the blade similarly by the overall appearance of the tool rather then the specific internals, but that’s not the case. Regardless of spokeshave type, the bevel forming the cutting edge will be ground and honed at a finished edge of 30-degrees. When the bevel-up iron negotiates the wood, the bevel being 30-degrees (or what is on the blade if ground and honed differently), the presentation to the wood will be 30-degrees plus whatever tilt you put on the tool when you tilt the spokeshave into the wood to effect the cut. This can add 5-10-degrees and more. On the other hand, because the blade is elevated to 45-degrees on metal-cast, bevel-down spokeshaves, and the bevel is on the underside of the blade so that the bevel faces down, the angle of presentation to the wood is then 45-degrees and nothing changes. Some say that this 15-degree presentation makes the spokeshave useless for planing or shaving endgrain and this again is not true at all. The marginal difference is discernible but don’t be put off. Sharpness will make all the difference and you can indeed shave endgrain just fine. The physics of the two different presentations are important because often the bevel up presentation will not tackle certain aspects of wood grain and vice versa. The ability to switch between the two types is highly valued and so you will eventually need both. My suggestion is that you but the bevel down #151 type first and when you think you need the other, go for it.
The Bevel-down #151 – Blade Presentation Strategy
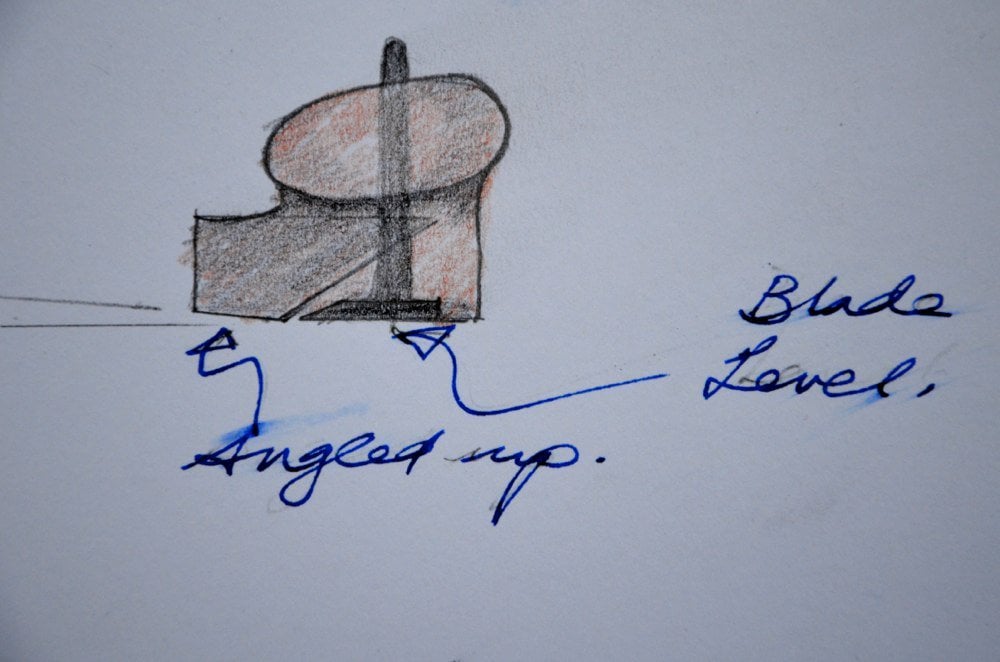
The blade on the #151 protrudes through the sole of the spokeshave and so, when you place the spokeshave on the wood it immediately enters the surface wood and starts the cut from penetration. This causes a slight step-down in the surface. To prevent this we lightly present the spokeshave to the surface and at the same time push forward so as to feather-entry into the work in an elongated sweep starting from zero and, over a couple of inches, follow through to full depth, which is indeed governed by difference between the sole and the protruding cutting iron.
The Bevel-up Spokeshave – Blade Presentation Strategy
On the other hand, because the sole of the wooden-bodied spokeshave is the blade itself, we create an additional feature that toes-in the leading edge of the spokeshave, the wooden part. This angle allows us to lead the spokeshave forward into the cut and it is best to do this with firm but gentle pressure until the cutting edge starts from a feather edge that is more controlled by the beveled leading edge than the sole or underside of the blade itself.
Do you need adjusters?
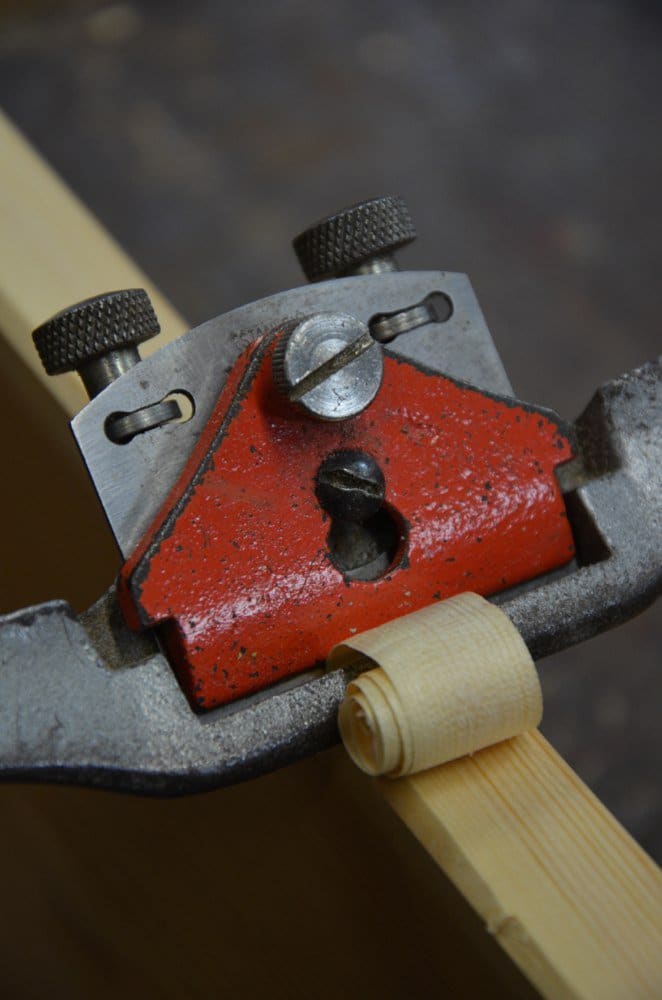
This is another question I am often asked and my answer could be yes or know. Yes they are not essential, and, yes, they do make life much easier. Here again the misinformant says there is lots of whiplash in poorly engineered models and that’s true, but whiplash makes almost no difference at all. Once the spokeshave is adjusted and you tweak an extra 1/8th turn on the setscrew to cinch the blade tightly to the bed the blade will not move. Adjusters are the way to go if you are intent on working efficiently. Comparing say the non-adjuster model #150 to the #151 adjustable spokeshave is night and day to me.
Why I Did this Series
I posted this series to counter the culture proclaiming that the Stanley 151-type spokeshave will be found badly lacking and that using the standard Stanley 151 spokeshave model results always in “chatter, screeching and cursing.” This erroneous and misleading statement saddens me because it’s a statement against hundreds of thousands of professional and amateur woodworkers who used them through ten decades with no such results. Between the 1950-60s, when a spokeshave came from the manufacturer, mostly Record and Stanley, we expected to have to fettle them and take care of manufacturer’s flawed workmanship in their products made here in the UK. This included planes and other tools too. It was and still is a sad condition pandemic throughout British-made goods made mostly in Sheffield. Those manufactures now relied on the past reputation of the industry fathers who earned their reputations. This demise resulted from complacency and perhaps a lack of competition and I am glad that US makers stepped in a few decades ago to make up for the shortfall and created high quality products that replaced them. British industry should be shamed by this indeed but I haven’t seen that. Even today much of Sheffield tool manufacturing for woodworking tools still survives despite shoddy workmanship even though much of what does survive and exist is because US demand for traditional tools has created a market and Americans still believe that UK and Sheffield goods have a valid reputation. What Sheffield makers have in most of what I see are good materials poorly prepared and assembled. They indeed spoil the ship for a half-penny worth of tar and forsake their reputation for the sake of a few minutes invested the final refinement of product.
So, that settled, and though we shouldn’t have to, it takes only a few minutes to rework the bed of the spokeshave and prepare it to receive the blade. Once done, you never need do it again. Of the hundreds of spokeshaves I have salvaged from neglect, almost none of them had any remedial work done to them. They all worked just fine as far as I can recall.
I haven’t had much shop time lately but was able to duck out and tweak my 151 per your instructions and was able to take a chatter-free full width cut with my spokeshave for the first time! Now I’m going to have to reread the series and tweak my low angle wooden shaves. I’d been finding them frustrating enough that I had been using a drawknife instead, but have renewed hope after reading your posts. Thanks!
Paul,
Thanks for the interesting series. It encouraged me to get a well-used #151 and refurbish it as well as look into making a wood version.
Paul,
Thanks for giving your expertise on the maligned little guy. The last part of this was enlightening because I’ve been under the impression that Sheffield steel means quality. I have a lot to learn. LOL! Would have been interesting to be your gopher. ( go fer this and go fer that)
If it is Sheffield steel then it is good steel. Just for clarity. It’s not the materials so much as the assembly and the dumbing down of skill standards, accountability of experienced staff, expectations of staff and so much more.
I’ve had the LV spokeshave kit in my drawer for a while, so this has made me want to get it put together. If anyone is looking for the old tang style version, I really like the Chinese style spokeshaves that Lee Valley sells as a “contour plane”. It works wonderfully when it’s sharpened up nice.
A lovely site Paul, and it gives me great pleasure to read your comments. And I agree with you regarding Stanley tools they always needed tuning up. But once set up right they do the job just fine. When I was serving my time back in the fifties the only saws we wanted was the American Disston’s when the factory moved to Canada and the quality was not so good.
Paul, I recently had to chamfer some curves on a wooden saw vice and used the curved side of an Auriou rasp. I then found a curved sole Stanly spoke shave and wondered how to fettle the sole, which is very rough. The main issue is maintaining a common radius across the sole. Any advice?
regards
Jeremy
Actually we generally do not use the radiused sole of round bottomed spokeshaves or even most compass or contour planes to follow the radius of the planes sole but more to allow the cutting edge to get to to the wood.By using our wrists we rotate the spokeshave until the blade engages and guesstimate the arc as we follow through into and through the cut, endeavouring to take as long a continuous shaving as possible. Often we actually mostly on g flat bottomed spokeshaves even for radiused concave cuts because it gives greater control. You only need to switch to a curved round bottomed spokeshave when the radius tightens to say a 6″ radius. On a flat bottomed, try extending the balder until it just kisses the radius and you will find it cuts very well. Allow both the heel and foredge of the sole to remain on contact with the wood.