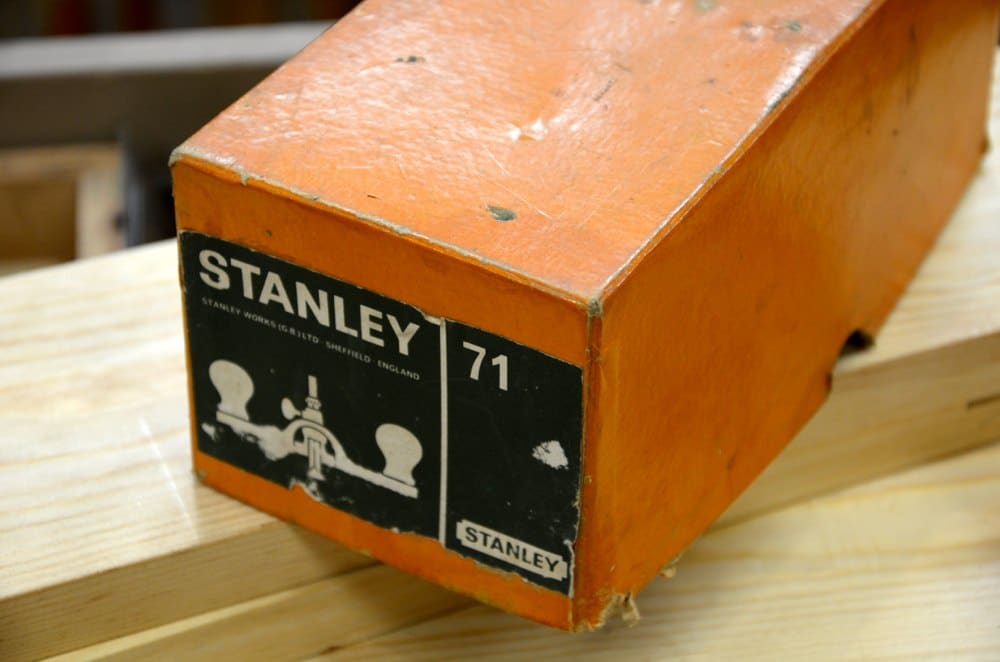
Questions Answered – What Are Pointed Blades for on Router Planes
For more information on the router plane, see our beginner site Common Woodworking.
Question:
Hi Paul,
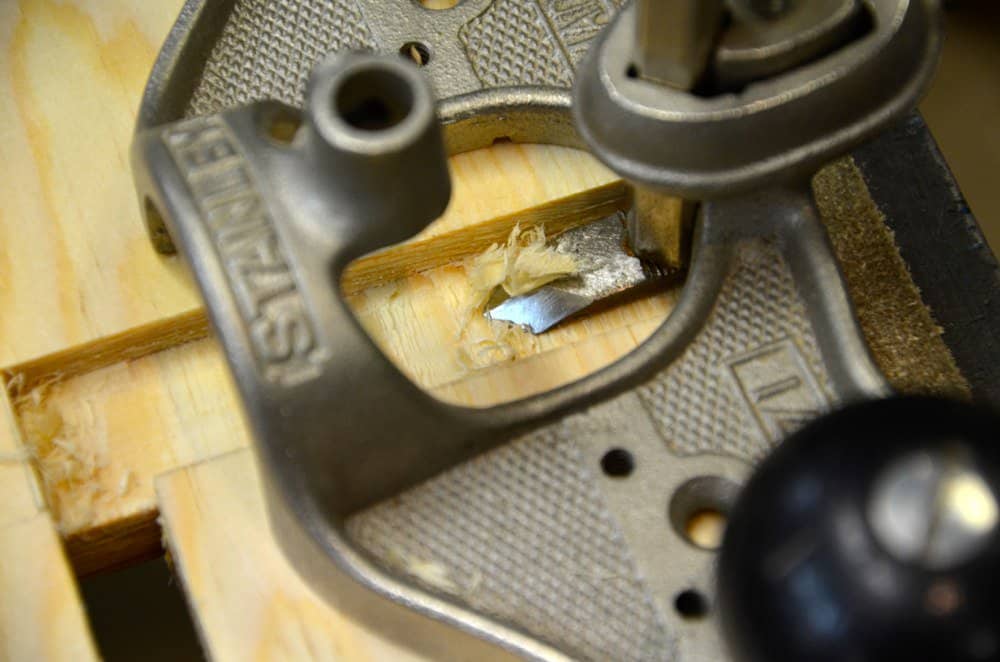
I have a question. I noticed when you use your hand router, from what I’ve seen anyway, you’ve always used a cutter with a square cutting edge. Some router cutters come to a more pointed edge and I wondered why you don’t use those? And what are they used for? Wouldn’t using one with a pointed edge be a bit risky when finishing off like a housing dado because I figured the edge could cut into the walls of the joint. I don’t know why I was curious about this but I was. Felt like one of those if-it’s-not-broke-don’t-fix-it things to me, but I figured there must be at least one situation where maybe a pointed cutter was better.
Answer:
At first glance this might look much more specialised than it really is and though it might be handy, it’s not necessarily essential.

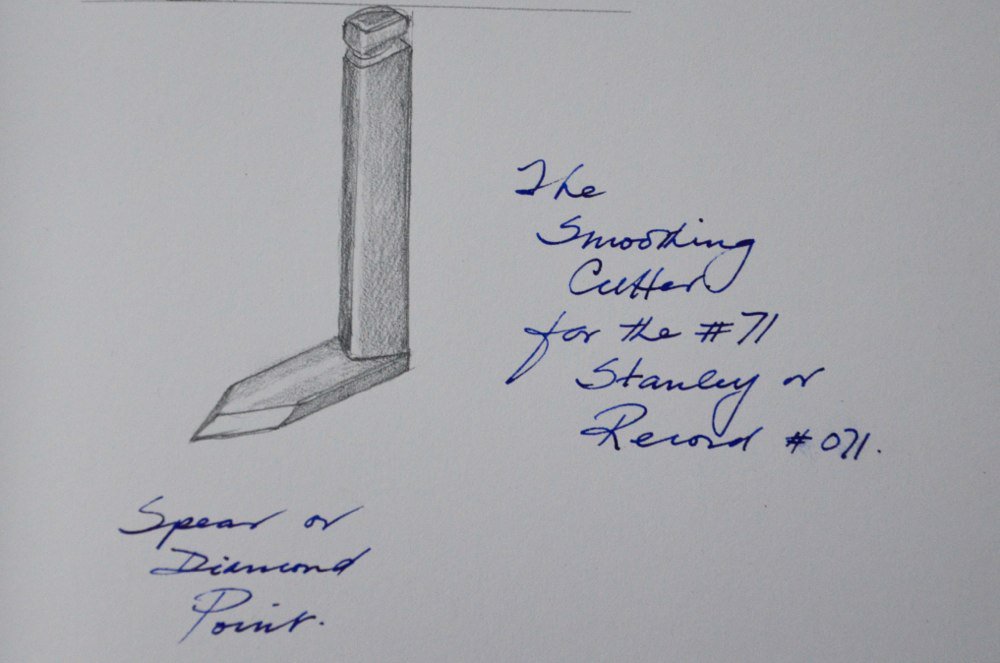
The angles presentation either side of the centre of the spearpoint also provide a sheer cut to the cutting edges and by manipulating the plane to the grain encountered the user can effectively gain optimal advantage in just about any grain.
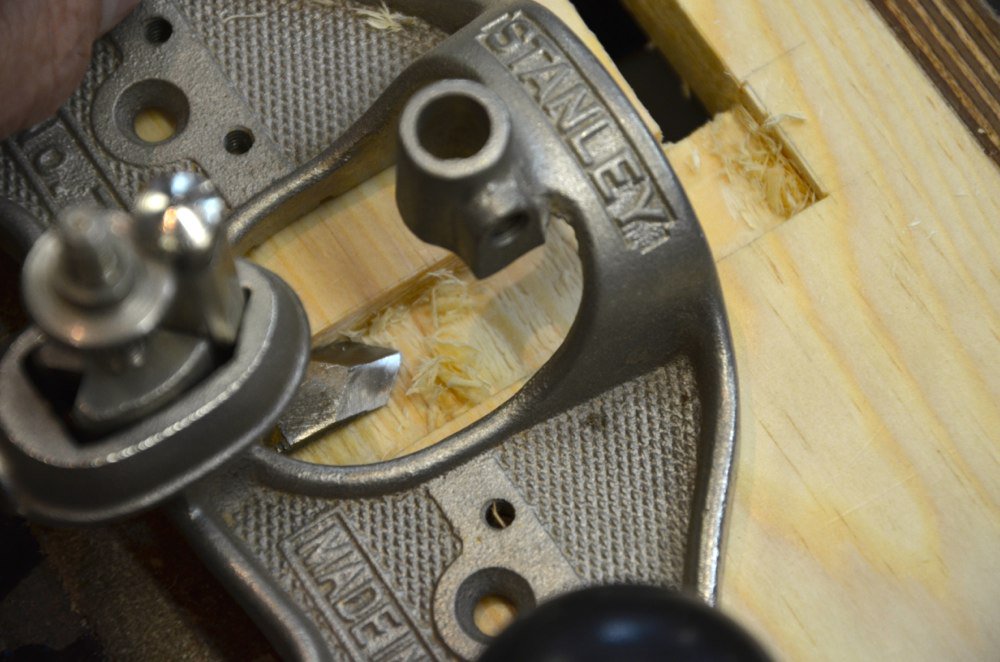
The end result is a level and smooth cut, which effectively improves on the cut provided by the square edged cutters and is ideal in some situations such as inlays for instance.
Generally 95% of work comes from the square edged cutters satisfactorily and so it’s not necessary to install a spear point.
Visually considering the appearance of the cutter it does look as though in actual use the spear point might dig in to the walls or surface being refined but that is not the way at all.
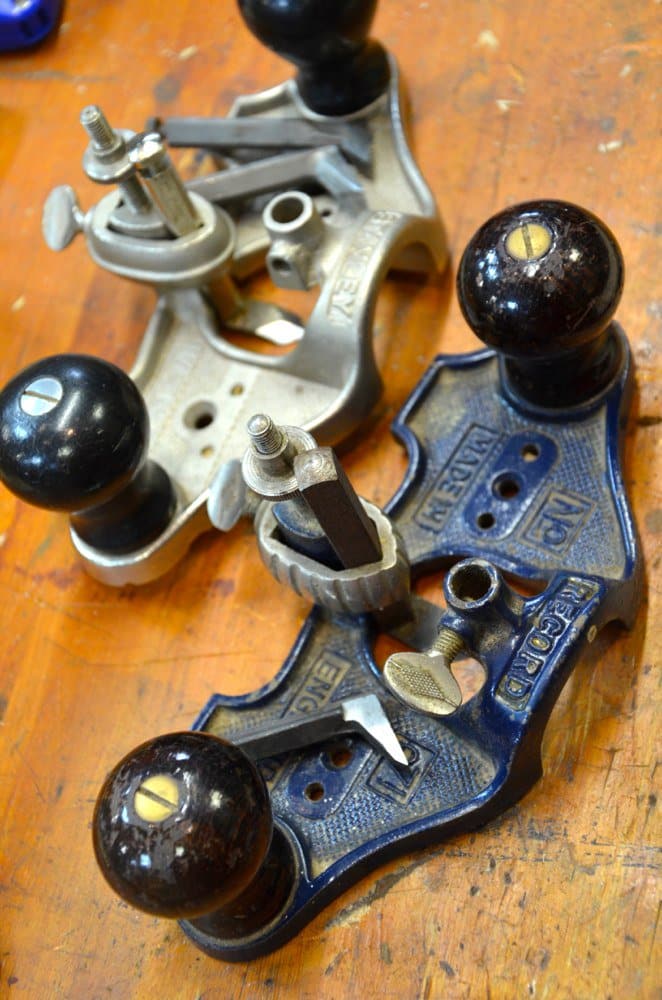
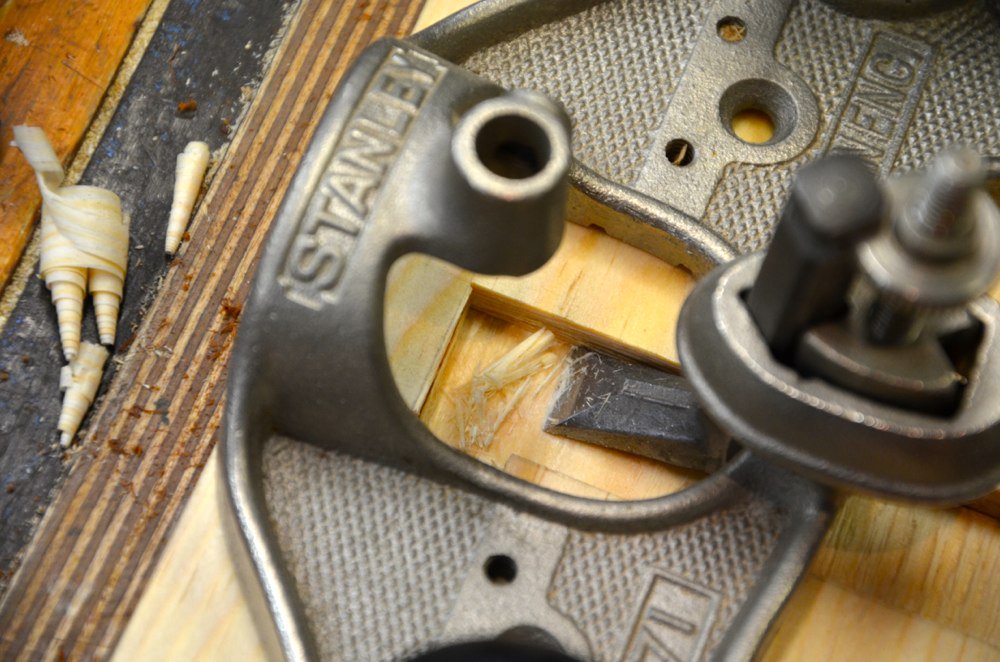
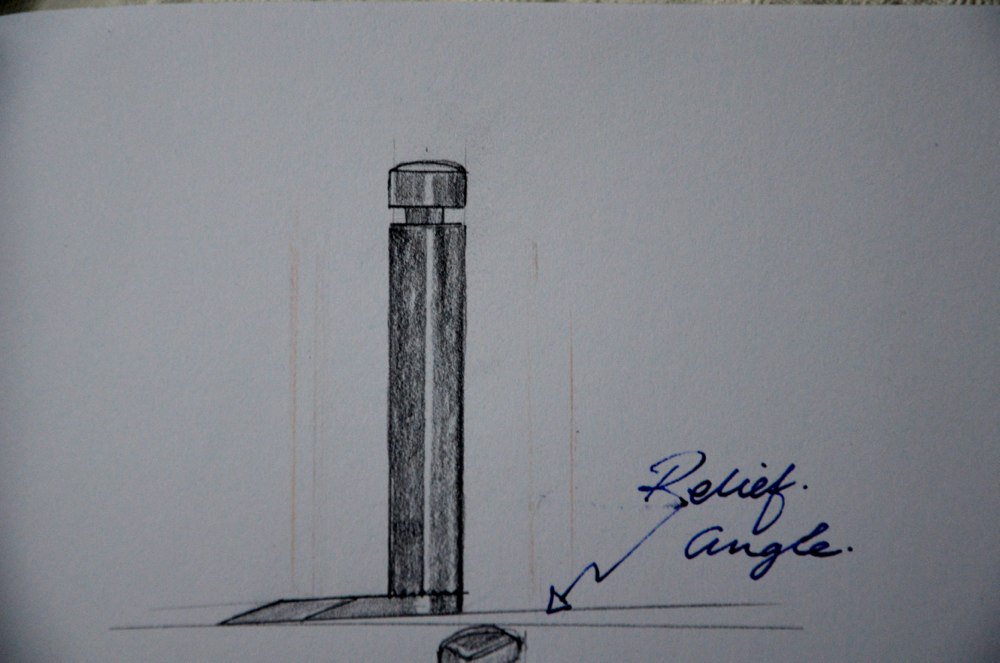
The drawings below show the diamond point and the angled presentation of the cutter to the housing dado or work surface.
Thanks Paul, that cover any questions I had on that one. Thanks bud
Hello Paul, what a timely thread. I too have a 71 router but am struggling to get a consistently honed edge on my blades. I am about to inlay some ebony into an American Cherry (small) table top and would really like to use my hand router (rather than my table mounted electric thing) but a couple of things are making me nervous. One is how do I get a repeatable/consistent honed edge… i.e. how do you hone your blades especially the narrow (6mm ish) one. I have found it very difficult to (hand) hold any blade at a consistent angle, sharpening on diamond stones. Incidentally, I have been totally converted from Japanese water stones to using your quick easy freehand method of sharpening using diamond plates; a BIG thank you for showing me the light! My second nervous point is that even after several practice goes on some scrap cherry, and using knife walls etc., to define the edges of my ‘housing’, I still end up with slightly ragged edges especially along the grain. I would be grateful for any help/pointers.
Keep up your great work; you are a beacon of light for me as I’m sure you are for so many others in our woodworking community.
Kind regards,
Chris Bailey
Thanks for that explanation Paul. I bought a Stanley 71 router with only the one blade, and was wondering if I should be searching for a spear blade to use in it, but wasn’t sure why I might need to. I also don’t have the underneath fence for my router, but that’s easily fixed using a piece of wood instead! What a shame these tools sometimes lose their parts over the years.
Perhaps the spear point blade could be used to advantage when one is smoothing the bottom of the female half of a sliding dovetail joint?
My 71 only came with the v shaped cutter. I have been looking for a standard cutter and the 1/4″ cutter. Trying not to purchase new. I have been using the v cutter for now.
The bottoms of these spear-point blades are utterly flat, and inclined as in the drawing with the relief angle. Mine certainly came that way. Thus, it appears to be geometrically impossible for the spear point to not be lower than the points where the blade edges meet the sides of the flat bottom as those two points are closer to the post and therefore at a higher elevation, given the relief angle.
I therefore do not understand how the two cutting edges could be levelly present along the cutting edge in relation to the surface of the wood. That could however happen if the bottom were bevelled under the spear point in such a way as to utterly or very nearly negate the relief angle.
You know, a lot of people think that routers are always used full in full face to the work when much if not most of the time, once the wood is taken down, we most often present the cutting edge or edges in the case of spear point skewed to the work. I generally achieve the smoothness of a smoothing plane this way and often even swivel the plane so the edge is working the surface. It seems a strange thing that they actually work though.
Hey Paul. I use the spear point cutter in my 71 almost exclusively. My main use for this plane is fine tuning tenon shoulders as I’ve seen you do so often lately in your videos. The great thing about the spear point is that it doesn’t produce any tear out as it exits the cut. You can simply plane completely across the teonon in one direction and then plane back in the other and you’re ready to readjust Till you have a fit. Try it and you won’t go back to the straight cutter.
Not really. I use the hand router all the time, so much I think the square edge is much easier to keep aligned to the underside for levelling whereas the spear point is harder to get exactly right with the amount of sharpening I would need to to do. As the surface is not so critical as planing with regards to smoothness the square edge is much less problematic, so I’ll leave it you, but I wouldn’t change.
Concerning skewing, I want to report to you, with gratitude, that the bullnose corners to the lid of the box that I recently made are credibly well done by me, having sustained no breakout when the ends were planed, simply because I precisely followed your instructions in your dovetailed box video about skewing the plane. Practically everything that I know about woodworking is from you, in the last year of so.
So having gotten my first No 71 only yesterday I tried it out with a dado (housing). I just now repeated my dado test using a better piece of wood.
Anyway, with the router full-face to the work and with the spear point installed the depression in the middle due to the spear point being the lowest point is very roughly on the order of 10 mils, ten thousandths of an inch. Then, changing up and skewing the stroke as much as I could (given the width of the dado) reduced the dip to insignificance. That was without changing the depth setting.
That is, going in skewed after having first gone in straight-on produced some additional fine shavings from the dado bottom near the walls. The bottom did then did indeed look quite smooth and flat enough. I understand that you mean that I should also try skewing with the regular flat end blades.
I must admit that possibly in me you have yet another Internet disciple. There are tell-tale warning signs: plane irons and chisels with cambered bevels and stropped mirror-like finishes, ownership of both pre- and post-WWII Eclipse No. 77 saw set pliers, collection of tenon saws from the UK now at 3 (up from none) with one sharpened according to your demonstration and the other two soon to have their “sergeants and sappers” filed off, ability to expound at length upon the sorrowful evolution of saw handles at the drop of a hat, the recommended knife, etc.
As a new user of the router plane I’ve been studying many of the videos you offer. I see that when you are chopping dovetails you frequently tell us to be very careful not to get any shavings on the underside of the board. But you never seem to have the slightest problem with that when using your router plane. I, on the other hand, can’t seem to use it without a bit of shaving getting between the base of the plane and the face of the board I’m refining. In one stroke I have created a huge gouge across the formerly pristine surface simply by pressing the shaving into the surface with the router base. Obviously, the solution that comes to mind is, “be more careful”. Now I’m brushing and blowing obsessively on it all the time. But you never do those things and you never have this issue, so I am wondering if there is something more subtle I am missing??