On Vises—Part II
Cutting the vise opening into the apron and fitting the vise
You can, as I said, use a jigsaw, but the hand tool method is more fun, more demanding and of course you get good exercise in clean, clear, breathable air. The choice is yours.
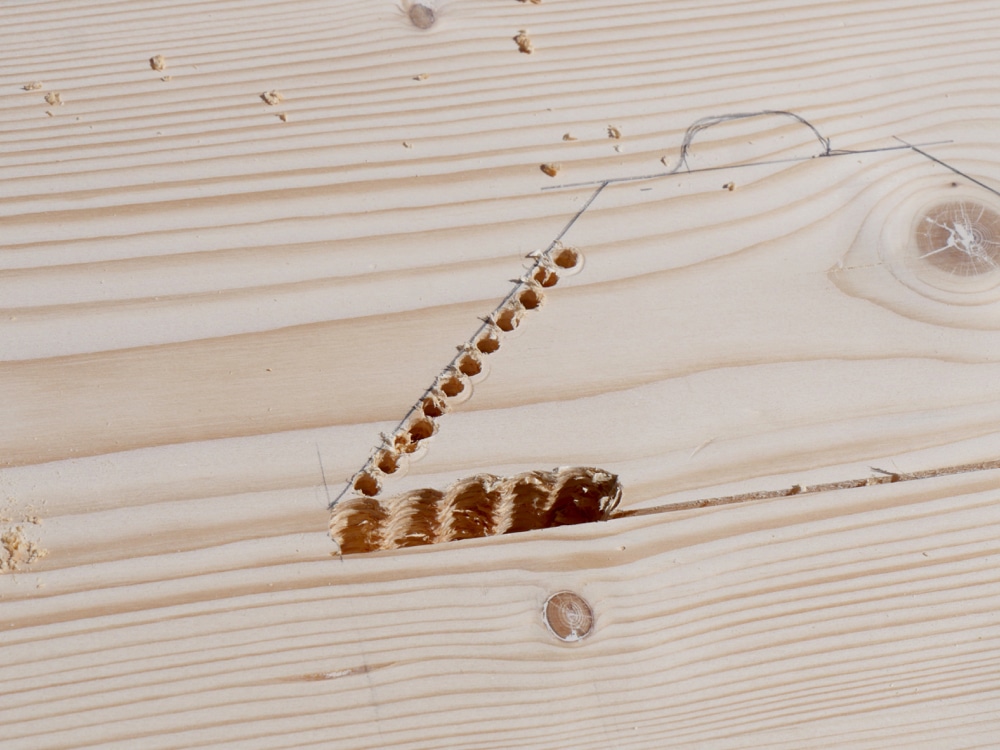
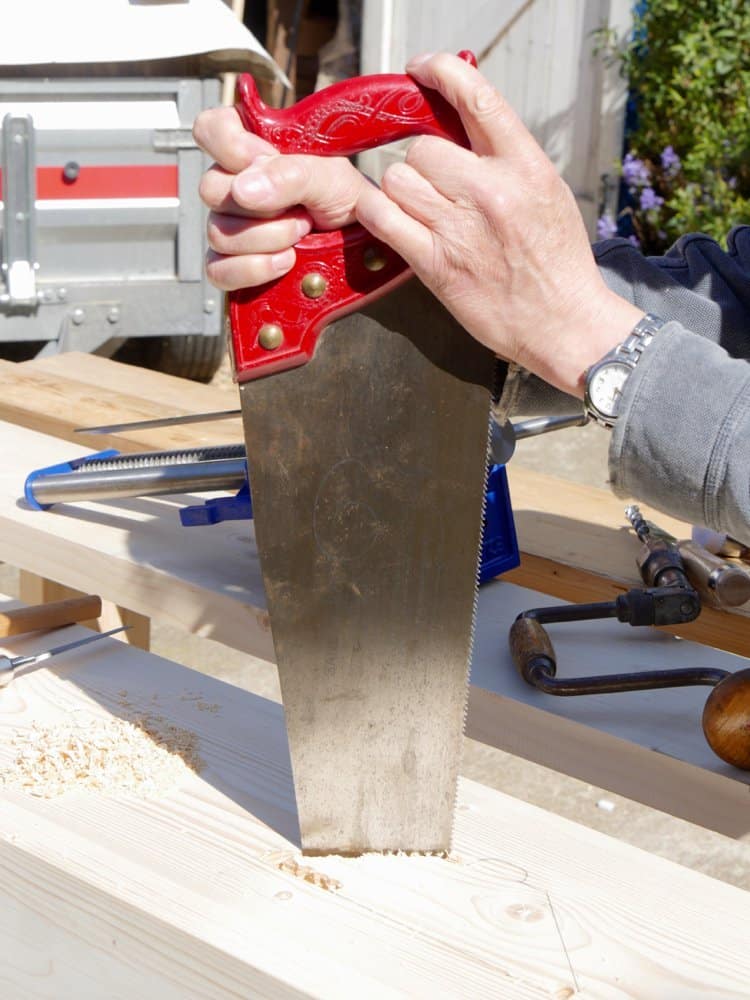
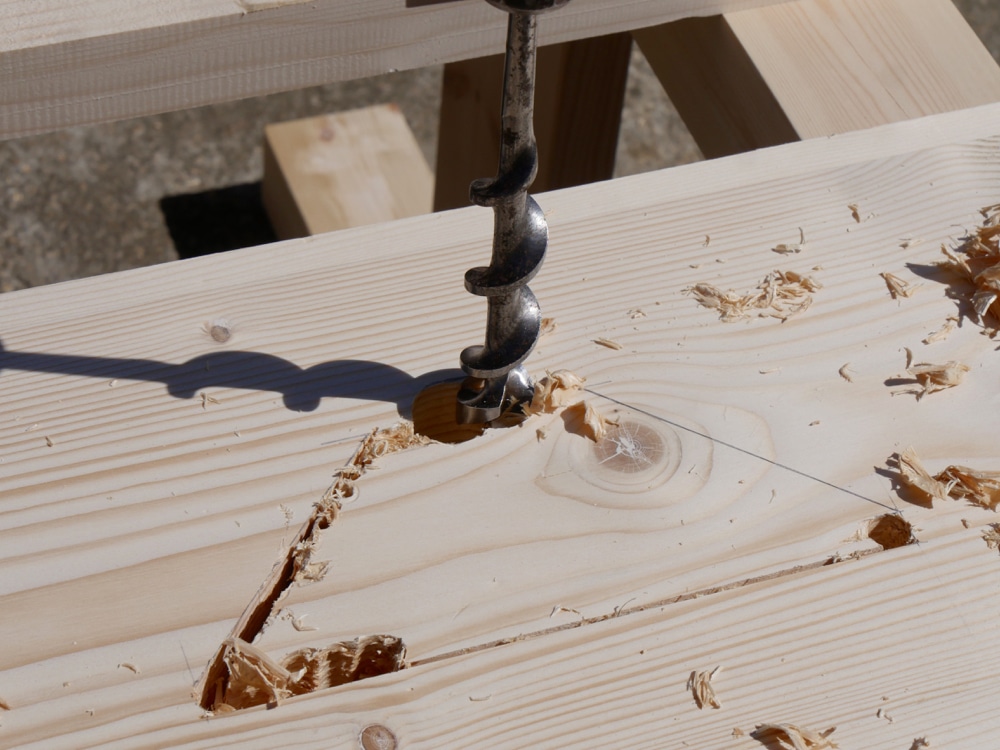
With the layout lines in place, bore a series of holes in a line and over a distance that takes the start end of the handsaw.

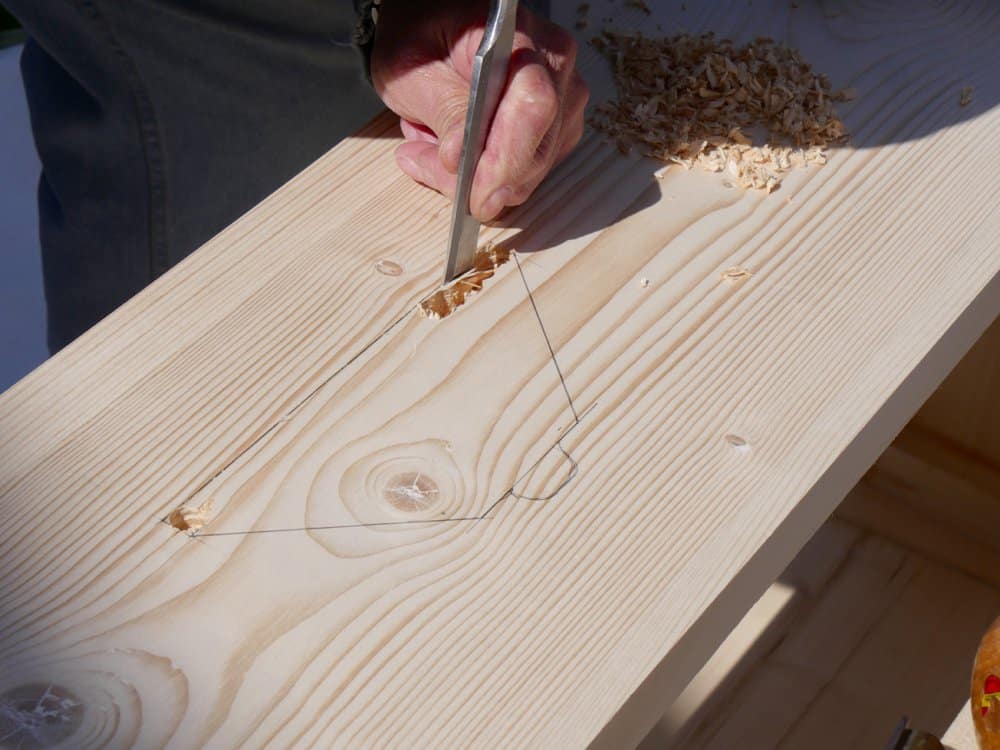
Pare down to the gauge line with a wider chisel; a one inch will work fine.
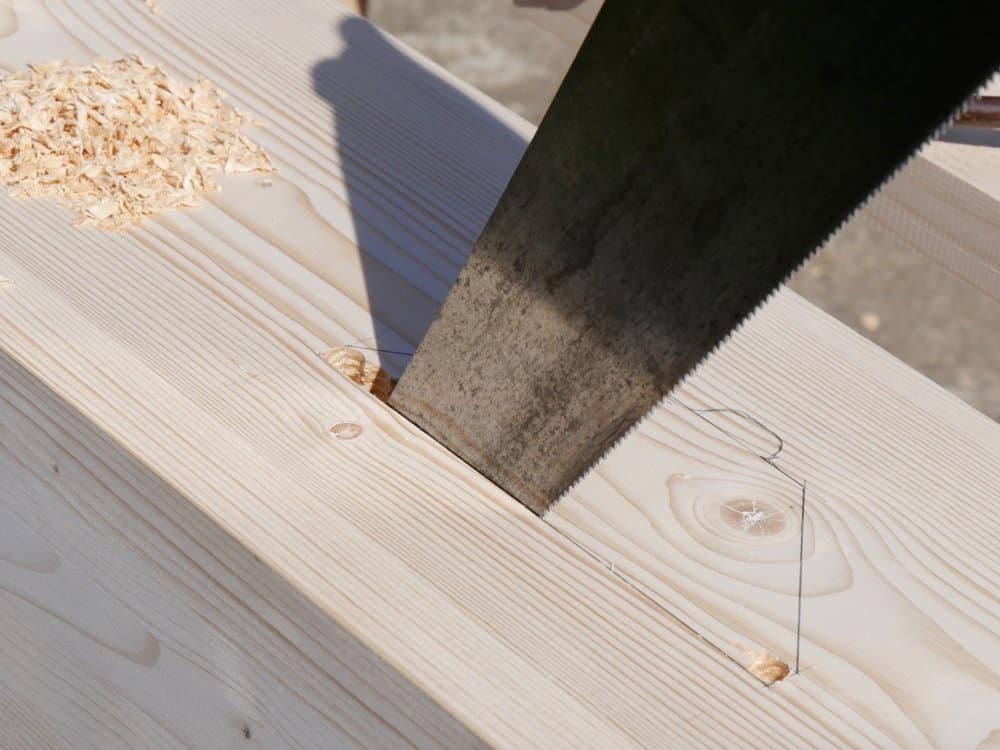
Insert the handsaw and saw to the line to the opposite end of the opening.
Drill a series of smaller holes or do the same as you did before. Your choice. I used a series of 3/16″ holes and the battery drill for this this time.
I pared down to the line again.

Insert the saw and saw away.
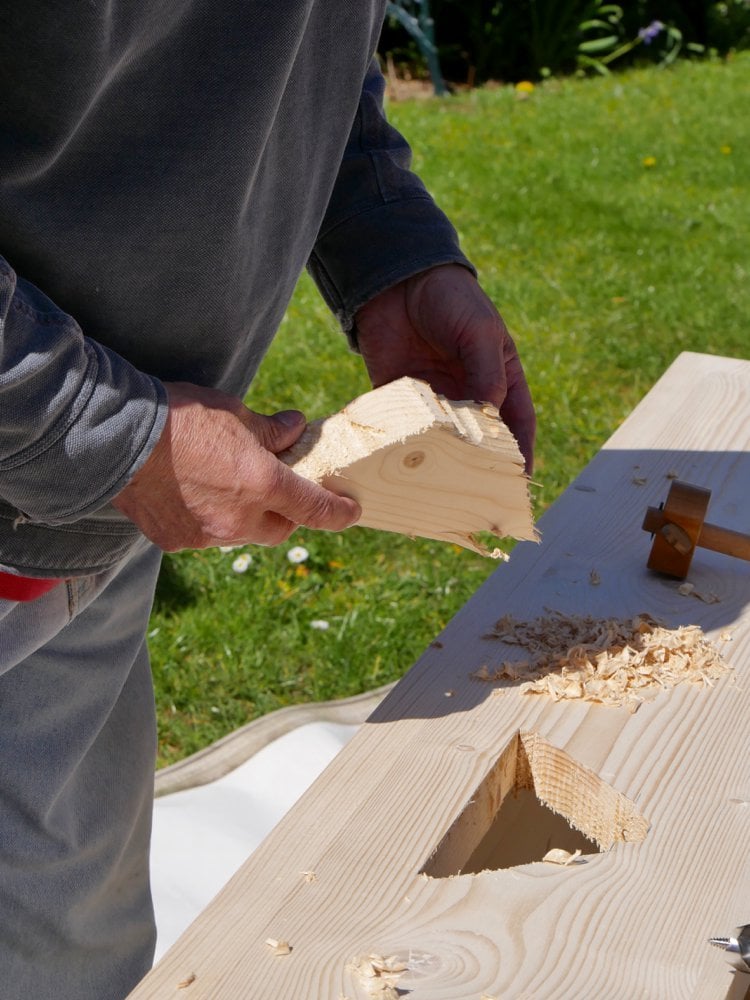
Repeat this wherever necessary to remove the waste wood.
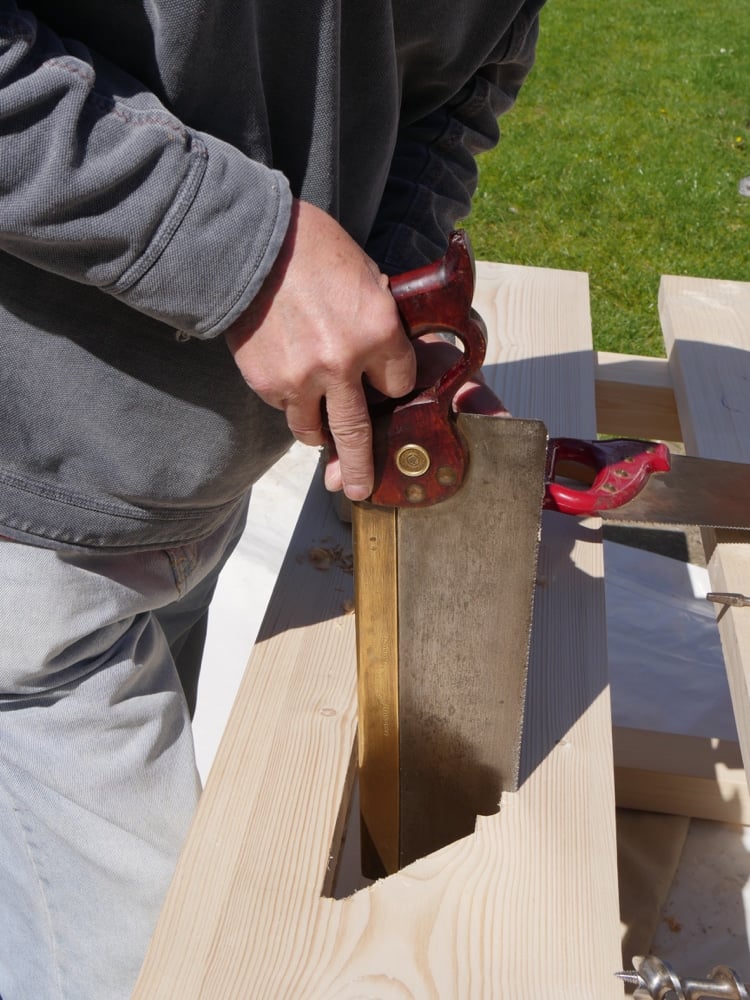
Use a tenon saw to cut walls for the pop up (or down) button for the QR mechanism.
Chisel out the waste with a 1/2″ chisel.

Use a rasp to level out any undulation.
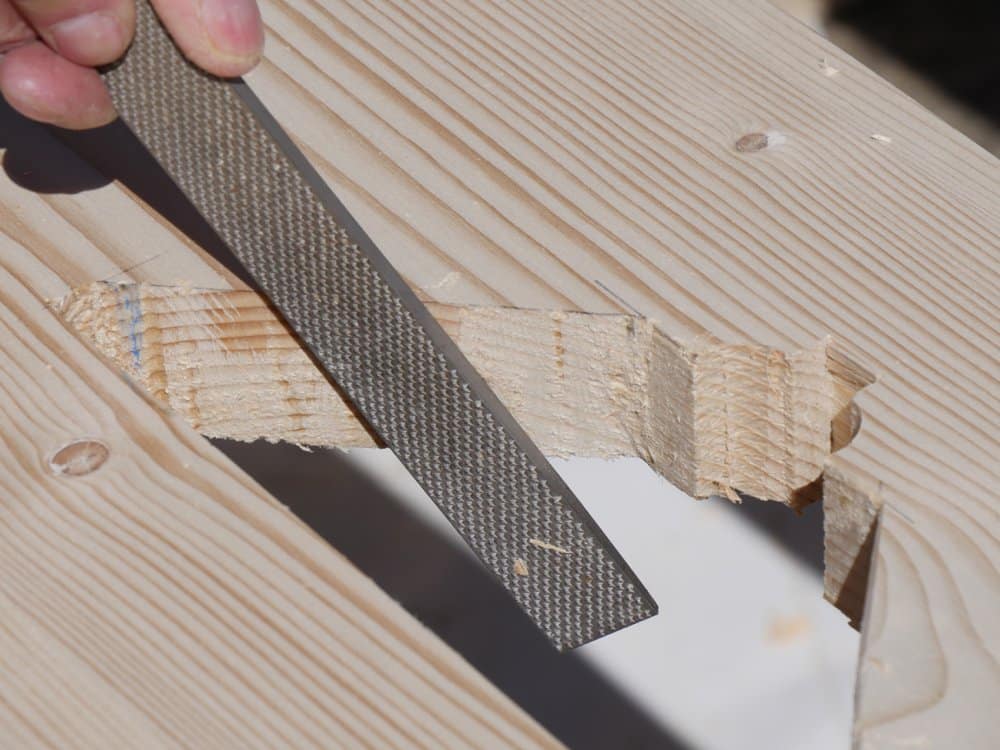
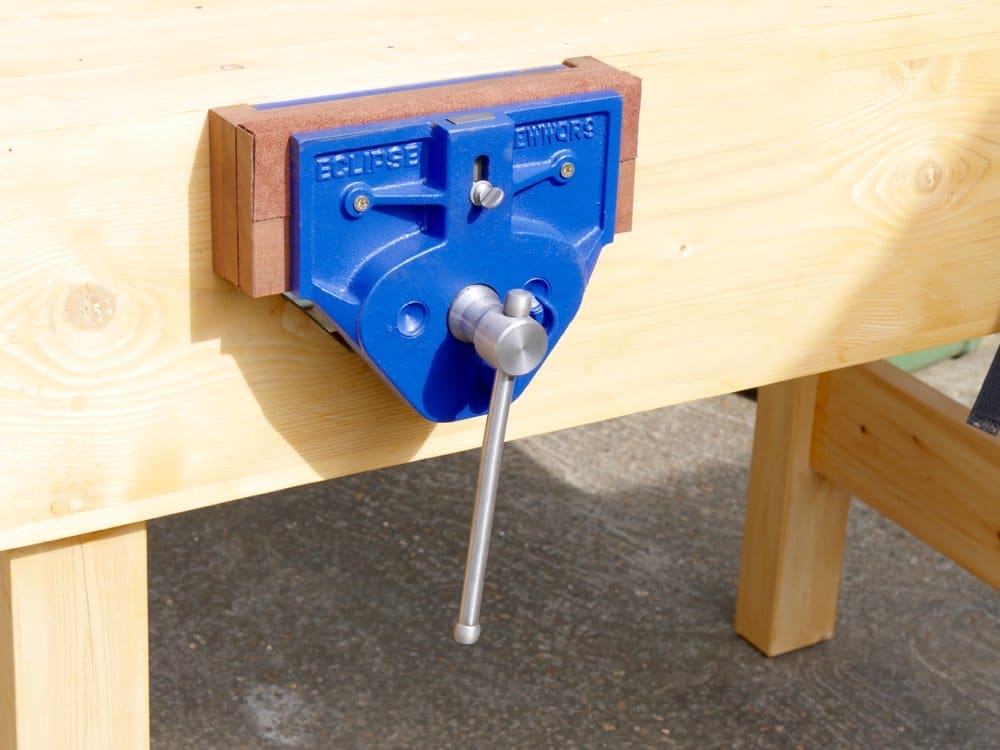
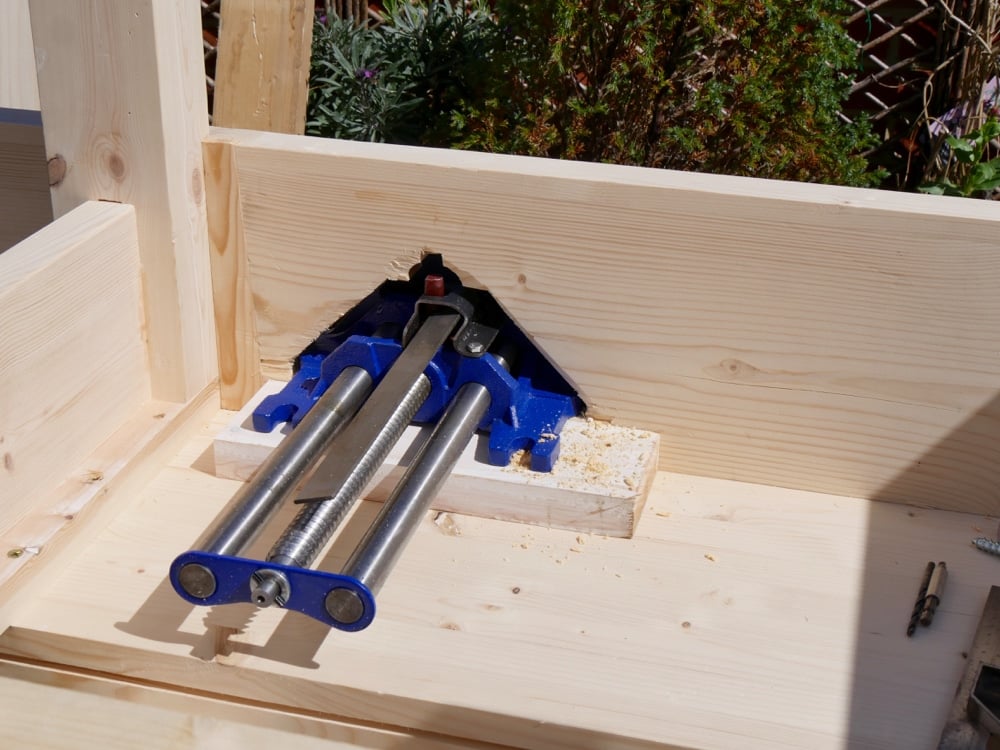
Insert the vise and see how it fits. The vise jaw should be 4mm below the corner of the workbench.

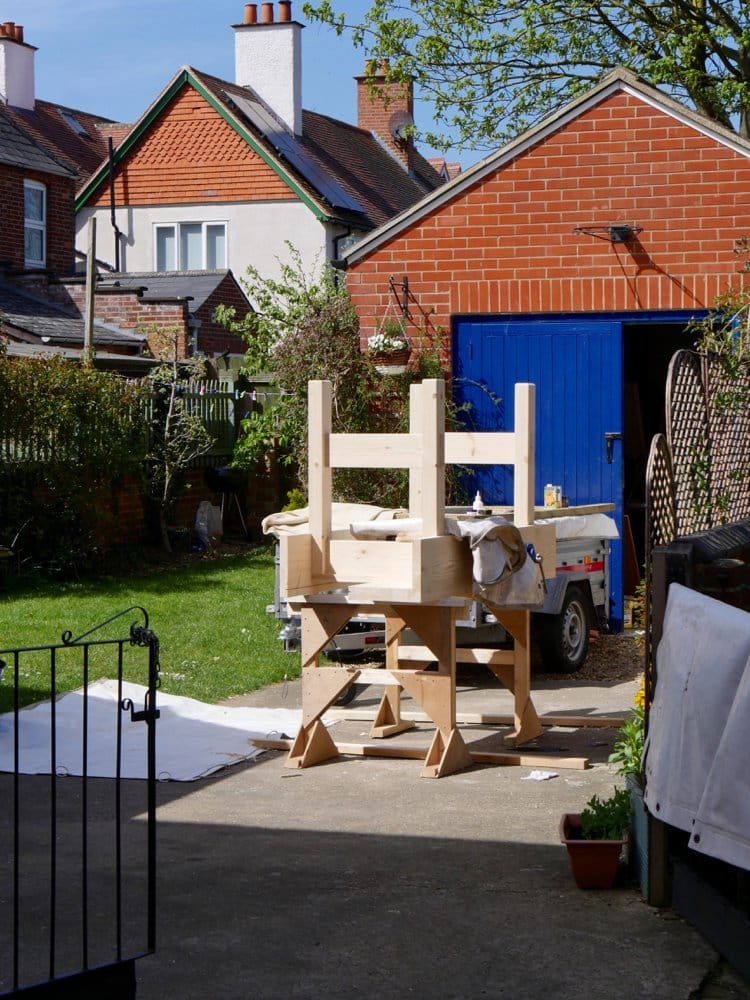
I turned my workbench upside down onto two saw trestles. This works best.
Pack the gap between the vise ‘L’ and the underside of the bench top. Use either solid wood or plywood for this. I also allow the packer to pass the vise sides for wider distribution of pressures and so on. I screwed the packing to the underside of the benchtop. Use thinner shimming to get the exact distant right.I used hard cardboard for this.
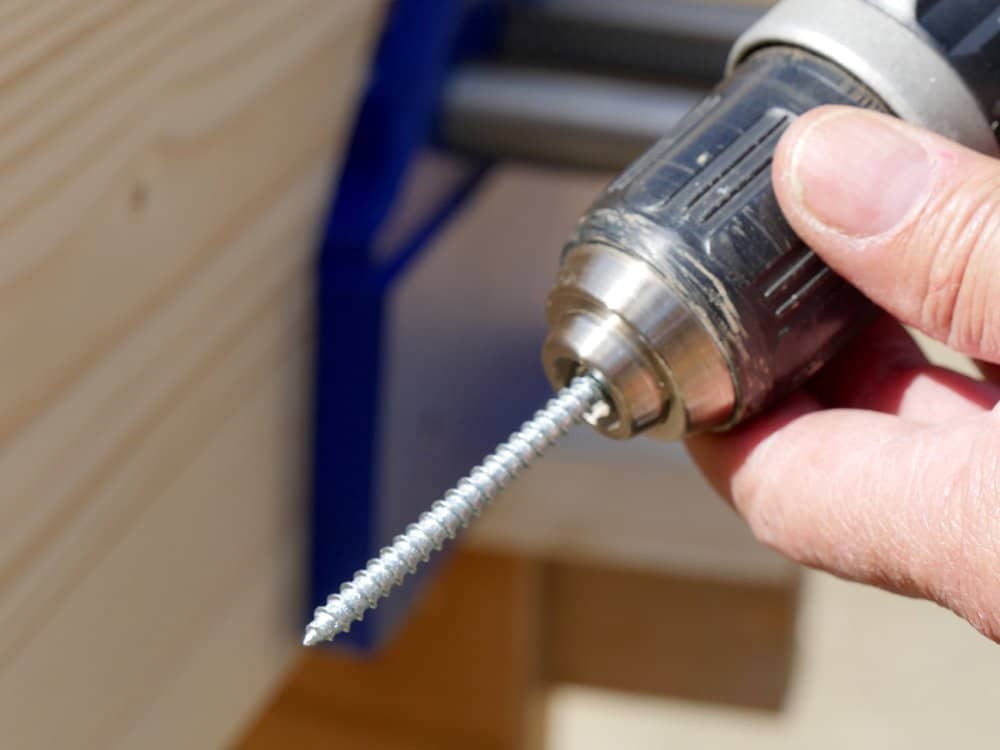
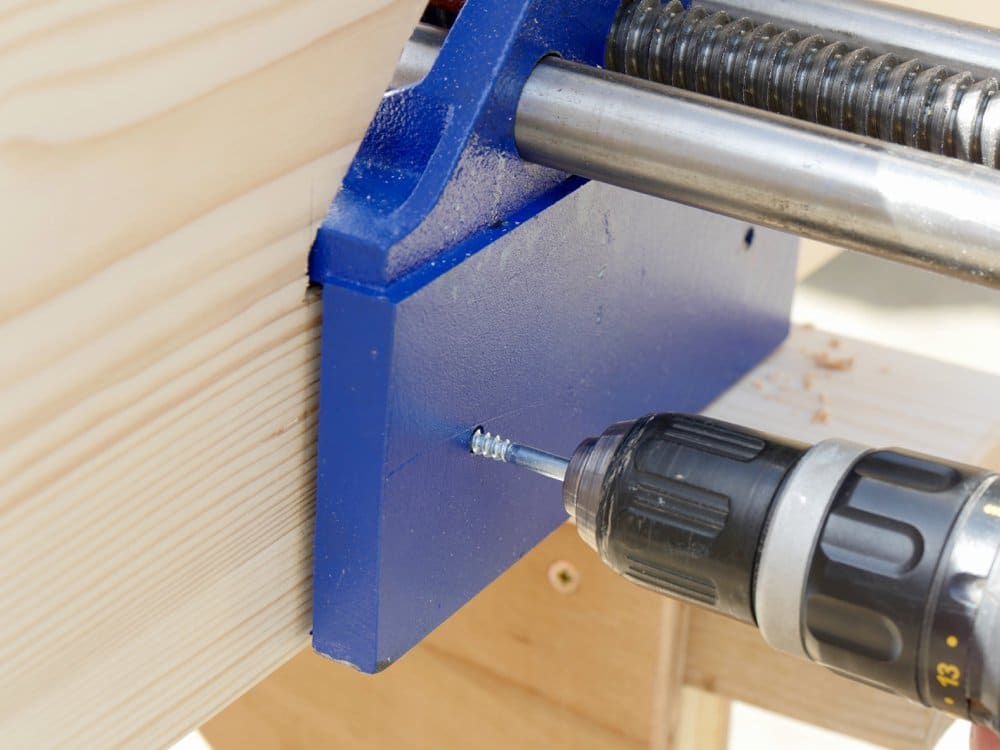
You can use bolts or coach screws but using bolts requires boring through the bench top and the resultant holes receiving the bolt heads will need plugging. I use both methods depending on what I have but here I used 5/16″ coach screws to the underside section of the vise and the 1/4″ coach screws through the face of the fixed vise jaw.

First pre drill pilot holes sized to receive the screw threads of the coach screws. 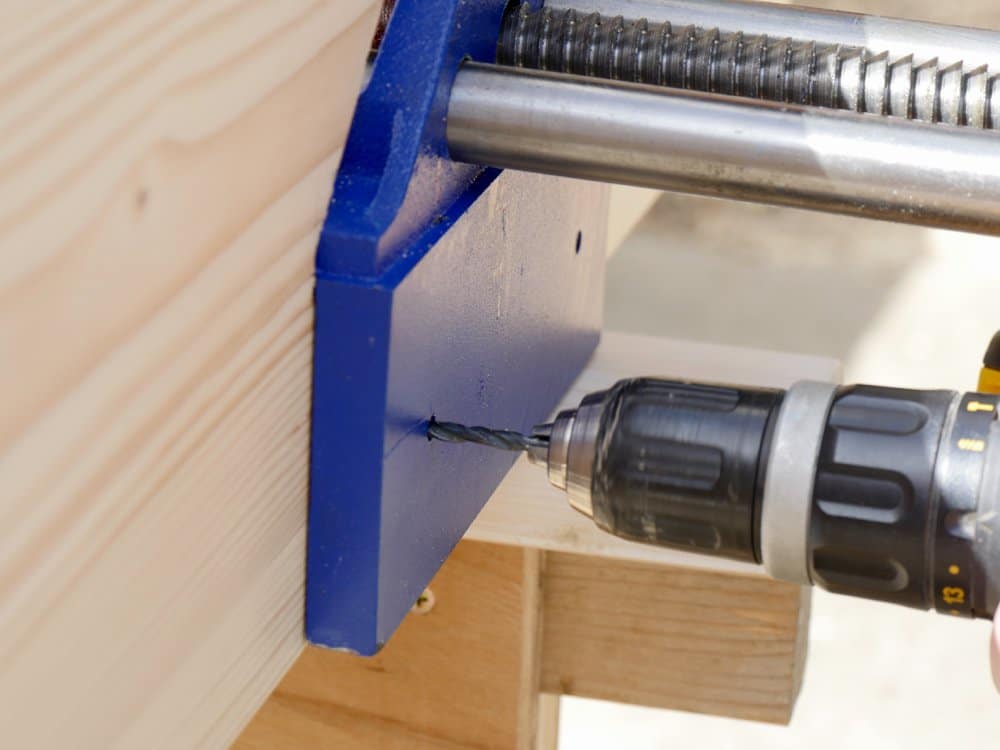
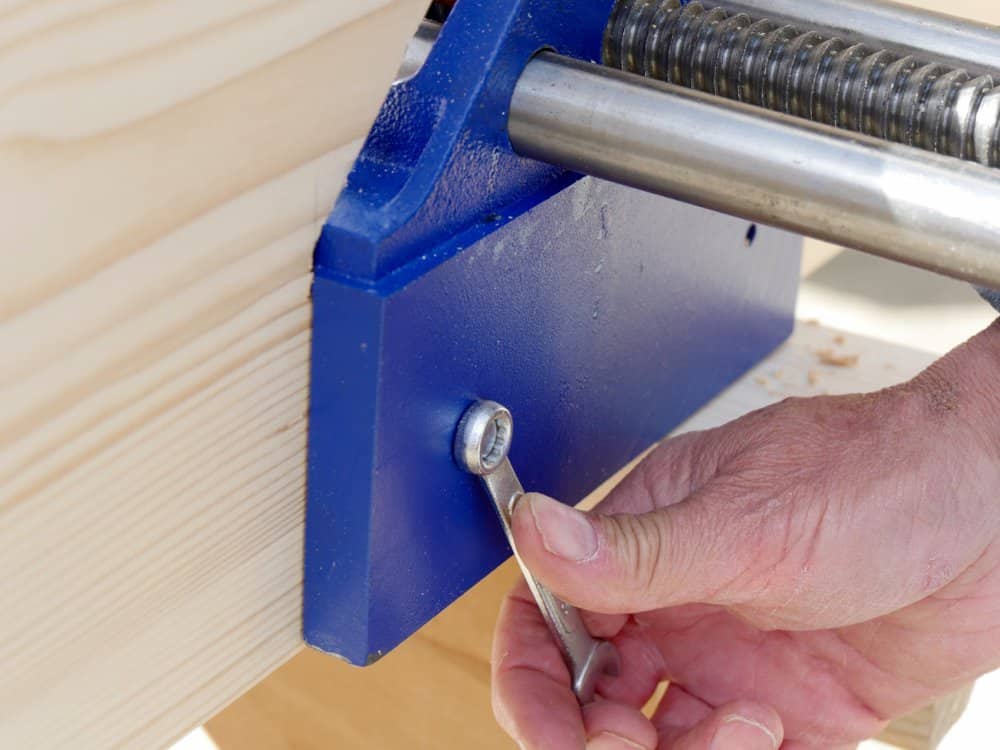
I chucked the screw head into the drill driver and finished off with a wrench.
By now you will notice that the holes inside the opening of the apron make it impossible to install coach screws there. The method I am using will be enough so leave these two coach screws out.
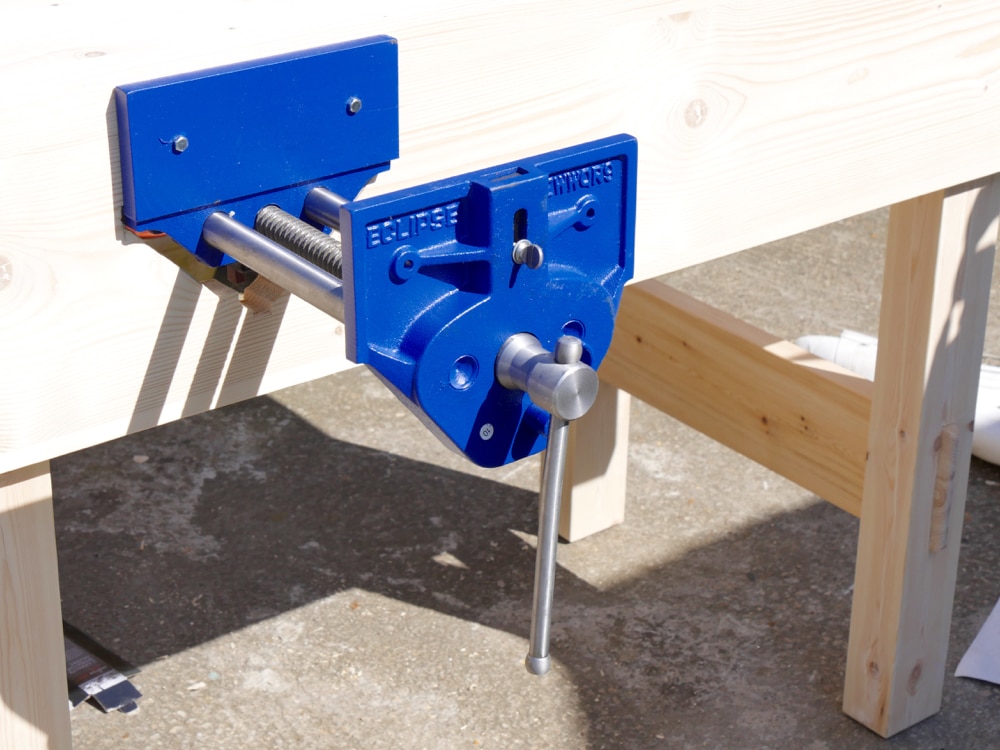
Next we will develop the wooden jaws (shown in top picture). The method I use makes this a wonderful installation.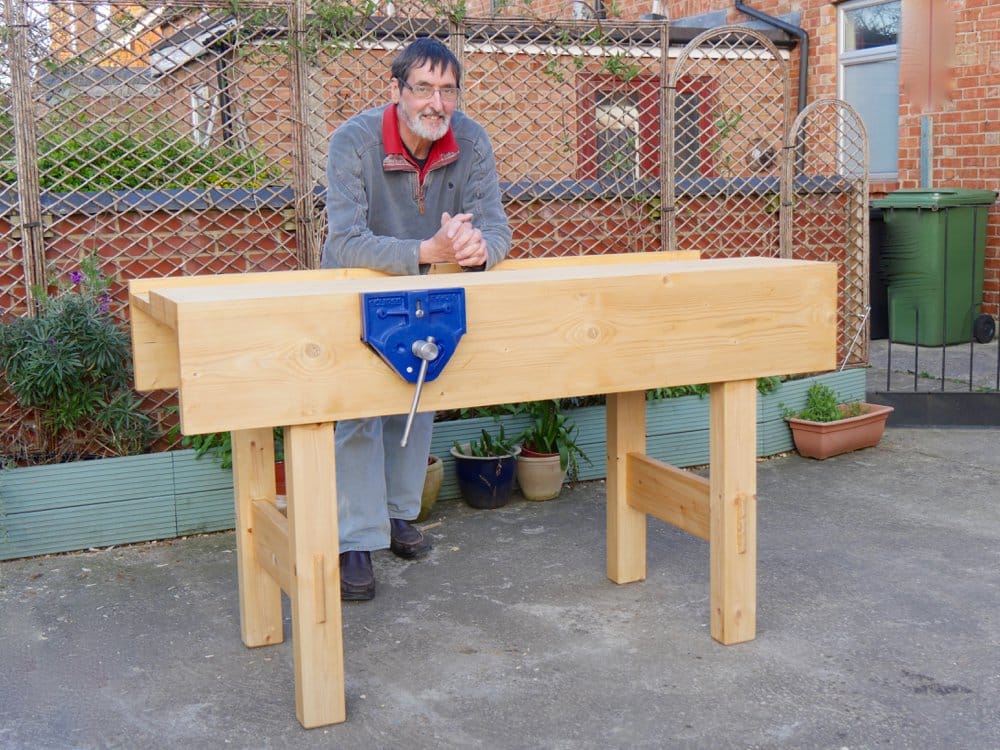
Hi there from Portugal,
It will be a new series of videos, about workbench making?
Obrigado(Thanks) Master P.Sellers 😀
There already is a 15 videos series on bench building by P. Seller. Look for it in his YouTube channel. This was my very epiphany trigger, when I could see this man making a superb workbench from regular lumber and a few hand tools, and I knew THAT was how I wanted to do woodworking
Paul, thanks for the excellent instructions for installing an Eclipse vise. On the one I bought the front stop protrudes about 1/4″ above the top of the vise when it is in the lowered position. Seems to me it would be hazardous to the health of plane irons. Am I correct, that should it be ground down to be flush with the top? Thanks.
Regards, JT
You should remove it and check that there is no card board inside stopping it from fully seating. A hacksaw and file will take about five minutes and the dog should really be 1/16″ below the vise top.
A quick side track from the vice: What’s the guidance on positioning the bench legs?
It looks like they’re about 8-10″ from the ends of the bench. Can you place them closer to the ends or is there a reason for that position?
I assume that the question arises because you would like the vise at or near the corner of the benchtop. Perhaps not but that seems to be the general reason for most,; so they can cut unhindered by the benchtop itself. For me, and it could be that I just got used to it from day one, this has never been any advantage. The bench legs are indeed 9″ from the end, which will place the vise around 15″ to the start of the vise. Being inside the legs means the vise is suspended between two fixed points and that removes any tendency to flex at all. For me this is this ultimate positioning.
To be honest I was thinking of maximizing useable storage space under the bench. My worry was if placing the leg housing dados too close to the ends would cause a structural issue.
I hadn’t really considered vice placement beyond a vague ‘just to the inside of the left leg’. You’ve raised a interesting point on that; I don’t think I’d want it close to the end for sawing, but is it more important to place it near the leg, or relative to the bench width as a whole?
From a purely selfish point of view, the most timely and appreciated blog post! I bought the 10″ version of this vise back in December from Amazon, have finally cleared my feet of almost everything that has occupied my spare time for the last 2 years (building my family’s new home) and should be able to commence my own bench build at the start of next month… Been looking forward to this for quite some time.
So thank you, Paul, for this post and for the peace of mind that your positive words about this tool have given me. Your experience and guidance means a lot to each of us who follow on here, Masterclasses and Youtube.
Question for anyone, really… I actually have two of these vises. Amazon replaced the first they sent because the tommie bar is bent near the middle of its length (about 3/8″ end to end). They didn’t want it back so I may as well fix it. What’s the best method to correct such a bend? Or would it be advisable to cut it free and and replace it?
Vise number 2 will be for my wee boy. Don’t know which of us is more excited to get going on this.
Paul,
Do you happen to know where the Eclipse and Faithfull vices are made ? I feel a new vice coming on… I have been using a non QR 7″ vice for a while (er… ten years !!) and it has always slightly annoyed me, being too small and a bit wimpy in the grip department. And yes, I did fit my vice with the back wooden face flush to the apron I also set the vice low enough that I could fully rebate both wooden jaws, thereby allowing a quarter inch of wood to master the top edges of the vice and the wooden jaws to be flush to the bench top, Why ? my dad did with his, he said you couldn’t nick the edge of the metal that way ! and now I’m used to the look of it.
I bought the 10″ Eclipse about 3 years ago and am fairly happy with it. I wouldn’t consider the 9″ because anything that can go directly into the vise is an advantage over working around the size issue. I’ve never had trouble dealing with the size and, if you do, you’ll be stronger in two weeks. The bigger issue is hand strength to use the QR, and I’ll bet that is the same on all sizes. If you have small or weak hands, it would be good if you can try one of these first and, if you cannot operate the QR easily, consider a Jorgensen style (Lee Valley, I think). I prefer the Record style, like this Eclipse, because I can adjust the pressure in both directions.
If you buy the vise at Woodcraft, I think you can avoid the shipping charges by having it go to the store and then you pick it up there.
The only issue I have had with this vise is that sometimes as I tighten down after sliding with the QR, there is a clunk, the vise loosens up a bit, and then I need to tighten again. This can be avoided by spinning the vise CCW a half turn to a turn after sliding with the QR. Usually, this does nothing, but sometimes there is a clunk as the vise registers. I’ve never figured out how to correct this.
I am happy with this vise, but do wonder if the pitch of the jaws is too big. By pitch, I mean how the top of the jaw closes before the bottom. I know that is correct, but I wonder if it is too much. It shouldn’t be an issue since you can adjust your wooden faces, which I’ve been meaning to do. For me, I find things sometimes slip in the vise because they are held only along a narrow line at the top. Normally, this isn’t an issue because you can just apply more pressure, but for thinner pieces when I don’t want to clamp so hard that the piece cups, it is a bit of a balancing act between being stable and cupping.
I worked at a friends bench where a twin screw vise was installed. I hated it. First, the jaw was flush to the bench, so I had to fight to get things into it. Second, the multiple posts seemed to be in the way. There wasn’t as much room in the jaw outboard of the posts as on my Eclipse, there’s limited space between them, yet the outboard posts are far enough apart that I don’t think I could have gotten some glued-up drawers or chest carcasses into it. (On the Eclipse/Record, you can straddle the one post, e.g, you can get the tool box carcass in the 10″, or in the big LV steel vise). Third, there was no quick release. It slowed me down a lot.
it’s not easier to drill 3 holes in the corner and use something like compass saw?
Hi Paul
I purchased a Record 52 Vise and installation may be an issue because it is not an L shape on the rear jaw, it has some rounded “brackets” on the back to support the rear jaw which would get in the way during installation.
What would be the best way to install such a vise?
Thanks
Hi Saqib – my vice had these supporting brackets on the inside face of the rear jaw too. I think they are found on the older, pre 1960’s record vices. All you do is make measurements of the depth and position of the brackets from the edge of the face, along with their width, and then chisel or saw a notch for each in the top of the vice opening you have already made in the apron of the bench. It’s a little bit fiddly, but quite easy to do really.
This may be a dumb question, but how did you turn the bench over? I am making one of Paul’s benches now and it is heavy. If I were to lay it down on an apron I’m not sure I could get it back up. And I can only assume that a pulley system or an army of sons was employed when lifting that bench onto some saw horses. I know this is a dumb question, but I would really like to know how to manipulate the bench. Perhaps it’s needless to say, but I am not a very large person
I did it on my own but I urge everyone to think safety first as I am quite used to manoeuvring heavy materials and equipment on my own.
Hi Paul
After your latest blog entry, I have been looking at the Eclipse vice shown in the image, but stumpled upon a vice called “Dakota DK2020”, which looks very similar and has a nice price. Do you have any experience with these vices from Dakota?
Thanks 🙂
Best regards
Jeppe
Yes, tested it out and it was very poor. That said, perhaps the makers, importers reworked the specs but the one we tested definitely wasn’t above a 1 on the scale of 1-10 with 10 being best. The makers/sellers do say that it’s a “high quality” vise but that’s far from true. Not recommended at all.
Thanks Paul. I really appreciate the fact that you are not endorsed by any one tool maker and can give open and honest opinions. I had a friend who wrote for a magazine (not wood working related) and was famous/well know enough in his field to have the back page for his articles. He wrote for about 30 years. In his twilight years I asked him if there was anything he had written the he had regretted or had a completely different opinion on (I knew at some point I would not be able to ask him ideas and I would be limited to his writing). He mentioned that there was one article he wrote that he regretted. The item was a new product and it wasn’t ready for the market as far as he was concerned. It needed about six more months of development. He wrote a bad review and tried to be as polite and factual about it as possible. The company whose product he wrote about saw a preview of the article are were less than thrilled and threatened to pull advertising from the magazine, etc. The magazine back up my friend and the article went to press. When I had asked him, the product had been on the market for 10 years and was a fine product at that point. He worked as hard as possible to avoid writing product reviews because of the nature of the way magazines are funded by advertisers.
You are in a unique position in that you aren’t funded by them and you have 50 years of experience and can distinguish between what is quality and good vs that which should be avoided. Thank you.
It’s been good not to be endorsed because we always wanted to be transparent. I do have many good relationships with makers and sales outlets who recommend us regardless of the fact that we are not endorsing or recommending something that they make. There are many ways of measuring success. I measure mine by seeing my name mentioned all the less by magazines, makers and sales outlets. I enjoy my freedom too much.
Thanks for this Paul – a very useful set of posts. I do wonder about leaving the main front pair of mounting holes empty and instead using the smaller horizontal ones in the rear jaw. I have an old Parkinsons to fit and the rear mounting holes are a long way back. I suspect I’m my case the vice might begin to droop using your method so I reckon I’ll use through bolts rather than lag screws. With the nut at the bottom and the right length bolt this should work even with the very limited clearance the thick apron leaves me. As you say this will mean plugging holes in the top. So, if you can squeeze it in to your blogging schedule – a short post on methods of plugging holes would be very useful and I think interesting for a wider audience too.
It can’t really droop and in all of the workbench vises I have fitted this has never once been an issue at all. Just to make sure others don’t think it will or can sag or droop.
Agreed. Most vices will have no more than a few inches between the front and rear mounting holes so for these no doubt your method is sound. My issue relates only to a very early vice – one that has two meshing cast frames in place of the more usual steel rods set in bushes. I wouldn’t have raised it here but for the fact that old Parkinsons like my one were made in great numbers from the turn of the century through to the 1920s /30s. Early Woden and a great many off brand makers copied the design and vices of this type are very commonly found on ebay for less money than comparable Records. For this reason some of your UK readers may like to use one. They are perhaps a little crude compared to Records and the later Wodens and Parkinsons models but they do work well, have lots of character and sport the original quick release mechanism which was I believe invented by Parkinson. One unusual feature of these early vices is that they often have a very long rear frame with the rear-most mounting holes sometimes as much as a foot behind the fixed jaw. As such the rear holes don’t really carry any weight they just add stability leaving the front fixings to take the whole load by themselves – vice, workpiece and user loads. They also have a hollow back to the rear jaw which would require packing if its not to break under the pressure of a lag screw driven through it into the bench. Even then I’m not sure the thin face castings of my rear jaw wouldn’t crack or crumble under the pressure of being used as main fixing point. Hence in my case through bolts in the front primary fixing holes appear a better option. The consequent need for patching the top is a relatively minor concern but its a useful general woodworking skill to have and I was hoping you might know of some clever hand tool methods that don’t need expensive plug cutters and a drill press.
A couple of suggestions popped into mind as I read your comment that may be helpful in plugging or patching the holes: 1. a wood filler product of the type consisting of two different substances, a filler and a hardener, mixed together giving a wet putty that you work into the holes (Bondo is the name of the company that makes such a body filler here in the U.S. Originally for body work on cars but works for wood). 2. Taking some shavings, sawdust, and tiny scrap bits of wood and mixing it all in the hole to be plugged with wood glue. 3. Find an old piece of scrap wood or dry board with knots. Pop the knot out to use it as a patch for the hole, if it’s close in size and thickness to said hole.
I’ve done 1. and 3. and it worked a treat. I believe Paul has mentioned 2. somewhere as an effective way to patch holes.
No, I have never once used glue and sawdust for filling holes or gaps, Carlos. It was a no no as an apprentice and still is.
A correction to my own comment – I mistakenly suggested above that Paul had used or mentioned sawdust and glue to fill holes or gaps as acceptable practice. As Paul has indicated below that is wrong! When I wrote that, it was a bit late at night here in the States, I must’ve not been alert enough! I should’ve added, “…but I may be wrong.” My apologies to Paul and readers. It just goes to show, I am still quite the beginner woodworker, but mostly that I am human, made of flesh and blood, and am fallible.
I understand for a fine furniture piece being worked on, gaps are frowned upon…and skill development should take care of gappy dovetails and other mistakes, but if you had a workbench or other carpentry project, or shop jig, where you had bored holes that needed to be patched or filled, what would you suggest as a good option?
What about mixing hide glue and sanding dust from the same wood with the hole you’re trying to fill? It should be sandable, and take a stain or varnish. It would also allow disassembly when or if you need to get at the carriage bolt or coach screw hole you need to patch over.
Carlos, there is a practical filler you can make from sanding dust that works well: Take a glass jar and fill with sanding dust from your belt sander bag. A smallish jar. Boil water and add it to PVA glue roughly at a ration of one third boiling water and two thirds the glue. Mix with the sanding dust and use as needed. With a lid on the jar the filler keeps. The dust of course is taken from the wood you are filling so the match is close. This sets up hard once left in the atmosphere.The boiled water is what stops the glue from setting up in the jar although it will set up if left for many weeks.
Thanks so much, Paul. This is very valuable information to have for me and practical too. I will be including this in my notebook, and will definitely be making up a jar to test out.
I recently used a two-part epoxy to fill four holes in a 1 1/2″ thick douglas fir board but I have found it’s not always easy to work with, can be crumbly when dry, the fumes strong and not good.
Thank you again. This goes a long way in removing the uncertainty felt when you know you will likely again have the task of plugging or patching a hole or void, and want something that works well.
Ooh! I feel a vid coming on on how to plug large holes instantly in a heartbeat!!!
😀