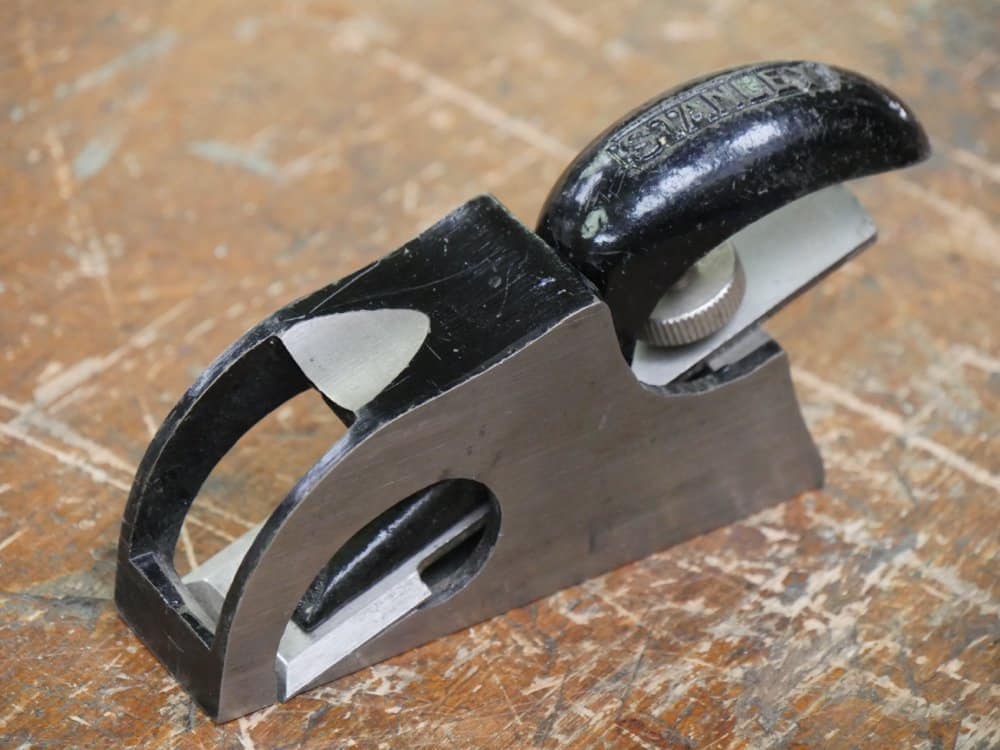
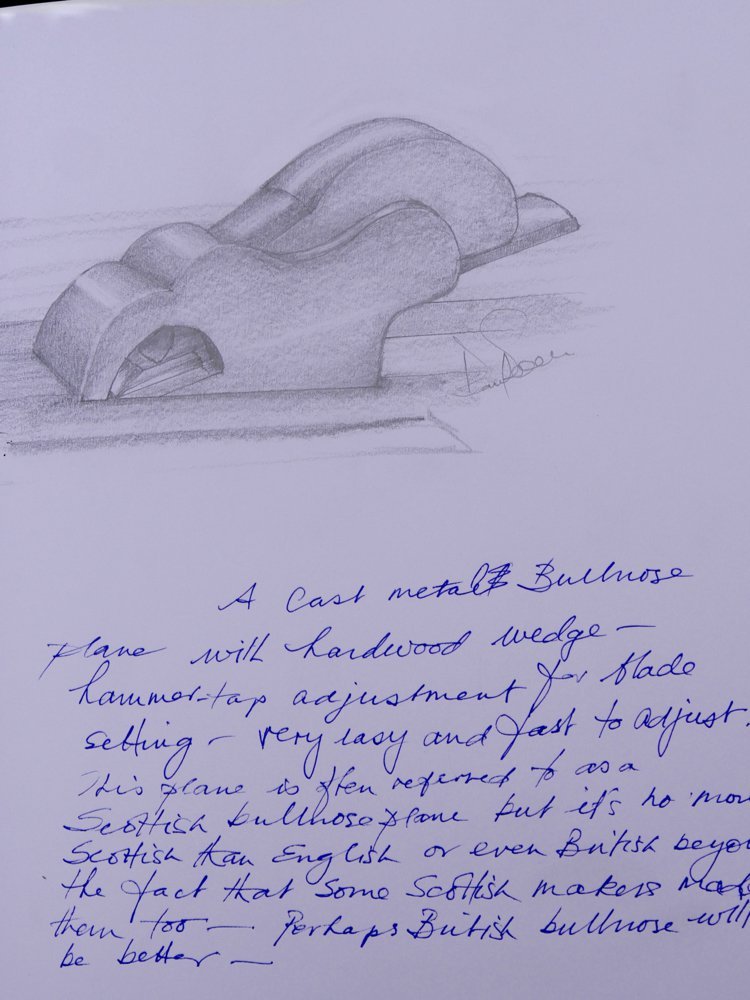
Rebate Plane No 2—The Bullnose Plane

Stanley did make a low-end bevel-down (BD) plane that generally works miserably and that’s the Stanley #75. As soon as you go bevel down you must increase the bed angle and when you do this with BD bullnose planes you seem to create the problem of iterant vibration in the blade as it works the wood. Most often, no matter the care you take, this plane grabs out chunks and tears out the grain. I am surprised that they were made let alone survived but perhaps that is because they were so predictably dysfunctional.
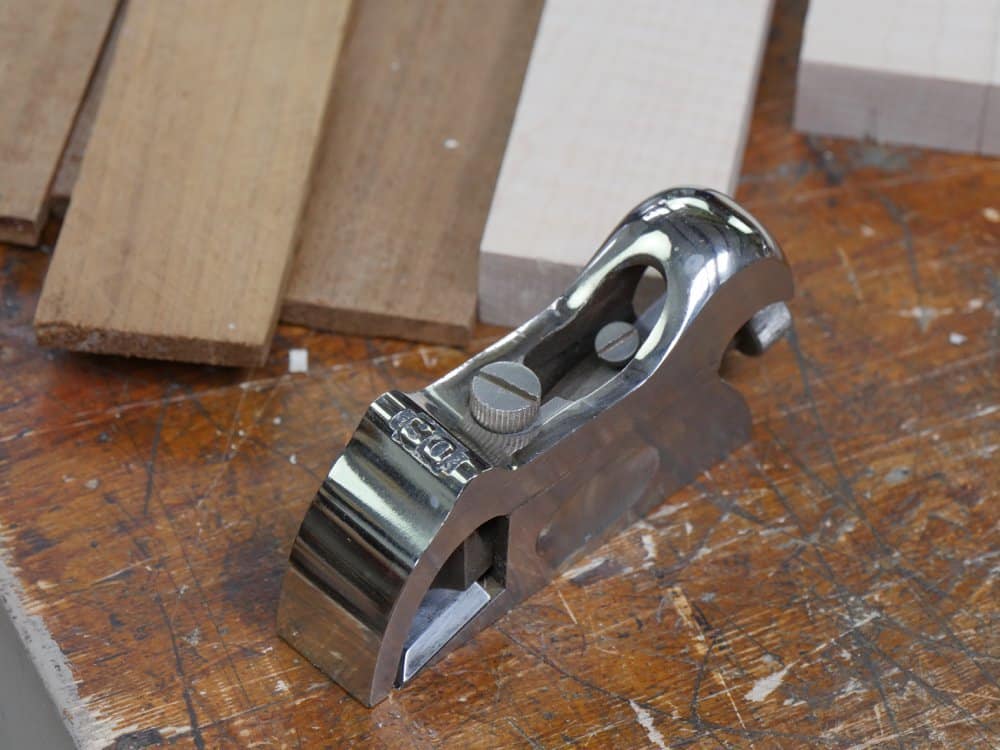
This Stanley #90 is the workhorse of the bullnose plane types and comes into its own when used for its intended purpose, which is working already formed rebates made by machine or with the #78 filletster mentioned in the previous blogs on rebate planes. First we should look at the functionality and and applications this plane works well for and then the adjustments and refinements it might need. Though we are discussing the Stanley #90, most of what I write about can be applied to the Record, Preston and Veritas planes too. I am adding a section on non-adjustables because they have their place if that’s what you have or can afford.
Understanding the physics
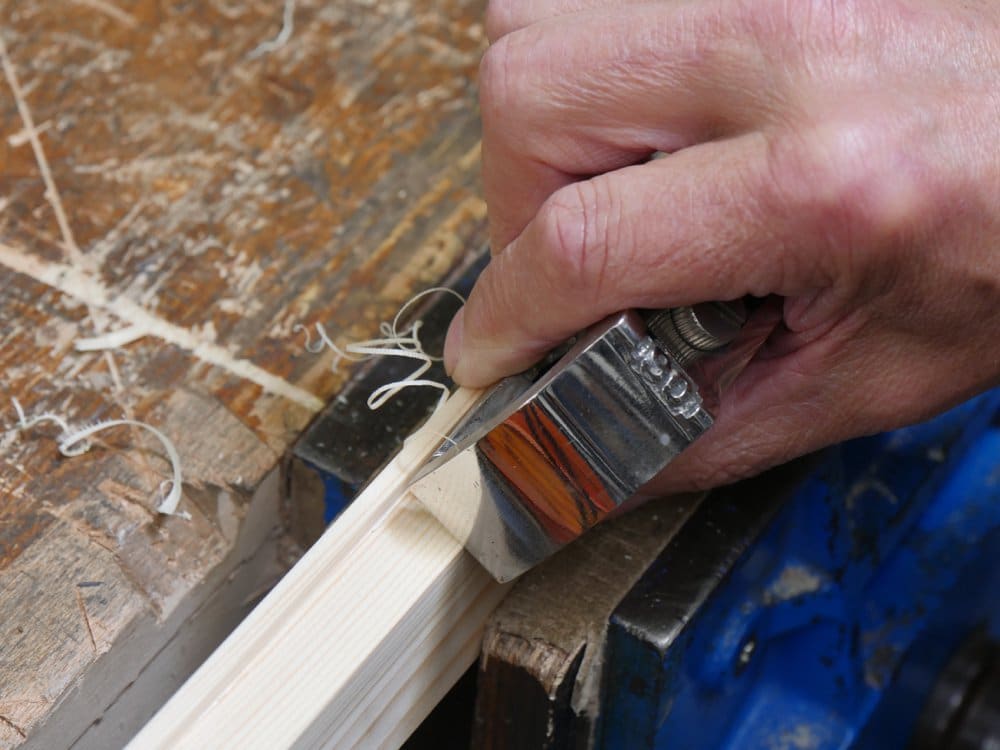
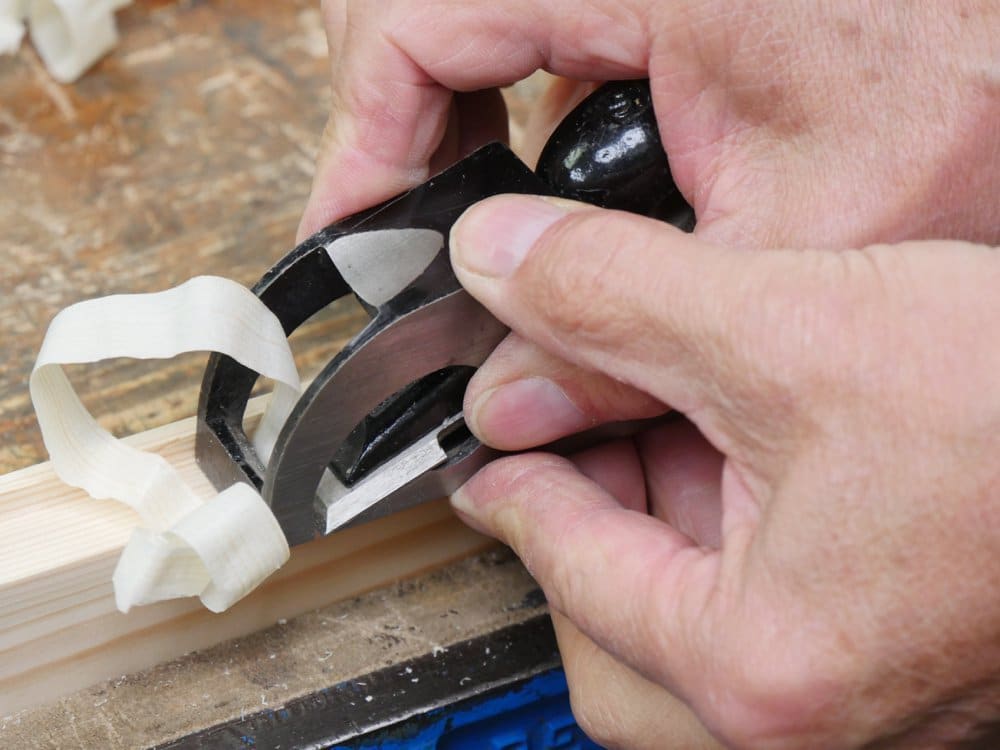
Though its best use is as a refining plane for rebates I reach for it to use it for removing internal arrises on box-type parts such as boxes and drawers. With the forefinger and thumb arched over the top of the plane and using them to guide the plane along the corner, the plane creates a perfect chamfer and successive strokes can widen the bevel it creates to whatever width you choose. I use it in combination a flat-bottomed spokeshave for developing stopped chamfers.
As with all other planing there is no guarantee that simply taking a stroke from one end of the rebate to the other you will automatically create an even and parallel line. This is because there are variables few might consider. You see wood absorbs pressures into the main body of wood and into the shaving the plane creates when removing the shaving. Shoving plane forward into the wood even without the blade exposed compresses the surface fibres as a plane moves along the wood in the same way say pushing a piece of furniture might along a carpet. When the blade is exposed it does this all the more and as shavings are separated from the main body of wood the wood being removed as a shaving compresses into itself along its whole length. This is the reason that when you take a shaving full length and compare it to the length of the workpiece you shaved it from, the shaving will always be shorter. The longer the workpiece the greater the compression and the more evident the difference in length will be. Wood also compresses beneath the plane and springs back into the throat at different thicknesses. This ‘mushrooming’ effect means that the wood removed will not be parallel and the wood that rose up beneath the plane, because it returns by elasticity to its main body of wood, usually leaves indiscernible undulations resulting in minute discrepancy in surface height. Because wood has inconsistencies in density the shavings and the surface will indeed be inconsistent all be that by minuscule amounts. Pedantic I know, unpredictable too, but worth knowing. For reasons like this, and indeed human error too, you may want to run a gauge line to guarantee finer levels of exactness. Especially with short-soled planes like the bullnose planes. Always remember the smaller the plane sole the more condensed the pressure.
Of wooden bullnose planes
In times past wooden bullnose planes were commonly used but often not as rebate planes but more as planes for bumping up to a full-stop adjacent and vertical component; very different than the bullnose we speak of here. The wooden ones were useful in the days of carriage building and some aspects of musical instrument making, instrument making such as scientific instruments and such. Most such work has now been replaced by metal casting and plastic injection moulding.
The chief function of the bullnose plane we are discussing here is rebate refinement rather than rebate development. That is it chiefly work an existing rebate to in some way enlarge it or refine it two surfaces. Good examples are inside the recesses for door frames where we sometimes fit the frame itself rather than the door and the wooden drawer supports on which the drawer runs inside a drawer recess or opening. There are many other applications for this plane to but generally we use it to maintain a surface level parallel to the original. Mostly this occurs after installation of the component, where use of the rebate plane like the #78 is compromised by size and space. This lead me to one key advantage this plane has over all others and that is its compact size. Even though its usefulness is pretty much limited to rebate refinement and fitting of component recesses, what makes it indispensable is the type of work you encounter in certain work and especially joinery and furniture making.
You can create excellent rebates with the plane
By using a planted fence clamped, nailed or screwed to the workpiece you can indeed create rebates along a length of wood. I have also used superglue and an activator to glue fences to the plane side and sole and this is very effective and non marring to the plane. This of course is a personal choice only you can make. To remove the stops simply tap with a hammer. This will separate the wood from the plane with single tap immediately and also remember that the sole piece, the guide glued to the sole of the plane, is only needed if you require the depth stop to guarantee the final depth and any temporary stop on the workpiece would indeed be in the way. Also, because the superglue is so fractious it can pop off in use. That shouldn’t stop you using this method because with care it will work just fine.
Working the plane

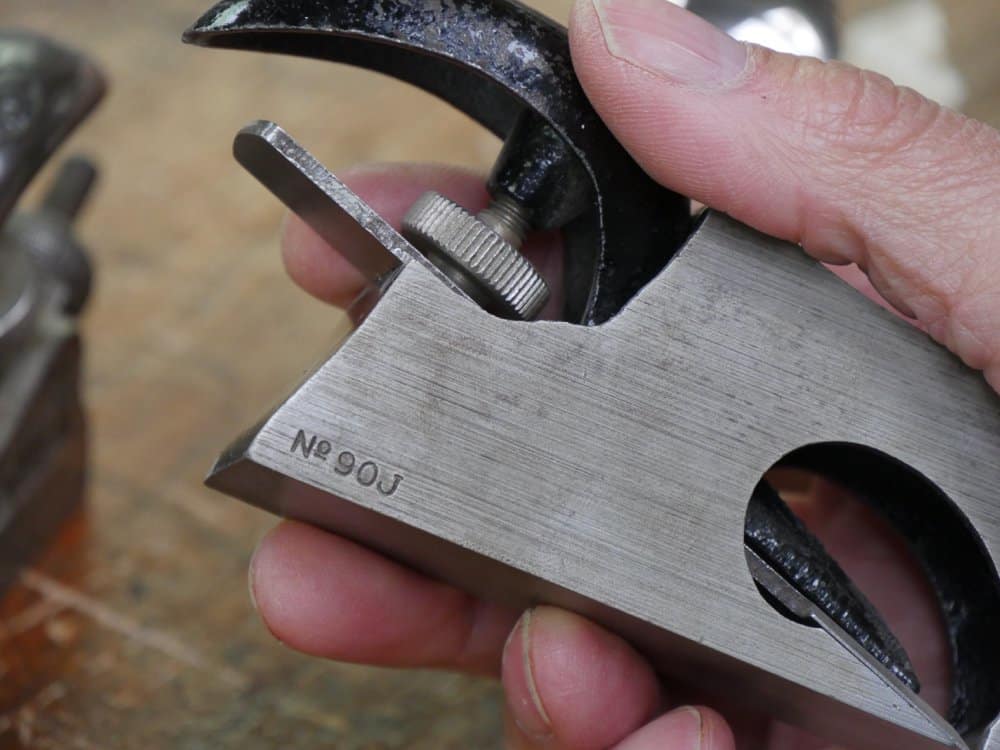
As with the #78 plane the blade is wider than the plane sole width and this is generally necessary. Ideally, when you set the blade to the side of the plane the blade should stick past the side of the plane by 1-2mm. This blade then rides against the side of the rebate ensuring that the cutting iron reaches fully into the corner or as much as is physically possible. As a reminder from #78, I mentioned there that we must bear in mind that corner fracture to the corners of blade’s cutting edge inevitably takes place in the first dozen or so strokes after sharpening. Usually it is not discernible to the unaided eye.
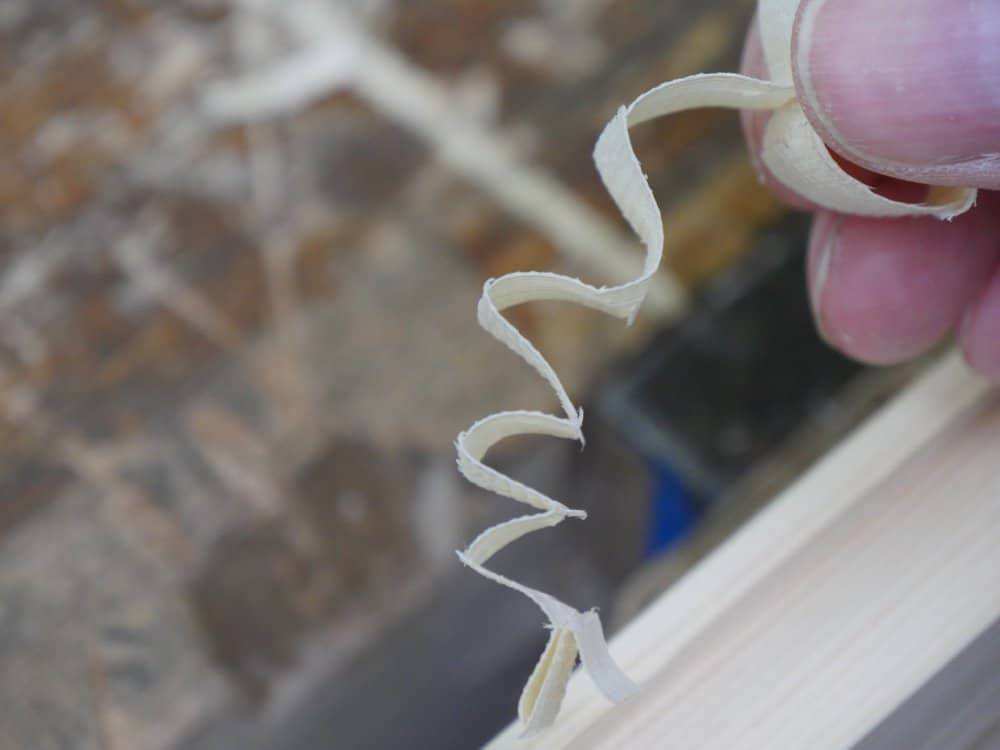
The bullnose removes a lot of material when set deeply and this can be handy. Inevitably heavy cuts with any plane causes inline grain fracture in the shaving that’s cause by the extra force needed. To give a better picture imaging dominoes lined up on a floor and pressed against an immoveable object like a wall. Pushing from one end would cause the blocks to rise upwards in a successive concertina . With the plane shaving this starts directly in front of the plane and the compression rises and falls so you end up with a zigzagged shaving inside the throat of the plane as show here. 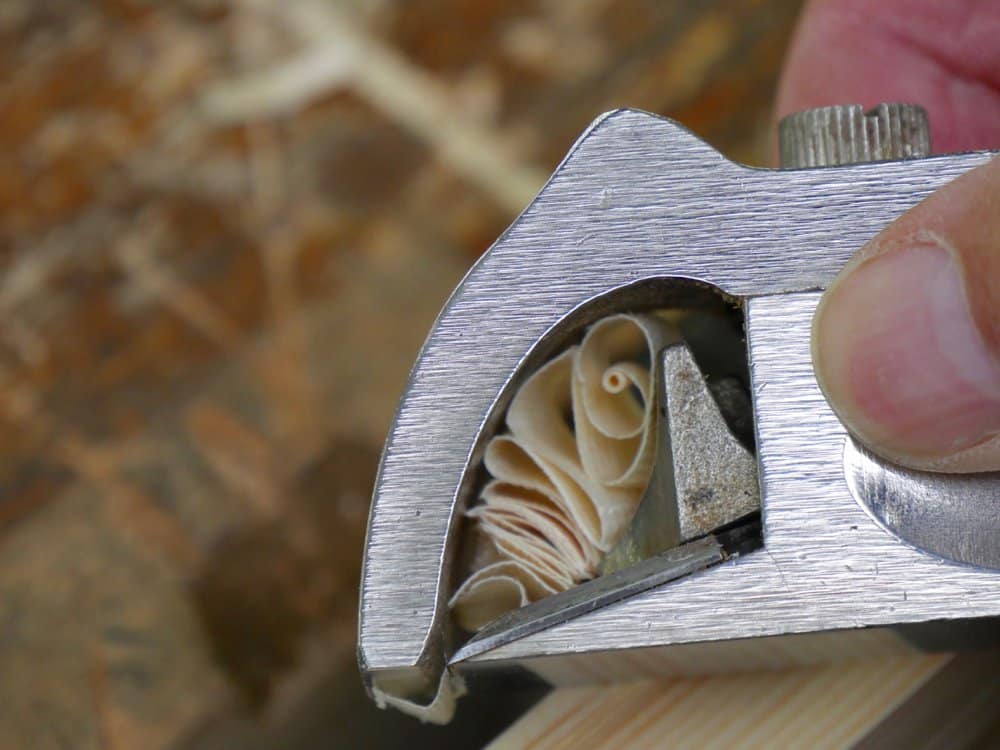
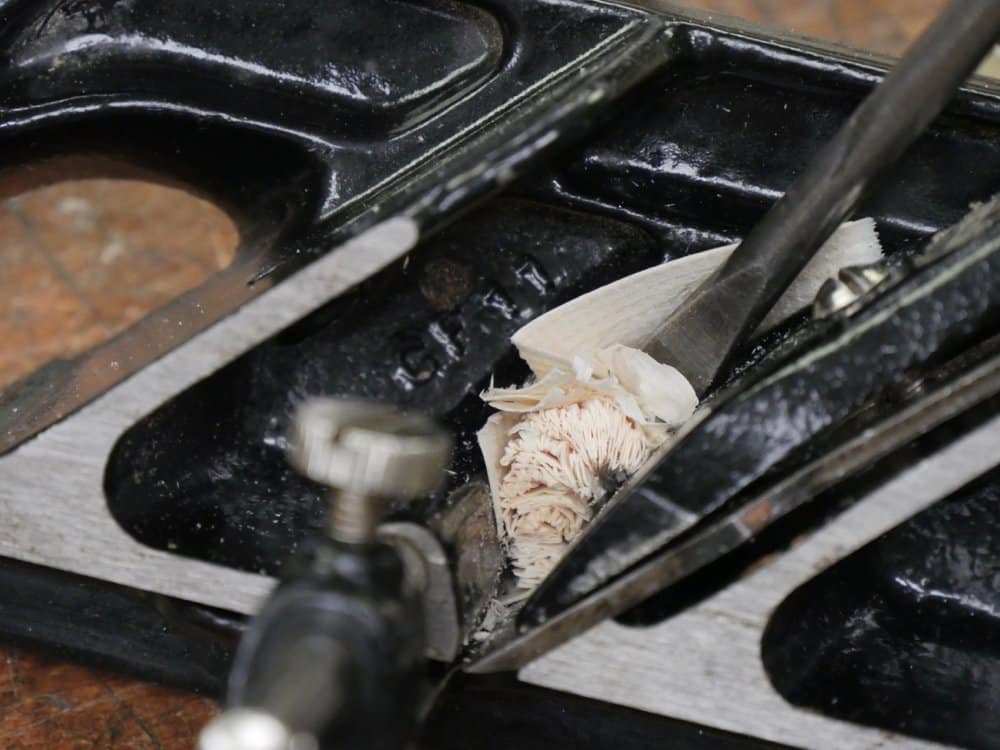
If your plane clogs consistently it can be a problem with the lever cap
I often come across #78 and 078 planes that clog more readily than others. Notice with the #90 plane that the lever cap securing the blade inside the plane has two directional diverting scallops either side of the leading edge to the component. These scallops divert the shavings one way or the other depending on which corner of the plane is being used at the time. It would have been possible to do this with the 78 too except perhaps the size of the plane and the wider shavings it is intended to take might have prevented this to work well. If you are experiencing clogging as said you can try to reshape the edge of the top curve to the cap iron by filing so that the shaving lifts more readily and also check the underside where the leading edge meets the cutting iron to make sure there is no gap where the leading edge of the shaving can gather as this will almost inevitably result in clogging or better still jamming. If there is a gap just rub the underside of the cap iron on the sharpening stone until flat and this should take care of the issue.
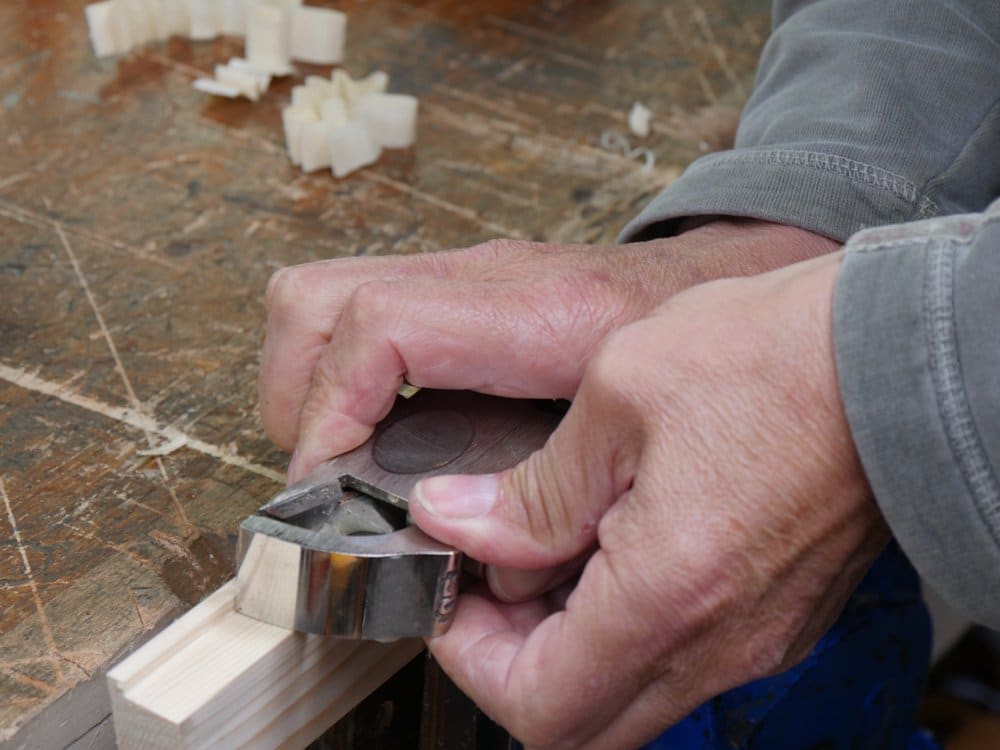
Holding the bullnose
Comfort accompanies this plane and also the Preston, Record and Veritas models. See how arching to the top of the planes helps it sit right in the palm.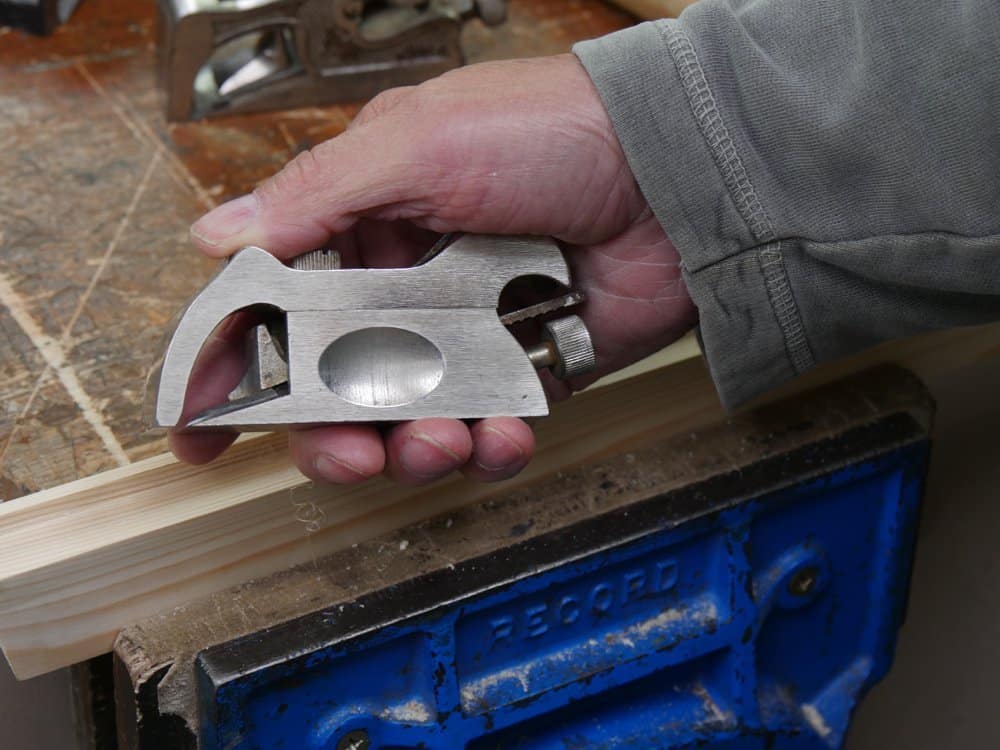
Here’s another too. Snugs up just right.
About the very clever skew mouthed planes
I snatched this last par from the sections I wrote on the skew plane blade. Couldn’t wait. Very worth honourable mention here because we compare it to square-set irons.
Though more deliberately sharpened and requiring a greater degree of accuracy in skewed-angle sharpening, the skew mouthed rebate plane knows no equal. Skewed mouths are dynamic and especially so as rebate planes. That said they do require greater accuracy in sharpening but nothing too demanding or overly problematic. The key in sharpening skew irons in every plane type is to ensure the angle corresponds with the mouth angle and of course the compound bed angle used in many planes further complicates sharpening and set up. Once set up the plane’s functionality is a superb effort of joy to use and perfecting work becomes effortless too. All in all it is a work of pure art in the truest sense of the word’s etymology. Some say that the primary purpose of the skew is so that the plane pulls itself into the corner as the plane advances progressively into and though the cut. That is indeed absolutely true, no question. Equal to this well thought-through dynamic though, in my view at least, is the fact that the plane rarely ever clogs if set up correctly.b This is because with skew planes, and especially rebate and dado planes, each stroke starts quite uniquely with the pointed corner of the cutting iron and immediately twists into a pig-tail curl out from the start point in the corner and into a spiralling curl away from any abruption that with other planes would cause a jam to begin. This is unlike all of the planes with square-across blade bedding, which no matter the effort always seem to create the periodic jamming of shavings compressed into the corner of the plane negotiating the rebate.
Extremely very informative and educational.
Thank you very much
Ahhhhhhhh that explains why I’ve had such difficulty with a Stanley #75 bullnose that I got on eBay. Might try sell it on now rather than persist with it!
Sorry! The price just went down.
Haha! Small price to pay for greater knowledge I’m sure.
I actually have a #90, and just as you said, I thought the screw on top was for securing the cap. I will have to “play” with it and see what happens when I adjust it as you described. This is very helpful information indeed. Sometimes I “get” information when it is re-stated in a different way. Is it possible to describe again how to tweak this screw and its real purpose? I’m not sure I really understand what it is supposed to do. Even if you can’t do this, I really appreciate the information on these planes; I have a number of books and none of them address these groups of planes as you are doing now. Thank you so much!
I have another section yet to post, Joyce that will make this clear.
Finally a superbe review on the Stanley 90! Bouth it but not good at using it the right way: thank you so much !
Paul,
Do you know of a source for the bullnose uppers for the #90. I recently acquired one without the top section. From what I have read here: http://www.supertool.com/StanleyBG/stan11.htm there are different sizes as well. I have looked all over and cannot find one by itself. Any help would be greatly appreciated!
David
I have been on the hunt for a #90 for a while now. I definitely see their usefulness .
Steve
Please Paul, a video would be nice! Unless it is already on your dvds?
Tx a million
Dear Paul. As usual an excellent informative article.
I have a Stanley No 90 plane which requires sharpening. Please can you advise the correct angle to sharpen the blade iron and whether a back bevel is required. Internet searches provide different opinions either 20 or 25 degrees and I cannot tell by looking at the current angle as the previous sharpening was poor.
Many thanks,
David
Just go with convention because it is tried,tested and proven through three centuries. Anywhere between 25 and 30 is great but if you slip into steeper but less than 35 you are good to go. Personally my cutting edges are generally at 30 and that does everything ever want.
Excellent advice. Our forefathers knowledge was built upon years of hard work and experience with limited tools. Sadly they are not here to tell us what was obvious to them and I really appreciate your insight to this lost world.
David
I’m so glad I found this article. I was just about to buy a #75 on eBay. I am literally “watching” 5 of them as I write this. Guess I’m about to “unwatch” them and plunk down the extra $ for the #90 I’m also watching. Thanks Paul! You’ve saved the day again! Keep up the great work.
Hi Paul
I note your lack of faith in the Stanley No. 75. Unfortunately, I have a hand me down from my Grandfather/Father, which I’ve just rescued from their shed. I’d like to keep costs down and want to use it but it would seem that the setup is the must important thing as is a very sharp blade. With your experience and knowledge perhaps you could help us unfortunate ones who have the No.75 and because of sentimental reasons want it to work. I hope this ia ok with you s I value your comments and videos helping us amateur carpenters to learn the dark arts which you make look so easy. Many thanks I have only just found your website and love the work you and your team are doing
I bought a bag of four old wooden planes for £20. They were in generally good condition needing a bit of TLC and sharpening. One of them was a skew rebate plane. I tried it on some spare wood using my fingers as a guide and scored the inner edge of the rebate with the plane heeled over and then completed a 1/4″ square rebate. It came out very quickly and neatly and surprisingly accurate. With this sort of tool available why would anyone go to the bother of setting up a power router or table saw to accomplish a simple rebate?