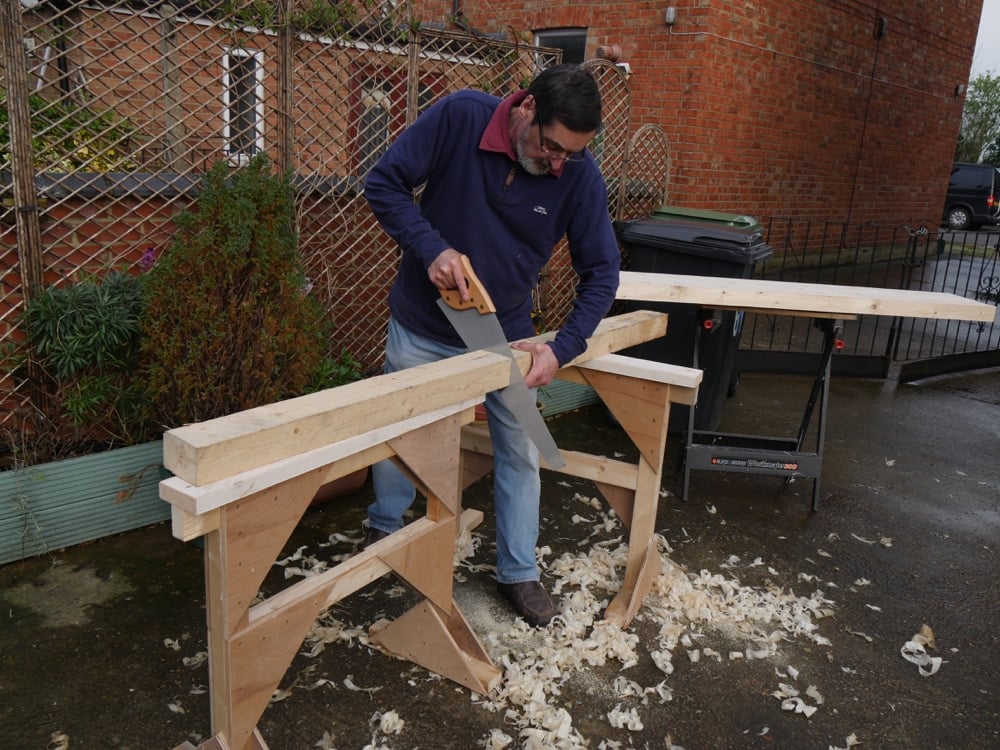
My Week Making and Filming Traditional Sawhorses
How to make live mouse traps from tin plate rescued from rectangular one gallon cans and threaded 1/8” brass rods and such is something I learned when I was a boy of 13. The skills and knowledge stayed with me through 5 decades and I found such knowledge invaluable. Folding the tin plate steel and soldering the folded edges, forming receivers for glass windows and making light springs to trip the mechanism flawlessly in a split second, that sort of thing, was built into a customised curriculum just for me by my metalwork teacher. Mr Curbishley and I shared a common interest in field voles and metalwork. We shared amazing lunch breaks together talking, planning and making. I learned enough to make me a tad less dangerous and to be productive in an alternate craft that way.

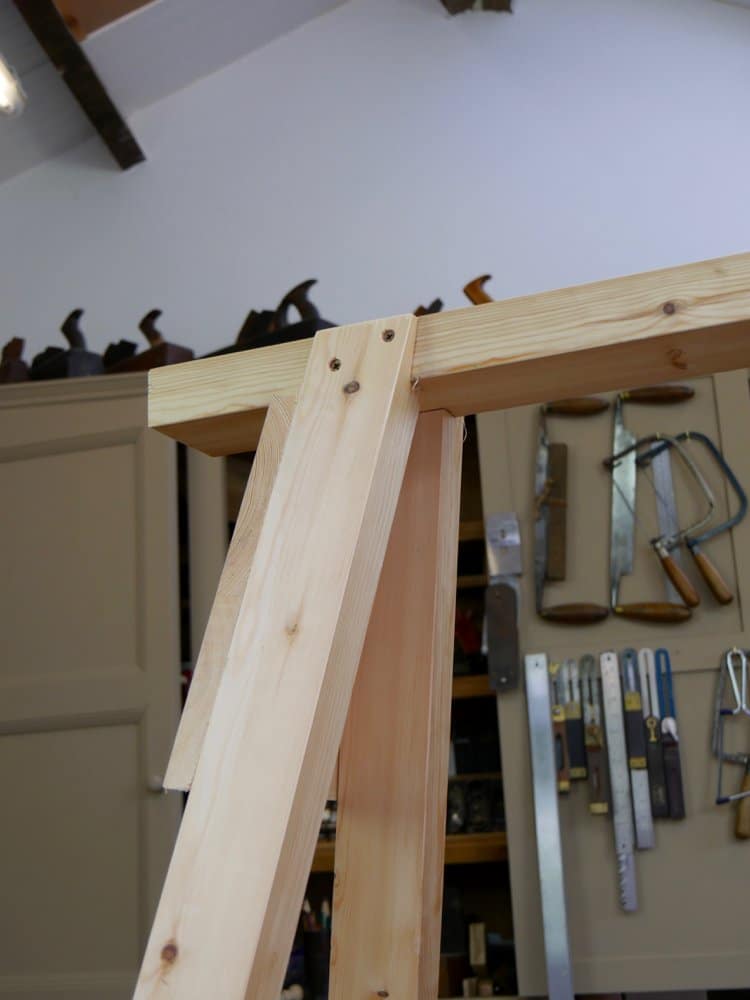
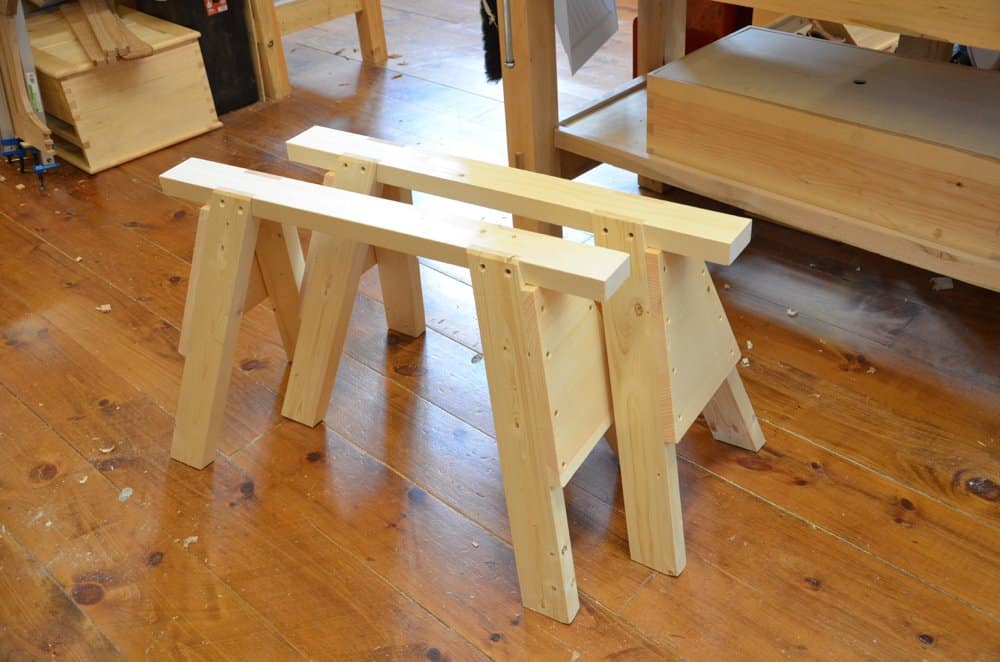
You will see that I have used screws instead of the cut nails that would once have been used. Cut nails actually worked better than we can imagine because they ‘bit’ into the wood with angular corners, very differently to round or wire nails; not as good as the screws. Round nails, the ones we commonly use nowadays, tend always to split wood near to the ends of sections of wood and are also easily withdrawn. This is simply because they have pointed starts instead of square ends. The square ends actually punch the section of wood to take that punched section into the main body of the wood with the nail as the nail is further driven. It works. Screws on the other hand do not rely on friction and compression to hold them but have pull-power we shouldn’t disregard. It’s not cheating as some say and it is indeed one of the finest inventions I know of. When I get concerned is when they completely replace specific joints like dovetail joints and mortise and tenons because they are not co equal and never will be. Screws work well with some joints like housing dadoes for instance most of the time and other joints of that ilk. The question has been whether screws in endgrain have sufficient lasting strength and durability in stress conditions over the long term. Things changed in recent years through the development of new and very special threads that work exceptionally well for some aspects of woodworking. In the case of the leg housings for this project they work great. Combined with the glue we have a dynamic support aid for a lifetime piece of equipment. In fifty years using them on work platforms of diverse types including these shown I have never known them to fail. For large timber framing of course such structures are inadequate. You must develop your project equal to task. Timber framing trestles and stools are moved less than say a joiner working through the second final fix of a house as in times past before miniaturised machines replaced hand work.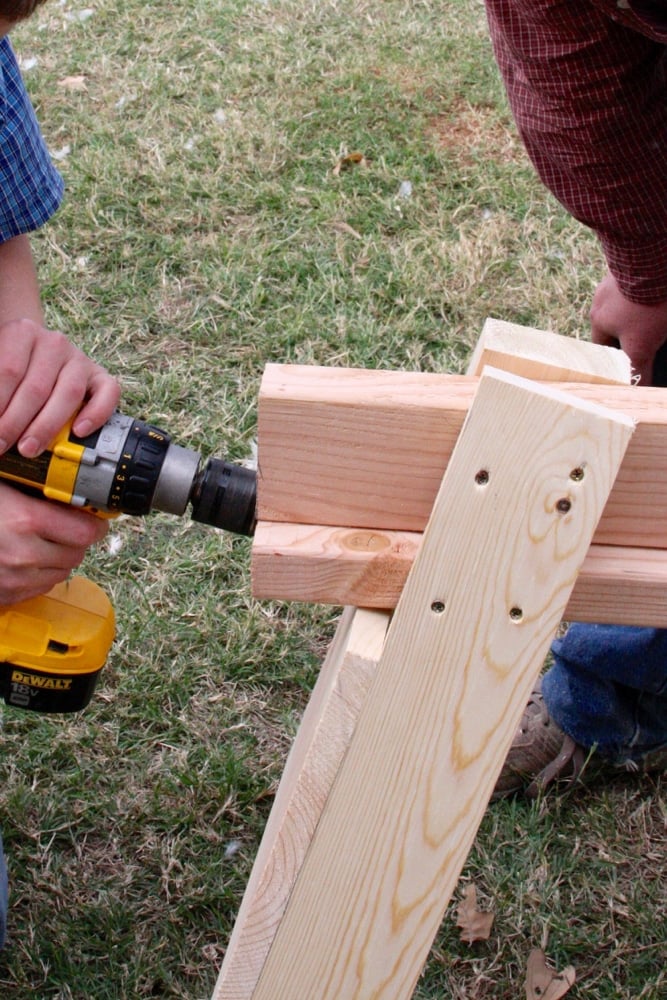
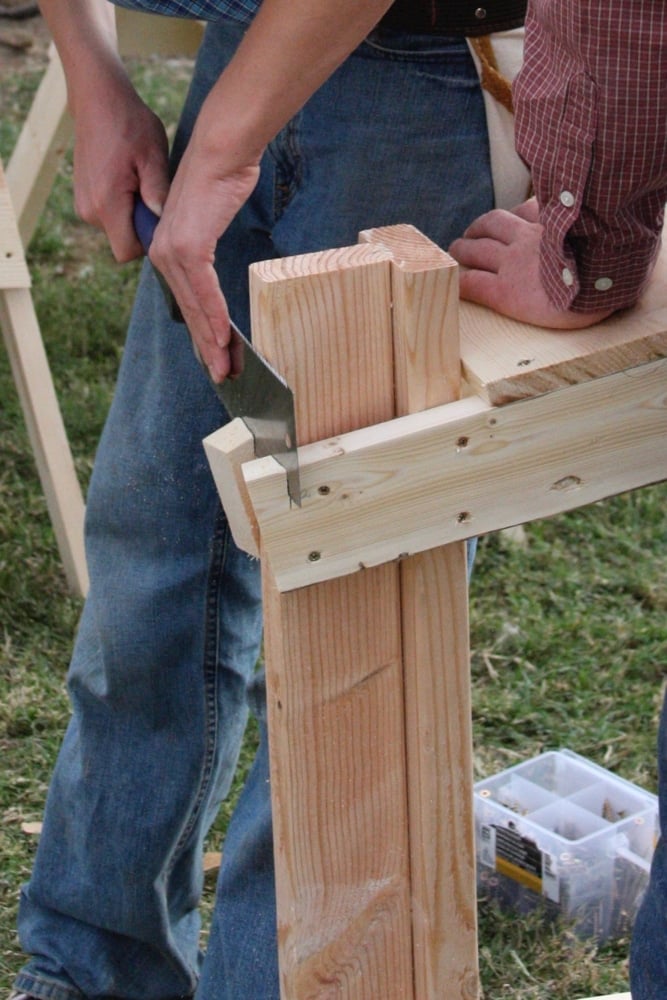
All in all I have enjoyed those aspects I learned from men I worked under but for making the film it was probably too unpredictable and difficult to lass on the information. Today it’s often a question of shooting nails from a nail gun and tossing the whole when the job’s done or the project unneeded. Two 4x2s (UK) nailed in a T gave the angle and four 4×2 legs air nailed to the side faces is a two-minute job. Add some bracing and you are on your way, but it does have the ugliness I can’t really abide.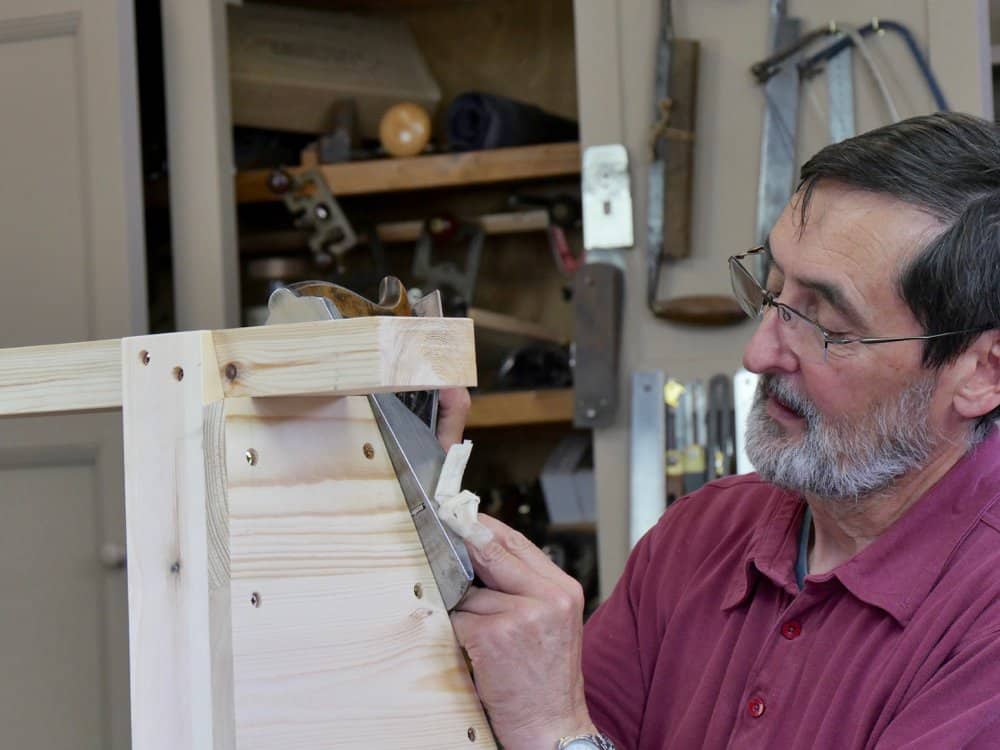
Watch out for the new series after the conclusion of the current chess board series and the upcoming table making series on woodworkingmasterclasses.com. This new series will be a two part series so not too long to own something that’s been around for centuries.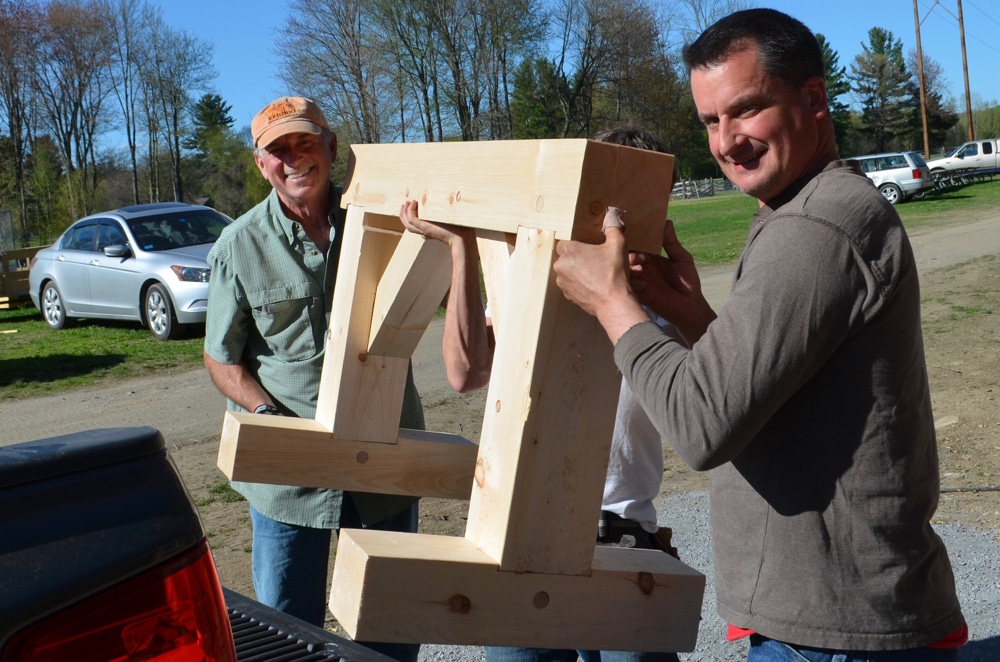
So, many hidden nuggets of reason can be lost as decades come and go and so then the craftsmen that used many methods of construction we might never know existed. The methods of work I was shown are in some ways nothing like the video we filmed. 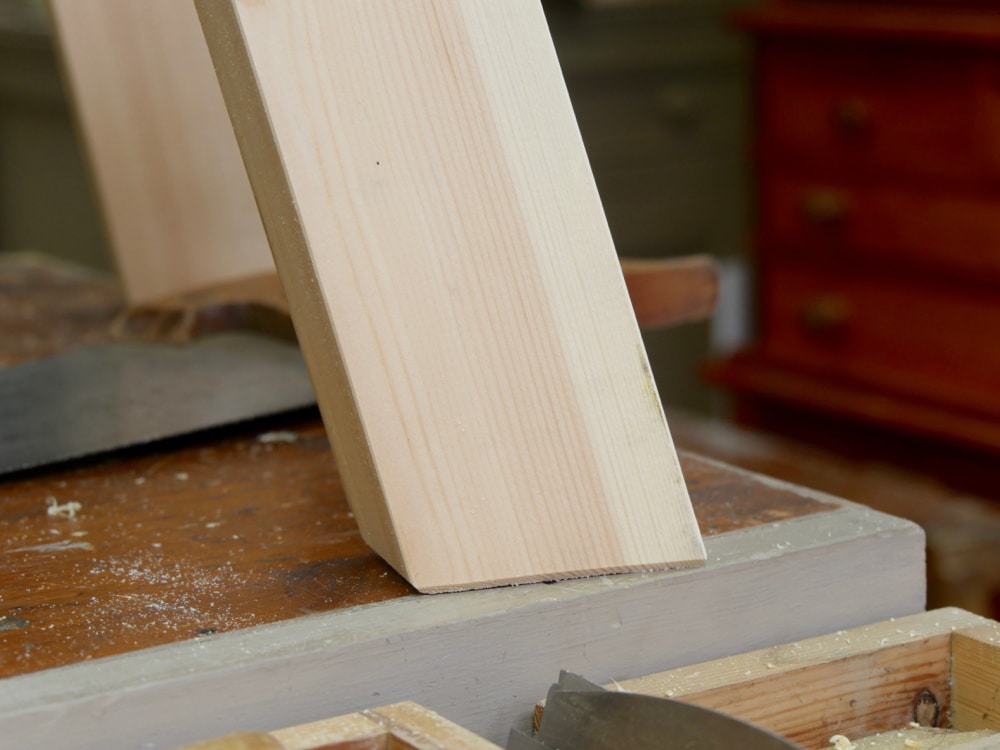
I have one saw horse I salvaged when Boulton and Paul bit the dust back in the 80s, really looking forward to making another so I have a pair. 🙂
Looking forward to this series! It’s a very thoughtful thing and I appreciate that.
Oh boy I want to build those 6×6? Saw horses…
Thought they were 4×4 but the angled members look 4×4 so now I don’t know!
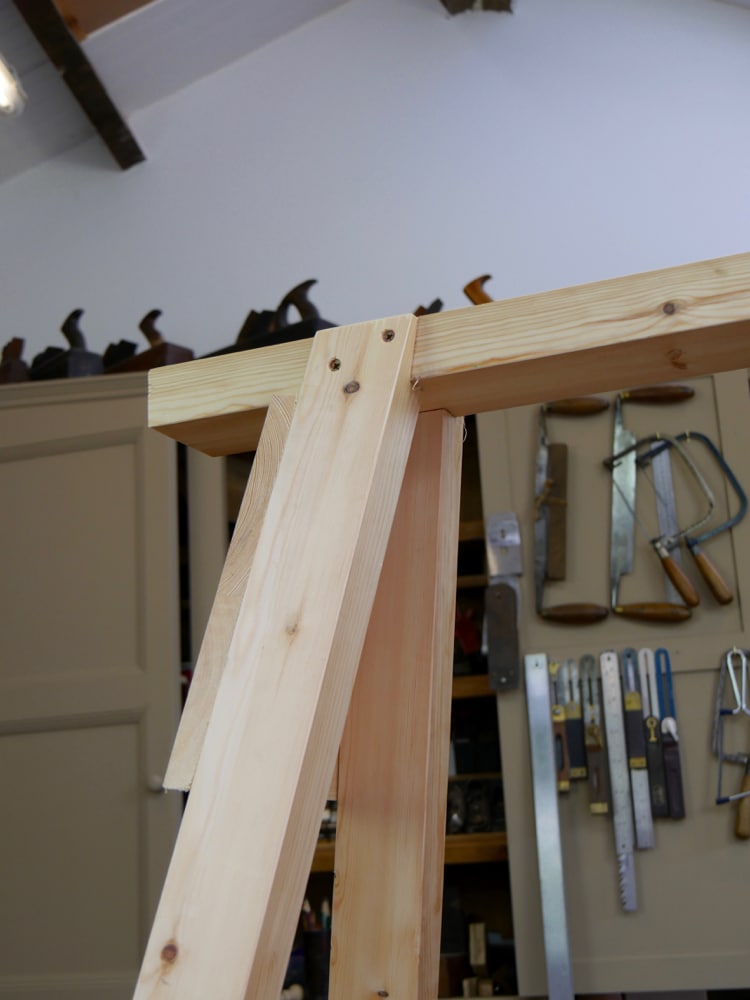
Love timber frame!! Also love the last shot of the leg where you can see the angle of the ariss taken off, if that is still what you call it when you break the sharp edge on the bottom of legs?
Brian
Love to see a post on making the mouse trap. That is a very similar kind of craft to hand woodworking and is lost to us also.
I agree! Share the mouse trap please.
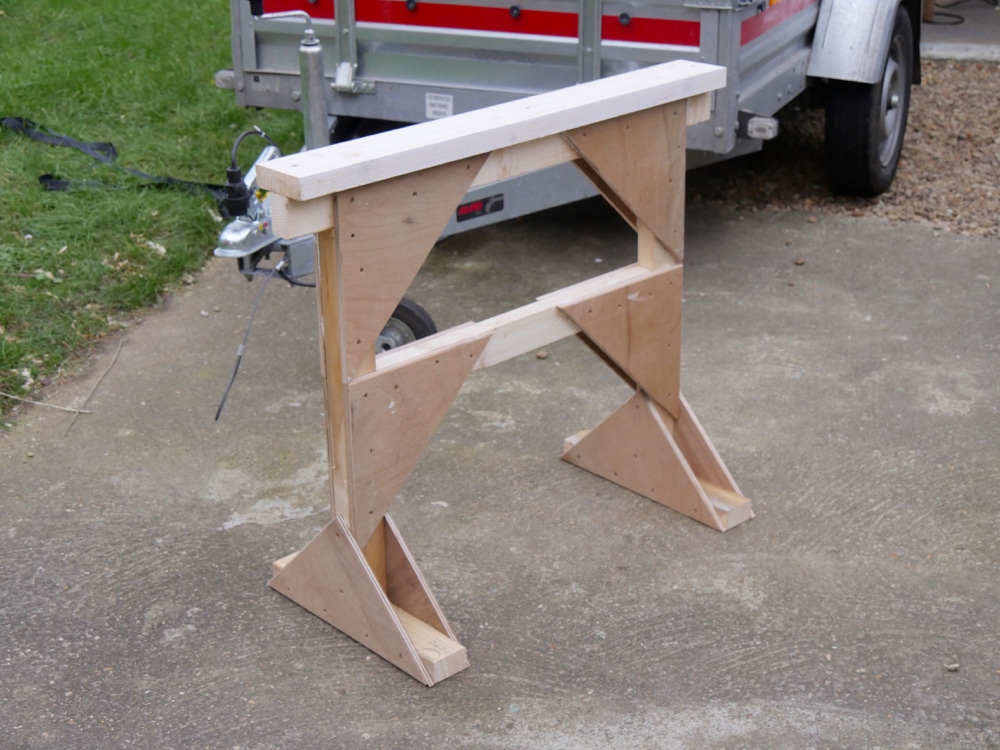
That last photo of the saw horse being loaded onto the vehicle looks great. Is a saw horse? Never seen one like it before.
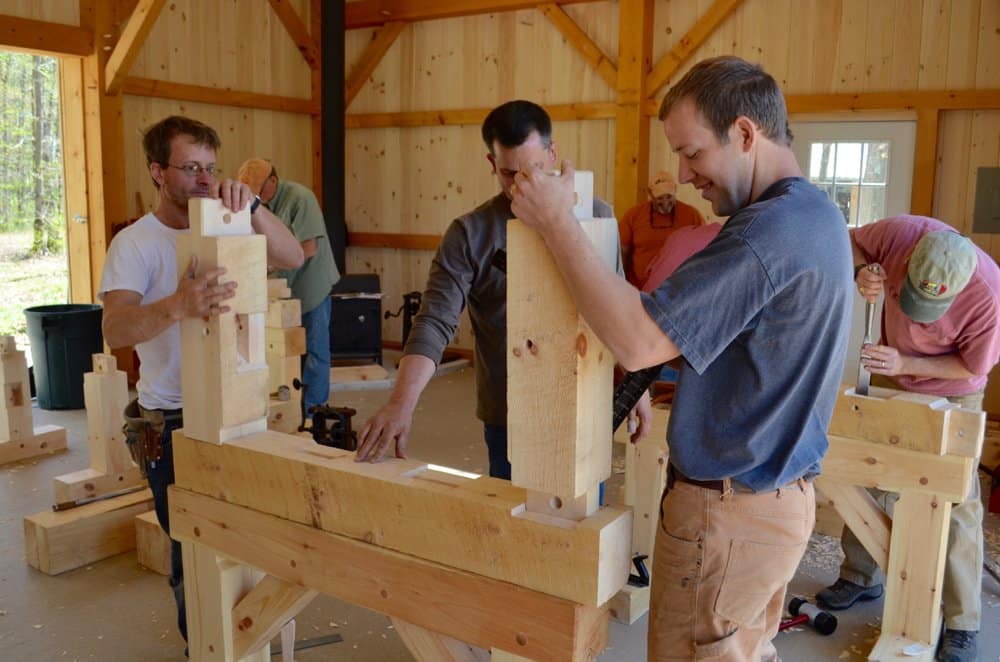
Not a saw horse. Saw horses have four splayed legs. This is a stool for timber-framing so it takes the heavy beams that are worked from to create a building on the ground before the great frame lift.
Well I can assure of two seeds that fell on fertile ground. My son and I, he is 10 and I am 41, have learned a great deal. He kicked and scream some but has since took a fancy. However, we both are perplexed with the spoke-shave. We purchased the $12 Stanley version and have yet to make it function correctly. It either cuts too thick or jumps along the cut. Its is as sharp and polished as I can get it. Oh well.
Is the blade bevel down. It should be.
Yes sir it is bevel down. I did try it bevel up despite your teachings and of course it only worsened.
Bevel up was my problem….. Thank You!
For years I had bevel up and a sharpened blade and it did not work well at all. I just thought it was how I set up and used. It did not get used much. Once I learned bevel down, it works great! What a difference.
I just picked up my first spoke shave last week and got it all sharpened up. I’m having so much fun with it. So far everything is getting a new handle or a curve somewhere. 🙂 Now I just need to finish my first new workbench without making that curved too. 🙂
Paul looking forward to this series as well. I have a couple “cheapie” plastic folding type now that are OK but obviously not near the quality of yours. The only good thing about the plastic ones is that they can be folded and don’t take up a lot of space.
Steve
Really can’t wait for this series; I was going to make a pair of sawhorses tomorrow but I think I’ll hold off until I see your vids.
Seemed like every jobsite I’d show up at…..we had to build a few saw horses. Along with building the steps and landing for the Jobsite Trailer.
I beam for the rail, chop four legs from a 2×4, add some plywood gussets on the ends, and get to building another foundation for a factory. used many a horse to build all those rebar mats. Buidling curved forms from scratch, if needed.
Managed somehow to keep two of them. They are holding up a legless 4’x4′ table top. Have the plane, and brace tills, and a 6″ dual wheel grinder sitting on that.
Sometimes, the 2×4 on top of the “I” was a 2×6 instead. Used what we had on hand…
So very looking forward to this, as I managed to miss some important detail in the blog version of the post.
Wow, those timber frame horses are awesome! What are the dimensions main cross beam? Looks like about 4 feet and a 2 foot overall height?
Is this video series available on YouTube or on Woodworking Master Classes?
I can’t seem to find it on either site.
Regards,
Miguel
I think it begins very soon on woodworkingmasterclasses.com. Maybe a week or so???