My Blanket Chest
I’ve enjoyed it. It stands squat, firm and stout but looks elegant enough without being pretentious. The construction is robust and there are no biscuits, dowels or dominoes holding the whole together. Some things mark progress and some mark many other things. I enjoyed chopping every mortise, every plane and saw stroke and then rounding the leg corners too. Putting it out for votes on whether to round the whole legs fronts or round the corners resulted in flat fronts with rounded corners. I’m happy with the result. I made my prototype with full round and that worked fine. I am going to paint that one I am sure.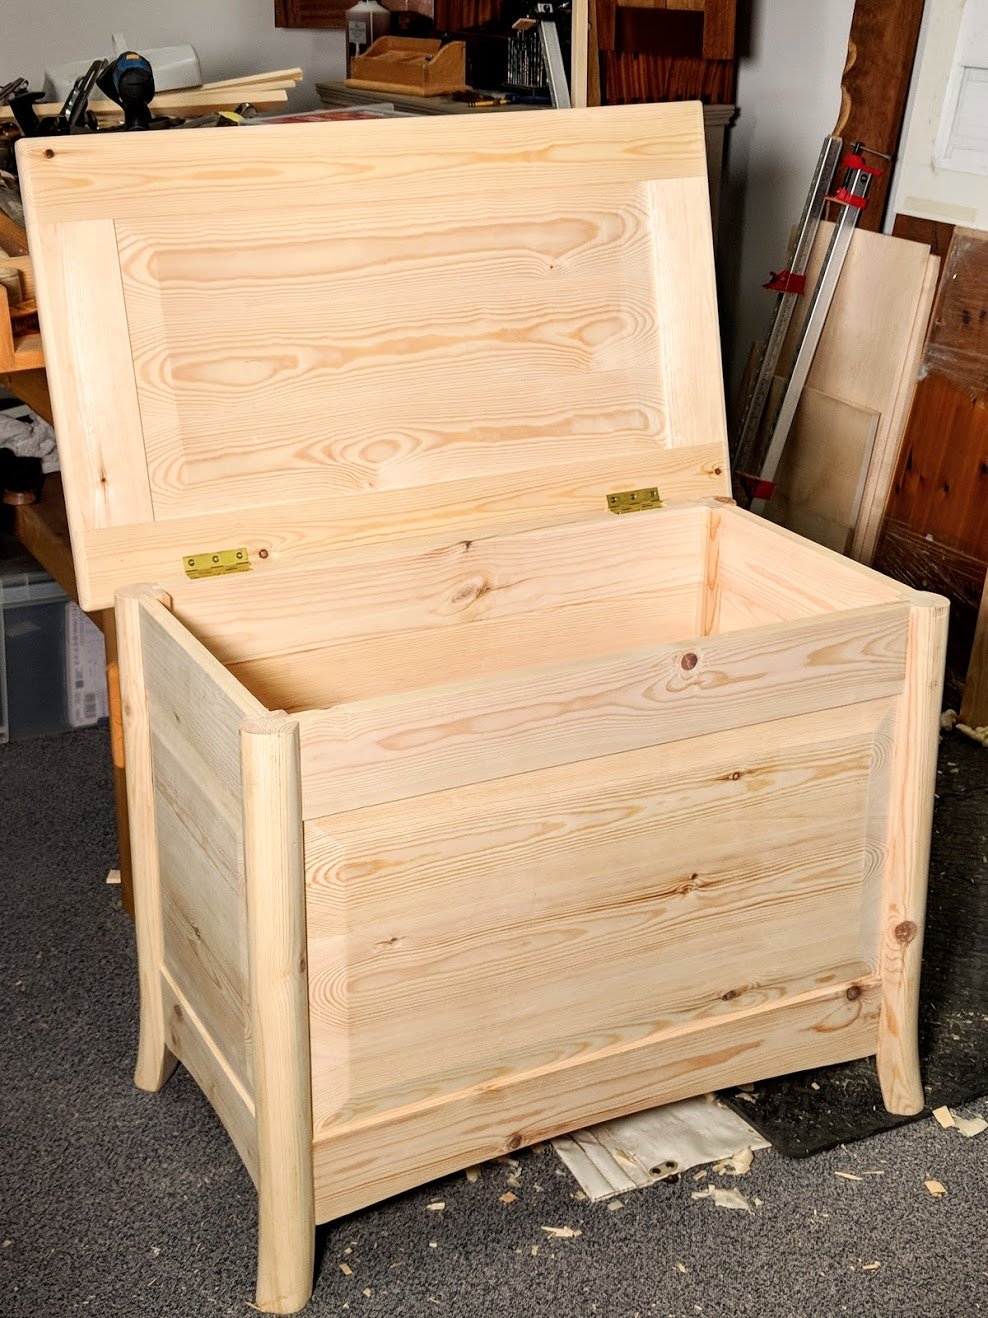
The mortise and tenon system, and I developed it for frames such as doors, door frames, sashes and such, is the very best ever hand tool system I ever developed and shared. I know that perhaps seem prideful, but I want you to understand that it is faultless and, as long as you follow the steps, your doors will never be twisted, each tenon element of the mortise and tenons will fit interchangeably into each other and they will have hand-inside-a-glove accuracy EVERY time. Putting it it out there last year for the first time for all to enjoy and upgrade their standards was a great thrill for me. You can follow the principles on YT or join your friends on woodworkingmasterclasses.com and follow this series to see it in actual operation on a project. I guarantee it will stun you when you try it for yourself.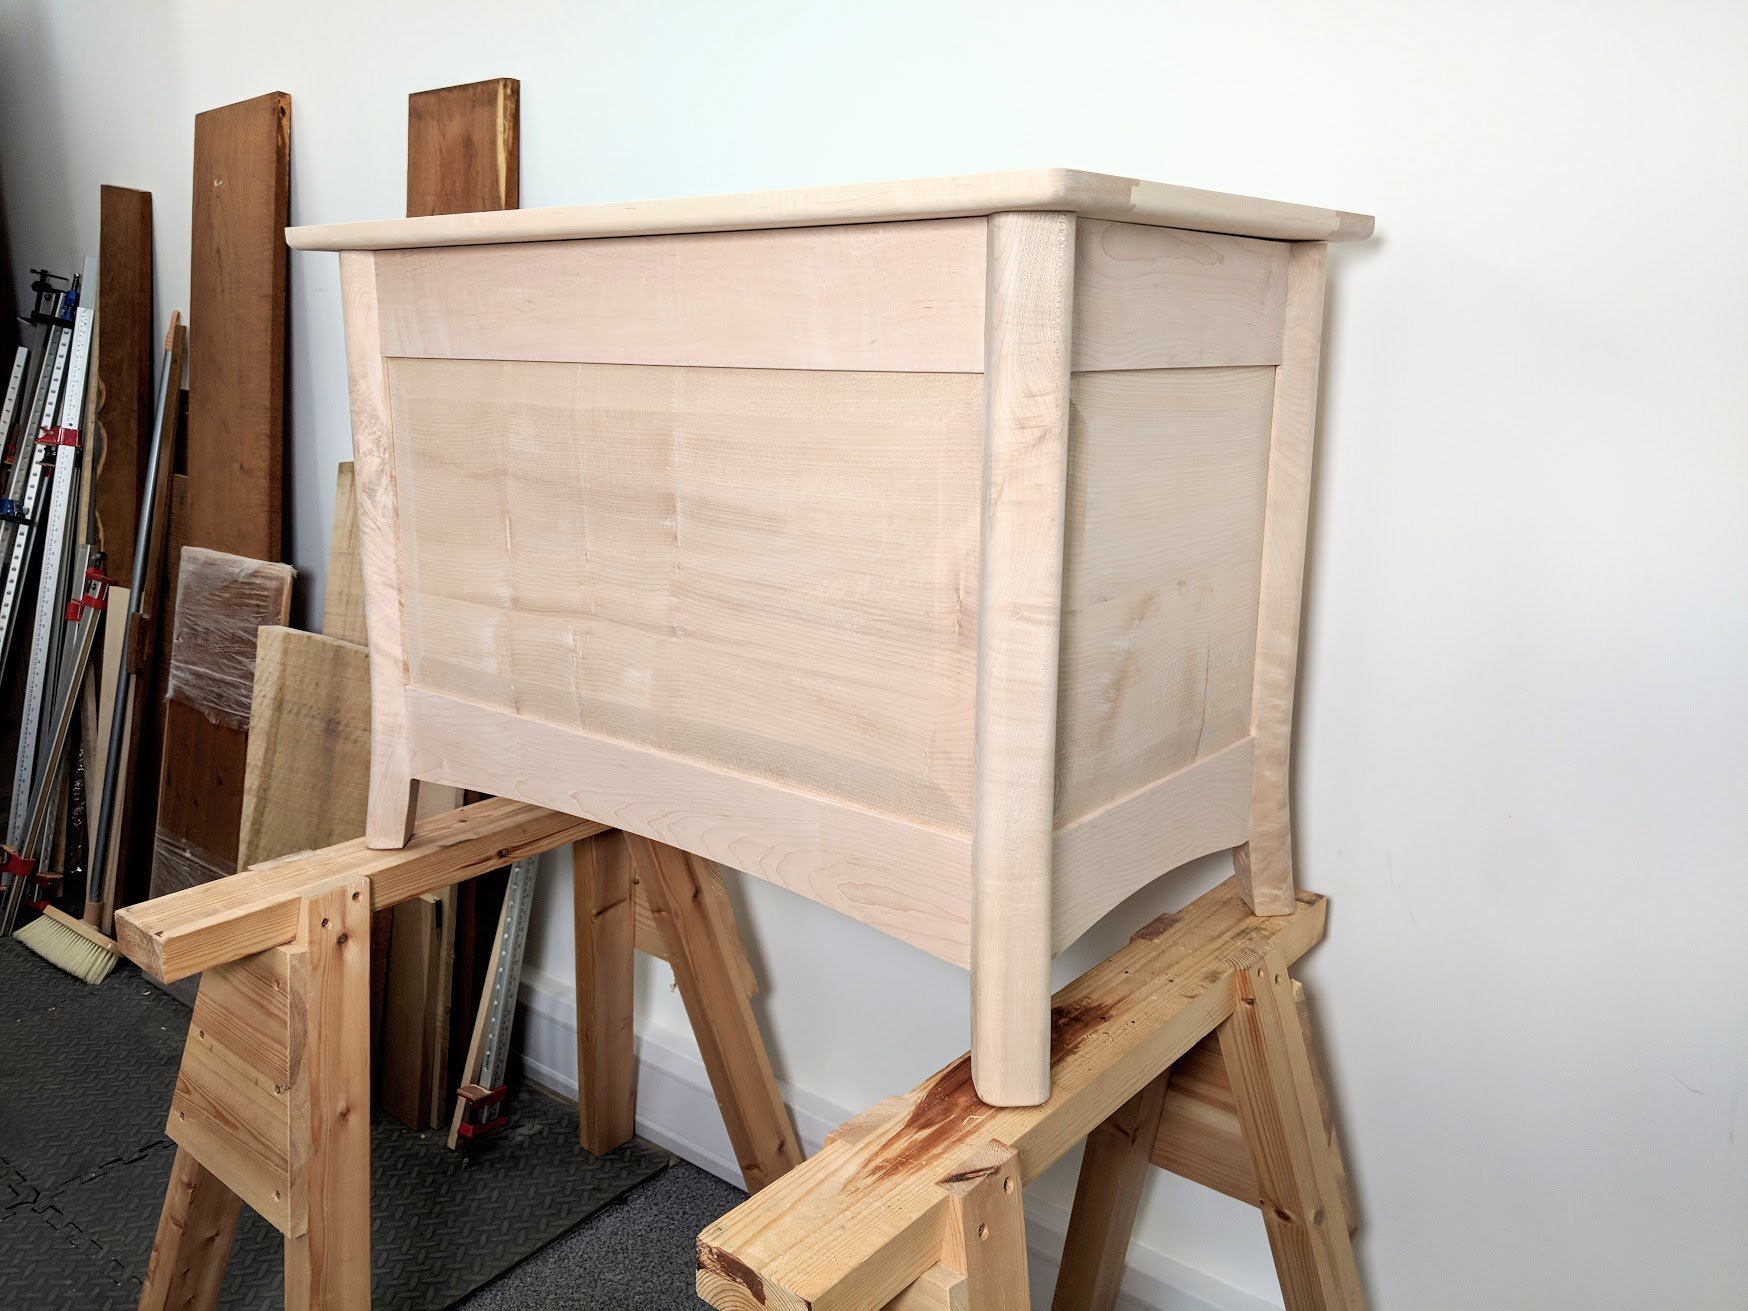
The frame for the lid was as perfect as I could get it outside of a machine set up using a tenon machine alongside a mortiser. I never trimmed the face of any tenon to ease it’s passage into a mortise once mortise and tenons were cut. No other method of hand work has ever given me such guaranteed results so seeing them go together in front of the camera was my great reward.
Having worked freehand on all of the other16 M&Ts to give me the angled presentation of the legs, it finally came together fine. Though some of the figured wood areas was a bear sometimes to work, I do like the chatoyancy as much as the challenges.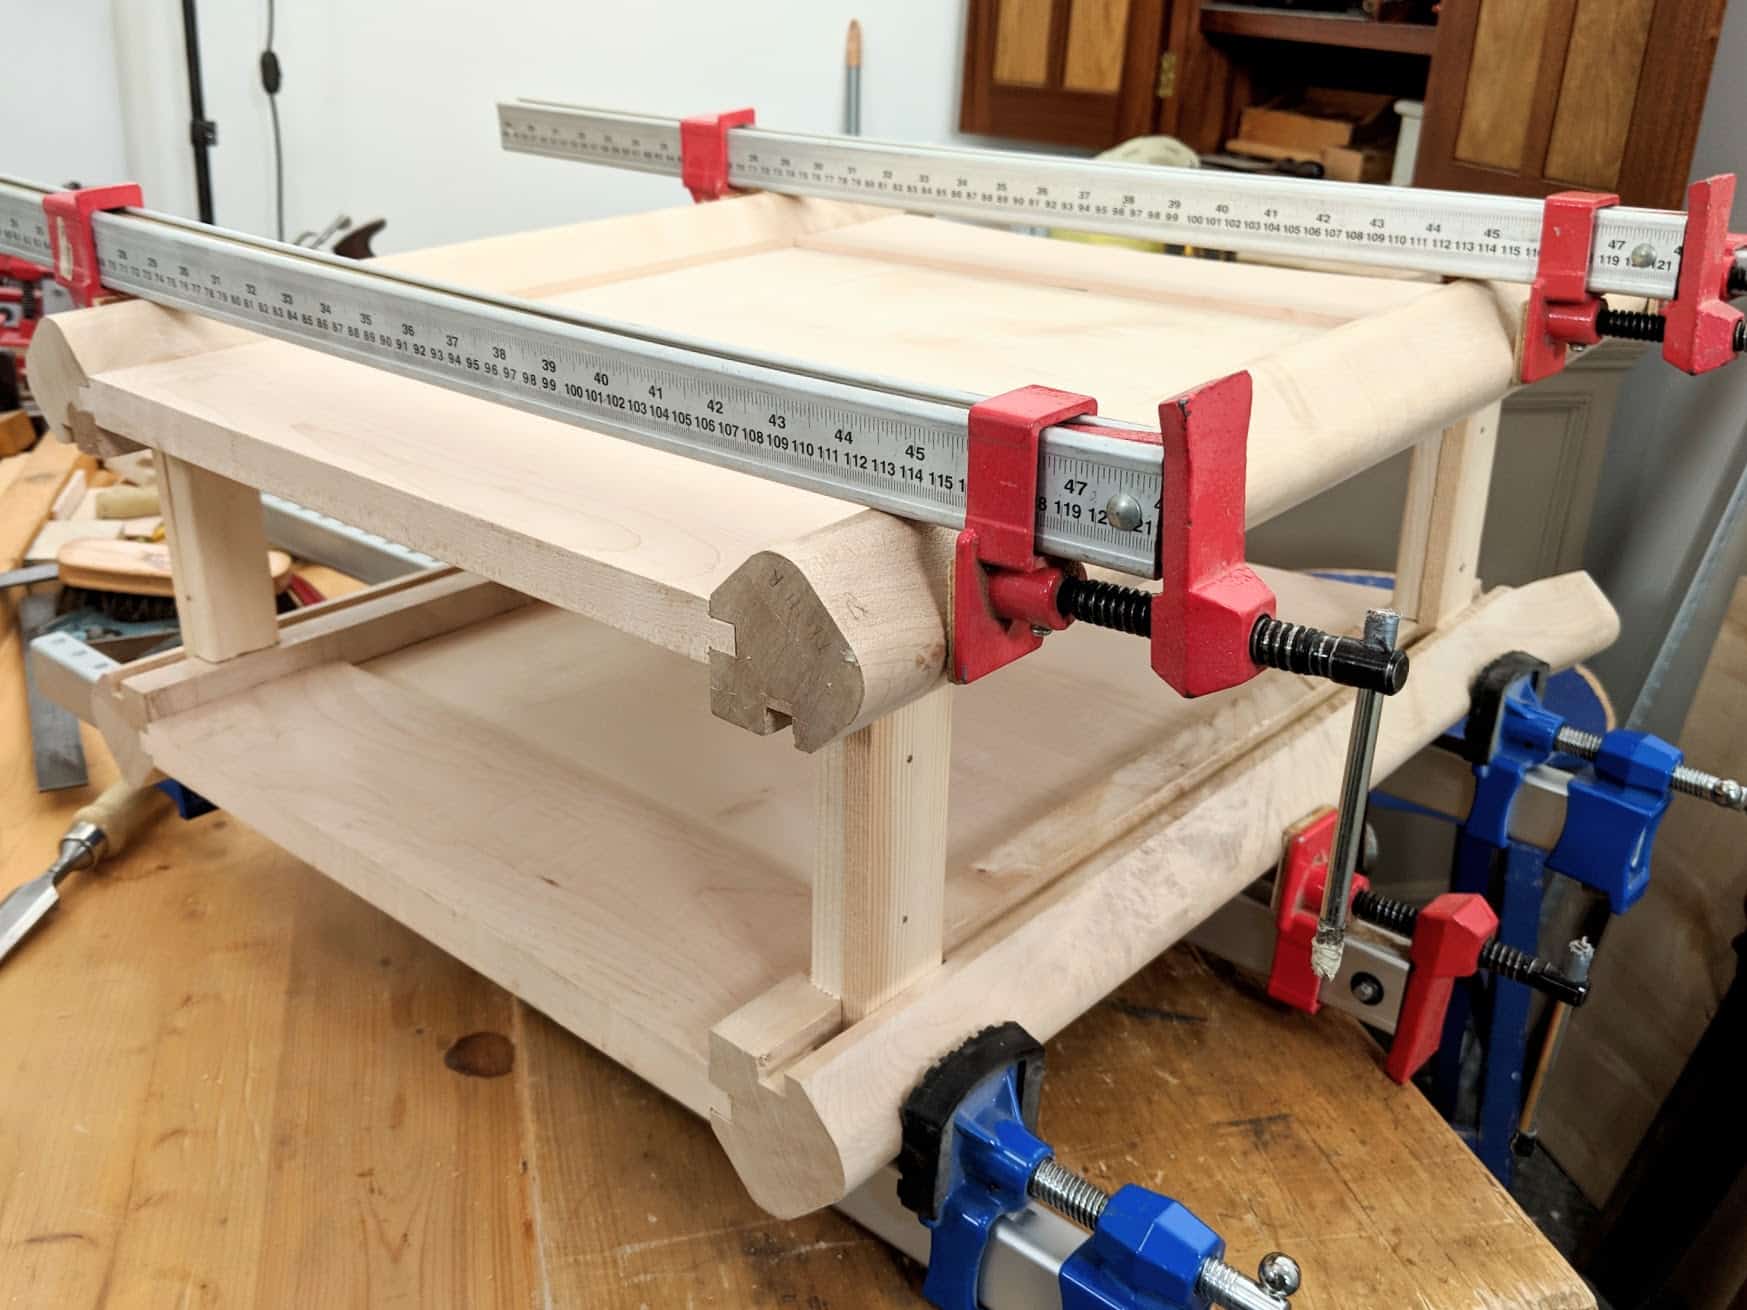
Clamping large projects can be a difficult point where the risk of losing it is high.. Just gluing up the end frames when legs and rails are all square is the answer, but when the legs are canted and the clamps are not meeting square faces it is easy to clamp the legs canted and then end up with adjacent mortise holes slightly cocked so the adjacent rails are misaligned. Too risky and the glue up for an all in one go is too complex unless you are really experienced. My system gives me guaranteed results for alignment and means I can glue up in two parts to remove any risk.
Thank you Paul.
I have just finished a split saw horse……using dovetails and
mortice & tennon joints.
The end result is just about acceptable!!……I made so many mistakes from start to finish, without listing, sufficient to say too many.
What I am most happy about is I know the mistakes and call it down to experience…….next time I will remember naturally.
By constantly watching and listening to you I will one day get to a decent standard??
Thank you John 2v
John2v, I can say you will get there faster than you expect following Paul’s videos.
Thanks Paul for all your videos……I just finished my first frame saw and it works great…pics are on my website below….cheers:)
Have to admit, I found myself looking at the pine prototype more, but I am a southerner.
Love the thickness of it Paul. I have a space near the windows in my bedroom where I need one of these. Thank you. My cat will enjoy this as well when he uses the top to sit and look out of the windows. The video on beveling the panels has given me a new option. I have always beveled panels in the vice which is why big panels where always a bear for me.
Looks awesome
Paul,
much as I enjoyed your blog, and as much as I hope to get round to having a go at making a blanket chest, the first thing I did was to google the word ‘chatoyancy’, thinking it must be a typo. Oh me of little faith! What a beautiful word, I just hope it comes up in a cryptic crossword soon to allow me to show off.
Thank you.
Haha – I was thinking what you said, word for word!
Wow……Paul…beautiful I am too much a green horn to tackle that project
I screwed up. Got the legs with perfect 45 degree cuts, but then cut the 2 1/2″ thickness all the way down, forgetting the thickness necessary for the kick-out. Deciding whether to start again or construct the chest with straight legs.