The best router plane is born
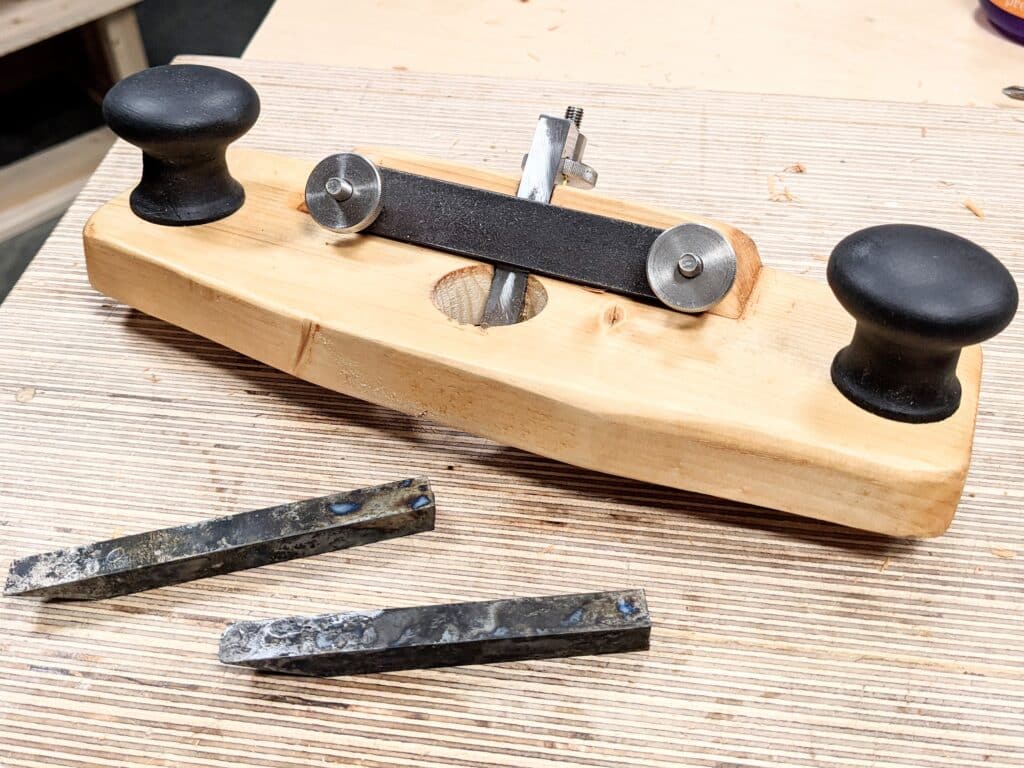
If you read my previous blog on why I made a wooden router plane you will better understand why I felt it was so very necessary to come up with my own for people to make. The one below was my very first prototype and since then I have made several variations to cater to different user scenarios. I took a 10″ length of a 4×2 (2×4 USA) SP&F stud and worked it into the plane to establish blade presentations to see which worked best for me. I found that any bed angle between 45-55-degrees worked well but that the steep angle gave clearer visibility at the cutting edge. Things like this make a big difference as does making sure the cutting edge isn’t too far forward to the front of the plane (though this can sometimes be a benefit for certain tasks too).
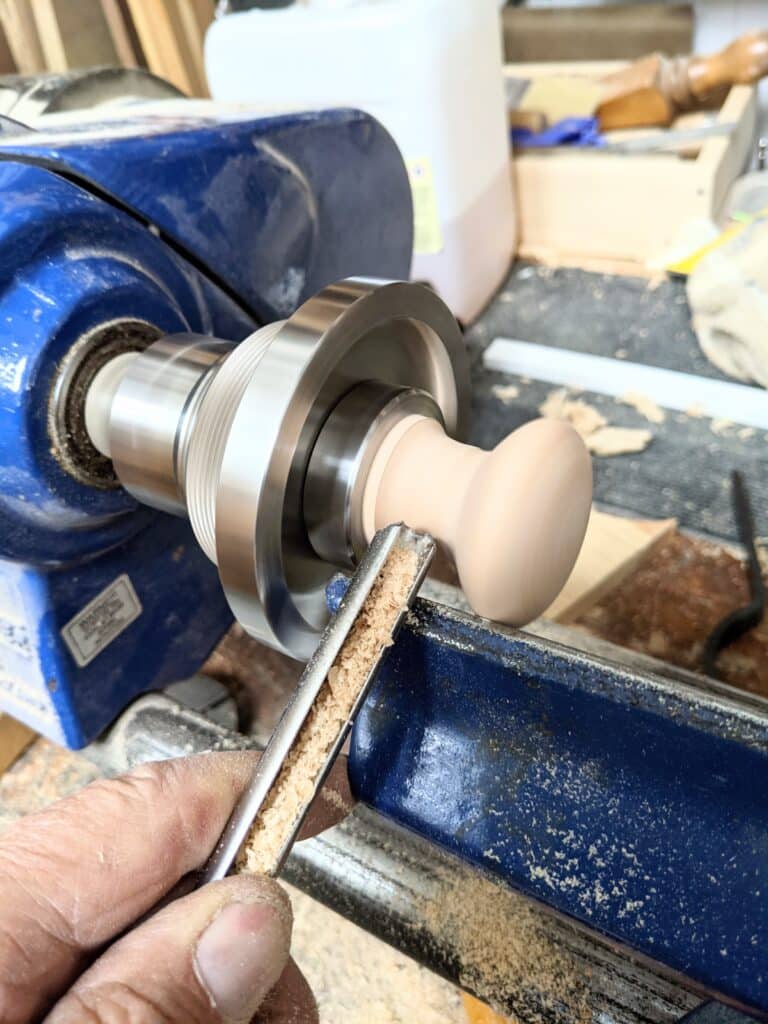
At first, I refined the doorknobs by rechucking them in the lathe and turning them to give better handling for plane use and less of a doorknob look too. The problem I then faced was that `I was telling my audience to go out and buy a lathe! I couldn’t do that. My audience is global and I cannot assume that everyone has access nor did they have to own a lathe. I came up with a much better alternative.
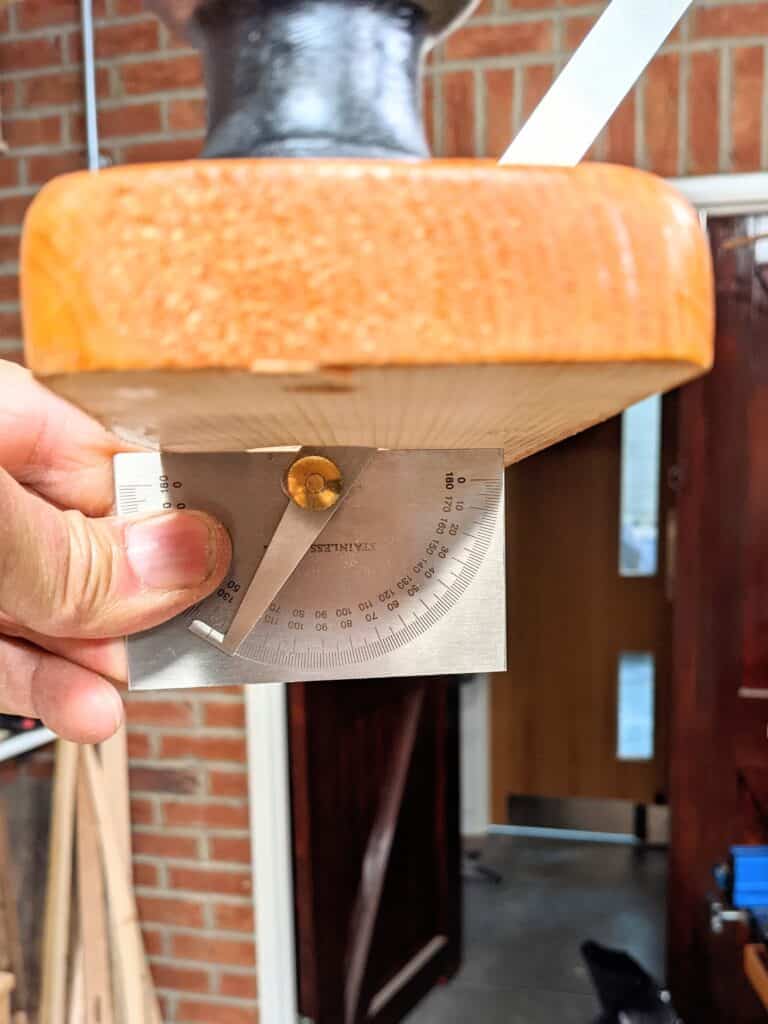
The angles of blade presentation fascinated me. I got mixed results and yet they all gave me a very nice finish to my lowered level recesses no matter the type. In the end, I felt it was mostly a matter of preference really.
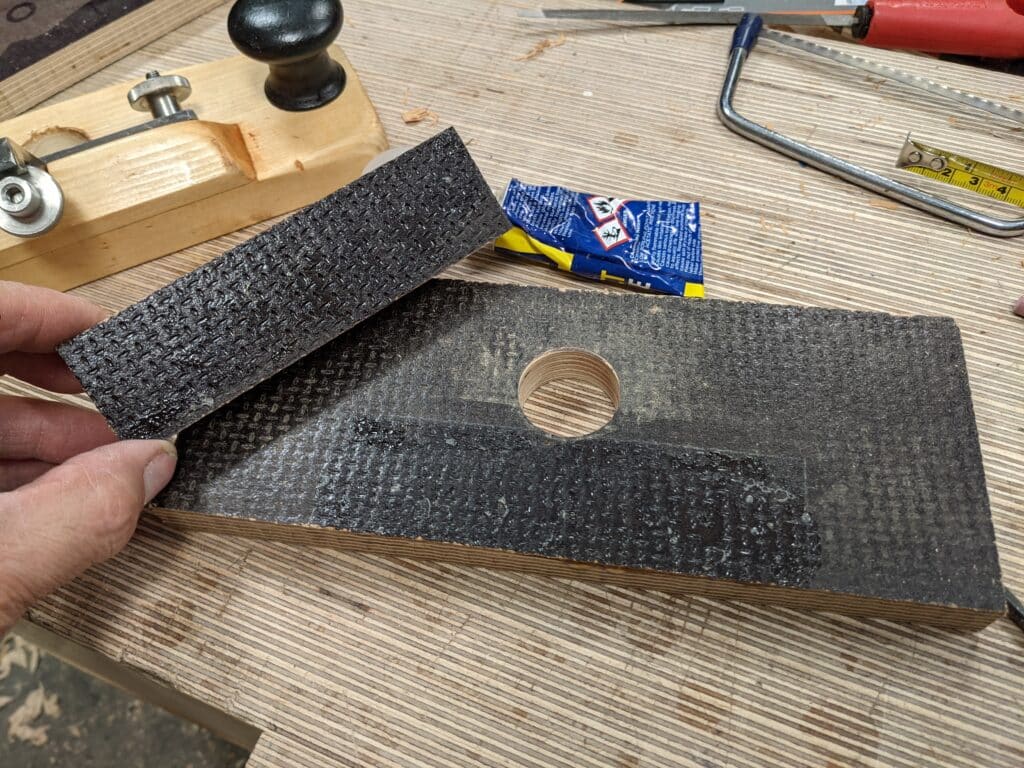
My materials varied too. On some of my planes, I use some coated and embossed Baltic birch anti-skid/slip, van flooring which I liked the look and feel of very much, and because it came from scraps, cost me nothing. There were issues surrounding thickness because the bolts came close to the face of the sole and a slight bubble appeared but I soon resolved that by removing the screw points by a small amount.
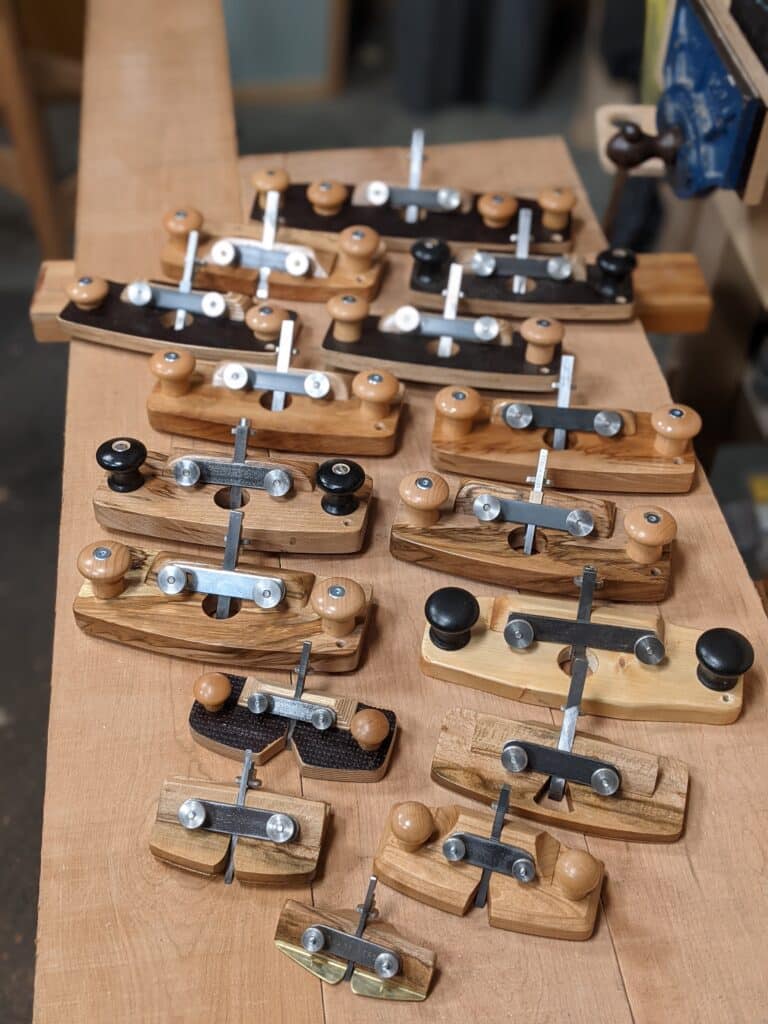
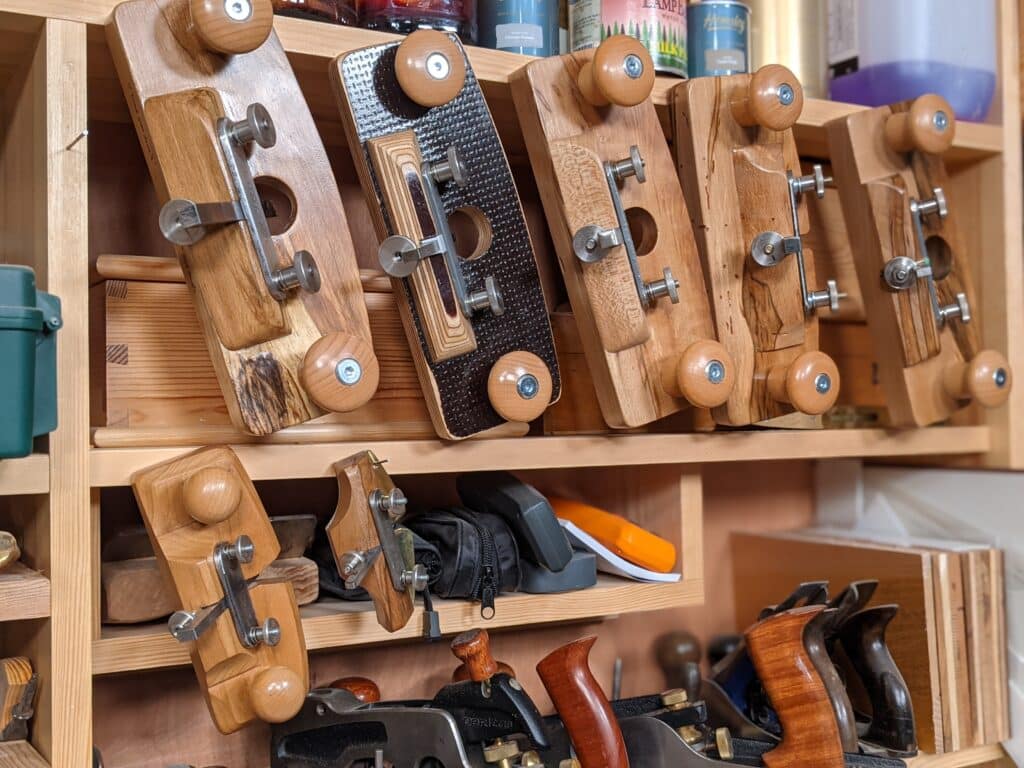
Ultimately I worked on a couple of iterations before I arrive at my spalted beech version which I just loved when done and in use. All in all, I made sixteen hand router planes before `I was done which gave me half a dozen variations on the theme and planes that would ultimately tackle every task I face using a hand router. I repeated my favourite version three times too and that is because I find it most useful to have a couple that I adjust in establishing different depths and one that I keep fixed for total control on repeatable final depths. This is perfect for things like bookcases where several shelves must be fitted.
I think you can gather the components for a single plane for around £30 ($42) but this comes down significantly if you are buying the components for several.
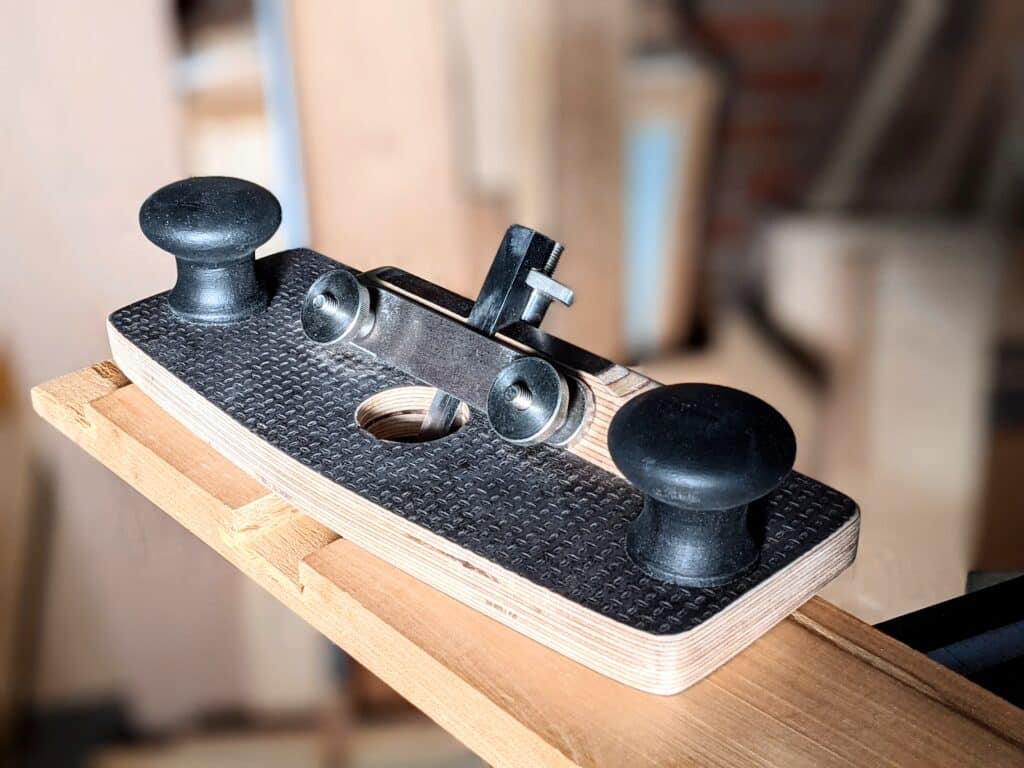
The plywood version has that utilitarian look yet I loved the way it worked and looked in the end.
So, here it is, a hand router plane that works just as well as (and I think better) than any premium, all-metal version with no compromise and one that you can make on a Saturday or in a couple of evenings after work. It’s fully adjustable, locks in to depth, and yet retains adjustability with a single turn of the adjuster. Having now made sixteen iterations I can now give you a plane that will cost only a small fraction of an all-metal, premium version but with an equal and better level of adjustability and stability. I can now encourage anyone following to make three or even four and have one or two set for stepped cutting. I can recommend this without embarrassment that I will cause a shortage.
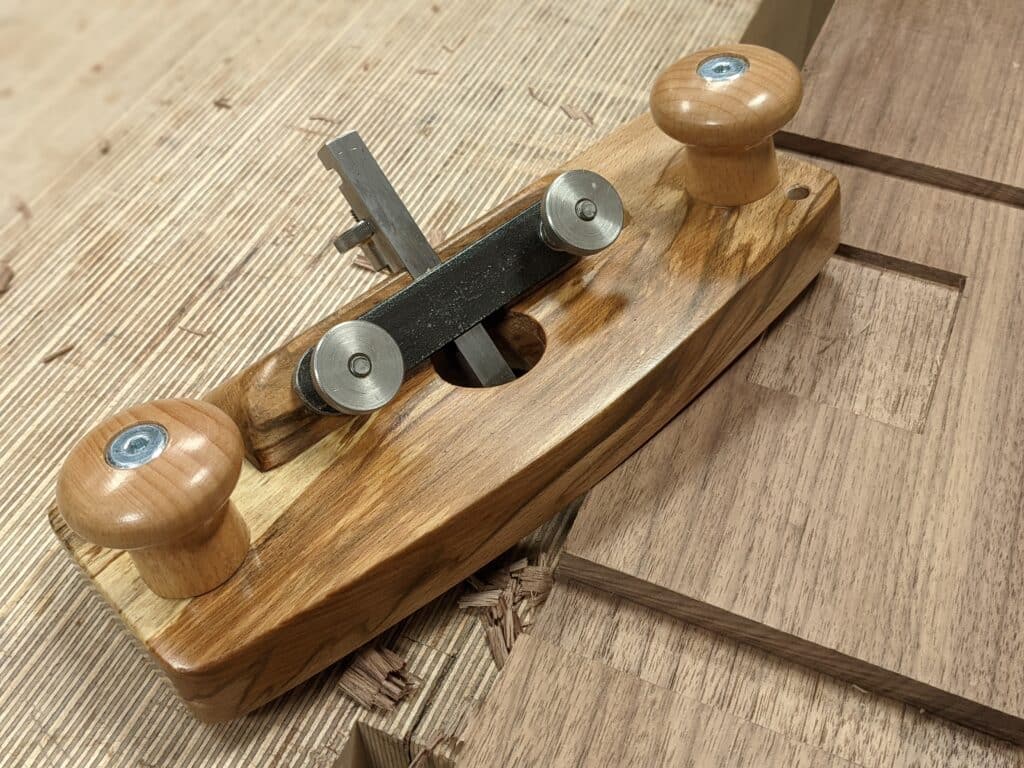
The change behind me at my workbench now looks different but as I reach for a router plane I feel very satisfied that everyone anywhere will be able to afford a good quality router plane at some point. I believe it is the best router plane in the world.
Updates
The videos and technical drawing are now available here.
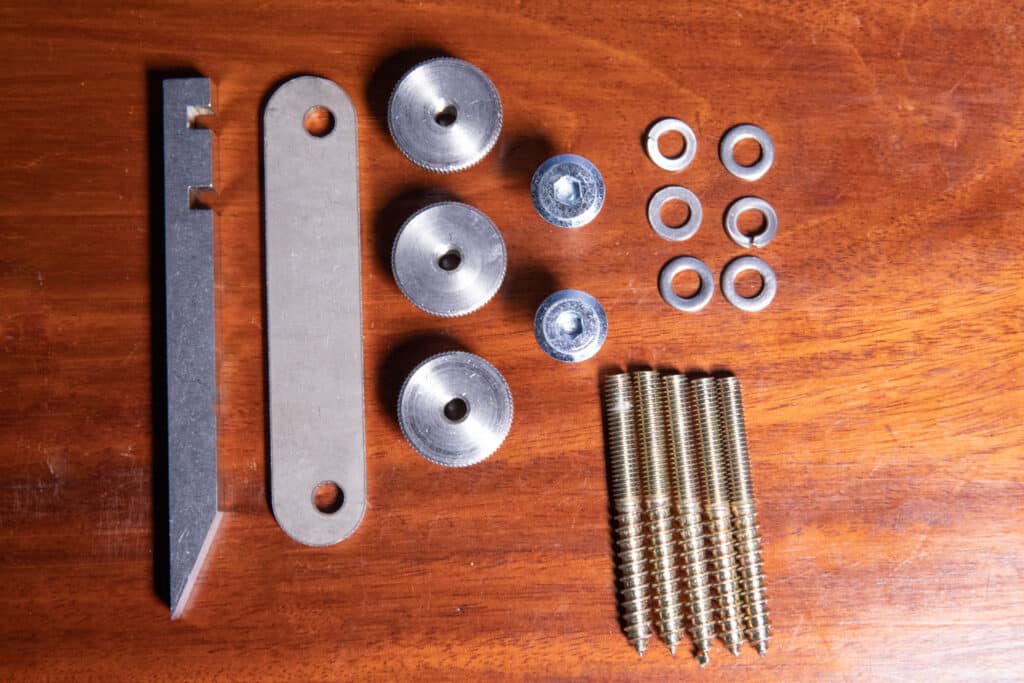
The metal parts are either readily available or can be made but if you want to buy a kit with all the metal parts ready to go we have you covered:
We have put together all the metal parts needed to make your own router plane. The parts are high quality off the shelf parts in the case of the washers, bolts, and nuts. In the case of the retainer bar and blade those are both made here in the UK by trusted manufacturers to a high standard. The blade is made from O1 tool steel and hardened, tempered, and ground to a 25-degree angle. You just need to hone the edge and it is ready to use in your router plane.


Fantastic! You are better everyday, Paul!
I would watch the video just now if I wouldn’t expecting for taking a plane, but I will watch as soon as I can when I arrive to Italy!
I bought a Veritas router four years ago, but I will not leave to try to make your version. I’m sure it will become my favourite one.
Thank you very much again.
Can I ask why you believe this is the best in the world and better than any premium router plane? This is genuine question and not one with any hidden malice.
https://paulsellers.com/2021/10/on-routing-out/?utm_source=mailpoet&utm_medium=email&utm_campaign=newsletter-post-title-from-paul-sellers-blog_3
Salko Safic, Mostly because you can make it yourself but also the base being wood is going to reduce friction on your work piece and won’t mar the wood like a metal plane can.
I appreciate you taking the time to comment, Matt, but that doesn’t explain why it’s the best router in the world. While I agree that metal base on router planes, including the Veritas, mar the work, friction isn’t an issue. Paul’s router plane lacks a depth stop, which I find essential when routeing multiple rebates on multiple boards. Setting it and forgetting it is essential for me. I think Paul is being a little over zealous in his assumption.
Ah, so in the ten-point advantage list I gave over metal planes, I needed the one more. In answer to that specific issue of the stop, and the good thing about my new plane now, is that you can make two (or three) planes at the same time and keep the one set to the final depth level because the blade does lock with the retainer bar if that’s wanted. I’m surprised this was an issue out of the list I gave but it is one that is easily resolved. Oh, and why not just make a depth stop for it if you find it essential to the work you do. Drill a hole in some flat stock, file out the corners with a triangular file, drill and tap a hole and add a 4mm knurled thumbscrew? This has been about basic DIY being an answer to what has for far too long been otherwise prohibitively expensive and even overpriced enough to make it inaccessible to 95% of my audience, Salko, that’s all.
Hi Paul,
I am just completing a fabricating process involving wood and other materials that went through four prototypes …. and, as a result of what I learned during the process, I urge you to create and sell a kit that includes ALL the parts (not just the metal) … because it is very difficult (or impossible) to buy some materials in the small quantities needed for this project (such as the anti-skid/slip, van flooring) … so please sell a complete kit (including the wood) so that everyone can benefit from it.
Keep up the good work!
Bobby L.
I recently made a wooden router plane. it was great to be able to use a piece of basswood i had obtained years ago for the base. there was several steps involved but it came out great. secondly figuring how to make the metal components added to the learning process. Working with the metal involved files a hacksaw and layout tools, some of the parts were store bought. it was a good and satisfying learning experience. A kit would greatly simplify the process for sure yet many times doing the process why
th your own materials is something I look back on with fondness.
Seconded Bobby L’s sentiment.
No kits, kits turn into purchases by fan boys and take away from self reliance and ingenuity when trying to solve the problem of ( I don’t have this material but what can I use instead). Kits should be a last resort when “making” your own plane like this.
That’s a bit strong. I dare to disagree with this kind of comment, Chris because so many assumptions can lead others away from simply following their own instinct and not everyone has the same access wealthy nations might have to simply make a plane. ~And I should qualify wealthy too. By that I mean wealth of spare time, material availability, spare money, etc, etc. Maybe you have different opinions to others but not everyone wants to go along the self-reliance path or just cannot for many reasons.
A kit can serve as a prototype. Optional blades/cutters from commercial models can relieve the DIYer from the need for heat treating.
I made a router plane from 1/2″ thick polycarbonate, and it has served well. Your design appears to have limited visibility.
I really think the kits are a great ideal. Even as a kit it will be a tool that the user will make themselves and will cherish it even more then the most expensive router and the fact that the kits are coming from Paul seller who has wrote about and knows about routers more then anybody you know that it will not only be an awesome tool that we get to make but a tool the will function just as good if not better then any you could buy already made I appreciate this very much Paul I’ve always been grateful for everything you write about and show us in videos
One question though about the kits do you think you will have any options in the cutting blade meaning different sizes or different types of blades the blades have always been the hardest thing for me to come by I don’t know what type of Steel to buy what size or any of that as I never done much metal work or have ever been shown any in school as it wasn’t option unfortunately when I went
I would say in reply, without trying to be disagreeable. What I gather from reading your blog over the years is that you are living the path of self reliance and ingenuity and, via this blog and other outlets, inspiring others to do the same. Which is much appreciated.
Hi Paul
As a complete newcomer to your website I have a question which is nothing to do with your new router – which I intend to make ASAP – but about the fluid You use on your diamond lapping plates. Simply, what is it?
I could not find a way to email you direct from your pages so I am highjacking the opportunity offered here. Perhaps you could put me right on that too.
Thanks for sharing all your knowledge with us less talented individuals now hoping to become more versatile in our endeavours.
Best wishes
Windex or window washing fluid. Lubricates but quickly evaporates. You can wipe remnants left after hone with rag or paper towel and remove the scarf from the process. Great stuff
Paul recommends auto glass cleaner over Windex because household glass cleaners have ammonia as an ingredient, which is a mild poison. Auto glass cleaners are required to be safe because they are used in a small inclosed space.
I use autoglass cleaner, the cheapest you can find. It lasts well and takes away the particles perfectly.
I love projects like this. Thanks so much Paul and team!
For sure, if you can make it you can use it, break it even, but then make another . even as a gift for friends of the same ilk. A true path of self worth … you made it with your hands.
Paul,
Is this your way of giving back for indirectly bumping up the price of router planes (just kidding)? I’ve not been able to afford a good router plane, so this is wonderful news. I’m sure these will take off brilliantly – I can’t wait to make one myself!
Thomas
Same here. They are such a collector item now that those of us who just want them for utilitarian purposes are out of luck! These ones look amazing though.
My fortune was finding a good, and well priced Stanley 71 many years ago. It has been delightful. Yet, I often wanted another for those projects that can use 2 or more different settings. Now, I see an affordable 2nd (or 3rd?) router
Many thanks!
Bob- how about a dedicated guide inset into the base, at say 3/8” from the blade…. and you have a plough plane. 1/4” blade, or your choice of bottom material thickness, and now you have a model 45 without breaking the bank. We really only need a couple of width blades and offsets to have a handmade tool that will last several lifetimes. Paul- you listening for future projects?
Definitely going to make this project. I work in a high humidity environment, my garage. I constantly have to be on the alert for rust with my all-metal tools. So, I love wood planes very much! Am gradually selling off my metal ones.
One, I made it and one of mine cost me less that £4, those are two good reasons straight off the bat. Three, by adjusting the retainer bar, you can then make of your changed depths of cut with a turn of the depth adjuster only. Four, the depth does not alter once the adjuster is turn to the depth you want. Five, the turn of the adjuster is without question and has no variable. By that I mean it is the most positive adjustment `i have ever had. Six, there is zero rattle, whereas you always expect thatt with metal on metal. Seven, option for varying the size of the plane to match your hands is right there in the making; half an inch longer, two inches, makes no difference. Eight you can make many different body types as I ultimately
did, for specific needs. Nine, no need to retrofit a wooden base piece unless you want a metal one, of course. Ten, wood on wood is always good, no marring associated with metal soles, much slicker and smoother to operate. Eleven, lighter weight than all metal versions.
How’s that for starters?
I love this router plane and I love the idea of the hardware being offered as a kit. I’m not sure how economical shipping to the USA would be at this time. That said I started pricing the thumbscrews they were $4 each plus shipping. Based on your blueprints/cut list it appears they should be 24 mm in diameter. I found the 6 mm threaded ones cheaper in 20 mm diameter, but they were not the “high” version, and I’m not sure how well they will work. Since we don’t use metric much finding the anchor bolts was a task… those were $8+ each. I can find some 6 mm all thread, but that is $8. I’m pretty confident I can find some of the hardware cheaper after a bit more time.
I’ve been trying to think of other ways to build this with SAE and some modifications to the base to make the hardware cheaper. I’ve come up with solutions for the knobs, but for the depth adjuster and metal bar hold down thumb screws, nothing yet. I’ll probably have to make one without the depth adjuster, I do like adjusting planes with a hammer, and use either shop made thumb screws or find something nicer that is in SAE.
What about wing nuts, or brass threaded inserts in knobs you make yourself, or nuts glued into your own knobs that you carve, turn on a lathe, or even a drill. For some, they may know someone who has a hobby of metal working with a lathe.Lots of possibilities, but Mr. Sellers plane is a great idea!
An old file can provide the blade(s) for this project.
Paul, I’ve been hooked on routers since watching your video on Poor Man’s Router.
Low priced sets of chisels have really opened the door! Buying your kits won’t happen quickly enough for us financially challenged. P.S. is there any truth that Marvel Comics want to sign you up?
And that has been my greatest hope in this. I want everyone globally to own one of these by making them for themselves and their family.
I think the hanger bolt problem could be solved by using epoxy to glue nuts into the upper piece, before assembly.Then all thread would be able to be used. Hope that is clear enough.
I intend to make sure no one is left out. We will ship them to every continent as we do my books and DVDs, Bob.
Speaking of which…
There is only one used copy of your Essential Woodworking Hand Tools book available on amazon.com, and it is listed at $634.49!
Paul, can you please reprint it, so those of us who can’t afford a collector’s item price are able to get a copy?
The book is available here for $45.50: https://rokesmith.com/product/essential-woodworking-hand-tools-book/
We don’t have any plans to relist the book on Amazon so our site is the only place the book will be available for the foreseeable future.
(I can’t reply to Joseph’s reply to my reply, so I’ll reply to my own reply)
Thanks for the link Joseph, I had not noticed that website with your books before. I have added them to my Christmas wish list!
Hello Paul,
It has been a pleasure watching your videos. I am in the midst of making my own router plane. I bought nearly all of the metal components on Amazon, in bulk, so that I have enough pieces to make 4 or 5 planes. All in all it will end up costing me less than $10 per plane as long as I have scrap wood laying around. I am making the first one out of maple.
Thank you and keep up the great content.
Norm
Dear Paul,
Everytime I read or watch one of your posts or videos it’s a therapy for me and a rejoice.
I absolutely love your dedication not only to this art, but to the millions of people you share your knowledge with so much generosity. This touches me till my very inner soul. Thank you so much for this!
This is a very special post for me as I do not own a router plane and I am trying my best to work only with hand tools. It’s so peaceful and I truly feel I can connect myself with the piece I am trying to work.
So, I will try to do my best to make at least one of your planes as I’ve been wanting to have one but they’re hard to find here in Portugal and also expensive even second handed.
Do you think I can use Cherry to try and make one of these beauties?
Thank you once again for everything!
Absolutely. Cherry will work just fine and give you many years of service. You can also laminate wood to have a dense-grained wood to maximise longevity but cherry will be durable anywqy.
Hi Paul,
What a fantastic gift to the world! Thank you.
Would white American oak work for this? I have some scraps just about the right size which I could use.
Best,
David
Oak will be great!
Thanks Paul. I’ve been searching for the answer to that question. I’ve spotted a lovely oak cut off on eBay. I’ll now put a bid in.
Wow, great initiative Paul. I am up to taking on this project, just let me know what I need to do in order to subscribe. I would be very interested in sourcing the screws (the metal hardware). I live in France and it isn’t so easy to find this type of material. Cheers…Rick
I am really excited for this. I use your method for tenon fitting but find when the tenon is longer it is hard to keep the one side flat on the wood. I think I can make this router then add an adjustable foot on it. That will help me alot. Paul, you da man.
In one of Paul’s many videos he shows you how to do it, when you have a long tenon cut the shoulders then make a cut about 12mm from the end of the tenon to your tenon depth chop out most of the timber between the saw cuts, then put your router plane on the timber and the 12mm at the end this way the 12mm piece supports the router plane, plane the tenon down to the correct thickness when that is done chisel of the last 12mm flush with the rest of the tenon
Looks like the demand for the video crashed the website. , I think demand was bigger than your server?
You do realise the price of door knobs will rise now…..LoL
Wow, wow, wow!!! I can’t wait to try this. Keep blowing us away, Paul!
There is a French company: Boutet, which makes the knurled nuts (écrou moleté DIN 466). Now the problem is where one doesn’t have to buy them by the hundreds.
Search “goujon double filet” on the big box store’ site to find the screw bolts.
Pay attention that they exist in different length for the metal thread size. It must be long enough for the one used for the depth adjustment.
I’ve always struggled a bit with sharpening the traditional router blades… Seems to me that the bar stock blades in your design will also be much easier to sharpen than the traditionally shaped cutting irons from the Stanley/Record router planes…. Looking forward to building several of these!
It absolutely is and I have a system that guarantees parallelity to the sole too. I will be instructing on all the nuances and possibilities on my upcoming blogs and will be taking questions. I am also thinking of a live Q&A to help with this too.
Including what to do if your iron had been sharpened out of square would be helpful for me! Sort of tangential to the main point regarding routers but still applies to this new model I think. Thanks!!
Indeed it does and I have the answer for that, no problem!
I think this is fantastic. I utilize your tenon technique, keeping one side on the piece, for half laps. I run into inaccuracies towards the top, even when I put another piece down for support. I think I can make an adjustable leg on one side of your new router.
This is why you’re the king.
Paweł’s routers are very fond of me. And I will definitely do one or two. Regards.
I wish you a good day.
A high-quality metal router plane is not available to me.
Two years ago, I built my own, a combination of beech and walnut wood, with a deep stop and fine adjustment. I used a knife to a Veritas router plane. I am very satisfied, it is a stable and calm tool.
Thank you for the new inspiration.
I built something very similar a couple of years ago, but I designed the wooden body to accommodate a spare blade from the Veritas router plane, with I bought from Axminster Tools. The blade cost me around £15 at the time (they are just over £18 now) Two M6 stainless steel thumbscrews, clamp the blade securely in place between two pieces of Oak (one permanently fixed the base, the other clamped to the first, using the M6 screws, which locate into a pair of M6 cross dowels embedded in one of the pieces of Oak) The plane works great. The M6 hardware cost about £10, so in total the metal components were around £25, plus a few scraps of wood! My version lacked any sort of fine depth adjustment and I didn’t fit handles, but it was pretty comfortable to hold the wood body of the plane.
Thank you Mr. Sellers for presenting this to the world. I thought your “Poor Man’s” tools were a fantastic gift. But you have now surpassed those with these personally made tools.
I have made a number of the router planes when needed since at this time I am not doing many dadoes or tenons in my work and any of the manufactured planes would be a waste of resources. For me it would be better to spend the money for a manufactured router plane on good wood to build with.
I do hope that you get as positive a response to making kits as you have had to the republishing of your books. I certainly will buy several if they become available as they will save me much resourcing time and I will be more likely to get them done in a timely manner.
Paul, did you put a finish on the sole of the plane, or leave the wood raw?
If a removable thin plywood plate were added temporarily to the bottom of the plane, you could use the plane itself to hold the iron for the final sharpening it to insure that the blade is parallel to the plane’s sole.
Paul you are completely the most awesome guy on YouTube. I’ve taken your excellent, easy to understand advice on several hand tool topics. I am about to build your shooting board shortly. This router plane idea is terrific. I really like how the blade is just flat instead of bent like commercially manufactured router planes. Gosh that in itself is huge in my opinion. I will certainly order a few kits from you to make a few of these. Anyway, thank you!
Why is it wood working but sword play?
I LOVE the handcrafted wooden hand tools. The wooden router place must glide atop the wood surface. The king of tools and the tool of kings.
Anybody want my overpriced Veritas Router? Just wait for me to finish the wooden router.
As a fitting tribute, you should use the Veritas router to cut the dado that the blade fits into on the new router. 😀
One last hurrah for the ol’ boy.
Paul, Please do offer the kit, as I started looking for a supply of 01 ground tool steel here in the USA and the shortest length is 18″ ($62). Not being sure if I will make more than one router, so I question the expense of the extra stock.
I wonder if an old file would do the job.
You could buy a used plow plane blade I believe.
Hi Paul,
Well, now that I recently shelled out $195 for a Veritas router plane (after reading your 2012 review and I decided that I need it to make a version of your diamond stone sharpening station), I’m not upset that I spent that much and I still look forward to making my own handmade plane now from your plans. I can see myself reaching for more than just one, and, even if I don’t, the satisfaction of making my own would be worth it on it’s own.
That said — assuming that you still possess your Veritas plane, do you still see room for it in your arsenal if you have a fleet of handmade planes to serve various functions?
Parts Kit: If you build a kit, it would be helpful if there was a version using classic British dimensions. I wonder if Hock Tools would be interested in providing your hardware kit. It would be nice to get a finished blade from Hock. He offers complete kits for other types of planes.
I put together most of the pieces on McMaster-Carr with modified US customary dimensions, generally up-sizing the parts. Interesting, brass knurled knobs are considerably cheaper than steel ones. I would prefer brass, just because of the looks, although steel is more functional due to its higher strength.
Thanks for this article. I was just about to build a plane router using a design I was not happy about. Yours looks great.
Thanks so much again Paul & the team, I was already looking forward to making it when you announced it but even more so after watching part 1 of the video and reading your blog. I will definitely make several (smaller base, larger base etc.).
And please offer the kit – I would like to order three!
Paul, would it be feasible to add a scallop on the underside at the front of the plane, in order to form an escapement?
Ah, never mind… I just noticed the open mouthed planes, right after pressing send…
Absolutely. Whether it will have the benefit you surmise rather than simply make a second router with an open front is questionable. I would simply make different router bases and interchange the parts.
I love this so much! I just bought the Veritas a month ago, but I’ll make one or two of these for smaller things like hinges!
Also, sorry everyone is giving you such an incredibly hard time in the comments, Paul. What you’ve done here is create an accessible router plane that is actually very high quality and the best user-made model I’ve ever seen. Please don’t let the jerks get you down, please keep creating content like this!
I haven’t noticed anyone giving me a hard time at all. Even if they did, I know what I know and I would not have said that this is the best router plane in the world if I had not thought that it was after 50 years of using every other model out there. I do think one person was baiting me for some reason, maybe I offended them somewhere along the line. I hope not!
I have already started looking at sourcing materials and am eagerly awaiting the rest of the video series on this router plane. I have really wanted one and the cost and long lead times from all the manufacturers has put me off actually ordering one. This, however, is exactly what I want. It ticks all the boxes. I can see having multiple ones built just to leave some set at final depths.
The was one build video I watched the other day that had extra width to be used for truing up tenons. All I could think after watching Paul’s video is that this would be so easy to modify to make it work for that type of work as well. You could make bigger or smaller versions as needed to do fine hinge mortising or huge dados. And because it’s so cheap, having multiple is no problem. Thanks so much for this awesome build.
Checking around for tool steel, I found that W1 tool steel is a quarter on the price of O1. And A2 is about 4x O1. W1 is water quench which would be more convenient than oil. Anybody have experience with W1 tool steel in an edge tool? It reaches the same hardness as O1 with the same tempering temperatures. The website https://keymetals.com/tool_steel_guide.html notes one use as knifes.
So, is it worth a try?
it is a really great plane!especially for young woodworkers and people who can´t afford these high priced tools!i was a professional joiner in germany and i own some nice tools,but i don´t have a router plane.the german ones are so bulky.i don´t like them and they are not cheap.therefor i will make one !
thank you very much for your kindness to share such projects!
stay save and healthy!
Dear mr. Paul many thanks for this beautiful and engaging project. But, please, don’t
forget that many of yours admirers don’t live in the uk or in usa and for them would be near impossible or too expensive to get the hardware (also in EU).
Maybe the kit you have in mind could be the solution. Maybe..
Thanks for existing.
Dear Mr. Paul,
thanks so much for sharing all your woodworking knowledge. Being a violin maker I often need to make my own jigs and tools and your videos have been incredibly helpful. I really like your attitude and your patience in going through every single step of any task you’re dealing with.
P.S. I was trained in North of England so your lovely accent makes me feel home!
Good morning Mr. Paul Sellers and your team,
I’m very interested in buying the router plane made from playwood. Could you please let me know
the price and delivery conditions.
Many thanks and greetings from Germany.
They are not for sale. We actually don’t sell what we make for woodworkingmasterclasses.com. We will be selling the kits shortly but that is purely as a service to those who want the parts from a single source at the right price.
Hi Paul, Yes – I wish to buy a kit for myself and one each for our three eldest grandsons each of whom has shown an interest in working with wood. My own interest was sparked by an uncle (by marriage) who trained as a cabinet maker in Germany prior to World War 2 before emigrating to Australia during that conflict.
Router Plane parts kit – please add my name to the list as I hope to make a few different sizes for my workshop. Thank you for designing a great piece of kit.
I would like to purchase the kit when available.
I truly think that you are not only a master but a guru as well.
Thanks.
Several kits please
hi Paul!
i am in the process of making my first router plane and loving it ! thank you so much for this information and design ! it is empowering and freeing ! i do have a question .I want to make a front door to my tiny home .i have looked into buying a plow plane but as with the router plane the cost has skyrocketed ..i am wondering if i was to attach a fence guide to match the thickness of my door do you think it would work similar as a plow plane for making the door rails ?
Please notify me when the router plane hardware kit is available.
I Can see the value of a kit
Please let me know when the hardware kits are available.
Hello Paul,
Please add me to the router plane hardware kit.
Thank you
Regards
Benoît
Please add me to the list for the metal parts kit. More power to your elbow Paul!
Mr. Sellers
Please add me to the router plane hardware kit.
Thank you
Bill
Hi Mr Sellers ! thank you so much for these well thought out plans!I have built your poor man’s rebate plane and was delighted that it worked so well and i am in mid way building one of these router planes ! yea ! Being able to make some tools is very empowering and freeing for me thanks you! i too would be very interested in buying a kit or two of the hardware from you if and when you manage this …..wonderful !
Please add me to your list for the router plane parts kit
Hi I have found all parts to try make your router plane first timer, but can I ask where is best to buy the correct steel for the blades and can you please tell me the best place to buy thumb nuts thank you,
I found eBay had the 10×10 size I needed, tho it was from China! Care to order O1 steel – I bought a small bar of HSS on first (newbie!) try and only realised when I got it you cannot cut with standard hand tools!
On tempering I found I couldn’t get it hot enough in open air with blow torch as the heat just dissipated, so recommend folk look up how to create a mini blowtorch furnace safely with bricks/firebricks.
Thanks Paul for this – just finished mine in spalted beech too. Looks great and works a charm!
In the US: McMaster-Carr (mcmaster.com) has all the materials. The shortest piece of O1 is enough for 3 planes, part number 9516K99, $26.65 plus tax and shipping. I checked all the usual places, the shortest they carry is the 18-inch one. Interestingly, McMaster-Carr was as cheap as or cheaper than the others were. So save on shipping by getting it all from the same place.
I checked around for the other parts. McMaster-Carr was competitive with them. If you have not dealt with them, they have fast shipping. You have to pay for return shipping.
The Thumbnut is similar to Paul’s, I can only find in metric. The US Cust sized one has a lower flange to cut off, which should be fairly easy in brass. The part number is 92741A160 $8.54 for a pack of 10. Again enough for 3 planes.
The matching Threaded Stud is 90915A554 $8.08 for a pack of 10, enough for 3 planes.
Instead of the split washer for the spring, consider a Belleville Disk Spring, 9712K61 $5.26 for a pack of 12. If too stiff, stack them pointy end to end to halve the stiffness. Stack them neatly to double it.
If you need a piece of steel for the strap, see 8910K263 $8.41 for a 2ft piece for 3 planes.
While you are at it, you might consider some brass washers 92916A365 $14.82 for a pack of 100. Instead of cutting the nut above down, maybe use the wash to engage the slot in the iron.
Good luck. And yes, if you need just one plane, seems the economical approach is to wait for Paul’s kit, although I’ll bet he will only supply a metric version since as I pointed out, I cannot find a US Cust version of the nut.
I tried in vain to get the parts from local big-box stores and hardware stores. I found conector nust at lowes but got most of my parts from McMaster-carr. I did made some changes. In particular I went with all imperial measures, namely getting 1/4-20 bolts and nuts. I think you can get 4 irons out of the 18 inch 3/8 steel, so I got parts to make 4 planes. I purchased low profile thumb nuts (part no. 92815A115) for the adjuster nut and Brass Flanged Knurled-Head Thumb Nuts (part no. 92741A160)
for the hold down nuts. I spent this evening teaching my neighbor how to carve a spoon, then I have to make turn some small 3″ salt bowls for a restaurant and turn some frustums to plug and give weight to the bottom of some cardboard thread cones, that my wife turns into “christmas trees”. So, maybe this weekend I can make the my first router plane. Is there a way we can show pictures of completed planes?
Dear Paul,
please keep me informed when the hardware kit is available.
I submitted the earlier form too but add to this list just in case.
Kind regards,
Peter
Oh yes, I would love to have several of the router plane “kits”. That way my routers would look like yours and not something from my imagination. Of course, I had just purchased a Stanley 71 a few months ago, that is the way my luck works! Will probably prefer the wooden version just because of the “feel” of wood on wood.
Dear Mr. Paul or dear Team,
Is it possible to know within how many days (indicatively) the kit will be available?
Many thanks.
On another subject, thin diamond sharpening plates, which brand from Amazon did you recommend / use?
Thanks, Steve
I vote for this too, for O1 steel or it’s analogs is hard to find in my country
Please add me to list for parts kit.
If I am on the list of parts you should now take me off as I have already bought enough to make 4 planes.
I have made 2 so far.Here in the USA,I have had problems finding the metal parts at a reasonable price.I ordered thumbnuts and studs from McMasters Carr which was
very expensive.I went to Freight harbor and bought a 3 pack of pry bars and took the biggest (3/8 inch wide) one and cut it down and got 2 blades for 10.00 total and had 2 smaller pry bars left to use like a pry bar.
I am on my 3rd router plane now.Each plane gets better,especially when I try to follow Pauls directions to a “T” .I have used pine so far since the wood has not been too easy for me to find as a reasonable price,and I am still learning .I plan on getting some good hardwood once I get it down.
I am interested in some metal kits when Paul gets them ready.Thanks a lot!
Tommy H in NC
I’m having trouble finding some of the exact parts in the U.S. I can purchase 3/8″x3/8″ O1 bar stock for the blade and 0.1875″ x 0.75″ mild steel bar stock for the retainer bar, which are close enough. But I’m having trouble finding close equivalents for the hanger bolts, connector nuts, thumb nuts, washers, and split washers. Can anyone suggest equivalent sizes available in the U. S. that will fit each other?
See Steve’s remarks above. I used all 1/4-24 bolts and nuts. The major change I made was to purchase a low profile thumb nuts (McMaster-Carr part no. 92815A115) for the adjuster nut and Brass Flanged Knurled-Head Thumb Nuts (McMaster-Carr part no. 92741A160), because I could not find in 1/4-24 thread an unflanged Knurled-Head Thumb Nut.
I think 1/4-20 is closest to M6.
Hanger bolts in 1/4-24 are easy to find and I found 1/4-24 connector nuts from Lowes. I thought for certain I would be able to get 1/4-24 Thumb-nuts from the local hardware store but they were not there, also not at Lowes or Menards. We don’t have a Home Depot so I did not check there.
Thank you, to both Donald and Steve.
You wrote that you purchased “low profile thumb nuts” and “Brass Flanged Knurled-Head Thumb Nuts”. Why do you need both? Do you use one part in one place on the router plane and another part in another place?
Steve, I just saw your earlier post in which you explained that the low profile thumb nut is for the adjuster and the brass thumb nut is for the hold downs. Thanks.
I guess you meant me and not steve. No worries. The only non-metric knurled thumb screws we can find are flanged . The flange will interfere with the cutter. One solution is to file off the flange, another is to get a low profile thumb screw which has no shoulder and no flange. I am hoping that not having a shoulder does not make it too weak.
Please add me to the hardware list.
Hi,
Please add me to the hardware list.
Thank you
J
Hi Paul, nice job. I just got finished rubbing out the 4th coat of shellac ( I used orange flake). I used scrap and parts I had laying around, so the total cost for me was $0. I wish I could figure out how to send a photo, if it don’t make sawdust I don’t know how to use it lol.I am more fortunate than most and have a fully operational Wood shop, I do it for a living (40+yrs. now). I made a slight alteration on how the knife locks in place just so I could make due with the parts I had and it works quite nicely. For me the best part of your design is the fact that I never look forward to sharpening the cutters on my Stanley router but if you can sharpen a chisel this is a breeze ( I used an old Japanese mortising chisel I had kicking around the shop for years that I never cared for, I prefer the old English style chisels commonly known here in the states as pig stickers). So back to your original question. I can’t tell you how many times people have come into my shop looking for bits and pieces to do a small project of their own. So I think it’s a great idea to offer a kit, and I think you should throw a hunk of beech in there with it just for the reason I just described because lumber is expensive. So keep’em coming.
Thanks for the post
Scott B.
Hi Paul, thanks for the great videos.
I am interested in making this router plane, but I am living in Egypt, and finding the needed hardware is almost an impossible thing.
Ordering anything over the internet, is here a very high chance to lose your money and your ordered goods. So that’s no option.
So I was happy to see you were looking into providing the hardware via your website.
Soon I will have a friend going over to the UK for a few days, and he could bring it to Egypt for me.
Do you already have the router plane metal components available as an item that can be ordered on your website?
Thanks in advance for answering.
Hi everyone. If anyone has bought an O1 steel piece longer than they needed and has enough left to make one blade (5-6 inches), I’d be happy to buy it from you and pay for shipping. I’m located in Canada and also had trouble sourcing O1 steel that didn’t cost an arm and a leg for a 3 foot piece.
To be honest, I’ve bought all the other components and everything is ready to go except the blade, so if I can’t find it here, I’d end up ordering Paul’s kit anyway 🙂
Thanks in advance!