On Owning a Few moulding Planes
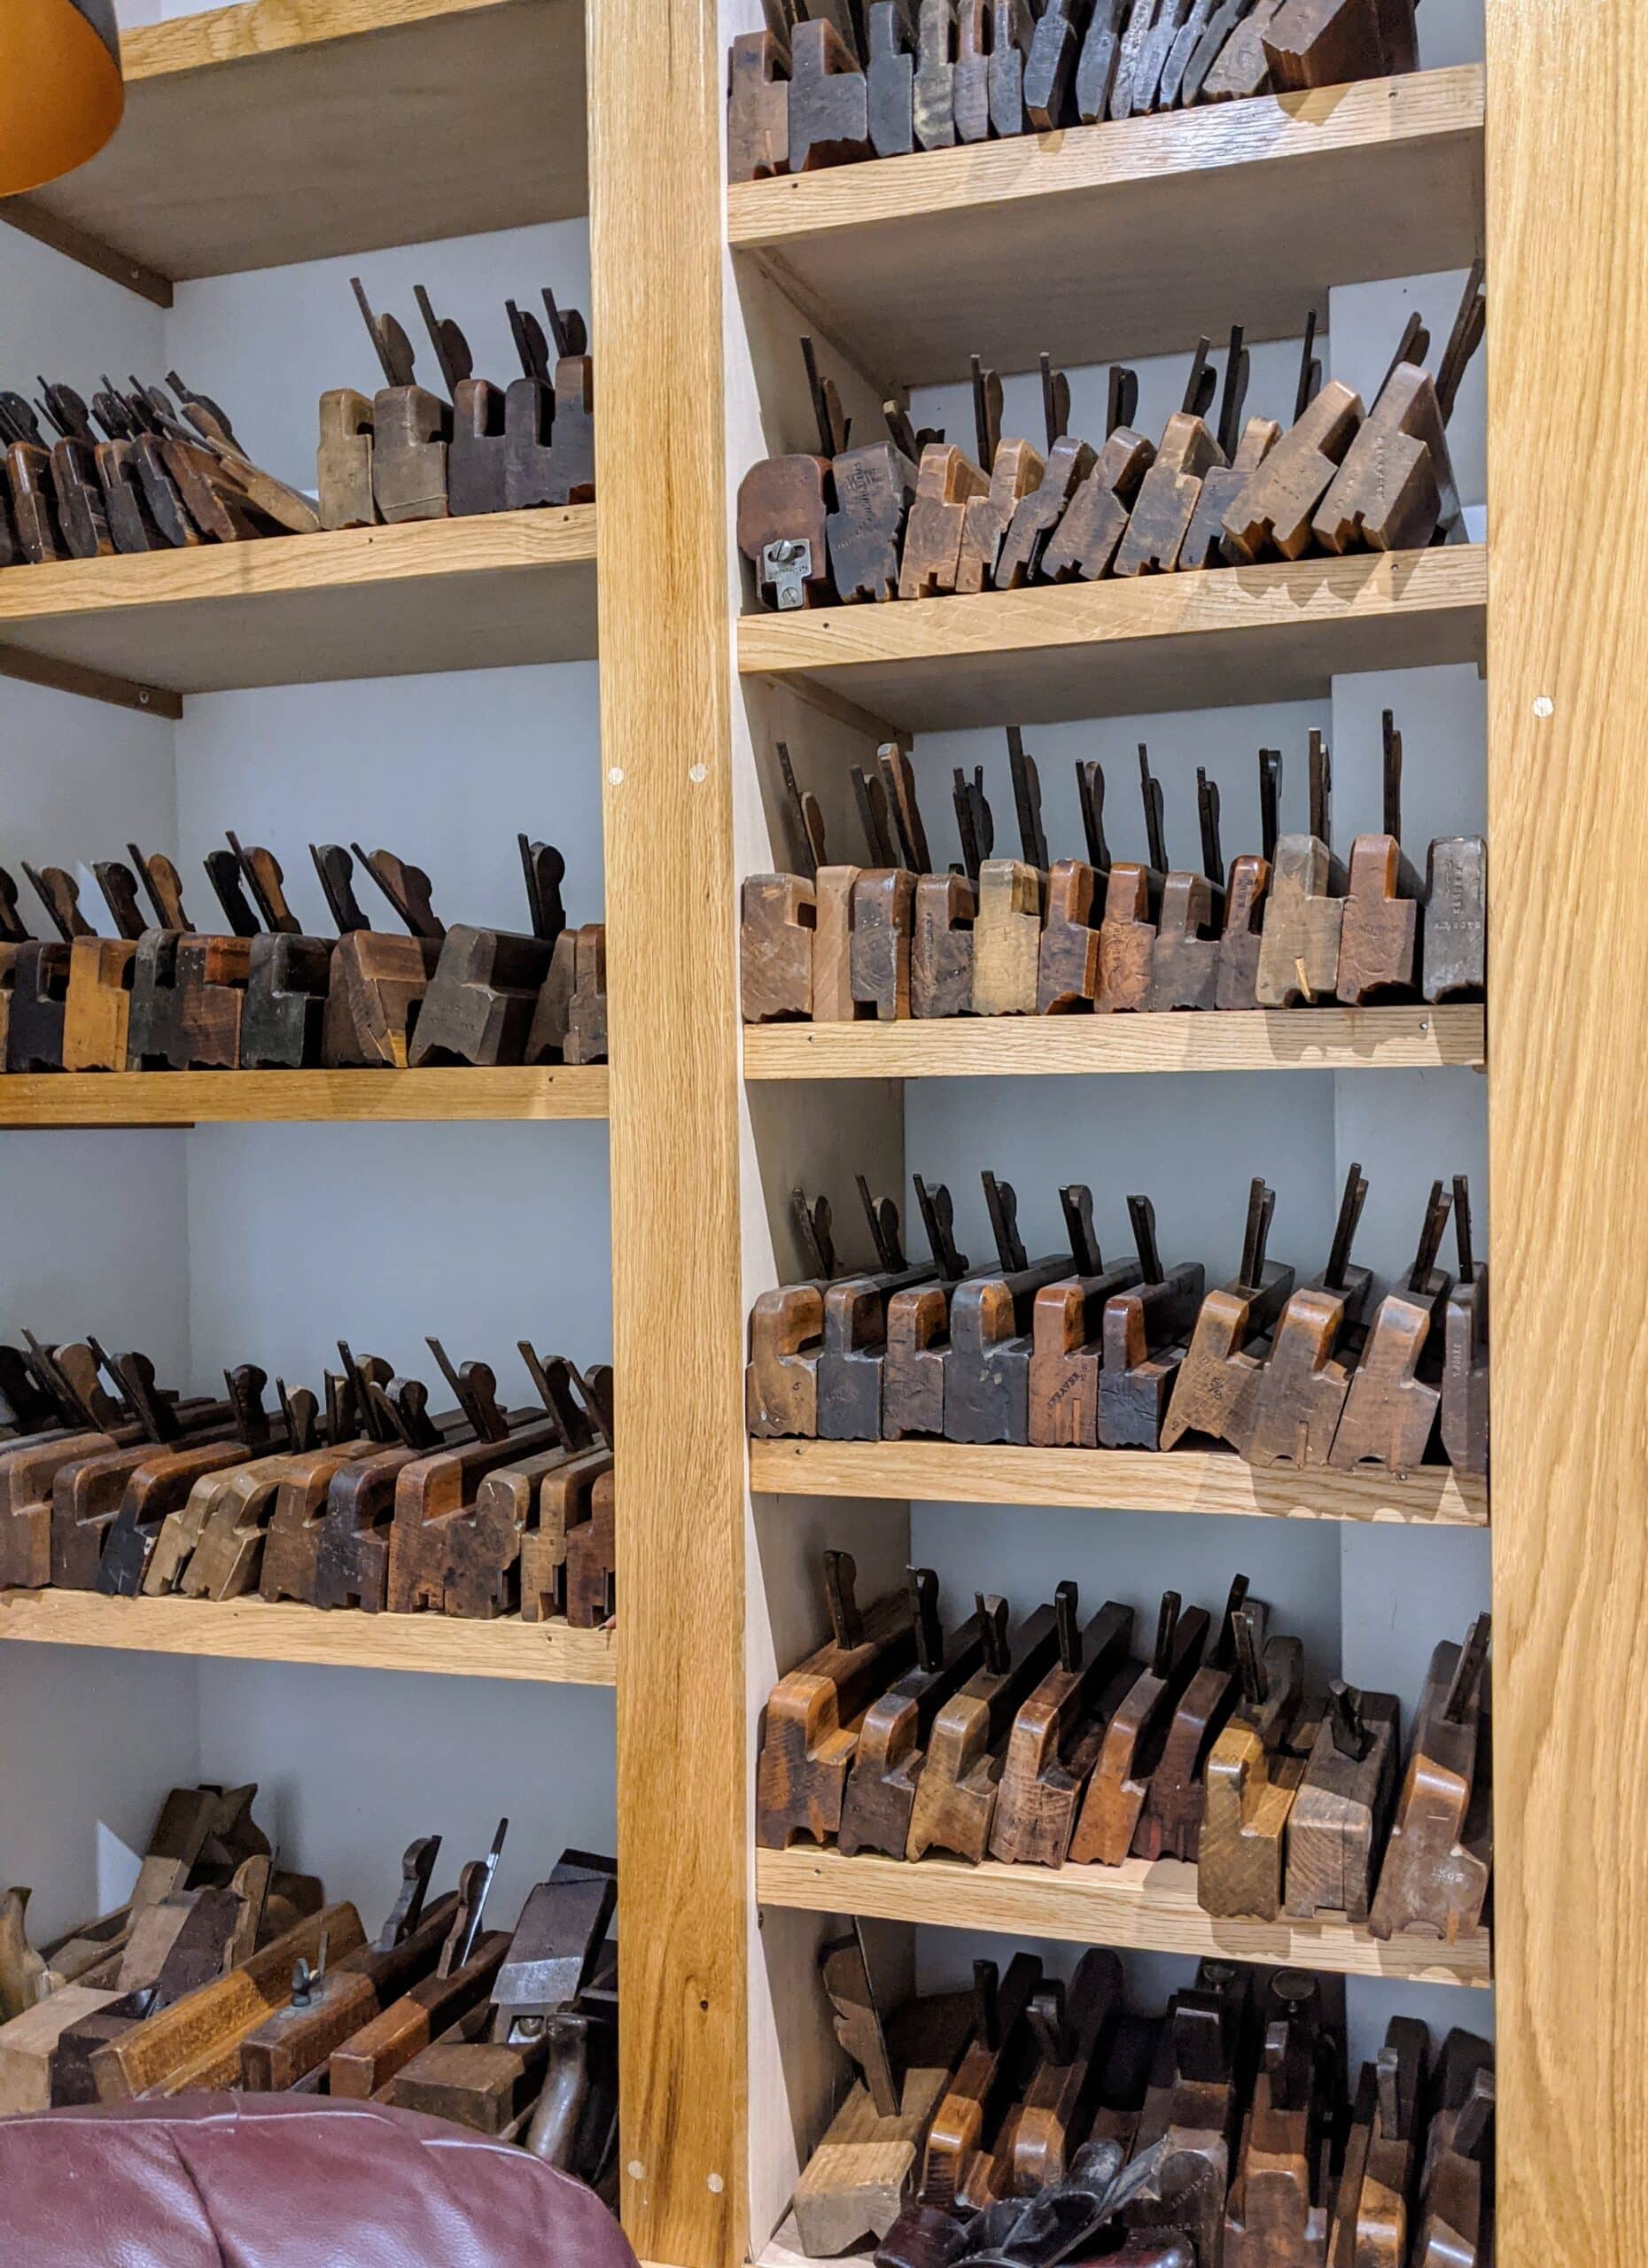
I own many moulding planes but less for use as my primary reason, so much as just having owned them for replicating moulding in my work, restoring pieces and making new. In my view it is still worth owning some well-chosen moulding planes for various profiles we might need and owning a handful is usually a low-cost investment. You can buy excellent quality planes that will be near functional at the point of purchase and you need not pay more than £10 apiece. The simplest forms are the hollows and rounds that create convex and concave shaping to the wood. Combining these with a plough plane of any type will give you a wide range of profiles and you can go from the simplest to the most complex as your collection grows. On the other hand, you can buy ready-made complex planes that cut the complete shapes in a single plane. You can also build up moulds to create deep mouldings as well. The choices are immeasurable and unending.
From personal preference, I generally don’t mould my stock and projects. Mostly it’s the link to simplicity I like, or perhaps my shunning of pretentiousness. But there are places where mouldings fit the bill perfectly –trimming out internal corners, trimming a drawer with cockbeading. Things like this.
To conclude my working on my Madox plane I will add the dimensions in response to two requests. The plane body itself measures 9 7/8″ (250mm) long, standard for Madox planes, it is 3 5/16″ (83mm) tall and 2 11/32″ (60mm) wide. Beech seems always to be the best wood for moulding planes since the early 1700s when other woods were passed over in preference for the straight-grained non-problematic beech wood. Fruit and nut woods were used in earlier periods until beech took over. Beech is indeed well proven for its longevity, workability with hand tool methods and stability. This Moxon is as good an example as any and is as true as the day it was cut and moulded to its final profile. Additionally, it shows no sign of straying from the path it will keep creating. A few additional details interested me and I thought you might like my thoughts.
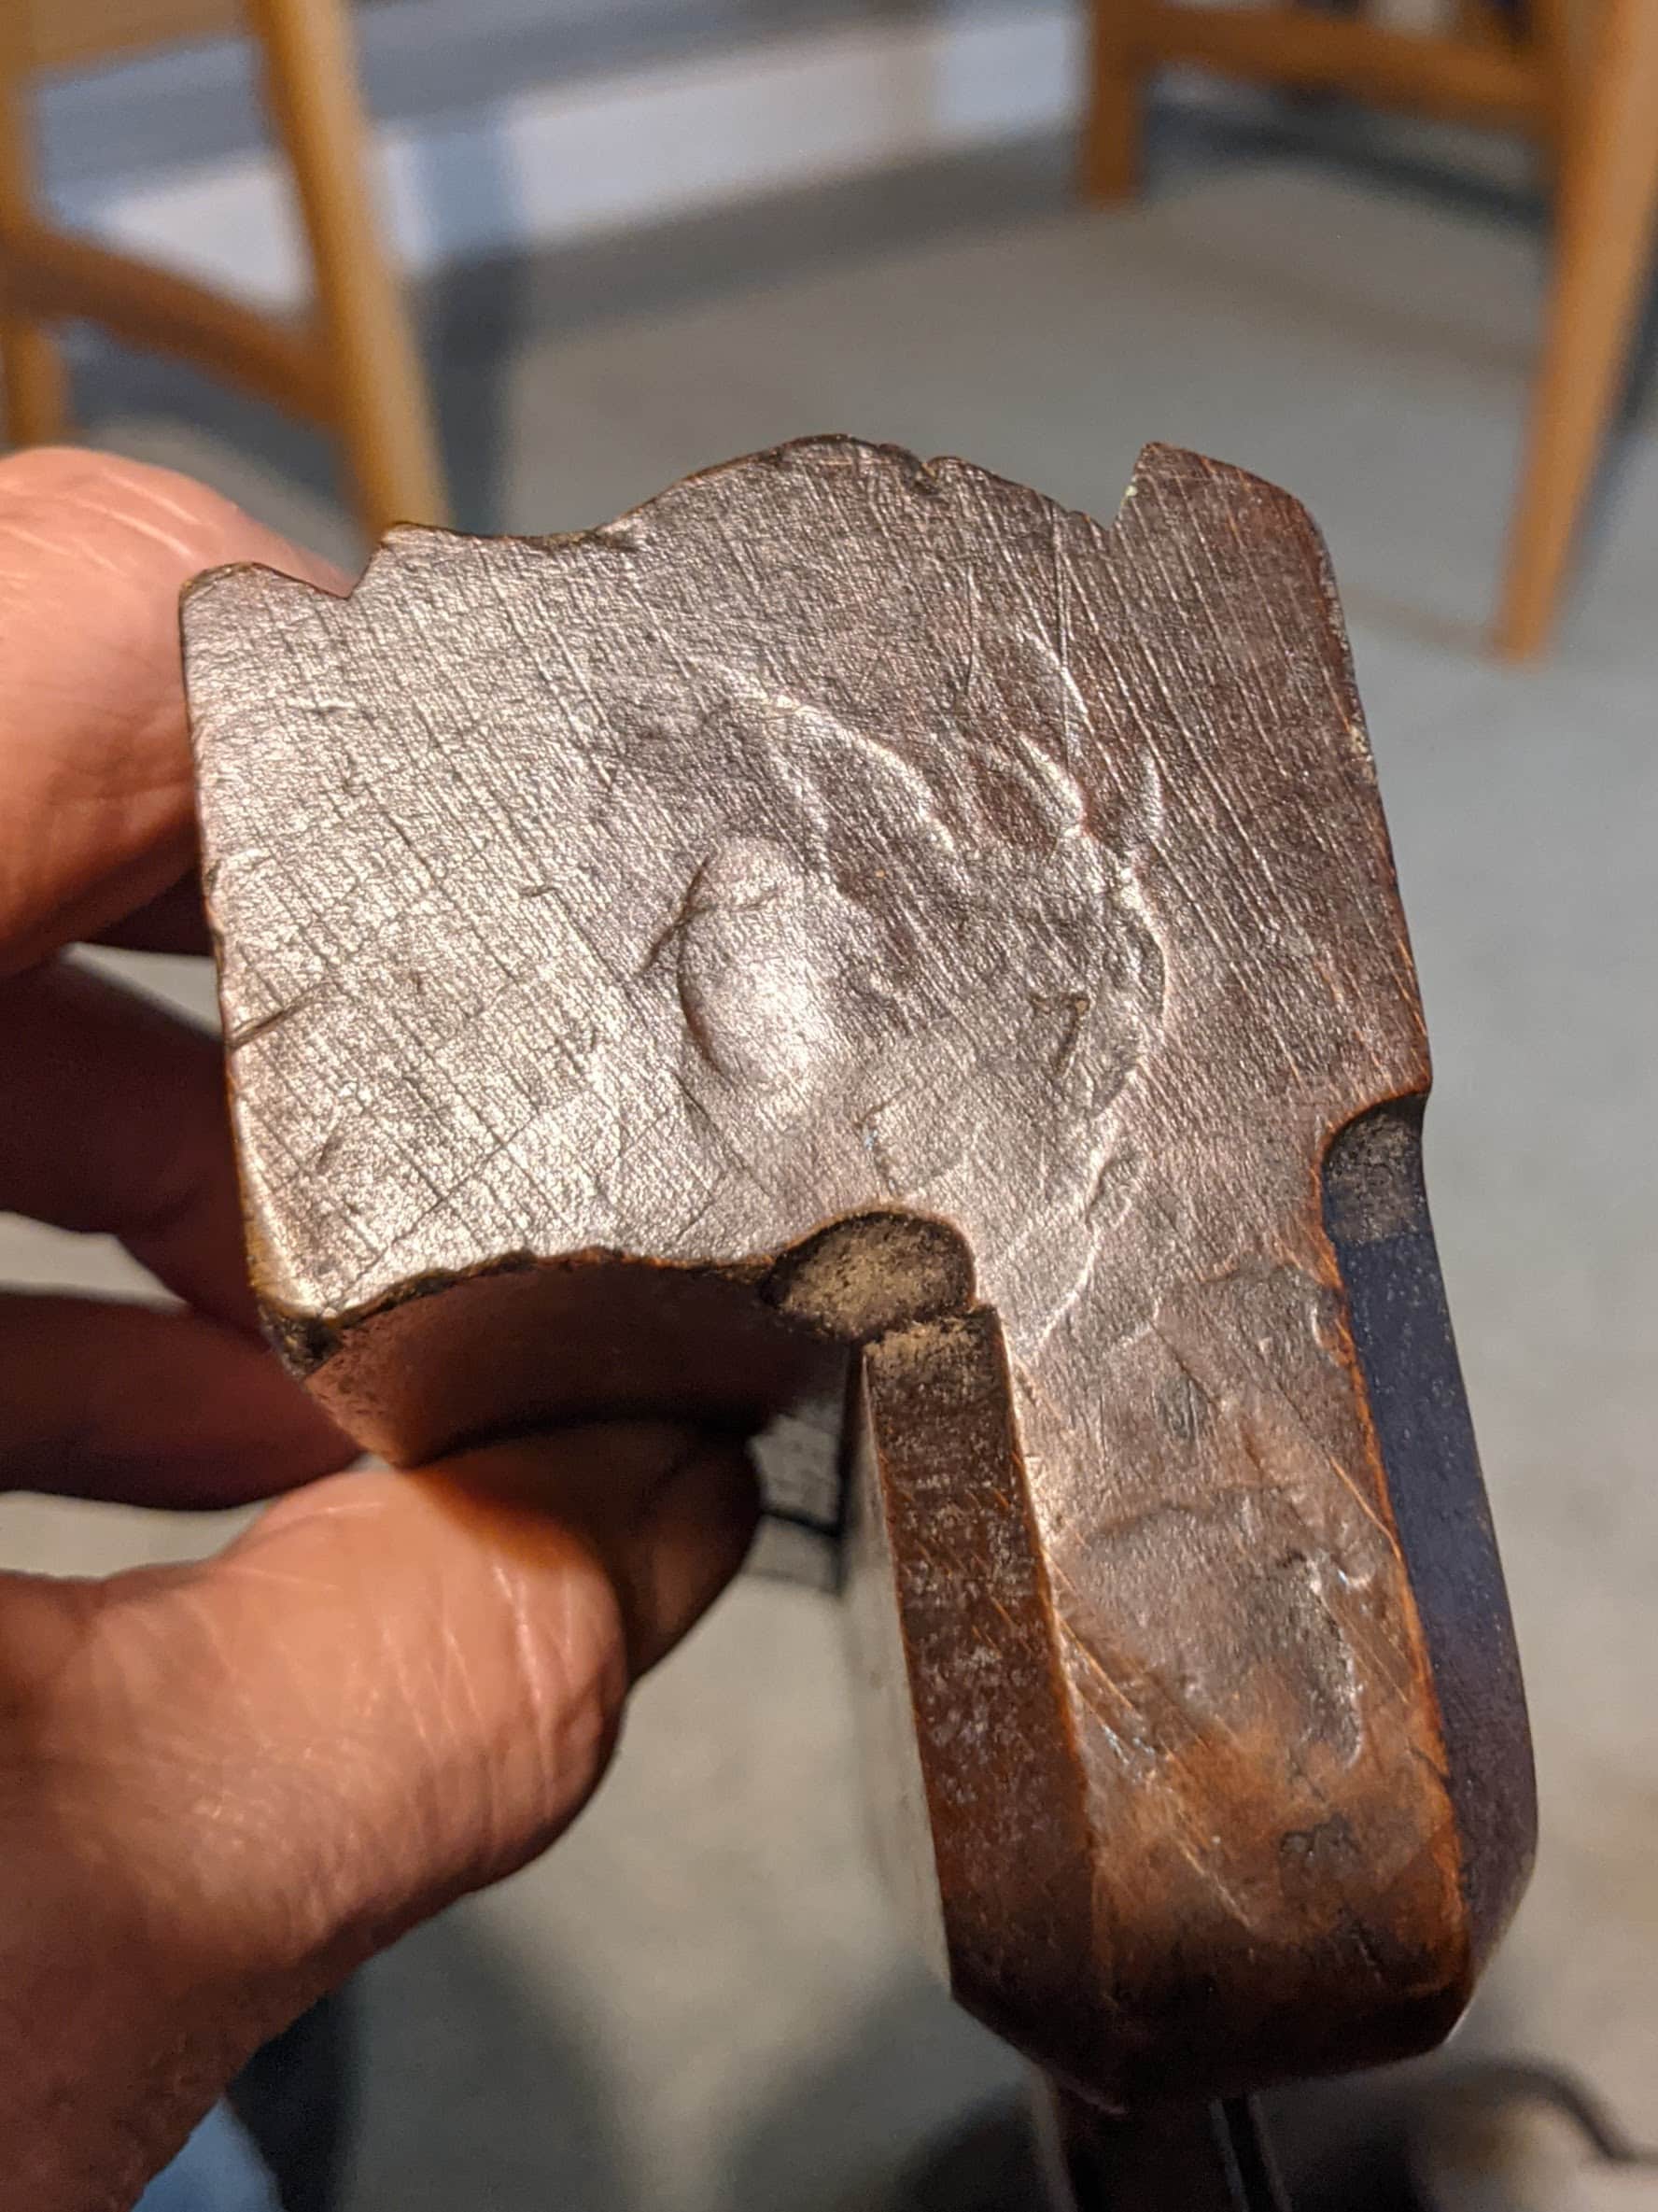
Here is the heel of the plane, replete with hammer marks aplenty. I have strayed from steel hammers for shocking blades and wedges most of the time because the weight of the Thorex 712 well suits my preference for doing as little harm as possible. The nylon face is suitably domed and in general gives good centre of percussion (COP) with every strike. That said, the Warrington 10-12oz hammer is still near to hand should the Thorex fail, and of course, the cross pein of the head hooks under the wedge to tap as and when I need it.
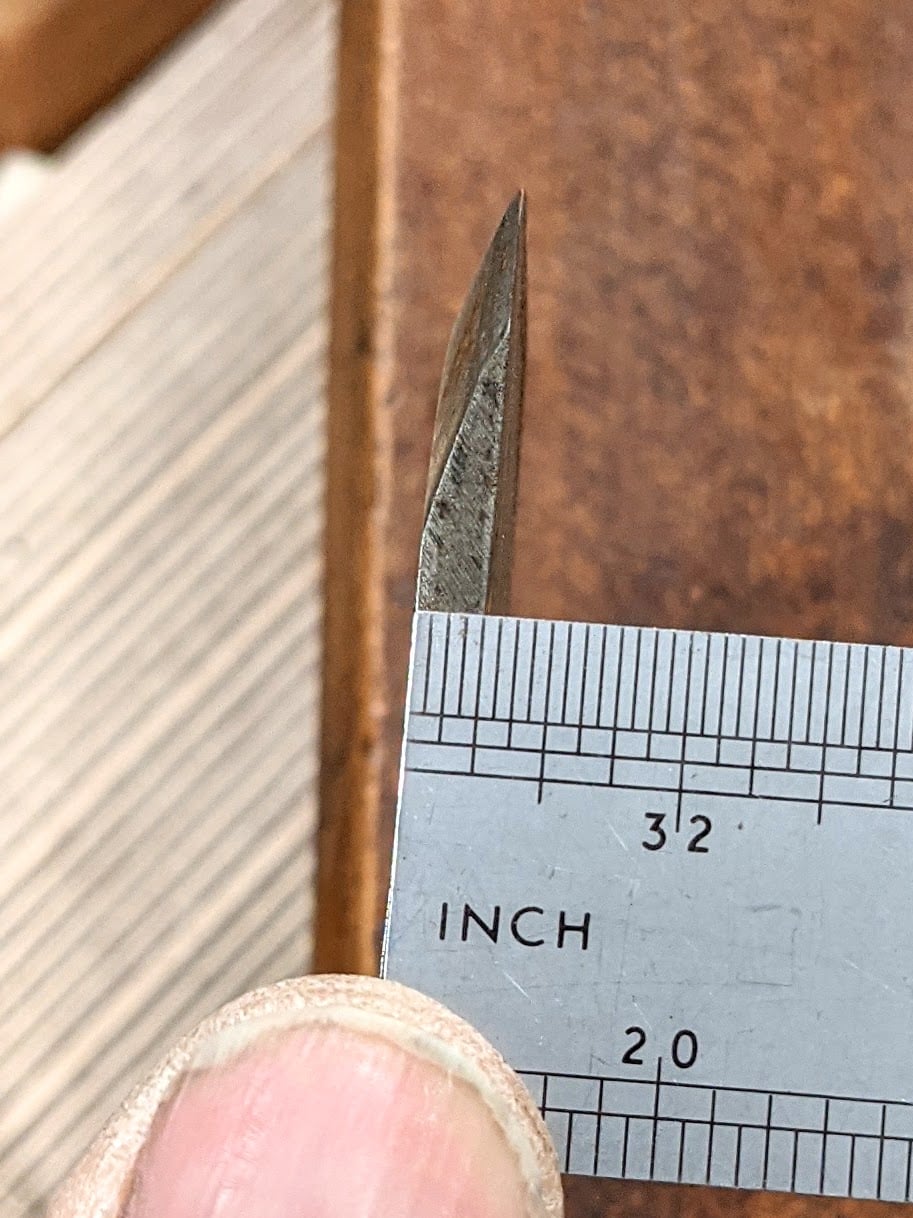
The cutting iron is thin as are many early planes of this type. At the thickest part, by the bevel, it is just 1/8″ (3mm) thick and tapers only minimally. This is not so much a surprise from an age when handwork determined economy of time, materials and motion. Even so, it does give thought for a plane that has no cap iron, relies on wedging for blade retention and one that sits at a steepish angle of presentation. Whereas you might expect the cutting iron to retract and retreat or flex in the cut under the pressure of forward thrusting of the plane, especially in heavier work, it showed no signs of flexing and the ogee was finished to a fully refined moulding with no chatter or skud marks.
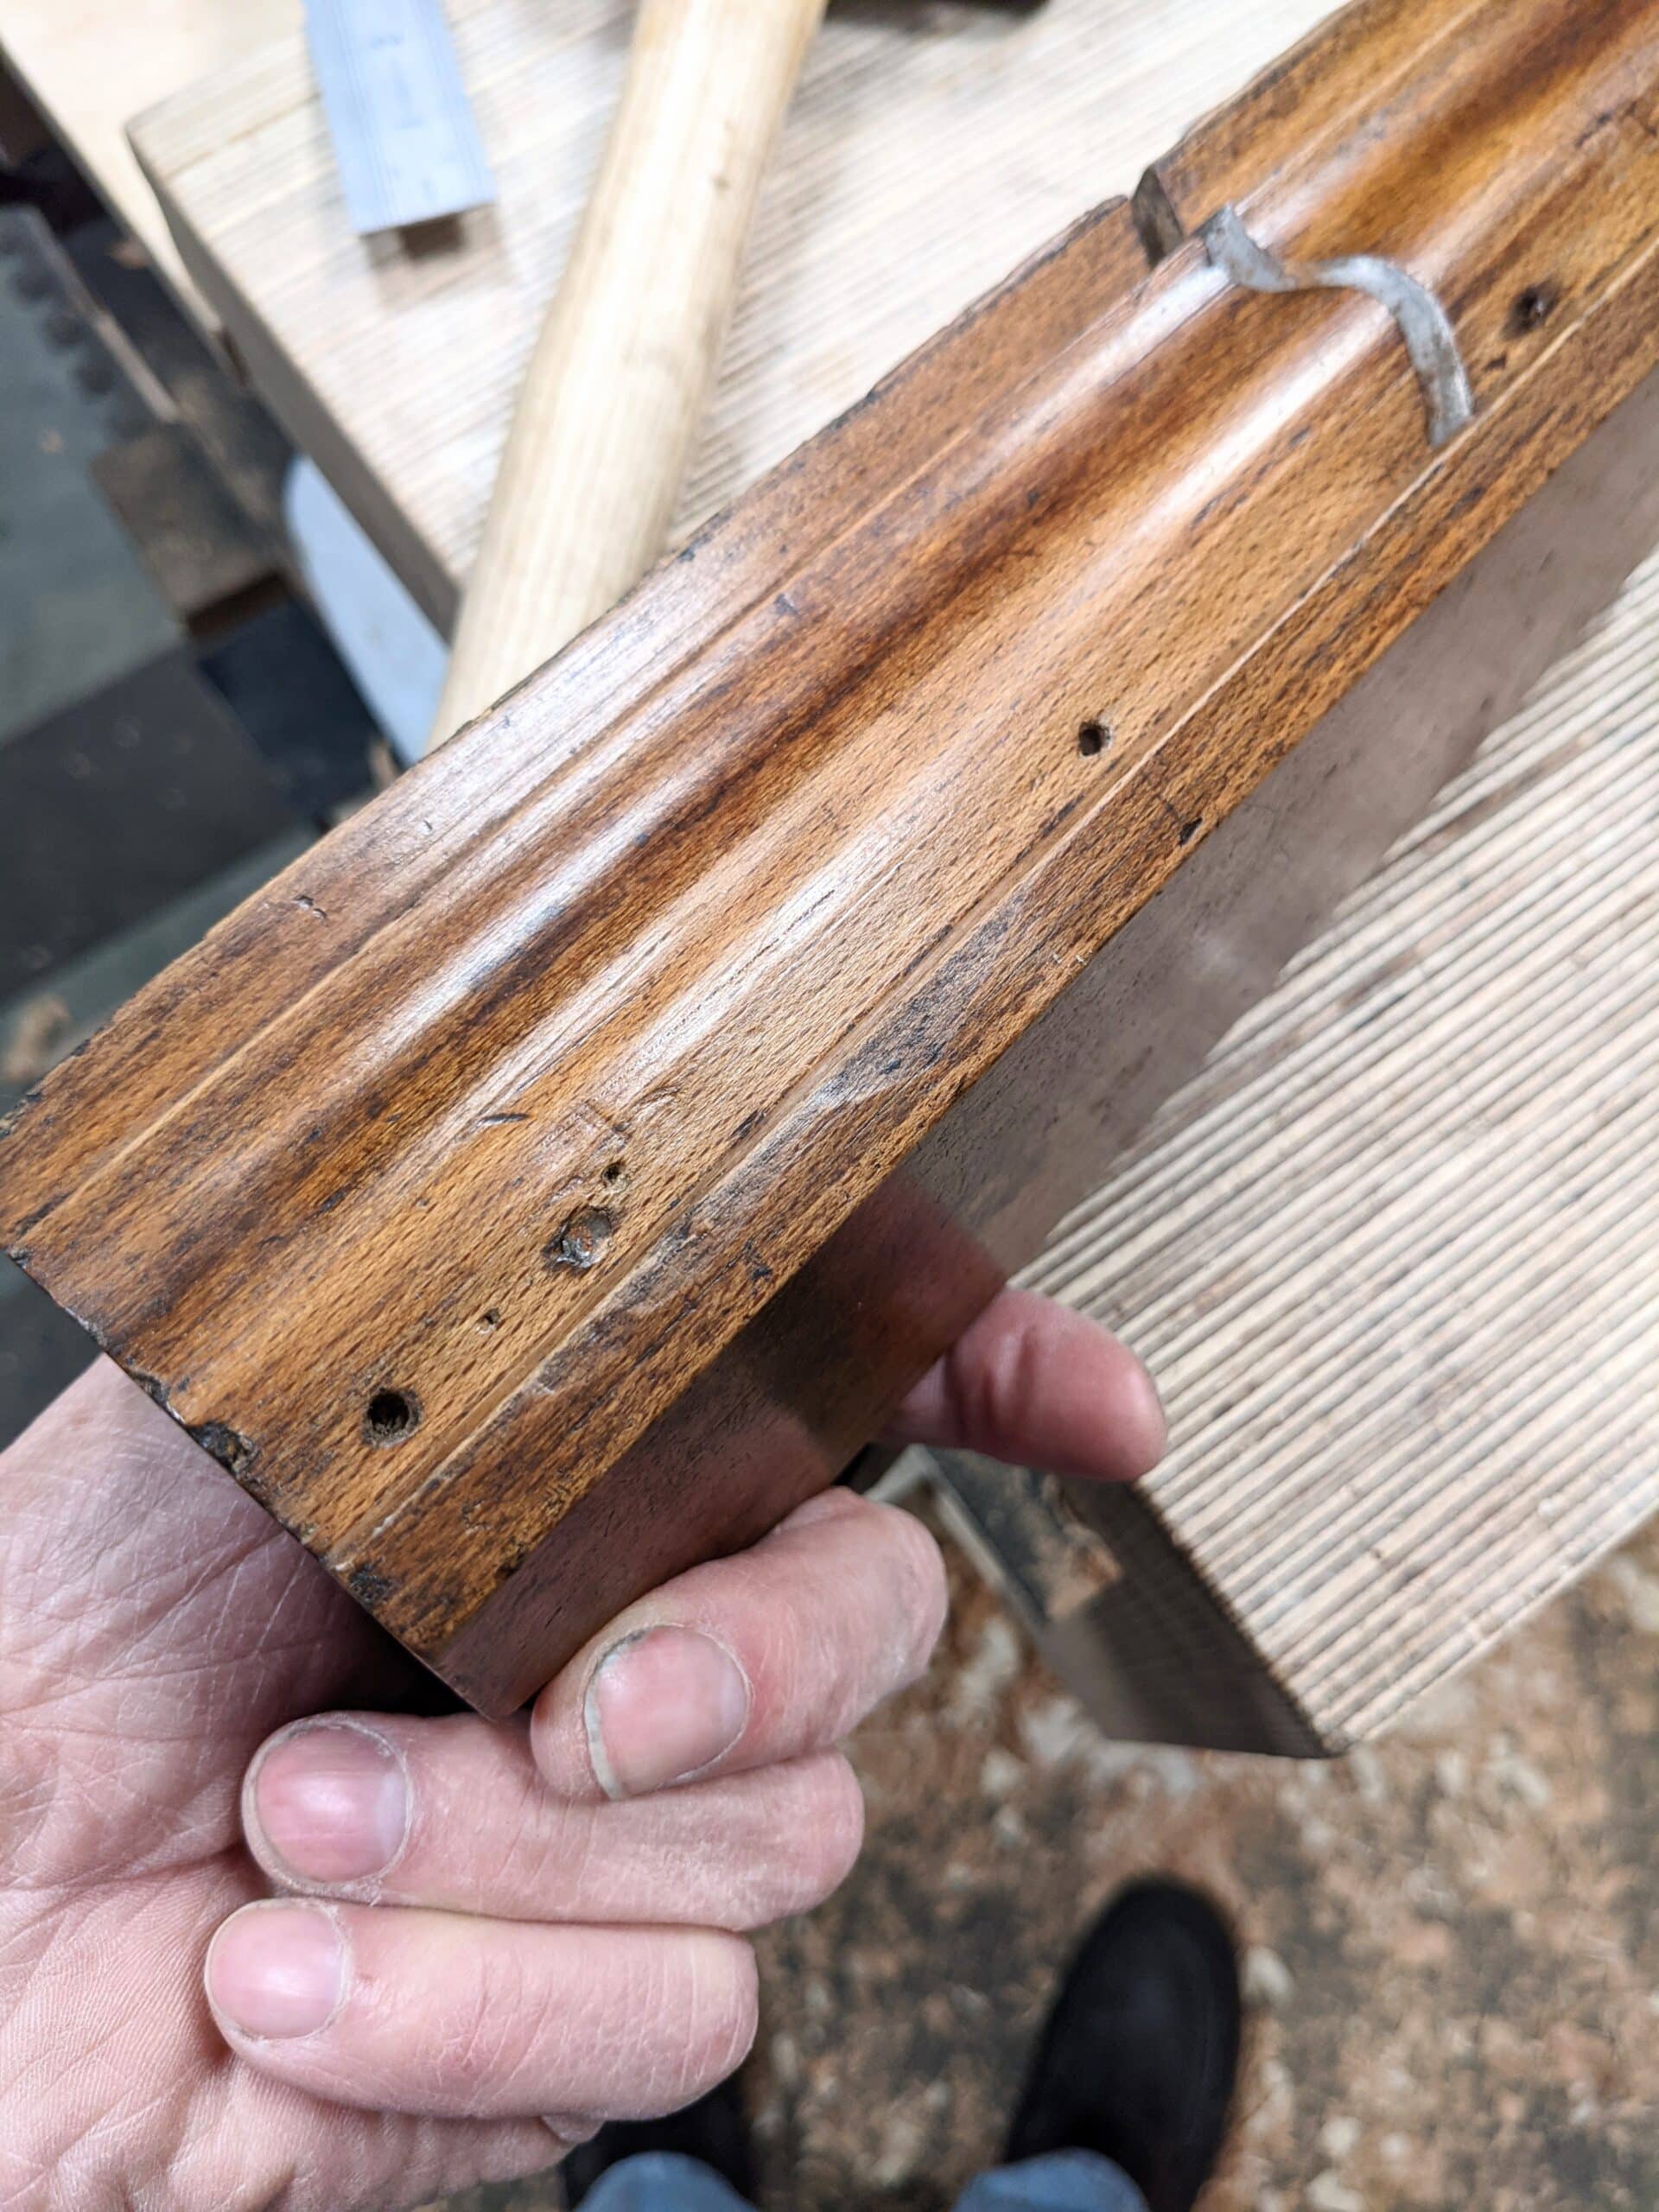
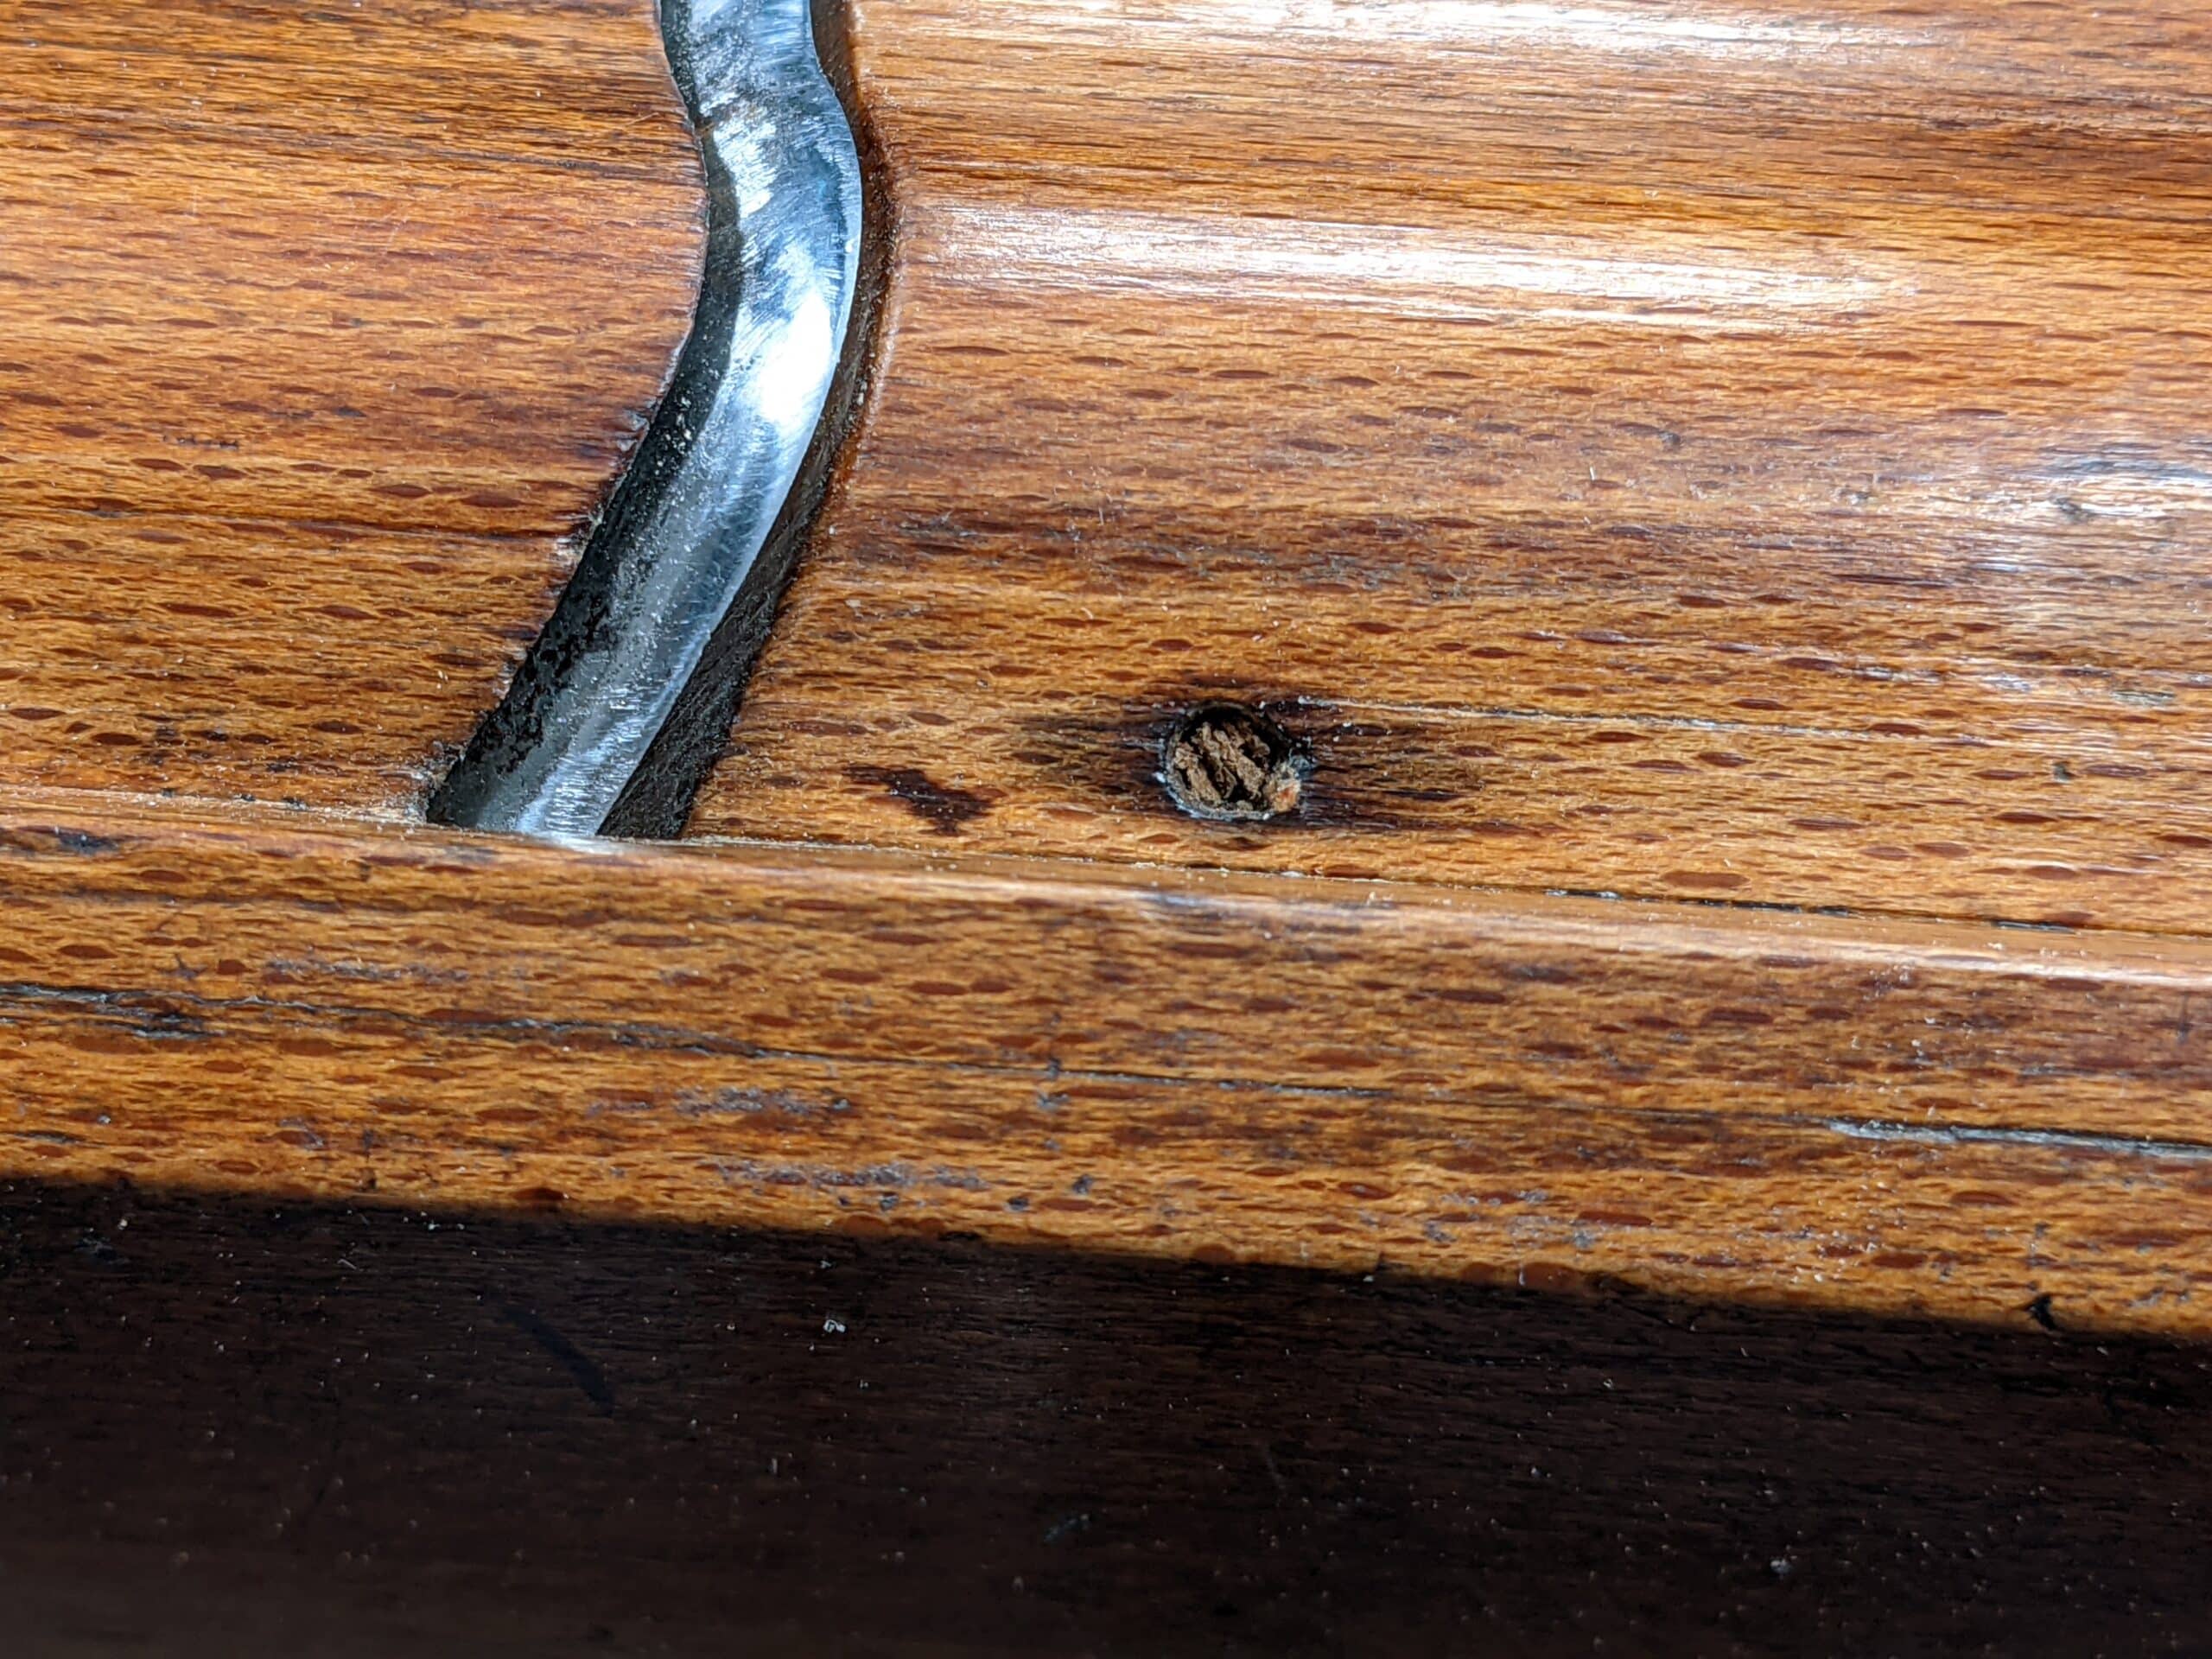
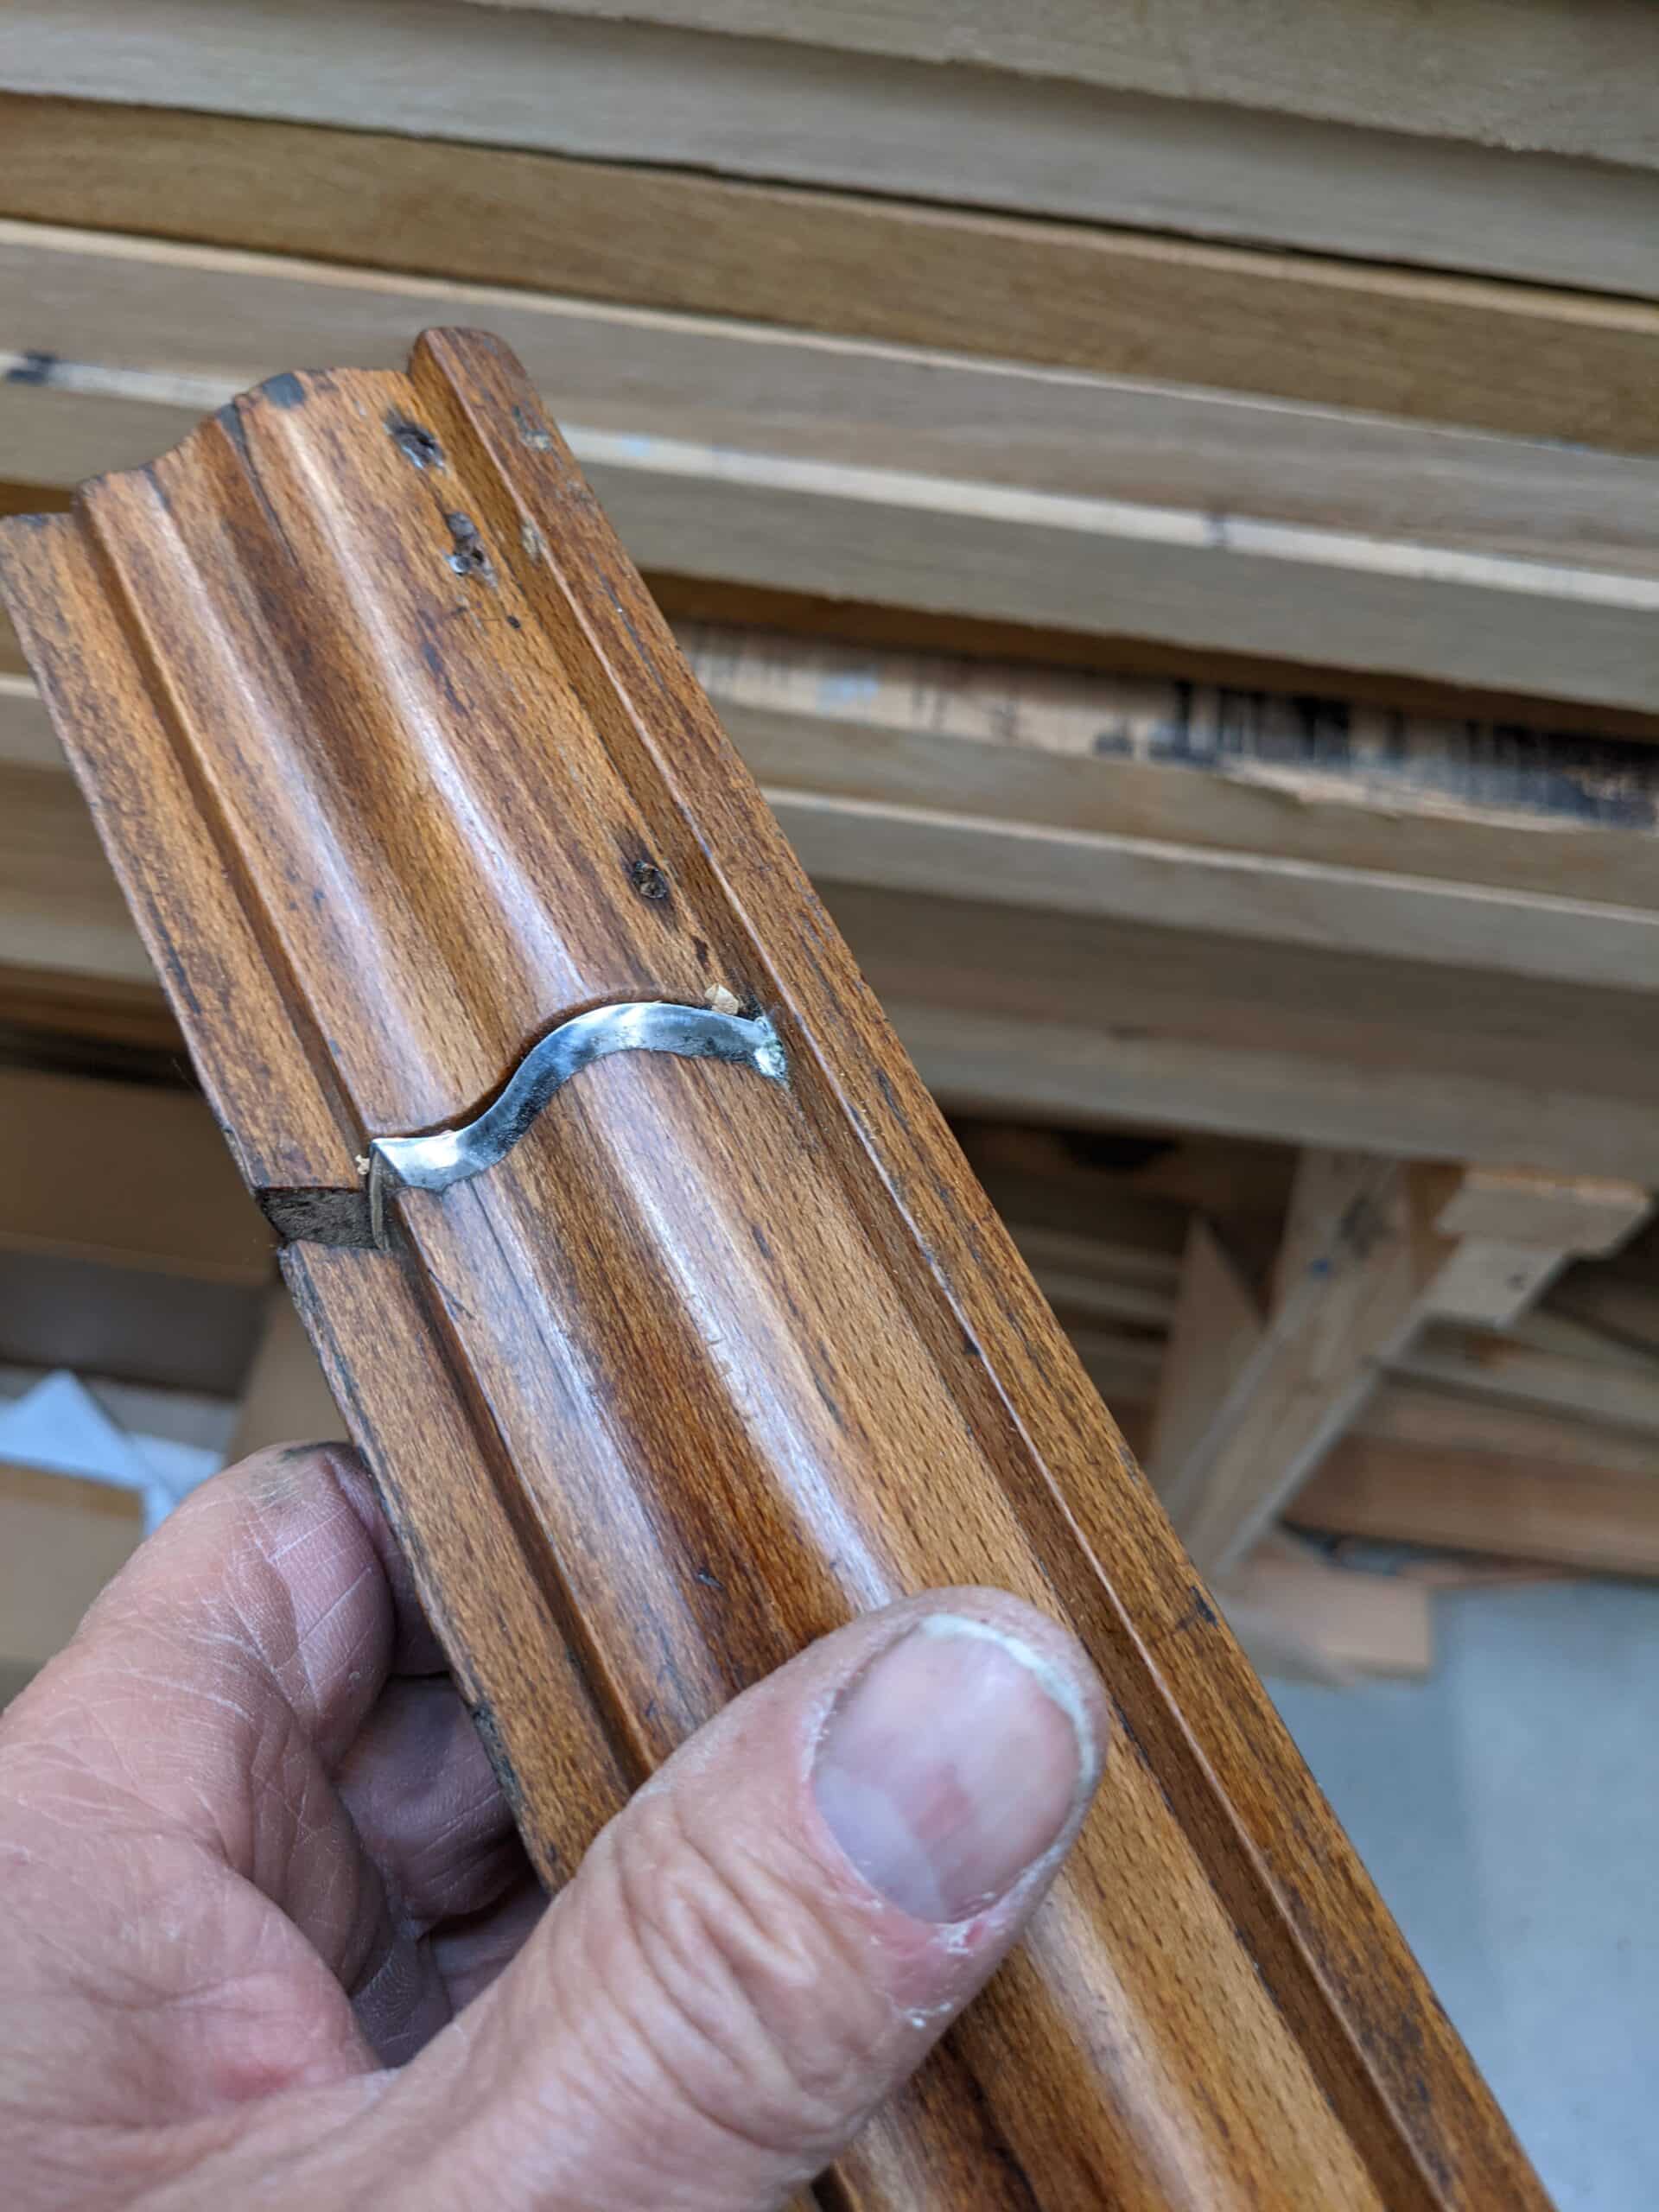
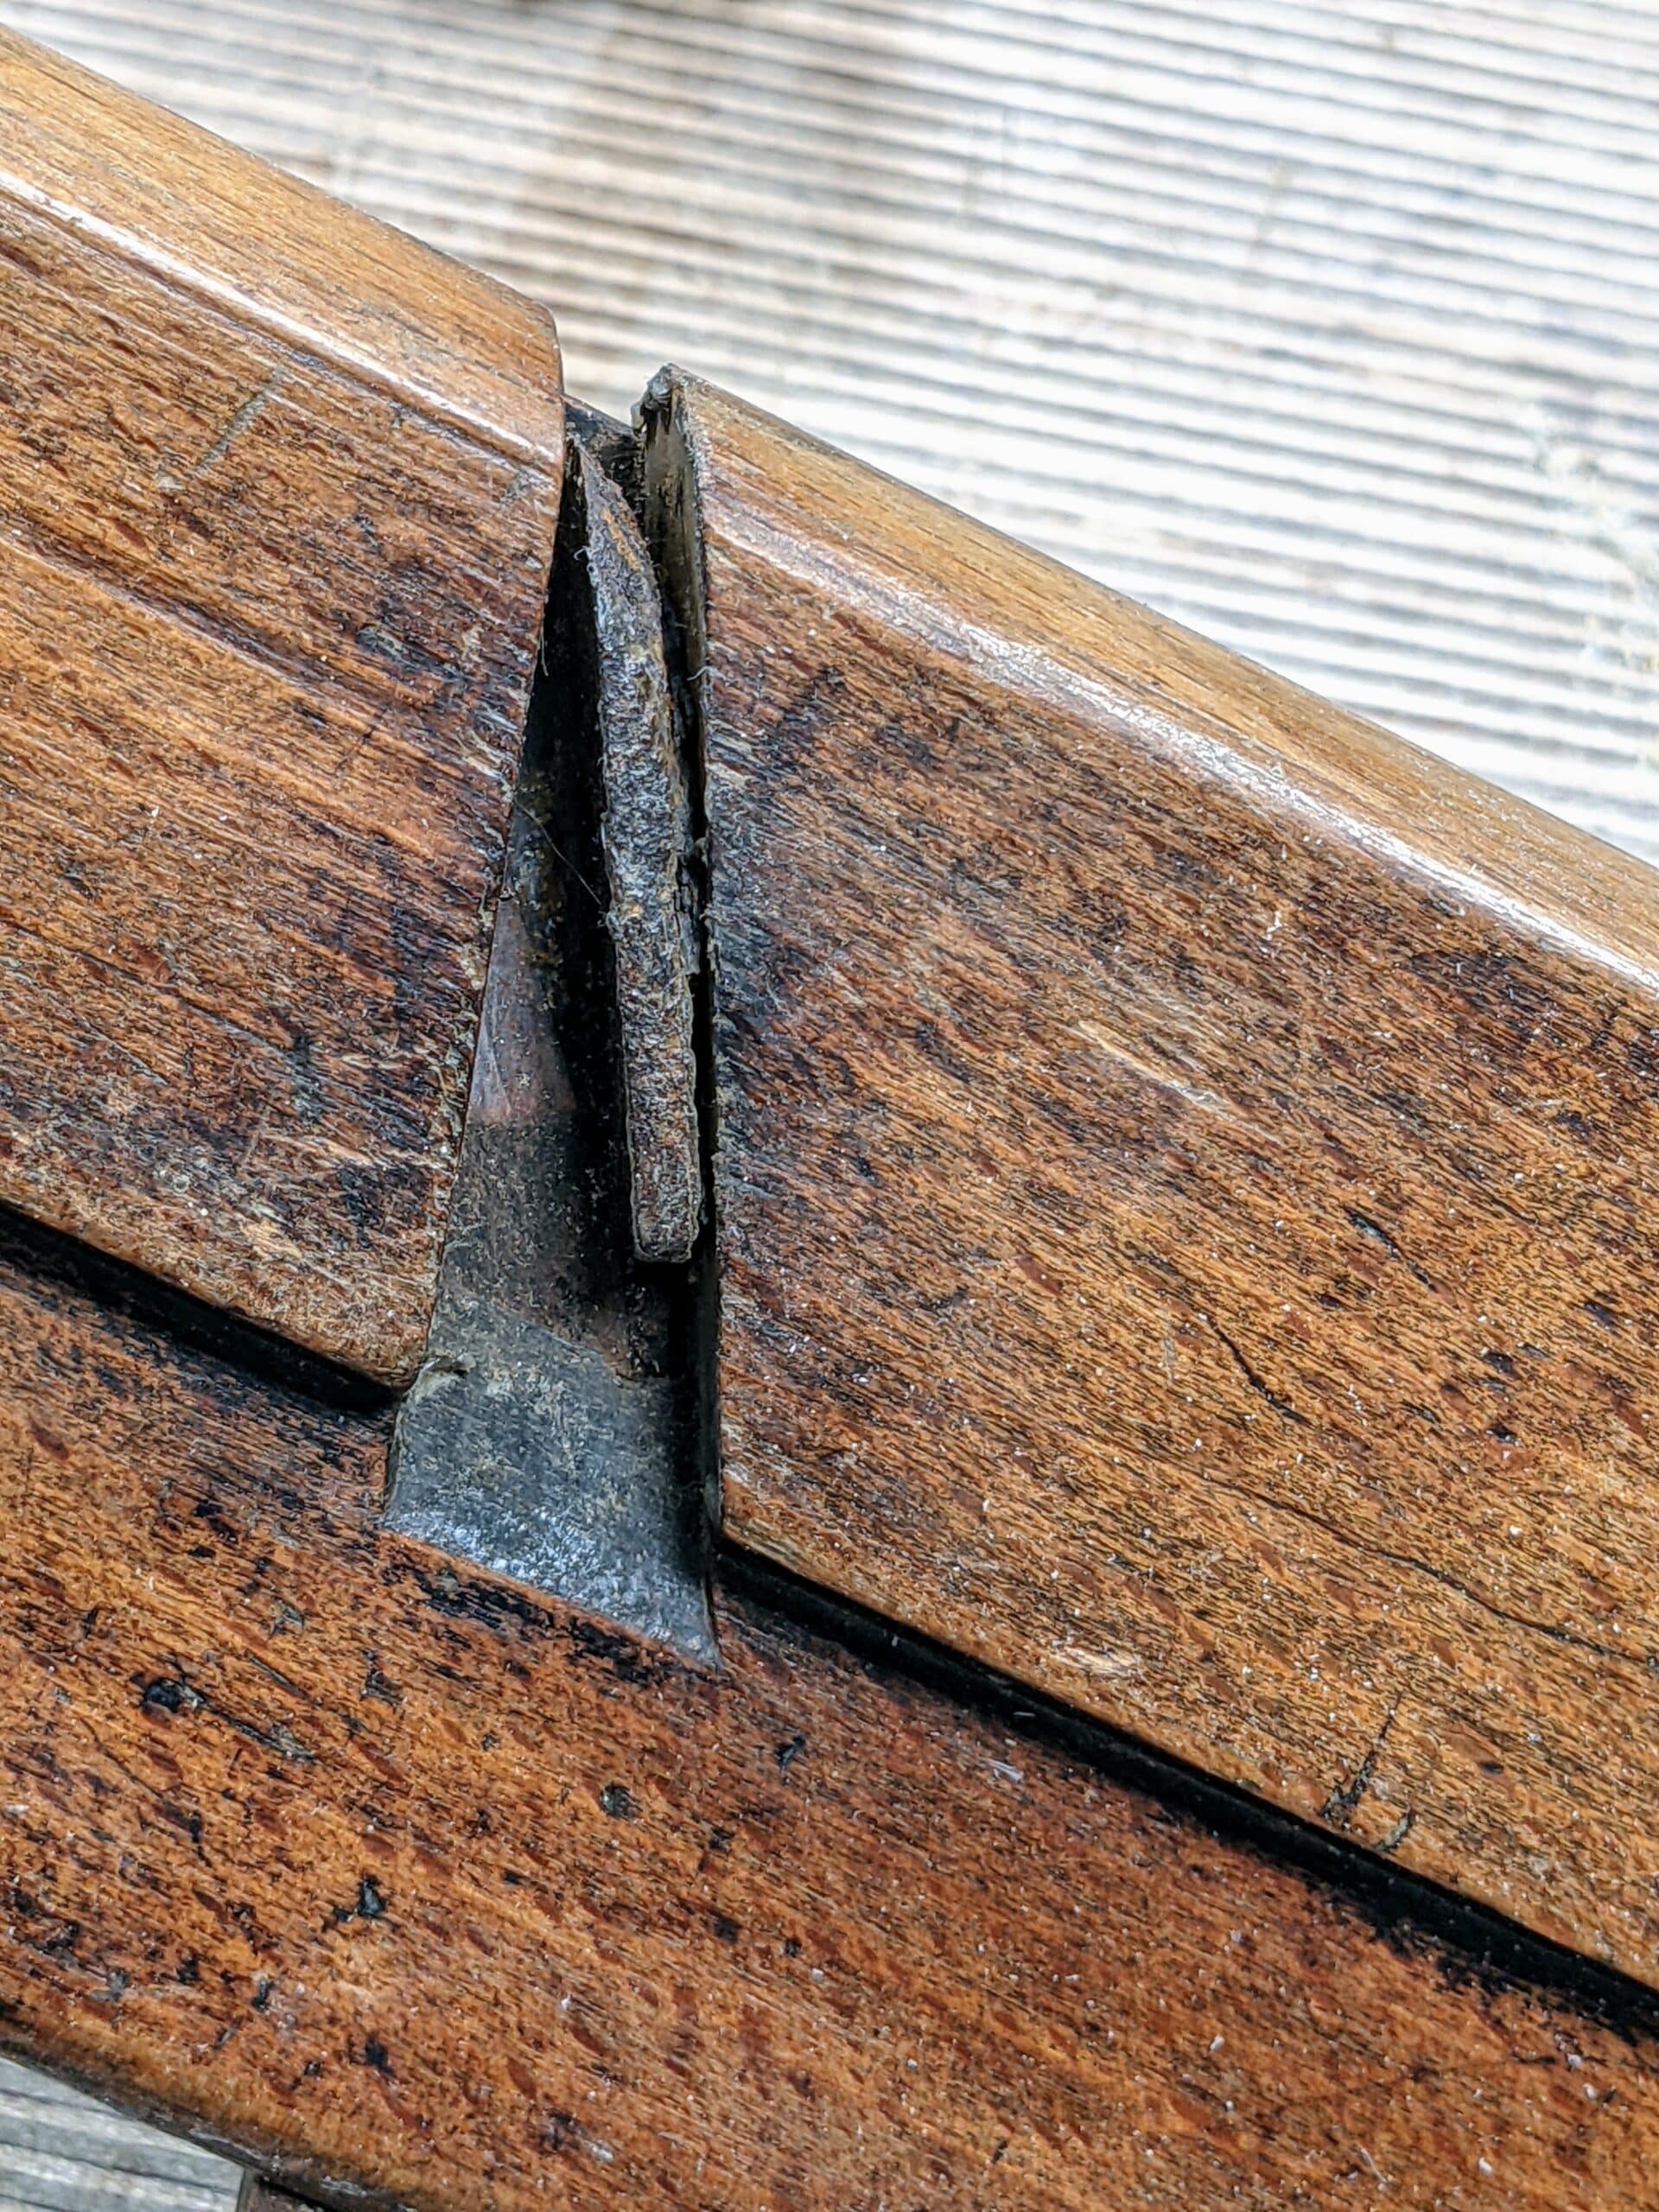
Running along the length, by an internal seat corner, I found a row of six nail holes that obviated a narrowing of the mould by attaching a fillet into the corner with brad nails. I measured a wear line that suggested the narrowing to be by around 3/8″ (10mm). One nail remained stubbornly in place and was subsequently bent over and hammered in and just below flush.
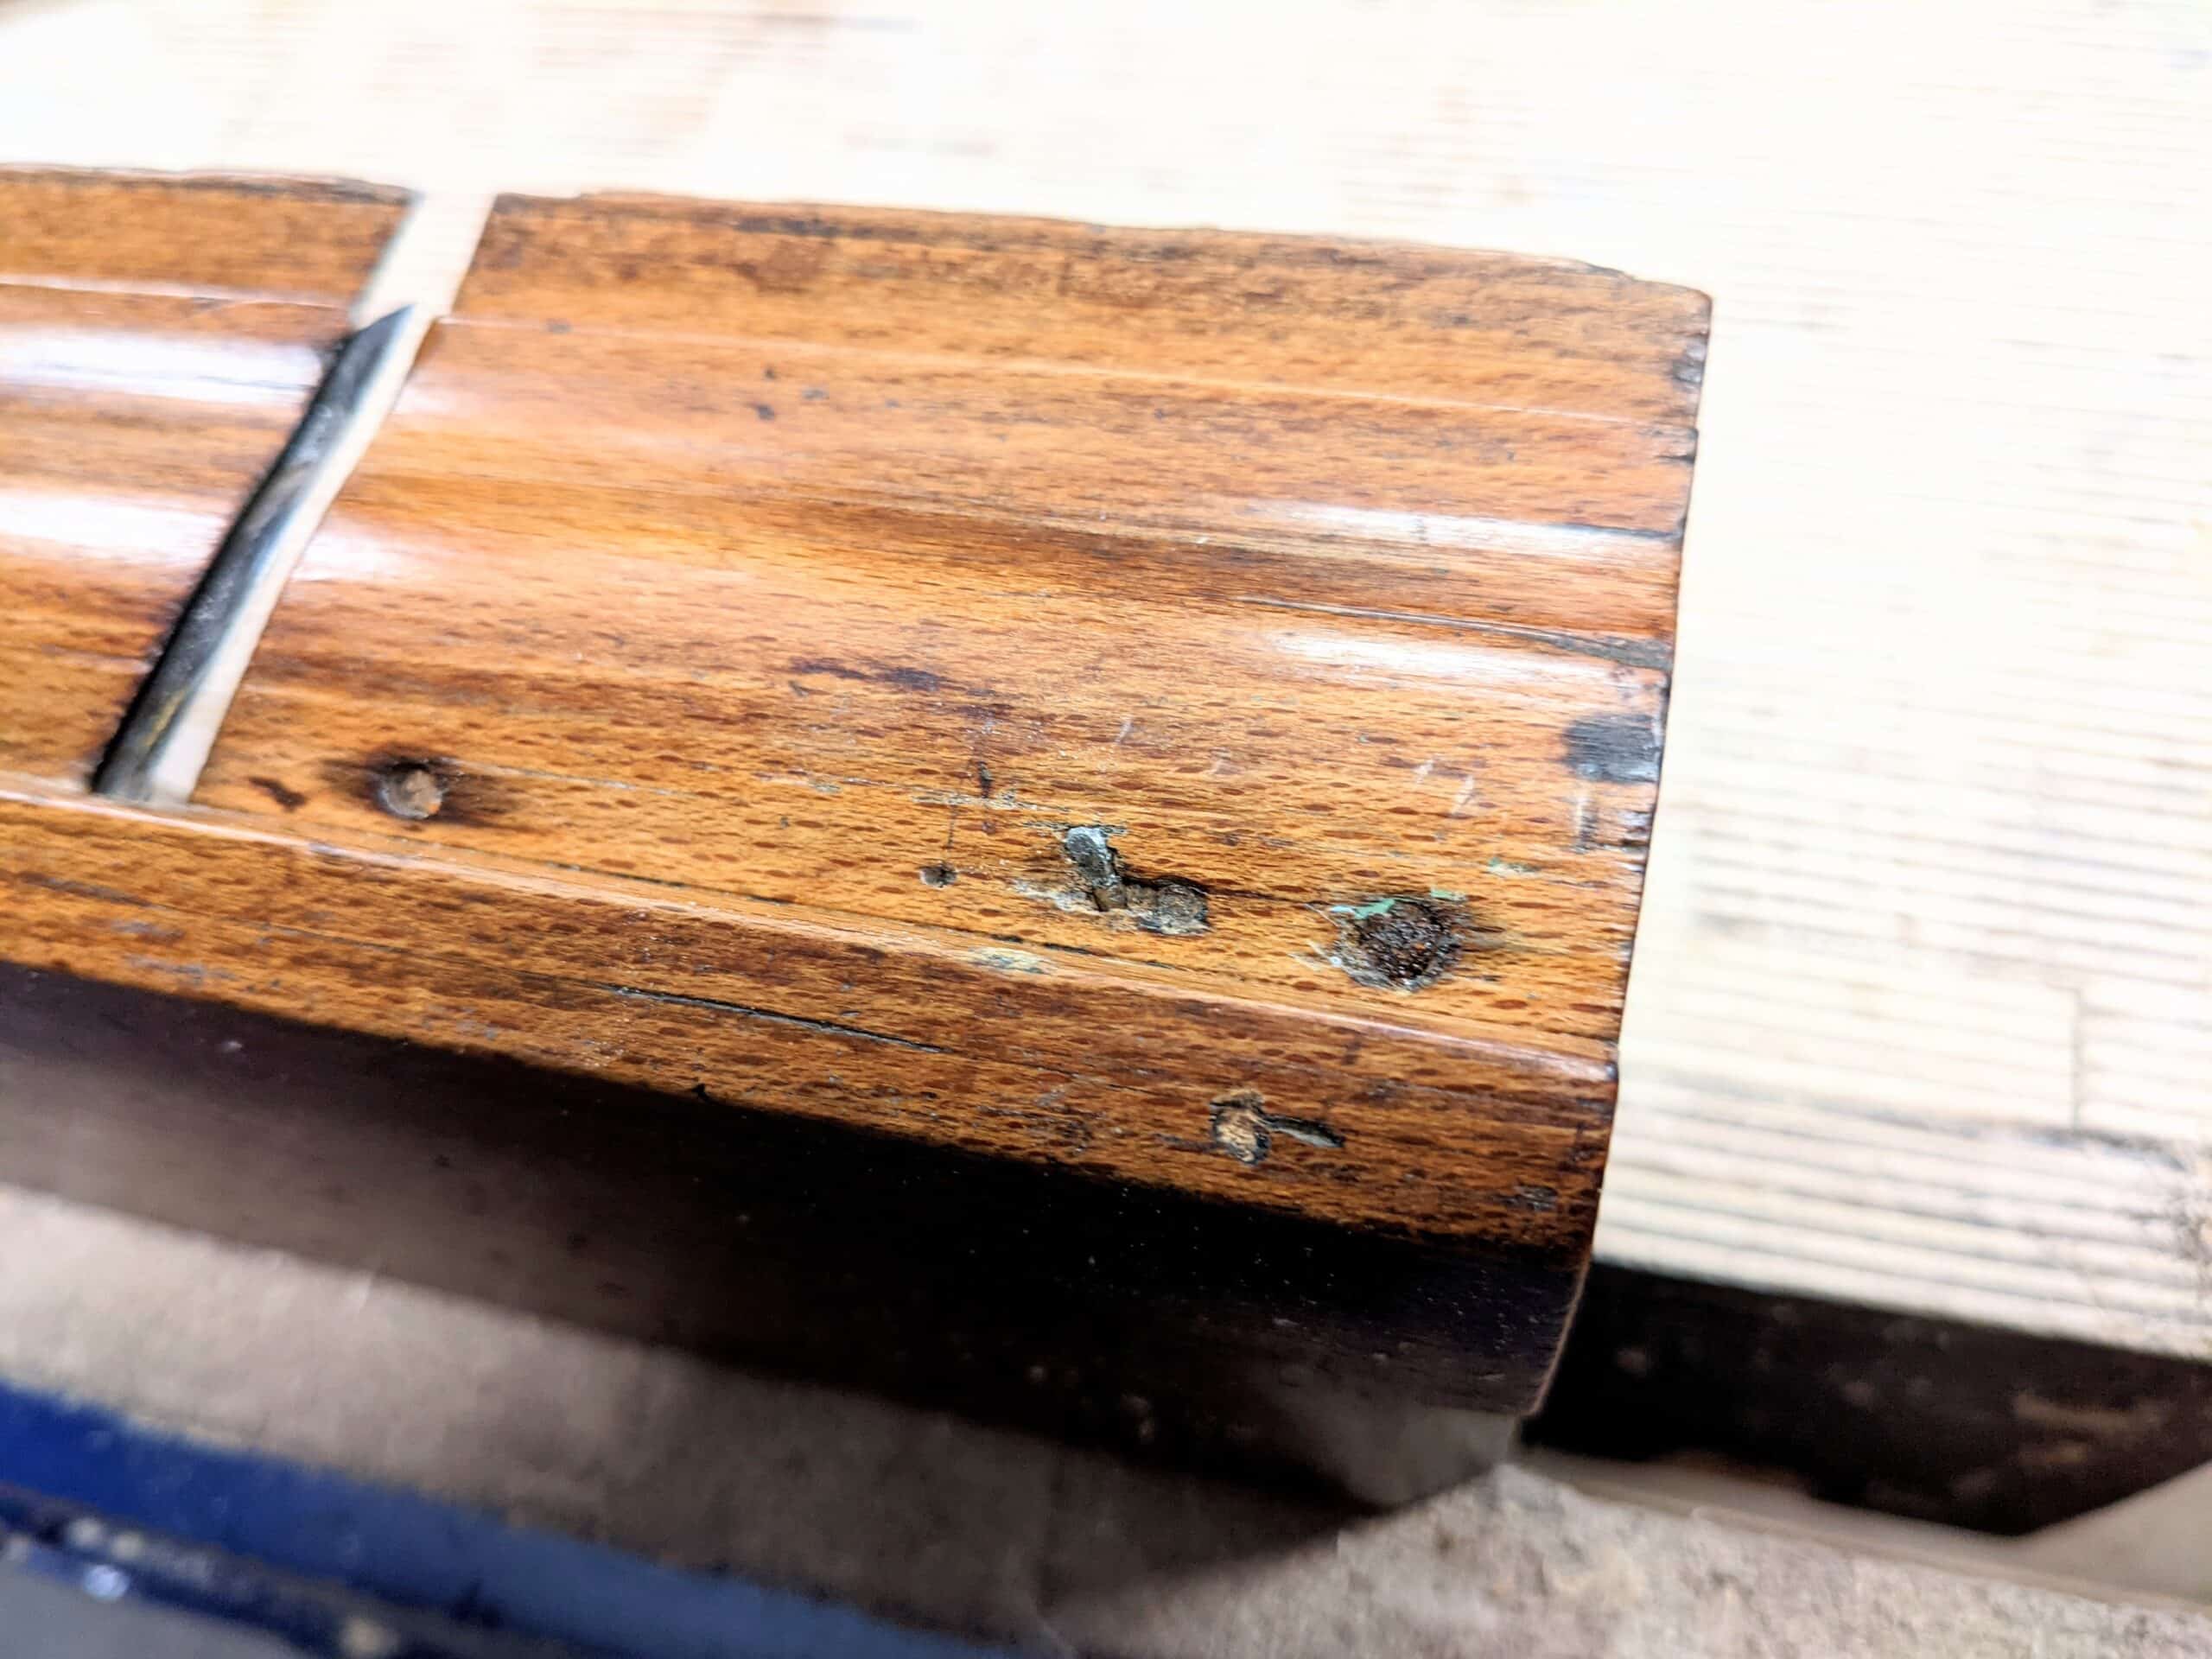
The nail had a small polished spot from shaving the wood over the years which showed more recent use despite the poor shape of the cutting iron. Just hints of possibilities really. But it’s the staining around the holes that indicates the fillet was installed permanently and then the rust on the first nail head at the start of the mould and the one where the nail was broken off through rusting through by the mouth.
The polish on the sole is wear-polish from friction between the sole and its moulded stock. Wood on wood leaves its telltale outcome and even the wood it was used on last in some cases. European redwood pine leaves a high polish because of the resins in the pine. This polish increases the friction and causes more sticking.
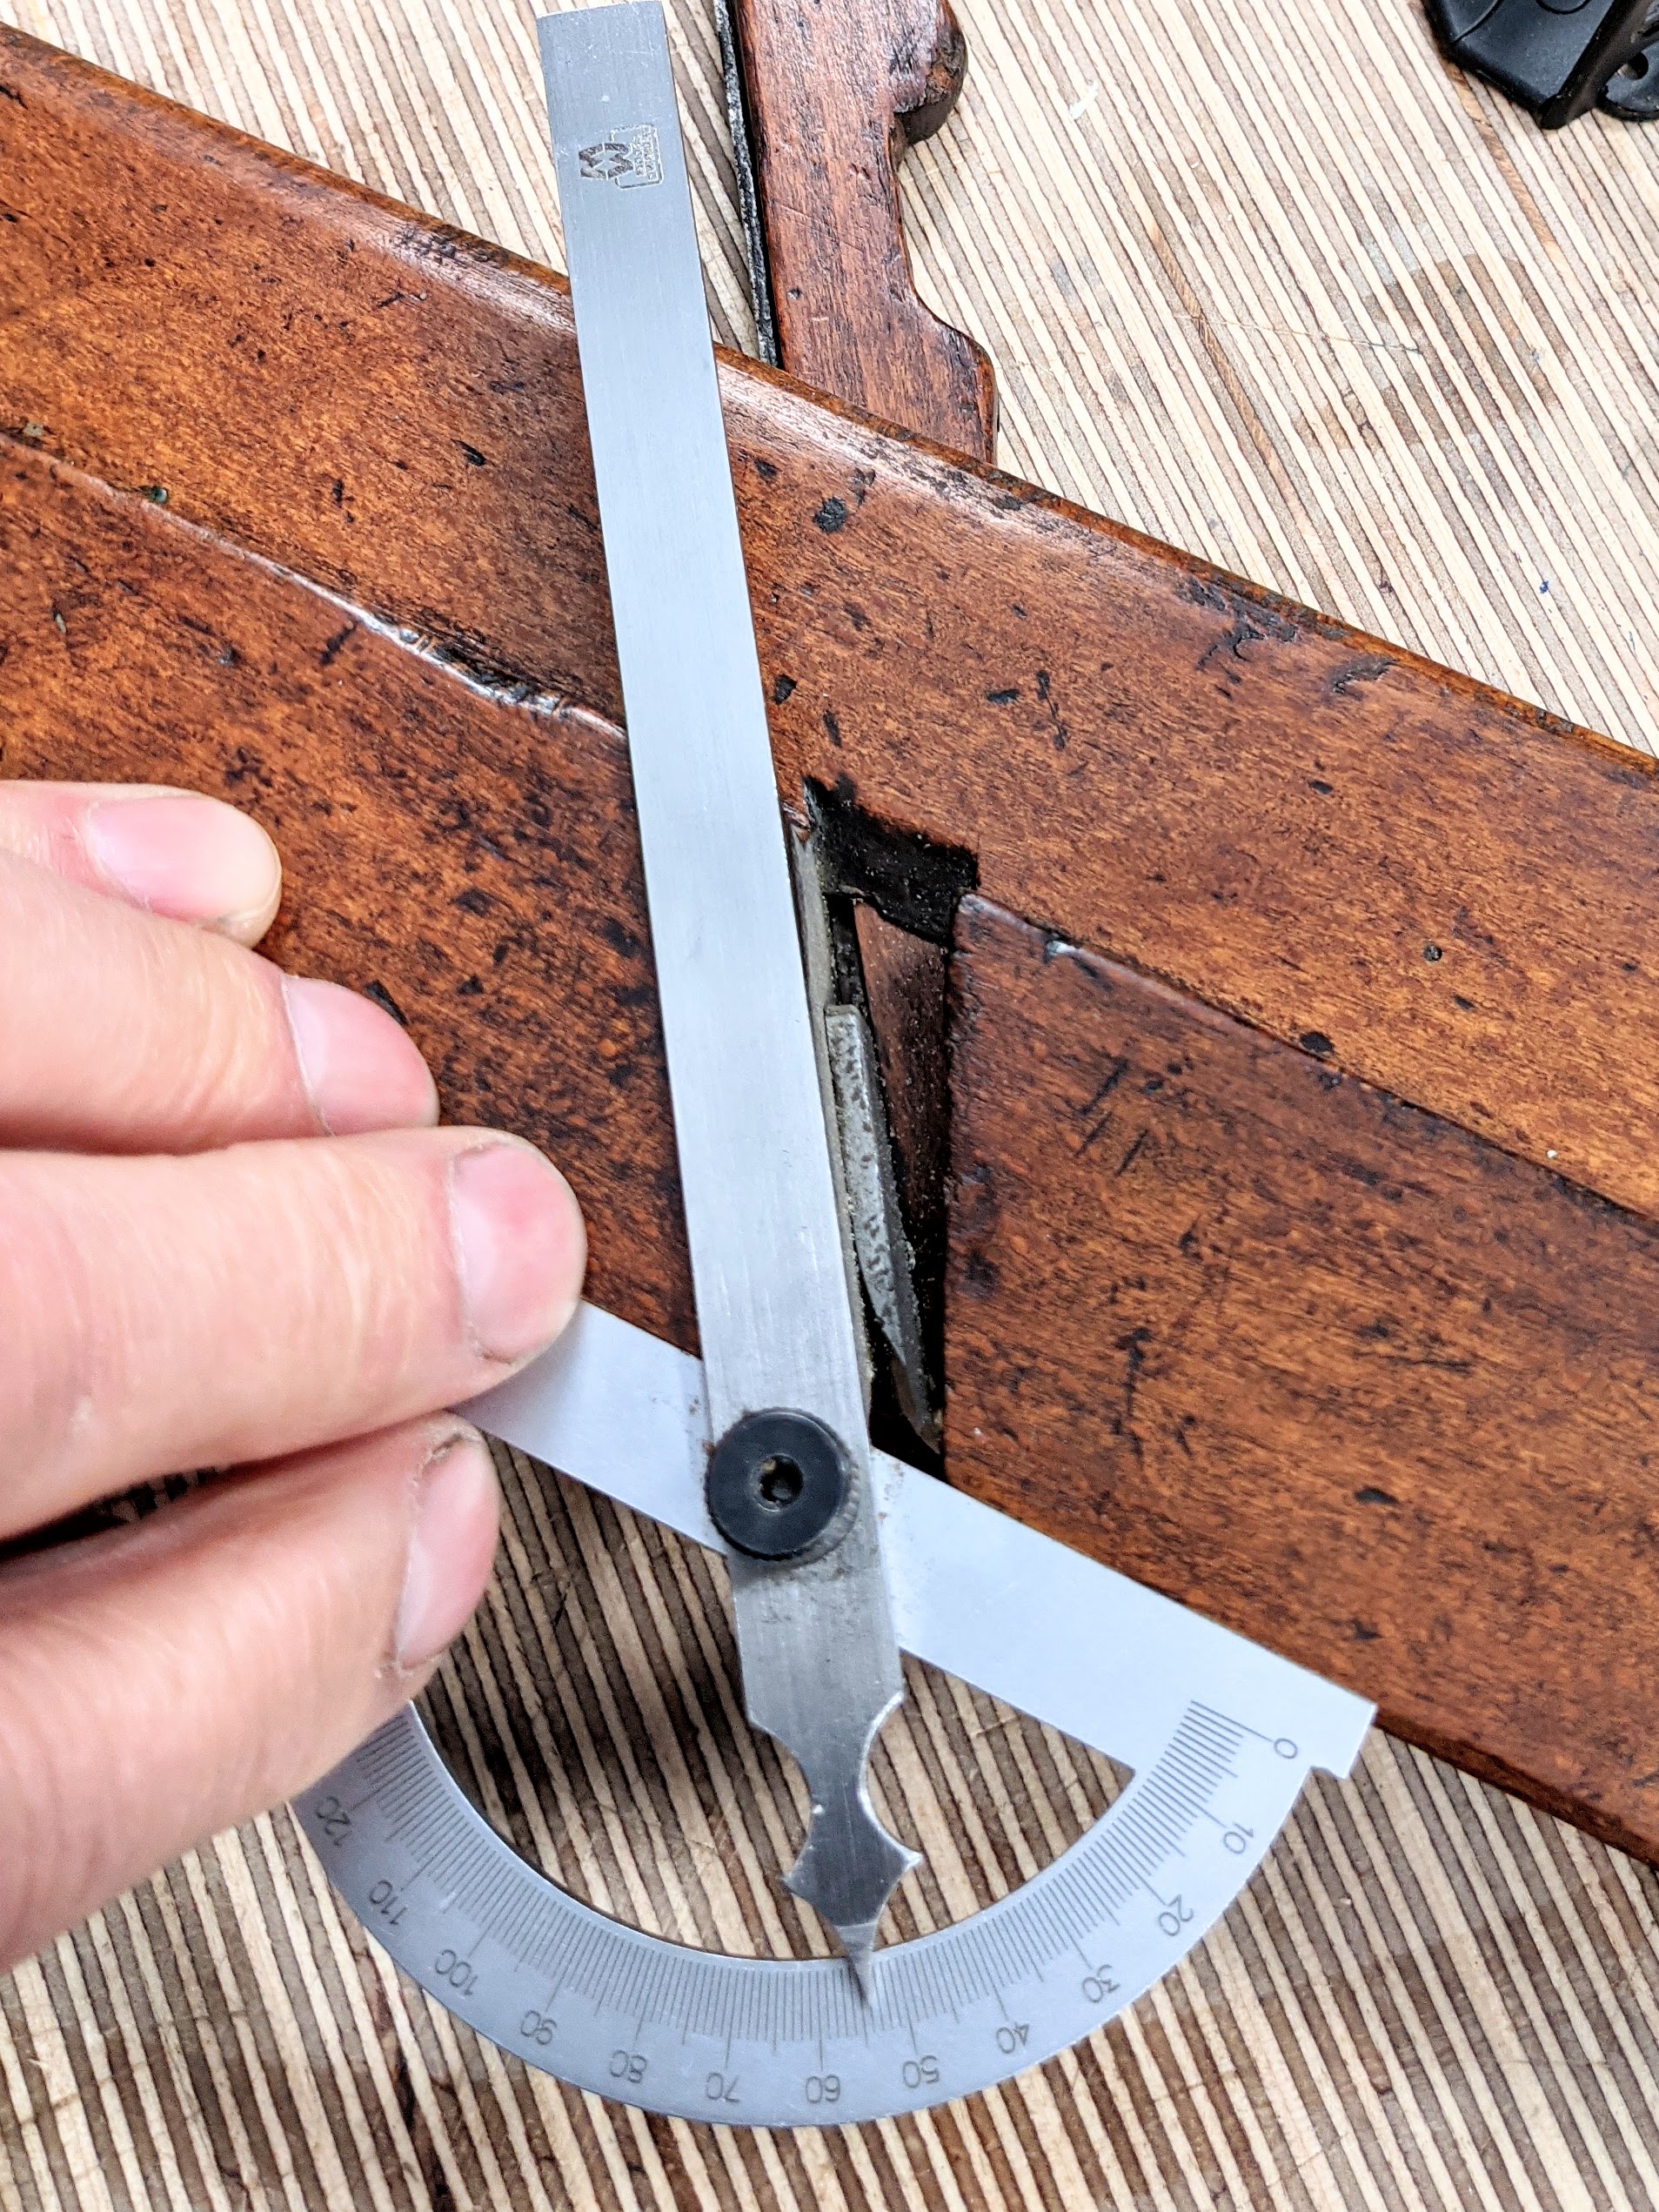
The bed angle is 47.5-degrees. We often fail to realise the importance of the bevel of the plane blade in determining the bed angle of presentation. The most practical bevel angle at the very cutting tip on plane blades is around 30-degrees, a shallower angle is weaker and the edge fractures more quickly on planes because, unlike chisels, for instance, the plane blade hits the wood like a side-swipe and not dead-on inline as in chopping and paring. A steeper bevel on the cutting iron would require a steeper rake to the bed of the plane, a shallower bevel, less than 25-30-degrees and the edge is really too weak for most woods and most work; especially is this so when we encounter any of the difficult grain associated with knots, etc. This edge fracture occurring when the bevel is too shallow to establish a sustainable bevel edge causes the grain to tear in a ripping manner.
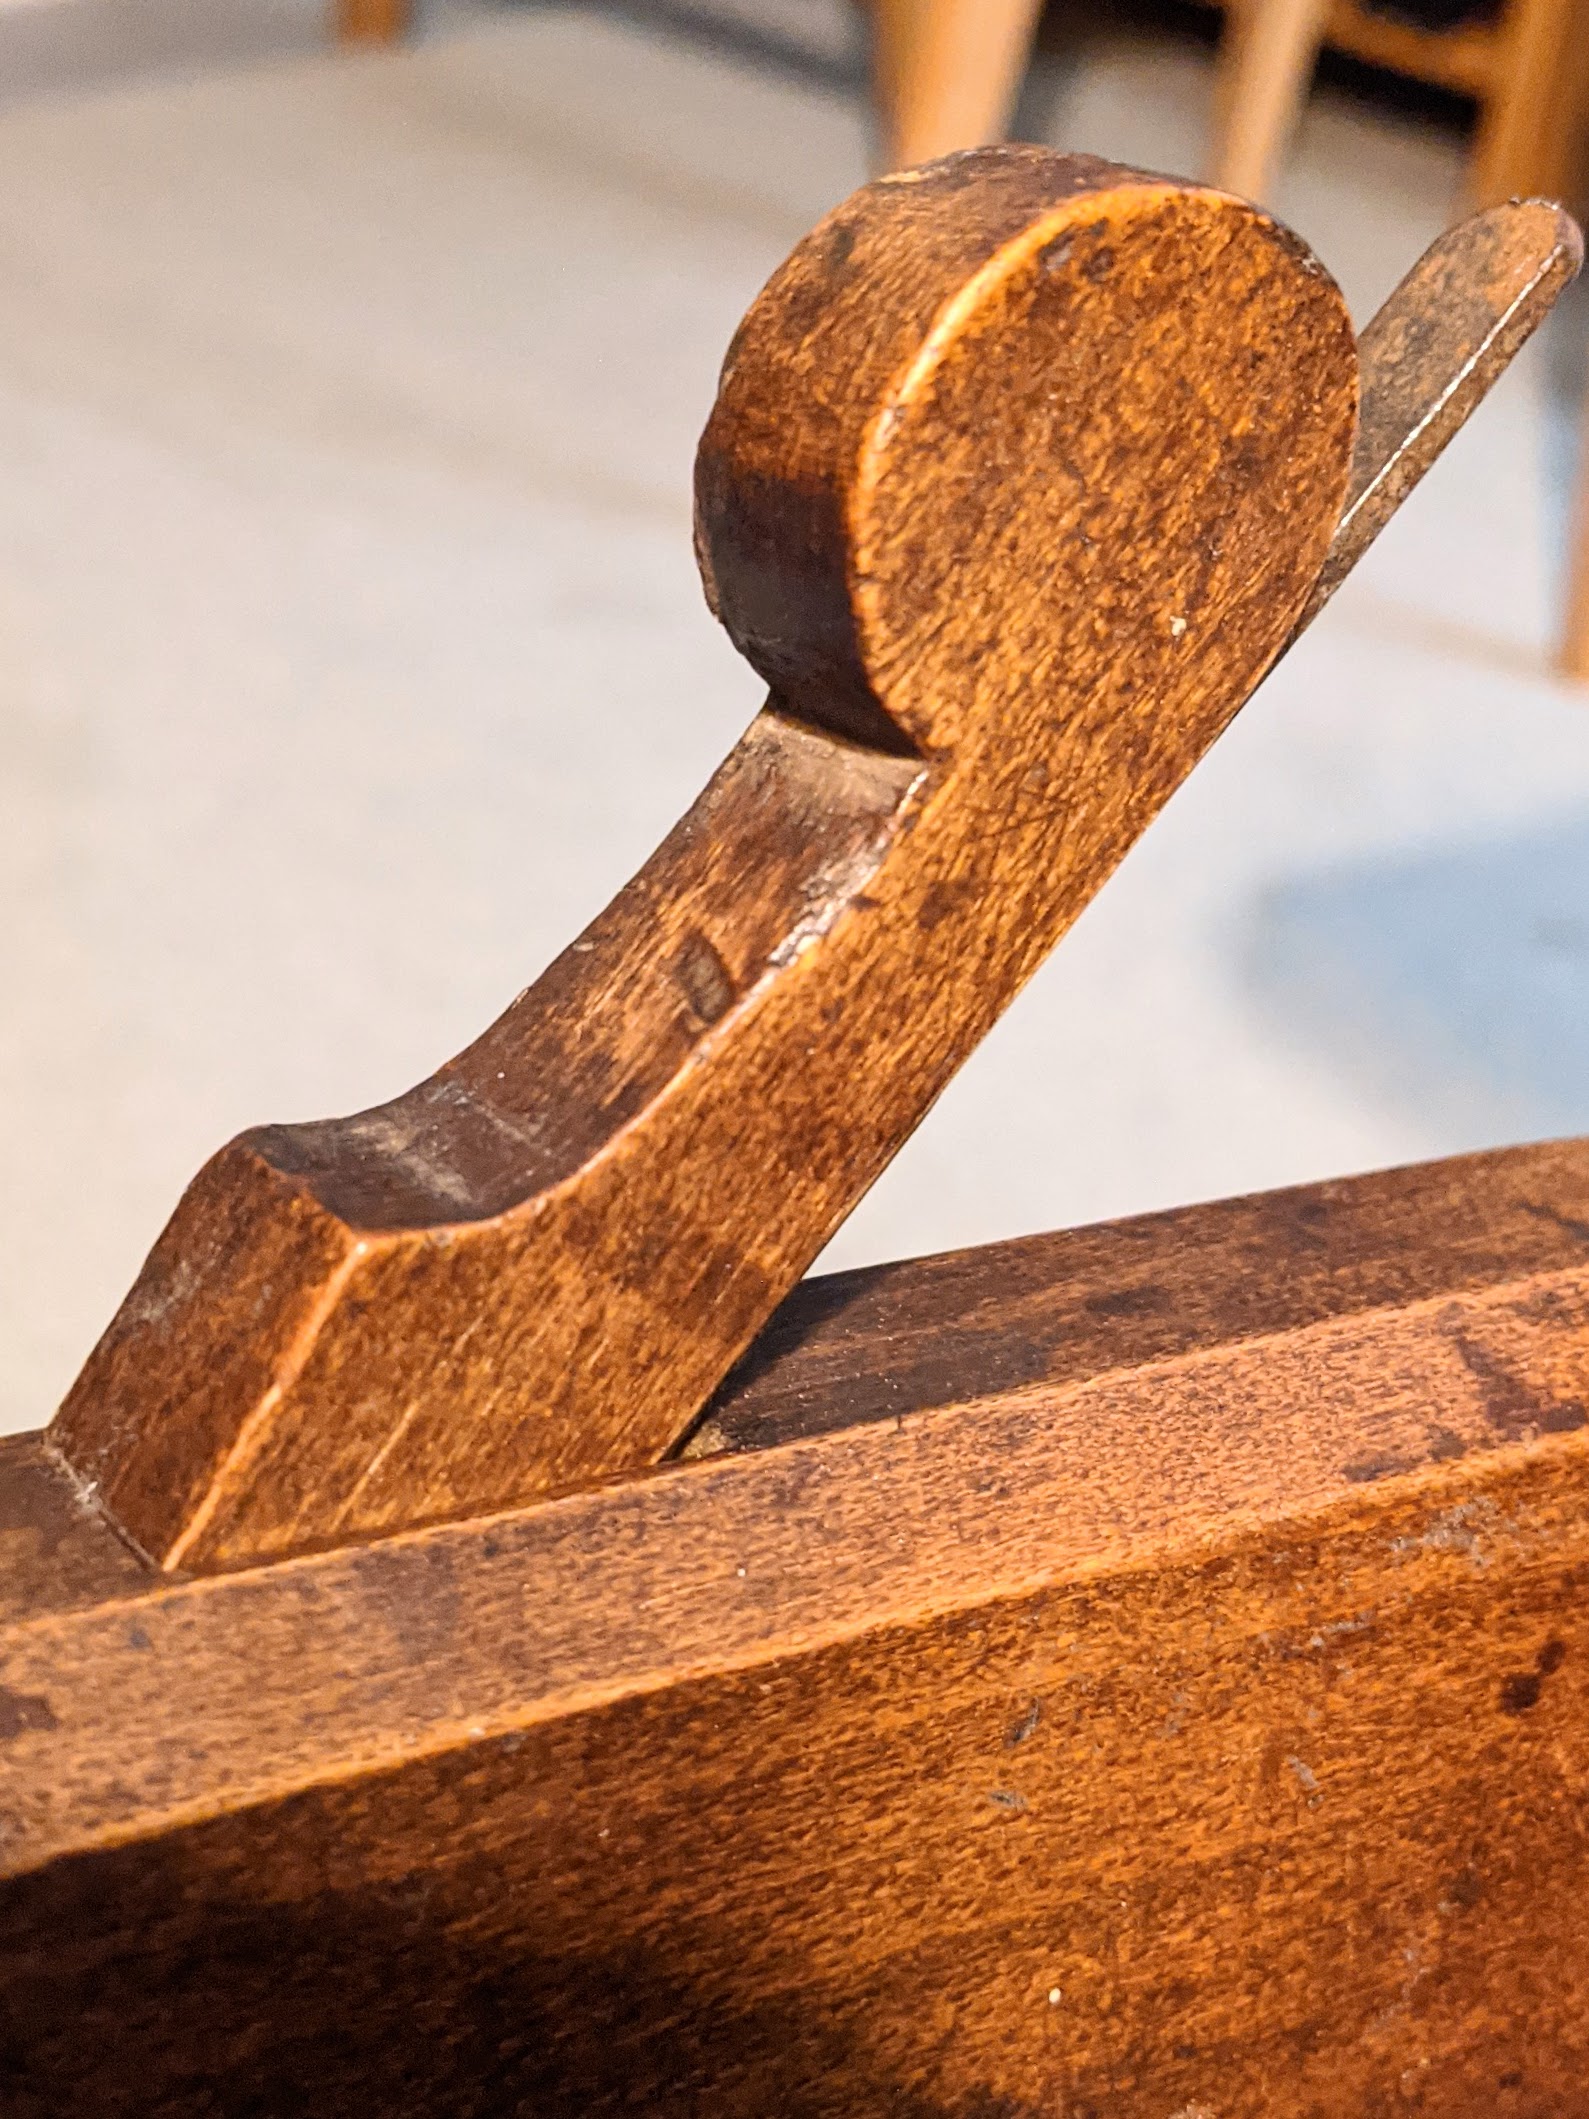
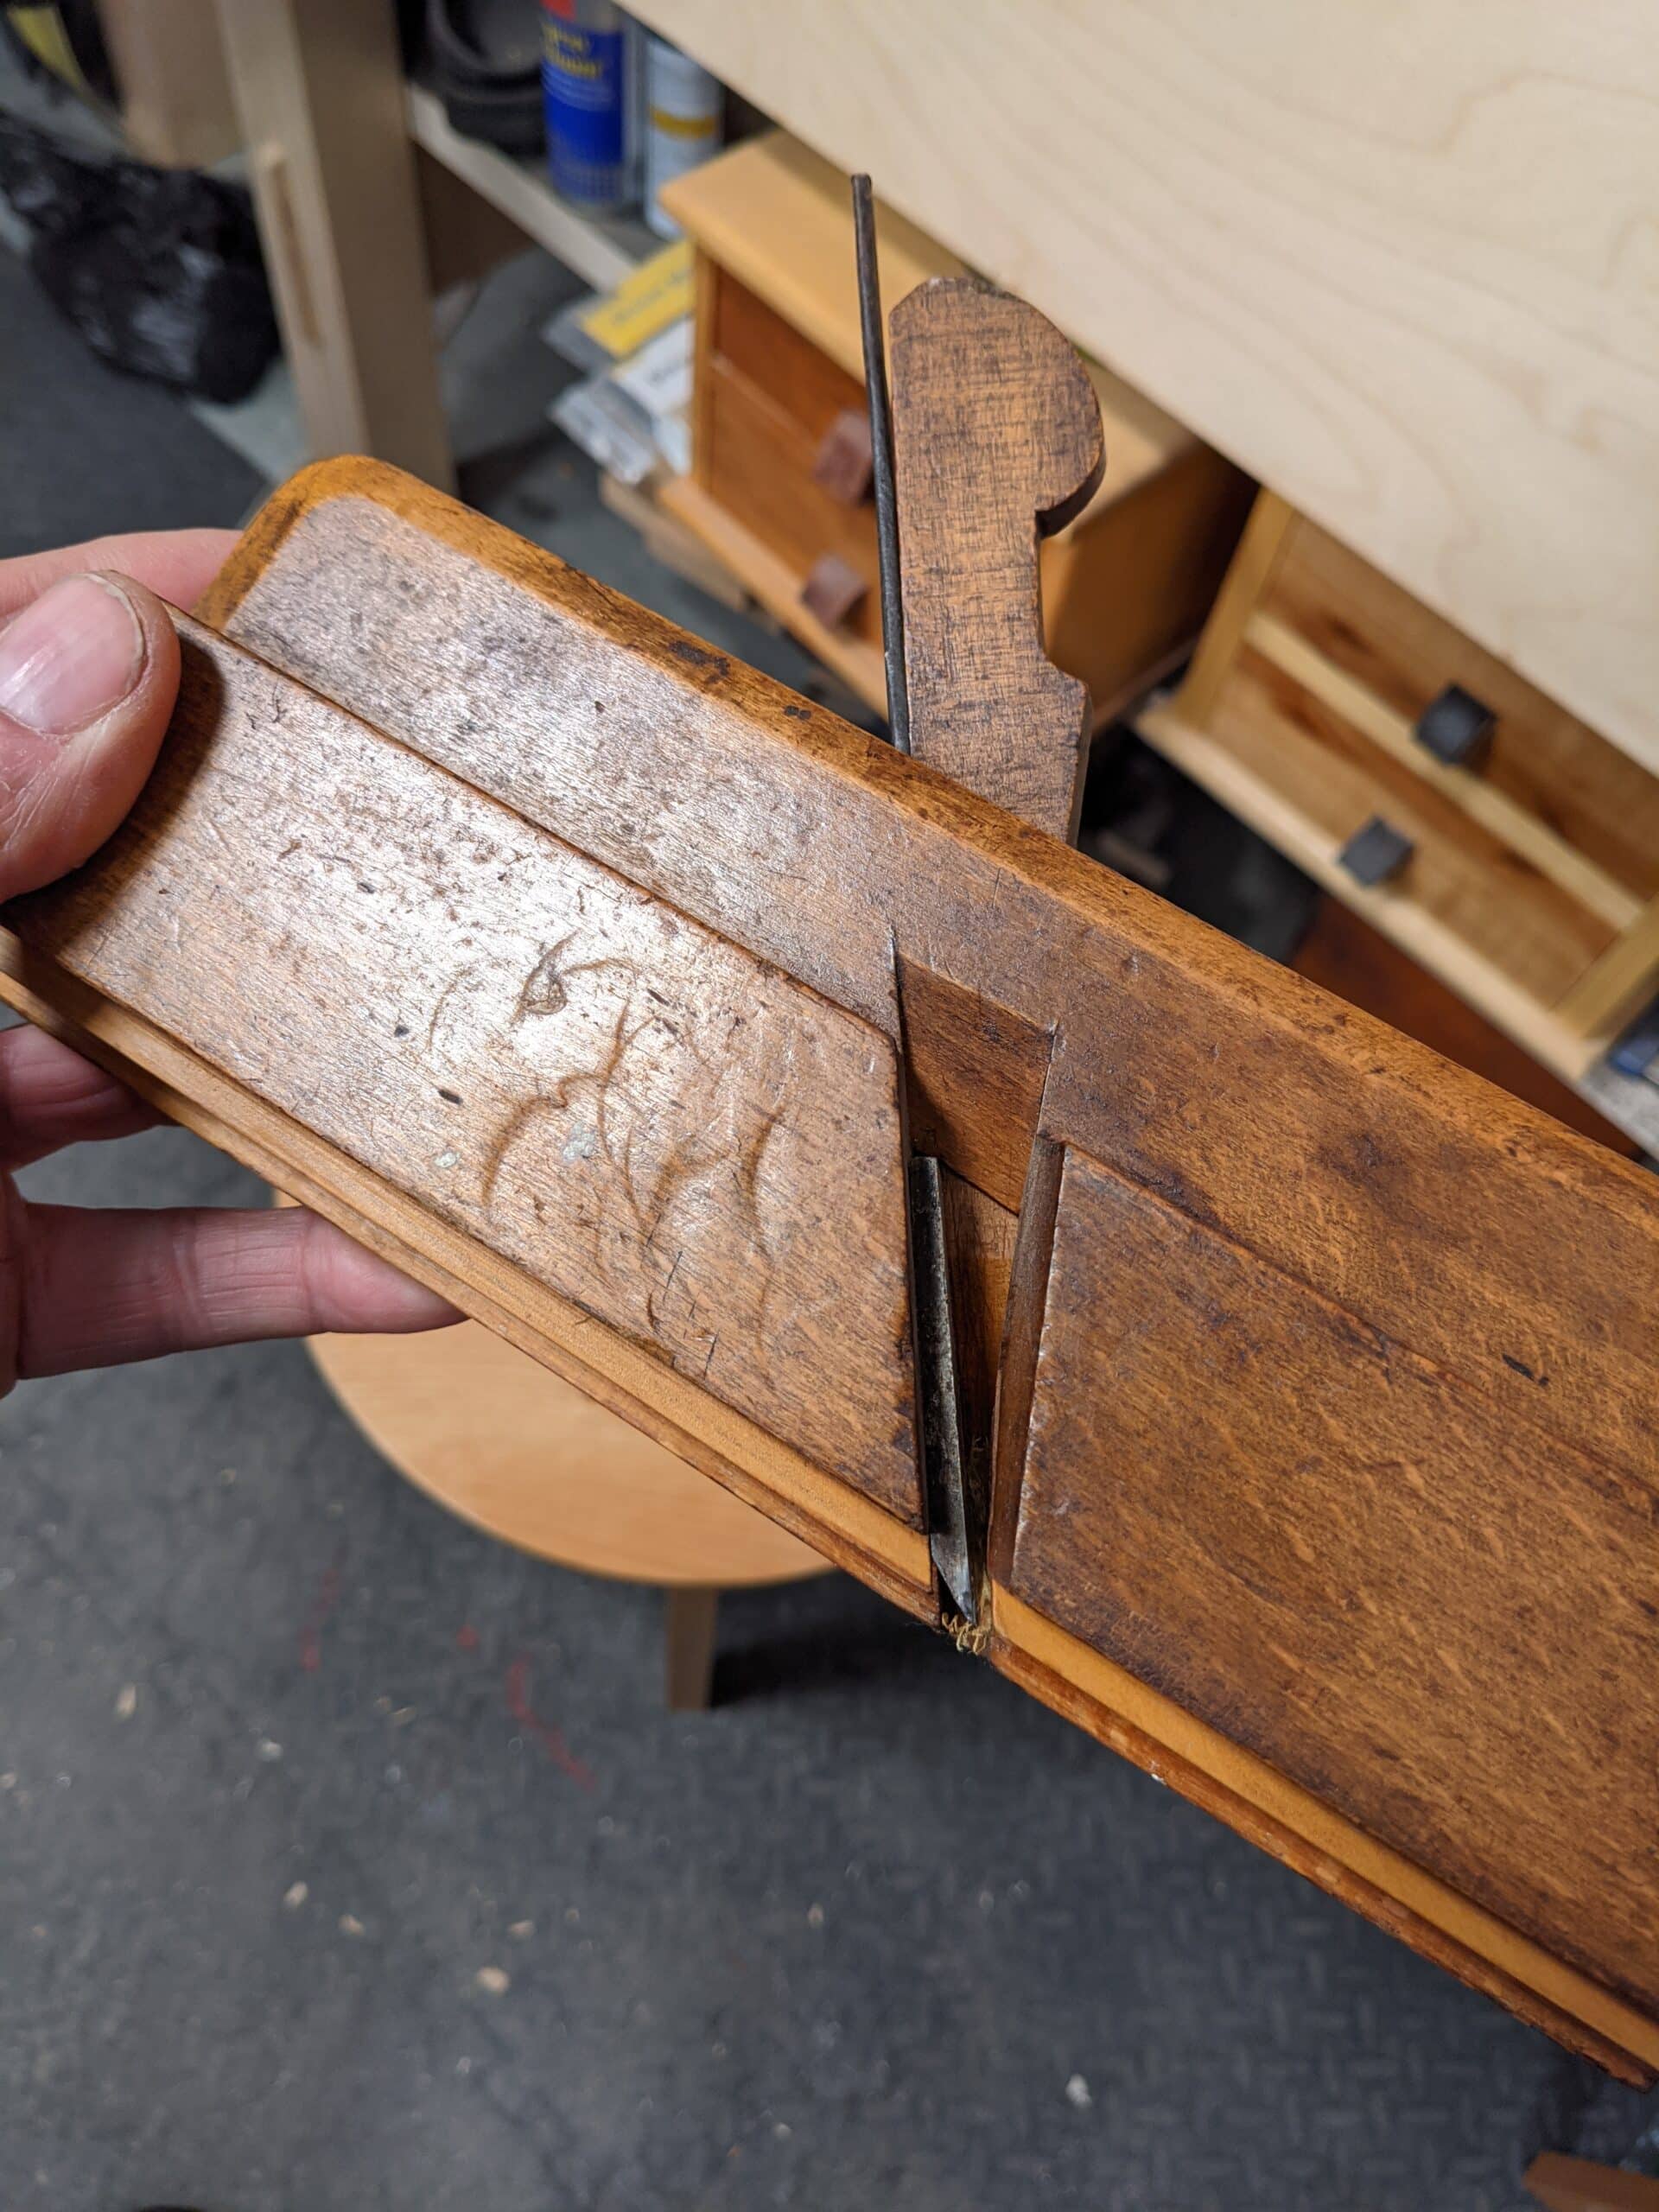
The wedge is in pristine condition considering its 250 year age. This might seem insignificant but it is not. When you buy vintage planes, look at the wedge and cutter in place. It is perfectly legitimate to sell a plane with the wedge and iron irreversibly ‘frozen‘ by long term rust in the channel as long as it is known when the transaction takes place. Working knowledge of planes comes by involvement and the longer the term of involvement the more experience to go off. I would not want a seller with zero knowledge to in ignorance try to shock a wedge and iron loose or indeed do much else to a moulding plane. This will most likely bend the stem of the cutting iron, snap it or damage the wedge next to it in the process.
Here is an example of a plane that I knew had a ‘rust-frozen‘ cutting iron locked in place when I bought it. I still bought it for its age and then one or two other good and justifiable reasons any collector-user might want to buy such a plane. In this case, the plane is made by a known maker called Mutter. I did try to shock out the cutting iron but it was immovable. It will remain in situ for now as I have no need to remove it. Chances are the blade will need replacing if I do choose to remove the wedge and restore it for use but I cannot think of a good reason to do this.
My Briscoe Moulding Plane

It’s hard to believe, but this plane accompanied me when I migrated to live in the USA in 1986. I wasn’t too much into the history of planes back then but I did know about the ones I owned at the time. Subsequent to my arrival there I travelled to woodworking shows to promote a better understanding of the use of hand tools. One thing for certain back then and possibly now is the reality that Americans love handwork and hand tools, craftwork and the traditions of such. I think at the time it was more than anywhere I knew of in Europe. At the shows I went to, it was nothing to have 100 and more woodworkers clustered around my workbench and my work after I demonstrated for an hour. It was the same for the best part of the next two and a half decades and showed no signs of stopping; this never happened anywhere else, perhaps complacency and the belief that Europeans had more to offer, which I never found to be the case. With this plane, I would mould two feet of ‘sticking‘ (the term used for making a mould) in 20 strokes at a rate of 20 seconds per length. The surface across the mould was pristine and it was this that they had never seen before and what made them so receptive to the use of hand tools. What really blew them away the most was when I said, “Let me tell you something that’s not so obvious. This moulding plane was made in the late 1700s. It is all original and functions just as well today as it did in its beginnings! Proven technology! I doubt that any other method will give me what this plane gives me in 20 seconds. My clean up is right here on the bench in a single clutch of shavings and I don’t need hearing protection, a dust mask or eyeglasses to save my eyes from flying missiles!”

This is one of my most used moulding planes. I have struck (made) or run (made) hundreds of linear feet of moulding in every wood type from mesquite to walnut to oak, long-leaf pine and many more since I first bought it in 1985. The length of the plane measures 9 1/2″. The width of the finished cut is about 3/4″ from point to point. John Briscoe was a British plane maker in Birmingham, England from 1785 to 1788. Whereas the throat opening gapes a massive 1/8″ from the point of the cutting edge to the fore sole rear edge, there is no compromise in cut quality and I am of the opinion that tighter throat openings are more restrictive than beneficial and for one good reason.

On moulding planes, at least, the opening cuts are almost non-existent but then they widen and thicken stroke on stroke very quickly and especially so on small moulds of say 1/2″. One writer, perhaps not so much a user but still knowledgeable, writes that closed throats were always essential for good mouldings, but this is not altogether factually true at all, as most moulding planes irreversibly wear along the length of the mould and the throat gets more open as the sole mould wears away. Users of the age would not throw out their worn planes and used techniques to skim off those awkward areas and always sharpened appropriately anyway. I think too that is worth noting that the much steeper pitch on many moulding planes were designed so because of the difference in grain structure and direction of grain along a length of wood. That ‘York‘ pitch exaggerated incline to a much steeper rake countered the inevitable contrary grains that we encounter minute on minute. This is never mentioned anywhere but the reality of the forethought of the ancients is still our leading light in the use of such tools and even though they never wrote down what they knew in 99.9% of cases, they did leave working examples for us to learn from. Now, I am talking moulding planes here. That being so, most moulding planes continue to be used with rarely an issue due to the gaping throat opening. The most critical element to good and clean mouldings is the sharpness of the cutting edge used and then the steeper pitch (York pitch) of between 50-57-degrees instead of lesser angles of 45-degrees and lower.
Needless to say, most plane cutters are and were well worn beyond their sell-by date. Of the hundreds I have examined I have yet to find one that was well sharpened and honed to an acceptable level. Having but a few hundred too, I have yet to receive any moulding plane with a sharp cutting iron and this is just about the case with every one of the hundreds of planes I have bought across the board through the years. I am not sure that this is a result of the demise of plane and tool use or just plain laziness on the part of the user/owner. Also, a good finish is affected by the speed of cut followed by the sole friction on the wood. Why the speed of cut? Well, it’s not so much the speed of cut but the quick and successive strokes that swipe so closely to each previous alignment. Remember that we don’t lift the plane off the wood at the end of the strokes but keep the plane as fully registered to the mould as possible so that the cuts are successively close to one another. This is both highly efficient and effective and whereas most of the depths of cuts will be full thickness, the closing stroke or two will be par-thick until the stop is reached and it’s this super-thin last stroke that strikes the perfect closing cut. It may or may not be obvious but moulding planes can generally plane in one direction only, so any rising grain will usually result in tearing at some point. If this is noticed or encountered early on and ahead of time, the best thing to do is to retract the blade and ‘sharpen-up‘ and, in the strokes you take, allow the cutting edge time to actually cut instead of just swiping away at it. Also, it is a good practice to ‘feather‘ into the cut. By this I mean you can lift the heel of the plane off the wood fractionally as you are about to encounter the rough grain and take an unmeasured half- or quarter-depth cut. It takes skill and practice to get this right but it is the best strategy I know of when an opposite plane is not available. What is an opposite plane? Some planes were made and sold in pairs as exact opposites and such planes can be used in the opposite direction on the same mould or on an opposite side in another situation if paired and profiled well.
Look for hammer marks on the toe and heel, yes, but also look for them on the side of the plane too. This occurs on older planes where the channel inside has been worn on the side through use. This allows the cutting iron to move offline and needs the tap method to align it with the general course of the sole’s profile.
Hi Paul. Perhaps if you have the time you could do a video showing us how to make “simple” moulding planes, such as paired hollows and rounds, or even a set to do tongue and grooves.
In theory, having seen your videos on making planes, the poor man’s rebate and the router, we have enough information to make our own, but it always nice to watch an expert craft one.
Keep up the good work!
People do assume that hollows and rounds were made as pairs and sold as such. Not the case at all as they rarely worked in opposition to one another nor were they ever paired as such. I doubt that I will find the time to video this aspect of woodworking as my schedule is already pretty full for the coming years.
I agree that having a match set is unimportant. The only time I needed a matched set was when I made a drop leaf table and other then that…………? I have made a 1/2 set of hollows and rounds and it is very convenient to use the round to make the hollow, so I did make matched sets, but only because it was easy.
hello Paul,
I always thought that they were used for windows….the windows of my house have this round and hollow matching to close up.
Will you teach us one day how to make windows and house doors?
I always thought them very technical and never found information on how they were made by hand.
Thank you for all your work.
Several moulding planes were used on sliding sash windows for the sashes and then the boxed sides that housed the weights channels, pulleys and dividers. From side beads to ogees, ploughed grooves and so on. The one thing about sliding sash or box windows is how very cleverly simple they are to make. Possibly the least complex of all joinery tasks yet the most apparently intimidating. The best way to learn about their construction is to take one apart or repair one.
Hi Paul,
I have just started into the world of molding planes and have an American sash plane that cut both the glazing rebate and the molding at the same time. I have seen some say the rebate and the molding depth “MUST” be the same depth. The plane has has a much shallower glazing blade depth but has four nail holes where someone may have added a piece to the sole. Your thoughts? I am making a replacement window for a neighbor using only hand tools.
Hi Paul,
Can you show us how to sharpen molding plane blades?
Love these posts!
Paul in 2015 put out a video on sharpening moulding plane blades.
Search for:
How to Sharpen a Moulding Plane | Paul Sellers
It’s on youtube.
Waited a long time to read about lovely moulders…..from you Paul …thanks.
Thanks Paul
Paul, I was looking for a video on wooden planes just yesterday. I’ve been reading an old book that alludes to the ability to re-mouth a plane (in this case a jack plane) that has been flattened several times and the mouth therefore wide in order to make it function as new. Have you made any such video? How would you go about doing this?
Adding a full sole by lamination works perfectly well and in my view is better than inserting a section of wood as is often extolled as the way to go. Indeed, it’s so simple to true up the sole dead flat, glue on a thicker section to near the original depth of the plane and then bandsaw or plane off the excess ready for planing dead flat again. Leave the width and length overhanging until the mouth is aligned with the cutting iron so both are in synchrony and once the glue has cured, trim to final size against the original.
To follow up on Paul’s response: I have laminated full soles to a couple of wooden planes over the last year and I can corroborate what Paul said: It is easy to do and works really well.
A couple of tips:
1) Most wooden planes will have some light rounding and/or dinging of the edges of the sole. You can either plane down to pass them or do what I did – I used epoxy for the glue-up, as it was able to easily fill in those areas.
2) You can consider using a harder-wearing wood for the sole than the original wood, as long as you bear in mind that it may move differently from the wood of the body of the plane. This is not an issue if you work in a stable climate.
Bonus tip:
Laminate a piece of wood that is thicker than you need. It can be planed down slowly to get the appropriate mouth opening.
Hi Paul,
Great as usual.
I have used, and still use after an enforced break in my career, wooden moulding planes and find them fantastic to use. I gave up on wooden plough planes though, and now use my original metal Record, Stanley and Wooden planes. I find the metal planes ‘easier’ to hold and therefore work the wood.
Keep up the great work – John, from the centre of the world, being Birmingham.
Good evening Paul,
I’ve been following you for a couple of years now. It’s great to see your enthusiasm and techniques on each piece of work you do.
I have a slightly different question for you however.
I am currently a self employed Joiner and have been in the construction industry for 20 years now.
This past 4 years I have been a Part time Lecturer for Joinery/Carpentry in a local College in Northern Ireland. I teach a wide age group from 14 year olds to a level 3 NVQ.
I would like some advice. I am considering talking up a full time post within the College.
My question to you is, can you share any tips on how to keep the students intrigued and keep up a good learning ethic?
I know that a great deal is to do with how interested the student is.
The College have different systems in place but not all works. I was taught by an ‘old school’ fellow and had great admiration for hand tools, which rubbed off on me.
I try to incorporate this into my classes and keep the old tools alive as such to speak.
Don’t get me wrong, I don’t bore the students I just would like to tap into your knowledge.
Any information that you can share would be valuable and appreciated from my behalf…
Thanks,
The most important element of any teaching is having a burden for those you will teach. This has carried me from day one through to now. My greatest challenges are not always in the face of the giants of the industry but those who teach in education. One lecturer from a furniture making college in the middle of Oxford city and who now teaches private classes told me in front of his 15 students that “you cannot make a living as a furniture maker” and these students were paying many thousands of pounds to be in his class. I was so disappointed because I had proved it could be done by doing it for many many decades. We often become mesmerised after we have seen someone set up equipment to cut a recess for a hinge and then cut the recess with a power router in five seconds. This is bemusing to someone like me. So many teachers in industry teach from the motive of making steady and secure income alone which I understand.
Hi Paul.
Any news of the router plane blade supplier. I have everything else but don’t want to cut the housing for the blade until I have it.
Can’t wait to get started
Thanks Paul for the inspiration on this one.
Kind Regards John
Kia ora (from Aotearoa/New Zealand) Allsop John,
In these parts over here (away from pretty much anything) I’ve found it as a common supply for the industrial (CNC, metallurgy) industry.
It’s called ‘key steel’, and it was readily available in several different dimensions, usually square, and on 30cm lengths.
It came with a “highly precision-polish”, which I found is just enough to start sharpening/polishing (after hardened as Paul shown 😉)
Paid NZD $33 delivered (can make at least two blades), that is €20 or £17.
Good luck,
Paulo
Over the past three years, I have been slowly building collection of moulding planes, in hopes of having everything that I need to replace the old damaged moulding in my house. I was very happy to take advantage of the lower prices that we’re available. In the past few weeks, the eBay prices have moved up to the point that they are not as affordable for me to purchase. What was once $1 – $3 each are now $14 – $20 apiece on average. I’ll keep looking for deals, but I think that the bargains are a thing of the past, just like the Stanley/Bailey 4’s and 5’s. I blame no one but myself. I should have bought what I needed when the prices were low.