Obsessing Flatness Can be Unreal
Over the past decade, I have seen woodworkers obsess more and more about flatness in planes, plane irons, chisels, spokeshave cutting irons and others. The obsessioning began in the 1990s, got worse in the 2000s, and left a residue of legalism that makes woodworking more unreal than real. I understand that some men in woodworking are as keen on getting a perfect edge and a single shaving as a result of compulsivity. They are not interested in using the plane as I might when fitting and trimming, surfacing for a level plain, or removing twist, cup and bow in readiness for starting the joinery in a project. I truly understand this and then too the hope of getting a continuous shaving in maple ten feet long, full width at two inches, and the thickness of the proverbial onion skin consistency of a thou’ thick. Countering the tendencies of gurus saying this is essentially what masters strive for and creating an unrealistic trend and so endeavor to normalise what I see is pure misguidance and very impractical. Before you know it, if someone doesn’t say something, you will be spending more time flattening your chisel backs and plane irons than actually working the wood when at the bench, in the zone such obsessioning is in general quite unnecessary. The exaggerations of this kind soon become online trending and indeed, worse still, a belief can enter that becomes essentiality when such is far from necessary at all.
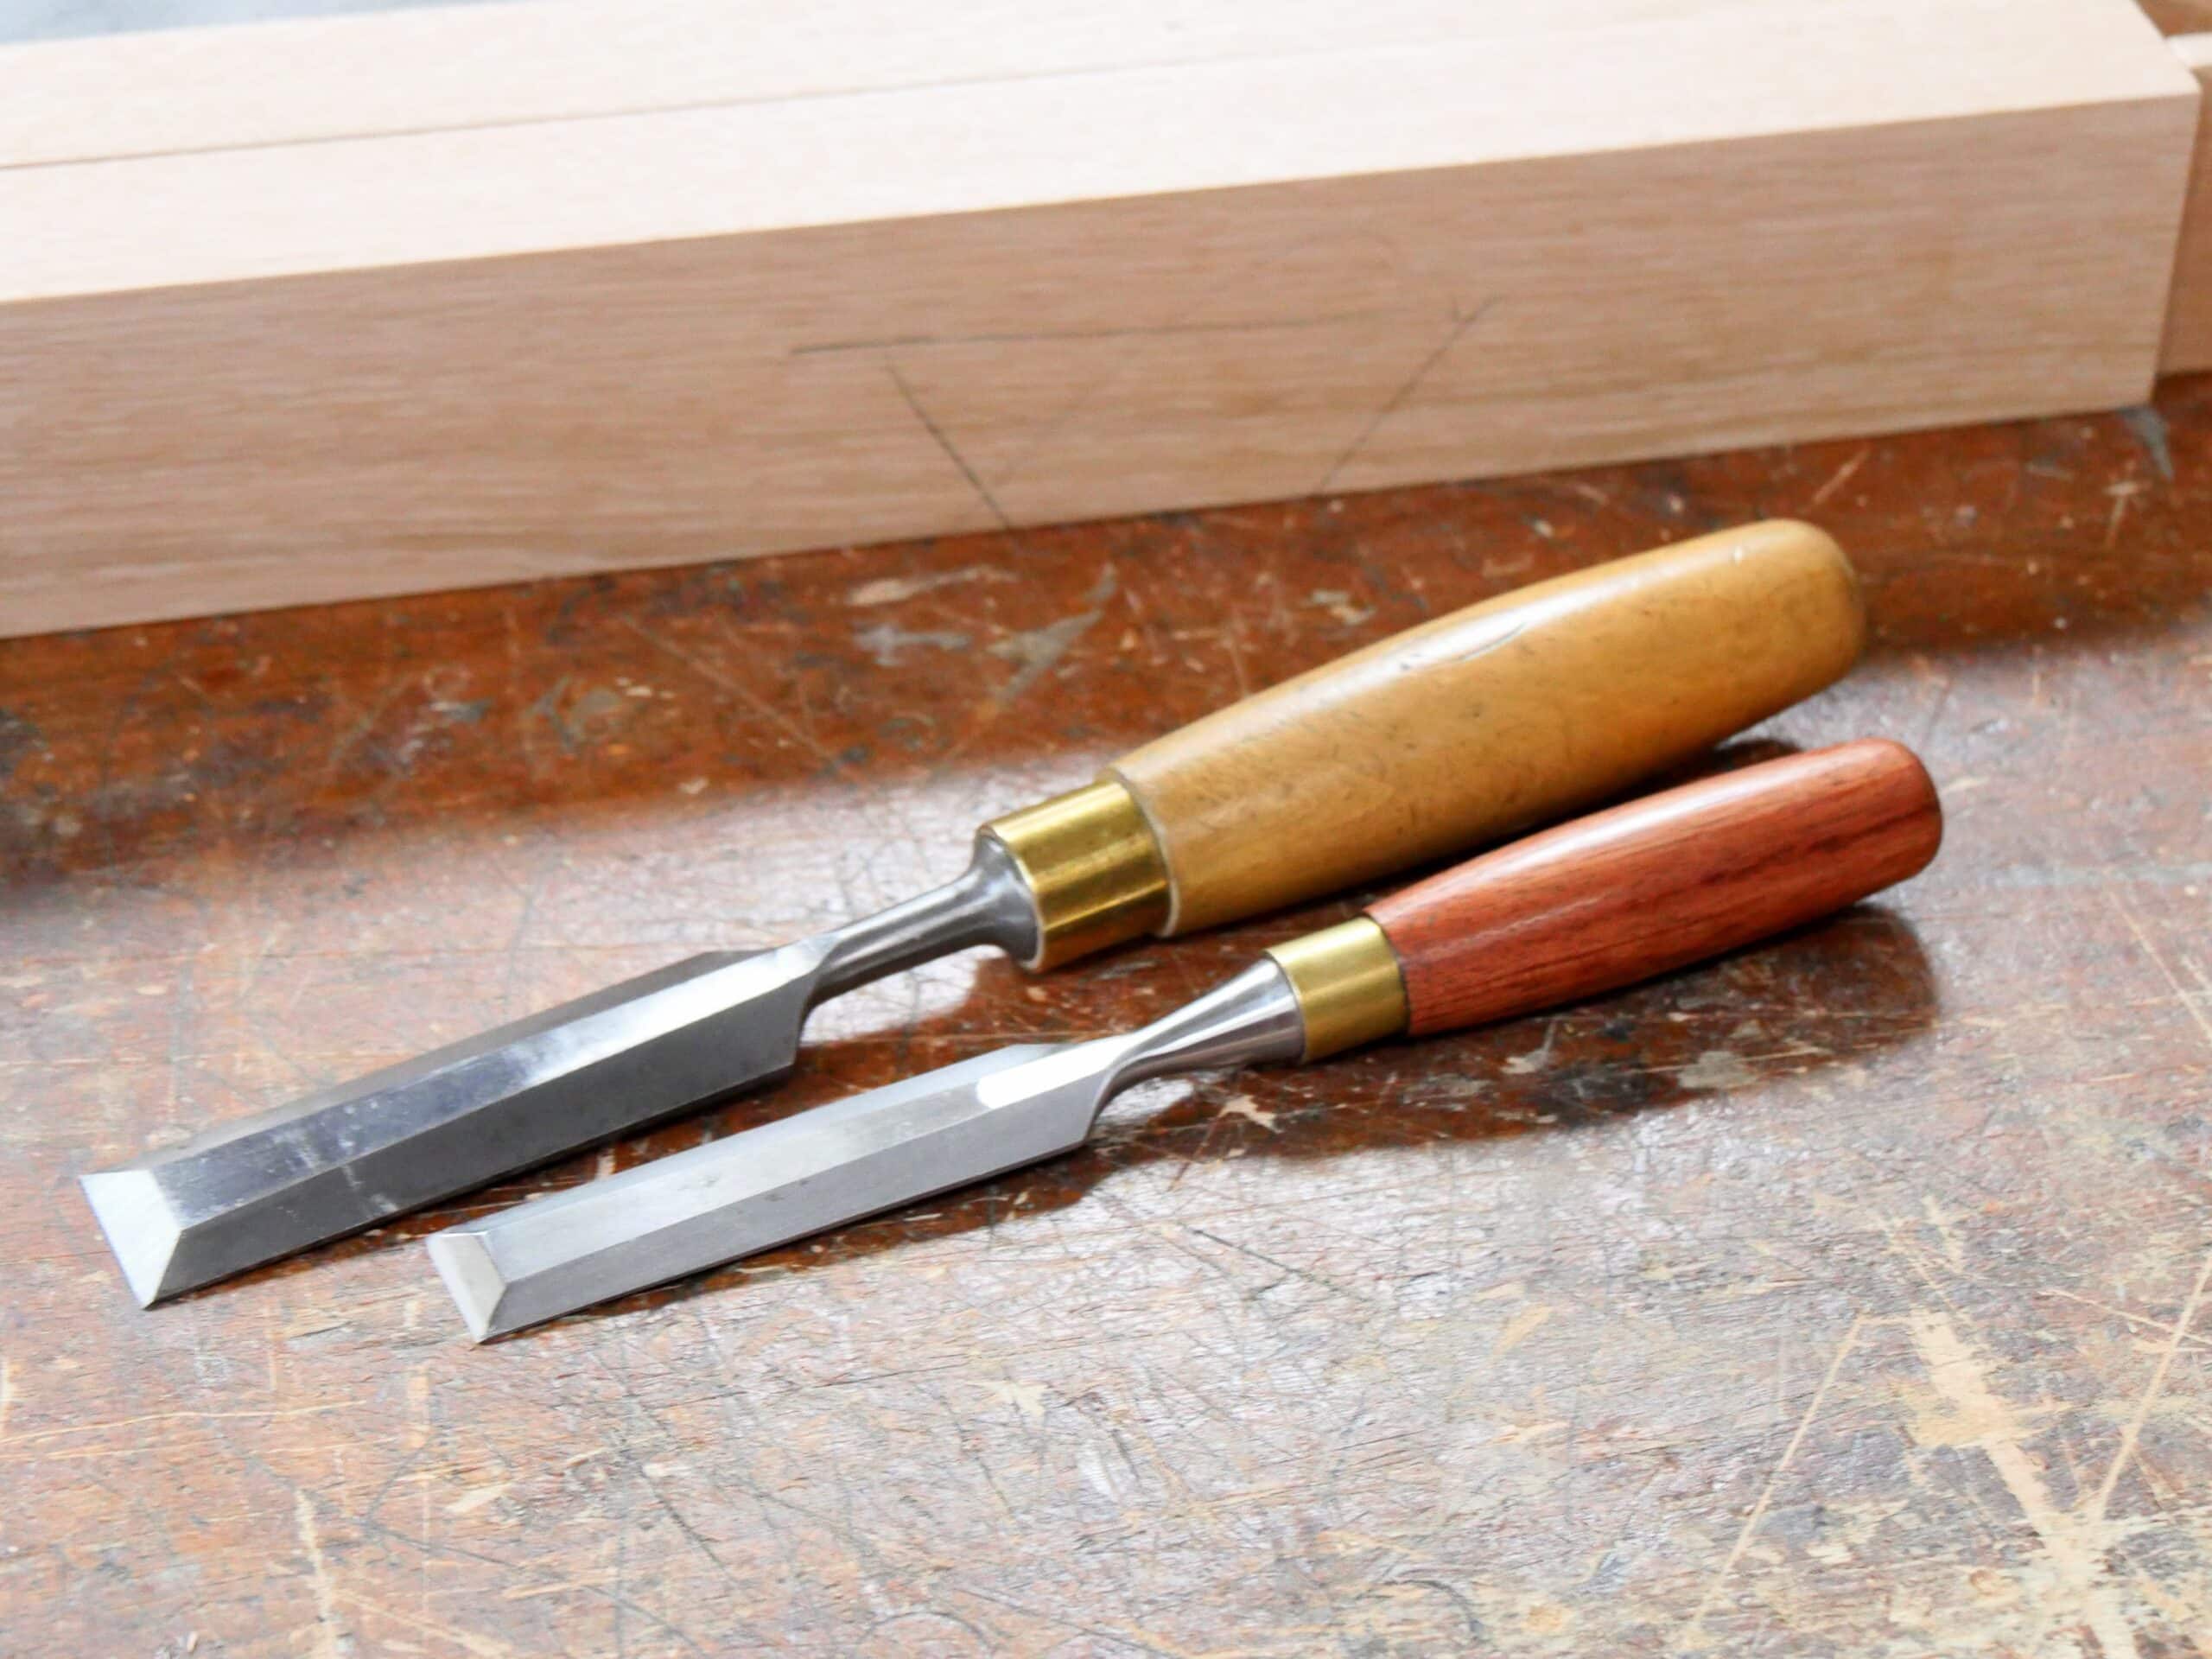
Chisels, plane irons, spokeshave irons are the primary edge tools in working with wood for furniture making. I’ll leave out draw knives and axes here — we don’t really use them much beyond some minor elements of green woodworking such as chair making and such nor in joinered, at-the-bench woodworking. Whereas it can be said that it takes only a one-shot deal to flatten a chisel as an initialising process when the chisel arrives, it is also true that arriving at that flatness level is generally only really necessary for paring chisels such as we use on the more refined bevel-edged chisels used in refining and making different joints such as dadoes, housings, wide tenons and sliding dovetails across wider boards. That being the case, and I believe in general that it is, it’s probably a good idea to keep one or two bevel-edged chisels for this dead-flat application and not worry too much about your everyday chisels. I generally use the basic bevel-edged chisels I have relied on throughout my life as a full-time woodworker and furniture maker. In the last decade, I use mainly the ones I bought from Aldi in 2010 for £2.50 each. I am sorry they stopped selling them because they are still the chisels I reach for over every so-called premium maker version that I own and for good reason. Someone recently asked me if I would be more realistic using these better quality chisels alongside my utilitarian versions from Aldi and MHG. The truth is, I use the term utilitarian very loosely; these chisels have proven to be very comfortable, well balanced and refined enough for every ounce of my finest woodworking.
So where are we on flatness? Flat faces on the backs of edge tools and blades create the essential cutting edges we need for clear execution of our work planing, pare cutting, chiseling and chopping, etc. The flat-face initialising is generally a one-off process. We take the chisel and plane iron and spend a little time truing what may well not be flat from the manufacturer or have become slightly rounded by our inexperience or the work of previous owners before we took possession. This flattening of the wide face, once done, needs either zero or very minimal revisiting through the lifetime of the tool once done. Think about it with me. If you spent a few minutes flattening that wide, flat face, all subsequent sharpening is worked on the bevel alone. It makes sense, it’s much easier to abrade a narrow face of no more than 10mm than the whole of a flat face 50mm wide by 50mm long. So here we see that when sharpening in the day to day we are taking the bulk of steel down from the bevel alone. It’s just practical to reduce the smaller face only and it’s of course not necessary to do much at all beyond breaking the burr that forms on the wide face side.

When we use the chisel and the cutting irons in planes and spokeshave the elevation of the blades means that the very fine cutting edge cuts into the wood with uneven or unequal pressure. The blade enters the wood at the start point and is pushed forward into the wood. At the rake, the fore-edge of the blade has top pressure only whereas the underside of the cutting edge is completely unsupported. This means that the steel fractures in the opposite direction to the force being applied and the ultra-fine cutting-edge edge fractures. All the more does this happen when we hit tough areas surrounding knotty areas which is always denser than the rest of the surrounding wood. Hitting knots, especially the superhard spruce and pine knots we encounter in softwoods, fractures the edge all the more. Some woods, hardwoods especially, have silica in the fibrous strands of the wood and so dull the edges much more quickly. I know of two woods from experience that do this; mesquite and teak, but there are others. Where does the greatest fracture resulting in a rounded over edge take place? Towards the bevel side of the edge. This then makes sense that we repair the damaged edge on the bevel alone. Of course, I am generally talking about the plane and spokeshaving, one and the same if we are using #151 type spokeshave where the blade is inclined. In wooden spokeshaves it’s different. The blade is virtually the sole of the ‘plane‘; with a slight one or two-degree elevation on the underside to allow relief for the cutting dynamic; the pressure, though still on the top bevel, has a much lesser impact. This is why these spokeshave types stay sharper longer. In chopping with chisels the pressure is equaled to both sides of the cutting edge and so too with paring because the paring stroke results in applied pressure to both sides fairly evenly hence in use the pressures tend to result in better edge retention and less fracturing for a long period. I have cut as many as fifty good sizes mortise holes in oak with a half-inch bevel-edged Aldi and Lidl chisel before any need for very minor resharpening.
Chisels in use are rarely held at a rigid angle as in the case with planes and spokeshaves, which have the blade held firmly and inflexibly to the bed angle casting. We don’t think much about it if at all, but when we chop with a mortising action, say against the ends of the mortise hole, we rarely actually keep the flat face verticle but actually alter the angle as the chisel deepens down to an imagined verticality rather than one we can see or indeed a fixed one. If you take a minute or two to gauge the angle when using a freshly sharpened chisel and then test again an hour or two later, you might be surprised that it will not be as verticle but you will automatically be compensating for the dulled edge. What you are effectively doing is evening out the pressure from both sides of the actual cutting edge. Until you abrade down the bevel of the cutting edge again, and you will continue to do this. `When you sharpen the bevel again and apply it to the wood for chopping, you will be nearer to verticality again.
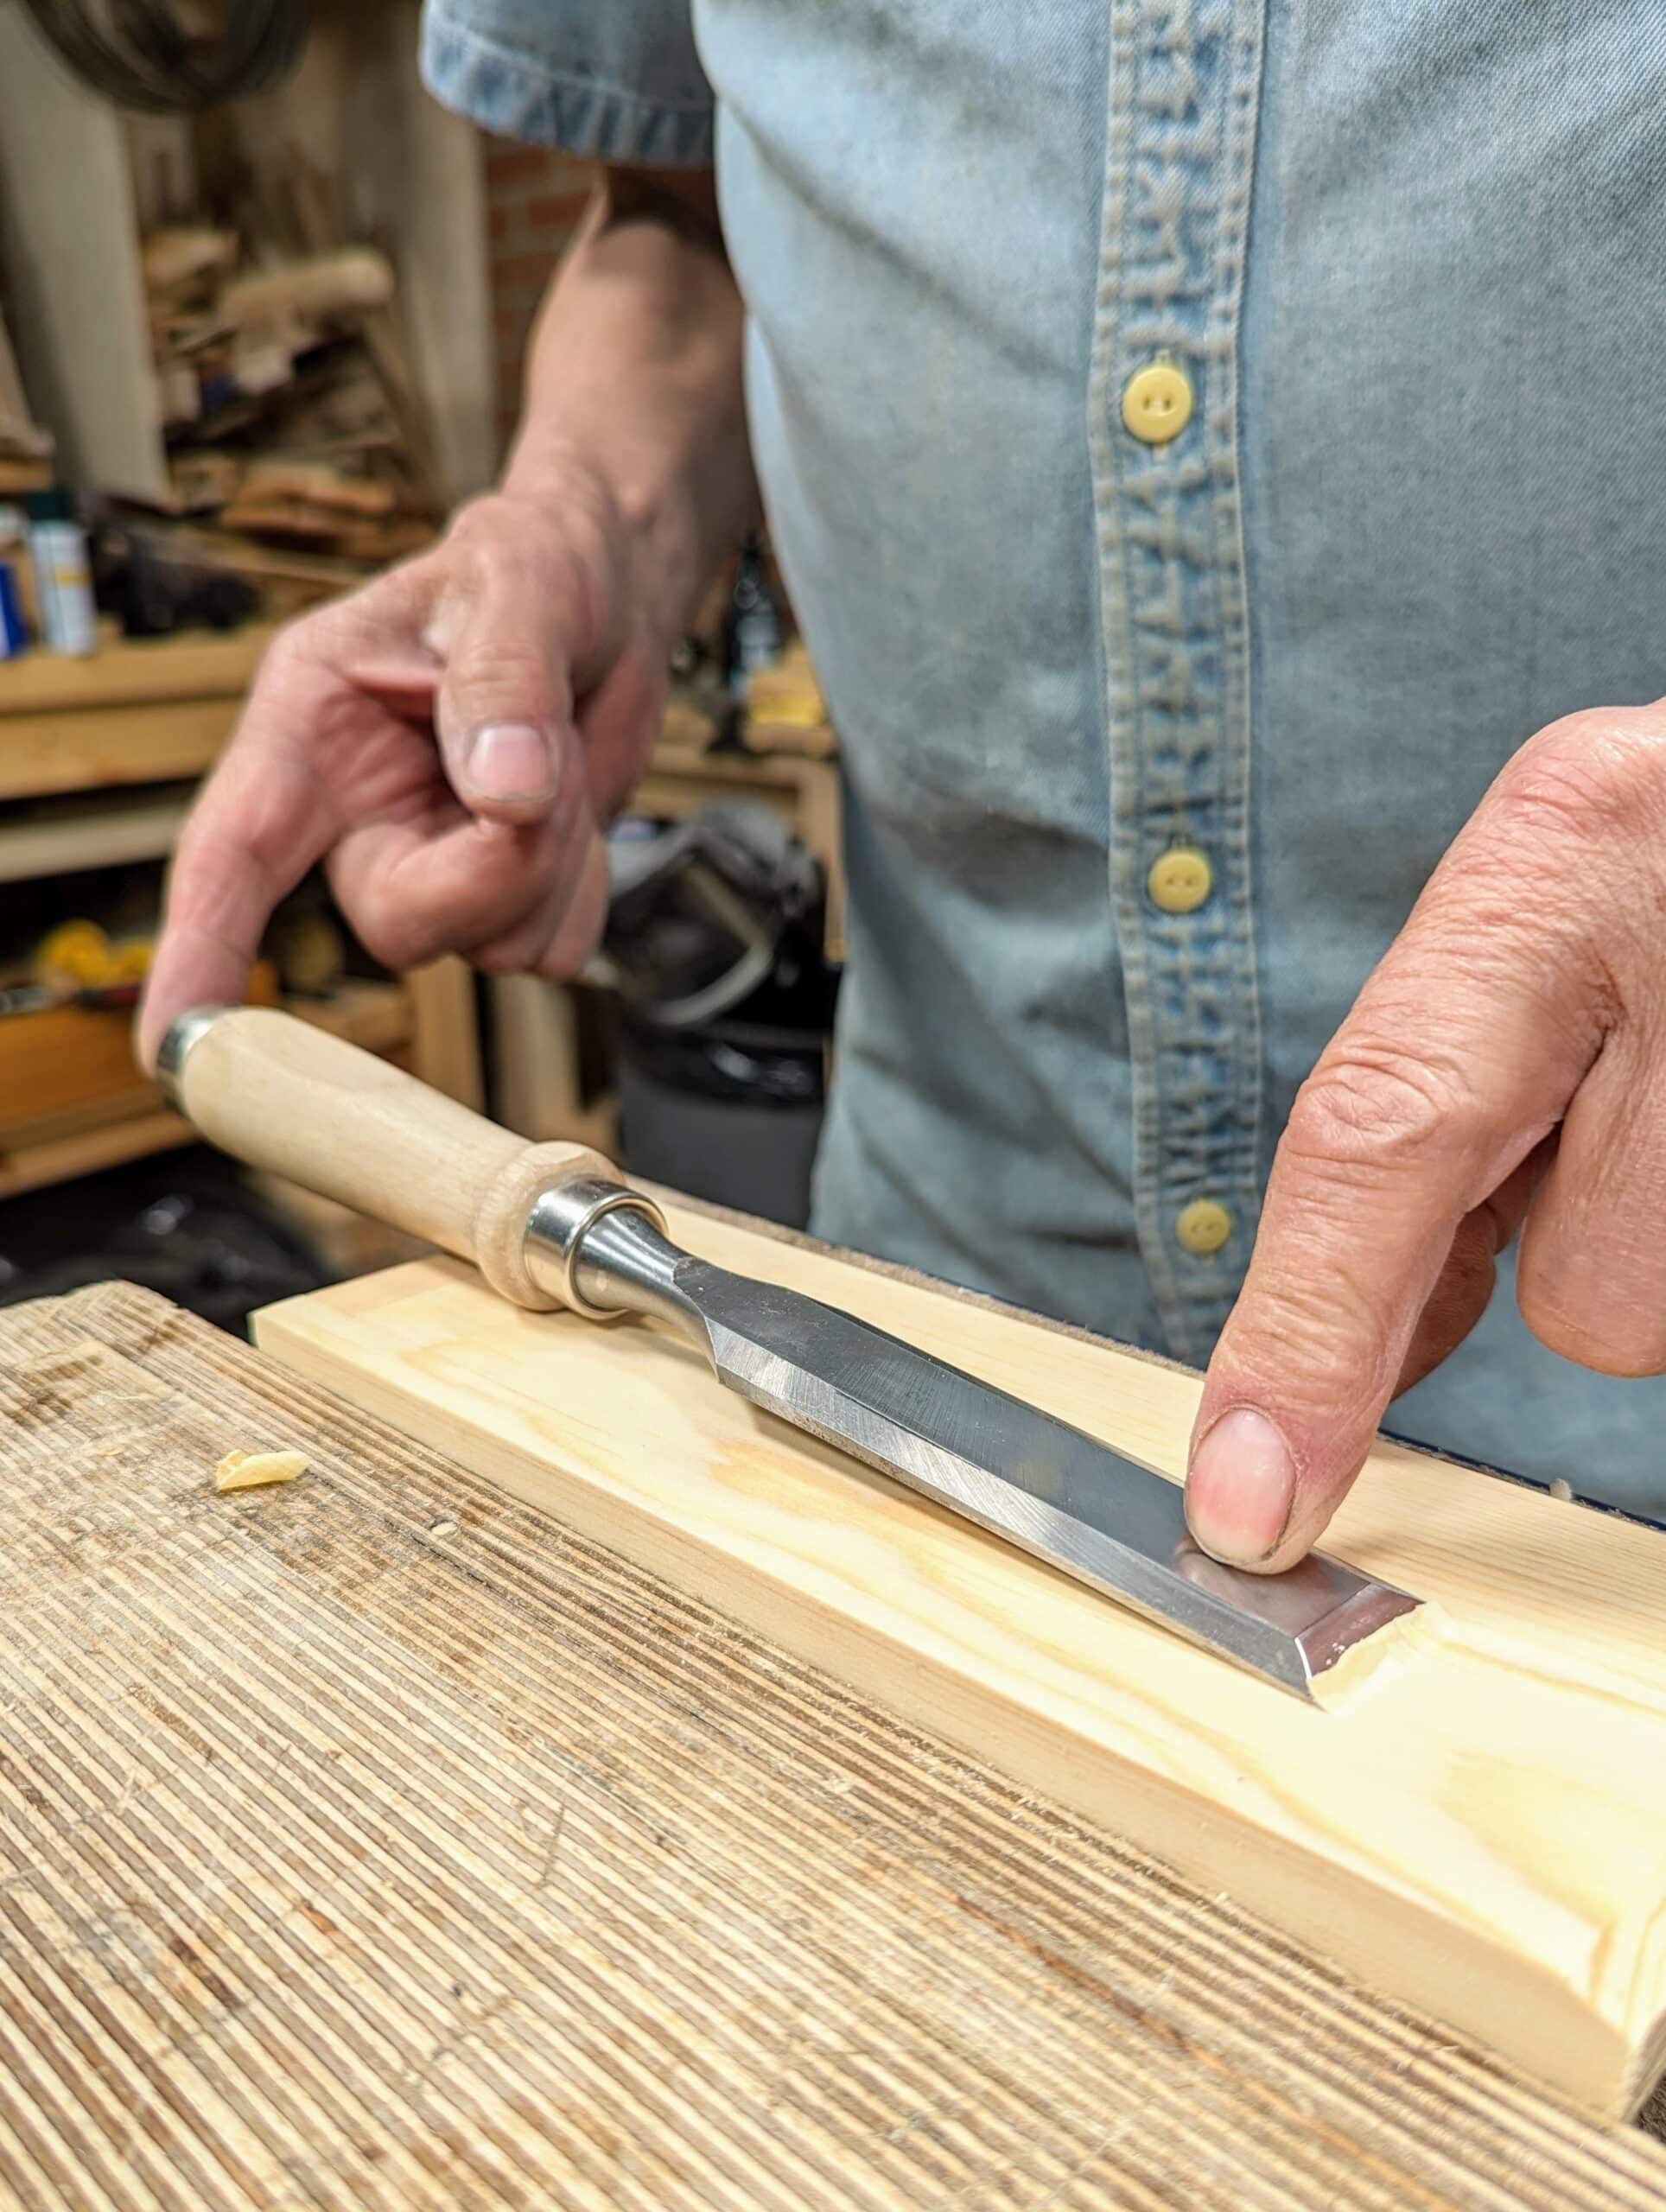
Another support for what I say is to lay the chisel onto a surface of flat scrap wood, bevel up, and nudge the chisel along with just a finger on the end of the handle. If the chisel immediately catches along the cutting edge then it’s sharp. A newly sharpened chisel should always catch. Of course, I am not talking about all woods. Dense-grained hardwoods, oily woods may resist more, but oak, ash, cherry, walnut, all the softwoods, etc. Now if the chisel is well used and dull it will glide along the surface without catching. Now by lifting the handle of the chisel with the cutting edge on the wood surface try applying a little pressure at different angles of elevation. The more you have to lift, the duller the chisel cutting edge will be. You will notice this when paring down end grain to the nubs of dovetail pins or plugs covering screws.. Paring the cheeks of tenons will also indicate the level of sharpness as you will find yourself elevating the handle to engage the wood with the cutting edge. It always surprised me how many woodworkers using a fabric wheel on a buffing machine end up with a dulled chisel or plane iron because they fail to engage the chisel at the optimal angle and then allow the buffing wheel to polish the cutting edge on the end itself. They also polish the back face but fail to keep a distance from the cutting edge with the main body of the mop. This then rounds the end and the chisel will not cut well if at all.
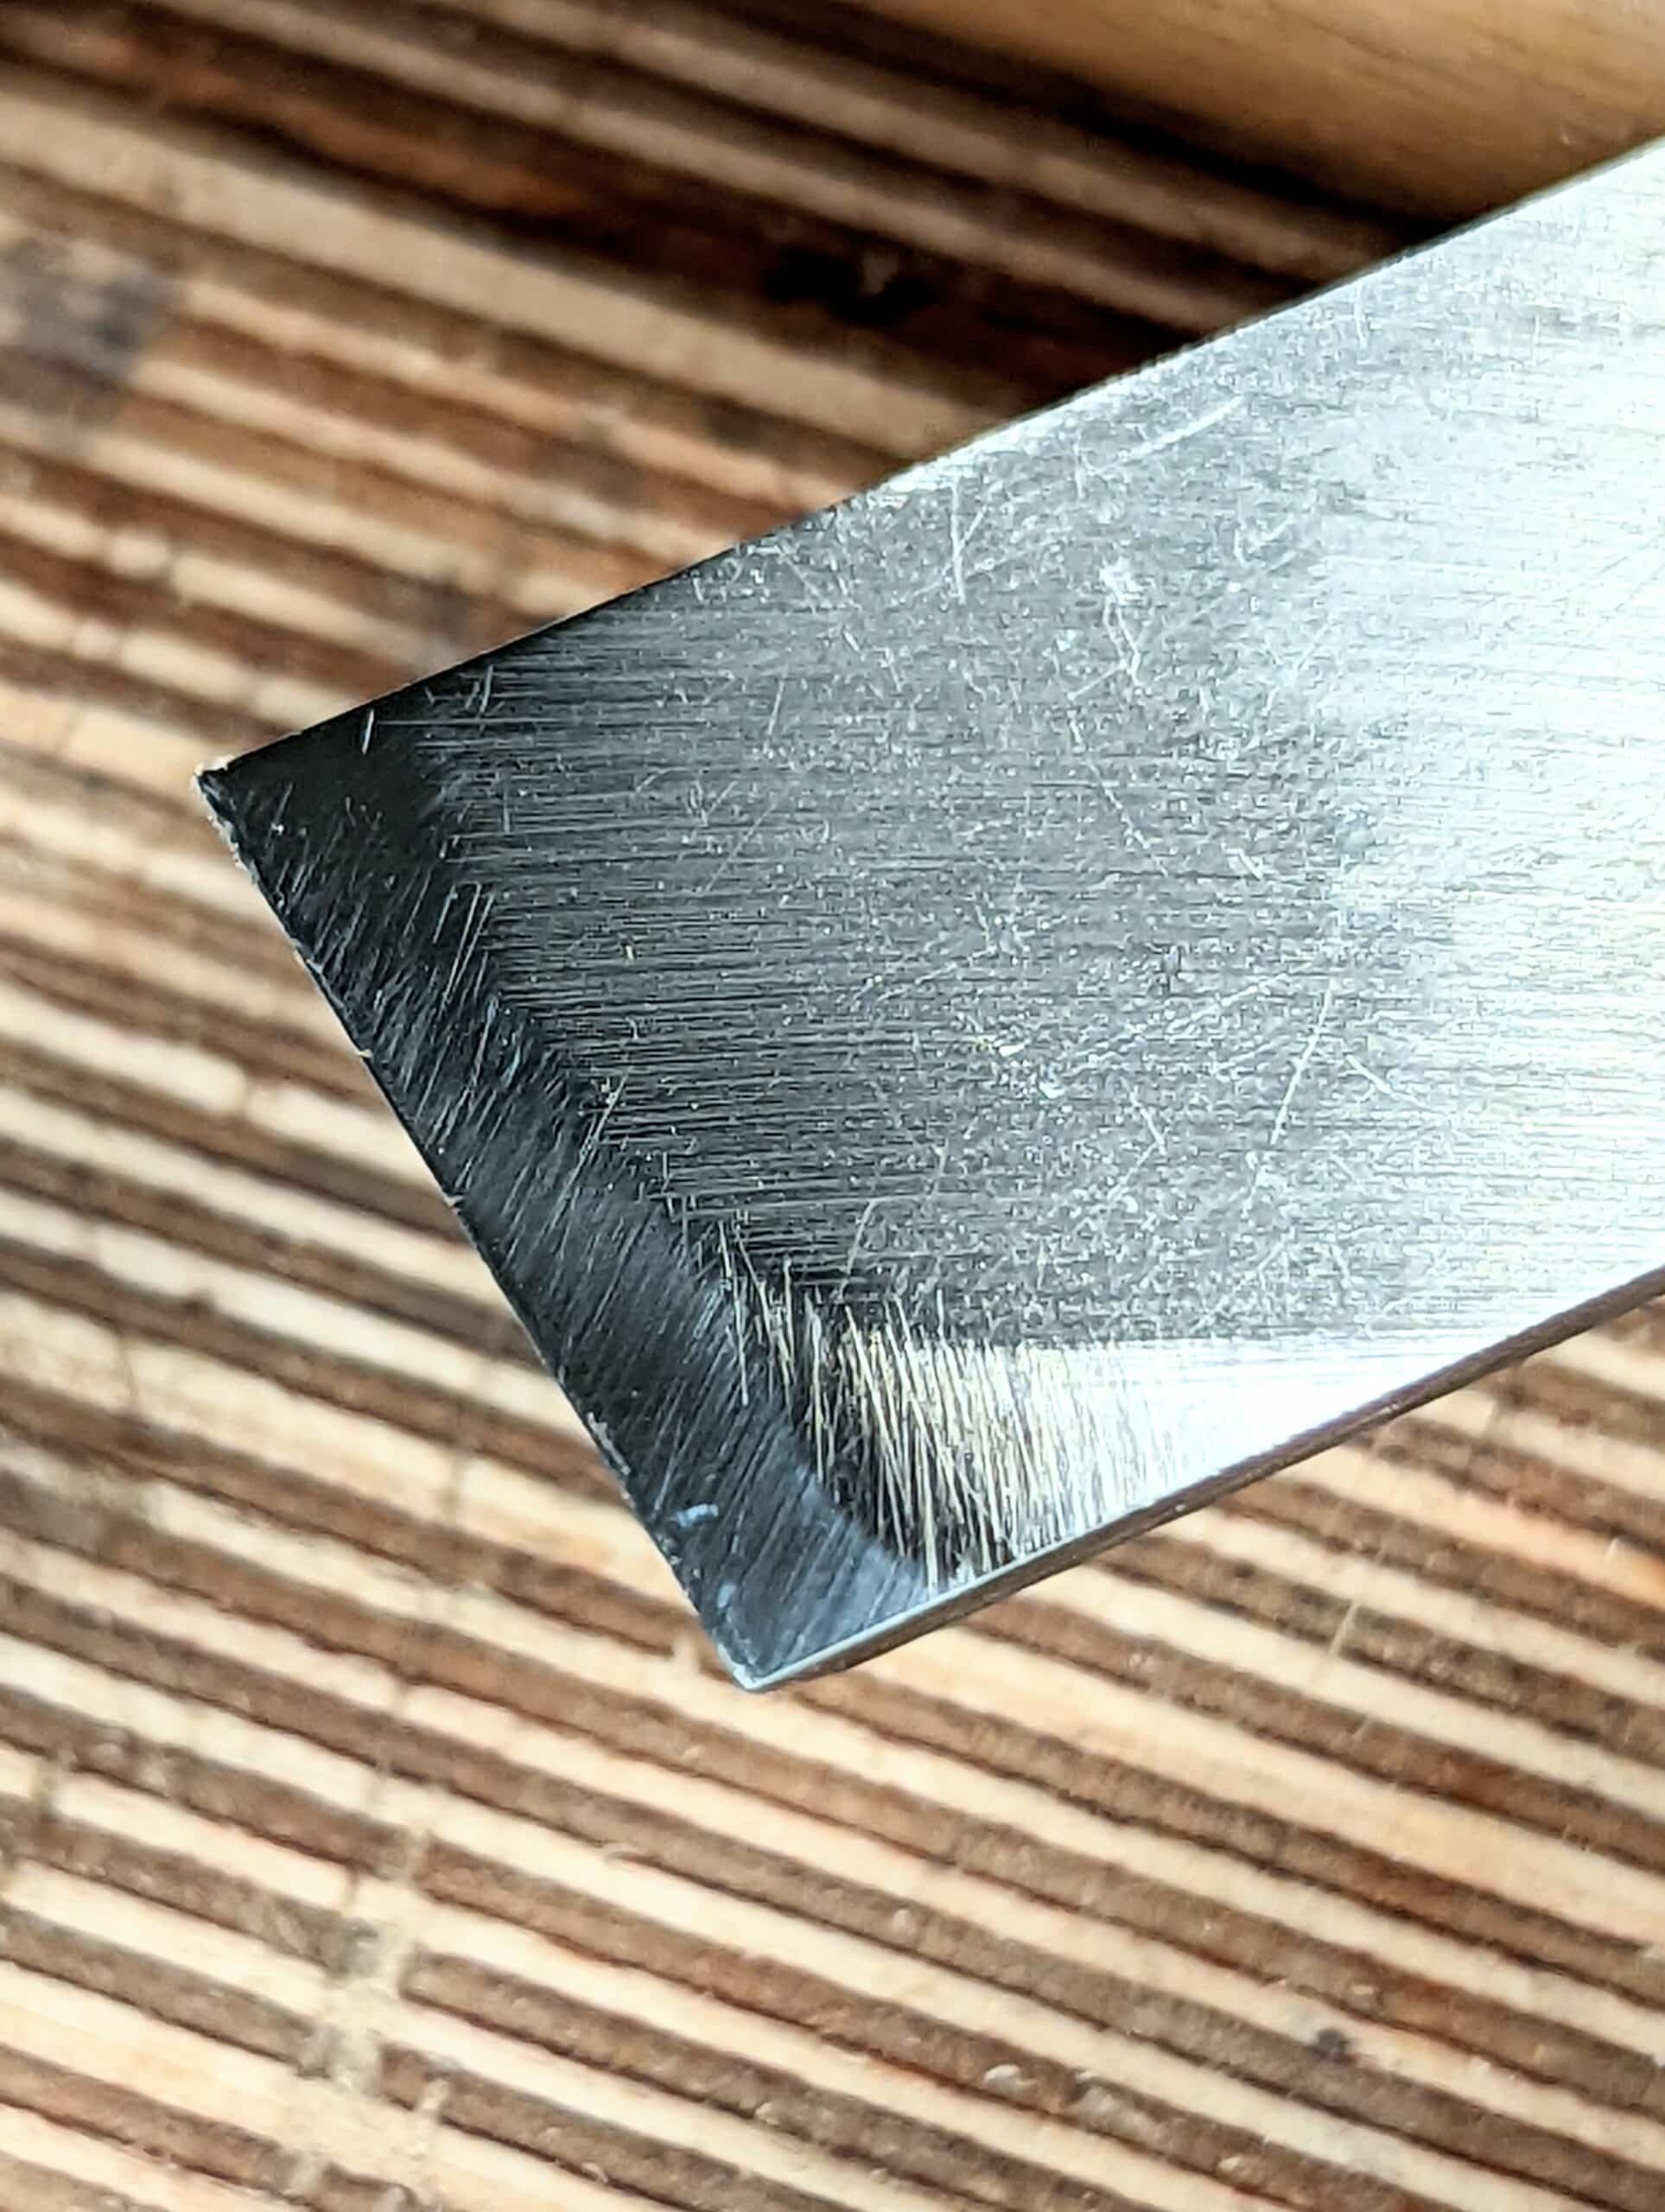
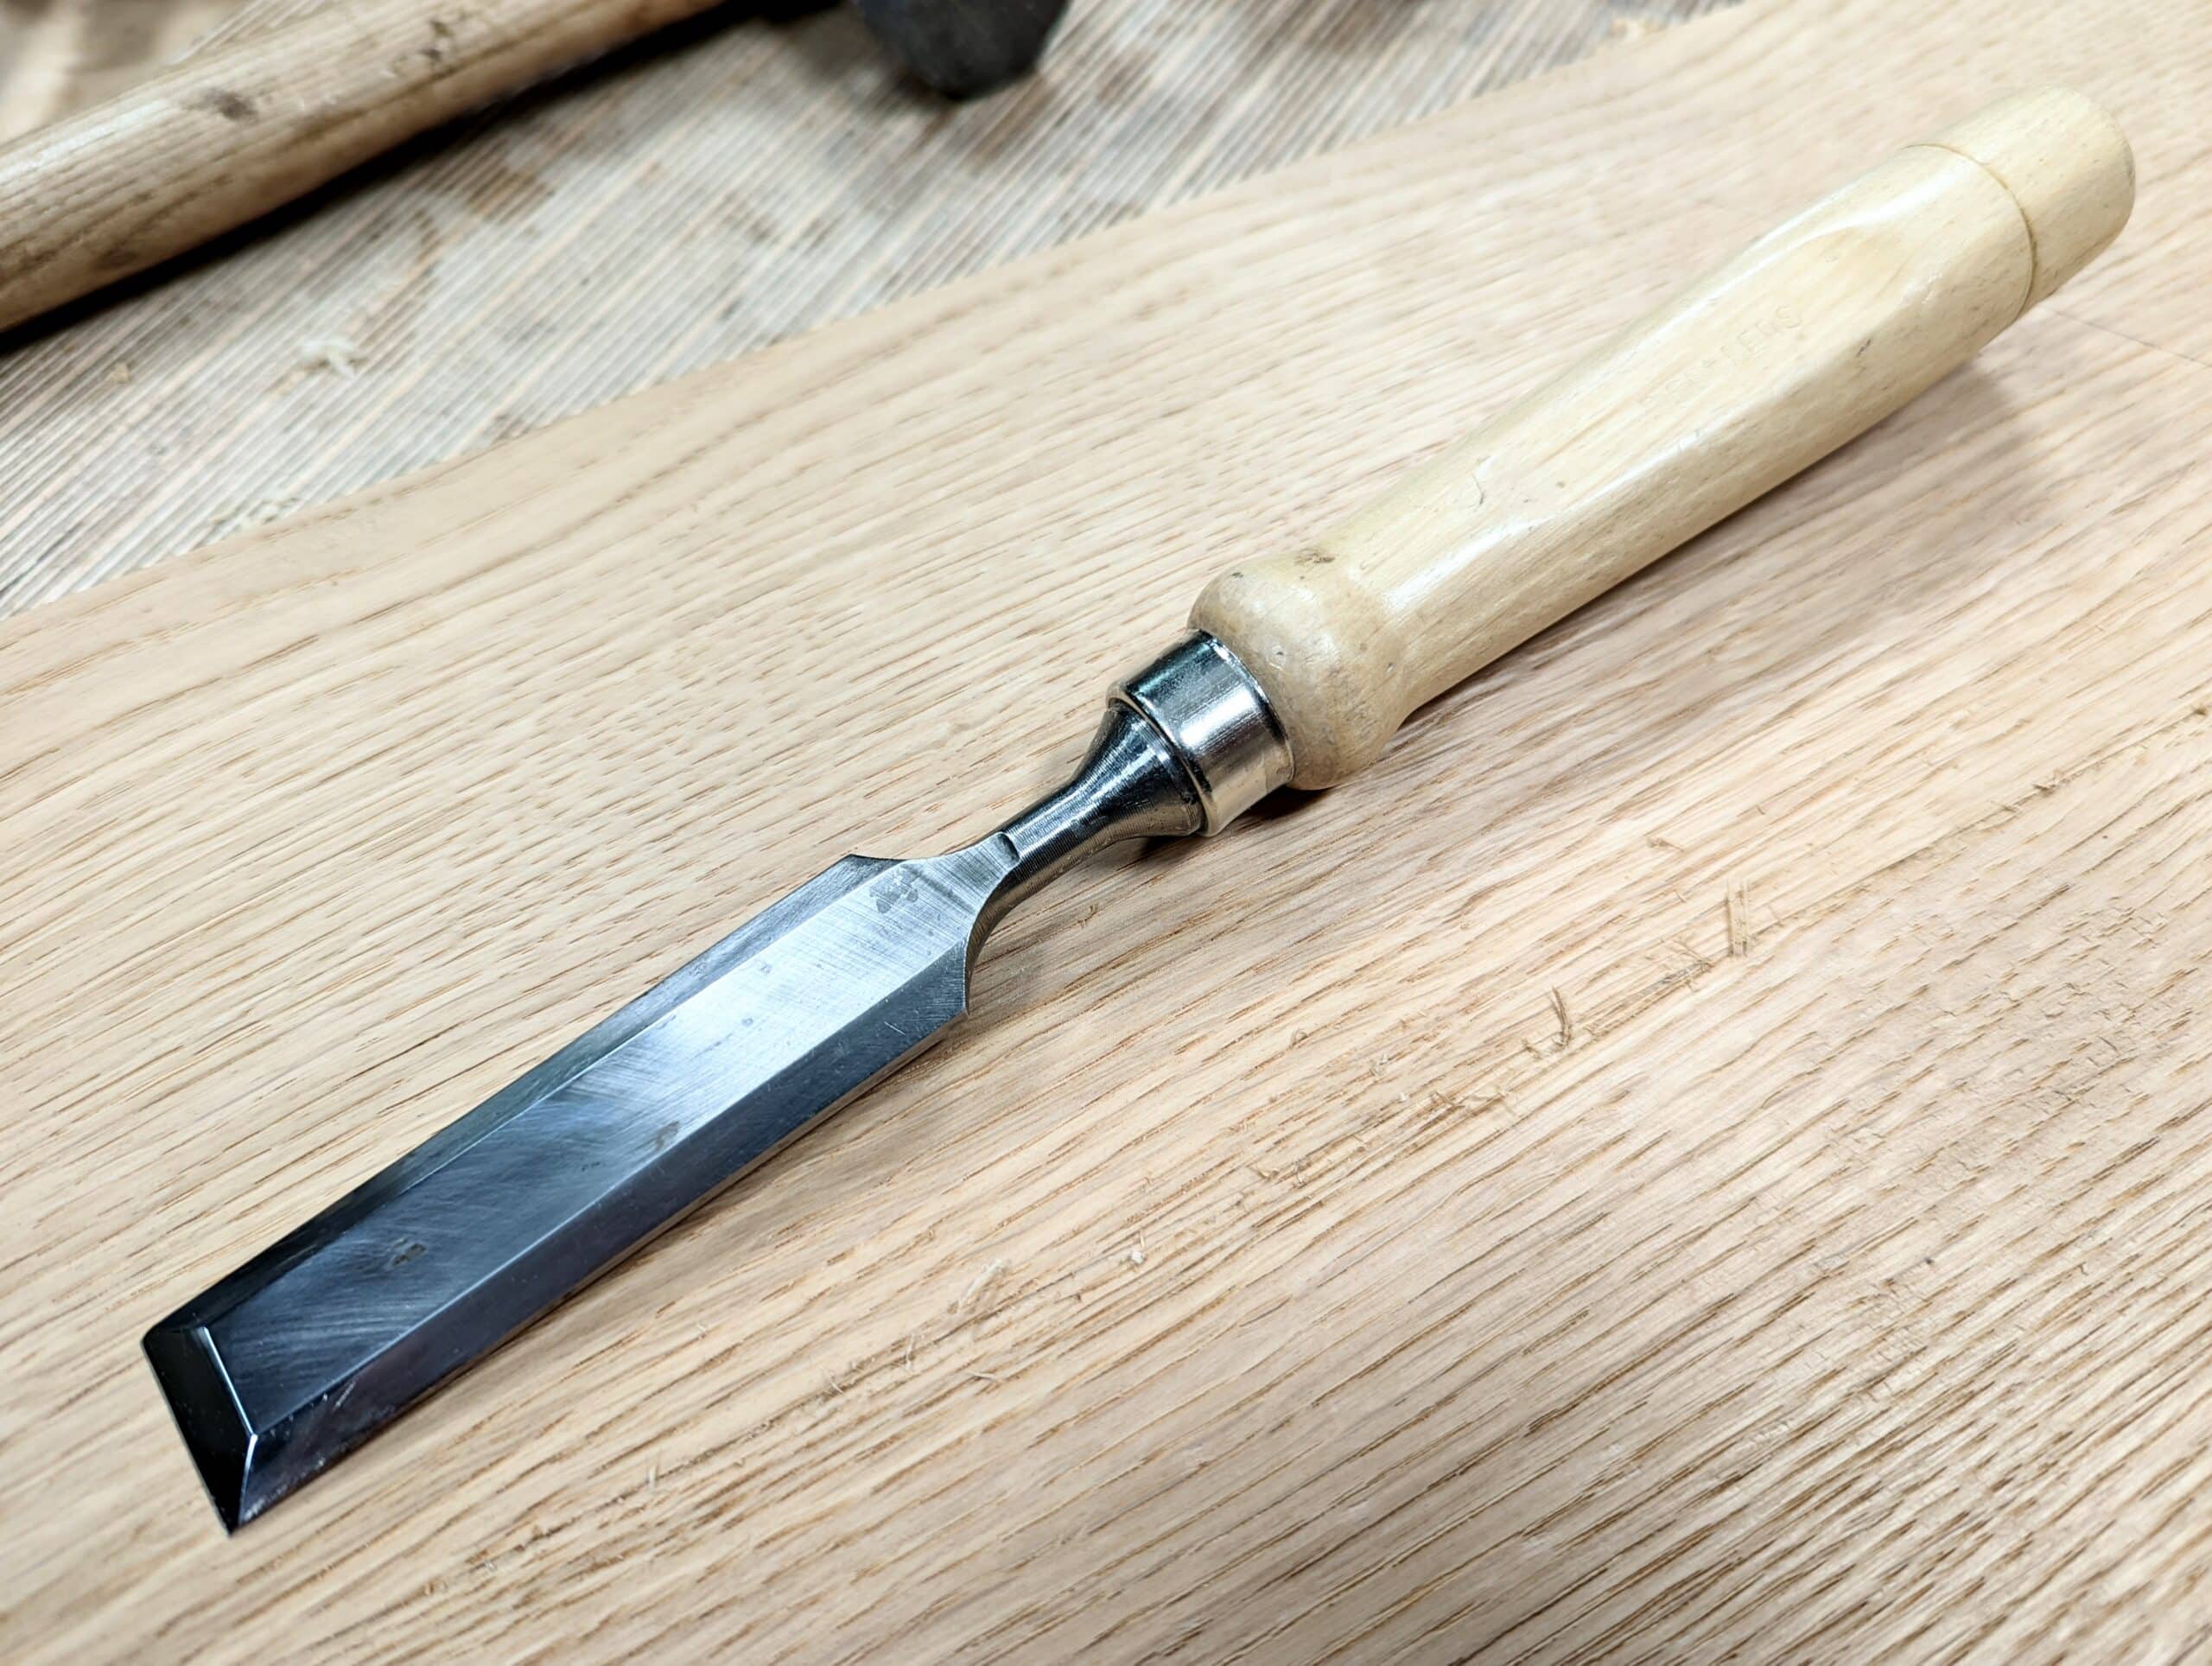
A chisel and plane cutting iron back need not be dead flat: it’s just something to aim for and there is no reason not to achieve flatness as near as possible. This is my chisel. It’s clearly not dead flat but it is actually ideal. When I sharpen this chisel I focus only on the bevel and take away the steel of the bevel alone until I have a burr and then an immeasurable touch more. I flip the chisel and with a single pull away from the cutting edge I break the burr. Stropping the bevel on the strop 30 (or so) times polishes the bevel. I use a 10,000 grit polish and this gives a mirror finish to my bevel which effectively means that the abrasive is so fine it has abraded out any major striations from previous grits to a higher level of polish and thereby sharpness. Remember that the flat face was initialised a long time ago — in my case, over ten years ago. This flat face was flattened on diamond plates I know to be flat and then polished out with the 10,000-grit abrasive compound on wood and not leather. I don’t recall returning to this process in the ten years of use.
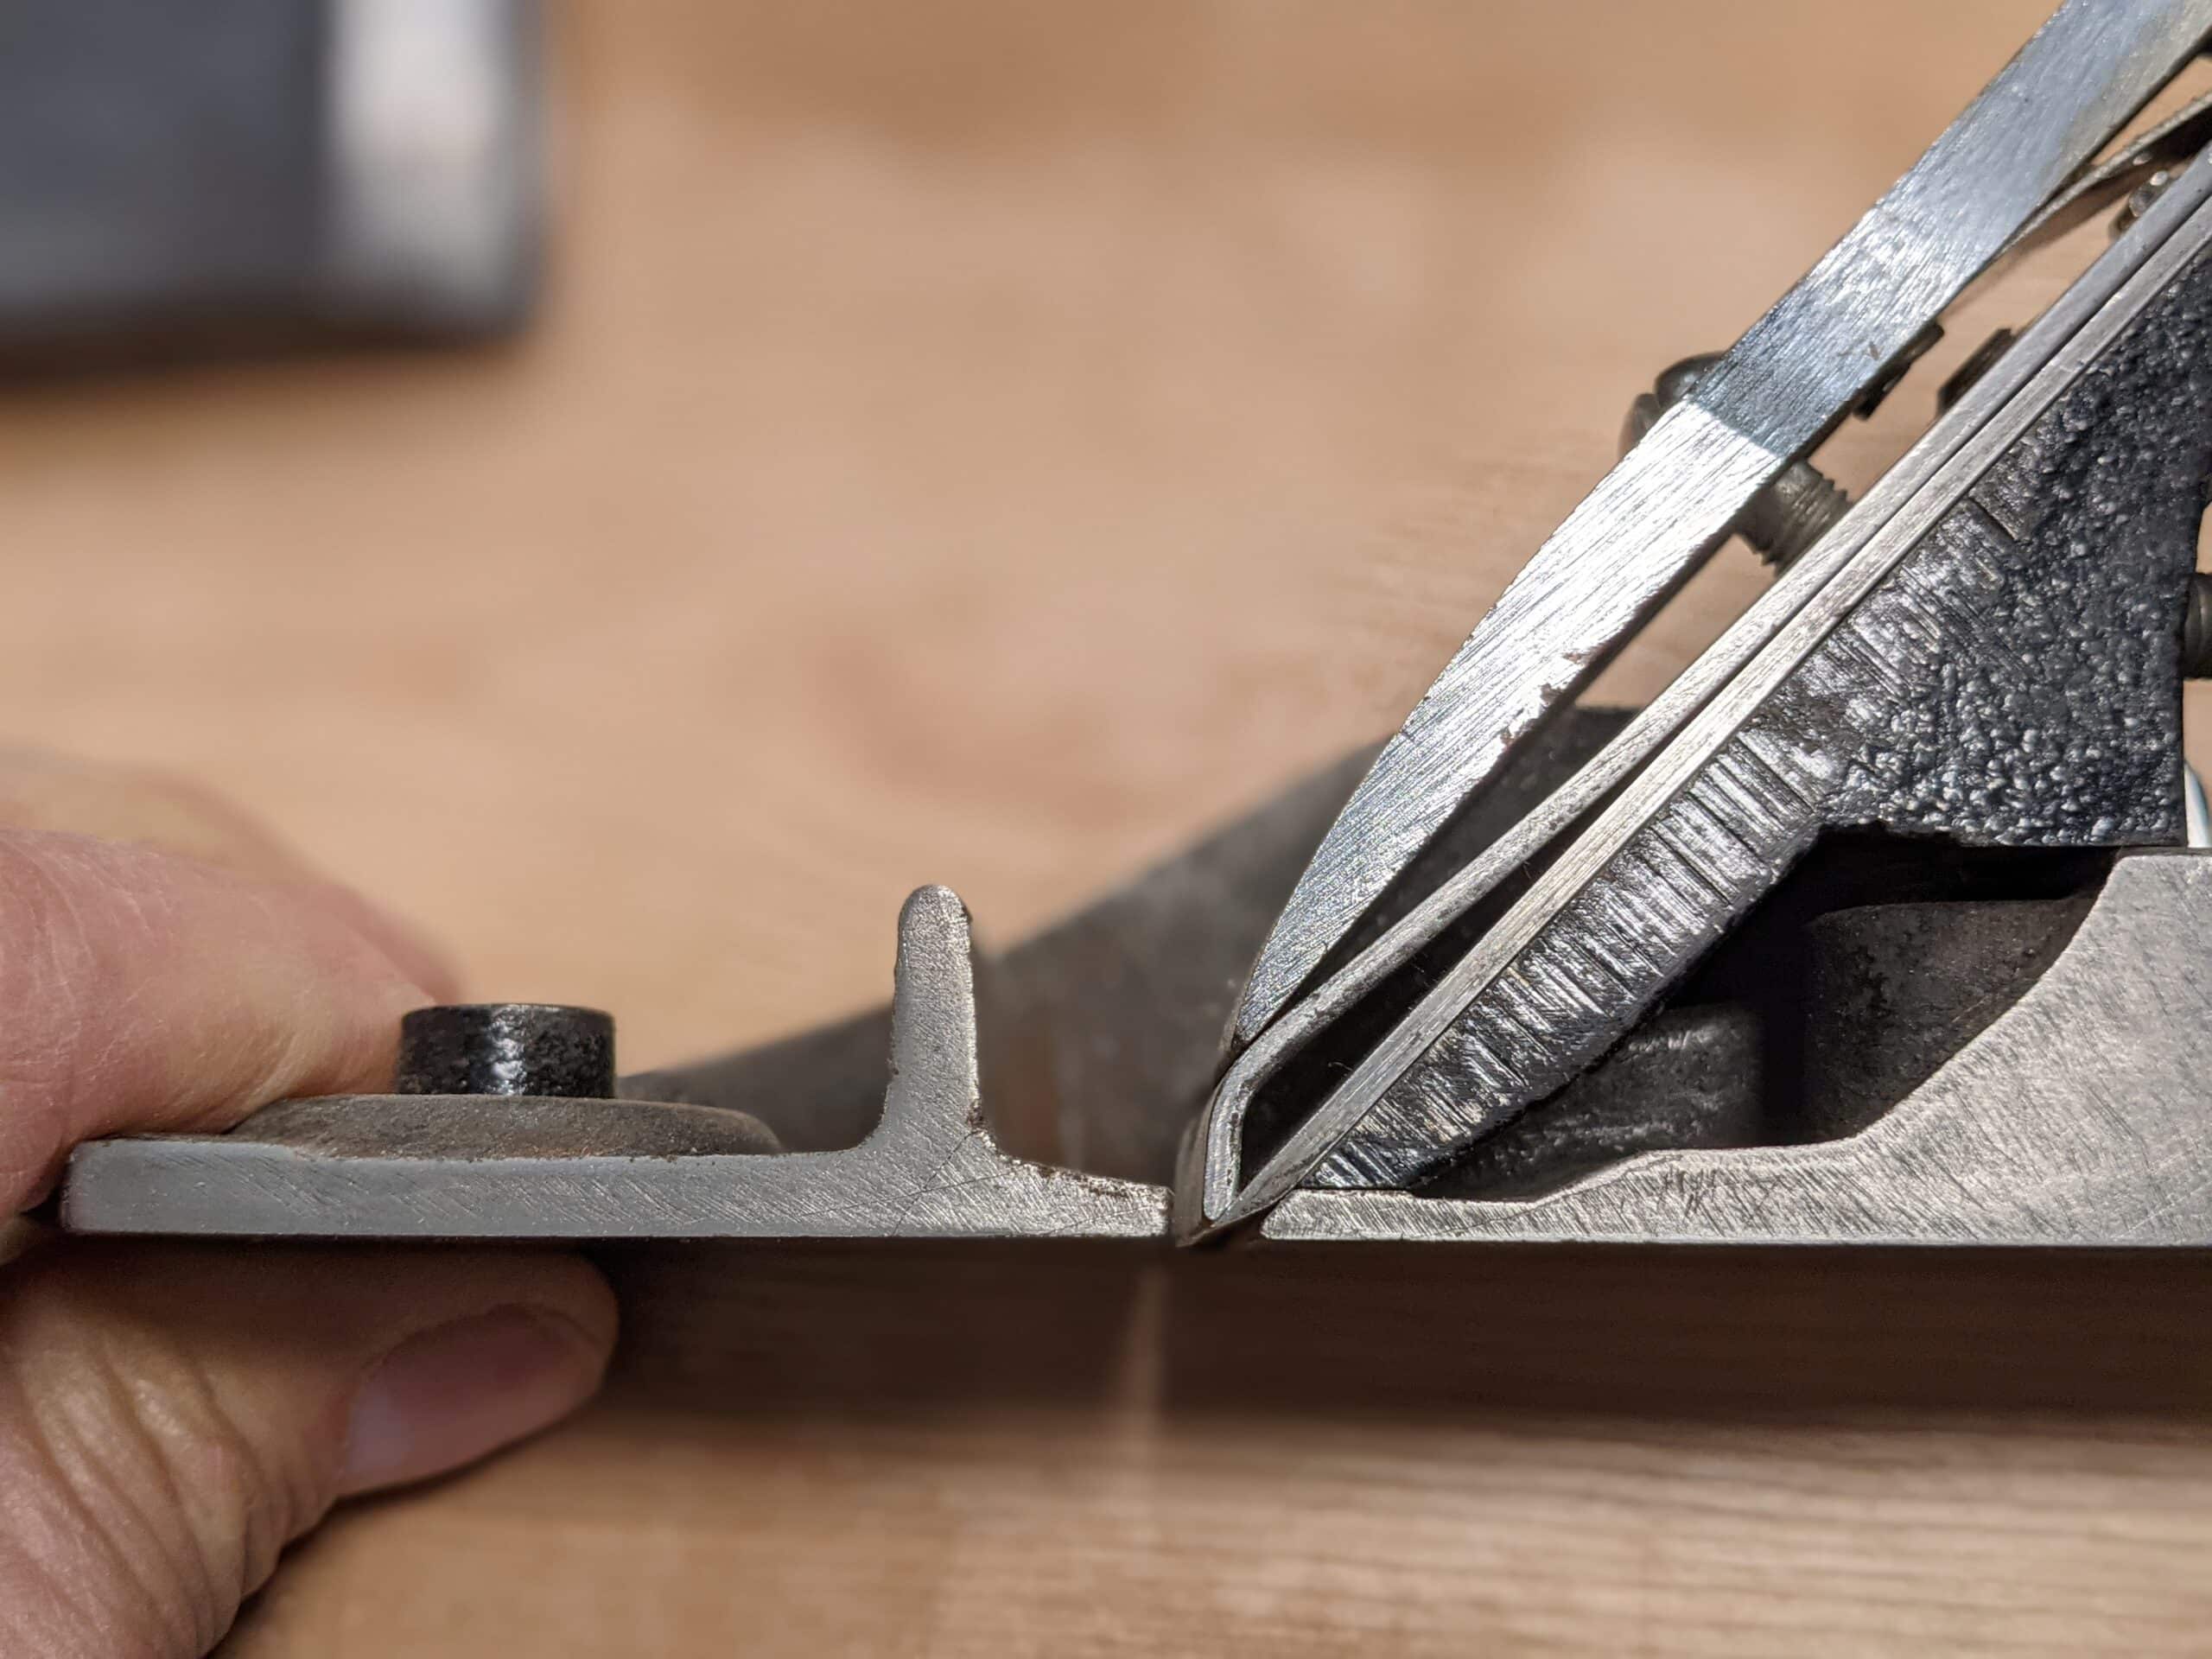
With regards to the flatness of plane irons. I have written on this issue before and covered it in my book Essential Woodworking Hand Tools by cutting away the side of a #4 Stanley plane to show exactly what happens under the pressure of the lever cap in relation to the cap (chip breaker USA) iron and the whole cutting iron assembly within the body of the plane and the frog. Even if a plane iron is far from flat, that’s hollow, twisted or whatever, the leverage pressure applied to the cutting edge end of the assembly is absolutely forced hard down to the bed of the frog and indeed flattened to it by the simple leverage of the lever on the lever cap. That said, it is easier and practical to sharpen if indeed we have a relatively flat iron to begin with and that is why in general we do ensure the near flatness of the larger flat face. The best way to test out a plane iron’s functionality is to sharpen it, install it and see if it works. It most likely will. You will not have to have a flat face within thousandths for the plane iron to function perfectly well.
Plane sole flatness has value but not perhaps as much as you might feel. I use the word feel strategically. Whereas a plane’s flatness plays into our endeavor to create flatness in our wood surfaces, it’s not really the be-all and end-all of it. We can overplay our quest for flatness believing that once we flatten a board, billet and beam, the job’s done. Rarely is that the case Wood is a constantly moving entity in the lives of woodworkers. How often do we plane a board true and flat, machine wise or hand wise, and the following morning we come in and it has cupped, shrunk or in some other way distorted. It happens all the time. I once put boards in the clamps two feet wide in Texas and stood it on end and the following day, 24 hours later, all the clamps were on the floor in a heap. John has been gearing up for a hands-on class here and shook a #4 plane at me. and the beech handle rattled as he told me he had just set up the plane and tightened the handle just yesterday. Over night it had shrunk enough to be loose. We do a variety of things to minimise changes in our wood and indeed we aim for flatness. After my 57 years in the saddle, I have come to accept that wood will always, always move. We aim for flatness mostly to complete our joinery be that edge-jointing for gluing narrower boards for wider panels or for the mortise and tenons we rely on to constrain our wood and make our boxes and frames, carcasses, etc. It’s the best we can hope for. I have yet to come across a Plane that does not distort with exchanges of heat, especially so in high exchanges of differences. Living in Texas I saw this the most. This week we saw a Texas record of 112F (44C). I will guarantee the plane’s soles moved some. In my life there I went from several degrees below to 90F the same day. The other thing that is seldom if ever mentioned is the exertion of force we put on the planes themselves and especially when we move up to the longer range of planes. The longest plane I ever use these days is the jack plane. There is no point in any of the other longer ones. They do not stay flat, they are ungainly and awkward to use, and most people including myself cannot maintain the kind of registration needed to the wood to create a decent level thrust. In 57 years, I have never failed to achieve everything I need with a #4, a #4 1/2, a # 5 and a #5 1/2. The only reason I really keep the wider versions, the #4 1/2 and the #5 1/2 is when I am planning the edges of two boards side by side for making panels.
I understand the onion skin thing. It’s one of those challenges we charge ourselves with just to see if we can. A bit like climbing a mountain just because it’s there but the quest replacing the enjoyment of the scenery, the exercise and much more by the intensity of the obsessive often. I have been on climbs with others where the journey was pretty much ruined by the one who constantly pushed in a rush to get to the top to be the first or beat the record time or their personal best. My interest in sharpness is because it perfects my work in myriad ways, not the least is the crispness of the look, the minimising of using abrasives and then, more importantly, the accuracy and the skilled craftsmanship I achieve.
Hello Paul,
I believe a lot of that obsessing comes from not knowing what to aim for. A large number of amateur woodworkers have learned from videos and books now and don’t have a mentor at hand to tell them what to look for, what works and why something might not work. It’s not always easy to get to the level of understanding or practical experience, where we exactly know what is essential in sharpening and what is excessive.
Best regards,
David
Yes, and into the void rush the legalists expounding on scary-sharp sharpening systems and then those hovering in the background with their sales pitch to sell special sharpening equipment, abrasive film, float glass, stones costing hundreds and so on. In the age of mass information comes the mass of misinformation with it and in this age of ultra-misinformation comes a volume a million times more than truth.
Dear Paul
Firstly I would like to assure you that I owe you a great debt of gratitude for your invaluable tutorials and blog posts which are always so helpful. All your teaching is practical, down to earth and simply useful. This post is another great example. Thank you so much!
But now for something completely different. I ordered the Paul Sellers router plane kit some time ago. Last Friday, a week ago, it arrived in its nice little box and I could not wait to open it. Only to see that the blade was missing. The most important part, isn’t it. I filled out the rpk-feedback form… and there was no response. I tried the contact form on the rokesmith website… no answer. Getting a little bit upset (just a tiny little bit) I even tried the contact form for website problems… and what can I say? No response whatsoever until today. Without lecturing but it seems that your customer service has some potential for optimising. I respect you greatly Paul.
Much joy
Axel
Mine came complete. Since it will be some time (broke my neck) before I will be making the kit (adding wood structure) I will be happy to send you my iron if you will send me yours, if and when you receive it. Marvin McConoughey
Hi Marvin
Thank you very much for your kind offer but I am not in a hurry and Paul will send the blade subito. Sorry to hear of your serious mishap. Get well soon!
Thank you for your kind offer Marvin. Paul will send the blade subito.
Sorry to hear of your serious mishap.
Get well soon!
This is a first-ever, so I am not too worried about our customer service. Things can slip technically but my coworkers are absolutely diligent in all that they do. I will send you a new blade first thing Monday, Axel, even so, I am sorry this has happened. Can you tell me if the plastic sleeve was in the package, that’s a square tube that is in two parts with one sliding into the other over the blade? Oh, and where in the world are you; country only needed?
Don’t take it too seriously. It’s definitely not a big deal and I even may like the idea to finally be the first-ever the first time. So thank you for sending me the blade but there’s no need to hurry. I have a lot of other things to do. And no the sleeve is also missing. Oh, yes, I’m living in Switzerland Zürcher Oberland. All the best to you and your team and much joy
Axel
When this project was first announced it was mentioned that feedback was encouraged: I ordered my kit in early April and it was dispatched 23 April, and arrived this evening there in Malaysia: so four weeks (untracked mail). That’s pretty good.
I’ve purchased a plank of rengas (a medium hardwood with an attractive grain) and some knobs from China, so am ready to go!
I hope we can have a dedicated place to post pictures, woes and successes.
Very well said Paul.
From now on, I’ll avoid taking seriously such You Tube videos that flood my devices.
Many thanks
Chris.
I always amuses me when I see people obsessing about polish on the chisel backs and super-high grit polishing of the bevels.
At the back of my mind, I keep thinking, “But isn’t that amazing edge only going to last a couple of seconds after you start chopping/paring the wood?” All that work and expense for a few seconds of pristine edge.
No! I’ll take practicality and do what Paul does – get the back appropriately flat, and hone to a sharp edge and keep it there with frequent honing. It takes almost no time, and I know it will allow me to do what I need.
It seems to me that sometimes people forget that we’re working wood, and instead focus on the tools more than the woodwork.
The problem is you have guys who are accomplished woodworkers such as Garrett Hack, who would have you thinking that if you don’t use Karl Holtey irons in your plane or sharpen on a shapton 100,000 grit cosmic ceramic super stone you can’t be sharp. You have Rob Cosman, another accomplished woodworker, putting out sharpening info be he’s also selling. Paul’s lack of selling leaves him obligated to no one to let you know you don’t need a home equity loan to buy sharpening equipment or super steel plane irons and chisels to do woodworking or enjoy the process of learning and developing skill.
Your not wrong. I’ve really enjoy Paul’s simple approach. But dang some of those tools so shiny! Lol
LOL! Then you may appreciate my maker/fixer’s axiom: It is impossible to have too many tools; spare parts; material; room to use and store them and, most importantly, too much money to afford it all. “Shiny” indeed.
Very beautiful text, full of experience and wisdom. Thank you Paul
So far, I fared very well with the process Paul shows for initiating chisels. I found, however, huge differences in how long that takes depending on the chisel. In most cases, I was done after 10-30 minutes. I had some however that did not show much sign of flatness after 30 minutes. I found recently, that the German edge tool company MHG (the chisels Paul discussed a couple of times) now also offers chisels that are “pre-flattened” (Chisel-premium with round handle, oiled ash, 2 to 40mm, polished blade, ultra-fine finishing on the bottom). I ordered a 32 mm for pairing larger bits, and it was initialized after some 5 minutes. They also have the very thin edges on the sides, allowing for detailed work. The common sizes are around 15 Euro. Still much less than some of the premium chisels, but in particular you can start woodworking quickly rather than spent a lot of time on flattening…
Best
Christian
Hi Paul
I want to thank you again.
You mentioned Mesquite, and I also watched you plane a piece of the same on your excellent YouTube video on the scrub plane. I have in my workshop a 4″ square post that had languished under an old shed for decades. I cannot believe how hard and dense it is; almost indestructible. I exposed the grain with a card scraper to reveal a similar structure to what you produced with the scrub plane. I’m convinced what I have is a piece of Mesquite and you could have solved a very old mystery.
I’m thinking of making a wooden jack plane out of this. Am I being over ambitious?
Thanks again
Cheers Alan
I don’t think so. mesquite is not quite twice as hard as oak and is possibly one of the most stable woods in the world. Surprisingly, it is also an easy wood to work too.
When I want a good laugh, I pull up a YouTube video of some of these “masters” and watch them obsess at going through 10 different stones, adding a micro bevel, and polishing, polishing, polishing.
I use the three diamond plates that Paul uses, hit the compound, and get back to work. All within a few minutes. Every now and then, I hit the back of the irons or chisels for a few swipes just to keep everything good. I don’t go to my workshop to sharpen, I go there to work wood.
Well said.
That’s because they haven’t found the right hones yet. I probably use one more than I need to. I use diamond plates and Spyderco ceramic stones. I happened upon a pair of them at a garage sale for a nice price. They polish pretty good. I have a medium and a fine ceramic stone. I only use the fine because I have it. I probably don’t need to. The fine is so pretty though. It’s a pure white. So I kind of like using it. I could probably get away with just one diamond plate and one ceramic stone for a basic sharpening touch up though. Plus stropping, of course. That nets me a high mirror finish.
Well, the obsession with flatness justifies buying planes of several hundreds of dollars… What would we do without those??
Oh, right: just use a decent plane like they did for centuries…
If I want onion skins, I’ll buy onions.
Exactly. I got myself some golden onions from a boutique shop online. They come in a velvet box. They’ve been pre-chopped, the peel re-instated with a thin film of oil. All you have to do is squeeze the root of the onion gently, and the skin falls off, and the chopped onion falls into the pan. They’ve been coated in a fine mist of lavender and honey spray, which prevents tears as the onion fries slowly in the extra virgin grapeseed oil used for its high burning point. You can order an onion subscription for only £650 per year. I can thoroughly recommend.
I’ve lapped plane soles. It’s not nothing. They’re quite the dream to use. Perhaps it isn’t for everyone though?
I couldn’t agree with you any more than on sharpening. I have bought alot of old tools over the years and not ONE edge tool had been dressed on the wide, flat face. Same with handplanes. I’ve have never been able to find evidence that the sole had been dressed. I know of another talented, long time furniture maker who says anything over 750 grit is wasting time. Basically the same thing. The magazines have brainwashed too many people.
I buy a lot of old tools. They’re usually in pretty sad shape when I get them. That’s because folks don’t know what they’re doing by and large. Edges can be sharp with coarse grits. There are different levels of sharpness though. Personally I like the kind of sharpness I can achieve using very fine ceramic stones and stropping with compound. The best way I can describe it is a silky smooth sharpness. Which actually transfers onto the work. Cuts made with polished edges are polished surfaces themselves. It really depends what you’re doing how far you should take things. I’ve found that not every steel can be sharpened to high grits. The grain of the steel itself needs to be fine enough to respond to the abrasive correctly. It’s a subtle topic.
It used to take me several hours to get my chisels and planes sharp because I had no idea how to go about the job. Then I was reluctant to use the tool because it took so long to get the right edge.
I was given a Stanley spoke shave that would never work only because it was dull.
The day I got it sharp was a revelation, the tool became a joy to use.
I tried several methods and jigs but could never seem to speed up the process.
Now using Paul’s methods I can sharpen anything freehand in just a few minutes with the exception of a few very hard plane irons that I can’t seem to break the wire edge to get them sharp. The process seems to distort or roll the edge and I have to keep working to get the sharpness I want. Once you learn how to get the desired result then it doesn’t take much to keep everything sharp and working. Even my kitchen knives can slice through paper! People who first use my knives have to be warned because they used to working with dull knives which take a lot of force. Now I don’t fuss much when sharpening…..Thanks Paul!
I use an Eclipse style guide jig to sharpen plane irons and chisels. I used to sharpen them freehand for a long time. The jig makes it a very straightforward process for me anymore. I also hollow grind my woodworking tools just to speed up the sharpening process too. But to do that does require some specialized equipment. Namely a bench grinder with an angle adjustable tool rest. Which I understand not everyone has. If you’re into woodworking you should get one though. I have 3. All homemade.
Thanks for that Paul. Some time back you compared just sharpening a plane iron to 400 or 600 grit to the full polish. I think the old oilstones achieved this and were good enough although I like the additional ease of use the strop gives for an additional 60 seconds.
The big lesson I learned was to integrate sharpening into the normal workflow and develop a system at the bench that was so quick there was no hesitancy in using it. That’s what Paul’s diamond plate and leather strop system achieved for me though I still use an oilstone for certain things like my knives.
I will say though that hand sharpening quickly takes time to learn. Some days I’m in the groove and others I’m not. I’m not shy to pick up a guide and use it if I feel I’m a bit off on one day but I strive to use hand only techniques because they are usually so fast – just a few minutes to tune up an edge.
Thanks once again Paul for taking the elitism out of hand wood working.
Sharpening knives and woodworking tools are different. They’re both sharpening but the techniques involved are not the same. Similar, but not identical. Heck as far as I’m concerned sharpening knives is practically cheating compared to the geometry constraints of woodworking tools. You can put a bevel on both sides of a knife edge. I don’t do the ruler trick with my woodworking tools either.
Paul, I LOVE this post from you!!! Well said. I wondered often where all the obsession for flatness and sharpness and polish and on and on came from. I watched a video online not long ago from a very reputable American woodworking magazine and the presenter insisted that a chisel MUST be flattened the ENTIRE length of the back. It was in the first 15 minutes of the video. I thought he was absurd and I stopped watching. I wrote in an earlier entry about owning and using Ashley Iles chisels. I like them because the edges are very thin and allow easy access for dovetails. But my every day user set is a set of original Record Marples Blue Chip in the original box. Original Sheffield steel. Blue “some kind of plastic” handles. They sharpen beautifully and have only seen the first quarter of an inch of the back “flattened.” I don’t and never did intend to slice beautiful thin slices of beef with my chisels. I cut wood. Like you. And millions of others. I sharpen up until the tools easily cut wood. When they don’t, I use a King KDS combination stone with 1000 grit on one side and 8000 grit on the other. It cost me $45.00 US dollars. I use a leather strop with green polishing compound. These items have served me extremely well for many years. Tormek makes a beautiful product. Expensive. Necessary? No way. But to each his or her own. As an aside, I just bought an old Stanley 40 1/2 scrub plane that is in wonderful shape. Off Ebay. Other then the length, is there any appreciable difference between the Stanley 40 and the 40 1/2?
Well he was right, but with a caveat. It has to all be flat eventually as your edge is at that point in the back of a chisel. A fraction of an inch behind the edge is all you really need. I’d say even a quarter of an inch is more than you need. But yeah it doesn’t all have to be polished from the get go. Some hollow may actually be helpful.
This is a great post. I’ve been working with wood using these tools for six or seven years now. Experience definitely teaches a lot. Early on I conflated working accurately with working with perfectly prepared tools and edges. After all, Paul talks a lot about accuracy and the importance of accuracy. What it took a while (and a lot of hands on work) for me to realize is the proper context for this advice. Accuracy is absolutely important and a key element of craftmanship. This accuracy, however, has to be understood in a proper context of working with a natural and fluid material to produce a product that meets certain criteria with respect to usability, visual and tactile appeal, and structural soundness. It must be understood in a context of how joints work and how works come together. Accuracy really means, doing all the right things such that your work comes together with proper harmony and polish. There is give and take with wood. You only start to get a feel for this over time and through work. Expert advice (as found here) helps tremendously, or course, but knowing what to expect from wood also needs the full spectrum of sensual feedback that comes from doing. As noted in the post, paring with a chisel is very different from chopping a mortise. Flattening a panel is very different from jointing an edge. With the panel (which is both thin and flexible and will be constrained) all that really matters is that it looks and feels flat. The panel only needs to satisfy our visual and tactile senses. With the jointed edges that will be glued, tools like a combination square and straight edge help us be a little more rigorous. Absolute flatness is rarely a constraint for me. My hyper focus on flatness and sharpening early on did pay dividends I think. I learned a lot about how to get a sharp edge. I’m glad I’ve mostly outgrown obsessing over it though. If you handle a lot of vintage tools you’ll discover (as I have) that they are far from perfectly machined. Most of the hundreds of chisels I’ve handled are far from perfectly flat. And really how could they be? These things were hammered out by eye be blacksmiths. They didn’t have reference surfaces spec’d to microns to flatten them on back then either. Yet, these historic craftspeople still managed to achieve accuracy and to produce very fine work.
Just because old timers didn’t know beans doesn’t mean we have to be ignorant today. Yes I’ve seen vintage tools in rough shape. That doesn’t make what they were doing right. There’s still people doing hack work today. Craftsmanship has always been in scarce supply. As far as precision goes it may have started earlier than you realize. It just wasn’t practiced by all.
“Just because old-timers didn’t know beans doesn’t mean we have to be ignorant today.” Not sure of your point in some of this. Why on earth would you say old-timers didn’t know beans, Paul. That’s a broad brush you paint with there. I have never felt the elders we should always treasure should be so dismissed when we stand on their shoulders in hopes of seeing further. I value them for their vast insights and important knowledge they have given to me through the decades. As I said in my last article, Leonard Bailey invented one of the best bench planes ever and no one has given me one jot of improvement through a century and a half. He knew his beans.
Yes, Mr. Sellers, he did. And I’ll bet he’d have found a good bowl of chili made with them interesting as well. However, there are “Old School” tips and tricks which are unfortunately being lost in many of the trades because of an overwhelming cultural expectation of instant gratification by powering through the work, sawdust/metal chips a’flying, which is permeating an awful lot of what are known as “The Trades”. Now there are CNC (Computer Numerical Control) routers small enough to fit on the same stand you would put a 13″ benchtop thicknesser/planer. “Back in the day” [’62/’63] they were big enough to hog out 2″ thick cuts at a pass on 14′ long aircraft ribs to enlarge the fuselage for a converted 1950’s Boeing Stratocruiser [Pan Am Pacific route] passenger plane called the “Guppy” to haul rocket sections from California to Cape Canaveral, Florida.
,.
I’ve been a follower for many years, and this is one of the best articles of yours I have read. Nothing you haven’t said in some way before, but here all in one place. This is a vindication for us that the media guilt we hand-tool woodworkers are encouraged to feel is uninformed and unnecessary shaming of our lower-tech approach.
In fact, I’ve noticed that, even when so-called “modern experts” reluctantly resort to hand tools, they spend more time bringing their technology to the tool (precision jigs, specialized metallurgy and motorized stones) than actually using the tool. Even with a hand plan, the focus is on the technology.
Smoke and mirrors? Not all of them, just more and more.
I’ve always wondered what those who obsess about the ‘flatness’ of their plane do with wooden planes.
Of course, wooden planes are easier to flatten with just a smoothing plane and a straightedge. Funnily enough, they have surprising resistance to wear and whereas you can actually flex and slightly change the sole of metal planes to a camber or a hollow, you can’t do that with wooden ones.
I used to think light of flattening plane soles until I did it once. So before you diss it I suggest you try it first. I could tell you why it’s better but I’d likely be wasting my time. That’s because people never want to hear what they don’t want to hear. Figure it out for yourself. That’s what I had to do. Get lapping. Pay some attention to what’s going on while you’re at it too. Maybe the truth will dawn on you?
Persistent, aren’t we? You may wax eloquent to your heart’s content on your joys of “Perfection”. Just try, if you would, to not sound like my English friend, Smugly Superior.
That’s what I thought, before I knew better. Have you tried it? Maybe you’re just charmed and all of your plane soles are flat now? I don’t know. What I do know is lapping plane soles made a huge difference here. Because I have done it. Old planes develop a hollow in front of the mouth from wear. That hollow doesn’t compress the wood before it is sliced. It’s not good. Whether you like it, or not. Everything else being equal you’re far better off with a flat plane sole than one that is not flat. Oh well! It’s all down to how far you want to take things. If you want to take it to the next level then you need to go there yourself.
All just theories, Paul. Just theories. Too many variables and statements like ‘Old planes” do this and that doesn’t really work. Wood compression varies even within the species; some woods will never compress by any measurable degree. I have used the same planes for decades and they haven’t done any of what you say. Flatten once, near enough, and press on with working the wood. I would hate for people to think that dead flatness is even possible because even when you might, and I say, might, achieve near-dead flatness any atmospheric temperature changes will usually markedly change the flatness of the sole as do you when you plane because I do know that I indeed bend plane soles via the handles when I use them and I consider myself to be very sensitive. So I suggest we end this here.
Such an interesting and informitive article, and for me, one of the best I have read.
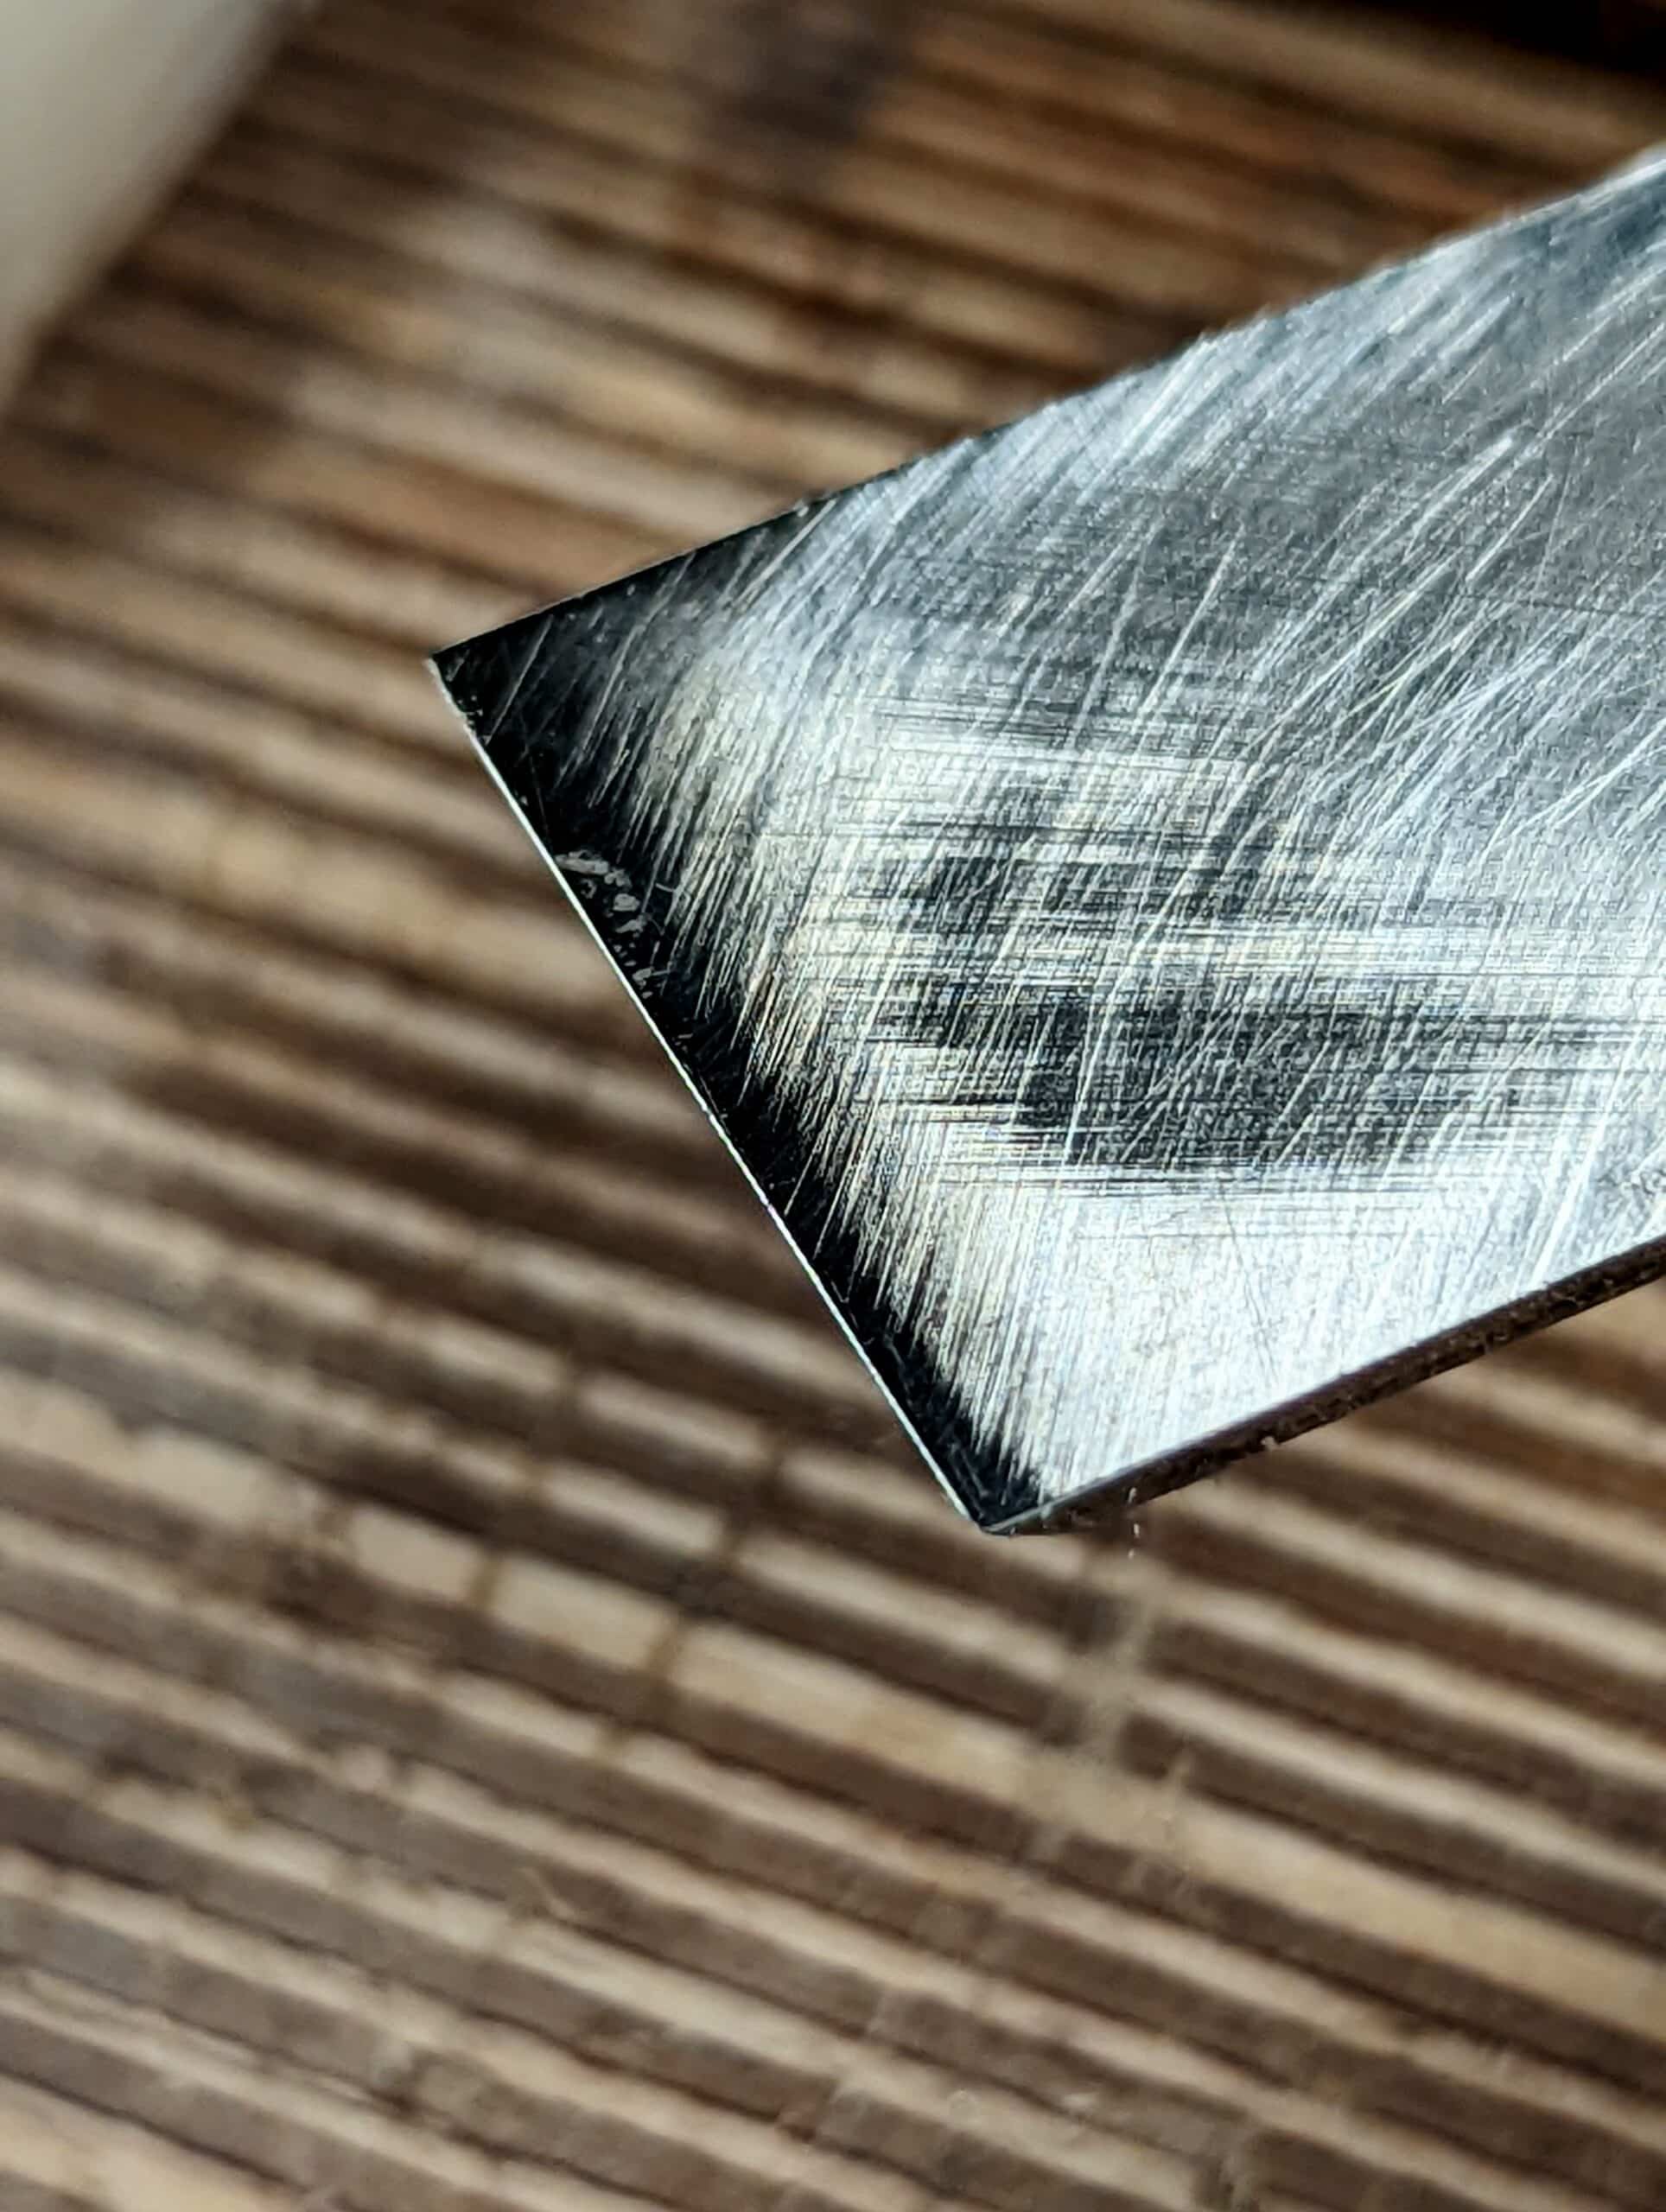
They say a picture is a thousand words. The one that depicts a white line along the cutting edge showing what a blunt edge looks like is pure genius. I will admit that I always assumed (and had no reason to question or research otherwise), that the bluntening too place on the top of the bevel, just goes to show you are never to old to learn!
Thank you Paul,
Many thanks Paul, I’ll have a go
Cheers
Found this tutorial most helpful. Pictures 4,5, and 6 in particular. I have copied them and slipped them in the chisel section of Essential Woodworking Hand Tools.
Thanks
C Ussher
Those chisels you picked up were made by Richter before they became popular. Today they’d be considered a premium brand. You were just lucky enough to get in on the ground floor so to speak. Timing is everything in this world.
Paul, thank you for addressing this topic. Your practical woodworking experience has helped put to rest many of the concerns that I’ve had as a novice woodworker. When I first started working wood with hand tools I too was caught in the trap of flatness. I have watched and read enough of your material to be convinced that most of what is being taught about the issue is not worth listening to. If I spent all my time making sure that all my chisels and plane irons were “perfectly flat”, I would never get anything done. I no longer obsess over it anymore. I make them flat enough for me and that’s what matters!
i am now retired, but trained long before the internet was an idea. my gaffer, who was at the time approaching retirement, taught me all i needed to know to get started. his approach, much like paul’s, was is it cutting cleanly? no, then go and sharpen it. back then all we had was an oil stone, but we honed everything on it. these new diamond stones that i now possess are a blessing. why mess around with oil and wet stones when with the diamond there is no maintenance. i laugh when i look at you tube. so many people with no real understanding purporting this that or the other. they watched some idiot on you tube do it, then make their own video of it and it becomes law. be very careful when watching you tube. it is a hive of misinformation.
Hello, Mr. Sellers:
There is something about craftspeople. They like to debate about the “best way” to perform a task. The ideal tool, the superior vendor, the brand of file. (I buy Nicholson to do initial shaping of an old saw, and than Bahco or Grobet for final sharpening. While wearing a hand made shop apron. Listening to Wagner. Or country music. Just sayin’.)
I saw a much loved and shaky but nameless You Tuber show how you can do the ruler trick on the back of a chisel. A chisel! But it worked for him. Then I saw another nameless You Tuber from Canada show that this just doesn’t work, because you need to flatten the back and use feeler gauges to check just how flat it is.
All good fun. No punches thrown, no bad language, smiles all ’round. It was disappointing, actually.
My “obsession” with flatness arose from learning how to sharpen. I’m MUCH better now than I was when I started ten years ago. So the obsession worked in the sense that I can rely on the tool working the way I want it to most of the time, although I still lose patience chasing the burr back and forth.
Anyway, thanks for getting us all to calm down and get back to enjoying the work!
Yours,
eta
I think that it is only a matter of time before there are sharpening competitions. They would seem to me to be in the same category as fly casting championships.
There was a 14 year old kid who made quite a name for himself, Steve Rajeff, who was wining casting casting championships in the ’70’s starting in San Francisco, CA., who now designs very good, very expensive flyrods for the public. It may be an art form in the casting, but there’s also a science behind it that has moved far beyond Greenhart and then Bamboo in the building of the tools used to practice it.
Hi,
Nice post as always, there’s just something I always find disturbing when you recommended extremely cheap tools. For their price to be that low, there has to be underpaid and undecent work somewhere in the production line. Buying them means supporting world wide inequalities and economic domination of western world on developing countries.
Buying more expensive doesn’t guarantee better work conditions, but by buying in countries with known work laws, you’re probably minimizing injustice.
I think that, in trying to make woodworking more accessible to people with lower budget, supporting an economy which actively keep developing country workers poor seems contradictory.
And it may well not be the case too. hard to know. Domestic tools can hide behind a traditional famed name and still be made in adverse conditions. With your lack of specifics, it’s hard to say what you are addressing, but many items bought no longer rely on men and women standing and working in poor work conditions for poor wages. Some products can be made entirely by machine now, with CNC equipment doing most if not all the work human energy once did.
I agree very much with the first comment, and it’s a very unfortunate observing.
I don’t agree with the second one: of course, machines have increased the general quality of life for workers making cheap goods, but if they had the same work conditions as you do in western countries, why are their price ten times lower than we could ever hope to get here? It’s not like they have machines and we don’t. And it’s not that they sacrifice quality as you’ve already pointe out.
Buying extremely cheap means encouraging that someone across the globe earns ten times less as we would for the same job, be it in the production itself, in the material extraction, or in the product design.
Great post, Paul. I don’t make furniture grade items – yet. Mostly utilitarian things. I am practicing my dovetails and am improving each time I make them. I don’t stress over my chisels and planes. I sharpen them when beginning and strop them during my work until the edge needs a quick resharpen. As with anything in life, some people will obsess over the minutiae.
Thanks for a great article as always , some people make shavings and we make furniture , it’s a reality and the extreme actions don’t finish at flat backs.
All the best from OZ . Joe
Mr. Sellers,
Our parents taught us that “Patience is a virtue” and you certainly have taken your parent’s advice in that matter to heart. I, however, not so much. Thank you for the “Intervention”.
On flatness and acceptable tolerances, they mean different things to different craftsmen, even within the same trade. Some seem to get lost in the minutia of “Perfection” while others never even give it a second thought.
As to the “Tips & Tricks” being lost, I to this day remember my father (in an aside to me in that California machine shop I previously mentioned) saying to me: “They call me a ‘ToolMaker’, but not by east coast standards”. [We are from New England.] Understand, he used to primarily run a full size manually controlled Bridgeport vertical milling machine while keeping within a +0.0003″ -0.0000″ tolerance all day long. His tip to me was, “Whenever you walk away from the machine (leaving it running but not cutting), or shut it off, always back off a thousandth. The metal will change tolerances with the heat and you’ll need to dial it in again.” Perfection is all in how you define it.
Thank You
Hi I have a few ward and payne chisels thst I put new handles on , the backs are pretty flat and they are sharp , I stopped worrying about the angle they are sharpened at years ago , just use a honing gauge and a little jig to set the angle , same jig for all inc plane irons , sharpen on a section of a huge 2 inch thick ex 20 ins diameter grinding wheel ,then 2 wipes on a fine India stone , back off on a bit of stone worktop with a little bit of auto so , over time the backs are mirror finish for last inch , all can be shaved with, 2 minute job , don’t worry about shaving worry about the work size and finish ,
Hi I have a few ward and payne chisels thst I put new handles on , the backs are pretty flat and they are sharp , I stopped worrying about the angle they are sharpened at years ago , just use a honing gauge and a little jig to set the angle , same jig for all inc plane irons , sharpen on a section of a huge 2 inch thick ex 20 ins diameter grinding wheel ,then 2 wipes on a fine India stone , back off on a bit of stone worktop with a little bit of auto so , over time the backs are mirror finish for last inch , all can be shaved with, 2 minute job , don’t worry about shaving worry about the work size and finish ,no idea if backs are flat ,
Dear Mr Sellers,
I’m new to your web site and catching up with one or two blogs. This one set me thinking about the need for flatness. I come from an engineering background (three decades at Rolls-Royce). Surely on plane blades and chisels all that matters is flatness across the width of the blade, not along the length. I have recently bought some Marples and Sorby chisels from the daughter of a late craftsman boatbuilder, about 1950’s vintage. The only one that has anywhere near a flat back is a very thin paring chisel. Some of the Marples bevel edge chisels are so hollow backed that to flatten them along the length would reduce the thickness by a third! I would be guided by the photo of one of your chisels which only appears to gave been flattened for about the quarter of an inch behind the cutting edge. I really like the photo of the sectoned plane. Do you have one of the blade out of the plane with the cap iron fitted? I looked at mine and you don’t need a straight edge to see the amount of bend that fitting the cap iron puts into the blade (more than a sixteenth of an inch) which is completely taken out again by clamping the blade into the plane as shown in your great photo.
Yes, many gurus send people scurrying to granite blocks and fifty grades of 3m film to flatten these faces and then they clamp them to the cap iron and into the plane and everything gets bent out of shape with the lever cap. So it is not rocket science to understand that the key element in this is the lever cap. This part alone cinches everything down to the frog and you are on your way.Oh, and being a boatbuilder does not mean fine carpentry or woodworking. It mostly means working with wood you bend out of straight into curves that conform to a hull by whatever means are at your disposal. As it is with woodworking, it’s mostly the novice boat builders that give overtime to perfecting issues for the accolade of their mates who spend most of their time out of the water repairing and building, painting and filling holes and cracks for a few hours in a year on it.