Dos and Dont’s II
Woven throughout woodworking there are the rights and wrongs to the way we work wood that defy being written down and yet the information would be very helpful. Read any book on woodworking and no one wrote about the direction of the grain when cutting dovetails. It’s a foregone conclusion that they go at the end of the sticks of wood and not sideways on. Outside of woodworking realms, to non-woodworkers, sideways on dovetails would be admired as exemplary of good craftsmanship. Without good guidance as to the whys and wherefores, we can all be ignorant.
There is a very brief but informative video clip on my FB here, (under two minutes) to show a specific reason why we generally orient our dovetails according to the intrinsic strengths of the wood used. Inevitably, 98% of all of the different woods are able to be split along their length. Whereas some are prone to splitting along or with the grain, others I have encountered have interlocking grains that defy splitting altogether. I am convinced that these woods could be dovetailed any which way you want to dovetail no problem. That being so, would that still make it a wrong way to dovetail? Would you fail the exam or contest or competition because of tradition? I once used a 5-ton log splitter to split an unknown tree limb and stem and never split a single piece of it. Its resilience caused the hydraulics to burst their seals and cost me the repair on top of the wasted hire charges.
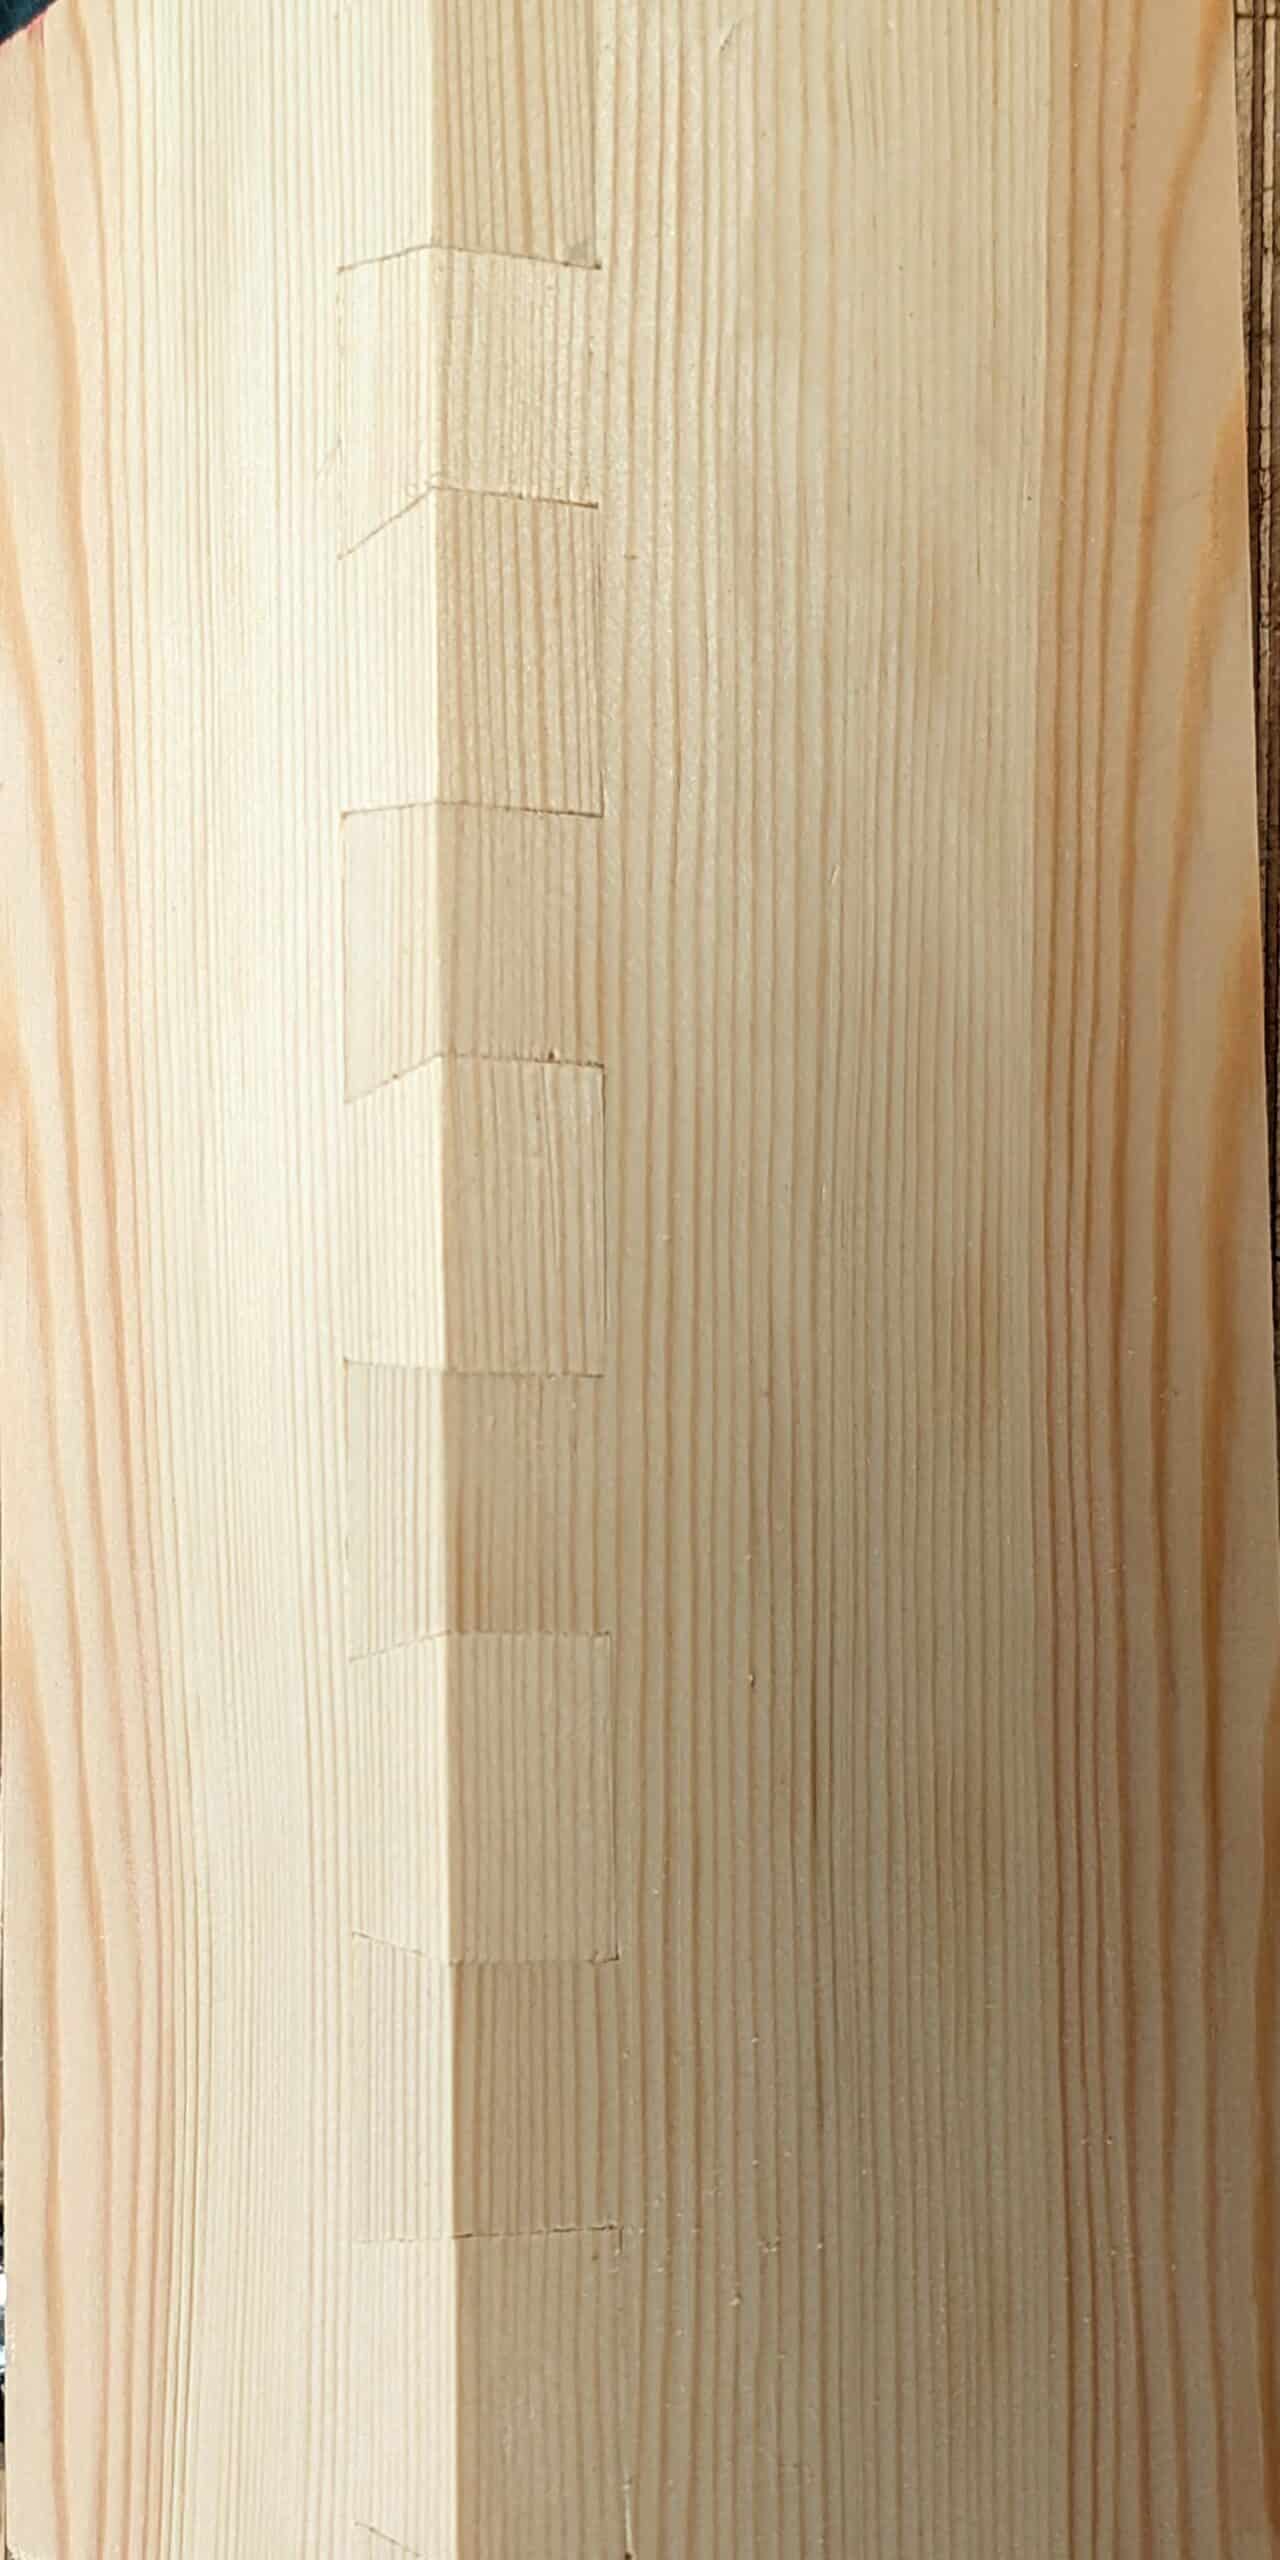
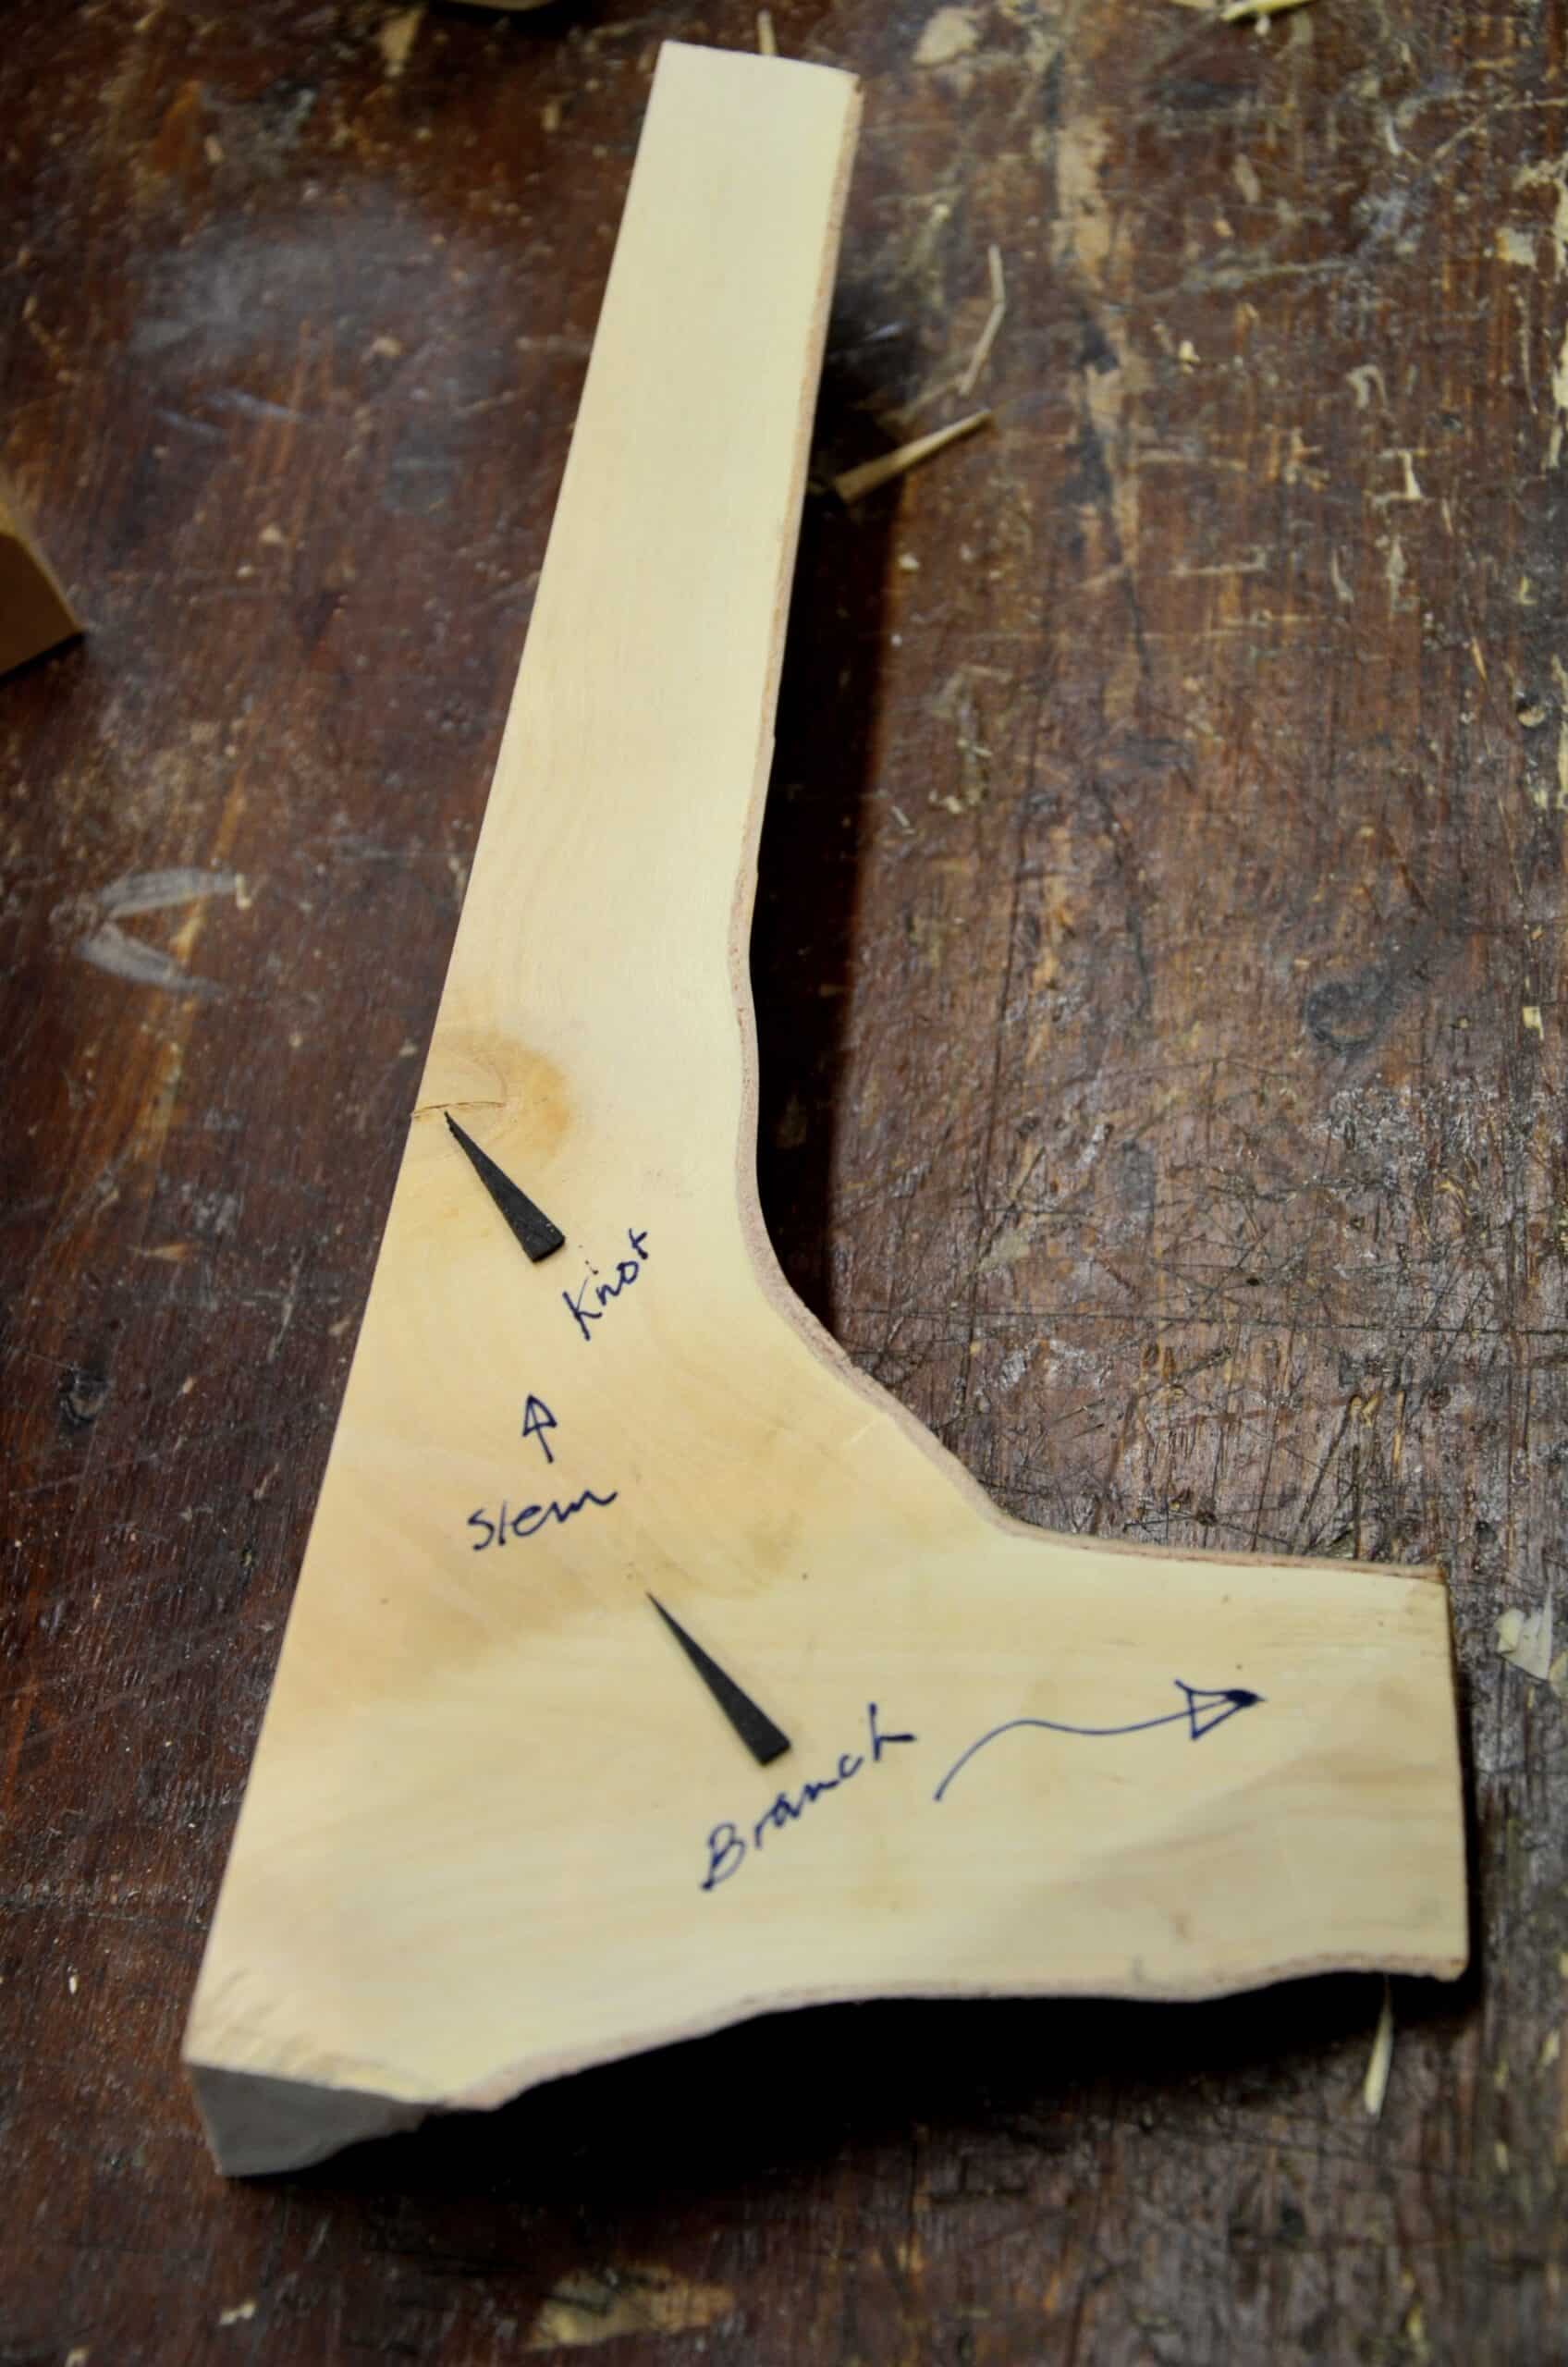
Because of the growth direction of the tree, the grain in the wood we get is generally unidirectional along the main stem until the branches splay and spread to become the leaf-bearing canopy. The commercially harvested and processed wood sold to us comes from the stem only and not usually the branches. This results in straight-grained wood with greater strength and resistance to pressure in one direction over the other. Wood only splits along or with the grain and not across it; that’s unless subjected to some very extreme force which is usually breakage rather than splitting. When we cut the tree stem into boards and beams the wood has greater resistance to bending and cracking along its length. In continuous grain, the wood retains this property, but when we cut across the grain as in the short cuts for the splays of the dovetails or in between the pins, the resistance to pressure and the risk of splitting is radically reduced and so an unwritten law exists to those of us who accept and work within the natural limitations and properties of our materials. It does not mean we cannot experiment, try something different, just that we should be prepared to change direction in view of our findings.
In my view, it is a good measure of an artisan’s character when he or she gives consideration of the wood and tools they use. It’s no longer that they have been told to do this or that but that they have internalised care as being intrinsic to craft and intrinsic to the person they are. If someone tells you never to cut a dovetail this way or that way, to sharpen a saw this way or that, or use this plane for long grain and a bevel-up plane for end grain, you can accept what they say, but doing as I did, gives clearer understanding and thereby acceptance in your findings.
Experimentation is pivotal to knowledge but the knowledge should become yours to own. In other words, experiment all you want, but be prepared to change your mind and your opinion on things. The only reason I generally do not favour bevel-up planes over bevel-down versions like the Stanley and Record bench plane versions is that there is only minimal advantage and only in some possible cases. My experience with bevel-up planes is that they generally work well across or at a tangent to the grain — on end grain and mitres, such like that. Experience tells me that the bevel-up plane is more than likely to tear the grain quite deeply, fifty times more likely than a bevel-down version. Inevitably, owners of the bevel-up planes are highly defensive and will contact me to tell me I should use this or that plane iron or that bed angle. The truth is though, in the moment, as you plane that surface on that very unique section of wood, before you know it to strategies as advised, it’s too late. The damage is ALWAYS already done and when you cannot predict it ahead of time. The damage is done BEFORE any remedial action can be taken, usually irreparably at that.
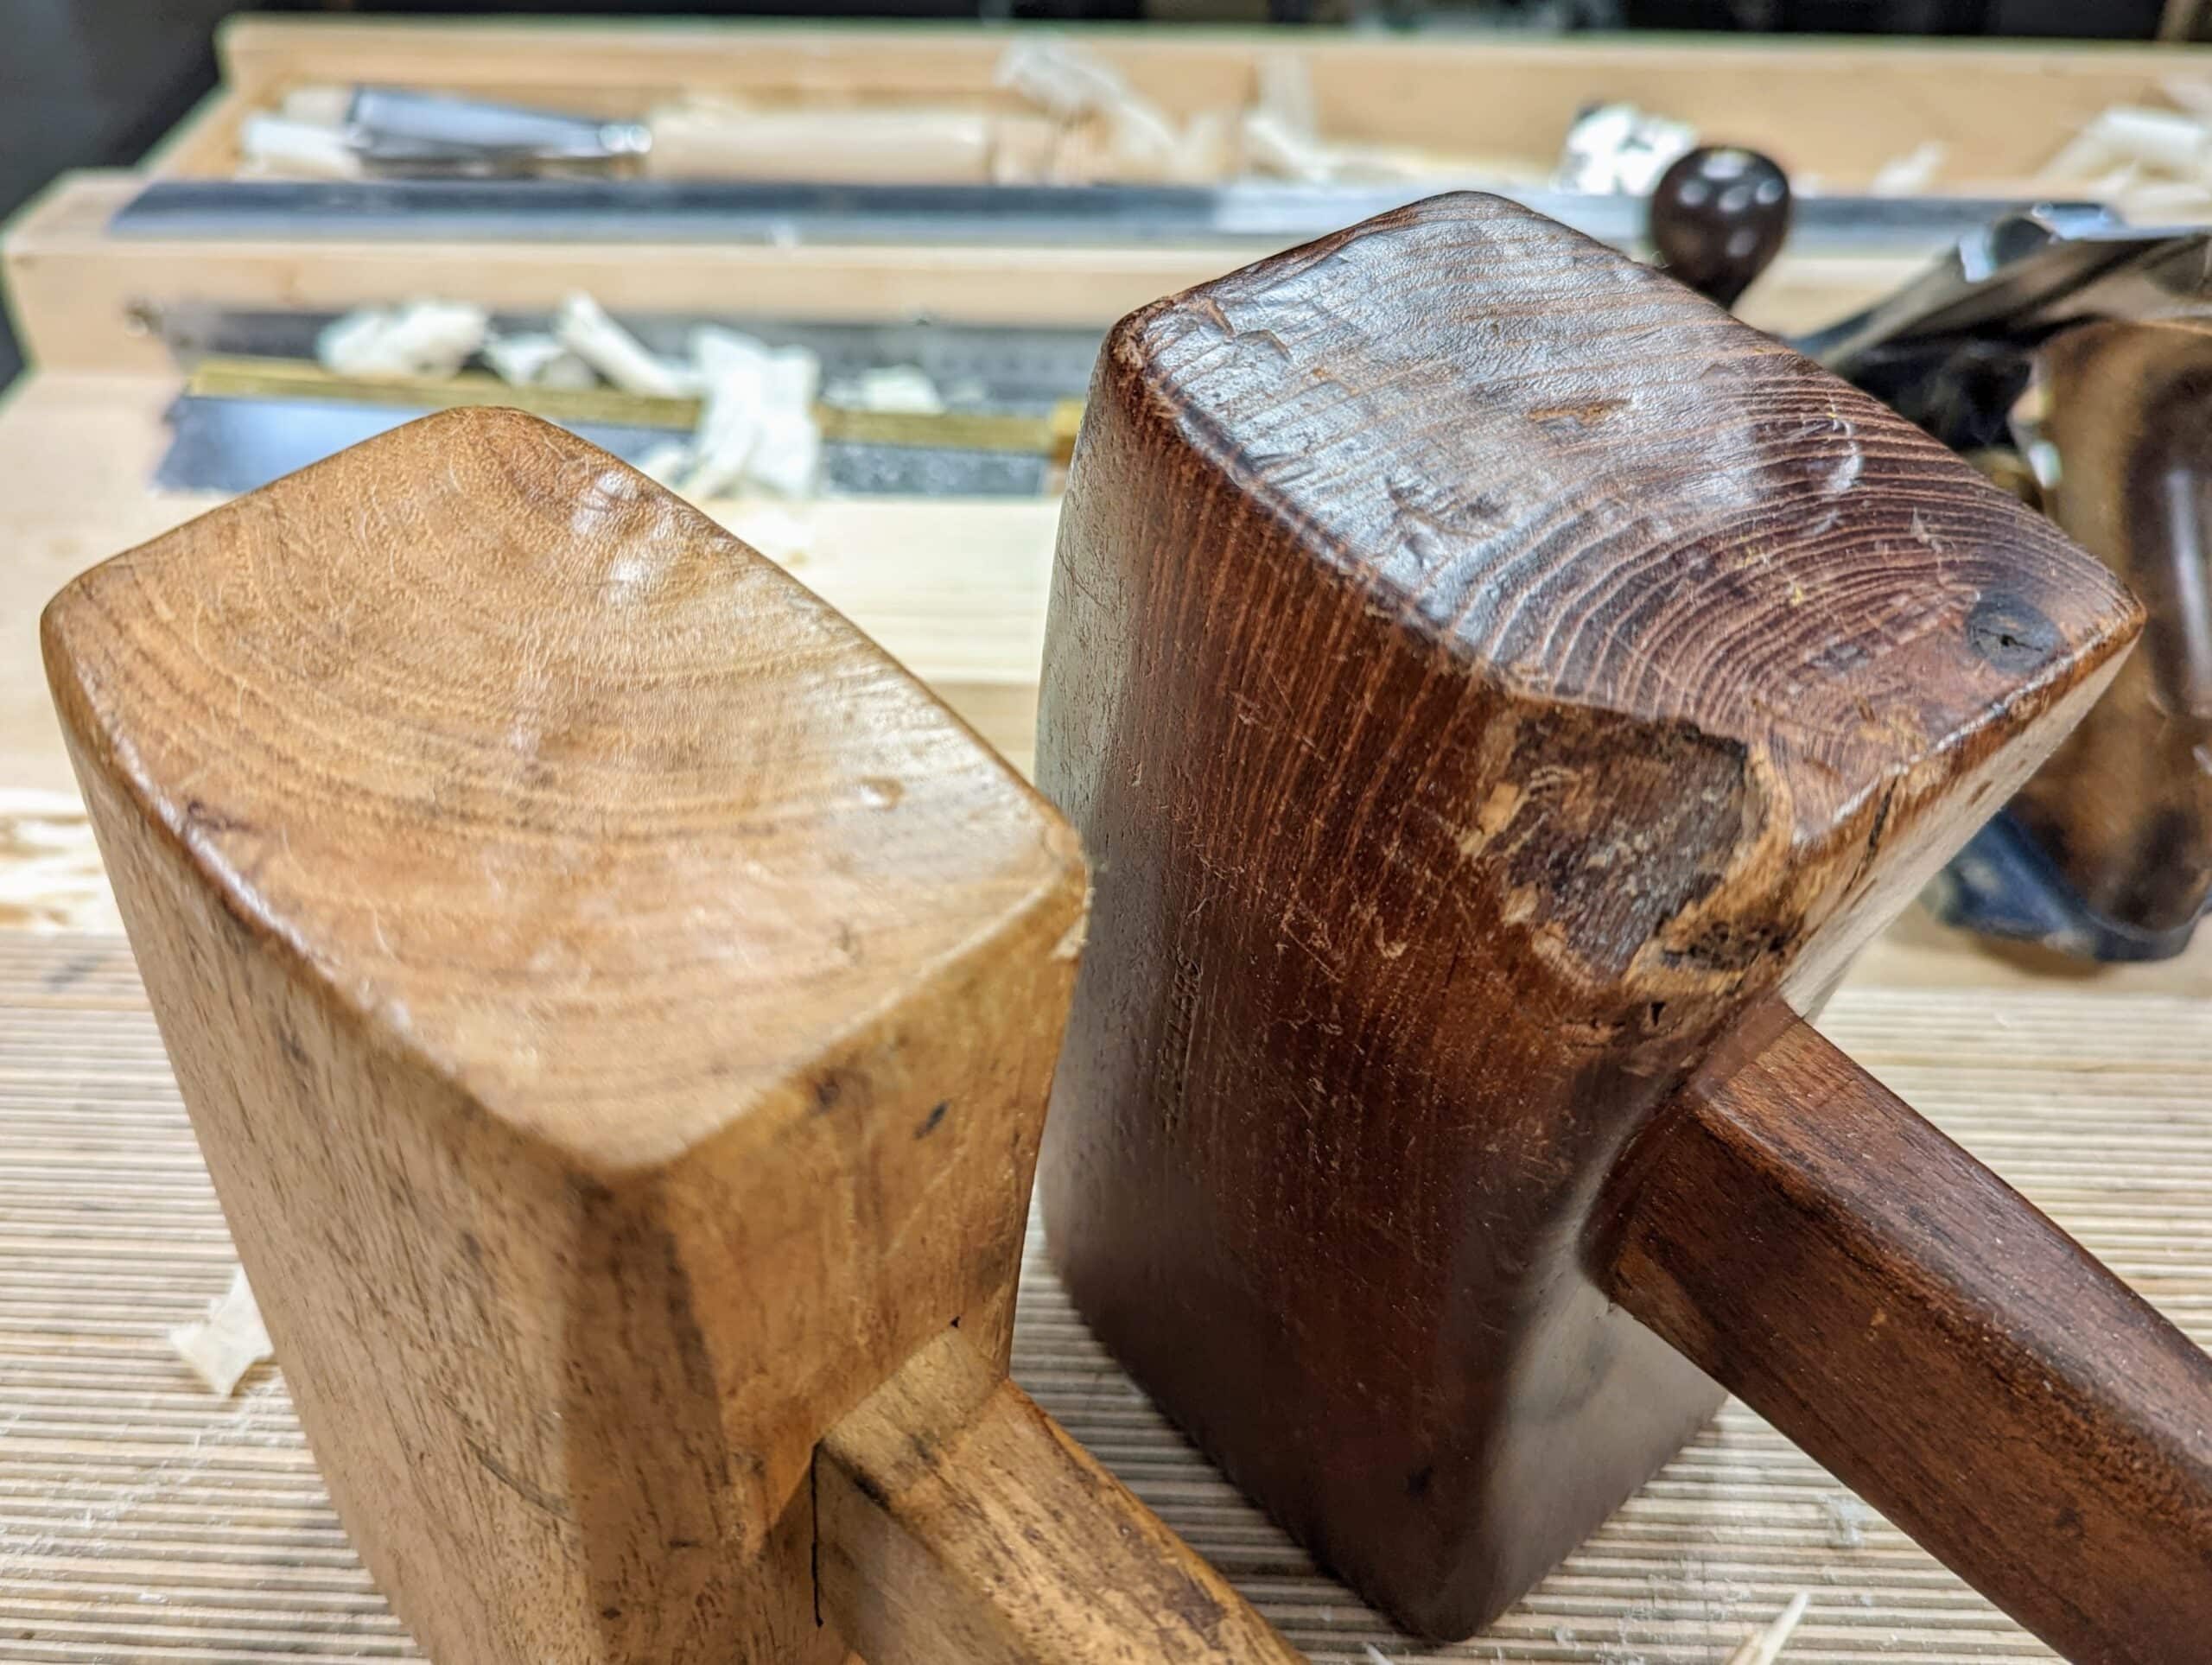
When something is revealed to you in the outcome of your trial and error, your experiment and whatever, you suddenly own it; as experiential knowledge, it becomes yours for life and you can then rely on it. It is always good to recognise the limitations of all we call work and to then acknowledge those limitations by working within those limits. Knots in many species result either in weakness or strength. When a man I worked with in my apprentice years sought out the knottiest piece of cherry from which to make his mallet head it needed but few words for me to understand his reasoning. Some knots work and some don’t. In his case, it was the interlocking grain surrounding the knot and extending well into the adjacent wood that he sought. Cherry on its own is not the best wood for a mallet because of its lack of density and its lack of resistance to splitting as well as density. The wood surrounding knots is almost always denser and indeed omnidirectional too. He was prepared to work through the omnidirectional grain when chopping out the mortise to receive the handle. Wood that many might reject can be a good source for a mallet head. Look at turning wood for sale. This wood would one time have been binned but when woodturning came into hobby realms such wood became sought-after “character wood” for bowls and vases. Look for even density though. If there is a central hard spot it needs to be surrounded by support wood. Just an added point: some woods fracture internally under malleting blows and some woods consolidate. My cedar elm mallet from a Texas tree is hard and dense and evenly so throughout. It’s the perfect mallet wood but not at all readily available. Using it through two decades plus five years it has become denser. Bois d’arc has given me a couple of mallets of even density weight and hardness too. Mesquite is twice as hard as oak but not a particularly good choice for a mallet as the grain collapses. In this case, I would look for something with dense, interlocking grain and within the branch range of the stem where the grain becomes denser during growth.
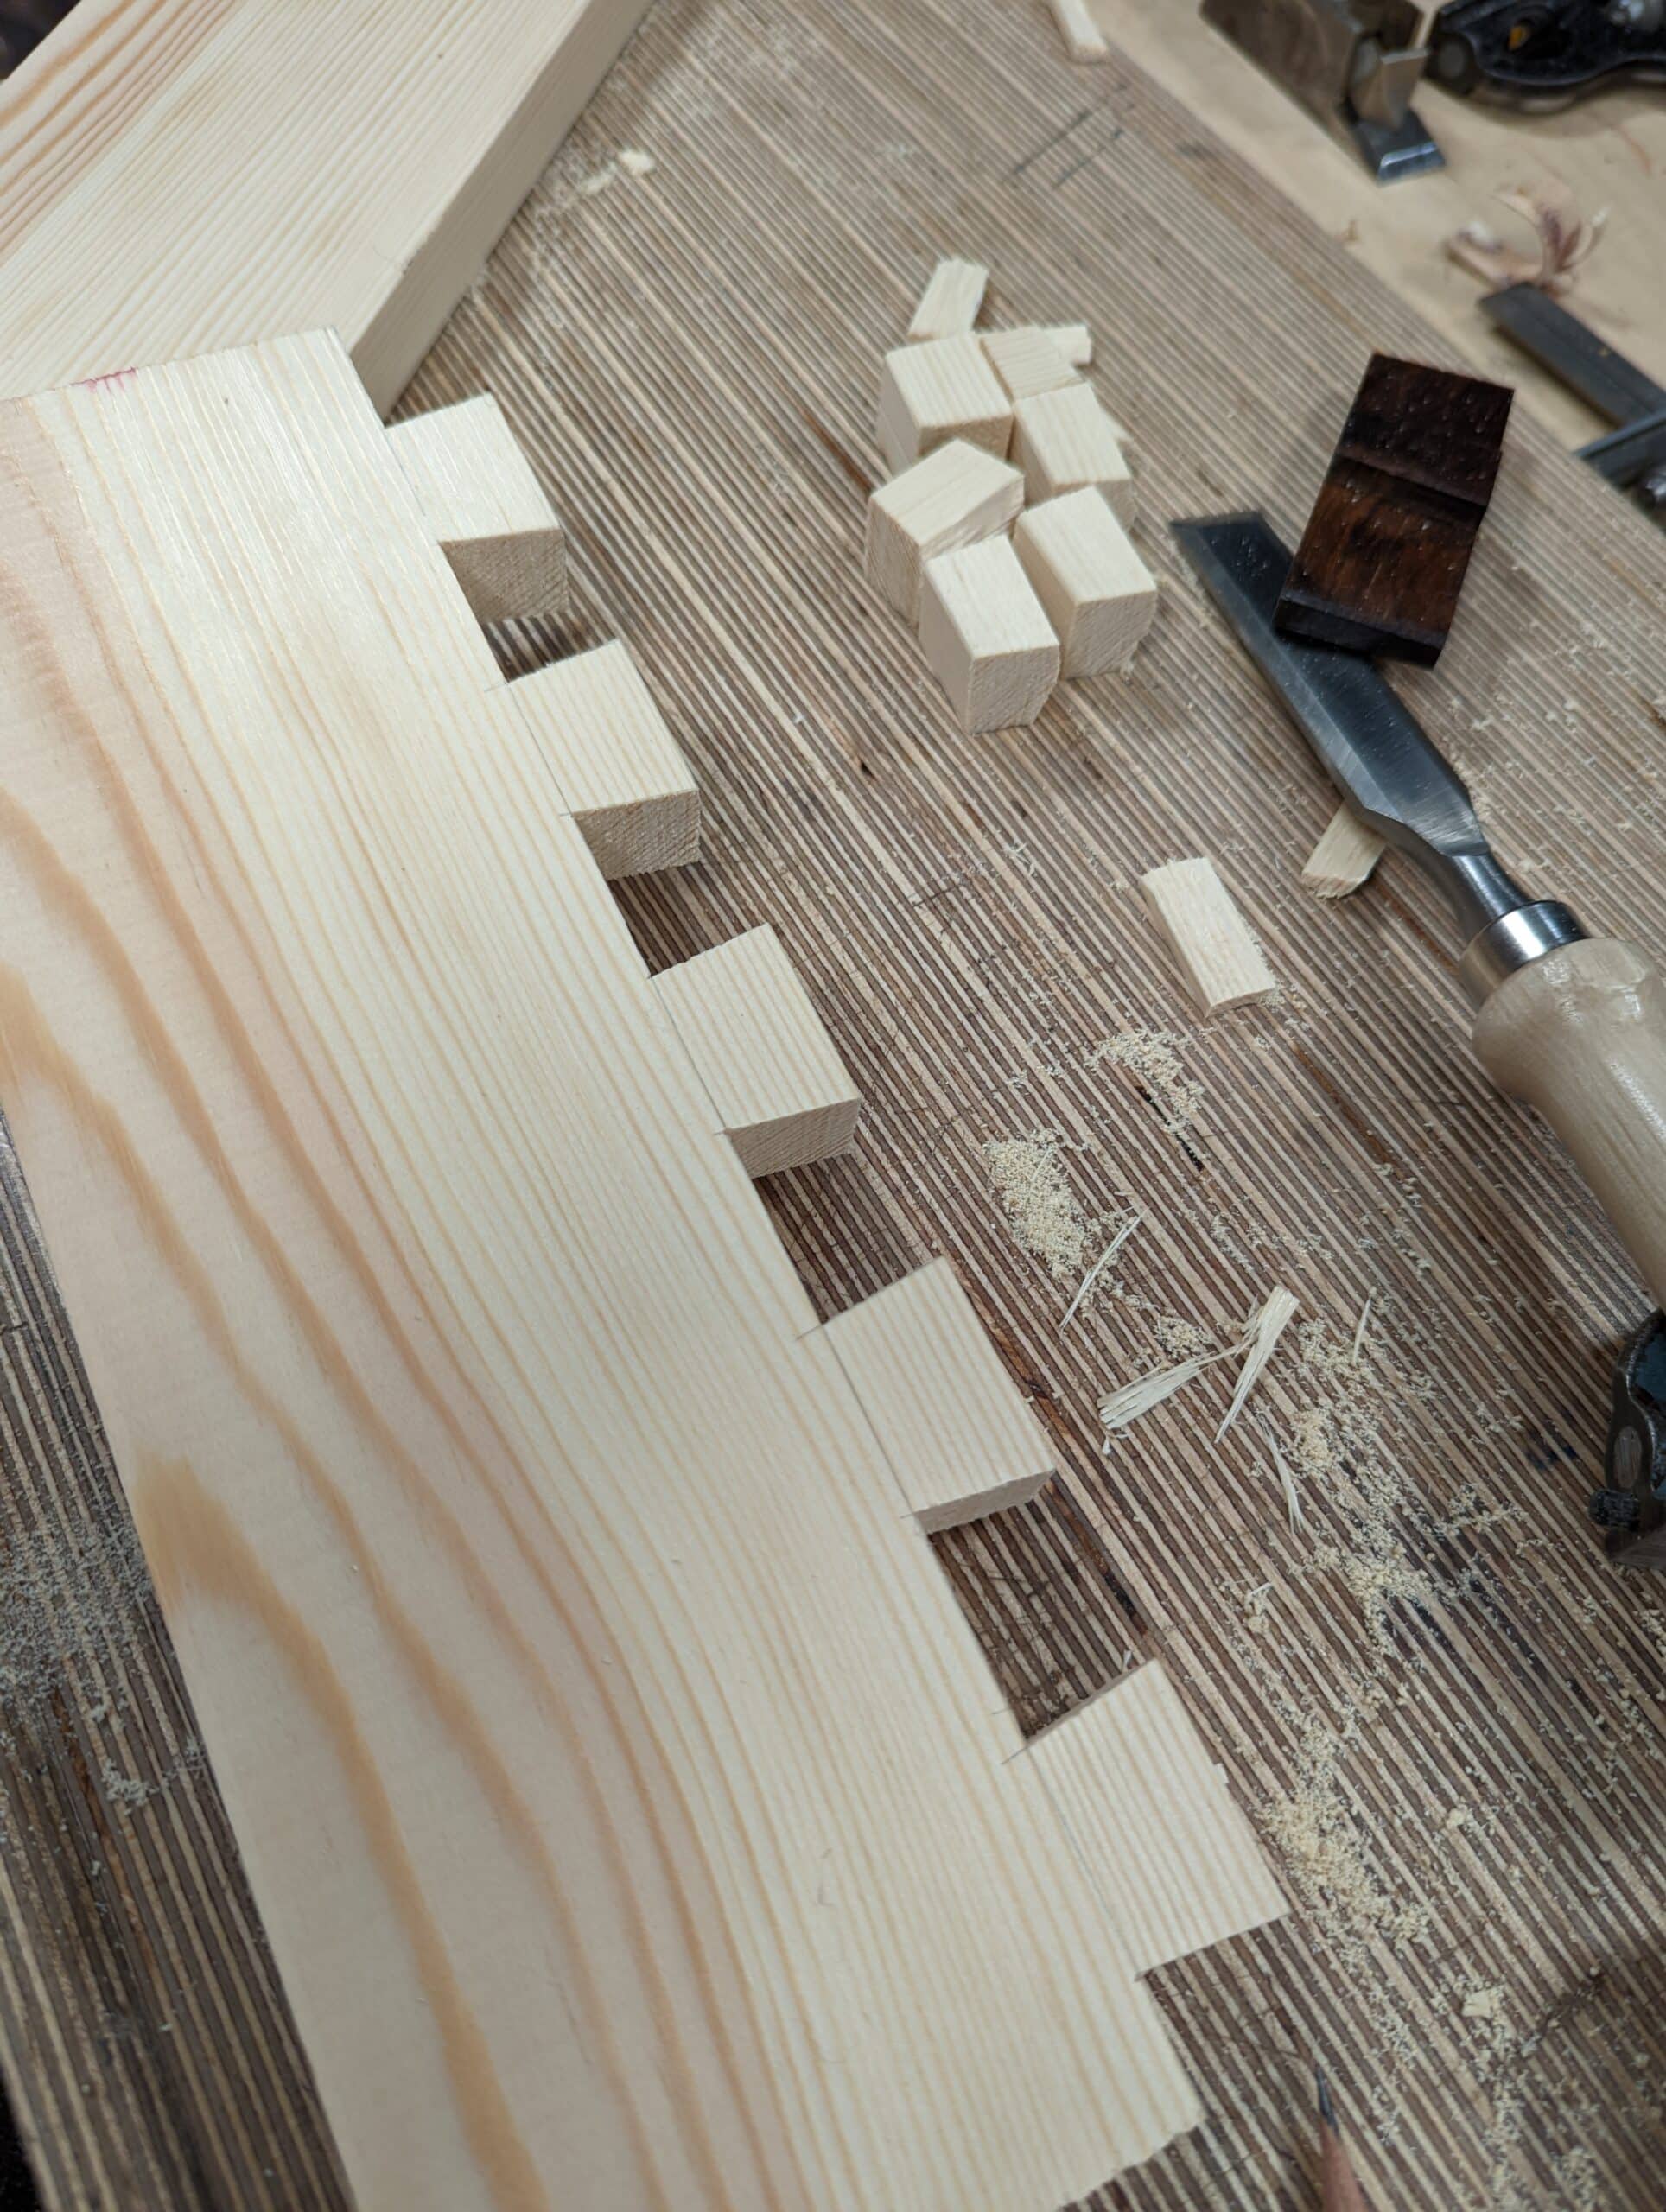
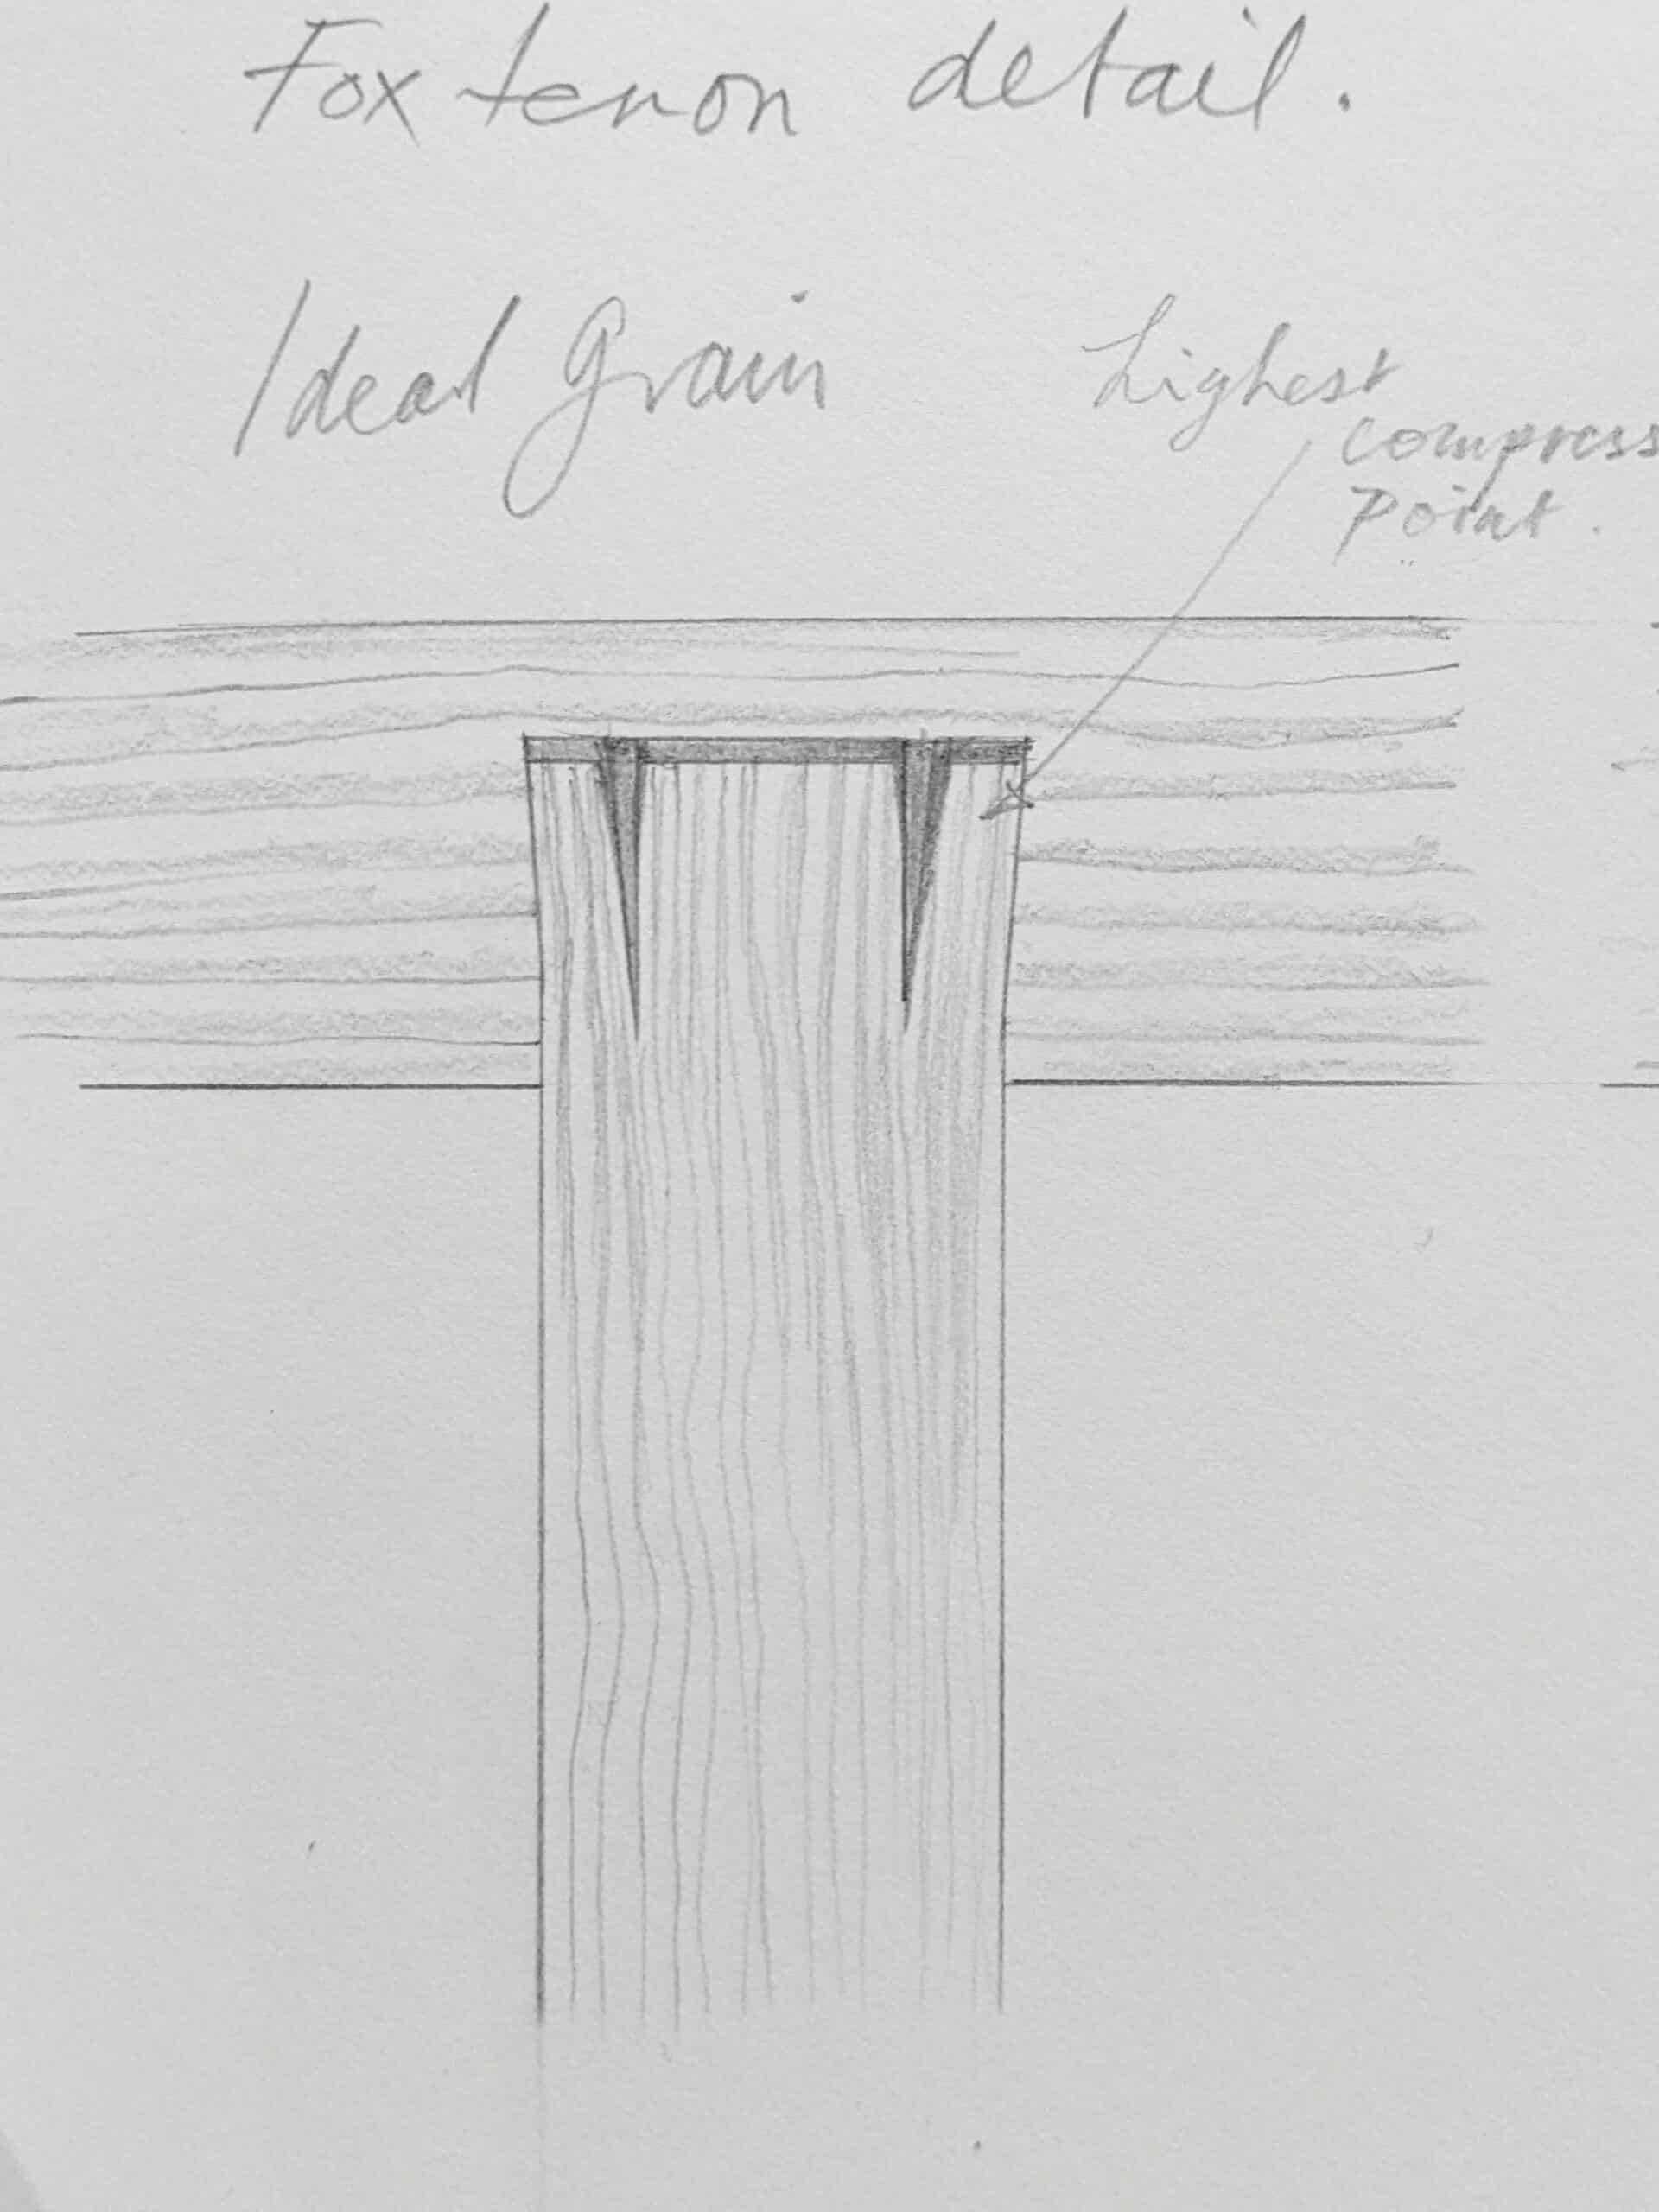
In crunching the alternative dovetailed examples, thinking about how it felt at the time, in the minute, I did feel a wall of resistance, a reluctance within me that I had to push through knowing that I had created something well intending to destroy it. I found, of course, that it went against the grain in that I am always making for longevity and permanence and never so short a life to intentionally destroy something I had just made. I have only done this handful of times in my 57 years of woodworking. The last time was with the fox-wedged mortise and tenon, you might recall, where after it was done I cut through the whole to see the effect of the spread within the mortise. The fox-wedge is not a common joint but an extremely useful one with specific applications. It at first seems destructive and time-wasting, but the visual impact is far more informative and long-lasting than an explanation alone and so that compensated to make the effort well worthwhile.
Destructive though it seemed, the examples show how we as crafting artisans must consider the grain and work within the limits of its natural, organic structure. To do this we must understand more about grain and what it is. before we become makers we see and understand wood without depth, as a surface, little more than a photograph. Once we get inside the wood, experiment with ideas, split it, saw it, bend it, work it with our tools, flex it in our hands and fingers, we start to gain some deeper insights and gain understanding of its substance, but we must see it as ever-deepening. We have not yet arrived but we are on our way, for even then we can only say we understand wood and grain by degrees. We better understand the characteristic of different wood types in the working of them over a period of time. Even people such as myself, lifelong woodworkers, only really know the woods at a very limited level. Take one species alone, Redwood pine, for instance, a wood I have worked with almost daily over almost six decades: each time I work it I learn something new from a pocket of resin sealed for decades and then seeping as though just woken from sleep, the undulation of a grain part that diverts from the common path of all the other growth rings, as though something impacted the tree 50 years ago, or a hundred. I see something different and consider myself choosing a different approach because of what I see.
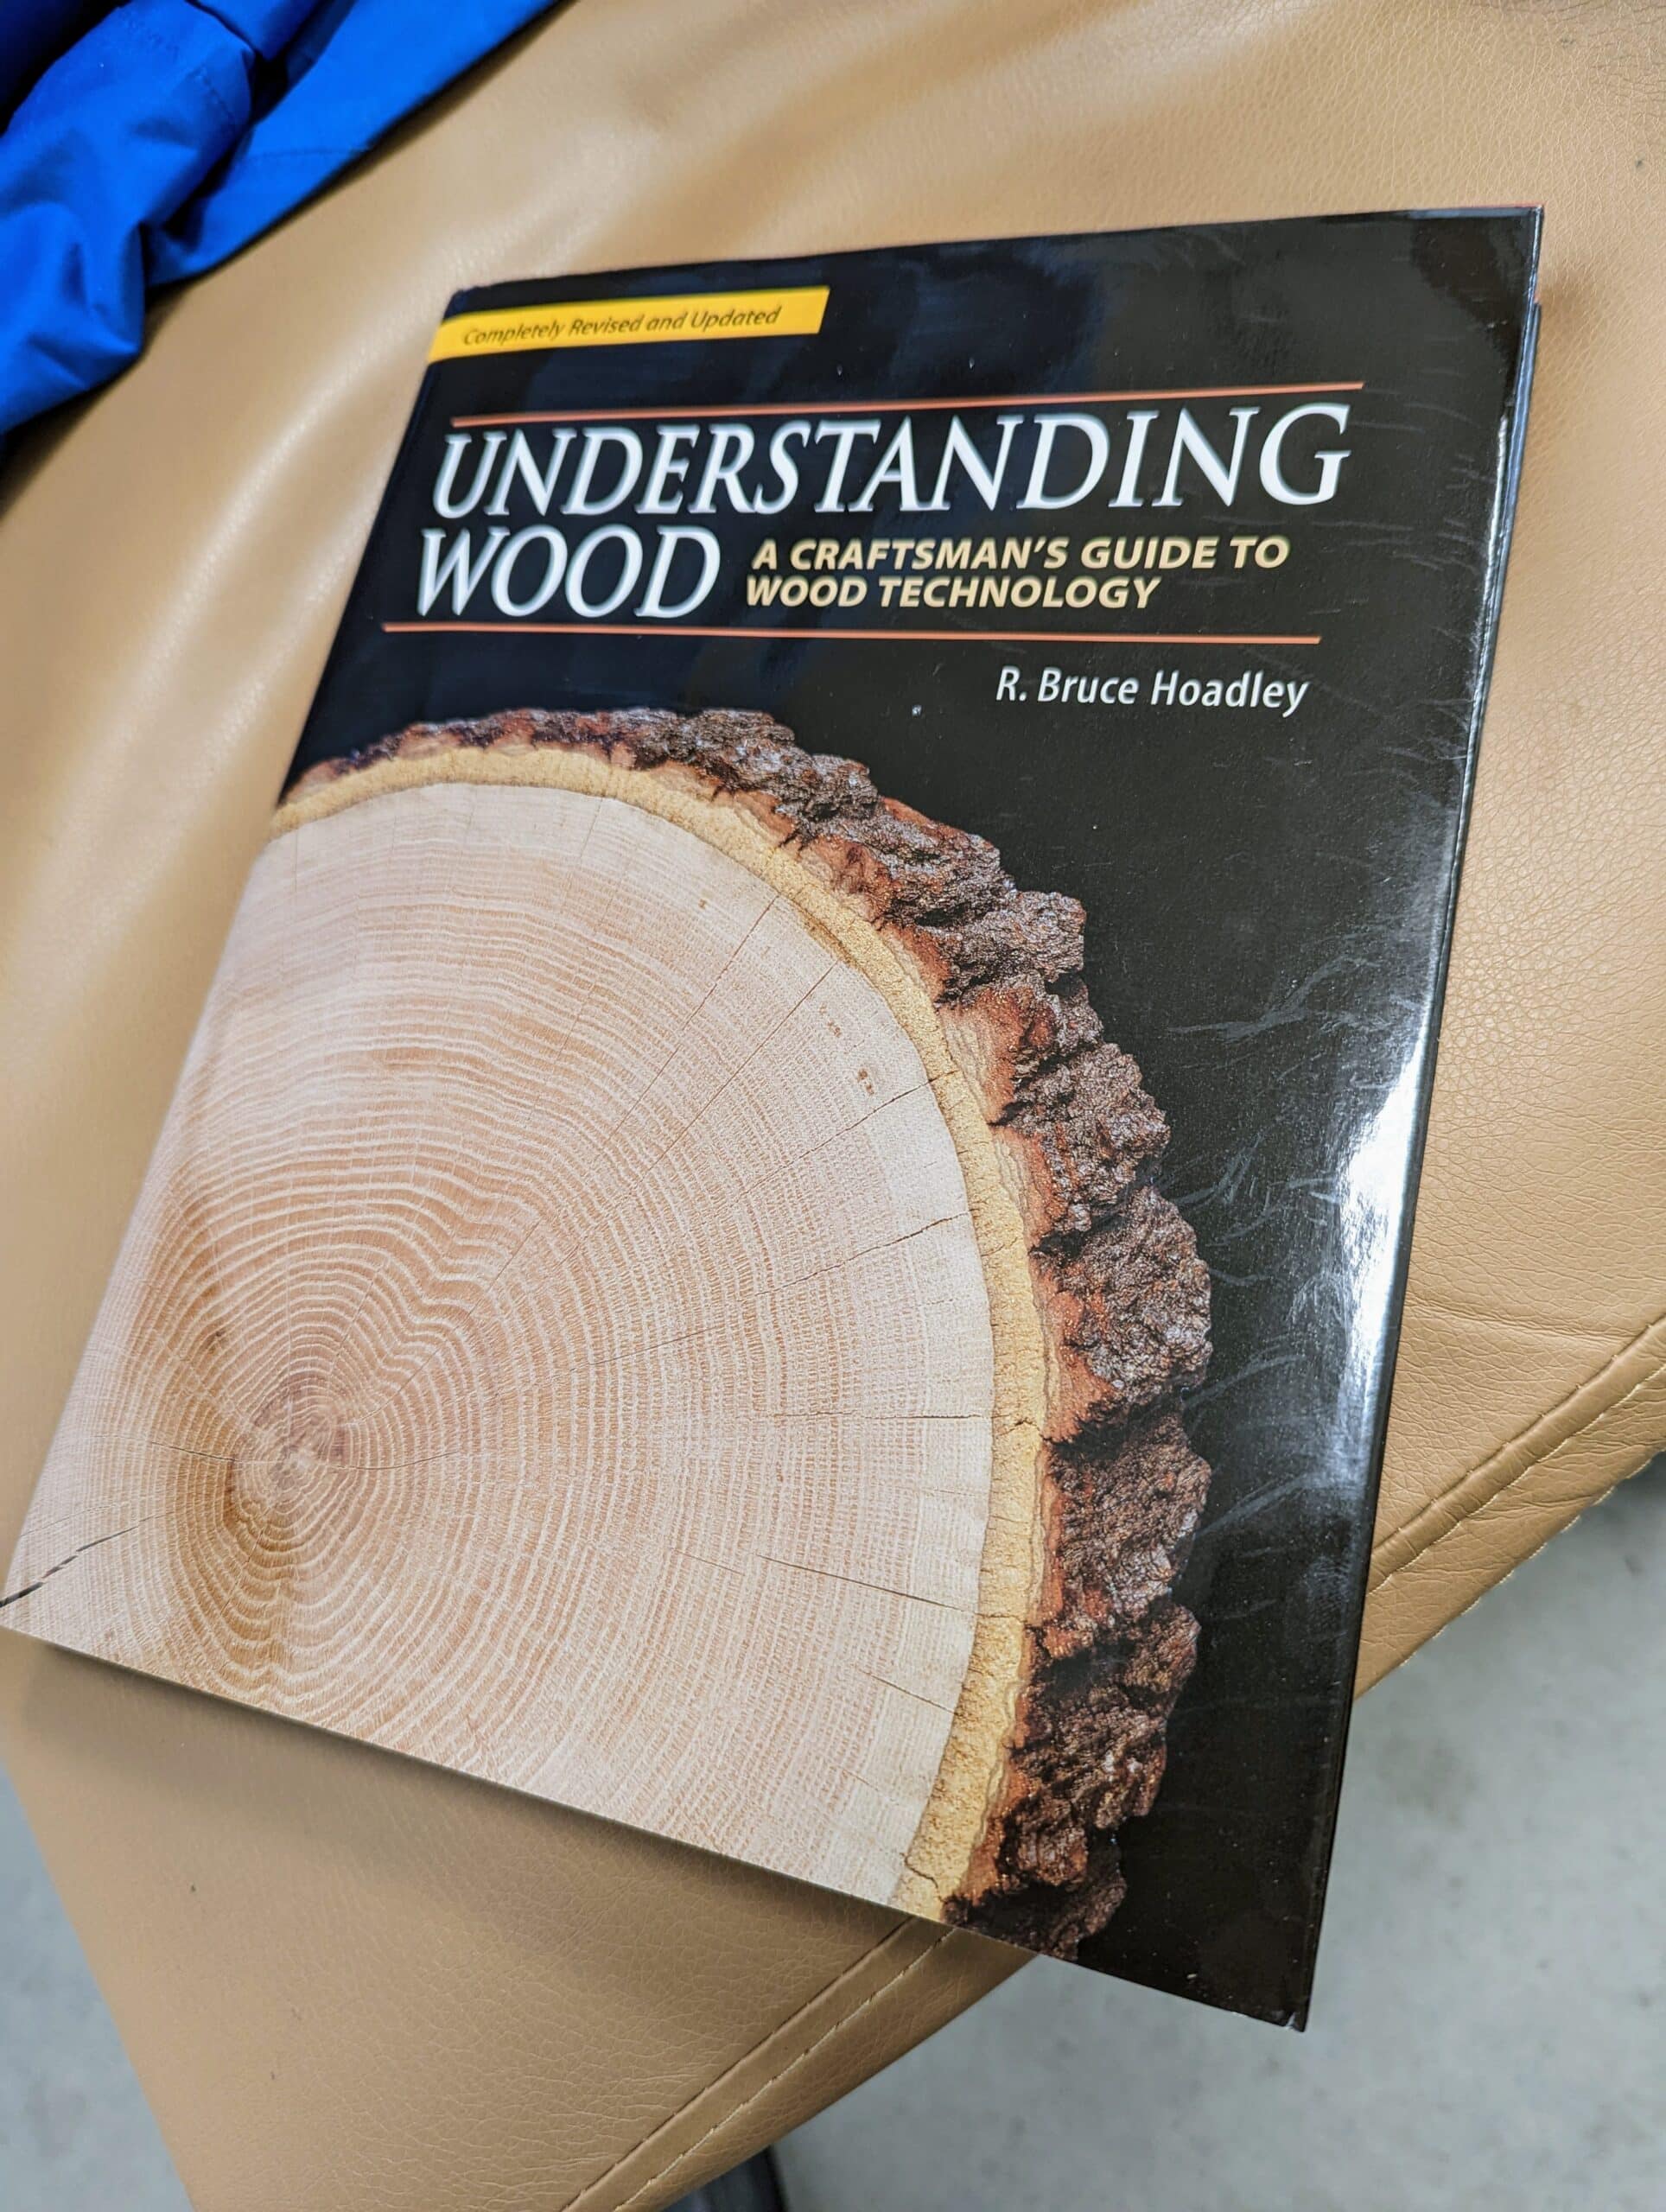
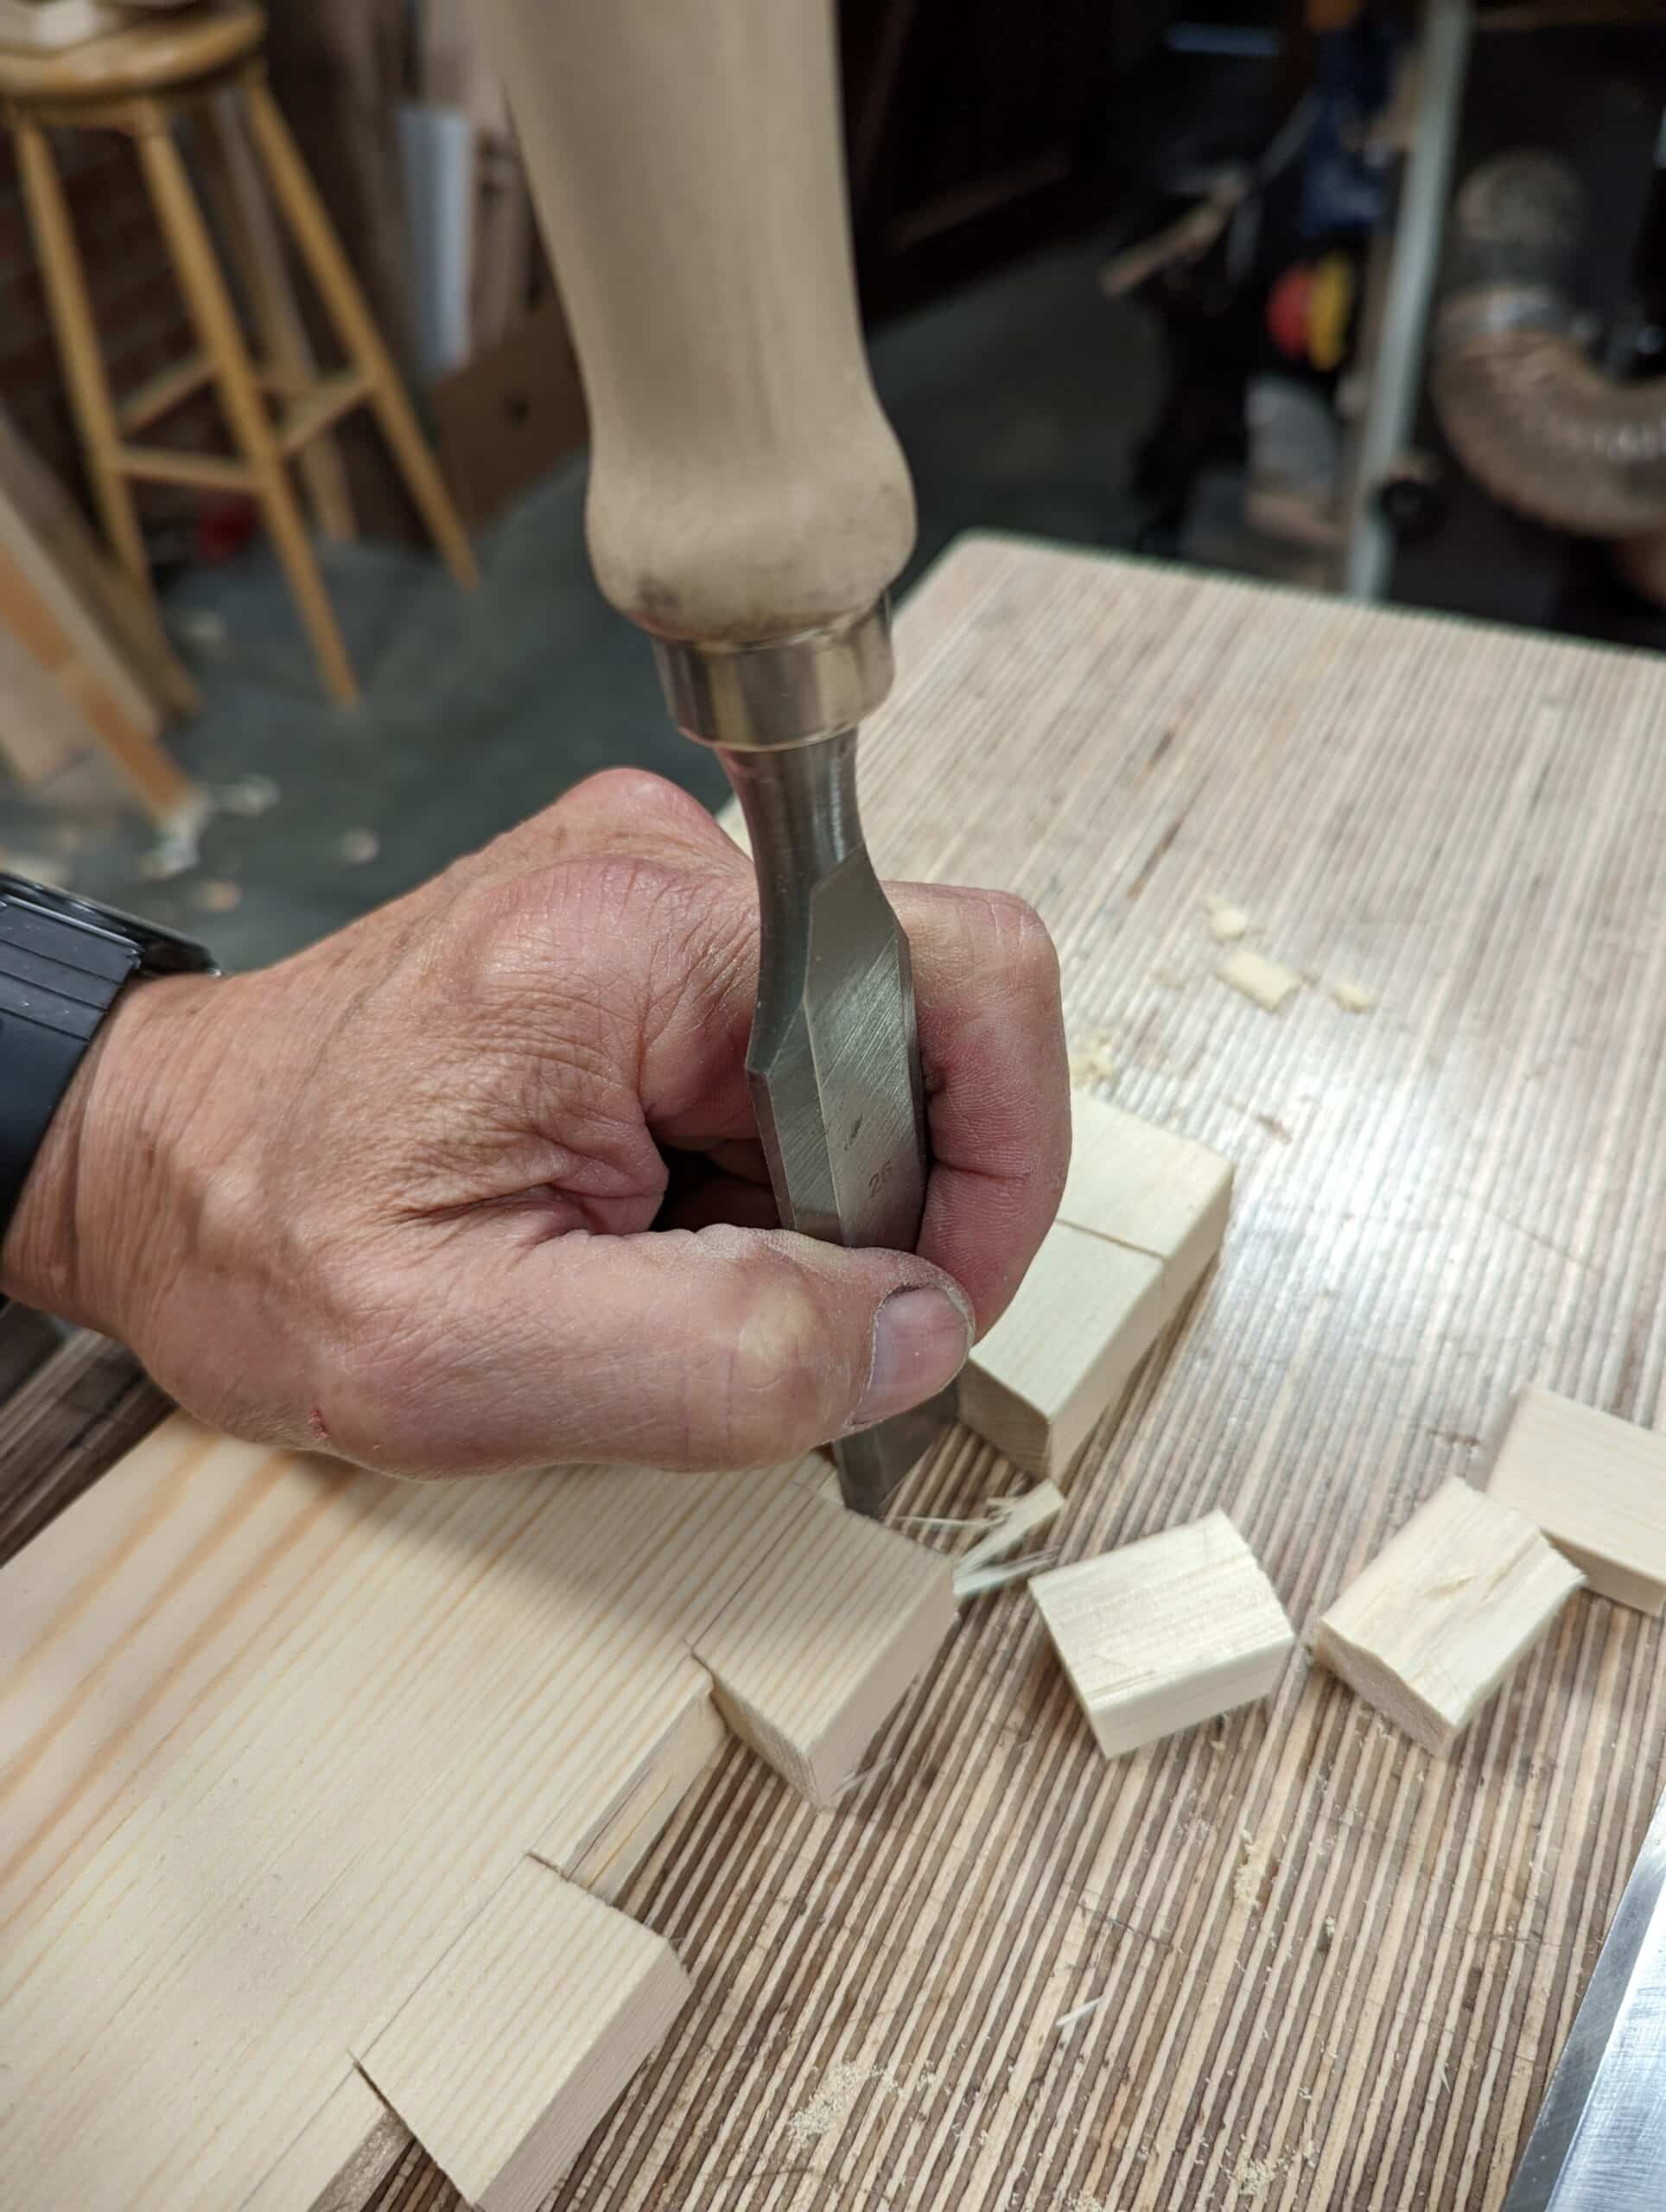
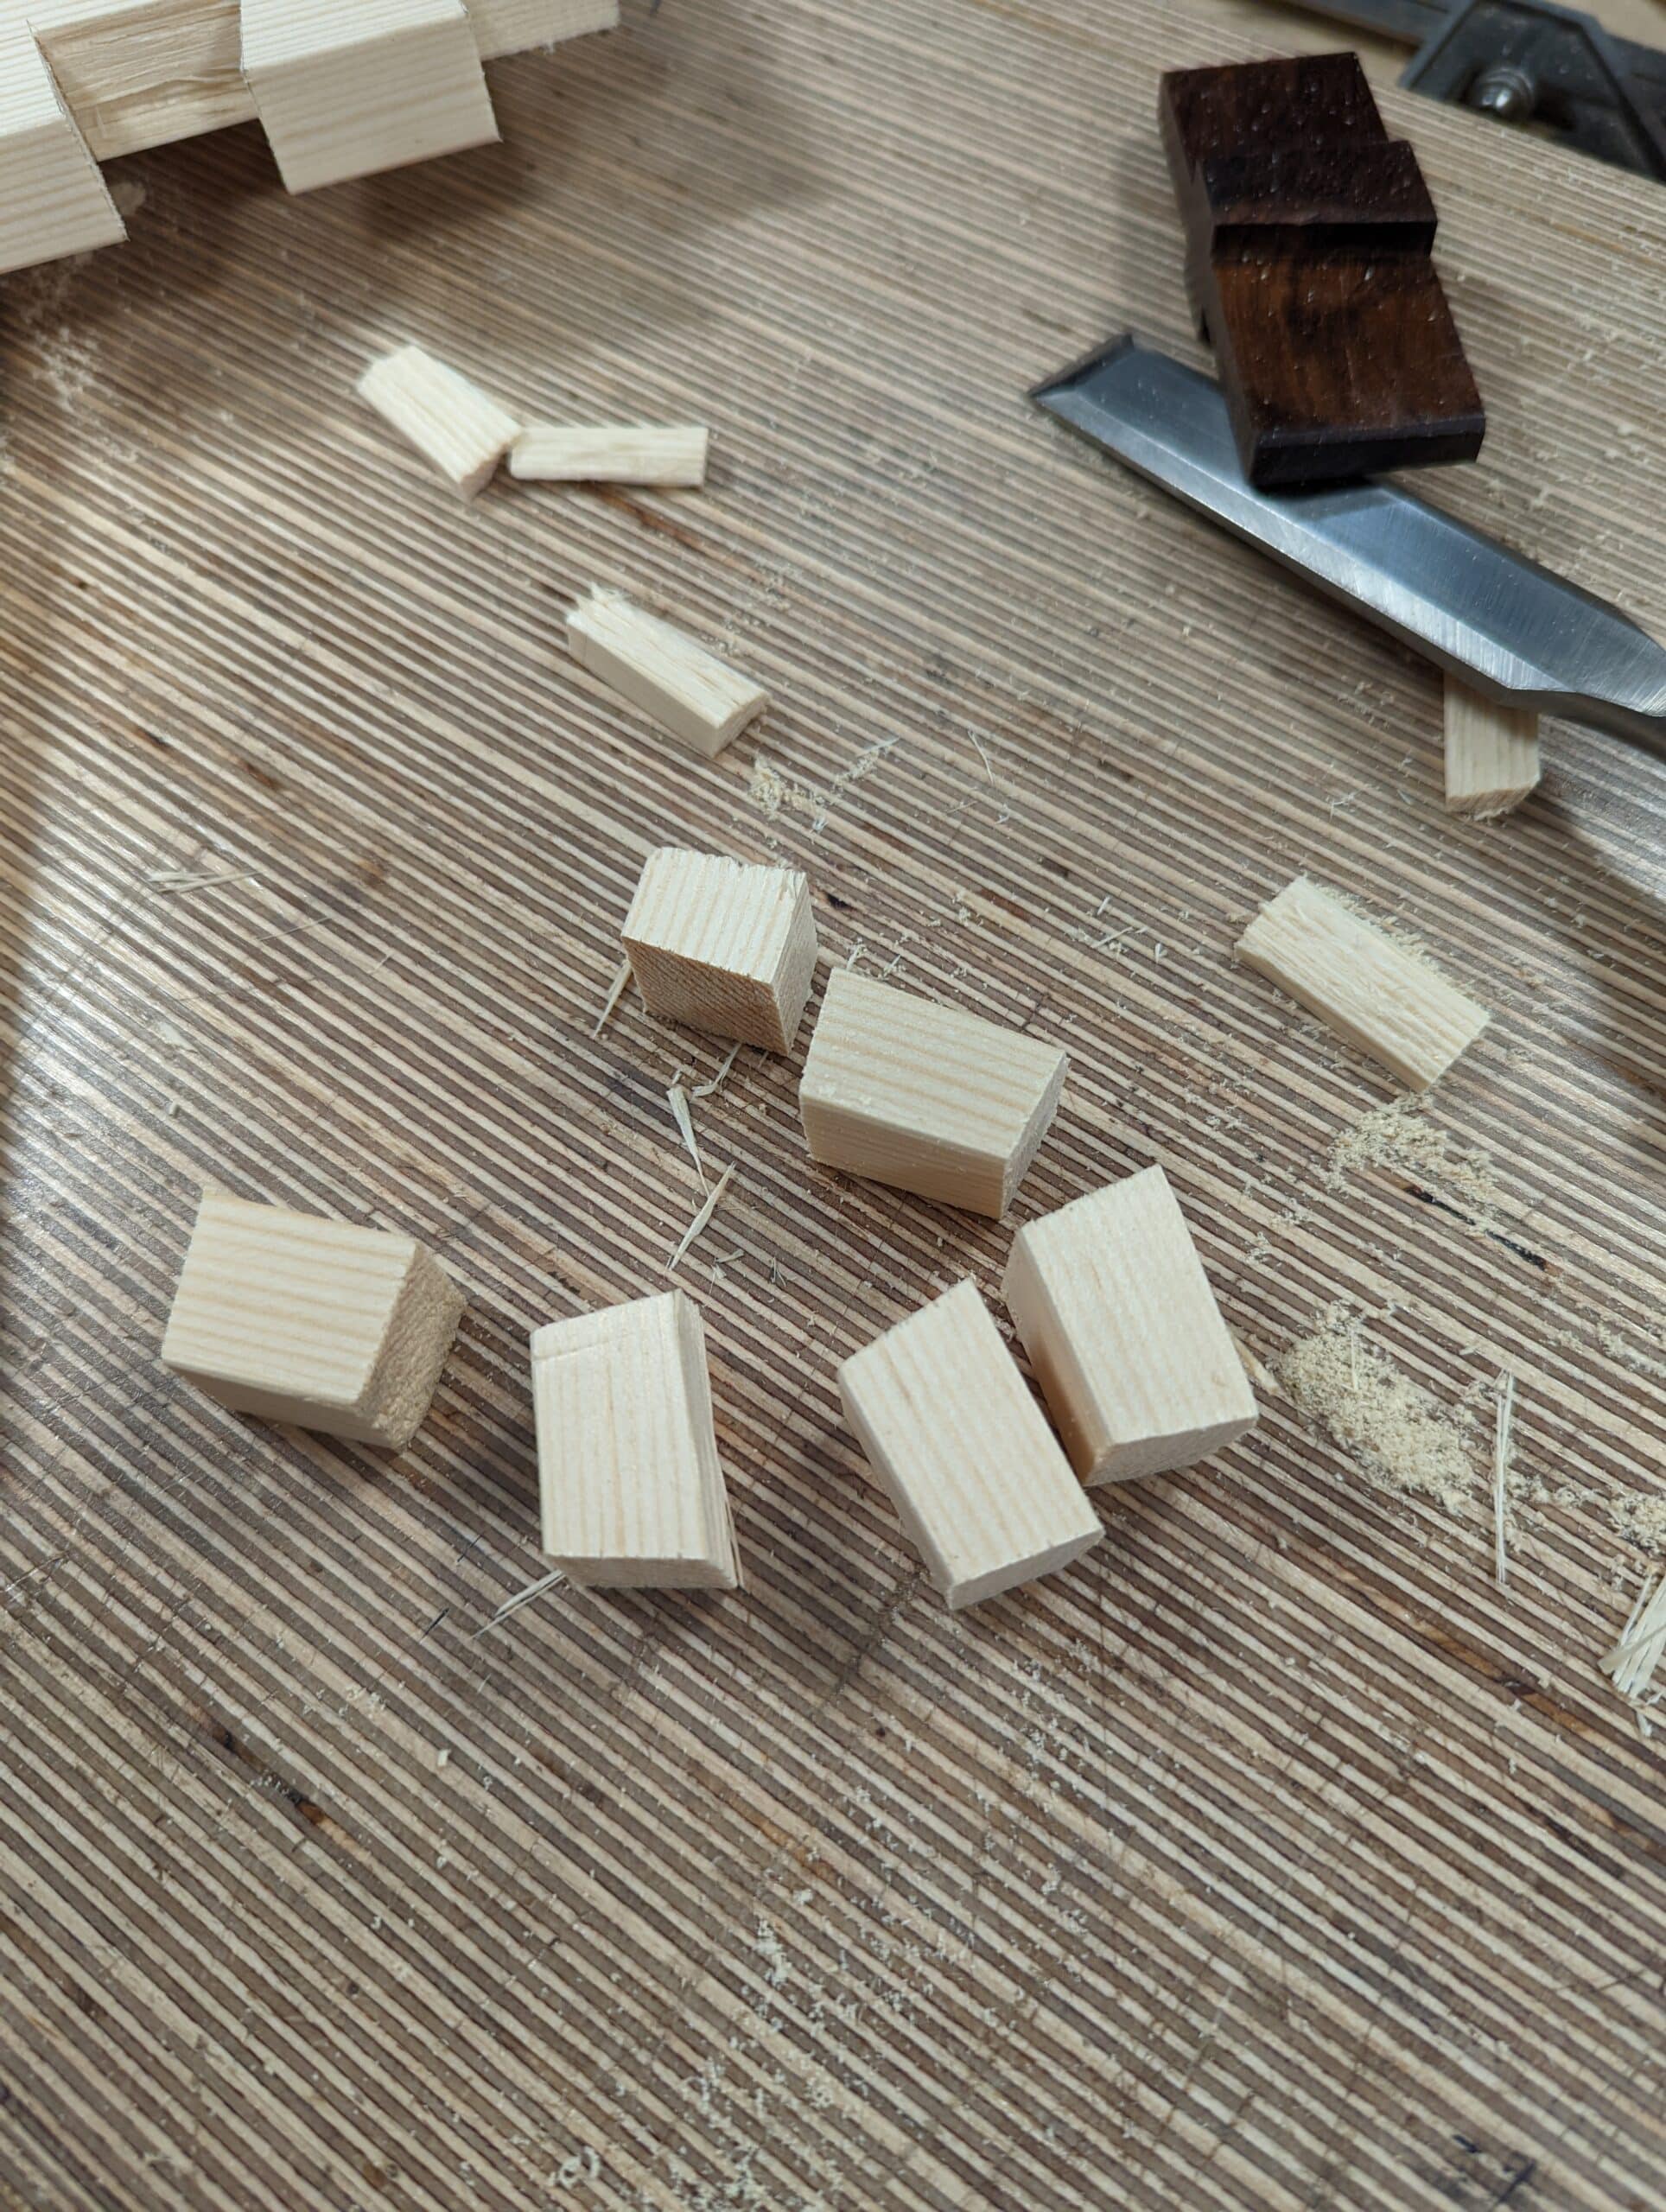
I have read information by authors known as experts, professors and such, I mean. I recently read a book by such a person explaining many things trees and wood. All quite interesting stuff, facts about ancient trees, forests past and present, how life is recorded in the growth of tree fibre, things that we might know but from a different perspective. At the conclusion of the book, it was evident that this particular author had not worked with wood as a woodworker even at the most minimal level. She had analysed data, processed information and presented it as an academic work. It was as if the work was presented as a deeply informative work when there seemed to be a heart missing from the whole. Primarily it was informative, a little dry but packed with what I might call relational knowledge rather than experiential knowledge. It made me wonder if she had taken a year or two out, removed her academic hat and made some pieces as everyone here does whether the book would have taken on a completely different dynamic without losing any of its present content. I believe this is what Bruce Hoadley did with his book Understanding Wood. From beginning to end his book is imaginative and totally readable. By relational knowledge, I mean accumulating academic evidence by way of reasoning, categorisation, planning, quantification and academic language. Supposedly, relational knowledge represents the core of higher cognition. I question this as being presented as fact in many cases. A calculation formula on a page representing moisture content alongside a pair of scales registering weight at the bench carries the same meaning but not really. Experiential knowledge is knowledge gained through the more sensory experience of handling our material rather than merely observing. Seeing even the most minute detail on a screen is still filtered to our mind’s eye through if you will a veil. These two ways of knowing are indeed radically different and give different experiences. On the one hand, my splitting the wood in my vise gives me a multidimensional understanding and of course, reasoning through the experience. The wood popping, the use of tension resulting then in the release of smells and sound, vibrations sensed, visual ability to focus and change focus from one part to another all broaden my understanding second by second as each pin or dovetail pops and fractures and splits off. Though I did my best to produce a video, it is still not the same as creating the alternative dovetails and then turning the vise jaw to apply pressure to breaking point to the whole.
My conclusion is that everything is necessary but mostly for different reasons and for we who work wood things are very different. Some people measure the density of wood in the lab with lab coats on and using more sophisticated measuring equipment, whereas others by the sensed pressure through a plane planing, a mallet blow on a chisel or saw cutting into the wood stroke on stroke, blow on blow and swipe on swipe. In my world, I know that the density, strength and resilience of wood is not singularly measured but one with shifts and changes throughout a single board. I am often amused when I read lists of wood densities because my experience tells me differently. I do understand that these are two very different ways of knowing with one result digitally tapped in as computer data, the other recorded in the mind and body.
Yesterday I was making a pair of bench hooks (sorry, I know you’re not a fan :/ ) in some particularly hard and straight grained red oak, using crosscuts and a chisel, and the pleasantness of the subsequent paring cuts right across the grain led me to similar thoughts. Even moreso since I had split the blanks along a check in an end cut of a board, nature having done the work for me. Overall it was just so pleasant in so many ways. Especially for those of us for whom this will probably only ever be a hobby or perhaps side-income work, taking the time to enjoy the work itself is so worth it. Otherwise what is the point?
a brilliantly edifying article, even by your usual standards, sir
I find my bevel up jack plane a pig to adjust. Getting the cap iron just right is a faff. However I find it useful with a 50⁰ blade or a toothing blade. I much prefer the bevel down plane.
Cheers Alan
I need some help, I brought a bedrock 604 1/2 plane, USA build, Patent APR-19-10. I am a Volunteer at WorkAid in Chesham and was able to purchase it when it was gifted to the charity. I paid a fair price. My problem is bringing it back to good/working condition without ruining it?
It is extremely dirty main, ground it grim and grease, virtually no rust other the on the ChipBreaker and Iron. there is a very fine crack beside the mouth. So I will need to be careful using it.
Is it best to soak the dirt off . If so, what should use. I don’t think I need to use a rust remover and I want to leave the Japan undamaged.
Any advice would be welcome.
Richard, the first thing I’d try is to strip it to its component parts and put them all in a bucket of diesel fuel.
Or maybe paraffin – I don’t know. I have ready access to diesel so that is what I’d try. Walk away and leave it for a week and it ought to soften all the grime and let you clean the bits easily.
I bought a Stanley #4 a while ago that was in a horrible state. Rusty iron, cap iron and sole. Broken tote and stripped tote screw thread and completely jammed lever cap and adjustments. Now it’s clean. The sole is flat and true. The irons are clean and sharp and the adjustments work well. It has virtually no paint left on it and the tote has an obvious epoxy joint repair but it all works beautifully. I don’t really care that it looks like it was abandoned for years because it was – it’s earned its scars. Form follows function and all that…
But I would never have attempted the repair without Paul’s teaching about planes because I wouldn’t have seen the viable tool under all the crud. I hope yours works out for you and you can get it how you want it, but even more I hope you get to use it successfully.
Diesel? That’s an interesting idea. I bought an old Parkinson vise on ebay a couple of weeks ago, rusty and dirty as hell, but will work. After scrubbing the dirt off with a wire brush, I left in a de-rust solution (Hammerite I think, can’t remember, bought in Halfords in the UK). It had very little effect and I was lost as to what to do from there. In the end, I resorted to power and used a nylon disc. It was extremely good and quick, and I didn’t feel unsafe using it (the wire wheel was a lot more daunting). However, a couple of things annoyed me. The first is that I had no way of getting to the difficukt to reach places (I’m guessing the power toolers amongst us would use a die grinder, but I don’t own one and don’t want to buy one). The second was all the associated safety gear, noise and mess, which removed all enjoyment from the process. Once painted, I know I’ll have a fantastic vise in great working order, but I’d love if the folks here could recommend more ideas like your diesel suggestion to avoid the heavy use of power tools (I don’t mind a little) for these types of rusty old tool projects? Thanks in advance folks!
If you’re going to resort to diesel why not just use Gunk degreasant? Brush on, leave on, hose off, clean as a whistle.
Hi Rico. Okay – I use diesel for cleaning. It doesn’t remove rust but it is a pretty good penetrating lubricant. Gunk is also a decent degreaser as Paul rightly remarked but unlike Gunk, dirty diesel can go in the recycling tank.
For removing or reducing rust there is something called Jenolite which works reasonably well.
But the great thing about your vice and my plane (and the half inch chisel I rescued from about 10 years under a poultry shed) is that they are made of stuff that doesn’t rust easily. Most of the corrosion should simply scrape off and clean up with steel wool. A quick polish with fine wet–and-dry if you feel like it and off you go.
As for hard to reach bits you might find a friendly old car restorer with a small sandblast cabinet. They’re pretty easy to make so lots of us more, umm – “traditional” mechanics have them and most of us are friendly!
Just a thought; good luck with your vice!
thanks! I never considered the sand blasting approach, that would seem contained and efficient. I tried steel wool and didn’t get far. The rust was thicker than expected in places! Anyway, the grinder worked for this one, and I’m left with a vise that should last another 100 years.
A basic sandblaster does work well for cleaning off rust and gunge. If you have access to a compressor you are ready to go. Tape off more sensitive areas as needed. a couple o wraps with plastic electrical tape or masking tape.
Hi Richard, The only thing that would cause me concern is that hairline crack by the mouth – as you say, you’ll have to be careful. As for the rest of it, you can do no better than watch Paul’s video on restoring a Stanley plane on YouTube. It more or less echoes what RS Hughes has already said, but with details.
Paul also has another video on there about making totes. I’ve made several now, and it’s not as scary as you might think!
Hope this helps you. Good luck
Regards, Chris Manning
Man, I really enjoy your videos!
I offer this as a reasonable alternative, like your plywood workbench. It’s all your fault.
After seeing your wooden mallet video, I wanted to make my own, mostly because it looked like a fun project.
Having no thick hardwood to use, at first I thought about laminating three layers of some 1″ white oak had on hand, but I remembered how you said something laminated wouldn’t last.
Then I thought about your plywood work bench.
I did have some 1/2″ Baltic Birch multiply plywood on hand, so I laminated six pieces of the 1/2″ Baltic Birch plywood together to make the mallet head.
I cu the plywood pieces to size, I laid out the handle “mortise”, using a 1″ tapered oak handle that I made first as a pattern, and cut the two central pieces of plywood before I glued up each half separately. That allowed me to be sure that the two mortise halves were identical, because it would be very hard to change the mortise once the head was full assembled.
I used Titebond 2 glue, and clamped the laminations as identical halves overnight. And then (smile) I glued up the two halves to make my final mallet head.
The finished head wound up weighing 10 grams per cu.in., which is exactly the same weight per cu.in. as my white oak handle.
I added two coats of thin superglue to the striking faces, to consolidate any softer wood that might be in the original plywood laminations, and then gave it two coats of shellac.
It is comfortable to use, feels balanced, and hits with energy, but I still prefer to use my Thorex 712 chisel hammer (thank you again).
Sorry to be so long winded.
Hi Mark,
I don’t mean to be cheeky, but it may sound so:
You didn’t want to laminate solid wood because it wouldn’t last …so you laminated ply instead?! I don’t get it. How’s it to hold better now than then?
Cheers, P.
Just to butt in here, laminated wood is well-proven to last and for centuries. Much of the longevity revolves around controlled environments. Any masses of exchanges in moisture levels will ultimately result in a breakdown somewhere be that the wood or the glue line. I own vintage tabletops and legs and other components well into the 1800s that are just as sound with animal glue.
Paul, a really lovely article, thank you. I recently prepared some blanks from a christmas tree stem that I’d cut a few years back and left to dry (or just left really, until I got round to dealing with it!). Just a 6-7 foot tree, likely very fast growing, but it was more of an experiment than anything. I chopped it into a few manageable 15-30cm (6-12inches) lengths and just rip cut the bark off, planing to create some perfectly square lengths that I’ll use for carving most likely. It was actually a delight to work with, creamy like boxwood and a lovely smell and feel. Whilst under no illusion that this was something I could use in a fine furniture project, it was nice to take it from tree to blank, which was a first for me. It gave me a better understanding of things (especially in such knotty wood!), and although just some basic dimensioning, was a fun project.
Your words here brought me back to a beauftiful book I read recently called Braiding Sweetgrass by Robin Wall Kimmerer. I think you and your readers would very much enjoy it. She is a scientist that appreciates the sense and meaning of things. This article reminds me of her writing (I could send you my copy if you like).
What are your thoughts on the flatness of plane soles? I have one plane in my collection that has given me trouble that lapping the sole has fixed but other than that I have not seen a huge benefit of it? Some people are very adamant that a sole has to be as flat as possible for a plane to function. I usually try a plane before I go through the hassle of it and find they usually work fine without the work. It leads me to believe that the craftsman back in the day didn’t make a huge fuss over it, so neither should I?
This article moves from woodworking to the plane of cognition, memory, and ultimately to nature of teaching and learning. Masterful!
You’ve speared the heart of knowledge and what it means to have expertise. I should have studied woodworking instead of paying for a teaching degree!
My first woodworking book was Hoadley’s. He was a darn fine chip carver and his experience guided his relational knowledge. His work on chip types sticks out as being informative.
I would agree that there is a big difference between quantifying the characteristics of wood, and experiencing its behavior when it meets steel.
Where is the R, Bruce Hoadley text available?
Got my copy (used but pristine) from Amazon UK recently for c.£18 (hardback).