Measuring for Dead-on, Twist-free Stock-Prep
Taking twist, cup and bow out of rough-sawn stock and making it flat is a simple enough machining process provided you own the machine/s, the extraction system and the place to permanently house everything indoors. To tackle it correctly you need either two planers or a combination under and over surface and thickness planer. These machines are not quiet, in fact, they are exceptionally noisy. Not for use in a quiet neighbourhood; your neighbours will definitely not be speaking to you for much longer. For a worldwide audience wanting to create their own pieces, 95% will never own such equipment and nor should they if they just want to make a few pieces of furniture a year — for most of my audience that’s all they really want. Unfortunately, some met a machinist woodworker before I got to them and they bought into the machining wrap. Mine happened in reverse. I was trained in both hand work and machining, two virtually unrelated realms. Not one and the same at all. The one demands skill and total immersion in the craft, the other dispenses with skilled handwork almost altogether. I know what it is like to ‘come off’ dependency on machines. But I have learned that 98% of achieving anything is a made-up mind. When I came to that point there was good reason. If 98% of my audience could never own a machine shop, and that was the case, what was the alternative? Simple! ‘Deconstruction woodworking!’ Wow! I got rid of my machines pretty well instantly. I needed to prove to my growing audience that there in the past, when the finest woodworking in the world happened on different continents, Asia, Africa, Europe, South America, North America it was done without any so-called power woodworking. I kept seeing these amazing pieces made in Japan, China, during periods of freedoms in craft, when artisans were so linked with their work, they could inspire one another to amazing work. My steps showed the viable and real alternative that would work for a worldwide gathering of woodworking enthusiasts searching for the wealth and breadth skilled handwork offered them. Once they saw they believed. The sought out the work that gives satisfaction, develops real skills, costs a fraction of the price of machines and you can talk to your spouse and kids in the same workspace all day long if you want to. You can have the radio on, listen to a record player with LPs on if you want. Oh, and did I mention safety in there? Must have forgotten!
Back on Topic
Tackling twist can be something of a challenge and especially so in the early days of learning the craft. I put this method/technique together so that you have a more definitive guideline to work to that is foolproof and guarantees flatness to your registration face. Once flat and straight, gauge lines guarantee the parallelity you need for working your joinery, creating panels and whatever relies on accuracy. Once you try this you will see how simple the whole process is. The method works incredibly well for all lengths and widths but it works especially well for the shorter lengths we mostly rely on when we resaw or sections of wood from larger planks, boards and beams. In general, we cut wood down in width and length for economic reasons — that’s economy of material, time and effort. We all need to minimise our hand planing and sawing to the least; we get enough practice without prolonging the effort.
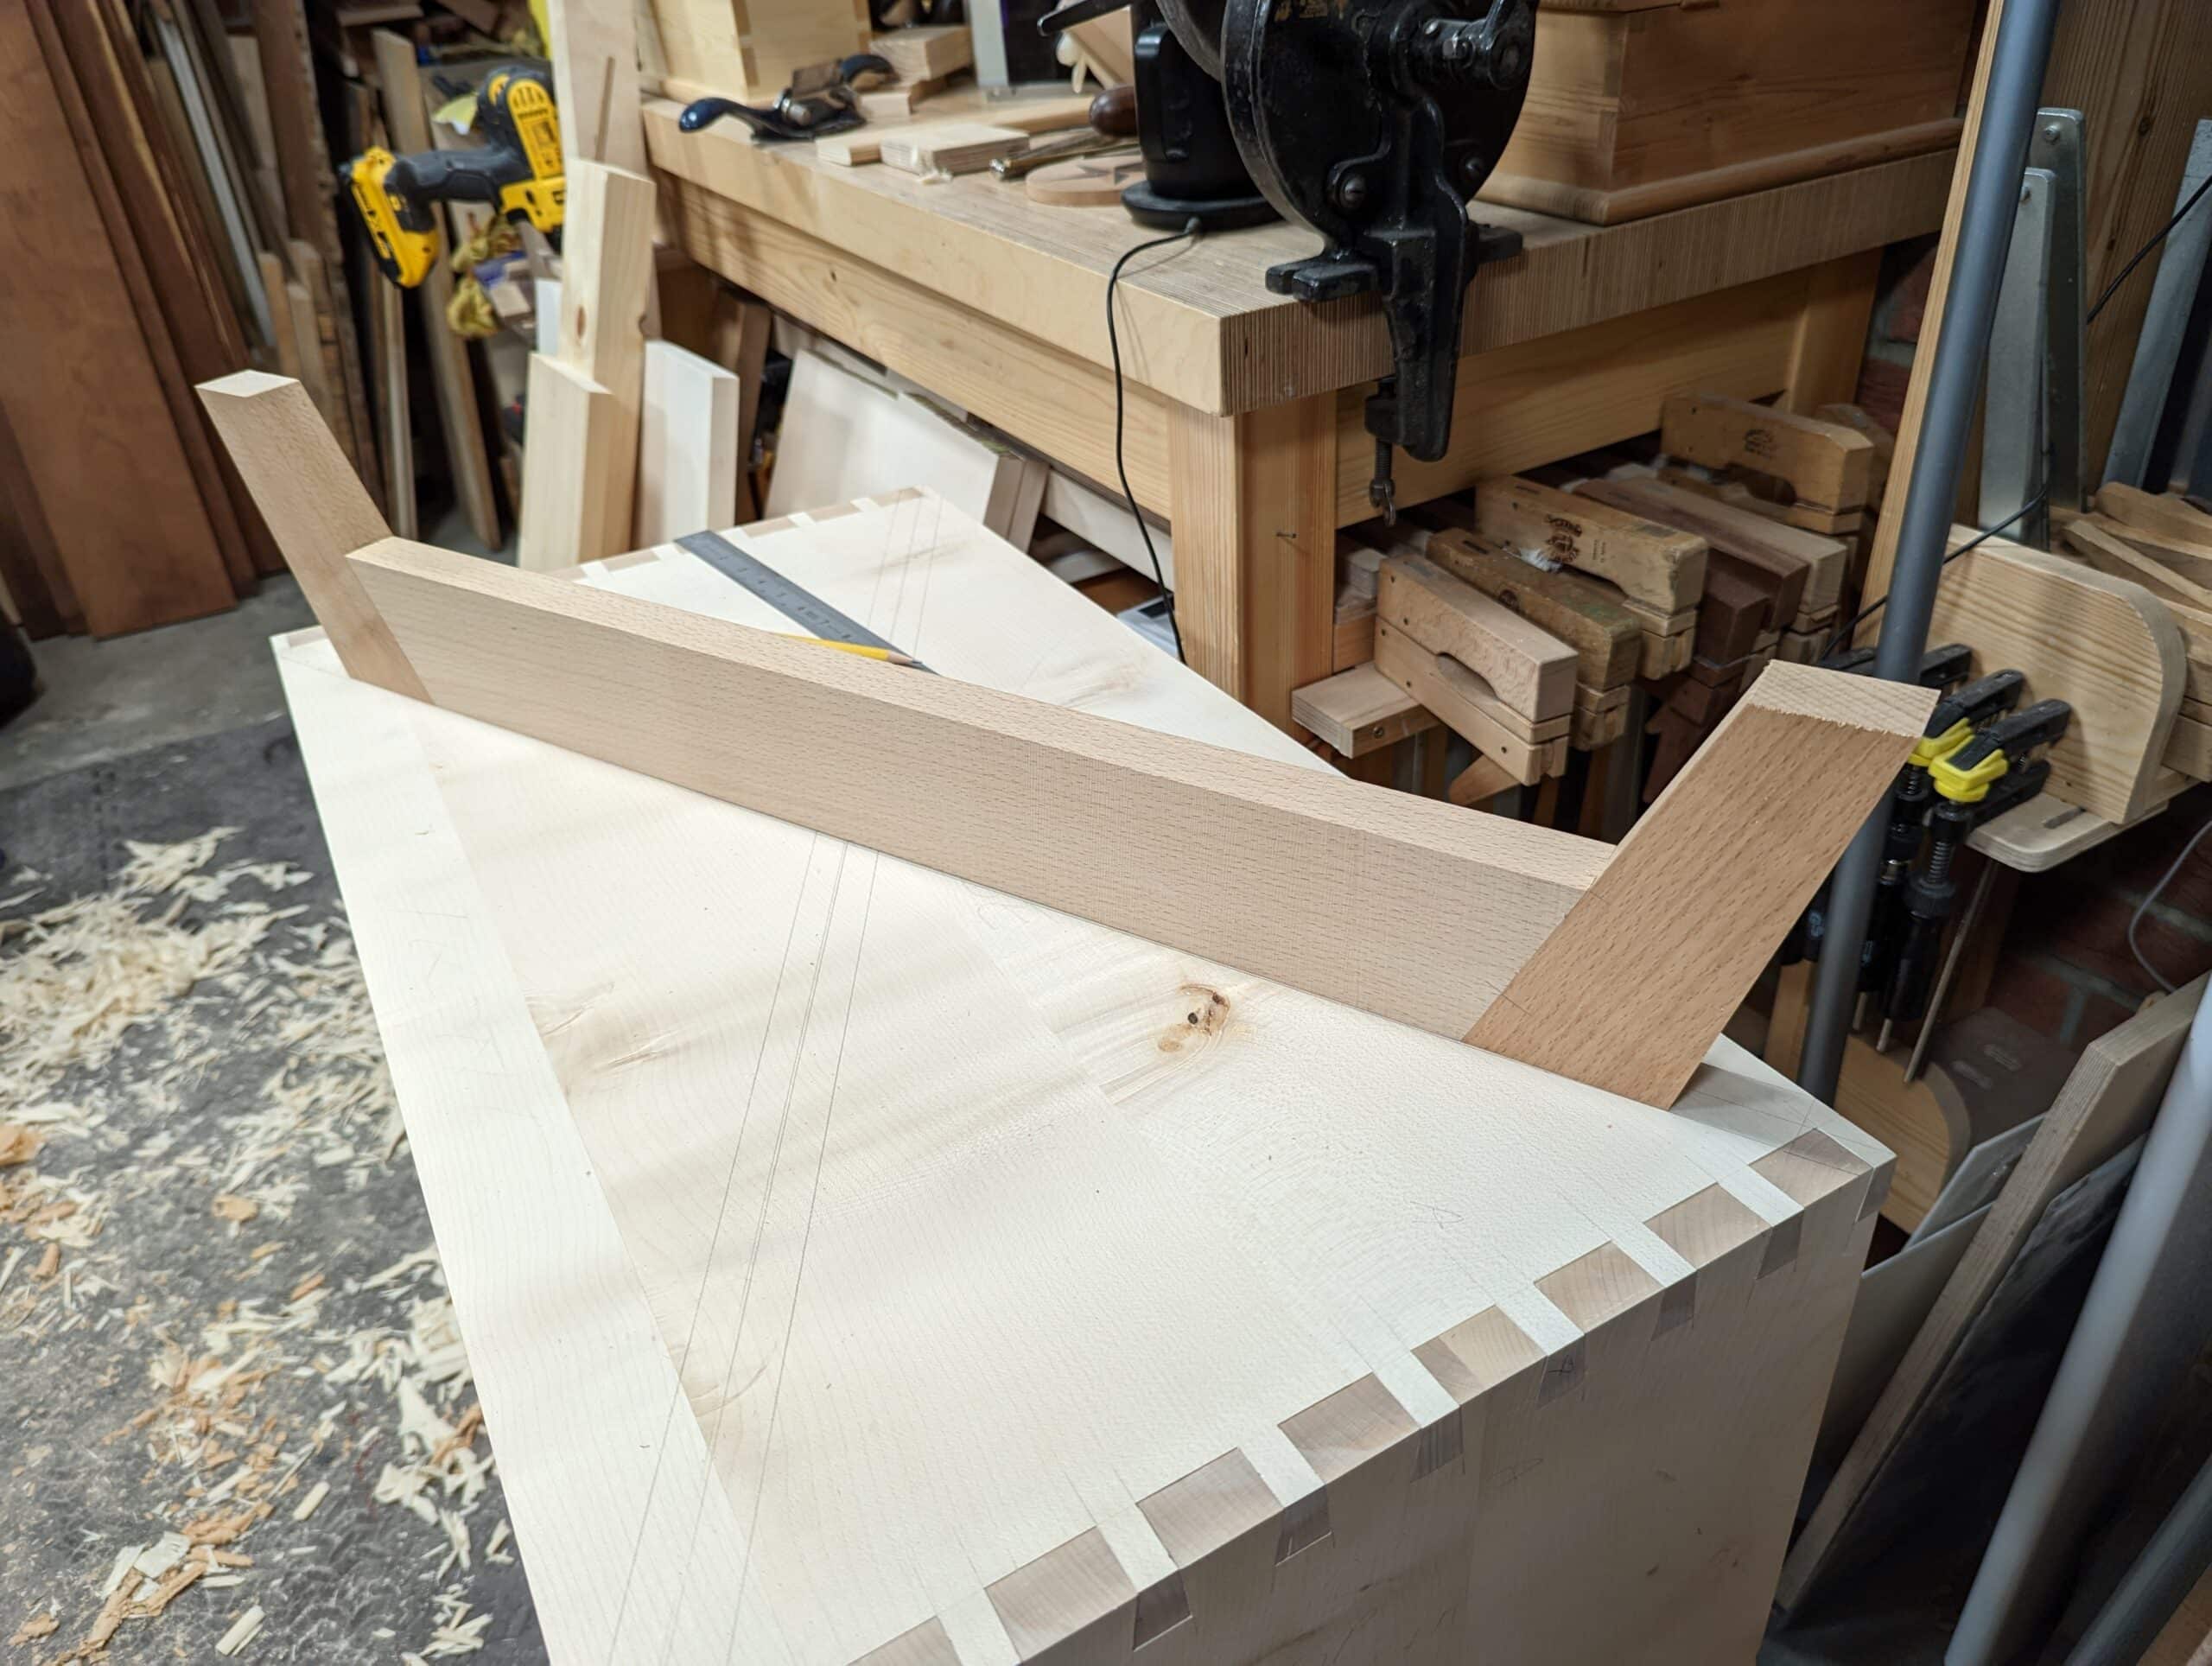
For my current cabinet, there are no pieces longer than 79cm (31 inches). A straightedge, a wedge and winding sticks give me a near-exactness for a measurement I can use to strike straight lines on the edges of my board to plane to. I say near exactness because the winding sticks still depend on how good my eye is at gauging the difference between the front winding stick and the rear one. ““even so, the idea of winding sticks is that that generally magnifies the wind by however many times the width of the board divides into the length of the sticks. A 3″ wide piece divides into a 12″ winding stick four times, so the exaggeration of twist equals four times. That’s the end of the maths.
For most of my planing I plane directly in the vise. Many of my critics will say that this is wrong because the vise adds compression that distorts the wood even further. Occasionally this might, might be true, but this depends on the wood, the width of the board, its thickness and more. It’s the quickest and simplest way to get your wood trued and for 98`% of my plane work it works perfectly well. If in doubt, I use my clamp-in-the-vise which is equally fast and keeps the wood fully supported. For checking for twist the vise needs not to clamp tightly at all so the wood will not be distorted. You can also simply place the wood on the benchtop to check too.
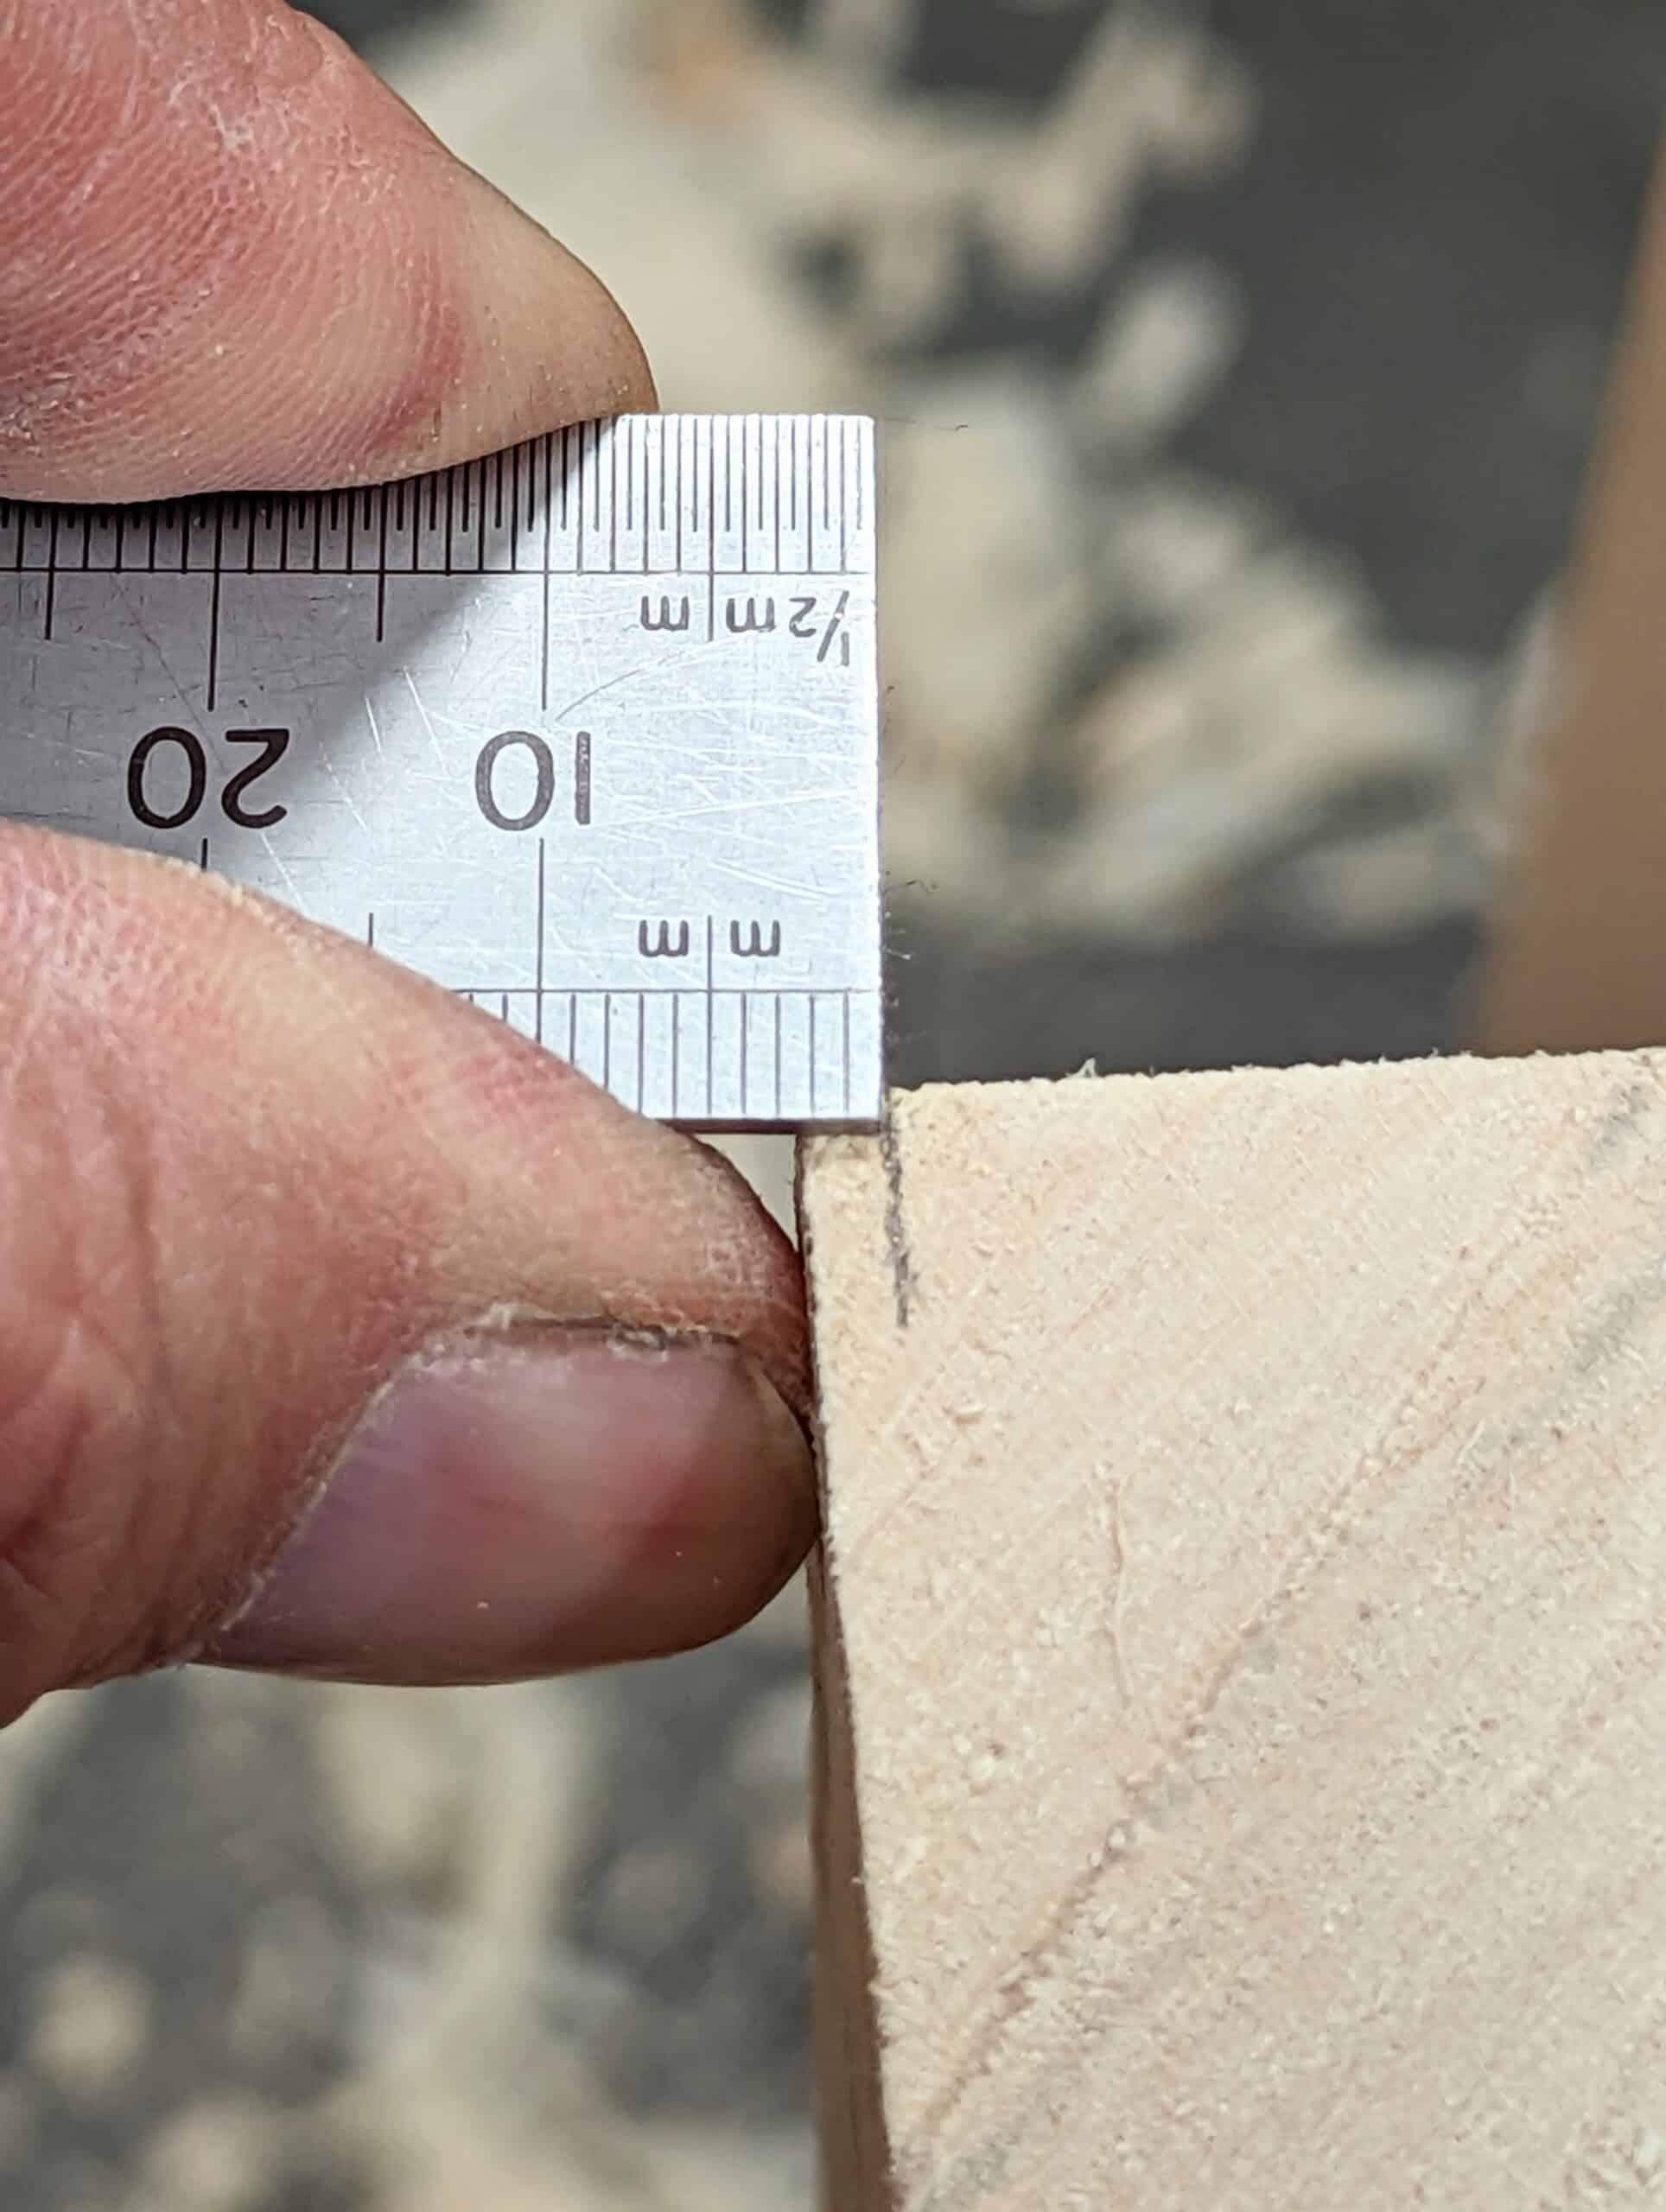
With wood in place position the winding sticks at each end, square across and centred on the wood and sight-in. Take your time and check and check again. This sighting gives a good stab at evaluating how much twist you are dealing with. In my case here `I am dealing with about 5-6mm (1/4″). It will rarely be dead-on but it doesn’t matter too much. We are relying on eyeballing here and we will end up with a trued board.
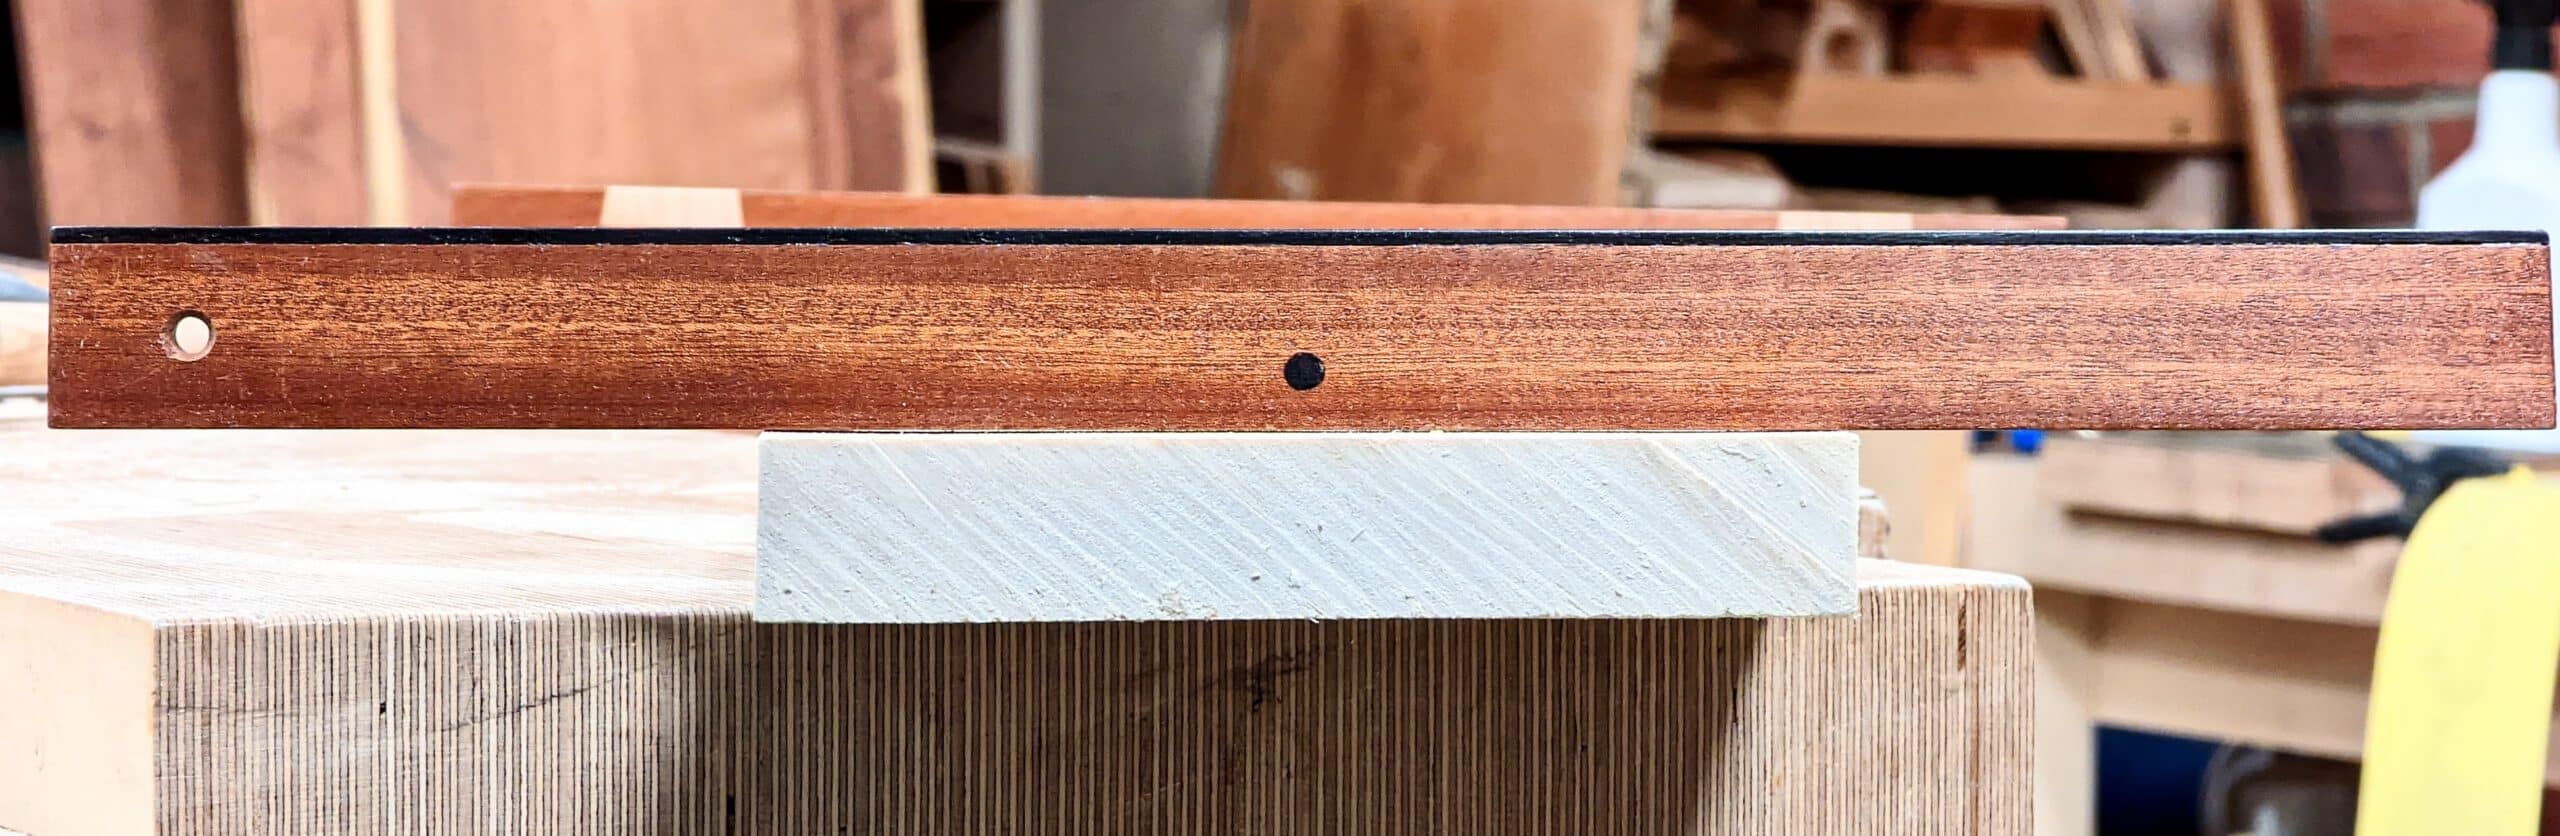
With wedge in place under the low point of the winding stick and lifting it to parallelity with the front one, keep sighting in until you’ve elevated the winding stick to show zero wind between the two sticks. Once level you have the exact amount of twist in the board.
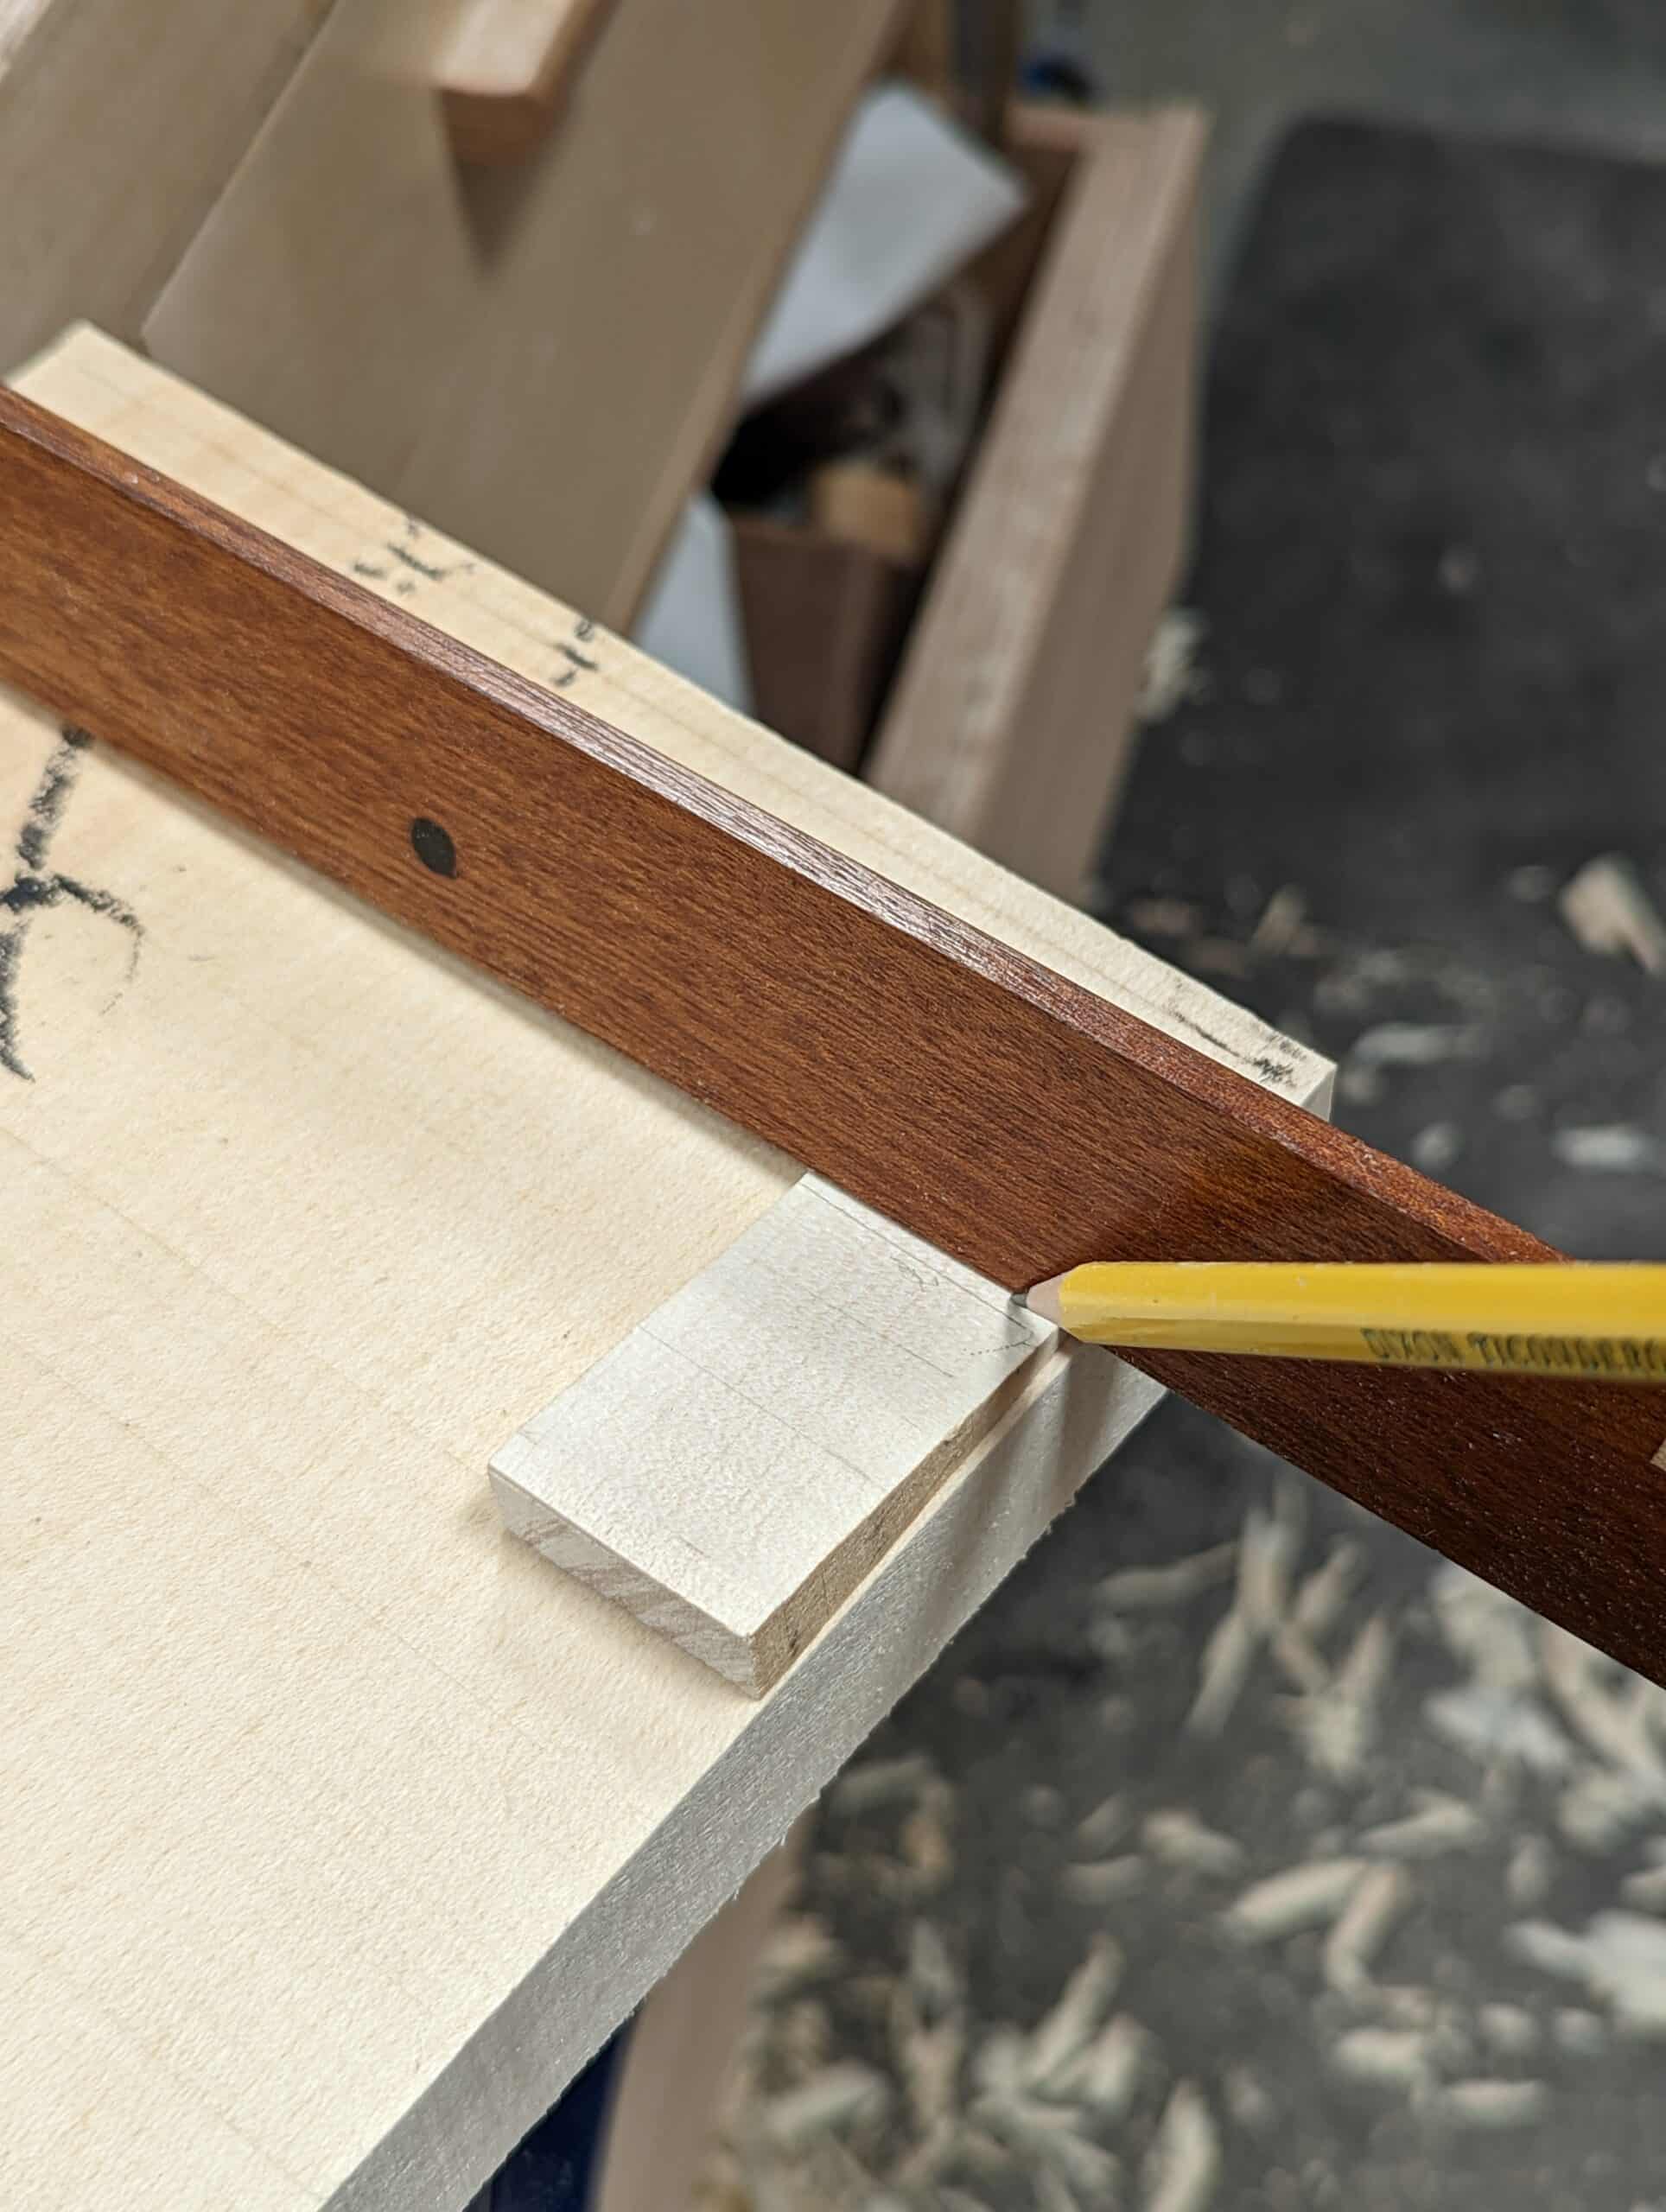
Take a sharp pencil and mark along the wedge itself at the point of elevation on the wedge.
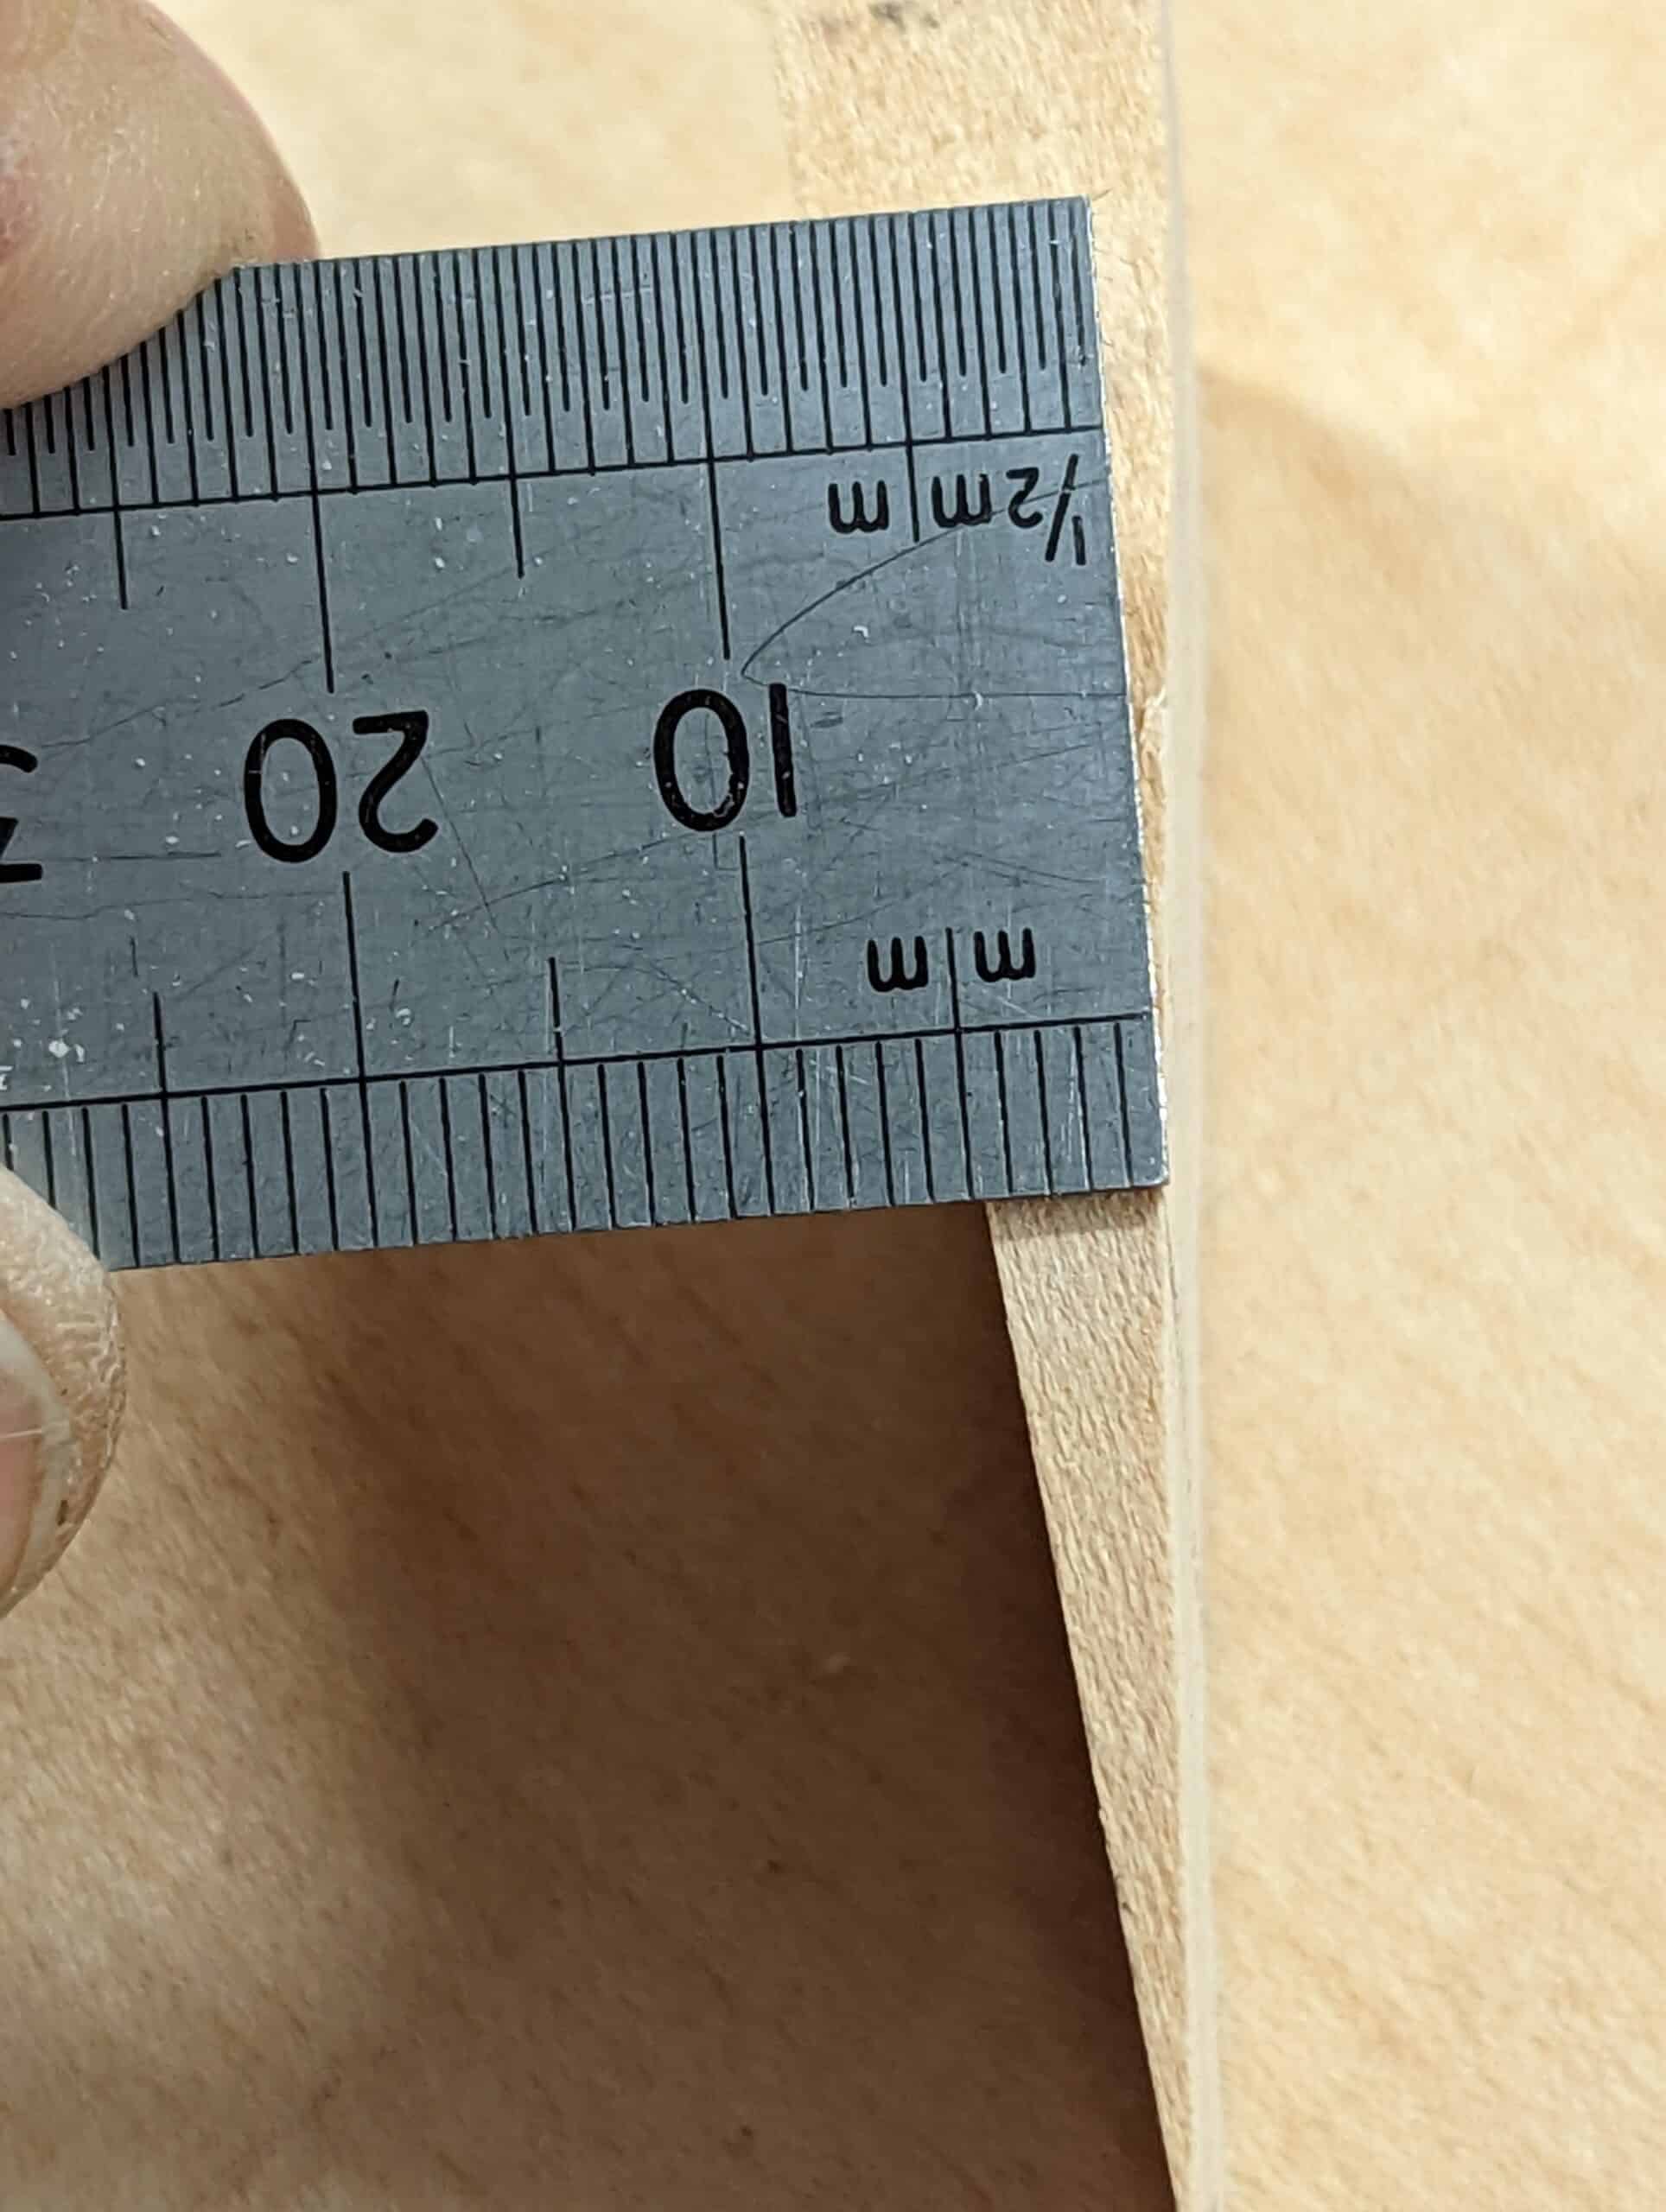
Measure the distance. . .
. . . and halve it.
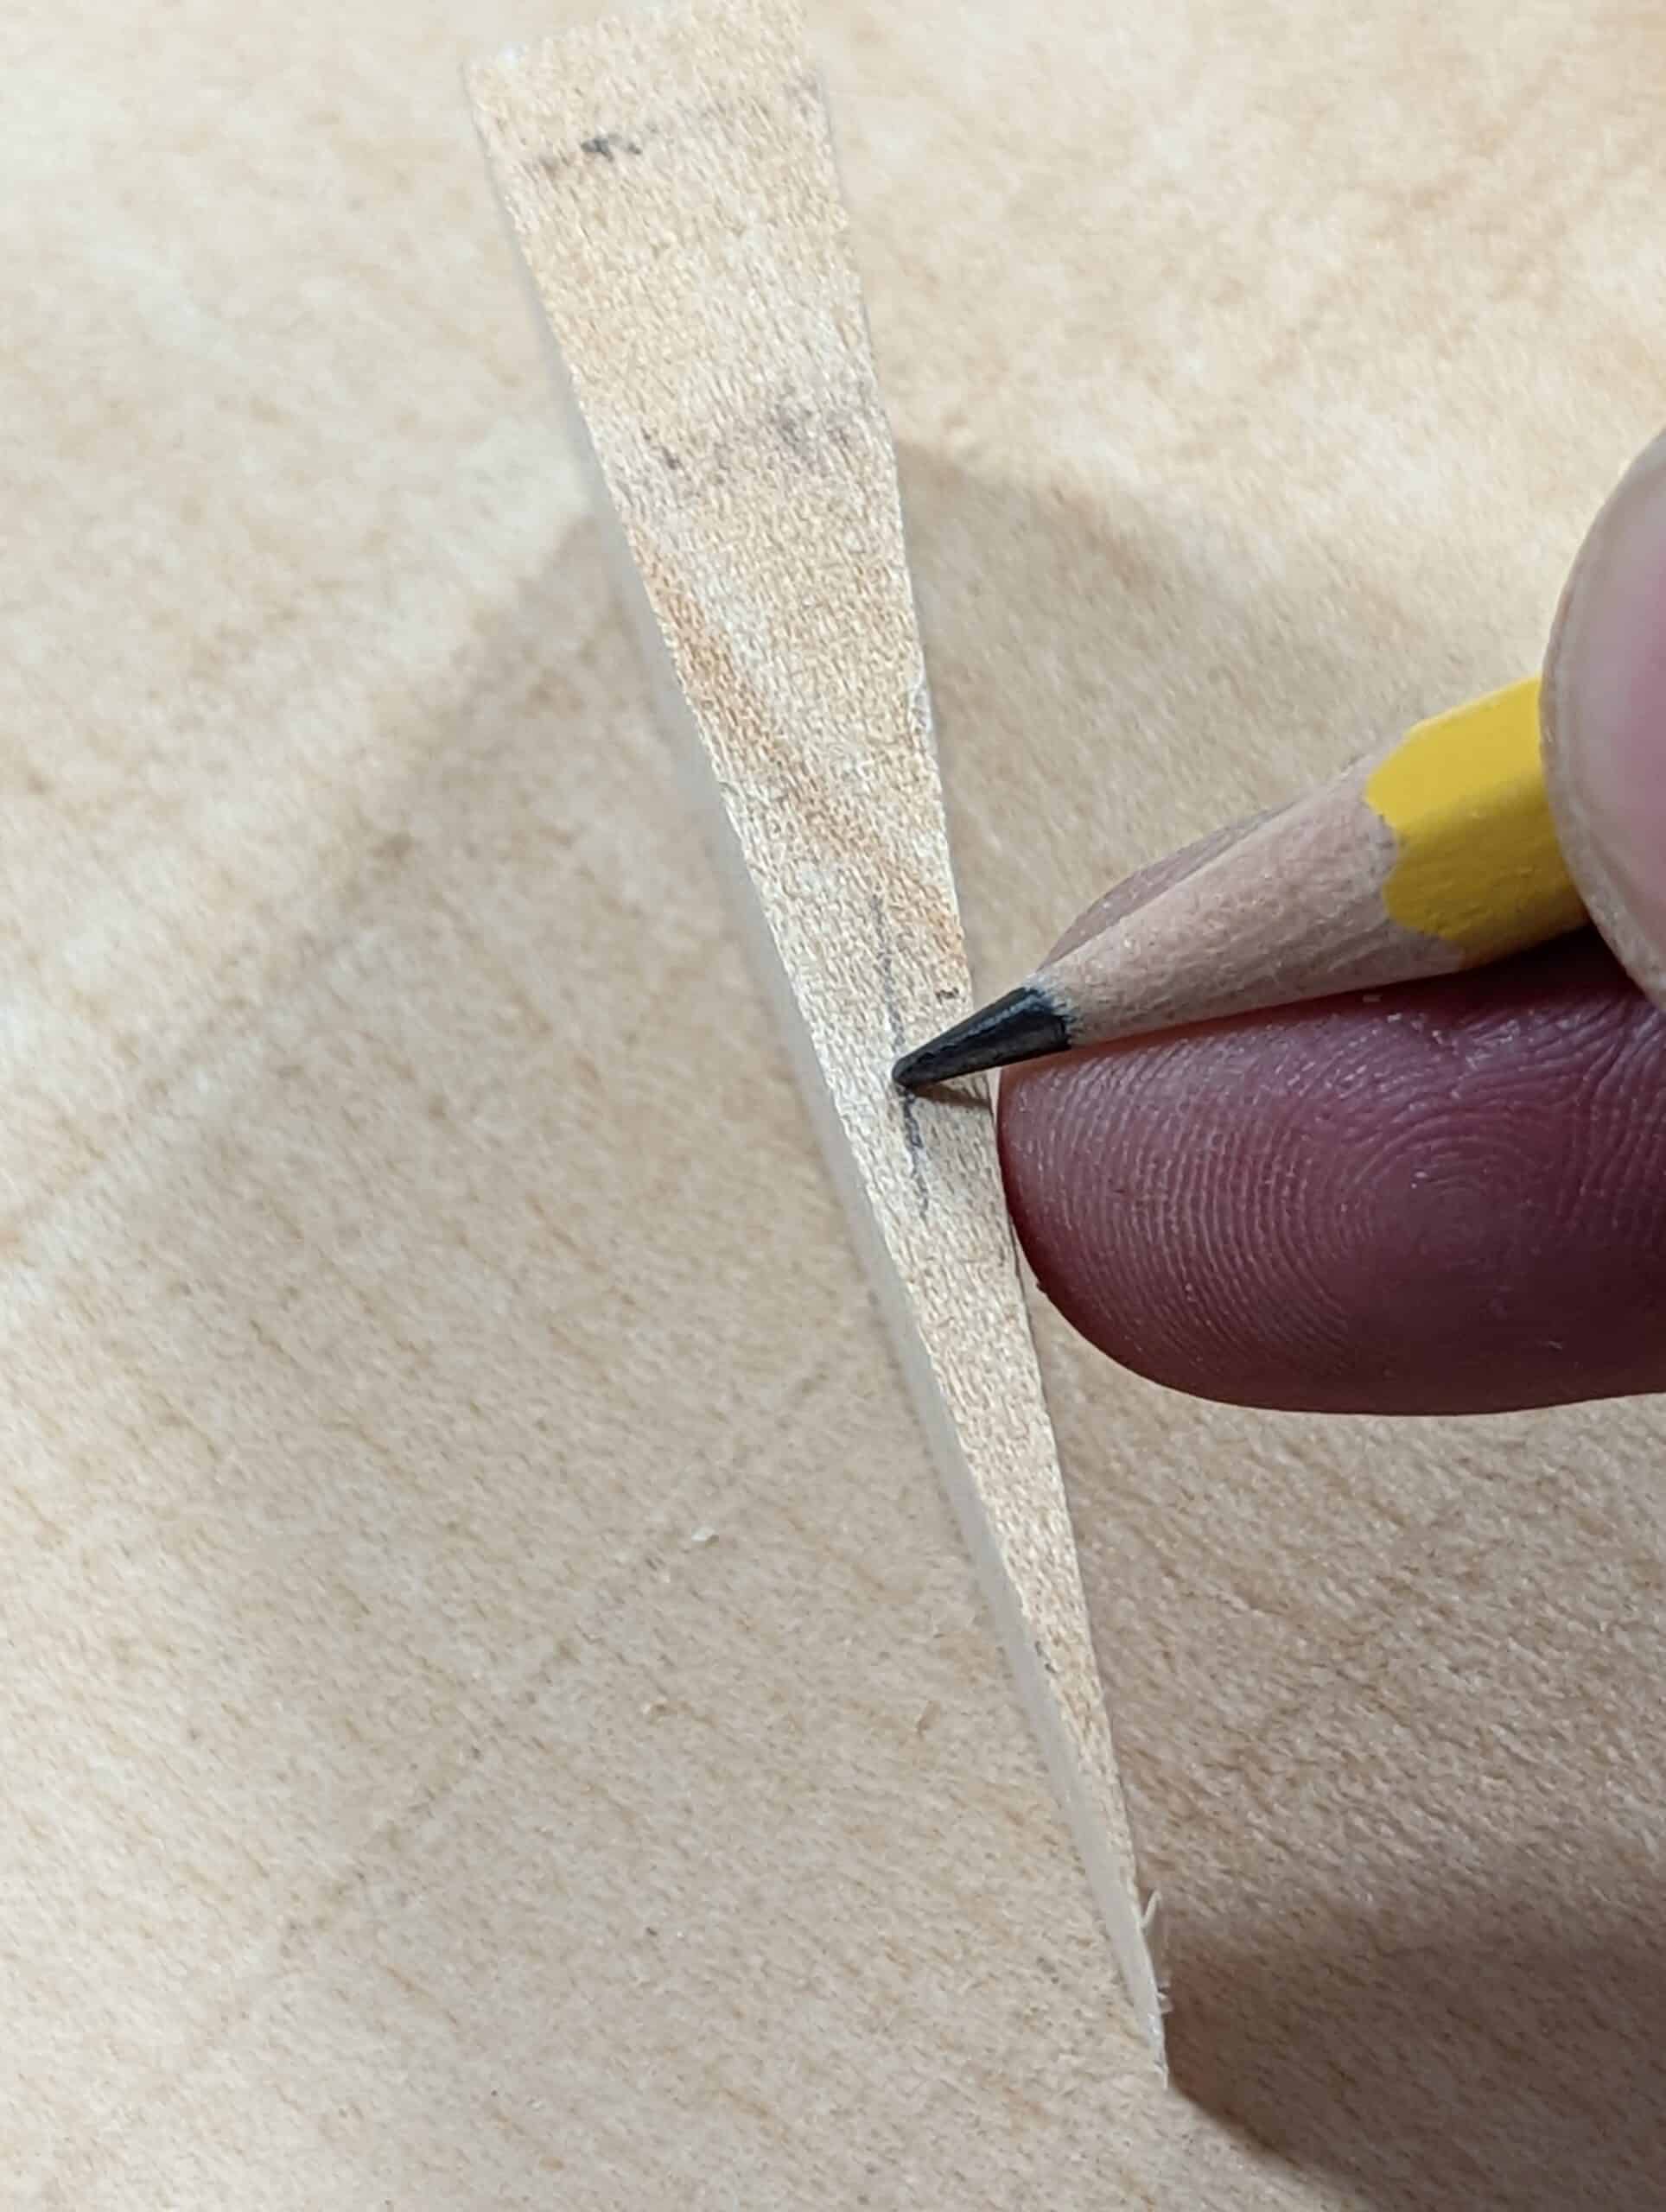
Mark this distance on the two high points at each extreme corner. In theory, of course, you can take off all the wist from one end but this usually reduces the wood thickness unevenly by too much and your board will be much thinner.
The two extremes corner to corner are the starting points to place lines on the wood edges on each side. Take a straightedge and draw a fine line end to end.

Stand on end and again make a line from the pencil mark to zero on the low spot. Flip end for end and do the same. These four lines are the levels you will plane to.

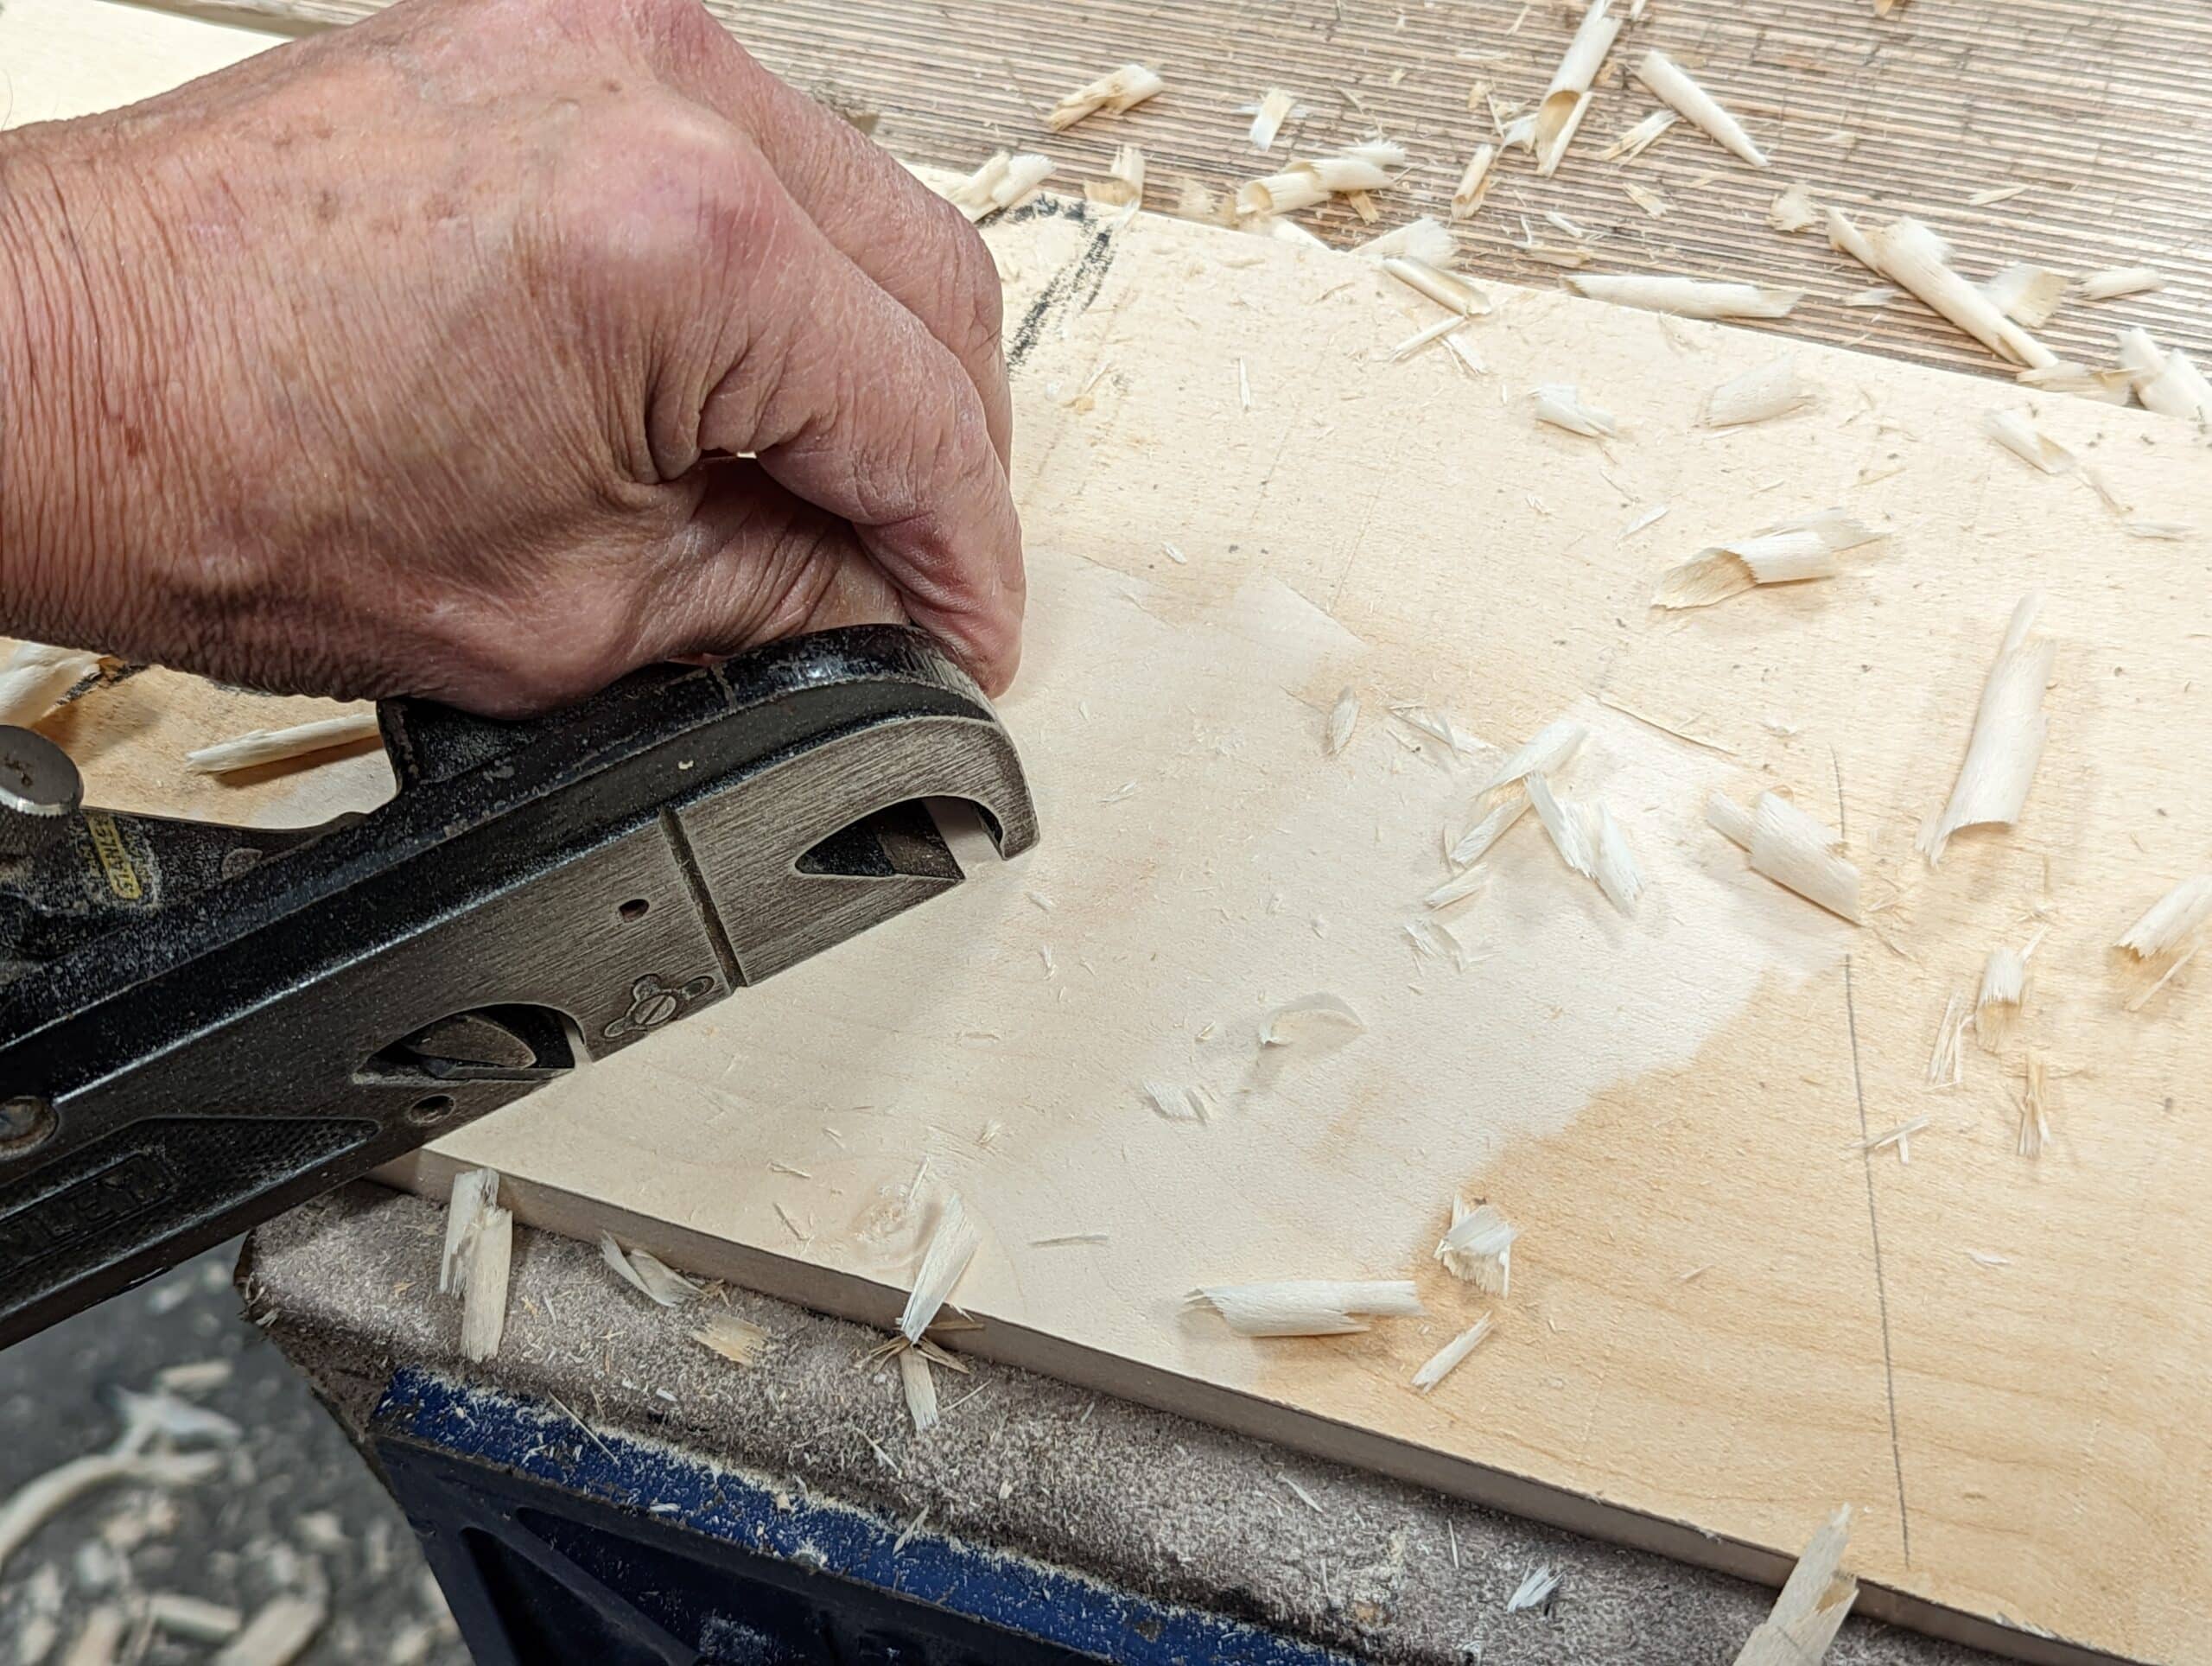
It’s a good idea to bevel the corners down to the line first. That way, planing across the grain, something we often do, reduces the risk of corner breakout.
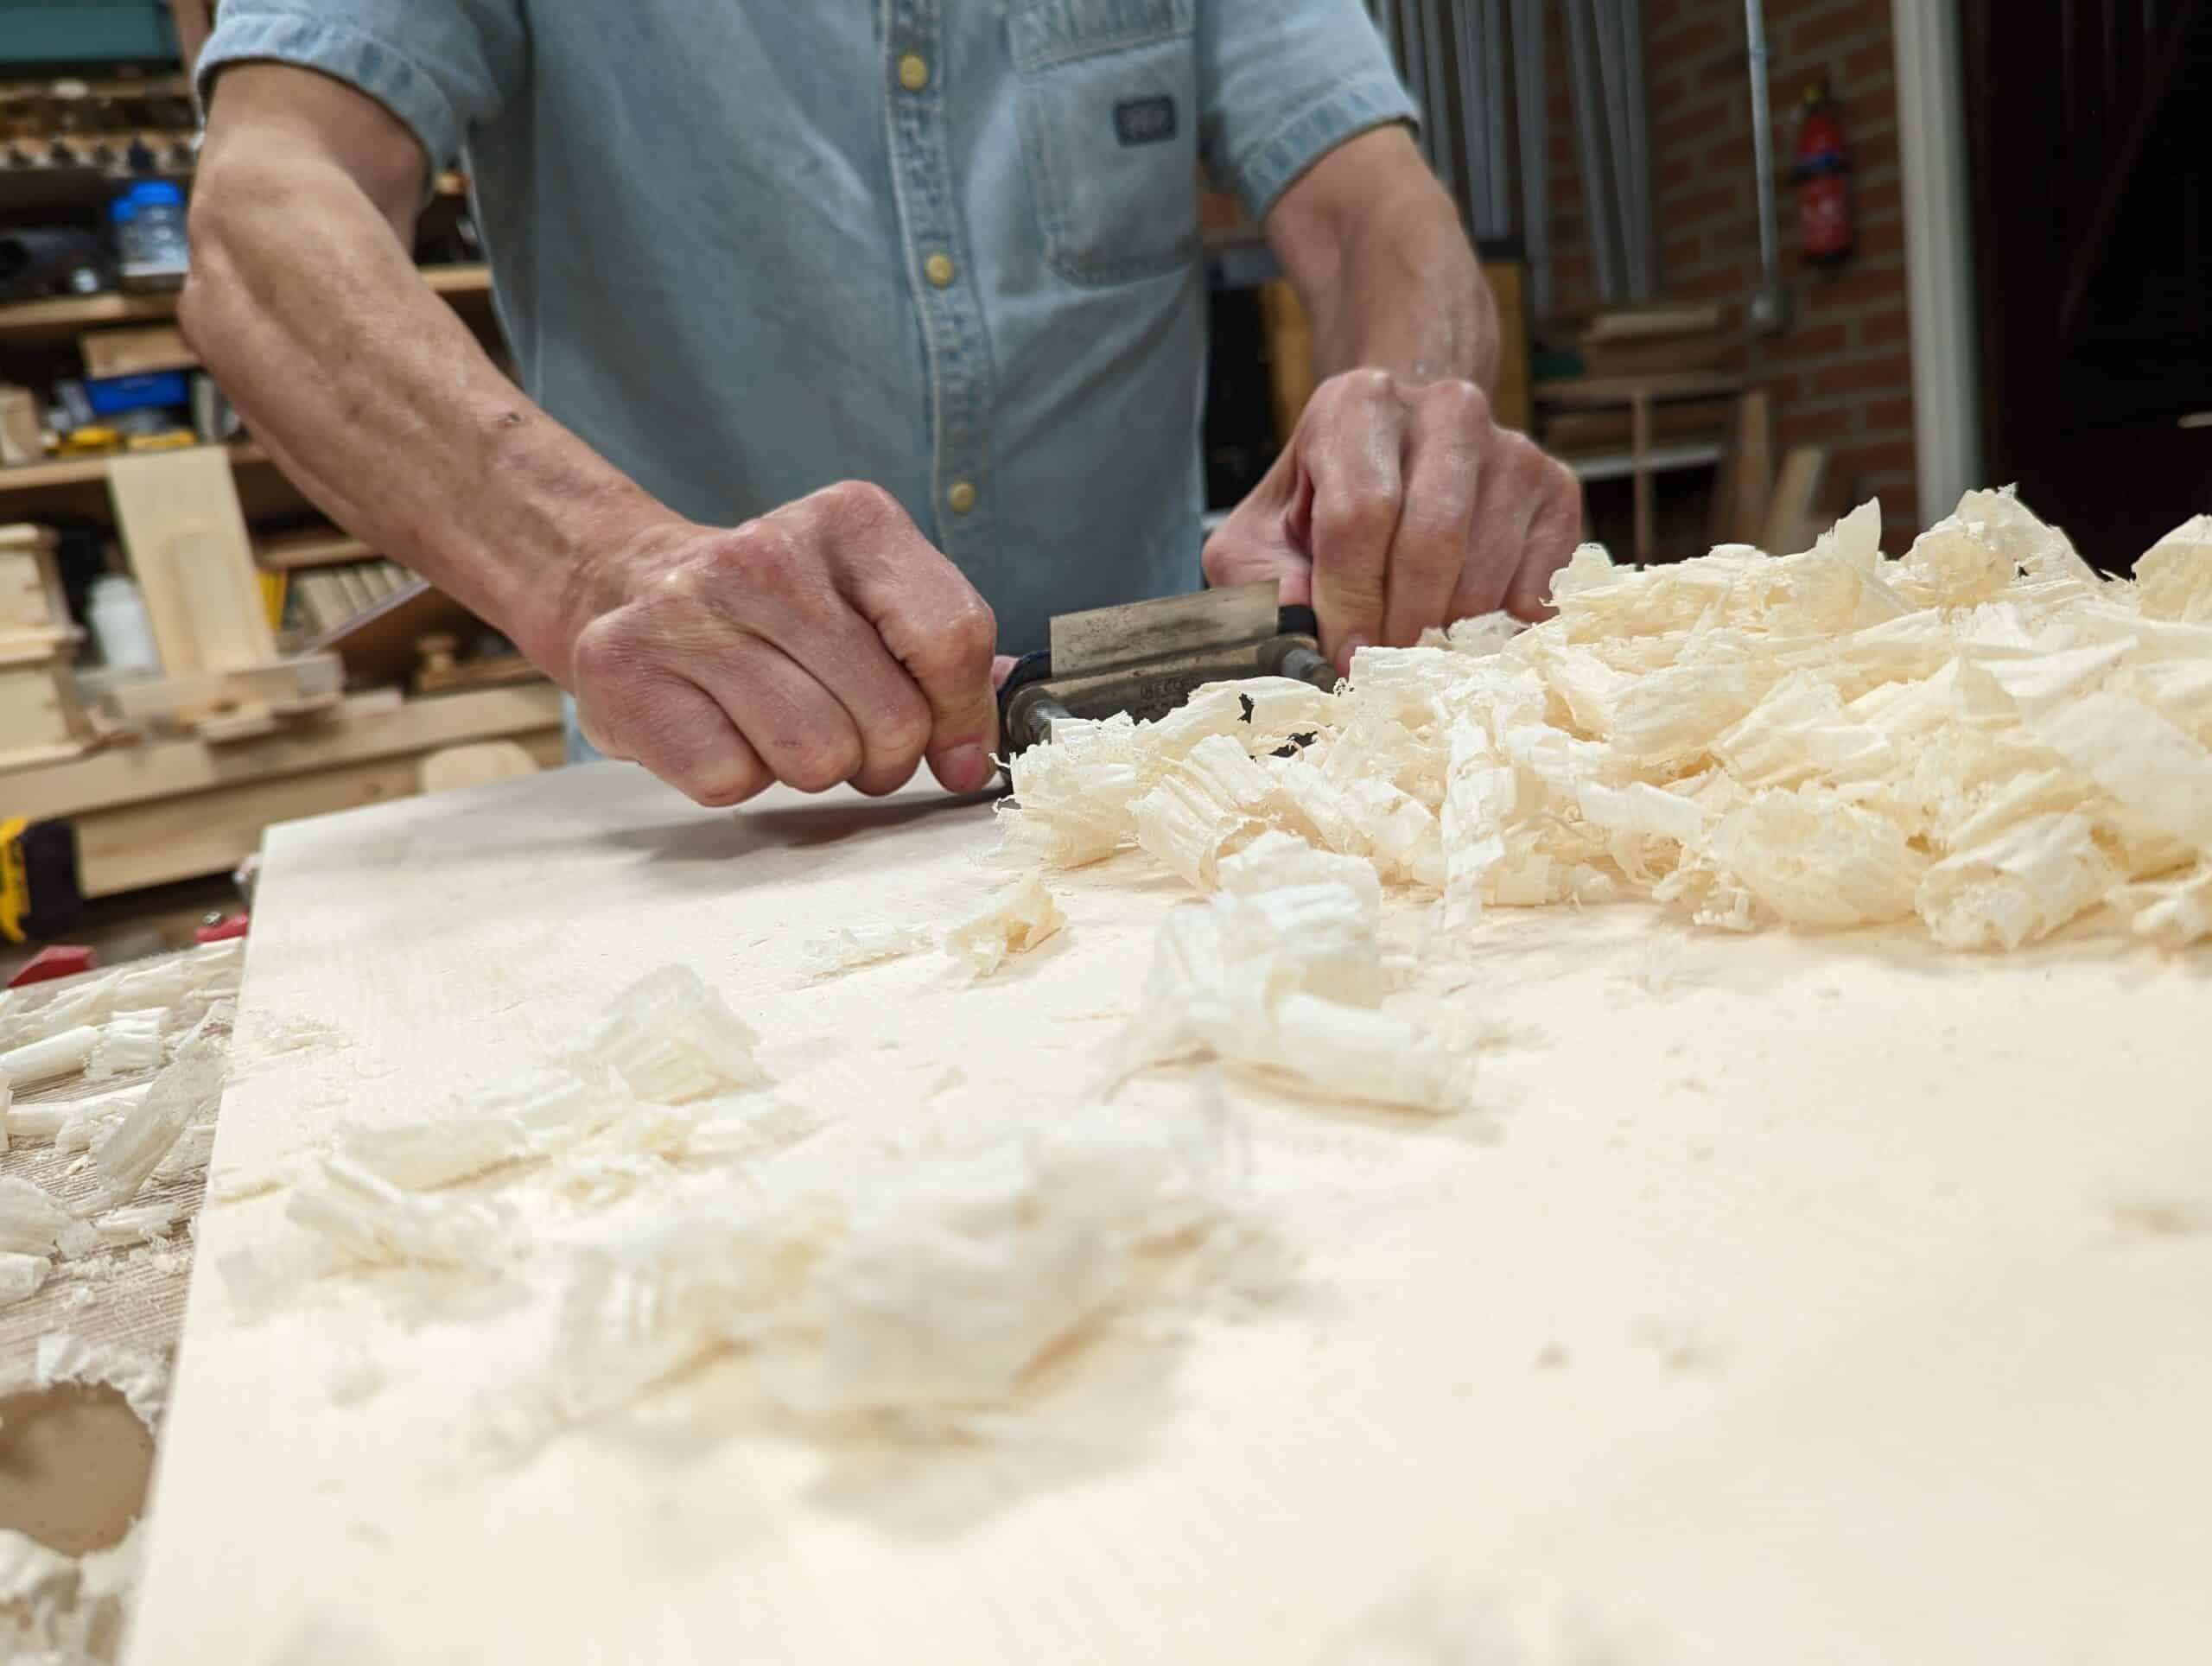
For my awkward grain in sycamore, I needed to plane mostly across the grain. This is a common practice and is the most efficient and effective measure I know of. Forget York pitches and special planes. A shorter plane (no longer than a jack plane) will do the job perfectly.
In most woods, you will be able to plane along the grain. Reducing the highs is a question of feathering into the low on the opposite side and along the length to zero at the other end. You have to put in mind that you are working on a propellor shape and trying to flatten the propellor.
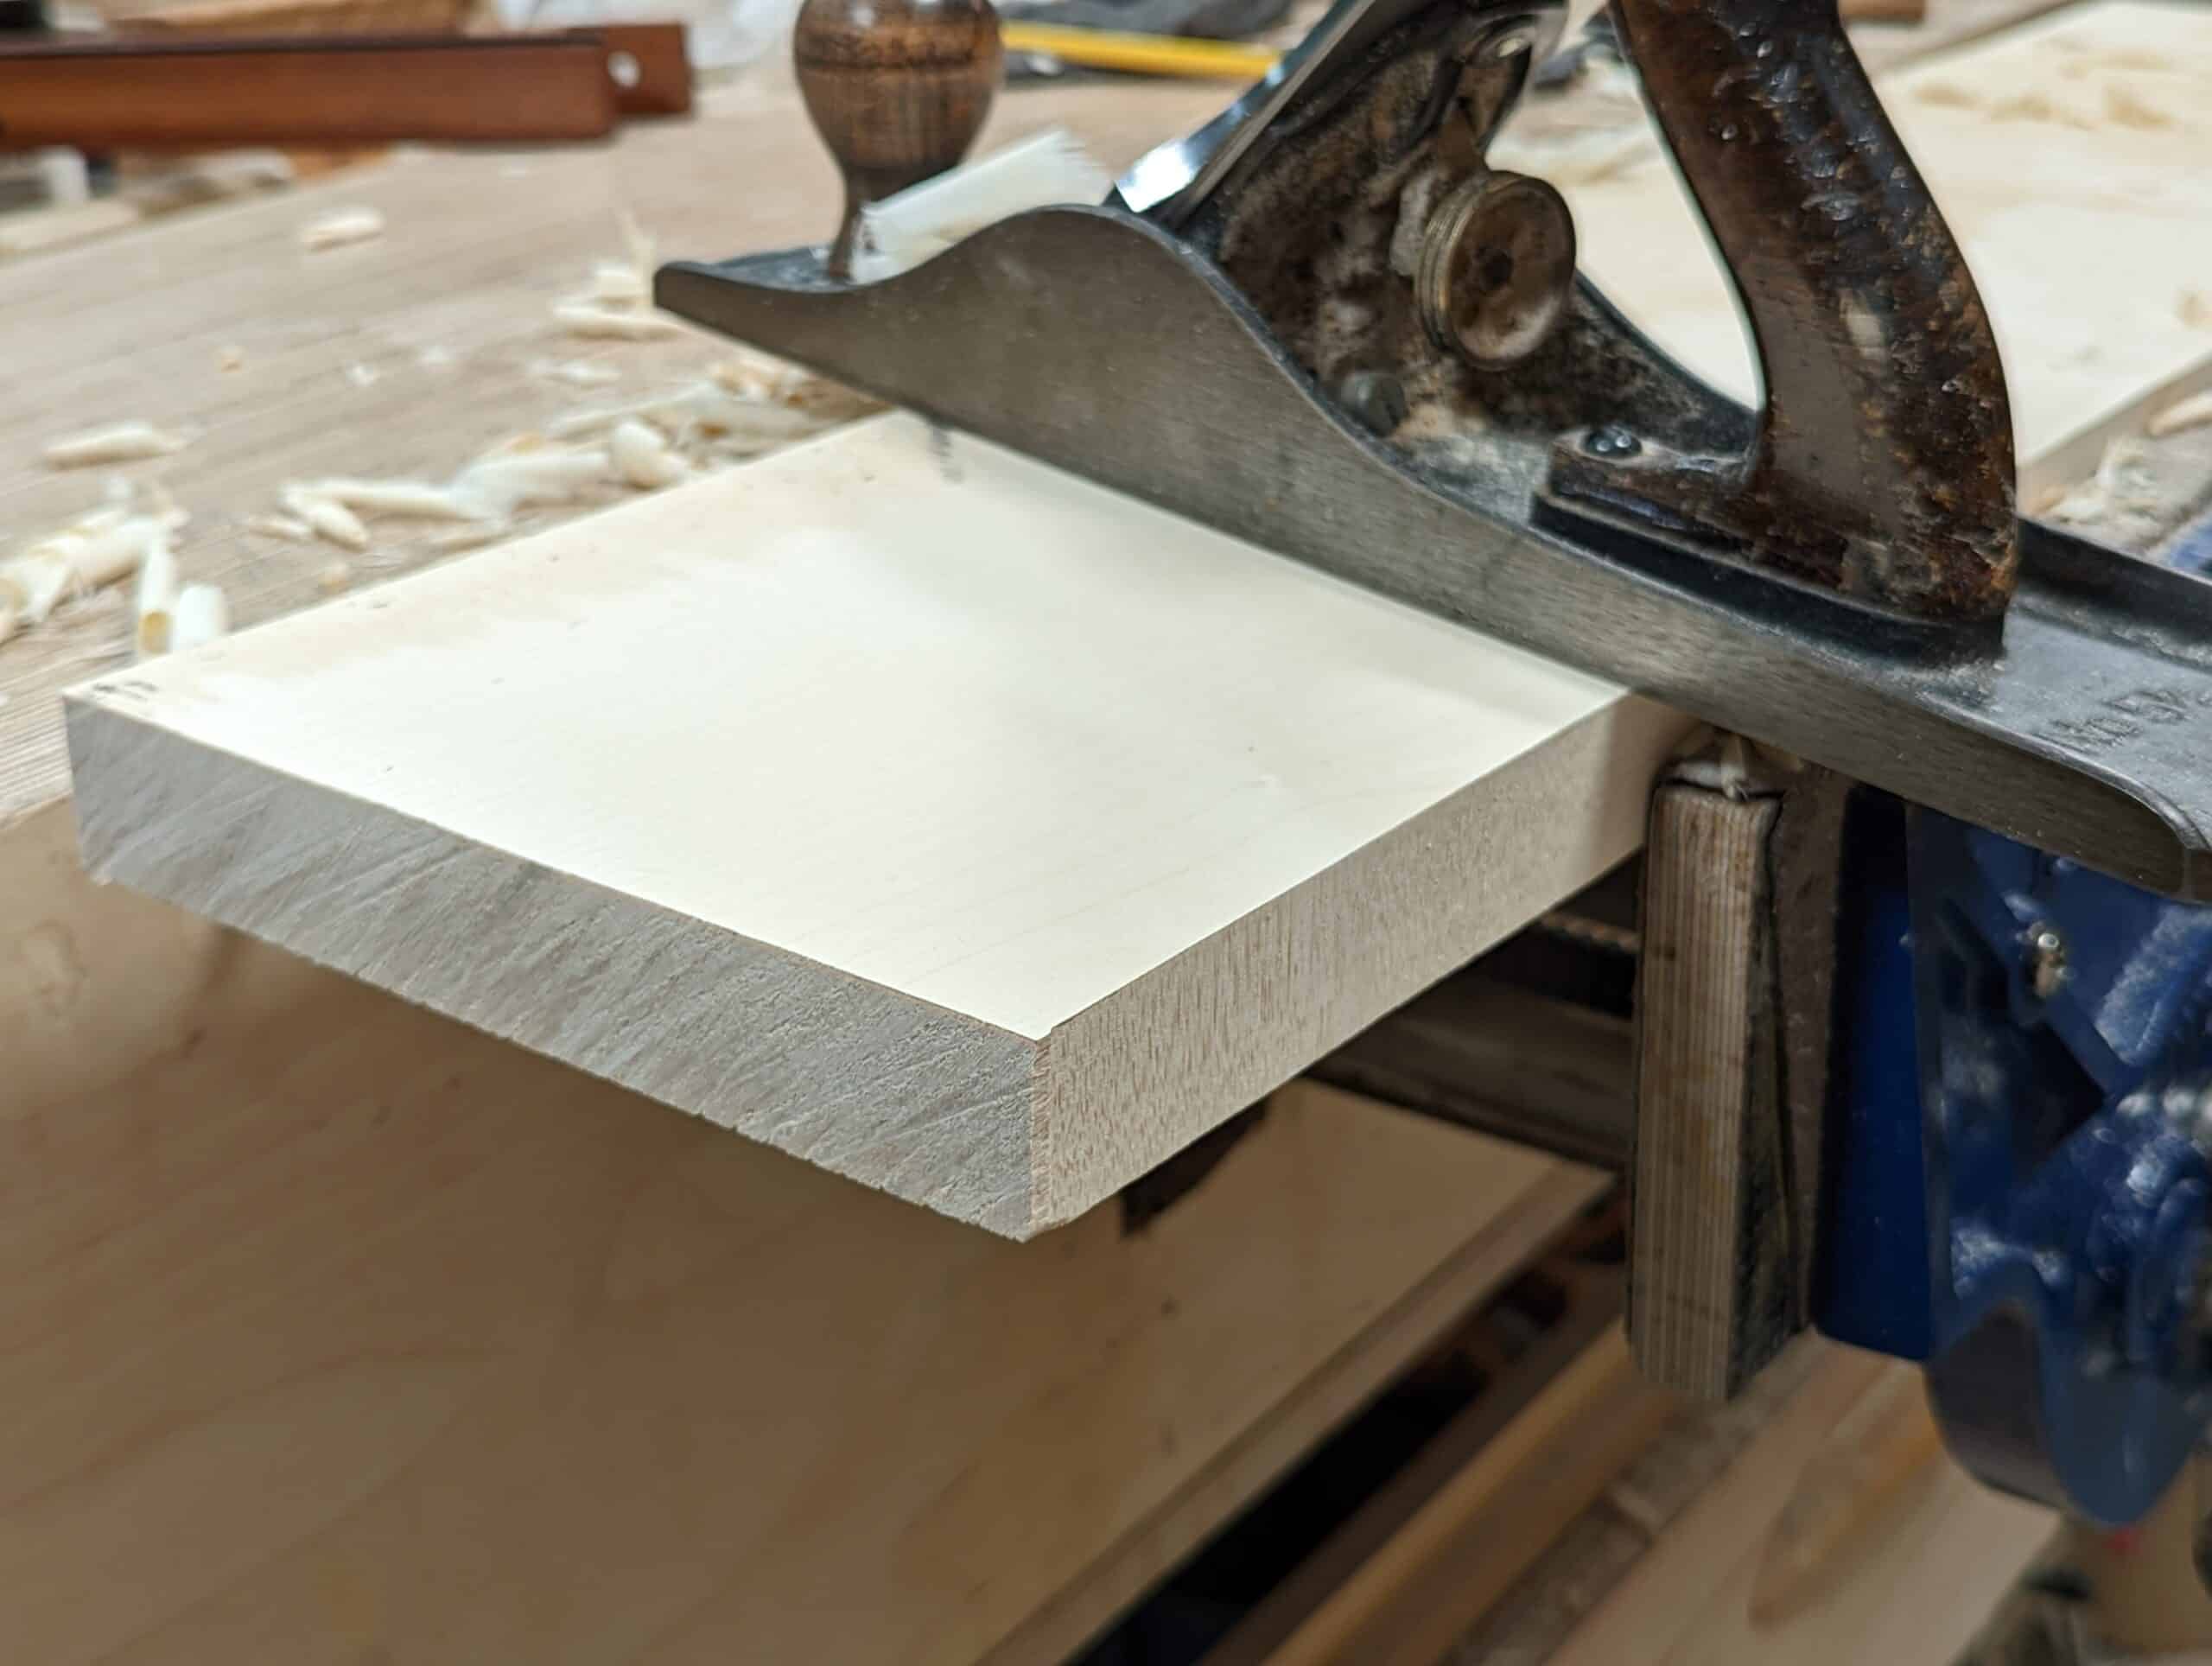
Once flat, take a marking gauge and set it to the thickness you want. mark the edges and ends to thickness and then simply plane as before.

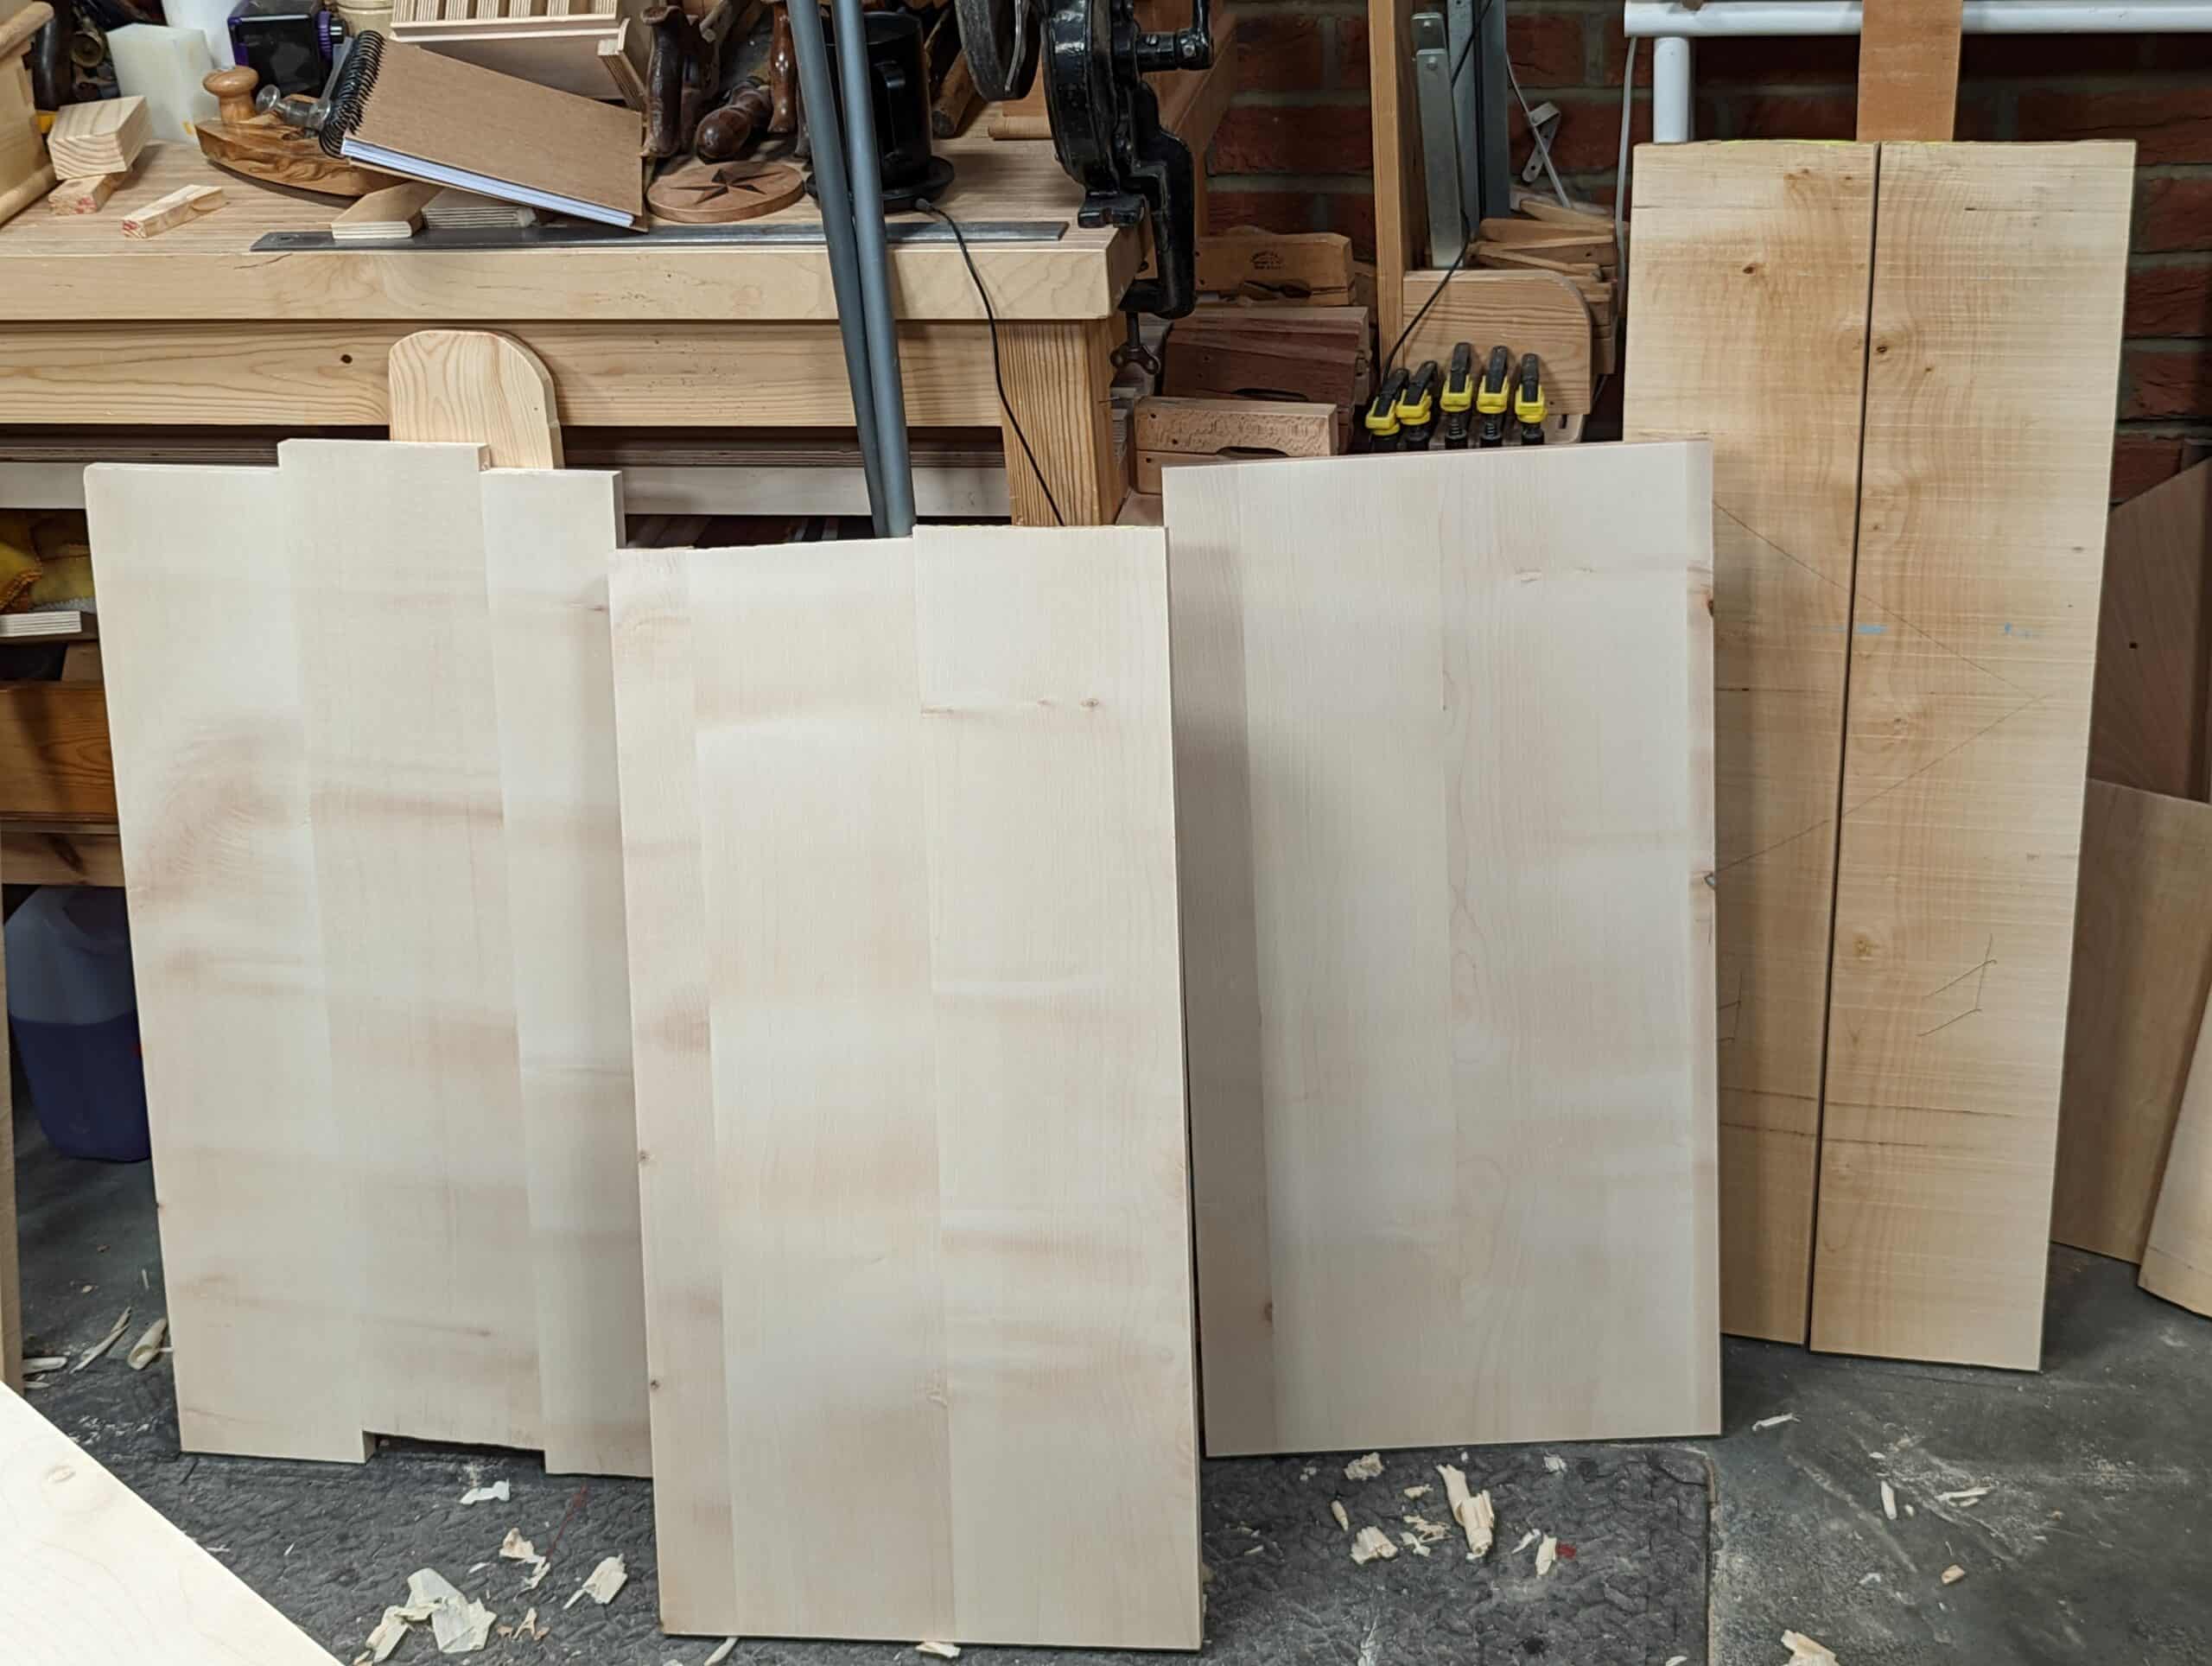
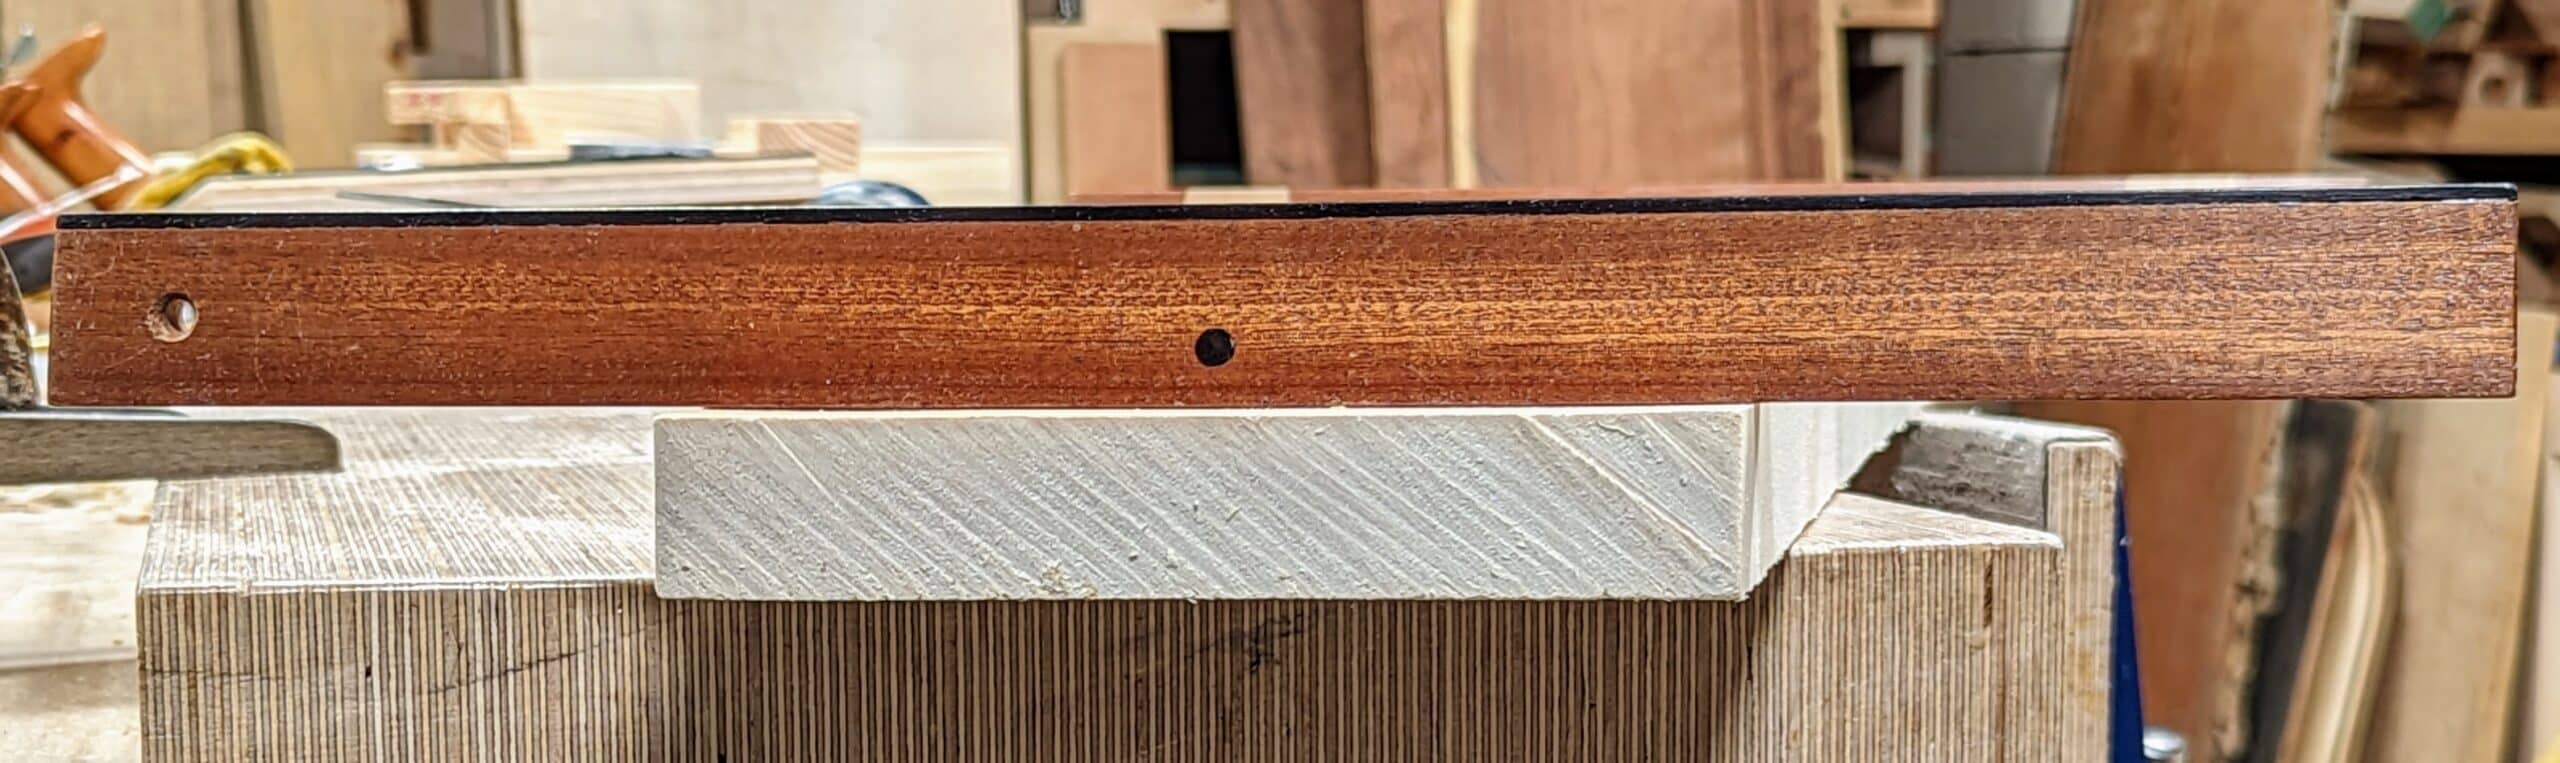
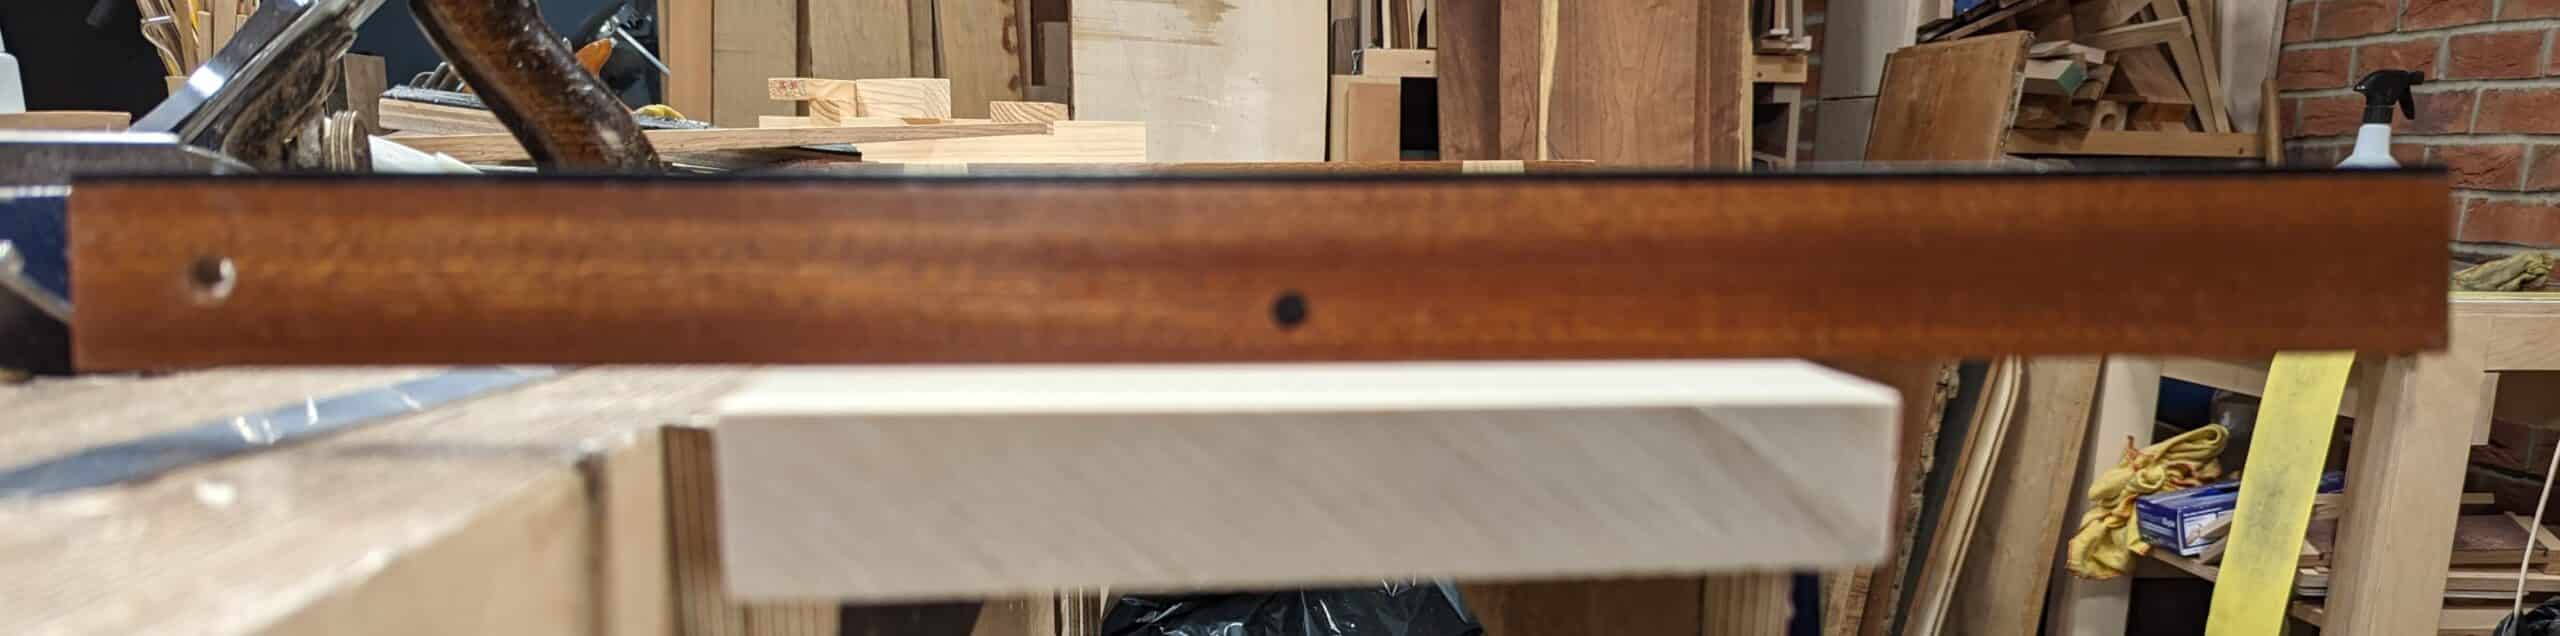
Here is the end result.
Confessions of a machinist woodworker:
Yes I’m one of the 5% who owns such machines.
Right now I am (was ) stalled making a 6 panel door for our guest bedroom.
I got the thickness close but when I put all the components together the small errors added up so I had discrepancies that are too small to correct by any machine.
Now I know how to go about tuning my door to fix the errors so this was very timely information.
On another note I ended chopping my 3/8 mortises by hand, it was actually faster and easier.
These were 3” deep mortises in pine, I wouldn’t have believed it until I tried the two methods.
I had 6 foot lengths of 11/4 “ pine and trying to support the length and use the machine was problematic and time consuming. So I ended up doing it by hand using a mortise chisel and all of my joints came out square with nicely pared sides. The joints all fit perfectly not one is to loose and light taps with my mallet separates the joints.
I’m learning the hard way I guess.
I too learned about wood working in shop class with the big machines. Then went through life with career and family. Thanks to you and other hand tool wood workers , a whole new world was opened up to us. For me, I wish I was younger because as a hobbyist I don’t think there is enough time to master hand tool work. But I been trying to hand saw,plane chisel and hand sharpen my tool even if I only produce nice firewood it’s the practice and process of doing is why I enjoy it. I still own my table saw and a bandsaw that inherited, a router. Just can’t seem to let those go.
Thanks Paul. I recently signed up for a local woodworking class. In semester one, it’s all about machine tools. Semester two will be hand tools. After those two classes, there are all kinds of things I can take as the first two classes are the prerequisites.
We’ve met for three weeks and I’m learning how to use the machine tools. I may not want a shop full of them but I’d like to learn how to use them safely. What I found very interesting is that for the past seven years, I’ve been using hand tools at home. In this class, I’m woodworking with machine tools and I’m not breaking a sweat or breathing hard and having my heart pumping like I do with hand tools. It feels very odd to me to not break a sweat and huff and puff while woodworking.
Don’t worry, I still intend to primarily work with hand tools at home though I’m saving for a few tools.
I’ll know I’m successful and that you are listening to me when you stop calling them machine tools. They are just machines. Okay, a little credit! At least you didn’t call them power tools!
several years ago I got into curing a twist using steam. I learned one important aspect. do not over heat the wood. heat to no more than 140°F and hold for one hour/ inch, as as for bedding. prior to heating the wood I make a set of wedges like you show. once the wood is hot I clamp it to a very heavy straight piece of Painted steel, using the wedges to press the twist out. it’s been great on straight grain, rather middle hardness. plus I only use this for quarter sawn Timber (Lumber to us).
have you ever tried this?
It’s not very practical timewise really as it is not over once steamed and straightened. Breaking the lignin in the wood by steaming enables you to twist a 1″ square stem along its length like a noodle.
This is a beautiful method for teaching the geometry of twist. Once it all clicks for the student, I’m sure you will agree that much of this can often be done intuitively. For example, when the wood is amenable to planing with the grain rather than across, I will sight with the winding sticks, put a quick “X” on the two high corners, and then plane as follows: take a shaving at the edge of the work for maybe the last 1/8th the length of the work, then back up and do it again starting further back, and then repeat again. Backing up like this causes more to come off the end than the middle, so it lowers the high corner and blends with the middle. Now step over towards the center and repeat, but not as many strokes and not as far back. Now, do this process on the other high corner. I may then take a corner to corner pass (high to high). For my planing, these strokes can make a hump in the middle, so I’ll sometimes take a few light passes at the center of the board across the width in “hump reducing” mode, but just lightly, and then will make full length end-to-end passes working from one side to the other to tie everything together.
The whole thing is quick and intuitive. I do more or less depending upon how much twist there is and return to the winding sticks as needed. The hump removal isn’t needed unless the twist was big. I like this quick, unmeasured, intuitive approach and it works for me since most twist isn’t as extreme as the 1/4″ you showed here, but I look forward to trying your layed-out approach.
Btw, what I’ve described utilizes a couple planing fundamentals that are worth developing: Learning to take passes working back from an edge as a way to lower one end relative to another and learning to take short but lengthening passes in the middle to remove a hump.
Confession: I’m scared of jointers and am glad I do not own one. Even in my limited commercial shop experience, I already knew people who had jointer accidents and some were just unexpected random things, like wood being unexpectedly weak and coming apart on the jointer. Okay, so you learn to bang the wood on the floor before jointing to listen for soundness, but that’s anything but perfect. And, that didn’t help Tommy when the wood had buried wire in it. So use a metal detector. Yeah, but you have to face up to the fact that things get missed, things aren’t perfect, and a jointer is a big motor driving a big exposed blade.
I share your fear of powered jointers. They take up a lot of space, are noisy and are very dangerous. There are many options for the hobbyist that are cheaper, less noisy and safer.
Thank you Paul for the great explanation on getting rid of twist. I had never seen using a wedge to measure how much to remove. This will be a big help on my next board to flatten.
This is sorcery, pure and simple. I think Paul may be a tree spirit. He knows too much.
Hi Paul. Perhaps I’m overthinking things, but is there any rule of thumb about the final flattening so that it stays flat and doesn’t once again warp or deform due stress in the wood or normal wood movement prior to using it in your project? Do you flatten the boards as you build the project – on demand so to speak – or do you flatten them all up front at the beginning of the project? Maybe I’m not asking this correctly, but the stresses that lead to the initial deformation – will they still be active after your flattening – which means you have a window of time where the board will be flat for use before you might have to flatten it slightly again?
Hi Bob. Whereas the stresses are worse when would is force dried too fast, generally the wood is stabilised by drying it down from its original mass of moisture to more manageable levels which can range anywhere between 5-18% or higher at the point of purchase Wood will by nature continue to distort if it is at the higher end and taken into a dry climate where it will reduce the MC. This is not always the case, it will shrink though. The best solution is to take it into your environment be that its final destiny in your home or into your workshop and keep it there for a week or two. You can do tests with metres but the simplest is to keep a decent pair of small kitchen scales. Cut of a small section, weigh it and then see which way it goes, up or down, after say a week. You can also measure across its wide point across the grain to see how much it shrinks or expands. Once the wood reaches equilibrium with its environment it will not distort further and you can work it just fine. Joints will constrain much of the distortion once made and glued except in extreme cases of high and low MC levels. Acclimation in the final environment places the wood as a project or ready to be made into a project is the best prevention for what you are describing your worry is. Having said all of that, wood generally moves when the MC is too high at purchase and the wood is shrinking (and distorting) in your workshop. Each reduction in size you make reduces the amount of distortion so usually, often, we don’t have a problem.
My winding sticks are very basic. I had some left over white oak flooring two inches (shade less than 51 mm) wide, and three feet long (85 mm less than a meter). I cut one in half with a back saw and cleaned the ends up on a shooting board. I trued them with a hand plane to get one straight edge, then used my table saw to bring the other sides to parallel. Then I put blue masking tape on one. I check them for true with straight edge. So far I have only had to realign the edges once. They are now well over twenty years old, but serve the purpose quite well.
Hi Paul
A little help to understand your post.
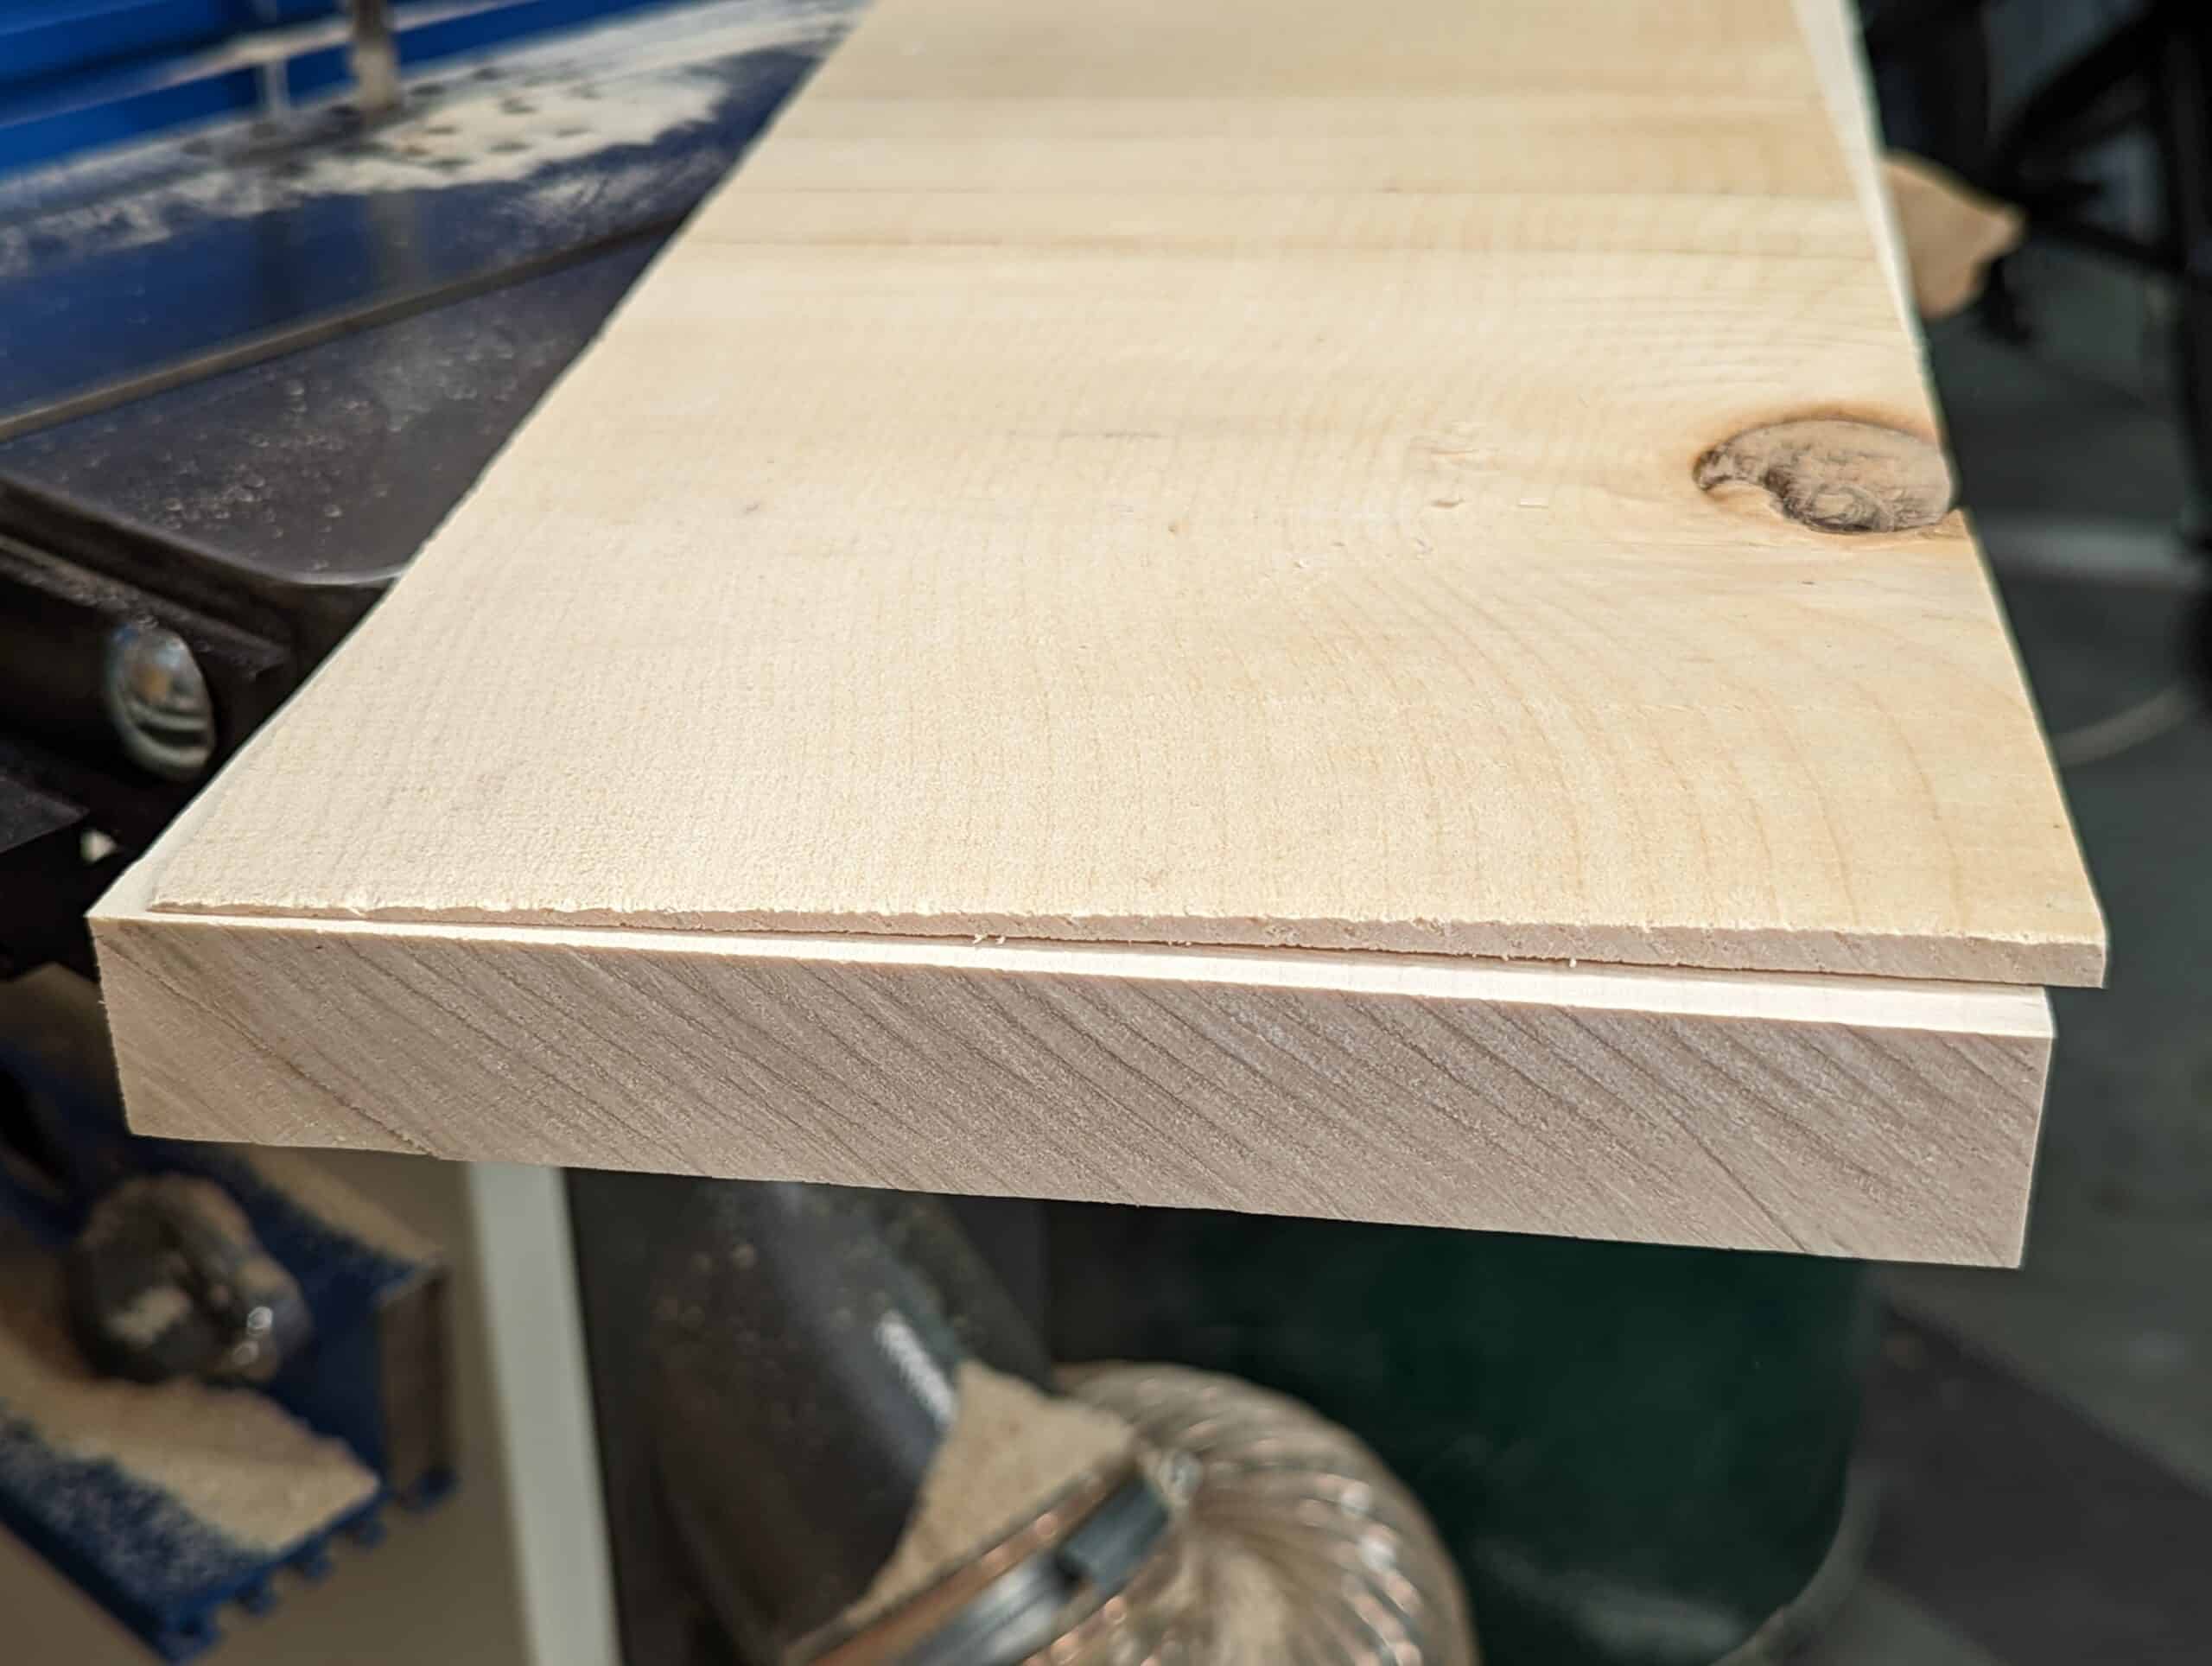
After where you write, “working on a propellor shape and trying to flatten the propellor.” there is a photo of a board with what appears to be to be a wedge shape sliced from it and the caption reads, “Once ripped parallel on the bandsaw…..”
This is my confusion while your post talks about working by hand to flatten one face and thickness you throw in the bandsaw comment. Would you please explain?
Thank you
bob
You cannot easily flatten the first face using the bandsaw because both faces are distorted equally. Flatten one face and then use the bandsaw to rip parallel to the first face or indeed plane both faces true if you have the time and energy and don’t want to use a bandsaw. I use a bandsaw because it saves my energy for the other work I do but not all the time.
I hasten to add here that I (we) are not only about hand tools, we’re just not at all about machining wood. The bandsaw is our donkey for the donkey work and is the single most useful machine for those of us with limited space, funds or if we live in a quiet neighbourhood or in a New York high-rise. Often our wood might be 1 1/4″ thick and we want 7/8″ as in my picture. Hogging off that much stock on 20 boards (as it was in my case this week) is prohibitively high and uneconomic use of my time.
Thanks for clarifying Paul.
All the best
Stay well
bob
Hello Paul,
Will you make a video of this ?
2nd. This method is too good not to. And it is again unique in the world. No one else is doing this.
3rd. Please do.
Lol. Machines, rather than machine tools it is. I remembered the machine part because my grandma used to call the car the machine (I think it is an Italian thing as that was her first language and I vaguely recall learning something when I took Italian in school that made me connect the two). Guess in my mind I added the word tool so that I wouldn’t somehow confuse the two though unlikely.
I was definitely going down the machine route since that’s what all the YouTube gurus showed and what seems to be the most popular on there. I was extremely intimidated by hand tools and especially hand planes. I had no idea where to start or even how to get into hand tools. I attribute this to how much nonsense there is on each YT channel claiming to have the knowledge you need. Once I started reading this blog and watched your video on how to restore, sharpen and set a hand plane, all the mystery went away. This has also been the case with chisels, hand saws and other tools listed in your book. I can now sharpen my own tools and work with them confidently. I’m still in my infant stages of a hand tool woodworker but will continue down this path. I’ve since sold off my table saw and planer and only kept my bandsaw. I don’t regret this at all. Much more enjoyable for me and for my family. No more loud machine noises coming from the garage.
Thanks!
Gabriel
This detailed information is just so hard to find. My previous source was a high school textbook from about 1950. It is accurate, but somewhat outdated by changes in availability and design of timber and tools.
Hi Paul,
Thank you for another great tutorial!
I had a related query that i would love your thoughts on, I was recently given 2 boules of old oak, the condition of some of the slabs are not great but there is some good usable wood there, i now need to move it from the warehouse at work to my garage but do not have the room for it as is, what size stock planks would you recommend sawing it down to with furniture making and household joinery in mind? All the best Rich
Hi Richard, I’m certainly not Paul but I’ll give you my two cents/pence. if the wood is fairly stable I look at the thickest things that I make – usually table legs for me which are around 1 ¾ inches square for what I make. Usually, 1″ to 1 ⅛” covers everything else that I make and leaves enough wood to take out twist later if required. A lot of the general work tends to get down to around ¾ inch thickness for final use but you need a cushion for flattening – hence the 1 to 1 ⅛ inches. so I’d pick some nice pieces for legs and leave them at 2″ and take the rest to 1 ⅛ inches. Again, that’s for the things I make. if you are into smaller decorative boxes and the like, it could be thinner.
As someone who like you mentioned only makes a couple pieces a year besides small boxes and the like i was wondering if it’s best to flatten the boards as needed? I keep the wood in the house like you said but sometimes work and life get busy and it will be a week or two between working on a project.
As to this method of flattening, just perfect to me. When reading it it struck me as so simple yet brilliant. One of those things that you can’t believe you didn’t think of yourself.
On a separate note, i converted an old no. 78 to a scrub plane like yours. I cut down an old front knob from a no 4 just a little shorter, took out the front screw and got a longer machine screw so i could mount the knob on the front of the plane. To me it’s much more comfortable to use. The 78 as a scrub plane is another great idea that works perfectly in practice
Glad you specified ‘sharp pencil’. Some people are marking with a pencil 2mms wide and then wonder why things don’t fit. I tend to use a marking knife or a 0.3 mm mechanical pencil, but always keep some regular pencils near by and a good sharpener in my work shirt pocket.
An excellent references to the wood working people.
Can’t tell you how often I find myself thinking “high spots, high spots” to stay on track.
I also find that, since I’m dimensioning by hand (no machines) I prefer to near flat the second face and then scrub across (unless the grain says no in places).
However I ignore the vise and use planing stops. I find a stud clamped in the tool well helps with traversing and can even be used as a warning to not overdo it on the far edge. Not only is lifting and checking quicker but I find that bench top planing helps focus on technique too when starting and finishing a cut.
ofc if I had a band saw it’d be different, just sharing 😉