Plane Away
I think planing wood is quite a troublesome and complex aspect of our working of wood but the good thing is that for every fibre-tearing, grain-ripping stroke of negative pain there are a hundred and many more really good ones. One thing that’s certain is the unpredictability of wood when it comes to planing with bench planes. Most planing is used always to smooth and level wood for one reason or another alone. To get good results can never be absolutely guaranteed but to get the best we can surrounds three key issues at least. The problem surrounding planing is not necessarily the tool itself and neither is it always the user but of course, it can be one or both and then, too, both. Persevering in the gaining of skilled planecraft is not an hour’s practice or a month’s or even a year’s. The reason for this long-term learning curve rests not in the tool nor in the user but in the wood itself. When I started out in woodworking as a boy I simplistically thought of wood in the very, very narrowest of ways––trees chopped down and slabbed gave us planks, boards and beams and they could be from any species, were always sawable, planeable, jointable, workable in different ways and wood was predictable for the making of different anythings and all you needed was a pair of strong hands and arms to deliver energy and direction to hand tools to work it. As I say, simplistic. But that was actually all it took for me to believe working it with good results could happen for me. My woodwork teacher provided two woods that could indeed be readily worked with basic hand tools and that gave me the belief that all woods could be worked and worked easily. Of course, long term, that was naive. It wasn’t too long before I encountered grain and wood that would occasionally drive me crazy. Even so, those two woods, obeche and sapele, gave me the start I needed with a positive outcome.
When I started my apprenticeship, new woods came my way and one by one my relational (related to by the working of them) knowledge of wood and each wood type increased. The list of woods I’ve worked since then and now, after almost six decades in the daily working them, is quite vast. Some came and went according to commercial forestry production, processing and distribution whereas others became protected species withdrawn because of overuse and careless deforestation. I am conscious of privilege the past gave me in knowing woods that would and could and should never be used today. Our European softwoods and hardwoods have a uniqueness to them according to the various climes of Europe. I can compare such to those woods I worked native to North America as in Mexico, the USA and Canada. Such diversity. Mixed into such regions are the commonly grown and used Asian wood too. Knot-free, straight grained medium density with stability and minus annular rings or any noticeable growth cycle usually resulted woods that were easier to work. Such woods can still be had from upcycled or recycled furniture and so on. Planing and scraping such woods give tremendous insight into the characteristics of wood types that cannot be read up on or described beyond the very basics of colour, grain type, density, workability and such.
Experience tells me that most woodworkers starting out give up and give in far too quickly and readily after a few miss-jumps even at the shallowest of hurdles. That rider’s hesitation is sensed by the horse even though with the right measure of rider confidence urging the horse on the horse would have taken the jump easily willingly and with an unfaltering leap. But I understand that leap can be intimidating when all you have known is a ruined surface uncorrectable by a novice starting out. There again, I have known many an experienced wood machinist who never mastered the hand plane resorting always to using only some kind of power sander. But in mastering the bench plane the incredible happens and it is not just about merely sanding a surface smooth. In woodworking, the plane can never be truly replaced and most sanding becomes necessary where skill in using hand planes is abandoned and the planes remain untamed. Planes have a much wider capability of multiple tasks than merely smoothing wood. In the hands of those who mastered them, you can take off fractions of an inch in thousandths if you want to and this comes with a single and continuous cut as a ribbon as opposed to a million chips leaving some measure of ripple texturing the wood’s surface that then needs successive work with sandpaper. Hand planes handle well are about as perfect for getting a door in perfect synchrony with its frame or the drawer to close after a little swelling. This tool leaves the surface pristinely smooth and within a thousandth of an intended goal.
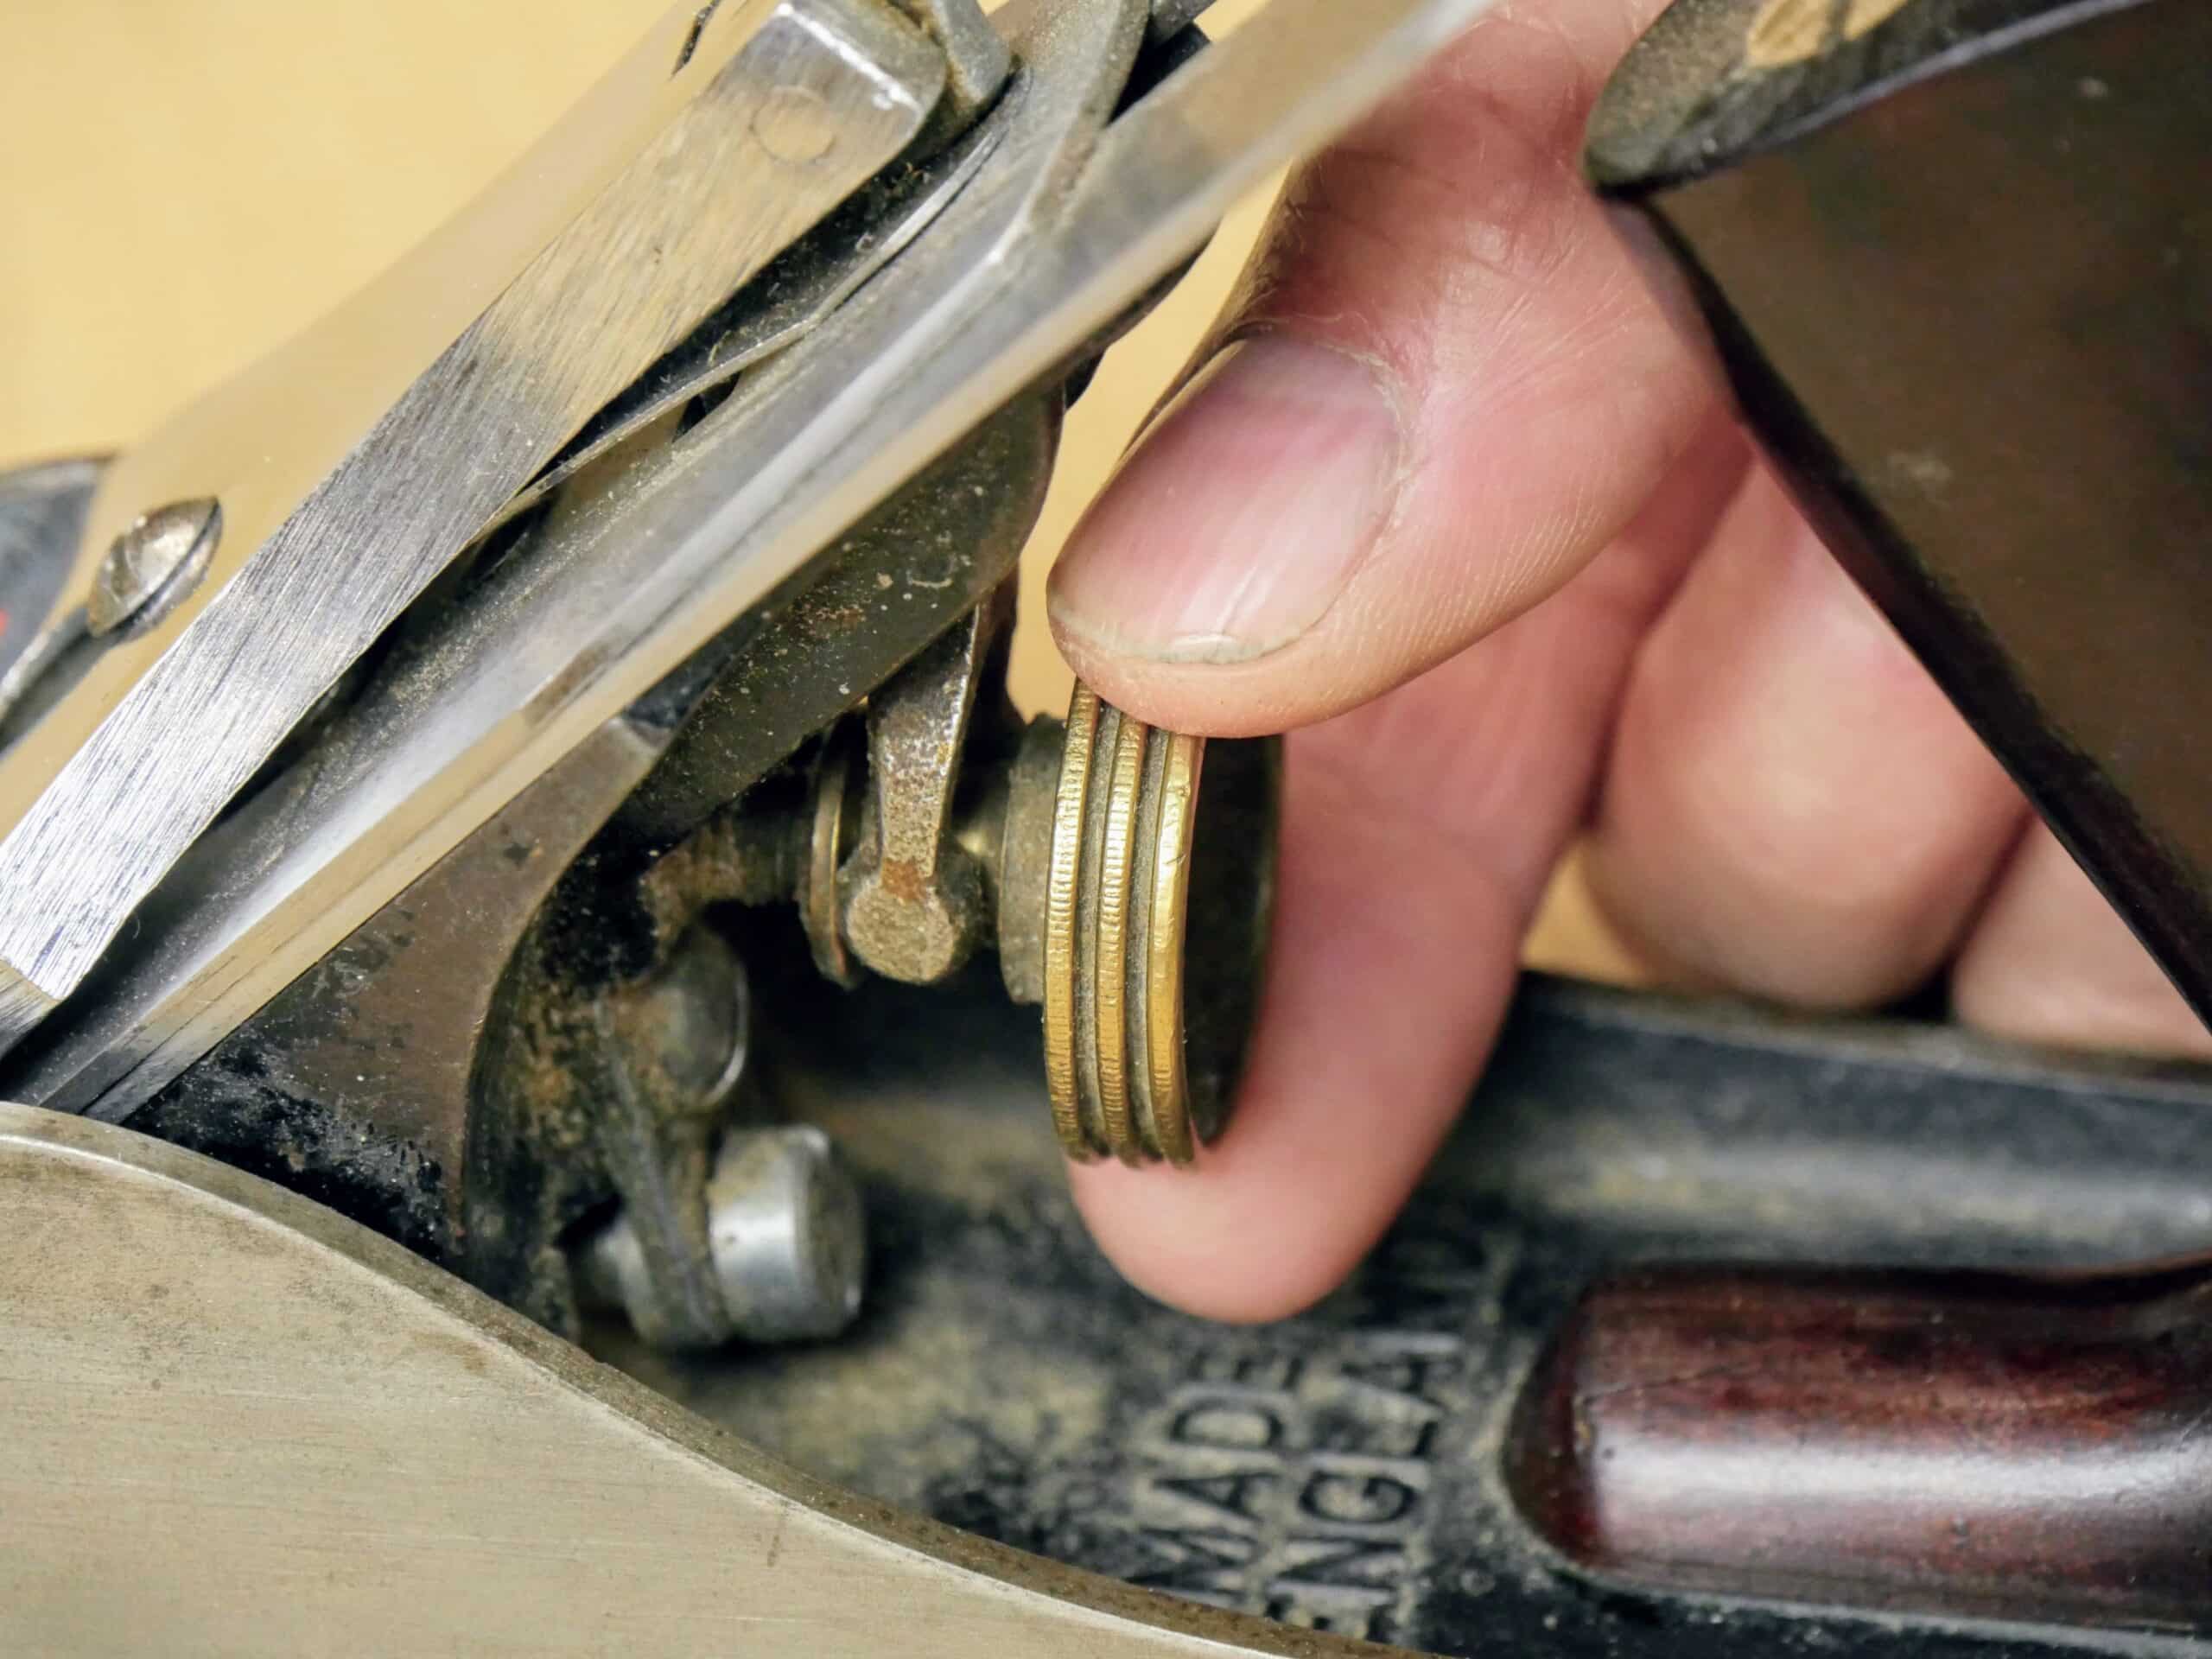
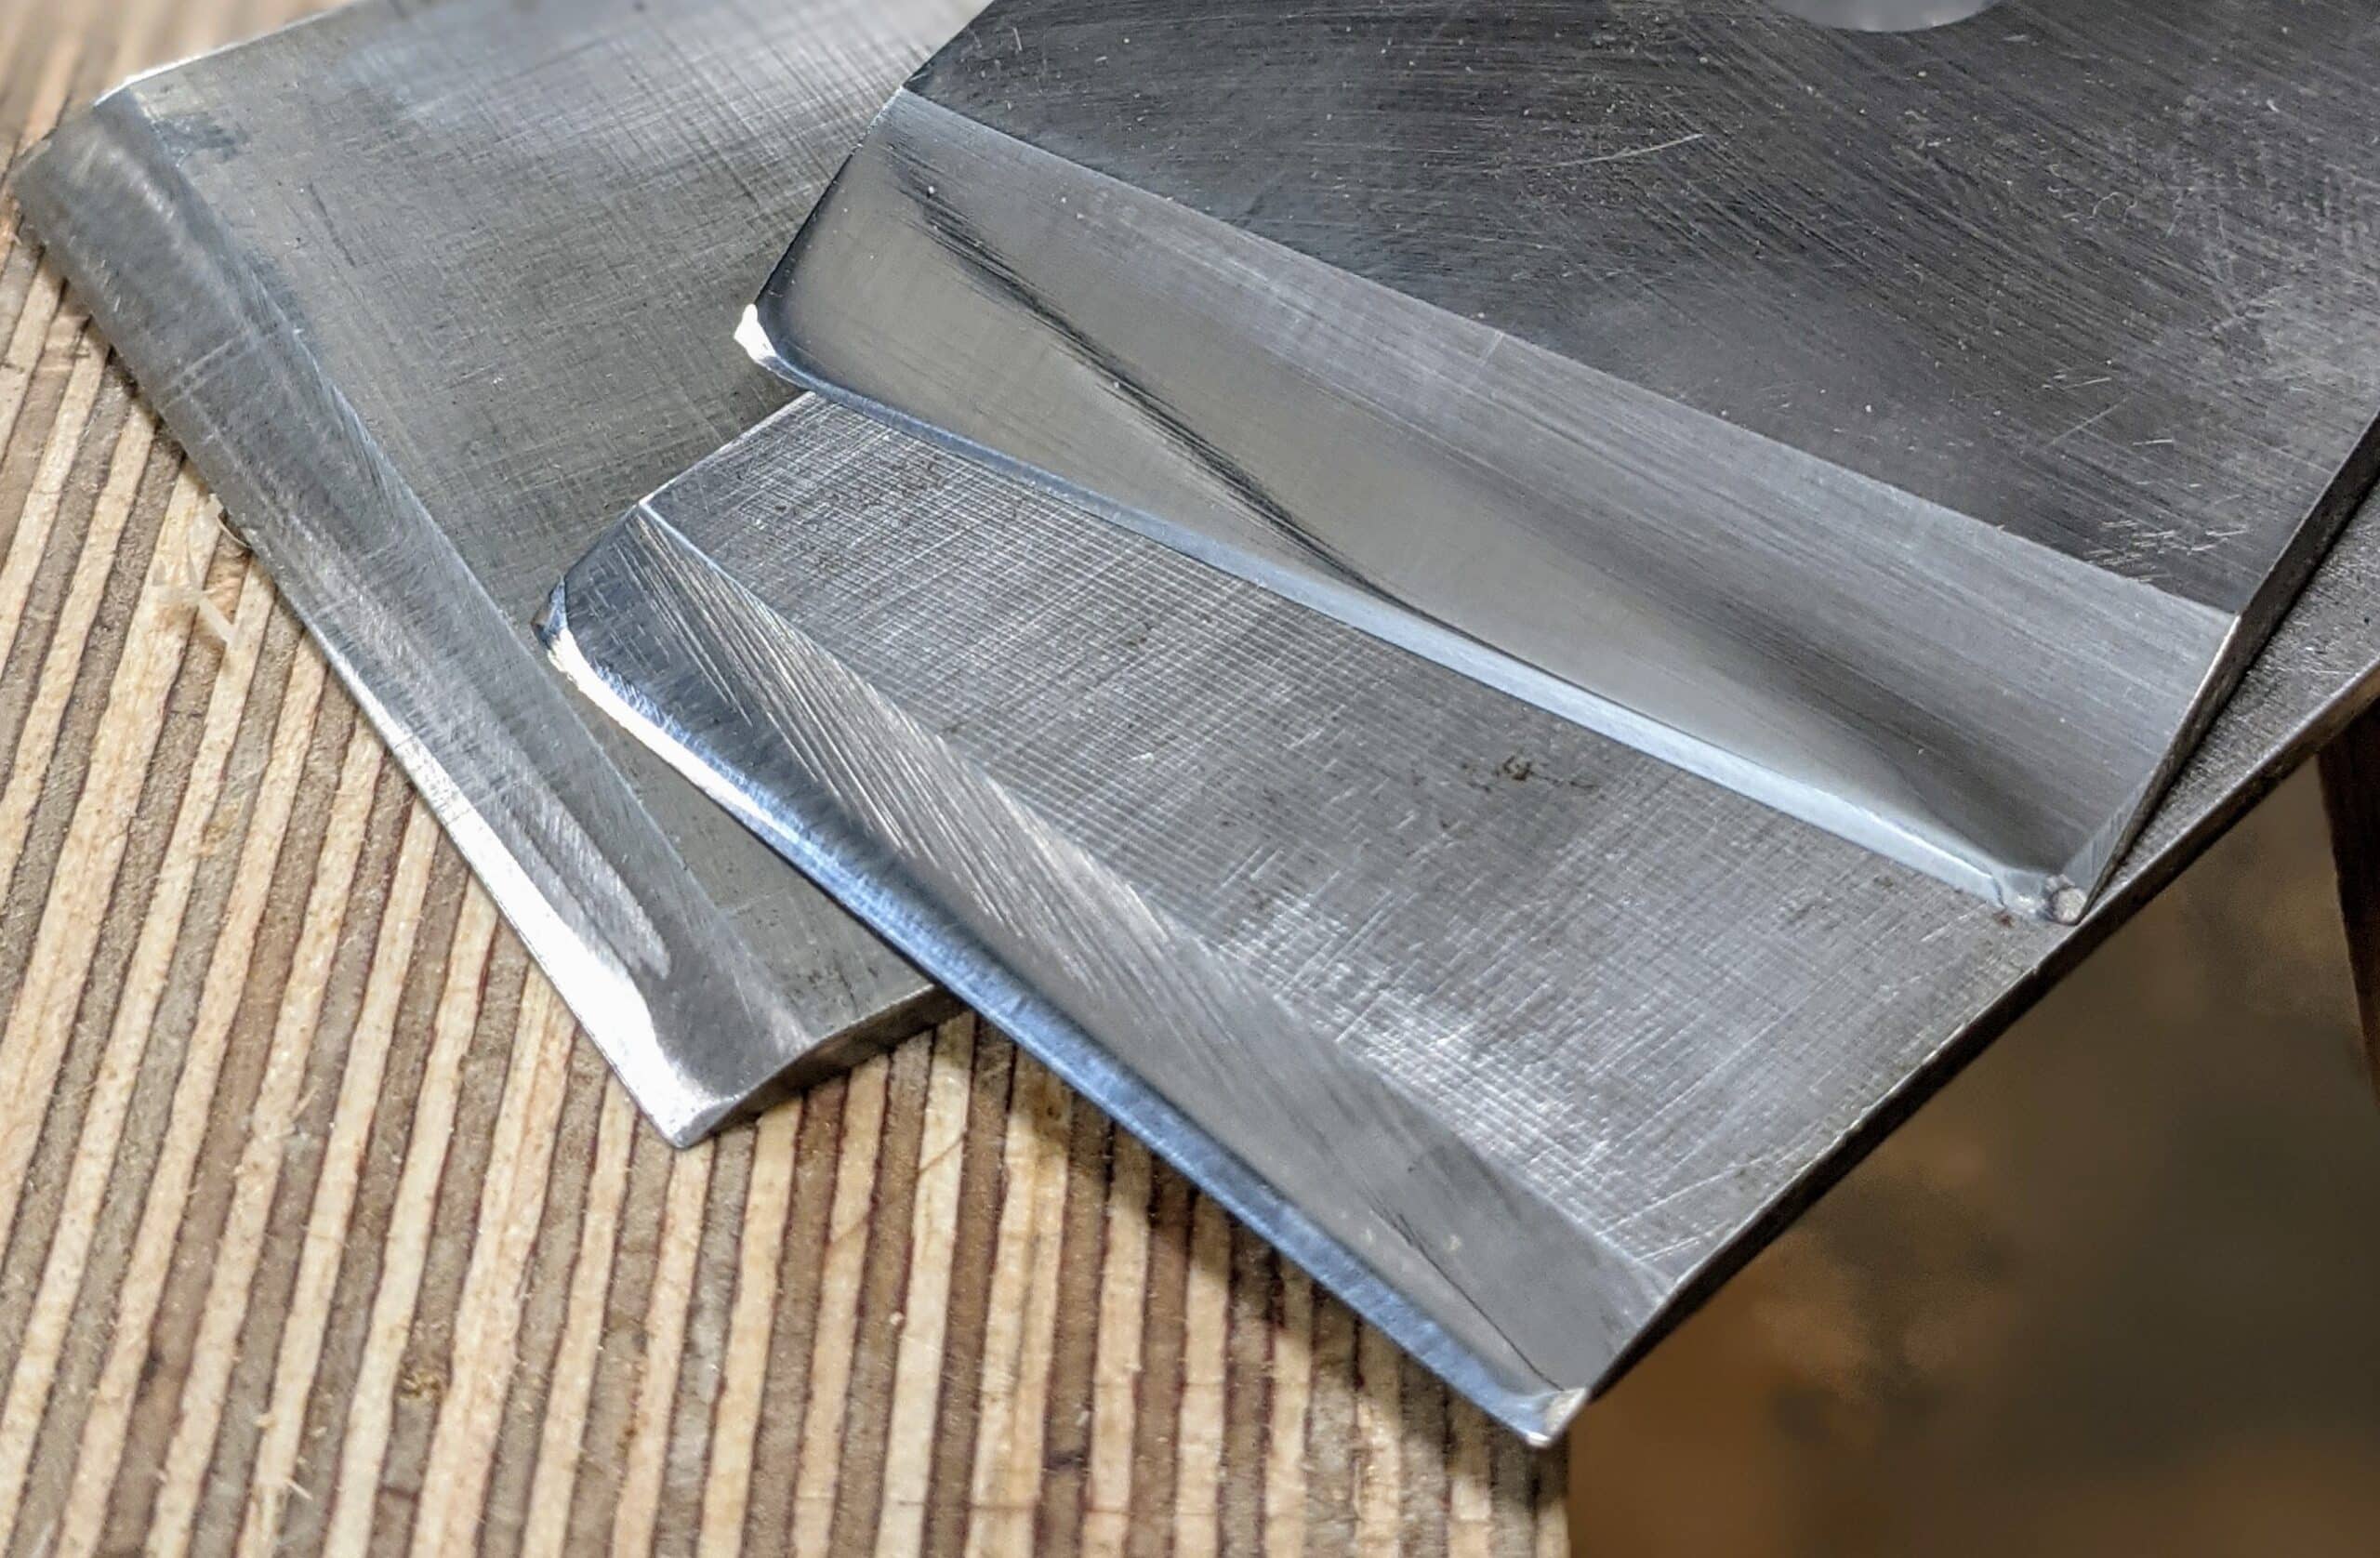
The ingredients to successful planing are in the setting of the plane’s cutting iron for depth of cut along with its parallelity to the sole and, equally important, that sharpness defining the mirror-smooth surface we strive always for. You also need to understand the adjustment systems that develop these elements so that you know how much to turn that depth adjuster and the lateral alignment lever. The turns on the wheel are never two the same. Yes, we would like a dial-in a number for each par-turn but there is no such thing as some woods will take a mildly heavier cut and others will send that silent scream as the wood rips and tears from its root. This does take time to master if mastery is indeed what it’s called, but you can do as millions of hand-tool woodworkers have in every woodworking trade across the world have done for three or more centuries prior to machine working of wood and that is to master it to the best of your ability.
What is actually more important is that you realise it’s more likely to be the wood than the tool used that has the problem. No two wood types are the same and two sections from the same board side by side and one under or over the other are as likely to be unalike as can be. Some woods tolerate of bad workmanship and inexperience whilst others absolutely demand the highest levels of experience and skill. Planing a surface in ten strokes can create the nearest thing to perfection you can ever get and then that eleventh thought-you-needed-it stroke over the same successive patch rips the root of the fibres to render beneath the wood totally unfixable. But eventually, you will sense the surface before the stroke takes full sway and in a split-second twist or turn you’ll save the day.
Nature, by its very nature, is almost totally unpredictable and most often we must constrain it by some kind of sterilising solution that renders nature itself sterile. Modifying plants for maximised growth, size, type and so on may give us uniformity but almost always at the sacrifice of something else. With the reproductive systems compromised, we must keep going back to the modifying source of copyright. In our kind of woodworking, it is the free spirit of working real wood that creates the uniqueness in the final look of what we make. Equally important to us is the how of it. Mass-made plywood, fibre-boards and particle boards, naked or faced, look like unreal wood though even plastic surfaces can indeed deceive us at first glance. Mostly, and of course, MDF has replaced wood because of industry’s need for total predictability and control. Created for economic large surface area materials, the material must comply with the intolerances of machines. You cannot have sheet goods that expand and contract at the same rate that wood does. Feeding wood through protracted periods of processing might mean a material can expand or contract enough to jam in the machine. Our working with human flex enables us to bend and yield here and there to absorb small changes.
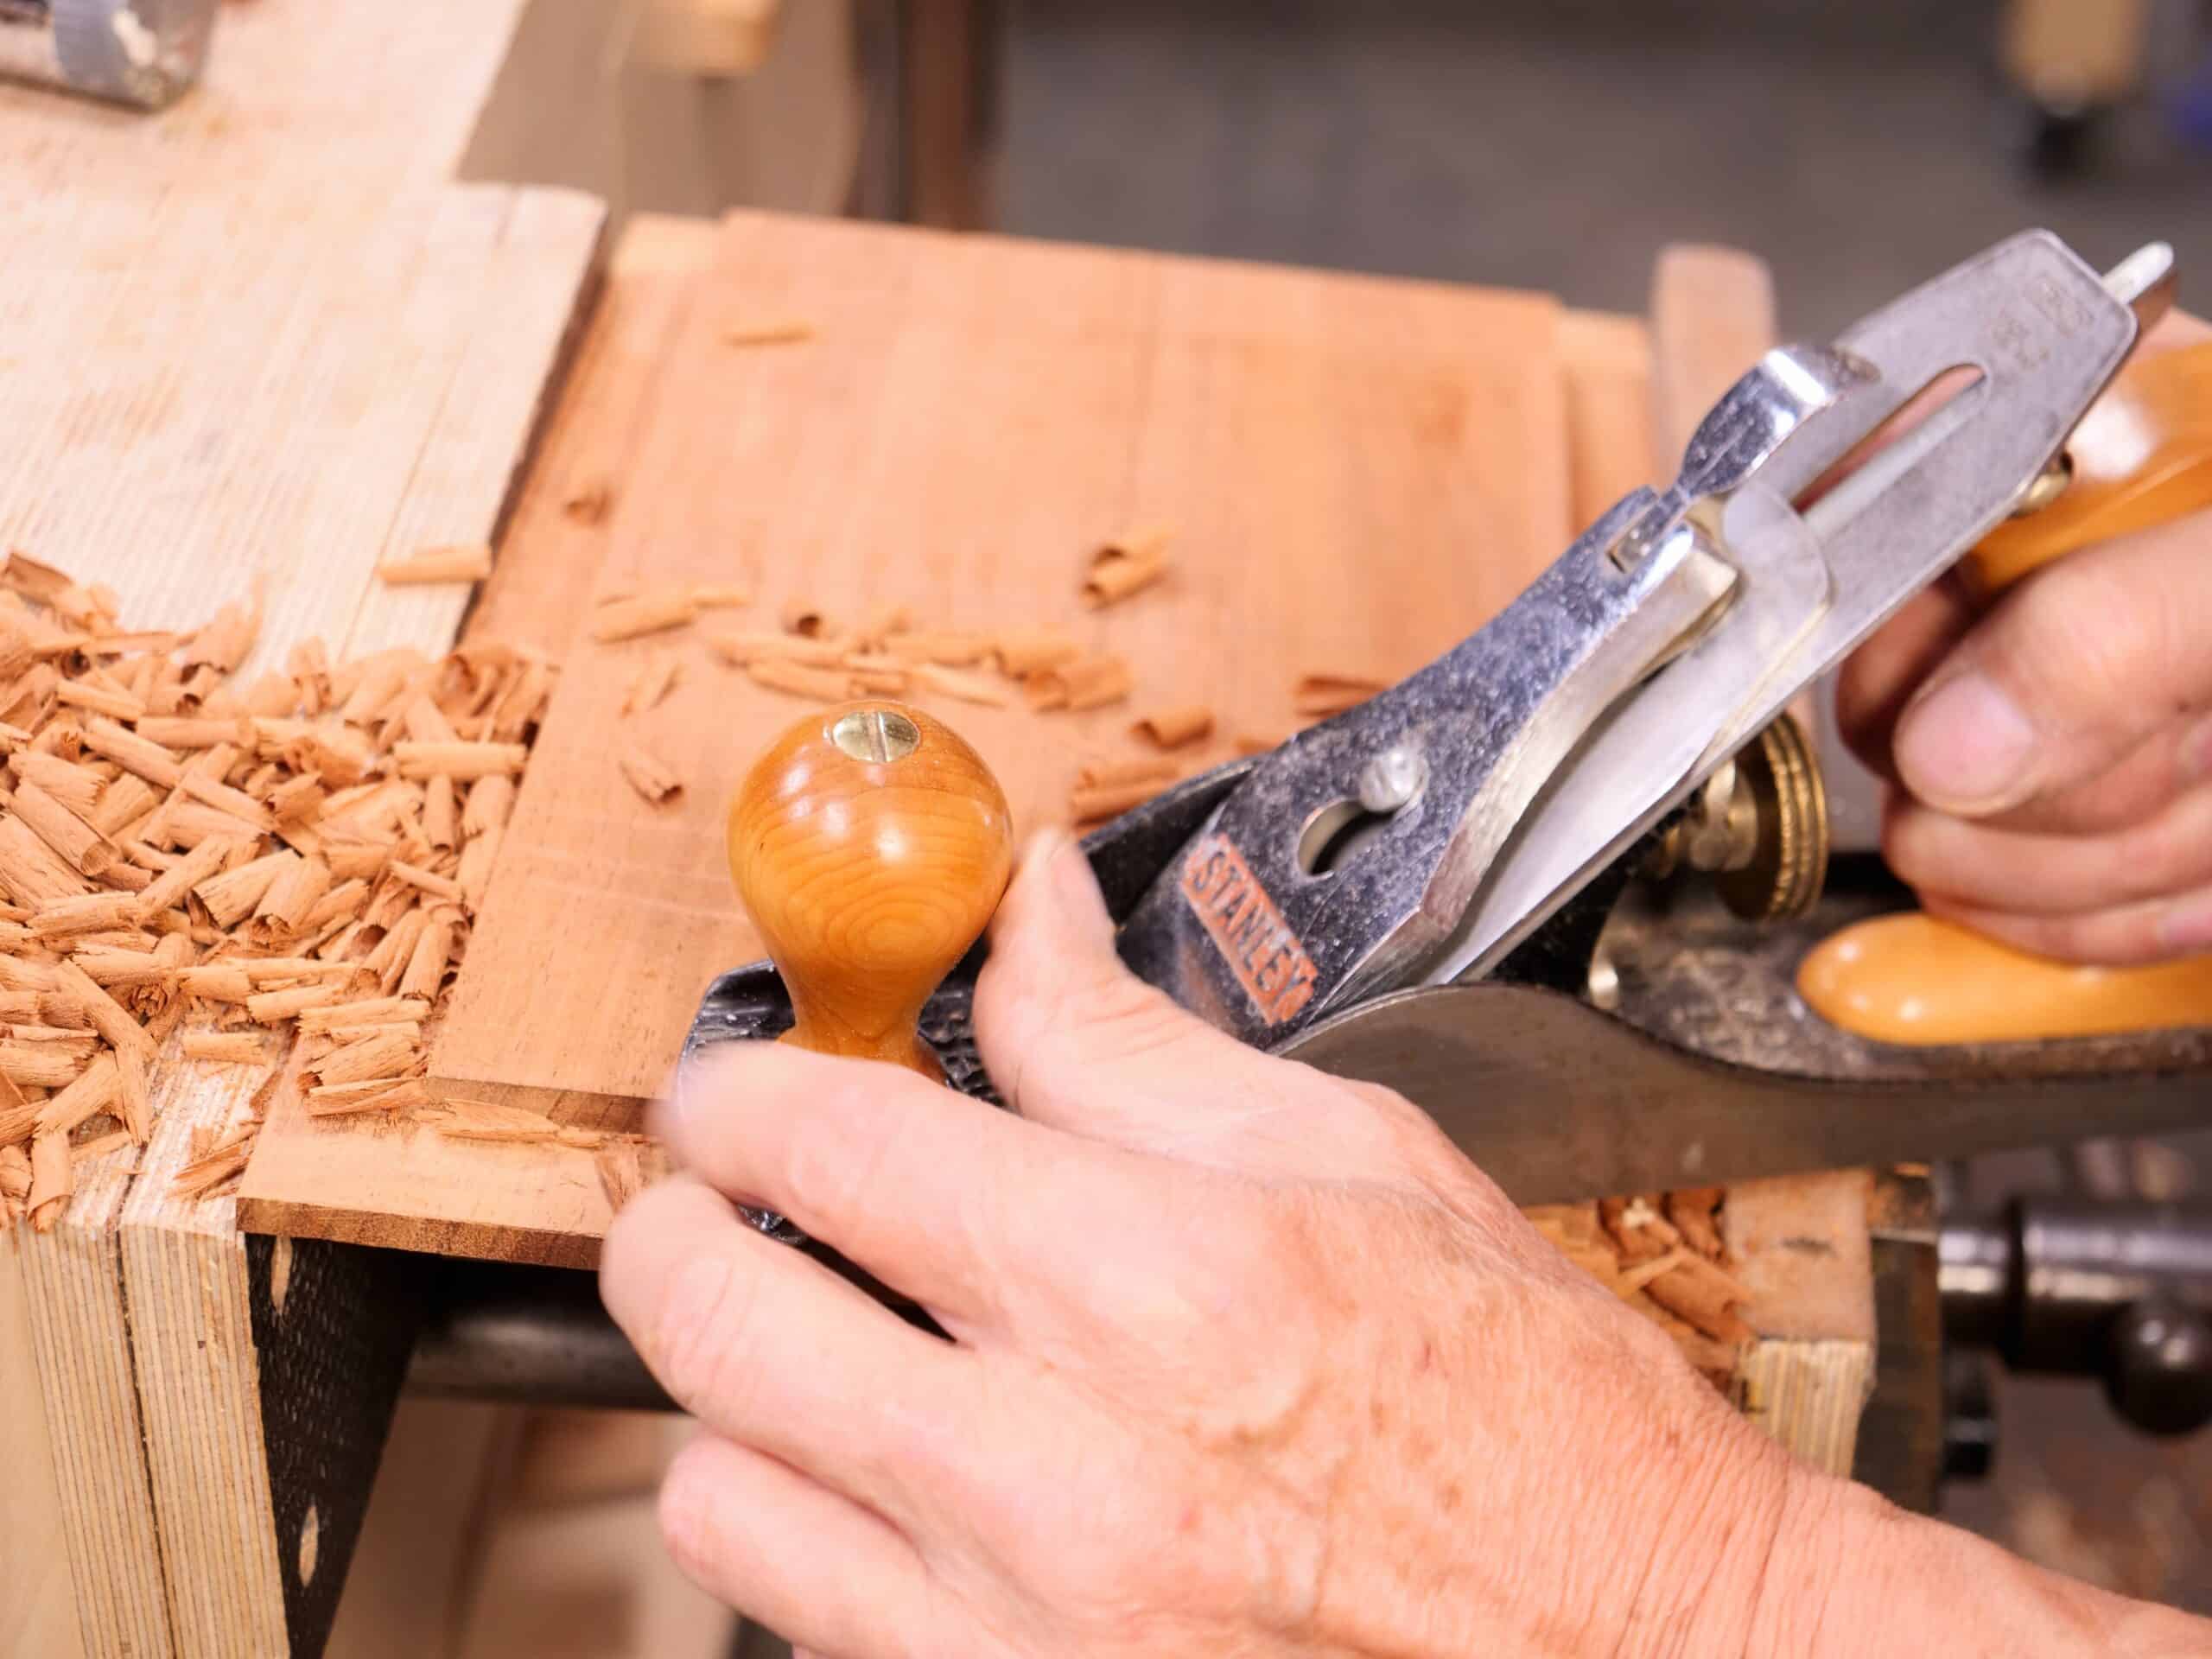
So here we are. Planing wood needs to be predictable as much as possible. My planing wood in my working is as real as I can make it. In filming, the wood I use has awkward grain and I do not suddenly run to machines like a power planer or a belt sander to take out difficult defects because handwork is too awkward or complicated. What you see is what you get and what you see is always real. On the other hand, it is too easy to believe some YouTubers presenting the plane flawlessly and creating equally flawless surfaces. 99% of this type of presentation is disingenuous at best because anyone should be able to set the stage for a positive outcome if and when they take half an hour for sharpening followed by a few steps in levelling the wood and readying the plane for a staged performance videoing. The three subsequent shavings are bound to look just brilliant. There is a reason they rarely if ever take the wood from rough-sawn to trued in successive work. The same is true when the wood is a flawless piece of hardwood like cherry, maple or oak. These woods are some of the easiest of all to work no matter the task and always guarantee a good outcome.
Although I don’t watch video presentations by others (never found any need to) nor like to either, I do know how the actors work on every platform. Placing a perfect piece of wood in a vise to swipe off successive onion-skin shavings that wrap around the wrist like gossamer is not really of any real help to anyone. Planing wood like this is a very different animal than wood still rough-sawn, crowned, bowed and twisted. My planing is usually in the saddle actually making for a series I am building. It’s always on the surface of the wood I am actually using in the actual project I am making as a whole for the audience be that 8″ wide or a thin edge, the intersection of a jointed area or the trimming of something like a door or a dovetailed drawer with six dovetails. I think my audience appreciates that I am not selling planes or blades, guides and equipment. Again, what you see is what you get. I simply want people to believe that woodworking did not come naturally to me but I naturally loved it enough to overcome my doubts to gain mastery over a number of years. Most of the demonstrators taking a pristine piece of wood locked in the vise to take off onion skin shavings a thousandth of an inch thick are not showing the reality of life but a very carefully orchestrated end result usually to sell something. It looks impressive, always looks impressive, but is always completely unreal and that’s because it is artificially massaged to that end.

Avoiding any spin, it’s in the spin, twist and flex of our planing that we gain long term mastery of hand planes and we never stop learning to deal with grain that would otherwise rip. We must sensitise ourselves to swivel but we must approach wood with the reality that as it is with real life, wood comes with knots in it. And what we see in the surface of a knot might not be visible on the opposite side of the board or beam. This inevitably results is some level of tearing so our anticipating problems ahead of sticking out is key to avoiding deep tissue ripping.
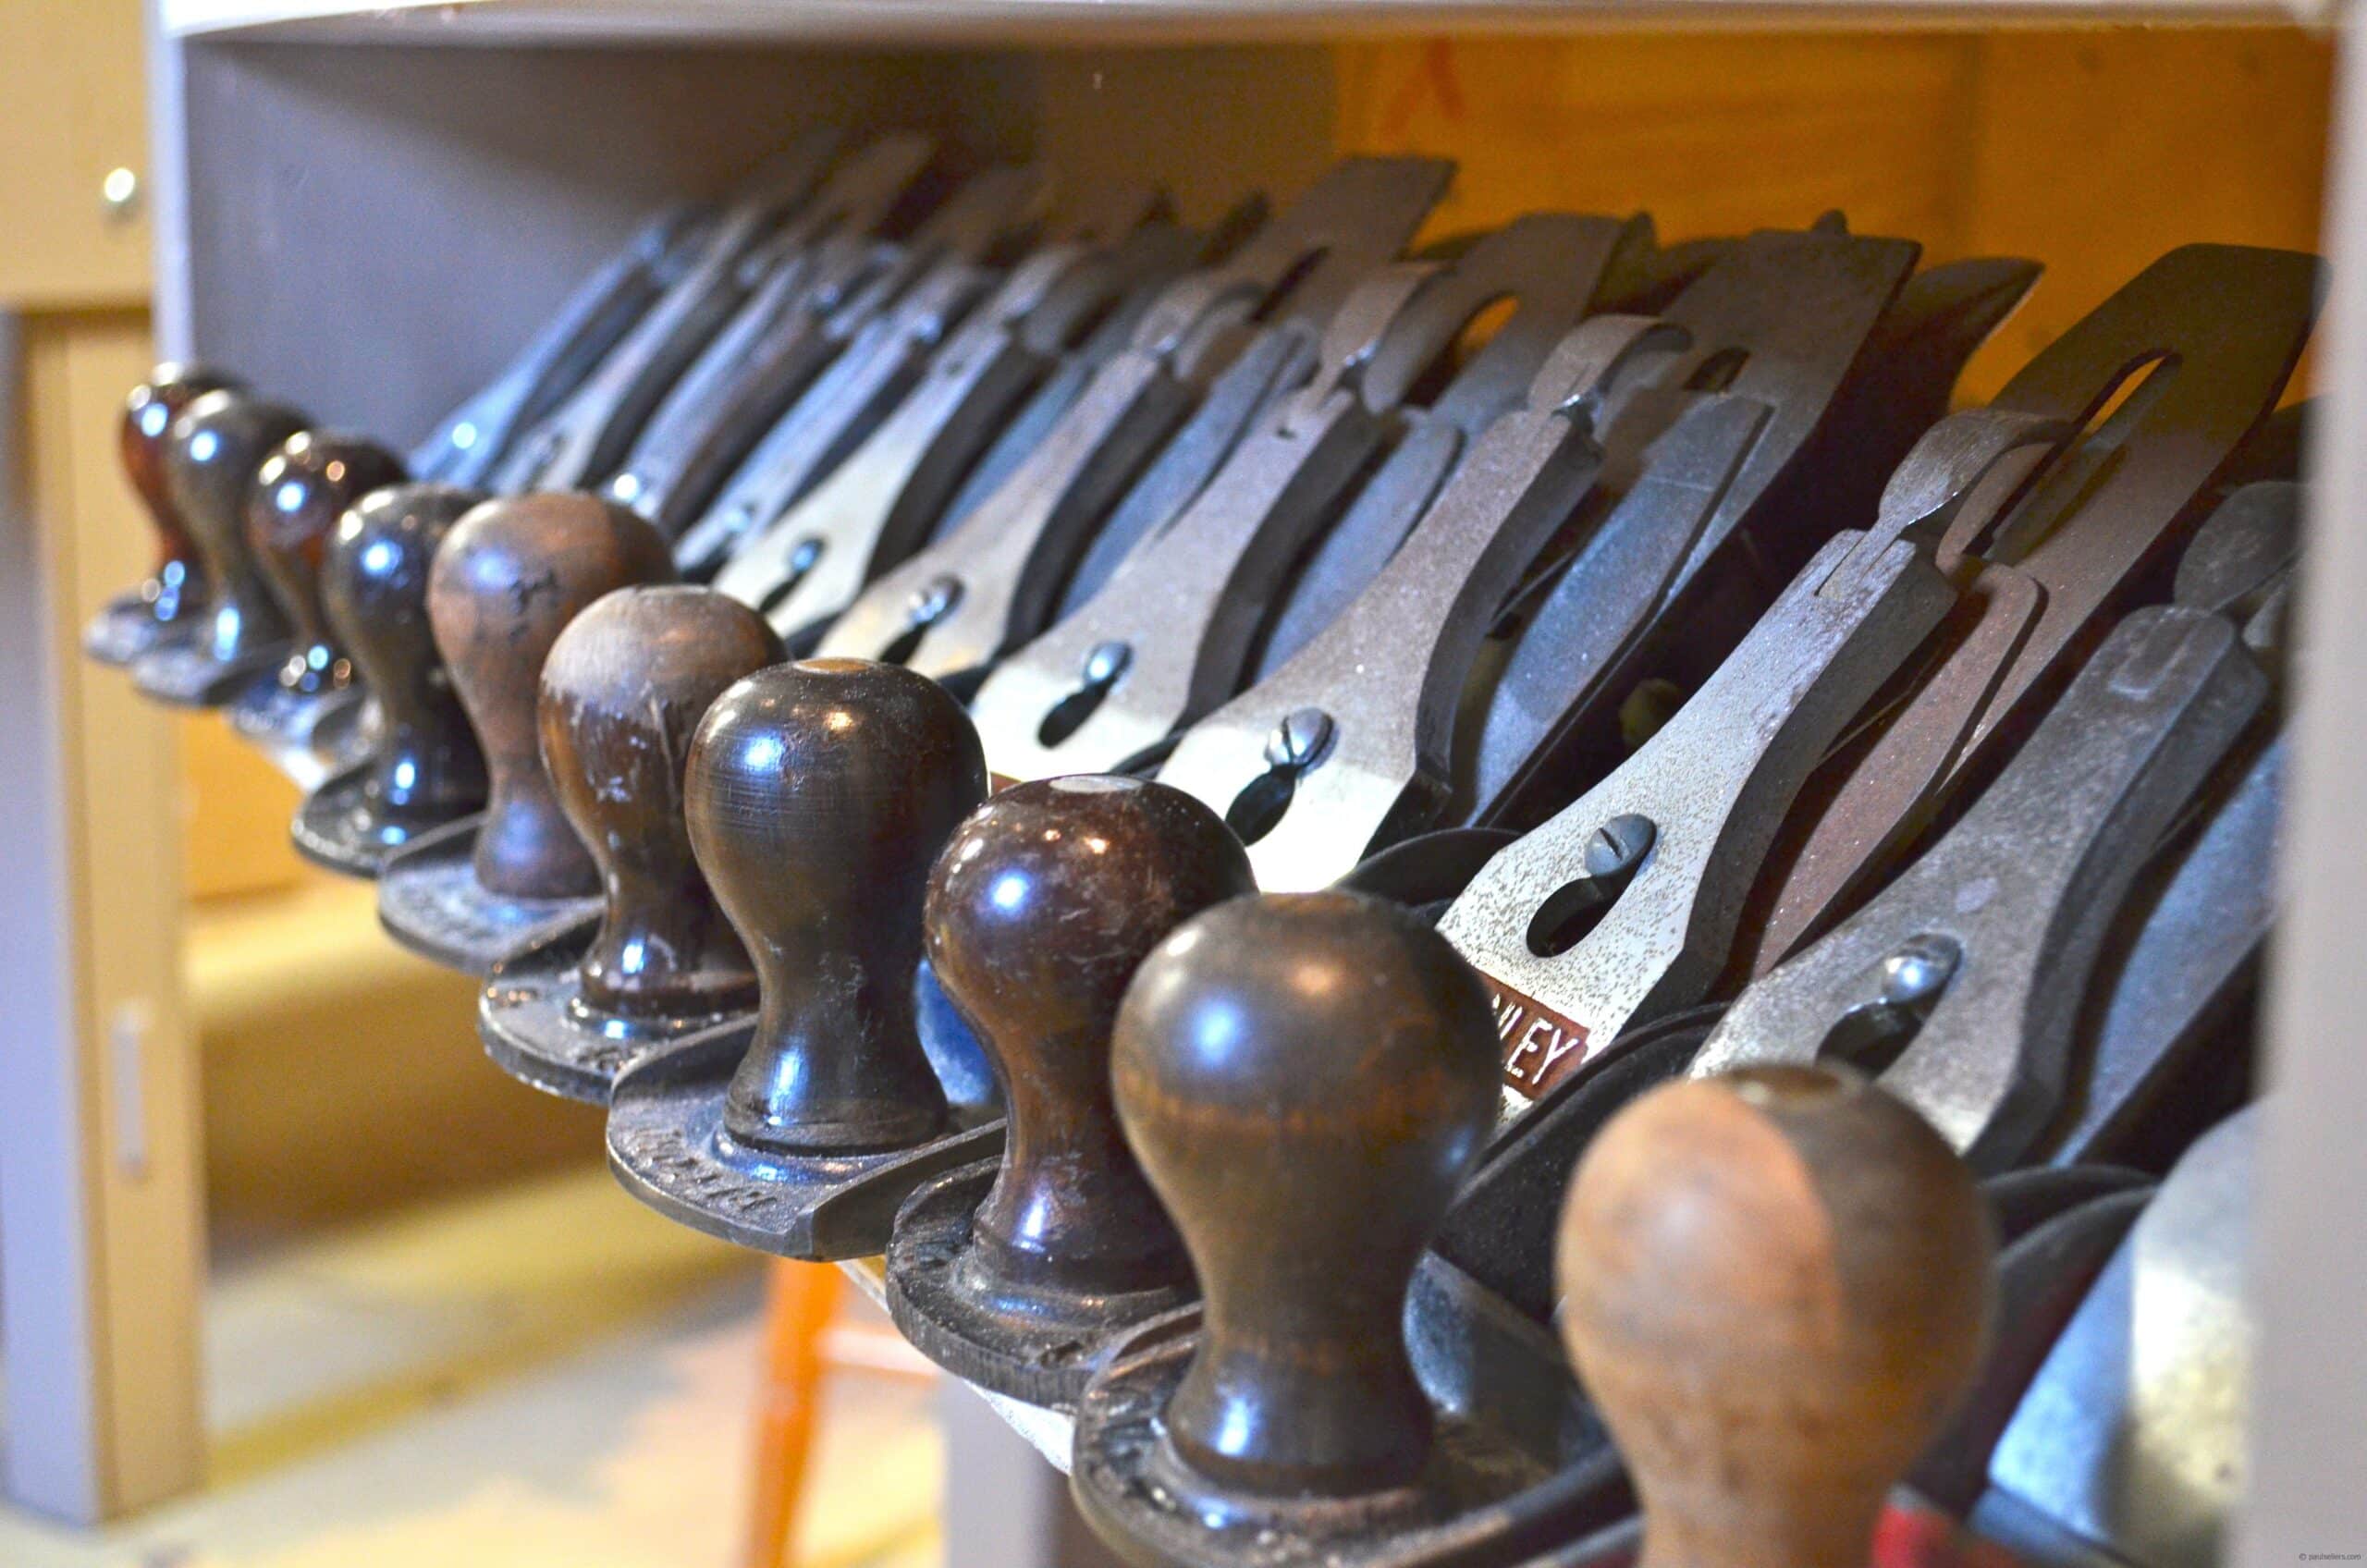
I’m wondering where a good resource can be found for identifying different kinds of planes. My father-in-law had one of the largest collections of old handheld woodworking tools in the Pacific NW (USA). When he died we inherited a huge collection including 50 or more unique ¾ to 1 inch wide molding planes. I assume that is what they were used for.
Any help you can offer is much appreciated.
Also, thank you for your article. Working with wood takes an amazing talent and loads of patience.
P.S. – My great-grandfather was a furniture maker in Uckfield, England. He moved to Canada and then the US around 1880.
Well, actually, working with wood does not take amazing talent so much as just ordinary practice and a modest amount of patience. Anyone who tells you differently simply doesn’t speak from experience. And within a few hours, a few days, no more than a handful, you can usually start making things like bookshelves and coffe tables, end tables and even dining tables. Learning to make and fit drawers will add to that but, really, anyone can do it. Anyone!
For moulding planes buy Bill Goodman’s book British Plane Makers from 1700. For Stanley type bench planes go to Patricks Blood and Gore at Superior Works
https://virginiatoolworks.com/tools/stanley-planes/
Very good resource
https://virginiatoolworks.com/tools/stanley-planes/bed-rock-type-study/
Duane, you should make a list (catalog) the planes and other tools you inherited. List, where possible the maker. For metal planes you probably want to verify that the blades and body are from the same maker. Check for patent dates cast into the body, and body numbers that may appear either at the toe or heel on the upper surface. You can find good information searching on “Stanley Bailey” and “Stanley Bedrock” to start with. For other makers, you’ll need to search the maker names. The same goes for handsaws and chisels, and other types of planes.
For wooden bodied planes it can be more complicated. Since the blades were commonly made by a separate company than the body.
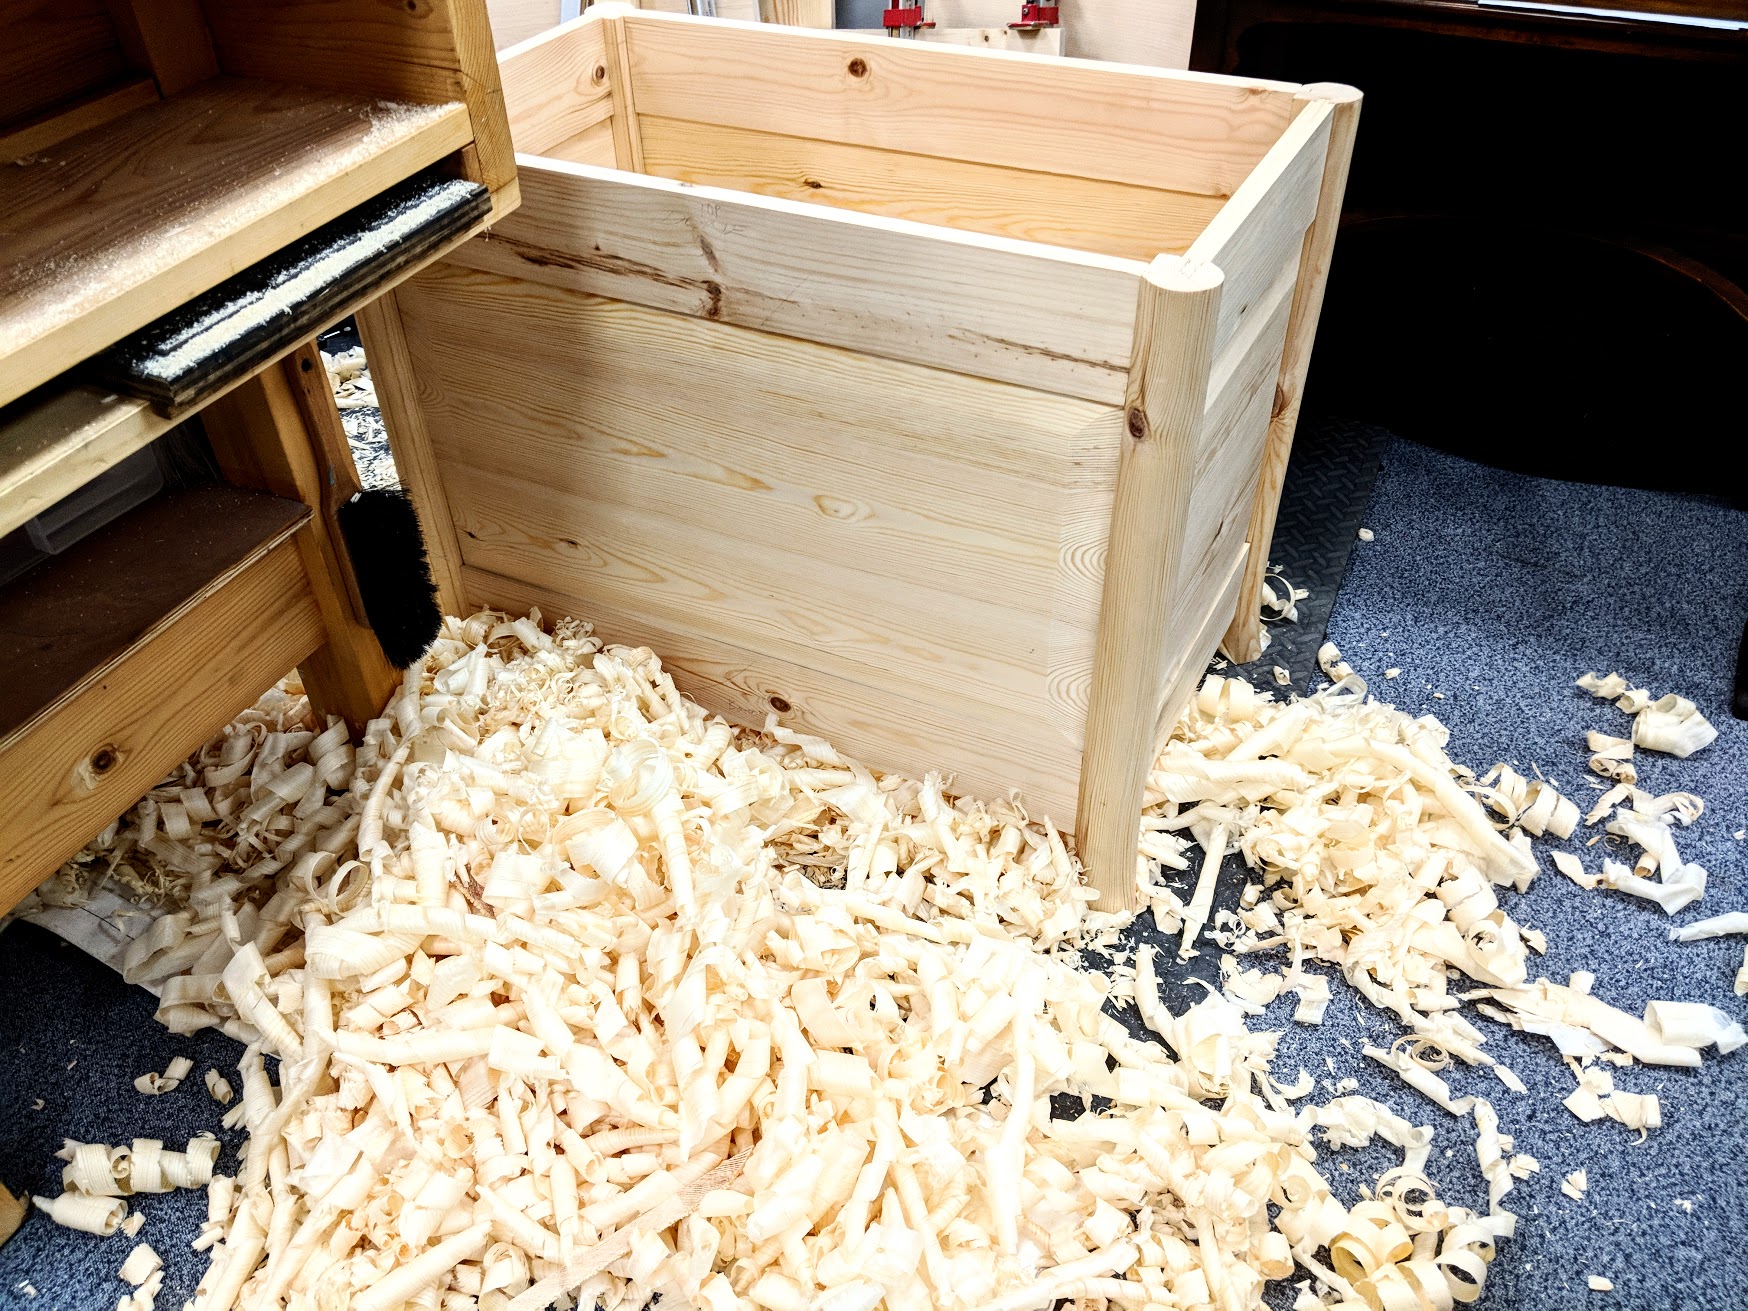
That wooden box for waste in the photo is a pleasing design. For example, it would be good for storing firewood next to my wood stove. Have you made a video on making that?
It’s a blanket chest though a prototype in pine version. So yes, we made a video on woodworkingmasterclasses.com under blanket chest.
It’s a blanket chest though, a prototype in pine version. So yes, we made a video on our woodworkingmasterclasses.com site under blanket chest.
Paul in today’s world multi-year apprenticeships are all but a thing of the past so the want-a-bee weekend woodworker or craftsman is continuously searching out shortcuts on the social media which in itself is full of weekend experts, as you say there is no substitute for hands on experience. I’m not saying that as a critic but just reporting the facts as my dad spent 4 years learning the carpentry trade, my grandfather before him 4 years to be a mason and I spent 4 years as an apprentice electrician now days there’s none of that as everyone is an expert or at least trying to pass themselves on as one or trying to being paid as one.
I think one of the biggest hurdles to getting started pursuing woodworking or craft work in general is that somewhere along the way, at least here in the USA, young people like me have been sold a bill of goods in that there’s this mindset that if you don’t make or perform perfectly right from the very beginning then you’re never going to succeed in it. I’ve had to really remember the mentality that I learned as a kid and a teenager working with my Grandpa and helping him make his beehives and cabinetry. In that it’s going to be a process, and I will mess things up, and that no longer how long I work at this, I will always be chasing perfection. I just have to practice and accept the process.
A good metaphor for what we encounter in life!
I don’t think i could add more other than to confirm what Paul says. Work, work and work (time) can’t really be sostituited for gaining (some) understanding. One of things that makes me happy is learning new things about stuff that have thought that you figured out.
Hi Paul, I’m new to woodwork and am really enjoying your news letters. I am collecting planes based on your work bench video series in an effort to make my own bench. I grew up in a time when tools, trades and craft were under sold in favour of technology and a university education. Part of me wishes I have followed my interest in making…. Better late than never. Thank you for the inspiration and instruction, it is greatly appreciated.
just the smell of pine shavings alone is worth it for me with using a handplane.
Dear Paul,
Having recently returned to woodworking after a long hiatus (due to work getting in the way of life) I was smugly overjoyed to find that I can still sharpen a cutting iron, flatten a board and square an edge using nothing but the “cheap” hand tools inherited from my late Dad. In my “getting back there” I found your videos invaluable and your underlying philosophy an inspiration.
But I must admit to nurturing a certain cynicism while watching you chop a model mortise or cut a pristine dovetail… “yeah”, I confess to thinking, “that’s all very well, starting off with optically flat, square, straight and dimensionally accurate pieces of stock conveniently to hand. But where did THOSE come from ? (With the vision of a surreptitious planer/thicknesser lurking somewhere in the background insidiously suggesting dirty work at the crossroads) ?”
To borrow an idiom from the world of cookery, just how does one “first catch those hares of perfection” without resorting to powered machinery ?
The answer is obvious. “Blood, sweat and tears” springs to mind but in olden times there must have been tricks to the trade. Do you know what they might have been and, more importantly, could you please pass them on….?
I do hope you know that every stick and stem I use comes not from power planers and chop saws but from my hands and a bandsaw but not always the bandsaw.
I do hope you know that every stick and stem I use comes not from power planers and chop saws but from my hands and a bandsaw but not always the bandsaw. I do not own any other machines but the bandsaw and no one else ever does the work for me.
The first time that I watched one of your videos I was in a rush to get started on my new hobby and thought the video was a bit long and laborious – but then I realised that most of those other videos out there are too short, miss out vital detail, probably cheat and concentrate too much on trying to sell something.
Now I get the kettle boiled, make a tea or coffee and spend hours watching and re-watching your videos for the sheer pleasure of watching you start at the beginning and work through to the end with all of the steps in between, including some mistakes.
I love how, every time you cut a piece of wood you explain from first principles how to mark it out and saw it – every time, because its worth repeating – and every video is therefore complete in itself without the ubiquitous “if you want to know how to do that please subscribe and click the links below”.
Just finished watching your clothes airer series – I’ve got no intention (yet) of making one but it was brilliant watching how you did it and the joints that you created.
As for planing, I was rubbish at it at first – I always thought “with the grain” just meant along the grain and could never figure out why sometimes I was gouging or tearing the wood. Now I’m constantly trying to read the grain like you do, looking out for rising grain going against the plane direction – that and far more frequent sharpening has improved my planing skills a hundred-fold and yet there is still vast scope for more improvement.
Thanks.
Bert Kirsten
Search the blog many posts “prepping wood” with the small magnifying glass on the top of the page.
Paul made numerous videos.
From which:
twist
trueing
edge jointing
stock preparation 1
stock preparation 2
planes I true my wood with
How to edge joint two boards by hand.
How to use a scub plane
how to plane narrow board edges square
how to prepare stock for joinery
planing technique: heel lift-of
and so on.
I am fairly new to woodworking and enjoy using hand powered tools. I am making some end grain cutting boards. I want to use a hand plane to level off the board after the final glue up and prior to the drum sander. I resharpen the blades with a 3000 grit diamond and a strop. My old school Stanley #4 and my wood body planes have proven too difficult to push through the end grain. Is there a better approach? My boards are hard maple, walnut and cherry. Thanks Tim
Tim,
When you say “too difficult to push through the end grain”, what do you mean? Is it that they wobble on the top of the board, or that they struggle to cut the end grain? Are you planing on a shooting board, or just upright in the vise (or, even better, with the jig that Paul developed and showed a few weeks back)? The bottom line is that both your old Stanleys, if properly sharpened and with true soles, should be more than capable of planing end grain in all those woods with little additional force required. I sometimes skew the plane if it’s struggling (although that’s usually a sign it needs sharpening), and I never take a deep cut of course. If you’re using on a shooting board, then try it upright in the vise (or Paul’s jig) instead and see if that works. I tend not to use my shooting board often as I find pushing the plane on its side uncomfortable and it seems to me to lack the control (even though it doesn’t) over vertical. Although I still use my #4 with the shooting board without issue. I don’t think that will be much use to you unfortunately, but just wanted you to know that the planes should be fine if set properly and sharp. Sharpen just before you’re doing the end grain and play about with different positions (vertical, skewed) and see what works. Make sure you’re definitely sharp (flat back meeting your angle, and burr removed) and that the soles are flat and don’t force the plane. I’m 100% certain that you’ll get there.
Good luck,
Rico
I always prep my wood with a hand plane without much issue. but I do struggle with finishing every part before glue up. It is there that I found my lack of skill less forgiving. sometime I wonder why I do it anyway since every parts need sanding before finishing. is it zealous to do that everytime or am I suppose to do it when there is dirt or defect only? And why is it done systematically?
Marc, Try using a Stanley (or similar brand) #62 low-angle “block” plane. The difficulty you are having is due to the cutting angle on you #4 and #5 being way too steep for end grain. BTW, the finish you’ll get from a sharp #62 on end-grain will be FAR SUPERIOR to using a sander.
That’s not at all altogether true, Arvin. The bed angle of a bevel down plane is at around 44-degrees and therefore is very similar to the combined angle presentation of a bevel-up plane with resilient 30-degree cutting bevel on a bevel up bedded then at 12-degrees. I emphasise 30z0 because those selling bevel-up planes fail to speak of that being the resilient and bst bevel angle whereas a 25º bevel they espouse is fractious and breaks under the pressures of planing. You must remember thats manufacturers, distributors and sales people sell and often use ambiguous statements to make those sales. Add the two together and you get 42º versus 44º of the common bench planes following the Leonard Bailey angle of presentation established by Stanley. These are the hard facts of reality. There are very few tasks that a block plane will tackle that cannot be accomplished readily with a #4 bench plane or similar but there is a million times more you can do with a common bevel-down bench plane. Block planes of the Stanley design, the all-metal versions, will never do what a bench plane will achieve or anywhere near. I only use a regular bench plane and never get any problem. Marc should persevere to mastery and that is not micro-wave instancy but trial and error until he gets there. If you have watched me working end grain in the hundreds and hundreds of videos we put out you will see I get perfect results with just very ordinary #4 and #5 bench planes with the very occasional use of low-angle block planes, perhaps once a year or so, and on smaller work. I appreciate your willingness to try to help but I would hate for people to think there is some kind of valid comparison between a bevel-up block plane and a bench plane because that simply is not the case.
I think I’ve written so badly my question… sorry about that. English is not my first langage and I do struggle a lot with it nuance. I was asking if planing every parts a last time before glue up to get a pristine surface was always needed? but you do answer it very well, persevere to reach mastery. The words I needed to hear.
Also, I would like to add. I do sand my surfaces before applying finish but I do not do it to sand out flaws. That is the difference between machining wood and hand planing it. Hand planing with sharp edge tools leaves the surface so smooth that the surface has no what we call ‘tooth‘ to properly adhere the finish to. In other words, when other people, machinists, sand their wood they sand it to take out flaws like surface machine marks, to make it level and smooth. I, because I have finely honed edge tools to around 10,000 to 12,000 grit, create surfaces equal to that level of honing but somewhat less, sand my wood rough. That is, around 250-grit is enough for good adhesion of all wood finishes.
I don’t know how anyone can do woodwork without using and understanding hand planes. Once you know how to use them in your workshop there’s no going back. Especially for one-off custom-made projects, which is what most weekend woodworkers are doing anyway. If I had to go back to using only machines and sanding I would probably give up and go find another hobby. What a horrible world it would be without hand planes.
I love hand planes but it has not always been that way. Paul’s YouTube videos have moved me in the direction of a Zen-like fashion. Getting ready to prepare rough wood is all part of the experience and, to me, very enjoyable.
I hope that one day everyone involved in woodworking will feel that way. Two and three decades ago everyone at woodworking shows and such thought that I was mad for cutting dovetails by hand and planing the surfaces after. Until they saw what I had done, that is. then they were persuaded differently but thought, because of the show mentality, that I was selling planes and dovetail saws and such. Then they realised I was not selling anything and neither was I paid to be there either.
Lockdown started me on woodwork after my retirement. After watching your various videos and having limited space, and inherited my grandfathers various planes I thought I’d give it a go. Both frustrating and enjoyable. I;m currently making a dovetailed box from some Yew rough boards that I purchased in Scotland. Any tips on how to plane well, there is always one spot where the fibres tear out
David,
Just take note, basically. Learn where the fibre tears out and try and predict it next time. Switch the plane round as the grain changes and learn to lift off the wood before the teary bits! Card scrapers or cabinet scrapers for difficult woods if your smoother isn’t gaining traction. Make sure you sharpen before your smoothing too, an extra sharpen can make all the difference, and take light passes (both in depth of cut and pressure on the plane). I’m at the stage where I can predict tear out, but not always avoid it, and I probably go too light on depth when I’m smoothing over torn grain just to be absolutely certain I don’t make it worse and end up having to do 20 passes where a couple may have sufficed, but I get there, almost always. I’ve actually found that the more I plane with cheap, knotty pine (or redwood/spruce or whatever is sold at B&Q these days), the better I get at planing!
Best of luck,
Rico
Rico
Thanks.
I’d already tried most of your suggestions, but the tip that worked was not putting any pressure on the front of the plane. Slow, but perfect surface
David
hi paul, hope all’s well.
if you were planing a chopping board or table top for example, and you get a section of tear out (eg 2-3mm deep) that you want to improve – could you please explain or demo any “fixes”, if any??
i understand minor tear out can be scraped or planed. i understand acccepting tear-out on the side of a cabinet and trying to do better next time.
… But I am unsure if deeper tear-out is improvable and would love some thoughts on addressing this. or does it just result in ‘write-off’ of that bit or work?
thanks a lot,
You can of course, reduce the whole board in thickness but that may not be what you want. that being so, it is unfixable without letting wood into the surface or somehow filling it with a resistant material like epoxy or wood filler.
Paul,
I really enjoyed reading this–it is beautifully written and true.
Hi Paul, I’m a young bloke of 70+ who didn’t have the opportunity to do any woodworking until a few years ago. Having done some building work as a younger – much – bloke, I immediately went out and bought a bunch of power tools. I quickly became disappointed in the results I achieved, not to mention the noise and dust and general dissatisfaction with the power tools. I had inherited a few hand planes, chisels and saws from my father and grandfather, but neither of them was around to mentor or provide guidance and instruction. Consequently I really struggled to make any progress with those tools although that is what I wanted to do. Then I discovered woodworking magazines, which, to varying degrees depending on the particular magazine, offered an insight into using hand tools. However, converting reading about it to successfully doing it is a long and painful path. Then I discovered dvds which was a big improvement, but the best thing ever was when I discovered YouTube and the vast possibilities it offers. So many options! Such a range of presenters. I still can’t say I’m a good woodworker, but I have moments of absolute joy when a hand plane, chisel or saw allows me the privilege of getting something right. I’ve been forced to downsize my workshop and all the power tools have gone and everything is being done with hand tools. I’m not fast and my memory is not what it once was, but YouTube and the smart phone are there to help me. So thanks Paul, you are my guide through the intricacies of a wonderful craft.
Your blog, and the comments, always make for an interesting read, Paul. Like others on here, I’ve had my share of power tools over the years, but most have gone now. The set-up time was rarely worth the effort on one-off projects, which is mostly all I’ve made in the 50+years I’ve been a hobby maker.
I do strive for perfection in my work. Not sure I ever achieve it, but at least by trying there’s a chance of getting close.
Your videos are ALWAYS a go-to for me.
Do you intend to make one covering the making of the small Oak lidded box with a lid that hinged perhaps on pins rather than conventional hinges please?
Kind regards,
Tim
We have filmed it and will be releasing it in the near future.
Paul, regarding sanding – I understand the benefit of sanding a planed surface for better adhesion of finishes; it makes sense.
Are there any instances where, giving two mating surfaces a light sanding in preparation for gluing, would be a good idea? I’m thinking when using regular PVA glues mainly.
Yes. Some woods really benefit from this –– Beech is a good example but there are several others too. PVA is a skin to the surface and woods that have untextured wood in the grain structure usually plane to a super-smooth level leaving a glass smooth finish. Sanding with a coarse-grit abrasive, 120-grit, slightly tangental to the long axis of the grain works best.
Thank you for your quick reply, Paul! 🙂
Best wishes from Norway!
I’d like to thank you for the information you share. I’m a beginner woodworker and being able to utilize advice and knowledge from skilled woodworkers such as yourself is greatly appreciated. Planing has been a struggle for me as I have never been able to get my settings right. After reading this post on your blog, I now see that it may be other factors that are hindering my progress. Thank you so much for sharing!
Please consider buying my book Essential Woodworking Hand Tools. It’s not just a book about a few tools but gives the experienced explanations from my whole life relying on them to make my living with. This alone makes my book different to all others. It’s still a beautifully crafted book, cloth bound hard cover, smith-sewn full colour and with many of my drawings too, but the information makes everything and every consideration crystal clear. Almost 500 pages of how the work and how it’s done.