Paul’s poor man’s router…
…or tenon and housing dado trimmer par excellence.
I say Paul’s because I developed it to work so effectively. Many routers are highly effective at perfecting a chiselled out housing or dado joint and the faces of tenons. They have been used for such for centuries now. The idea is of course that they span the two sides of a recess and the cutter skims off the irregularities to take the final pass down to exact depth. 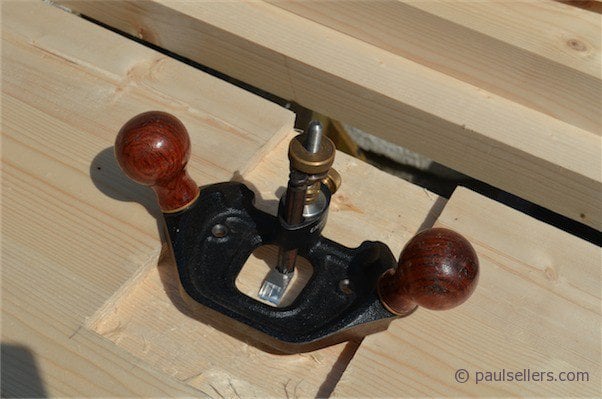
Paul’s perfect router is Paul’s because of the extended length of the sole and the calculated angle of presentation of the cutting (chisel) iron in relation to the wood to be worked.
I want my tenons to be surface skimmed so that they perfectly align centrally to the length of my rail. Any discrepancy here will result in ill-fitting shoulders, a misaligned tenon and worse still a twisted frame. This tool aid eliminates this altogether. By extending the length of the body of wood I can hold one side to the length of the rail and then swivel the business end to task. It’s easy to adjust position throughout to negotiate grain and knots as you work too. The same tool will be used for the large housing dadoes yet to be formed in the aprons and well board.
I chose a piece of wood 1” thick by 3” wide and 20” long. That’s my suggestion for you, but go with what you have as this is not critical. The important thing here is the angle of the bevel of your chisel. Typically this will be 30-degrees.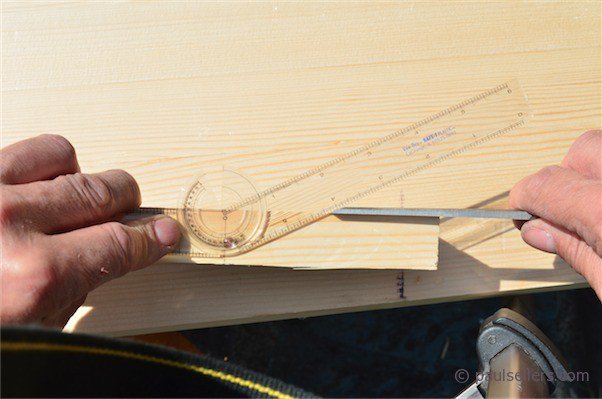
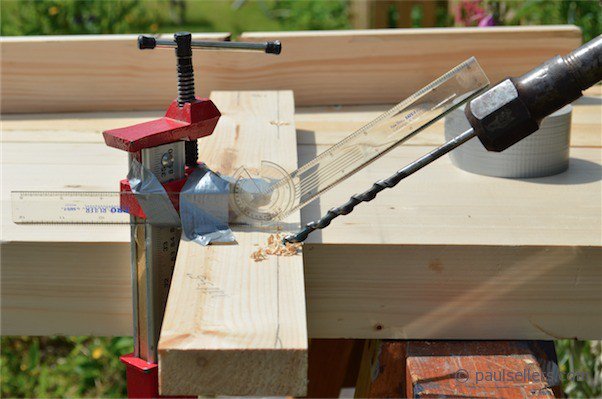
I bored 6” from the end of the wood and 5/8” in from the top edge corner.
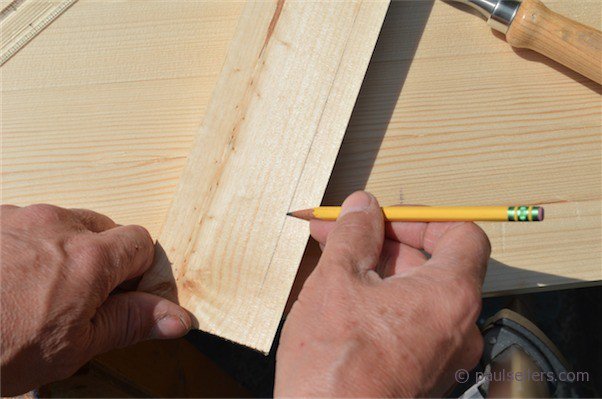

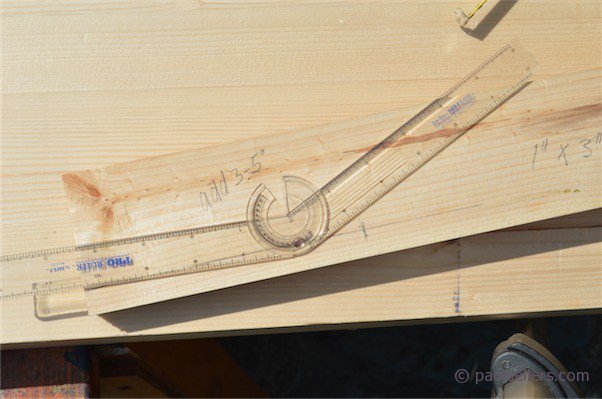
First I ran a parallel line 5/8″ in from one edge to guide me and then measured 6″ along from one end for cross hairs for the point of my auger bit.
Don’t worry if there is any breakout on the underside, as this has no consequence on the work in hand.
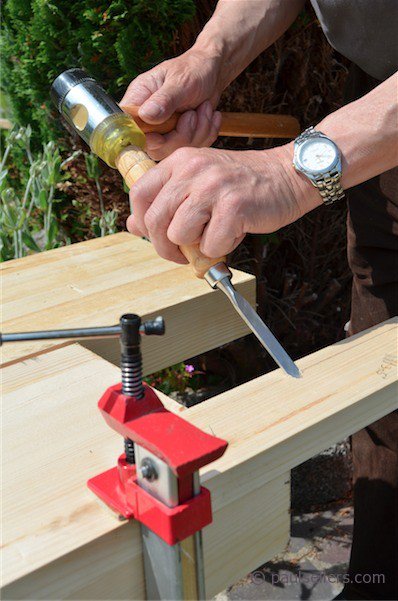
With the hole bored, place the cutting edge of the chisel near centre to the hole and angled to correspond to the pitch of the bored hole. Drive the chisel into and through the hole. 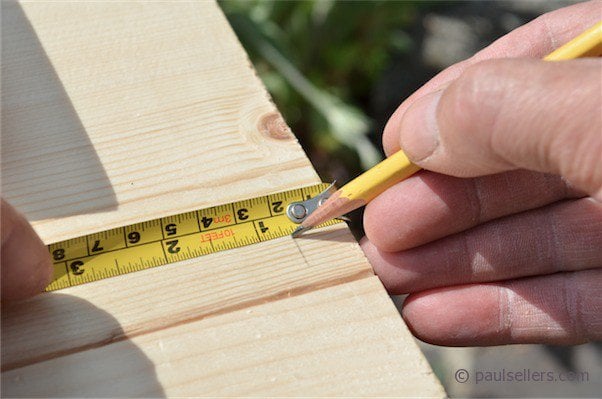

To get the right depth, or near to, mark your depth of cut onto the edge of a piece of wood and tap until the chisel protrudes through to where you need it as shown. For trimming tenons, tap through and test on the actual work. The idea is to take of small increments in depth and by tapping the chisel handle you can get the exact depth you want. To retract the chisel and lessen the depth, tap the back, upper corner with the hammer. It is trial and error but surprisingly quick and accurate with a little practice.


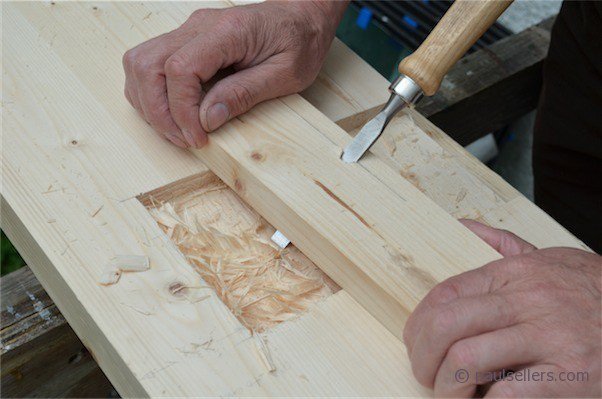
The underside of the sole often breaks out when the chisel is driven through, but this again has no consequence on the work in hand. Simply chisel away any unevenness with a second chisel.
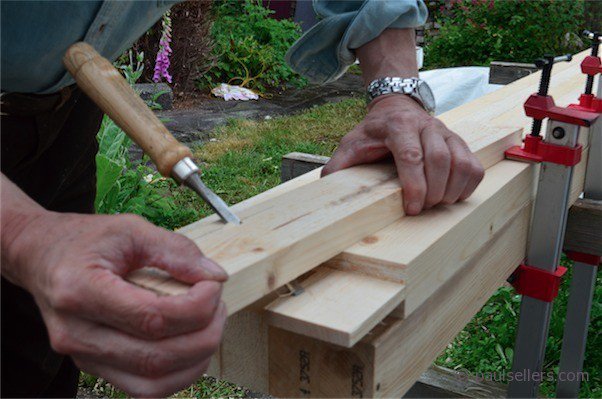
Here is the new tool in action on housing dado and tenon.
Nothing new under the sun.
I had to improvise a router like this the other day, you have posted about this before. It worked a treat and got me out of a spot.
Thanks for passing this on. It’s stuff like this that is being lost in this mechanised world.
Keep up the good work
Ric
Simple ideas are usually the best and this is no exception! Thank you Paul
Paul: How do you get the chisel to stay straight on the bottom? I got mine in, but it’s tilted just a little bit.
Mr. Sellers,
Can this be used on grooves as well?
Greetings from Brazil!
-Julio
how do you keep the chisel straight as you are putting it in the new hole. Mine keeps want to twist or turn sideways.
It’s all about never allowing the wood or the tool to have dominance. Resist twist and make certain that you negotiate grain unevenness by anticipating shifts say around knotty areas or wiry grain.
I love the simplicity of this tool — it is so easy to make it when you need it.
A couple of times I found I wanted better visibility of the cutting edge, so I drilled a view-hole through the wood near where the chisel pops out of the sole. A 25mm Forstner bit worked well in my case.