Questions answered on flattening chisels
For more information on chisels, see our beginner site Common Woodworking.

Answer:
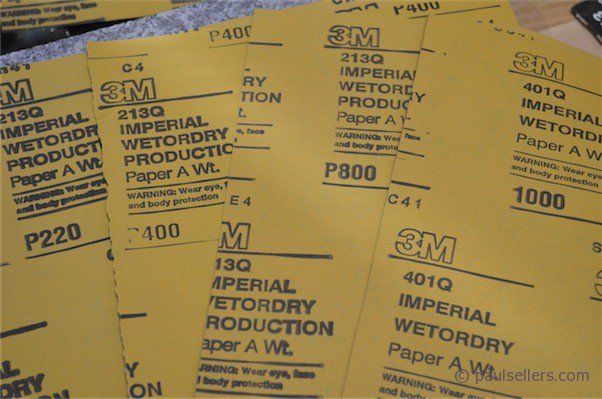
A couple of things come to mind from my experience. I generally use plain ol’ wet-n-dry and start with anything between 180-240 grit.
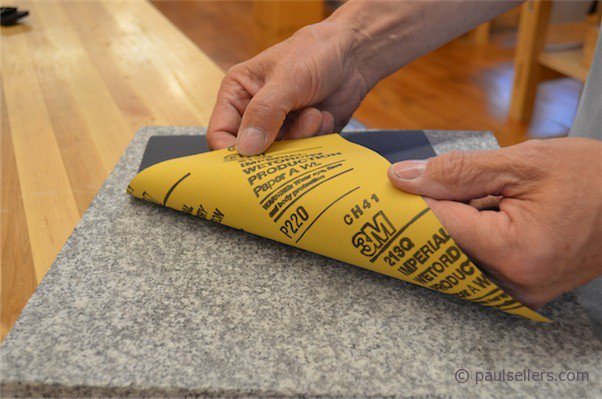
I use a light (I mean light) misting of spray adhesive on the reverse side of the abrasive paper to prevent slippage but also to prevent the paper from rucking up in front of the tool edge, which is the most common cause of roundover on the flat face at the leading edge.
A squirt bottle with water keeps the surface from clogging. An important point here, and this can well be your problem too, is that, when you push the chisel on the forward stroke, there will be a tendency to hold the chisel with the dominant hand, pushing the chisel on the surface at an angle so that one corner or the other enters the abrasive before the remaining long part of the edge. Thus you can cause a build up of abrasive on the fore corner of the chisel with each successive forward push. This then also tends to be the more aggressive and productive stroke. Because this is the leading edge it becomes more like a bulldozer causing a buildup at that corner point. Any stroke, and there will likely be many, that goes over this rise of particulate on the surface will receive a mega dose of particulate at that corner and in a matter of seconds you have created your own problem of rounding the corner and even the full leading edge of the flat face of the chisel. 

Not all blocks are truly flat as I discovered when I tested one we used at the school.
Here in the UK I purchased a certified block from Tilgear that proved dead flat:
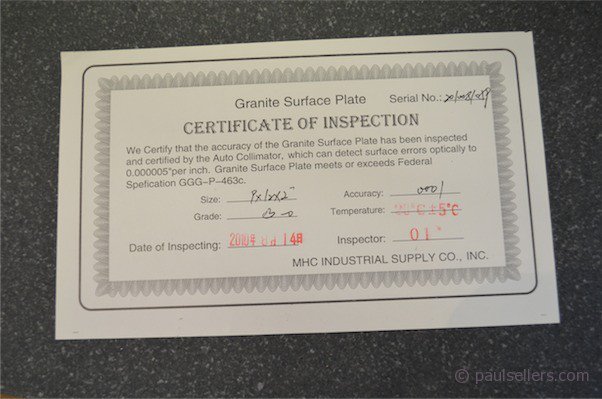
Here is the link to their website too. They have good pricing and fast delivery: http://www.tilgear.info
DIA0912GP – Diatec granite surface plate, dimensions 9in x 12in x 2in
Another concern to seriously consider is that the sub plate support you sharpen on is truly guaranteed dead flat and not even slightly undulating and that it’s also thick enough or supported enough not to be flexing with the pressure of the stroke. For instance, unless float glass is fully supported, it will flex. Even double sided tape allows a measure of flex in glass. Any of this will cause rounding on the fore corner of the cutting edge. Of course the worst scenario will be if the platen, slab, tile, glass, granite or whatever you use is itself indeed hollow.
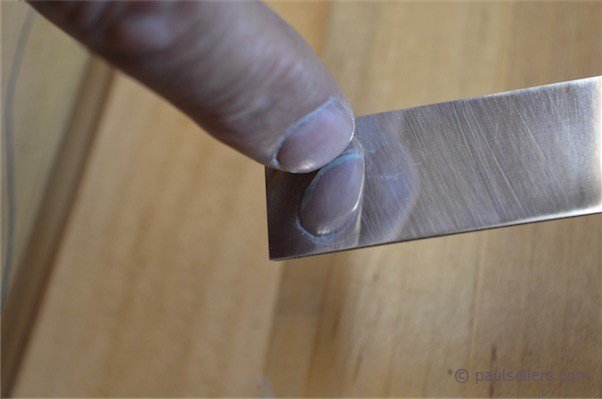
You will be amazed at the significance of using a dead flat chisel in your work at the bench. Machine-only woodworkers never enter these realms of working wood. It should take no more than five minutes to flatten a 1″ wide chisel to a polished face as shown. remember also, if a chisel is dished as distinct from hollow, you do not have flatten it. As long as there is about 1/2′ of flatness directly behind the actual edge, all the way up to the edge, and the sides of the chisel have some flatness continuing from the edge, it will operate exactly the same as a dead flat face. It’s only convex surfaces that need flattening.
Sorry this was so long.
Thank you Paul for your full and complete answer.
Cheers – Miles
Quick, simple, effective and on with the woodworking now…Remember that gurus usually complicate what’s a very simple process and that working wood is simple with sharp saws, planes, chisels and scrapers. Master sharpening and you master your tools. master your tools and you master wood.
Hi Paul and team,
I’m so glad I’ve found this post – I’ve been having the exact same problem. I have not been able to get my chisels/plane irons to anywhere near the level of sharpness you do, despite following the procedure as well as I could, and using the same sharpening grits and strop.
I inspected the back of my chisels recently, and found a narrow band of much lower polished steel up to the cutting edge (less than 1mm). I’ve tried sandpaper on granite, had this problem. Stuck it down with double sided tape, still having this issue. I get a totally different abrasion pattern on each of my DMT diamond stones! Utterly confused about the next step to try, so any ideas would be very much appreciated!
It sounds possible that your plates are not truly flat although the flat face if a chisel is mostly a preference rather than a necessity. Simply abrading on the fine stone will get you where you want to be but it will take longer on one grit only. Truth is, no matter what the makers say, most plates are not truly dead flat and that is why you are getting the different patterns.
In my view chisels need not be truly flat because most if not all of our work is done presenting the chisel at an angle anyway–even paring cuts.
Thanks Paul!
I wish I had read this post before I attempted to flatten my new chisels. If you do by chance happen to get roundover on the corners of the flat side. What is the best/easiest way to fix this?
Well, in 95% of your work these slight roundovers do little harm and will not affect your work at all. Unless they are badly rounded. Personally I would just used the chisels as you have them, polished out and as you continue sharpening through the bevel only from here on it will only be a short time before the roundovers will be passed and you have the crisper corners. Don’t sweat, just wait.
What do you consider badly rounded? I’m a beginner, but following all of your blogs and videos to the best of my ability I can not get the corners of 3 of my new Narex chisels flat. I worry I may be abrading too much of the back or applying to much pressure on my diamond plates in attempting to reach the corners? I started on paper and thought it was wadding up so I switched to my stones to no avail. Do you have any tips or should I just move on? I have flattened a couple other chisels and plane irons so it’s not that I’m completely incapable of the task, but I’m still learning.
If you are using abrasive paper there is a good possibility there is a build of abrasive that’s broken loose and building up around the edges. This causes the rounding you are speaking of and so too does the fracture of grit. Diamonds don’t tend to do this. Maybe start there and look at that.
Hi Paul
I’m having some severe trouble flattening my chisels. One of them, a 3/8 kangaroo brand sorby I have been working on for a good hour and a half. It was lightly pitted but I wouldn’t have ever imagined it would take this long. I first had a go on my 400 grit diamond stone then went back to 120 grit and then 80 grit on a piece of float glass. Is this something you’ve ever come across?
Are you trying to get through all the pitting depths of the different ‘craters’ for good-looks sake? Don’t you just want a working chisel? Either way, pitting is almost always deeper than you can see with the naked eye. When you start abrading the hollowed crater under the surface becomes more exposed and particles of rust-rotted steel tumbles out if indeed the tool is badly rusted inside. It can also make a difference what you want to use the chisel for. For general chisel work such as chopping work and then the more general paring and splitting work we do it is often not necessary to have a dead flat face. People often declare that paring chisels must be dead flat, which is absolutely not true at all, but if you want them to be you can of course work to that end. Paring chisels are much longer and thinner bevel-edged chisel types. They can be flexed flat and slightly bowed in use to pare down protruding tenons and such. This is the reason flush-cut saws were unneeded in earlier times. Flush cuts were developed for machinists who don’t really use hand tools. They need something to cut dowels flush, protruding tenons and such like that.
The issue for flatness could also be that you are wanting a flat chisel but are bending the chisel as you strive to flatten it.
Oh, and if it is laminated as it could be, the steel will be super hard and not tempered and I love these chisel types. but they are used less for chopping work and are used very sensitively.
I’m not looking for a perfectly smooth back on the chisel as such, but the flat area is more along the very back of the chisel towards the handle and down one side. It hasn’t reached the cutting edge as of yet. I guess the only solution is to keep at it until I reach the edge.
Technically, Saqib, a perfectly flat edge forming a cutting edge is near impossibly, which os why we almost always have to lift a chisel to engage the wood. I minute relief is formed at the cutting edge caused by minute fracturing at the edge. of course you can’t see it. We just get as close as we can.
Hello
I recently bought a set of Faithfull chisels and i inspected them with a straight edge to see how flat the backs are and they all a bit hollowed. So then i prepared a flat surface (that i made sure was flat end to end first) with some Norton wet/dry 240g paper stuck down to it and began sanding away, using the method that i had seen Paul demonstrate on youtube, on my 25mm (1″) chisel. I would stop and check where on the back has made contact with the abrasive and how much progress had been made towards getting an entirely flat back. after an hour or so i hadn’t made much progress so i dropped down to using 180g. after another 3 hours i had made more progress but still not a lot. It was taking far to long for me so i dropped down again to using 80g. I’ve been lapping this one chisel for hours and hours now and i have managed to get 11mm from the cutting edge, 50mm from the bottom end and 3mm from the sides flat with a bit of a hollow still in the middle.
Its kind of making me scratch my head seeing as how Paul seemed to do it much much quicker with the Aldi chisels.
Originally i was aiming to get the entire back a the chisel flat but its just taking far to long and consuming abrasive paper.
Paul or anyone will having that bit of a hollow there in the middle of the chisel affect how straight or flat it cuts? and is there any benefit to having a completely flat back on the chisel?
Cheers.
Chisel backs can be slightly hollow for the main part and so flattening to develop flatness need only be for 10mm or so behind the cutting edge, which is generally sufficient for registration purposes in the the work of paring. For chopping purposes flatness matters very little. It’s just convenient to be able to use one chisel for both chopping and paring.
I am a little surprised at the amount of effort you have had to put in to getting the chisels flat.
Hello Paul,
I have the same issue as Jim asked. Instead I have a belly on my chisel back and I think I can’t get a flat cutting edge with that belly around.
I use 180 grid and 250 grid abrasive paper on a glass that I checked flat. And I have been working on it hours and got little progress. I think I still have hours to go. It seems that much longer than you do in the video.
So do you have some suggestions or figure out what’s wrong?
This is not meant as insulting.
I have been reading here and on other blog entries comments to the effect that after a ‘given time’ (generally long) people then decide to go to a lower grade of grit.
To me the obvious approach is to start at the bottom of the scale (50g or so) and work up; this removes the worst quickly and then it’s a matter of refining the scratches to get to polishing and stropping. I’ve so far done about a dozen and a half chisels using this approach. Some where old(ish), others were brand spanking new with grind marks from the manufacturer. They’re all down to flat and more or less mirror-like steel now.
Again, no insult meant, and I’m surprised nobody else has mentioned this before.