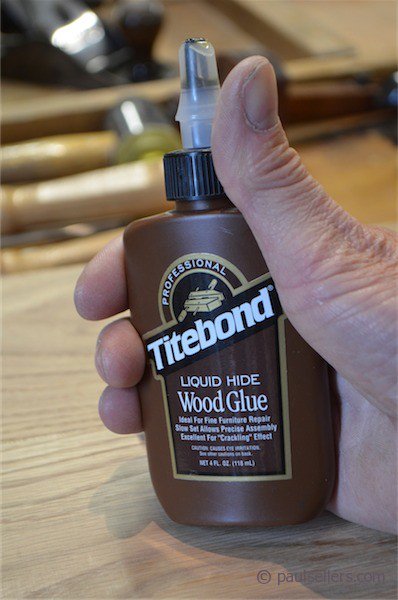
Titebond Liquid Hide Glue – Good to Go?
I grew up on and off with hide glue. My dad boiled it on the cookstove and glued anything and everything made from wooden components together. Violin makers still use hide glue in making traditional instruments like violins and cellos and also for repairing them. Why is that? Simple really; these instruments must be repairable. Were it not for animal hide glue there would most likely be no Strad’s, Guanari’s, Amati’s and dozens of others from the past near half a millennia. Instruments like this rely purely on glue to hold all of the components together. There is only one joint that connects the neck to the main body on these traditional bowed instruments. Remarkably, joinery is an unnecessary and unwanted element and might render an instrument irreparable were it not for the unique quality hide glue offers the repairer-maker. Unlike most all other glues, hide glue is readily split along its glue-line if and when necessary. This characteristic then allows maker-repairer to separate the components by shock-splitting along any glue lines, often using no more than a thin knife tapped with a hammer to split one part from another. Titebond glue allows this perfectly. Though to any average woodworker it may seem strange to see such a thing as a positive feature, all of the violin family of instruments need to be dismantled from time to time to repair any part that gets damaged. These repairs often take place from the inner part of the instrument toward the outside simply because most points of damage comes from the outside faces into the inner chamber, forcing the wood into the chamber. Other repairs use what we call patches. Bits of wood fitted and shaped over a puncture or damaged area and pared down or carved inside to reduce parts that might adversely affect the movement or passage of air in the cavity. Beyond even that, instruments may well need different types of modifying and even ‘voice’ changing by reshaping. This is mainly possible on the inside surfaces only, as the outside surfaces are fully and acceptably shaped, body-filled and finished to completion with polished out ancient pigment and varnish. Some of the advantages I speak of can indeed be applied to furniture and antique repair too. Boxes have glued bottoms and lids that can repaired using the same methods. Chair legs and frames can be dismantled this way too.
Two Tests of Methods
Good for Wood?
Old Glue for Old Work – and For New
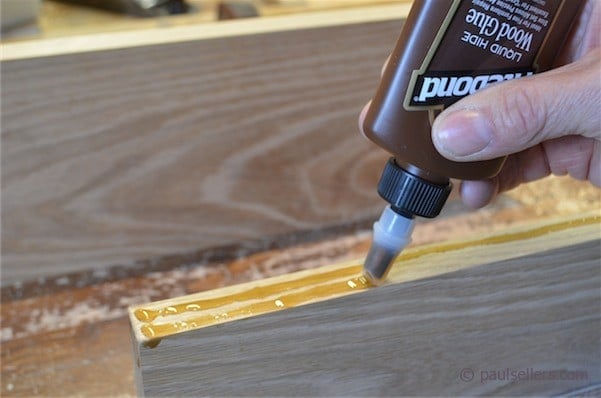
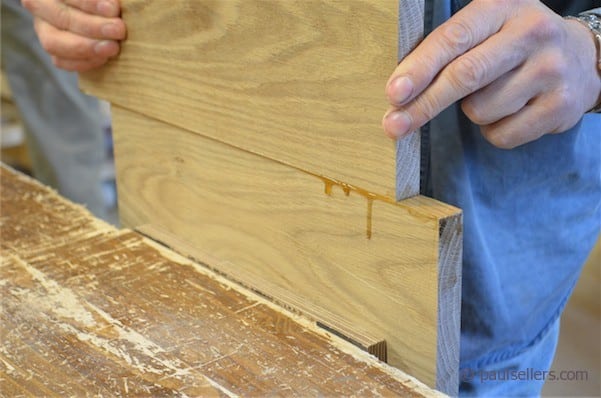
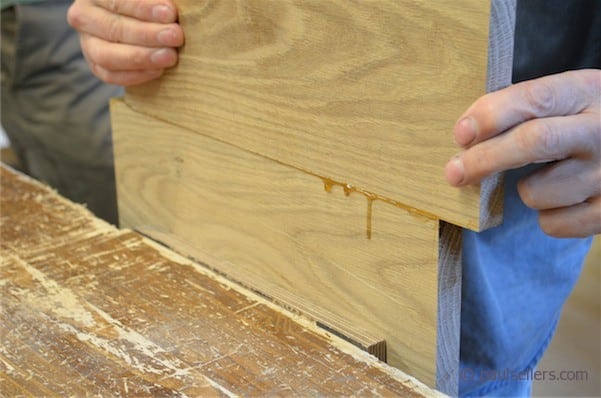
For furniture restoration, this glue gives us a ready-to-go glue that I find highly suited for all types of furniture repair and I would not hesitate to use it on any old pieces. The glue cures over several hours and as it was in times past when we used hide glue only, the glued assembly is best left overnight – twelve hours minimum. Cure is important to achieve maximum strength. I found that the glue was still fairly rubbery after three hours, typical of the old boiled hide glue too, which means that the glue did grab, but could still slide for a while if left unchecked. Open time seemed to me to be about 1/2 an hour, plenty long enough for all assembly procedures and certainly an advantage in complex glue ups. My next tests will be with veneers using both the veneer hammer and veneering using bag press methods.
Hard and Brittle When Cured and Set
I like the hard set of animal hide glue and always have. This liquid hide glue has the same hard set and that means that it can be readily scraped, filed and sanded and these methods leave only minimal trace on the wood itself.
Nice Just Looking At It
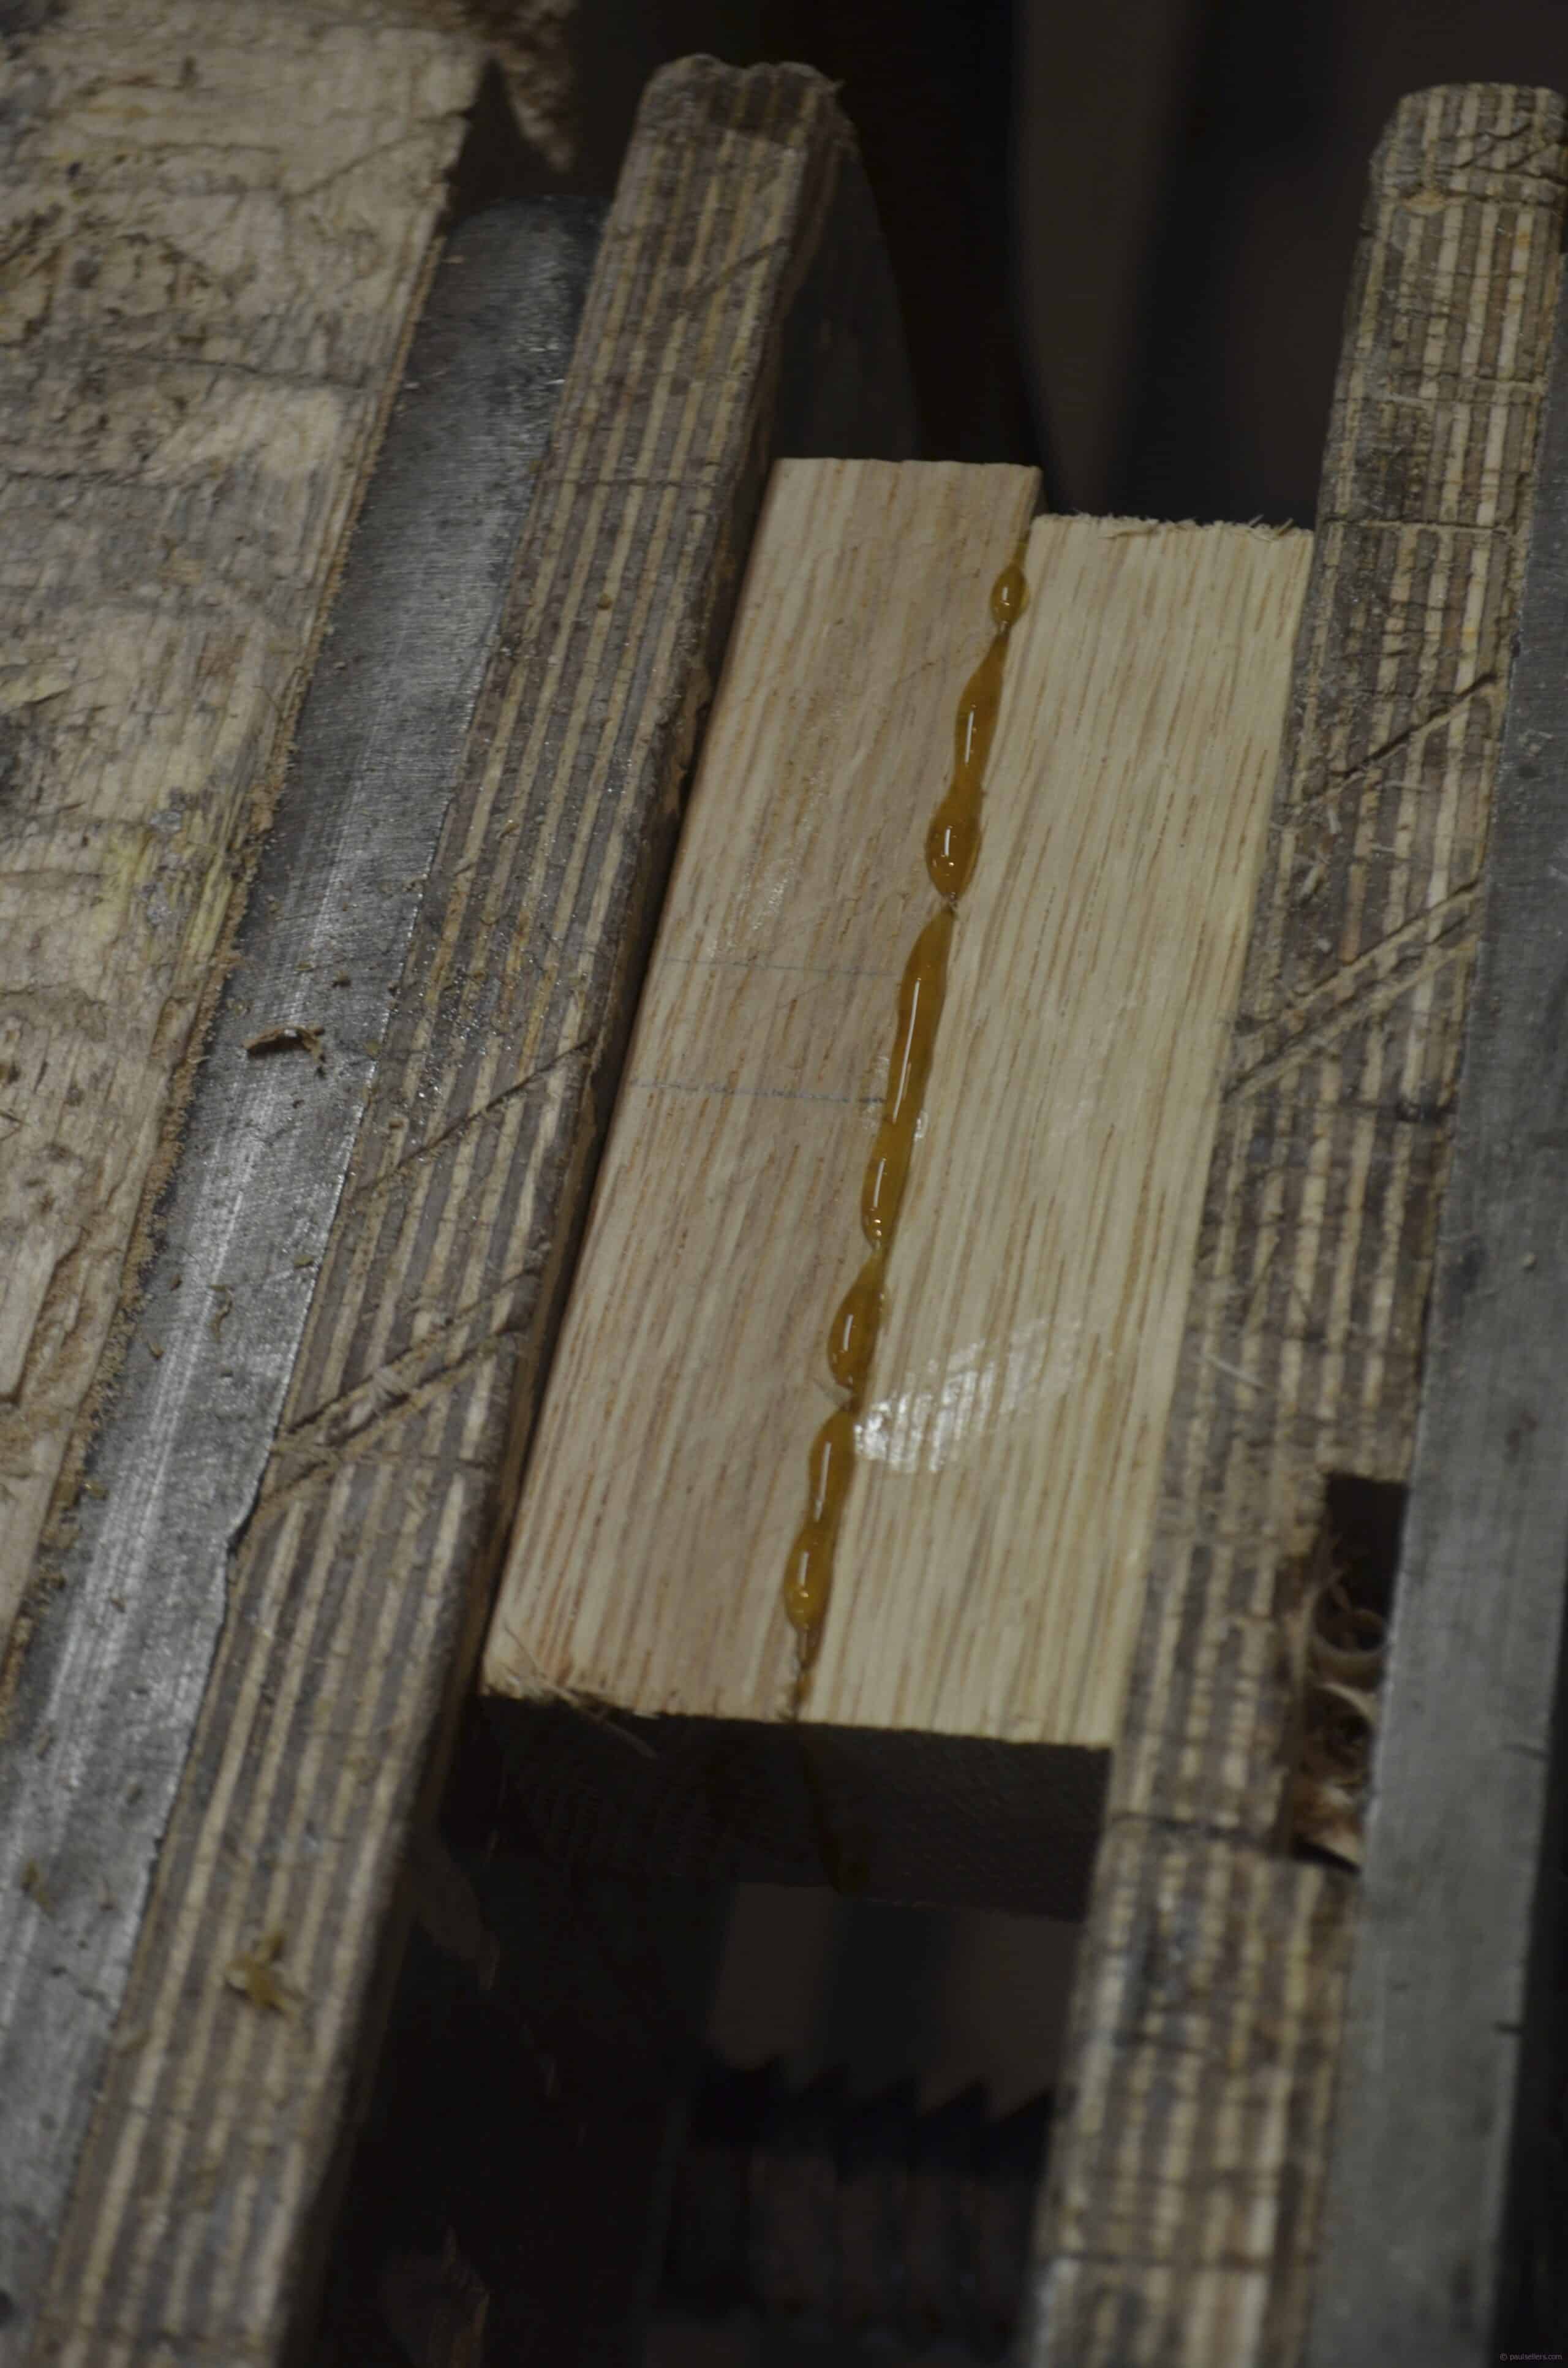
I remember the first time I saw animal hide glue drip and run from a joint my dad made. Hot from the pan, it first ran in like candle drips, curtaining and then culminating slowly into deep amber globs. The image is impressed on my mind. Apart from the above, I felt that this glue pleased me with a sense of peacefulness in the same way clear honey has that immeasurable quality that defies description. It’s the nearest substance I have ever found to seeping pockets of resin from sun-warmed European Redwood pines in summer heat. Try some.
I recently started using Titebond hide glue for box making, where you can’t get into the box to cleanup any glue squeeze-out until after the glue has set and you can cut the box open. With the hide glue, I can soften with warm water and wipe up any glue residue. Try that with yellow glue.
I’ve read that the Titebond hide glue can’t be used for hammer veneering like is done with the hot hide glue. If you’re going to test that, I look forward to reading your results.
With the great strength and exceptional open time, I don’t see why the Titebond hide glue can’t be used for most interior woodworking projects. I think the name (hide glue) gives it a bad rap, and keeps its use from growing.
Paul,
Funnily enough, I have started using both bone glue and hide glue two weeks ago. I haven’t touched my PVA glues since… but I still keep them around in case there’s an exterior project popping up.
I have used animal glue so far to repair a couple of antique pieces and to build a few shop appliances. As my workshop is unheated and the temperatures dropped again, the open time was variable but that should improve in the next months. Even in low temperatures, the open time was sufficient for assembly. The gap filling ability is very useful to hide tiny imperfections
The only downside so far was the initial soaking time, but that only happens once per batch so it’s no big deal. I do find that applying the glue with a brush gives me a good control of the covered surfaces and I do like that the brush can simply be washed with hot water at the end of the day.
As I am not using large quantities in one go, I have so far successfully used a baby bottle warmer with plastic baby bottles as glue containers. A brush up to one inch wide can stay in the bottle and you can find many types of spouts for those bottles if you prefer spouts to brushes.
Your explanation on violins came at the right time too, as my project pipeline features the repair of a damaged 1904 German copy of an Amati violin.
Instrument makers like animal glues also for its brittle hardness as this transmits vibrations from one component to another more affectively than a rubbery glue such as pva dose. However titebond liquid hide glue which in the bottle is liquid at room temperature is not as good as proper pearl hide glue or the animal glue granuals it is weaker than both of these and I suspect has a lower melting point. where I want to make sure a joint is particularly strong I would use one of the traditional glues and I would also only use the traditional glues on instruments.
I think another factor with instruments is the glue-grab you get from hot hide glue’ We call this snatch, which is when the glue shrinks and pulls the components together.
I am cautious not say that this matches the original hot hide glue but I still think it is a good alternative for certain work.
Paul, I built my second guitar with cold liquid “Scotch/hide” glue in 1964 and was admonished by a well known Yugoslavian guitar builder living in Chicago at the time it would come apart in August. Sure enough, everything held together until one humid spell in August and the whole instrument just started coming apart. This was NOT Titebond brand (it was probably purchased at Sears) but you might want to do some testing with the Titebond brand with stress under humid conditions. Thanks so much for your great wealth of information! You are a real treasure for so many of us who have not had the access to real woodworking traditions as in your country.
Doc Scantlin
I see so many different glues that Titebond sells. I understand that the Hide glue is good for guitar neck assembly. Is Titebond 2 or 3 as good for guitar assembly as well?
For traditional instruments it is important to be able to separate the parts for repairs and adjustments and that is why hide glue is used. Hide glue can be split along its glue line and usually separates without removing or splitting the actual wood (but there are surprises and no guarantees} PVA on the other hand boasts that the glue is stronger than the wood and the wood always seems to split and not the glue. For guitar making many makers use PVA for the majority of guitar-making needs and then use hide glue for restoration work and for any parts they might feel they need to disassemble the guitar for in the future. I would search around a little and don’t just take my word on this. I have just been around makers and I am not a maker.
Thank you Paul for your reply.
Well Paul I’ve read it and you’ve answered one question for me but now only time will tell just how good or poor this glue is. I’m a clock maker and I’ve tried and tested various glues but never properly this one only due to a mishap of hammering a brad in an lightly I might add and it broke the glue joint. So I’m giving it another go, so far I’ve enjoyed the long open time especially on this wall clock which I’ve always had an issue assembling it, very time consuming and fiddly. If you saw it you’d agree and I also like that it’s clear and blends in with the stain. So hopefully all in all it will hold and not give me grief, I’ve never had a come back and wouldn’t want to start now.
Cheers Paul from down under.
It’s been well over 24hrs since glue up I did as the bottle instructed and applied a generous amount, I thought hey what’s the harm it will dry up and just break off not sure where I got that idea from but far from the truth. It’s gummy and a complete pain to get off and looks down right disgusting. Not sure what I’m going to do my only alternative if it was possible would be to heat it up and pull it apart but it’s mortise and through tenons I just might end up breaking it. A real shame as I was pretty much exited about this glue.
Now Tom Fidgen from unplugged reckons that old brown glue is the go as I have read in his latest book, he swears by it.
But if I don’t fix this mess my customer might just end up swearing at me.
Where are you Salko? Is it humid or wet and damp?
Funny you should ask that did cross my mind after I made the post I did notice a bit of stickiness and thought damn it hasn’t cured. Yes it is humid I live in a tropical environment and my workshop doesn’t have aircon something I didn’t consider before using this glue. Even though it is Autumn here it still is quite hot., damn I just never thought about it.
Well all I can hope for now is that it holds indefiniteley atleast for the next 100 years or so and let the next poor chap deal with it. I still have the top and bottom decor to glue up so I’ll just use yellow glue from now on. Very good point Paul I should of thought about it before hand but I was too anxious to give it a whirl.
Oh I live on the Gold Coast, Queensland Australia
I wonder how old the glue is or how long you have had it since it opened the bottle. Perhaps the shelf life is less than we know or the atmosphere you live in. If it is humid it will affect the glue. Fresh animal glue is the best way to go for a traditional glue that you may need to disassemble in the future. The break line is what it is all about. As with instruments when you need to split the line to take the fingerboard off a violins for instance. I would most likely not use the titebond on a classical bowed instrument or repair but only newly home made batch.
Well I can’t remember when I bought this glue, it has been sitting on my shelf for some time now it could be a year old or 6 months old.
It’s night fall now and the temperature has fallen significantly, the glue has hardened up but still not rock solid. I wonder if it will ever truly harden up? I also wonder if it’s shlf life is up, who knows how long it’s been sitting on the shelves prior to my own purchase. Either way I can’t risk using it again. This is really quite embarrassing a work of art destroyed by glue I don’t know how to fix it, maybe I will cover it up by adding a very small bead or something or just leave it and pass it off as a medieval crude type of work.
Well I’m over the moon what looked like a disaster actually turned out really well, the glue seems to have finally cured two days after it’s application I might add but lets blame it on humidity. What I managed to clean up I added stain to it, this morning I came to check the results and the glue accepted the stain really well and it’s blended itself with the rest of the clock. Happy days.
2 days to dry not very appealing but it has sparked some interest in me in hide glue mainly because of it’s very long open time and because it’s basically clear and does accept stains and other finishes. Maybe I will give the old brown glue a go.
That’s great.
If you ever decide to visit Queensland, Brisbane or Gold Coast please let me know it would be an honour to meet you in person.
Thanks Salko.
Thanks for the review, no reply is needed. I’m getting close to finally finishing the workbench. I was going to delay the final assembly and redo the top which did not come out too well. Now I’m planning on using the Titebond Hide Glue to glue the top to the bench. Or maybe not, I might just use screws without glue to secure the top. The bench top will be temporary and I can use the bench to make a new top.
I know this is a very old post and I think I need to update my latest findings, as I didn’t have much success in the beginning with titebond maybe due to humidity but what I later discovered was that the glue was out dated. I did return to the store at the time where I purchased it from and all their bottles were out dated. They did do the right thing and took them off the shelves.
Now for the latest update I have purchased old brown glue recently and have applied it to my latest clock. I allowed it to dry over night and it looked fine I left it alone until a full 24hrs has passed I really didn’t want to take any chances. Yes my workshop is humid but that didn’t have any effect on the glued joints thank God. The joints are extremley solid and after applying Kunos oil which is known to soften and break glue joints if they are not properly cured nothing happened. Everything is still very solid, I have just applied my second coat and 24 hrs later will be my third and final.
I’m not going to biased and say that Old Brown Glue is better than titebond since the bottle was out dated but after speaking with several other traditonalist hand toolers they have all said there isn’t a difference between the two brands. As Old brown glue is not available in my country when it expires or runs out which ever comes first I will give titebond another go. I must say I feel right at home with hide glue over PVA.
Hs anyone tried using it for veneering? I am restoring an old mahogany desk for my grandson to use, and it has a leather top. Obviously, leather is not practical for a 12 year old boy, so I intend to veneer it. I purchased the Titebond Hide Glue for this, as I will need plenty of working time – the veneered area will be 27″ x 48.”
Advice ?
Well it is different in that cure is not dependent on cooling as with traditional hide glue that cools under the veneer hammer. In that case it relies on constant application of a veneer hammer back and forth for much, much longer until ‘glue grab’ takes place or you use cauls or you use a vacuum bag. Introducing water-based adhesive is always problematic without total surface pressure as the veneers generally expand too and this causes the veneer to curl almost immediately. With heated adhesive the glue pulls as it shrinks back down and pulls the veneer to the substrate.
I have been using old brown glue and they say that there is no difference between titebond’s liquid hide and old brown but my question to you is that old brown glue must be placed in hot water from the tap and fully emerged does the same hold true for titebond.
Would Old Brown Glue be any dofferent? Was in Rockler yesterday and they had no true hide glue (don’t think the fellow even knew what i was asking for).
It’s not the same but in some limited situations it’s a decent substitute.
Acoording to Glenn D. Huey from Popular Woodworking Old Brown Glue is a mixture of animal collagen and urea with no other additives. Titebond Liquid Hide Wood Glue lists cyanoguanidine (used in the manufacture of plastics and pharmaceuticals) and ammonium thiocyanate (used chiefly as a herbicide and in textile printing).
Wow, Paul. I read through your blog and was amazed as you look exactly like a friend who lives Victoria, BC, Canada ! You could pass for twins !
Everyone has a twin in this world, religion say’s Eve gave birth to twins one male and one female at every birth so I guess that’s why we all have a twin some where out there…
This will be my last post on this subject but I need to know whether or not you used this glue without heating it up using hot tap water from the tap. I did call Titebond today their technical support and well on every question I asked he had to go and ask someone else who wasn’t any better in answering than he was. However what little information I could get he claimed that you do not need to heat it up unless it’s below 20°C in the shop, he also said that it’s not pure hide but that it’s synthetic, however it works the same as real hide glue in regards to reversibility and so forth. I am currently using another brand of liquid Hide which is real Hide but with added urea, this needs to be heated to 140°F prior to use but the label reads hot tap water only. I’ve measured the temp. of my tap water and it’s maximum is 108° which is probably why I have been experiencing some problems with glue failure.
My question to you Sir besides the above since I want to work with hide glue should I switch to making my own using a pot or will titebond LH be just as effective and equivalent in bonding strength as PVA white glue.
Personally, I think original hide glue is better, much better. It’s not convenient all the time, but with judicious planning you will enjoy it.
Thank you very much Paul. God Bless
My latest post was directed to another poster whose post I can no longer see
Hello, I’m late to this conversation, but I’m wondering if Mr. Sellers remembers a recipe/procedure for making up hide glue.
In the Popular Magazine article (June 2011) referred to (above) there is recipe given by Mr. Don Williams of the Smithsonian Museum Conservation Institute:
http://www.popularwoodworking.com/article/hide-glue-in-liquid-form
I realize this was an old post-came across it following the trail of previous posts at the bottom of the broken tenon post. I am a fan of hide glue, but for those just being introduced to it, Titebond Liquid Hide Glue is a good introduction. Your post mentions “time will tell” about how well it works for furniture. Just wanted to point out that Franklin started selling this in 1935-same formula, now under the Titebond name.
Hello Paul, I am about to perform a massive glue-up of a roubo workbench’s legs 1) to each other using mortise&tenoned low stretchers and 2) into the table top via the straight & sliding-dovetail duo – all at the same time. So I while looking for a slow-setting, manageable glue Titebond’s Hide glue came up and this great article followed. I would love to know if in your opinion, Titebond’s Hide glue would be a suitable candidate? (and if not, then is an epoxy glue a good candidate).
Thanks in advance for reading and, yeah, for anything and everything you post. I learned a great deal from your writing and videos.