Making Winding Sticks by Hand – Part I
I felt troubled that anyone would consider buying what can readily be made from real wood. Especially for real woodworkers. I can understand someone buying their initial workbench in certain circumstances but eventually it’s most likely they will rise to the challenge of building their first workbench themselves. Having something to work from might possibly be necessary. So, here we are, the first stage of any project preparation is to determine what and where the flaws are. Is it cupped, is it bowed, is it twisted? Winding sticks show twist by giving us height above the surface that might otherwise be blurred by surface defects. Additionally, winding sticks that are longer than the wood is wide exaggerates the visibility of that twist. The longer they are, the more the twist is exaggerated. If the winding sticks are three times longer than the width of a board then they will exaggerate the twist three times and so on. The winding sticks help determine the highs and lows of twists and show us where to take off those areas offending the work.
Winding sticks can be as basic as you want them to be. Two 1″ x 2″ sticks of pine alone can be used, and will do exactly what bars of metal will do or a fancier pair made from wood with inlays to create contrast. These winding sticks have a couple of features that provide contrast from one with the other. They have features that help them stand and they are wood not metal. It’s worth spending a little time insetting contrast spots and dots to centre them on the boardsThe list of features are as follows:
Mahogany – darker woods make contrast easier than light woods and minimize reflection
Inlays – ebony and curly maple to maximize contrast and give permanent long term service
Centre dots – to prevent imbalanced placement
Wide base – gives good seating and bottom-weight
Forming the Winding Sticks
First I trued up my wood square, straight and to dead sizes of 20mm x 32mm x 406mm (3/4″ x 1 1/4″ x 16″).
I measured in from each opposite face 12mm and drew a line to an angle across the end as shown.
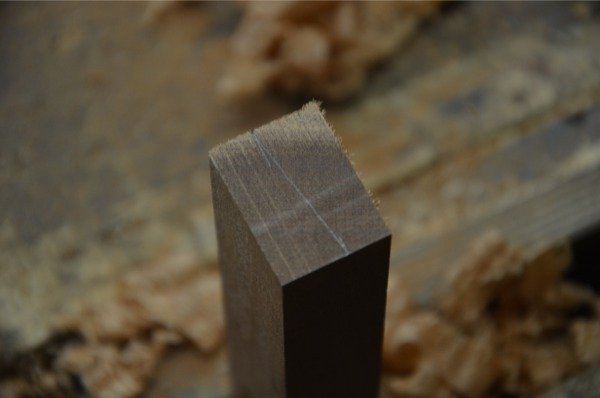

Draw a parallel guideline align the edges to guide you as you saw the angled faces.

Saw along the angled faces to split the stick in two.
Plane up the sawn surfaces and check both pieces in case they distorted after cutting in two. True up as necessary.
At this point the winding sticks will work. You could use a black sharpie to create a contrast line on one stick but…

…you will likely want to go all the way on to the inlays.
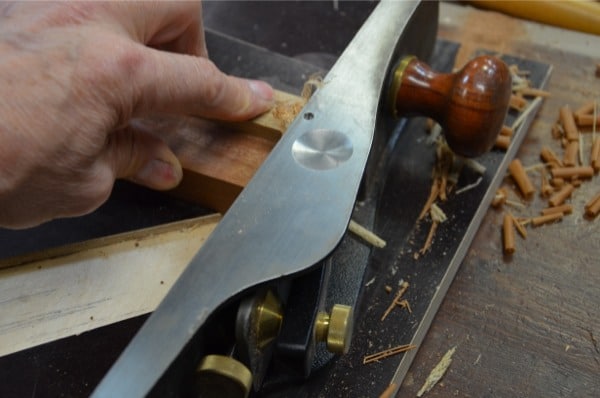
Trim and finalise sizing on the shooting board as needed.
Inlays and such – centre dots first
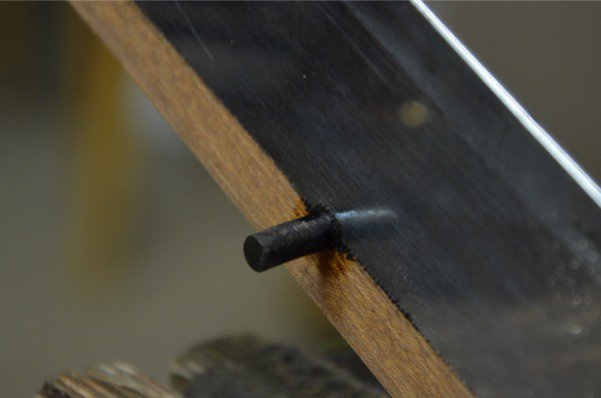
The easiest installation is the two centre dot locators centred in the two winders. I decided on a 6mm (1/4″) dot. To make the dowel I drilled out an odd hinge hole with a 6mm (1/4″) hole. I cut a piece of ebony just a hair over 6mm (1/4″) square.
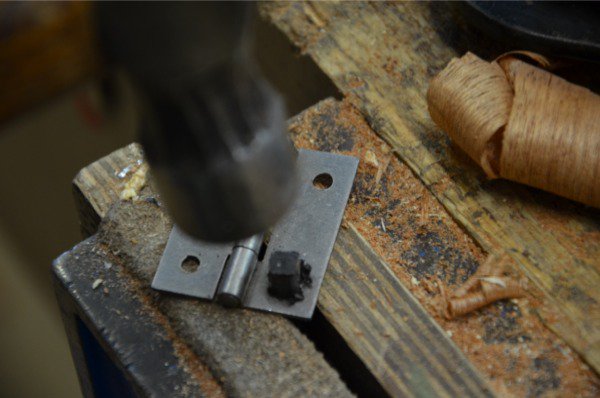
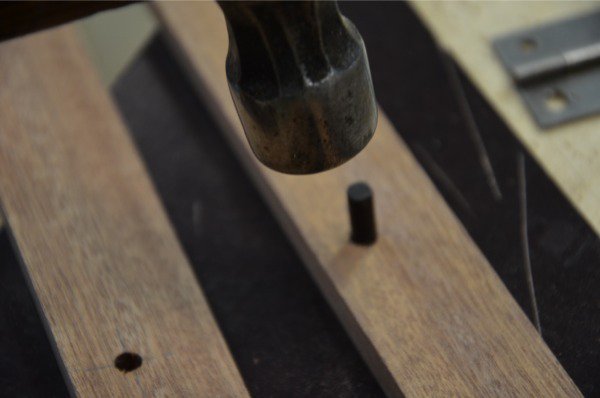
Hammering the square section through the hole creates a perfect dowel that fits the hole perfectly.
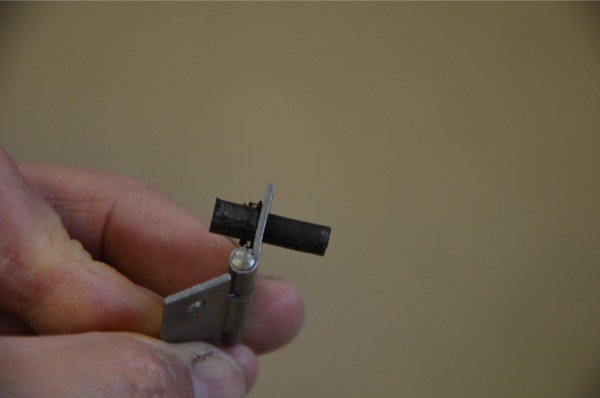

Here is how the dowel looks after forming.
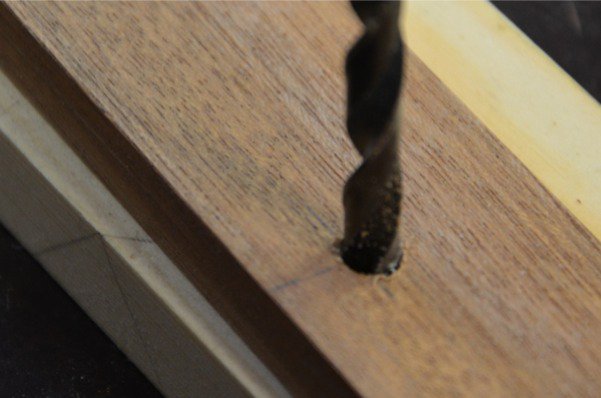
Drill the hole centred in the length and half an inch up from the bottom to the centre of the hole.
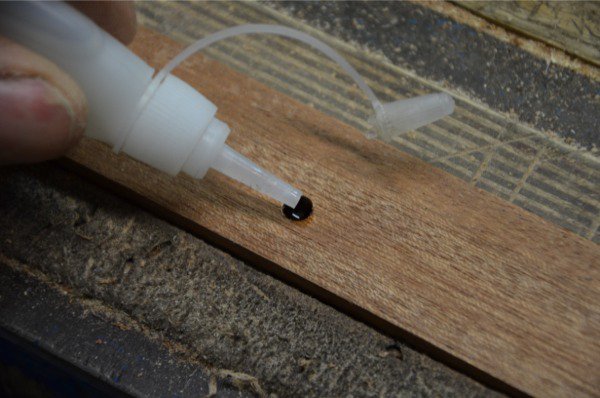
Tap the ebony dowel into the hole and use super glue to wick in from both side.
Cut the dowel flush and…
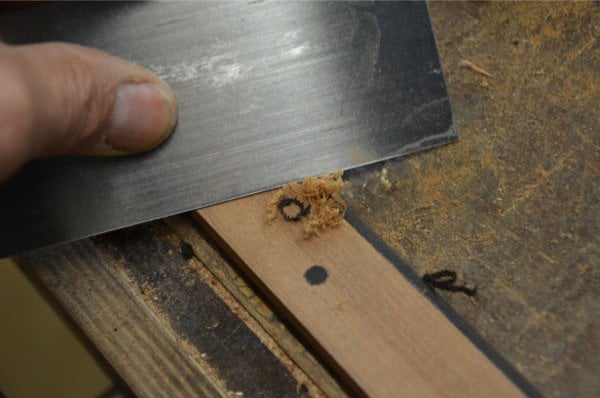
…plane or scrape flush.
More tomorrow
this is going to be a job that is put to the top of the todo list i have some walnut that will fit the bill thanks for your continued guidence .
Hello Paul,
Yet another valuable tool that you can make yourself! Ironically, I made my own set only last week. Having some scrap oak on hand, I decided to use that, but stained it with a dark walnut stain for contrast. For the inlays, I used holly; the nearly white color makes it look almost like ivory. For the center dots, I used one of my Hitachi plug cutters that I recently bought on your recommendation (it’s the first one I’ve ever seen that works well in a hand drill). All in all, it made a nice set, though I wish I had made mine tapered from top to bottom like yours. Looking forward to tomorrow’s lesson!
Paul, you are amazing. I think I asked if you’d be showing how to make these a while back. And here you go. I was about to buy some, too. In fact, I was just looking on line. Now I know what my next shop project is.
Are there any woods that would not be good to use? I’m not as up on my woods as I’d like to be, and don’t want something that’s going to get all twisty. I’ve got some cherry, maple and cedar hanging around. And some white oak coming in for the lamp project. I think the cedar is too knotty though. I’m thinking the cherry would be nice.
Cedar may be a little lightweight but other than that you can use anything including a 2×4 for this one.
What about an apple wood?
Nit stable enough if you are talking about the whole winding stick. Fine for lighter contrast dots or insets.
Thanks for this Paul,
I’m in the process in making a pair, your post have come very timely. Thanks for the guidance on this. very much appreciated.
Paul …….. As mentioned thanks for this, this is defiantly on my to do list. I have been using aluminum angle which I got free but all ways wanted some nice wood ones. So is 16″ the best length or should one have several different lengths such as 12″, 16″, 18″. 24″ ??
Steve
Nice one Paul I have always thought I should have a set but never got around to making or buying any. I have now I have a set up to your first post , I wait to see what the following post will show.
Nice one Paul , I have always thought I should have a pair of Winding sticks but had not got round to making or buying any , well I have now I have a pair up to the stage of your first post, I wait to see you finish them off
Well… all went well until I tried that diagonal cut. Started drifting and couldn’t correct it for the life of me. By the end, it was a mess and went in the trash. I’ll blame the saw. On to plan B.
Plan B should be to make two separate sticks and not ripcut down the length. Go for it. You can just plane down to gauge lines. The only reason for the taper cut is to make the base heavier.
That’s exactly where my mind was going. I could plane that taper in too.
Hello dear team. I proposed to make a winding sticks and check the blog entries by Paul, but not possible upload any photo!. What can happen?
1000 thanks
Thanks for the comment. I have fixed the links to the photos.
Thank you Paul. I have become an addict to your generous and expert lessons.
Question: I can’t find the various measurements for your work bench. Can the be found somewhere?
You can find the whole series written up on my blog and here is the link to the measurements.
What kind of saw did you use / would you suggest for making the diagonal rip cut? It looks like it might be a japanese style saw in your photo, but it’s a bit hard to tell.
It’s just a small panel saw. I don’t use any Japanese tools.
Thanks so much for this article, Paul. I recently got done making my second set of winding sticks (my first attempt turned out a bit shabby).
My light inlays were rectangular, rather than dovetailed, and go all the way through to the back of the stick. That way, I can easily tell which stick is which, from any angle.
Mahogany and Ebony not being readily available here in Australia, I ended up using Jarrah for the sticks, Victorian Ash for the light inlay and Wenge for the dark inlay. Finished with Danish oil. I am very pleased with the result. The Jarrah was very hard to work, especially the diagonal rip, but it was worth it in the end.
I did notice that when countersinking the holes, the countersinking drill bit tended to leave behind unsightly tear marks in the wood. I experimented with different drill speeds, and different amounts of hand pressure on the drill, but couldn’t seem to get a nice smooth countersink. Do you have any suggestions?
I use the metal workers countersinks which give the neatest cuts of all I t looks like a cone with a hole going through at an angle.
Paul you mentioned inlaying Ivory. Can you plane it like wood?
It scrapes with a scraper and files and rasps.