Thicker Irons May Not Always Be Actually Fit For Purpose
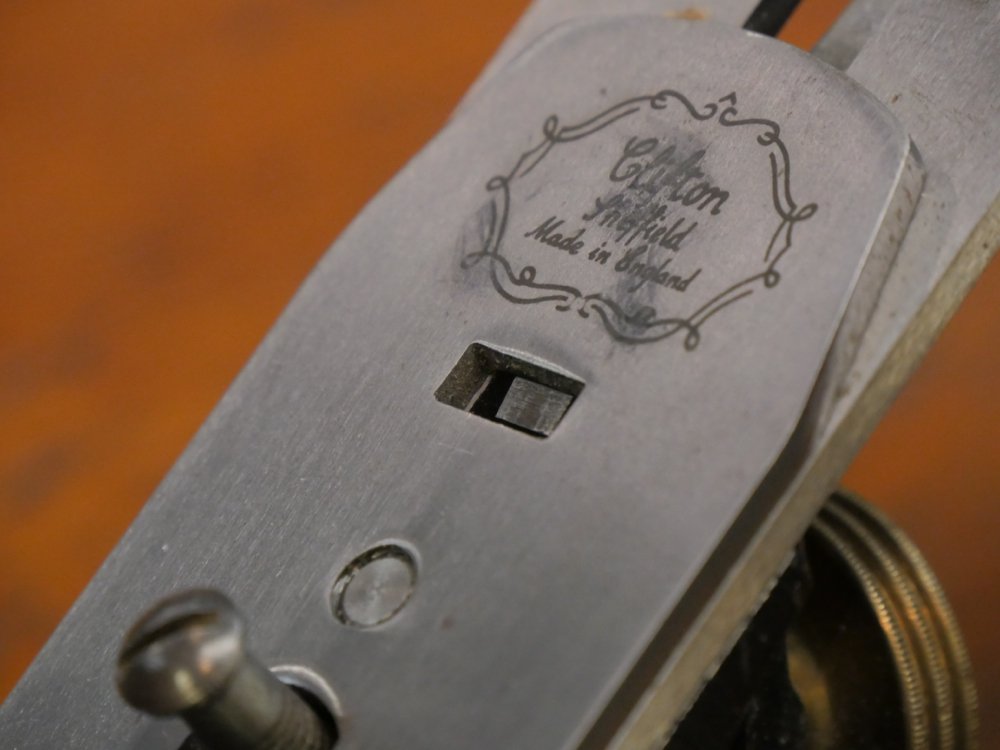
Florian from Vienna is in the Nine-day Foundational Woodworking Class this week here at Penrhyn Castle. He was struggling with his personal plane and asked me to look at it. It was a Stanley #4 plane he had decided to make an upgrade to by retrofitting it with a Clifton iron and a stay-set cap iron, also by Clifton. It seemed that the plane couldn’t be adjusted as it should and that registration of the iron to the sole of the plane was relatively ineffective. The problem wasn’t altogether obvious at first glance and it seemed the overall plane was generally in really good shape after he had spent time restoring it. Additionally, Florian had done the right and necessary research and Dieter Schmidt, purveyor of the Fine Tools Company of Europe, based in Germany, went to great lengths to make certain the information was there to help Florian make an educated choice.
Thicker Irons May Mean Less Engagement
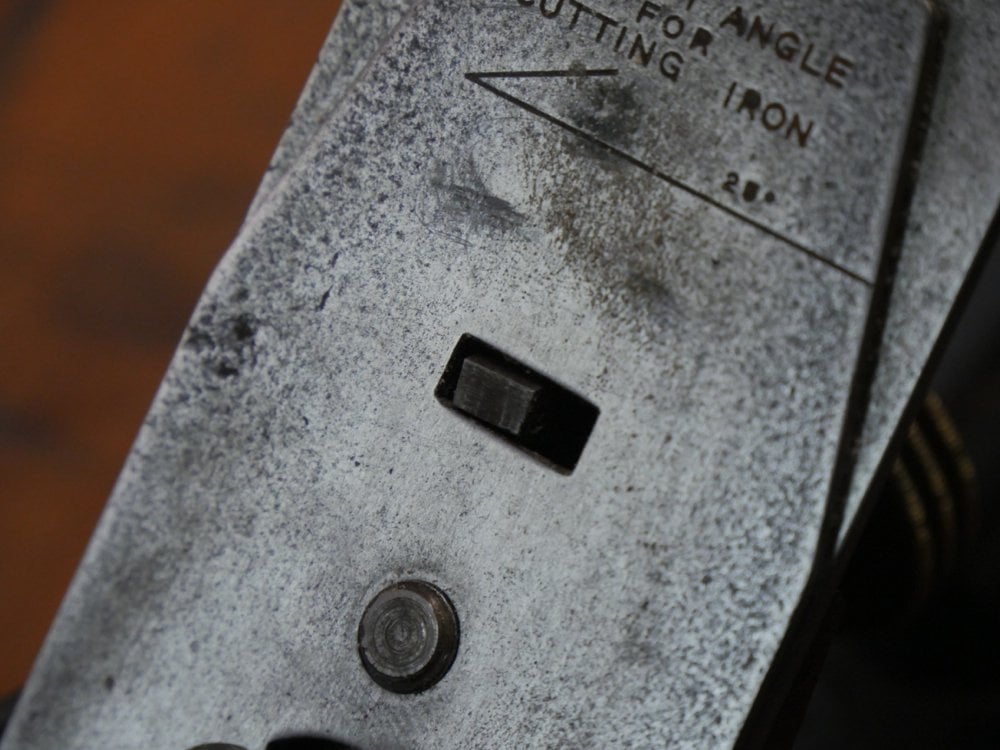
With the Stanley cutting iron assembly the yoke presents squarely inside the cap iron and through to level with the outside or top side of the standard-fit cap iron.Here you can see that the yoke doesn’t engage with the cap iron and therefore the yoke cannot advance or withdraw the iron for setting depth.
After a couple of seconds I noticed that the yoke protruding into the rectangular opening on the cap iron seemed to be less engaged than I was used to seeing. I mean it seemed to barely engage at all in the enclosure. I removed the Clifton iron cutting assembly (the combination of the cutting iron and cap iron) and measured the protrusion of the yoke from the face of the frog and found it to measure 4mm. I measured the protrusion on my own Stanley and found that that one measured 1mm more at a full 5mm. Considering the extra thickness of the cutting iron now distances the cap iron from the bed of the plane by the additional 1.3mm increase in iron thickness, it soon became clear that even with the best willing in the world, the retrofit wasn’t really fit for purpose, even though no one had done anything wrong. Because of the added cutting iron thickness the yoke cannot give full enclosure as standard with non retrofit irons.
I offered to trade my frog with the added 1mm protrusion on the yoke as a possible solution and indeed that changed the situation acceptably. Trading out the identical frogs was the easiest answer, and that’s what we did. So, anyone retrofitting their Bailey pattern bench planes should be aware of this subtle difference and before ordering should make sure the yoke is at least protruding 5mm past the face of or bed of the frog.
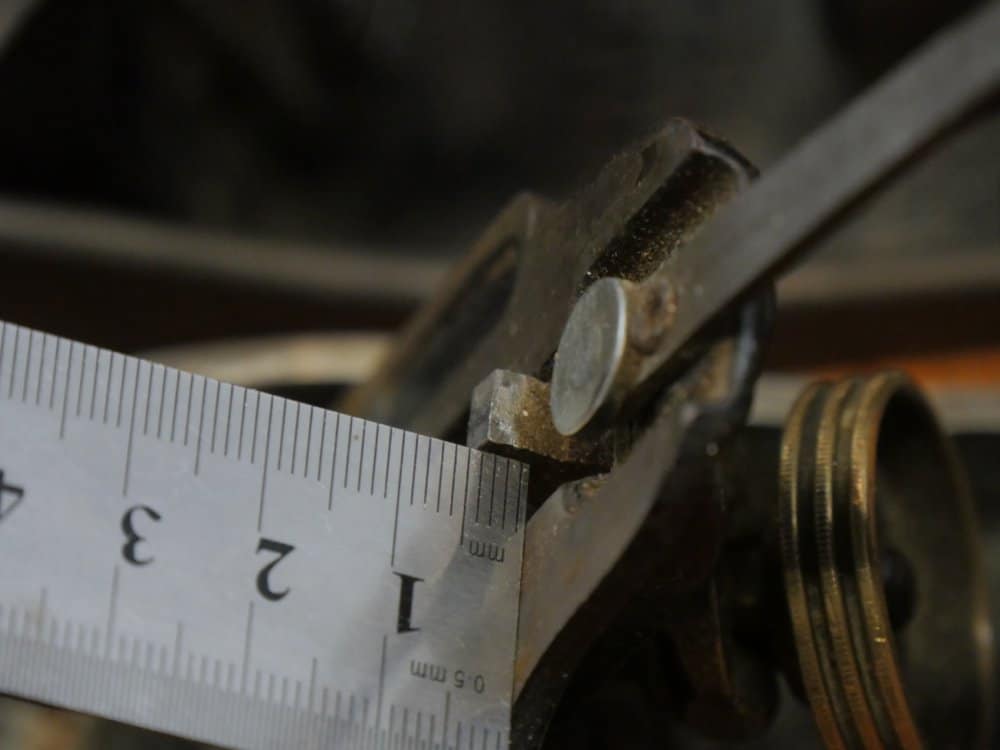
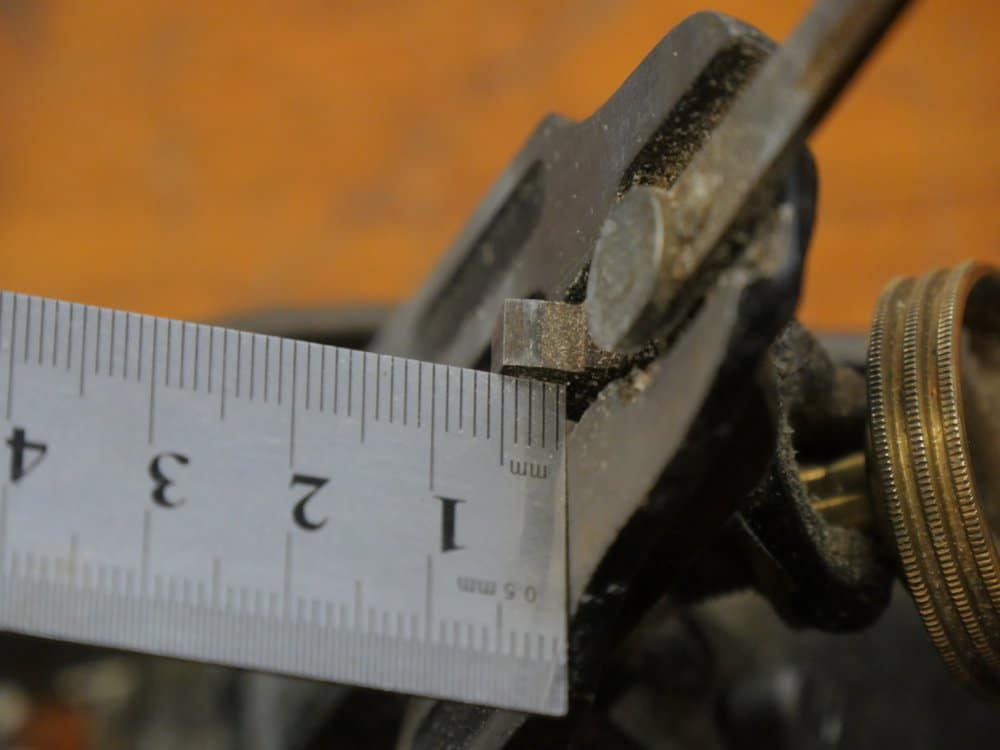
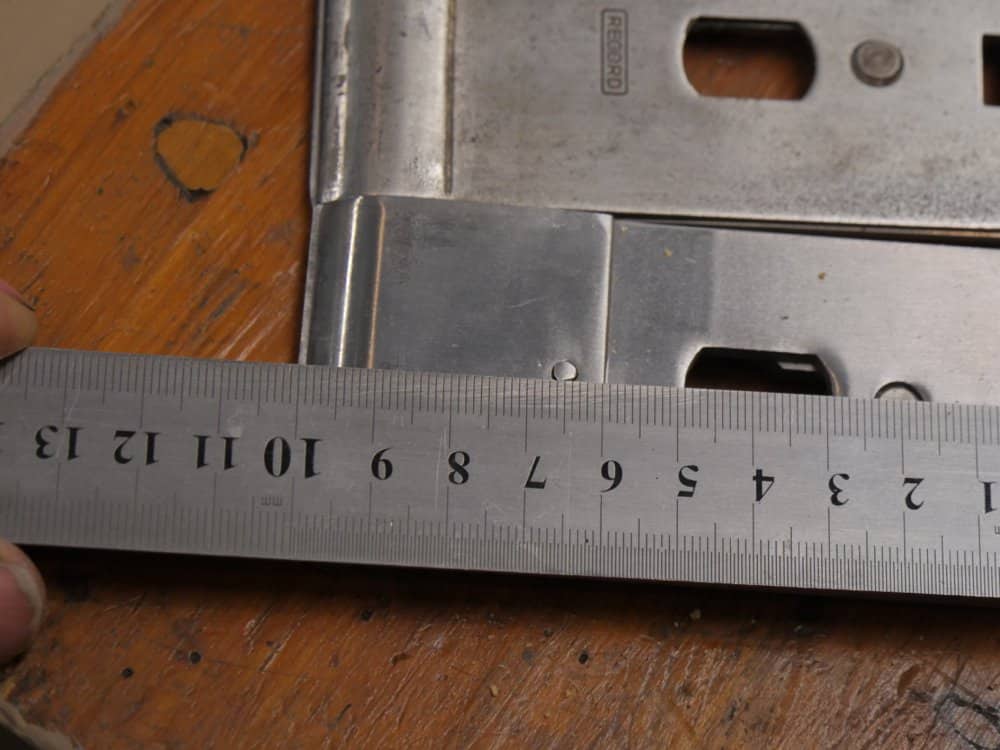
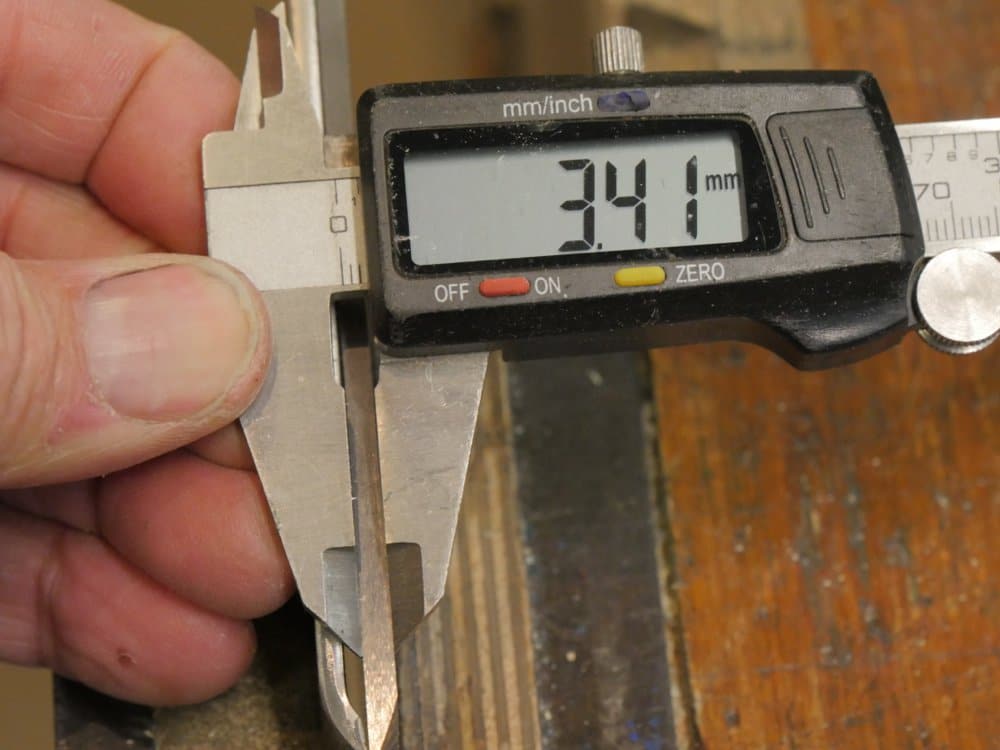
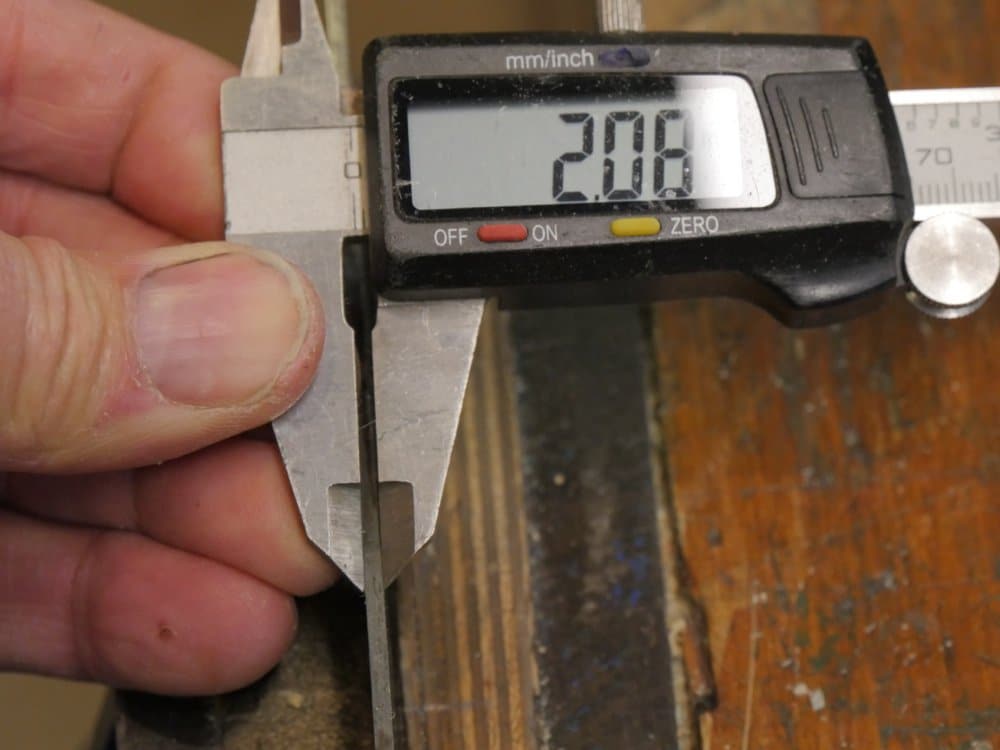
However, then comes a second point I picked up on that’s also worth noting. The difference in the location of the rectangular opening that registers the end of the yoke to facilitate the depth adjustment of the cutting iron assembly is slightly different than that of the original cap iron. Again, at first glance at least, the Stanley and Clifton cap irons both have the rectangular hole for the yoke to stick into and through, but we discovered a small difference. The distance from the tip of the cap iron at the business end by the cutting edge and the rectangular opening on the Stanley and the Clifton is different by 3mm. This effectively means the yoke tilts on the forepart of the pivot point quite a bit more; so that the yoke is not square in the opening but tilting forward quite a bit and that’s before the iron is set to take even a thin shaving. The yoke is what presents the cutting edge of the iron at the correct protrusion through the throat of the sole and allows for the adjustability of depth of cut. This means that the yoke engagement, being already drastically lessened, applies less support inside the recess. Again, the effect this has on the plane iron is prevents the adjuster from changing the depth of cut. The thickness of the Clifton iron is 3.41mm whereas the standard Stanley iron is 2.08mm. So the engagement in the opening of the cap iron is less than .5mm. These two seemingly small differences, the short protrusion and the tilting yoke,when combined, drastically affect the retrofit, and, as in this case, renders the upgrade ineffective.
A New and More Equal Yoke?
I suppose the next upgrade for plane retrofits would possibly be a new yoke with an added 2-3mm to compensate for the thicker iron. Even if at 1-1.5mm passing into the rectangular opening the yoke is engaged, I conclude that there is a good possibility that the yoke will wear much more quickly and stop working.
28 Comments
Replacement yokes are available to correct this problem. These are easy to fit using a punch and small hammer. A nail with the tip ground flat will serve as a punch. Thicker irons improve plane performance significantly.
Hello Paul,
I’ve heard of this problem before and a few options are available to resolve the situation. Certainly replacement yokes can be bought (CHT) which are longer and designed to extend further into these thicker blades…I think they are actually made by Clifton specifically to retro fit their thicker blades into older planes.
Another alternative is the collaboration of Rob Cosman and Pinnacle / IBC who have added little tabs to the chipbreaker so that the hole where the yoke engages is smaller and more suited to capturing the yoke in a more positive manner. Again Rob recommends replacing the yoke if necessary…which in most cases involves a small punch to press out the split pin and then replace the yoke.
I’m sure you are already aware of all this but I thought that it might be useful for your readers who are purchasing old planes on ebay and wanting to put in a nice thick plane blade.
I hope this is of some use to people.
Thanks, Stephen.
“A ‘nice’ thick plane blade”?
Sorry, just a figure of speech!
Just joking here too.
I have the Rob Cosman Pinnacle and was thinking the same thing while reading then I saw your comment. I think my yoke is wearing tho. It hits at the wrong angle I think so the corners of the yoke steel are wearing on the tab bit. I must admit the only reason I still use my ‘nice’ thick iron and chip breaker is because I paid so much money for it and can’t quite let it go. I have a standard number 4 sitting right next to it and find myself reaching for it more often these days.
I don’t like to use the thick one because I like to keep it sharp so I don’t have to spend the extra time sharpening. It does look nice and shiny sitting on my bench in my fully restored plane though. I always prefer the ‘feel’ of a standard sharp Falcon (Australian Bailey style) blade shaving through the fibers. It always feels like it’s cutting nicer and I can’t quite understand why but it just does. I think the hard thick irons are great for the first few strokes and thats about it. The edge is probably fractured a lot faster on the silica content in Australian hardwoods making them blunt in no time. The standard blades seem to stay sharp longer and are quicker to get that fine edge back when needed. I know this might be controversial to some and sorry Rob if you’re reading this but in some ways I feel like I’ve been ripped off with my blade. The sad thing is I filed out the throat of my best plane which was the only tool handed down from my grandfather. I wish I’d done it to one of my others now. You live and learn I guess. Thanks as always to Paul for bringing these issues up. The world needs more honest un biased opinions like this instead of coming from the guy selling the product to you.
Usually, it’s when it comes to sharpening that it makes the biggest saving in my view. No matter which way you slice it, thick irons take twice as much energy, cost five times as much to buy, do not stay sharper longer and seem to have many problems that far outweigh the non-existent problem people selling planes and plane irons say is an international problem. I still love sharpening after fifty years plus of sharpening and I am so glad I never went down the thick iron road for more than a few minutes. Remember also, when people say the old planes had thick irons, that’s not comparing apples for apples. The old planes had tapered irons because they were wedged in the plane and relied on the wedging action of the iron to ‘hold’ their position under the pressure of each forward thrust into the wood. Without a taper the plane wood have spit out the iron. So any arguments along that avenue don’t hold water. Thin irons didn’t work until the brilliance of Leonard Bailey, the inventor and developer of the most widely used plane ever made in the whole wide world came on the scene.
Perhaps Florian should consider hard-soldering a piece of brass on the yoke.
I would hard-solder a bigger piece of brass onto the yoke and after that I would shape it with a file. If it fails you can simply file off all the brass.
Nevertheless it is very annoying to spend so much money on a premium iron resulting in such troubles. I hope Florian solved the problem.
Best regards
Dominik
Yes, I agree, you can do many things to make the thick irons work, but already I see the benefit, if any at all, diminishing in the overall scheme of things.
Hi, If this can help, I have retrofitted both my stanley #5 (post-WWII) and #7 (pre-WWI) planes with a blade & chipbreaker from Hock, and they work perfectly well.
Yes, the Hock irons are just a little thicker than the standard Stanley and Record irons and these work with no need for changes. They are also nicely made if you do need to re[lace an iron for some legit reason.
I retrofitted a #8 with a Hock blade and cap iron because the original blade was kaput, but it did not work at first. I was able to fix the problem easily by making a small rectangle of wood equal in thickness to the blade that fits in the slot in the blade and that is bored to pass the cap iron bolt. The length is cut to catch the adjustment pin at the right place. I expected the fragile wooden piece to fail, but it is sandwiched between the head of the bolt, the cap iron, and the two sides of the slot, so it has been fine. JB Quick Weld might be another way to cast something that would work.
The iron cuts very nicely, but if I were to do this again, I’d look for a replacement “old style” blade and save myself the bother.
I had a related but slightly different issue with my old Record No 4. I was advised by a well-known supplier of woodworking tools to replace not the blade but the cap iron with a thicker one to reduce chatter. They did offer me a longer yoke which works well. The problem I later discovered is that the cap iron has a slightly different profile so the locking cap, if that’s what you call it, does not sit so well and has to be pulled back a few millimetres to sit properly on the new cap iron. In retrospect I probably never needed the ‘better’ cap to reduce chatter, just a sharp blade and the oily rag that Paul uses. Beware snake-oil salesmen disguised as experts!
so in shot you simply cant beat what Stanley originally came up with, I was lucky enough to find a box of blades at a junk store for $20 dollars. I got my wallet out so fast I almost hurt myself. Great read Paul.
This goes to tell you that for some, getting a new plane from a reputable manufacturer may be the preferred option. Ready to use out-of-box kind.
Ray
It is questionable though, mostly because all of the planes made by the more “reputable makers” are perhaps mostly more highly engineered than really needed and, indeed, Though I would consider myself a strong individual, I find them much too heavy and clunky for daily at-the-bench use. Especially on the larger longer planes like 4 1/2 Bed Rocks and such.
Paul – Thanks for once again addressing an important subject using facts and squeezing the snake oil out of it.
Used #4: 20£
Clifton Iron: 65£
Having Paul fix it for you: priceless
In all honesty i bought the iron because it is handmade and i work with my hands, too – i encourage and support that.
Plus i do not intend to ever buy another similar plane, why would i?
I own a wooden scrub plane pre WWI from my greatgrandfather and anybody who follows Paul’s teachings knows that you do not need 83 planes to build amazing furniture.
It is true also what Paul said about sharpening, you need some extra time to get the blade sharp but it does add some weight to the plane which feels quite good, too.
I love working with it =)
-Florian
Great thread! Have to say that in my three short years getting into this craft I have bought bedrock planes, wooden planes but no matter what I do I always come back to the eBay Stanley number 4 that I set up following Paul’s DVD.. Silky smooth surface every time. Standard iron. no chatter. perfect design. But I don’t regret trying all the others either! 🙂
Martyn
Thanks for this Paul,as usual that is an excellent understandable explanation.
I have a Marples M4 with a protrusion of 6mm and fitted with a Stanley iron of 1.9mm basically for ease of sharpening. The tip of the yoke does rub the lever cap spring when the blade is retracted. I always wondered if it needed a thick iron and it now seems like it may have been intended for one but I don’t know if it is worth it.
John
I have two bench planes, a #4 Dunlap (a cheap line of planes sold at Sears in the 50s and 60s) and a Stanley Handyman (another cheap line of planes) that is a jack plane.
[img]http://s19.postimg.org/7q767qt43/Planes.jpg[/img]
Both were made in the USA. I bought both at a farmers’ market in Tennessee. I took them home, cleaned, sharpened, and adjusted them. I bought a Hock for the jack plane and it fit and works well. The funny thing is the #4 (Dunlap) has the original blade and it works better than the jack with the Hock iron. The Dunlap produces a mirror like surface. Both of these planes are considered not as good as the Stanley/Bailey models, but they are all that I have and work very well for me.
Here I am a year late to the party 🙂 I am hoping someone can help.
I have a Stanley #5 (Type 9) that I bought a Hock replacement iron for. I did not get the Hock chip-breaker and intend to use the original instead.
All of my (internet) research (including comments in this thread from Paul) indicate that the Hock iron should work without having to make any modification to the plane. I am, however, having issues at the mouth of the plane. When I install the new iron and advance it via the depth adjuster, there is virtually no gap for a shaving to pass through.
I have the frog set flush with the aft edge of the mouth (I have also tried moving it aft about 1/16th of an inch). I have the cap iron set somewhere between 1/16 – 1/32″ back from the sharp edge of the blade.
Any thoughts on this? Is it possible that I have to open the mouth of the plane a few thousandths of an inch?
Best,
Casey
Hi Casey, I am having the same problem, I picked up a beauty old Stanley No. 5 but the blade is badly pitted. I bought a veritas Stanley replacement but there is no room for a shaving….did you end up filing the mouth? This is a very late post!
Scott
Yes you have to file the mouth, this is quite common, there’s a video on it I think. I wouldn’t recommend it though, I did it to one of mine and kind of regret it now.
Do it to an old cheap one that you don’t care about but don’t do it to your best one as there’s no going back! And only file just enough, you can always file more gradually if it’s not enough but don’t take too much off the first time. Check then refile if needed, go slow and get it even. Use masking tape to guide your straight edge and see where to file to.
See my comment above, and others for more insight.
Dear Mr Sellers,
I am wondering if it’s possible to swap the 3.2mm thick iron of the Juuma plane for a 2 mm thin iron while keeping the same chip breaker of the Juuma . Regarding a no 4 smoothing plane.
Thank you
Regards
I don’t see why not.
Every time a restore an old Stanley, I buy a new blade for it but not an “upgraded” model. I just buy a standard Stanley blade. My reasoning is that I don’t want to wear out the original vintage blade so I keep them in a safe place to retain the value of my plane. I don’t buy upgraded blades for two reasons. They are expense, and I don’t really have any issues with standard blades. They work just fine for me. Maybe I just don’t appreciate the improvement in performance a thicker blade offers because I have never used one. But I can’t help but feel that sometimes us humans always “reach for the moon” so to speak just because it’s there.
Hi Paul,
I’ve been woodworking for about three years now. I have a mixture of old planes from 30s with thin irons and new modern planes with thick irons.
I just finished up a big project and wanted to tidy up and sharpen everything. As such, I basically did side by side sharpening of thick and thin irons. There is no comparison, the thin irons are significantly easier to sharpen. I really don’t see any advantage in thick irons at all AND they are expensive.
As usual, you always give solid advice I can trust. Thank you.
Comments are closed.
Privacy Notice
You must enter certain information to submit the form on this page. We take the handling of personal information seriously and appreciate your trust in us. Our Privacy Policy sets out important information about us and how we use and protect your personal data and it also explains your legal rights in respect of it. Please click here to read it before you provide any information on this form.
Want a roundup of Paul’s latest posts each week? We’ve got you covered.


Replacement yokes are available to correct this problem. These are easy to fit using a punch and small hammer. A nail with the tip ground flat will serve as a punch. Thicker irons improve plane performance significantly.
Hello Paul,
I’ve heard of this problem before and a few options are available to resolve the situation. Certainly replacement yokes can be bought (CHT) which are longer and designed to extend further into these thicker blades…I think they are actually made by Clifton specifically to retro fit their thicker blades into older planes.
Another alternative is the collaboration of Rob Cosman and Pinnacle / IBC who have added little tabs to the chipbreaker so that the hole where the yoke engages is smaller and more suited to capturing the yoke in a more positive manner. Again Rob recommends replacing the yoke if necessary…which in most cases involves a small punch to press out the split pin and then replace the yoke.
I’m sure you are already aware of all this but I thought that it might be useful for your readers who are purchasing old planes on ebay and wanting to put in a nice thick plane blade.
I hope this is of some use to people.
Thanks, Stephen.
“A ‘nice’ thick plane blade”?
Sorry, just a figure of speech!
Just joking here too.
I have the Rob Cosman Pinnacle and was thinking the same thing while reading then I saw your comment. I think my yoke is wearing tho. It hits at the wrong angle I think so the corners of the yoke steel are wearing on the tab bit. I must admit the only reason I still use my ‘nice’ thick iron and chip breaker is because I paid so much money for it and can’t quite let it go. I have a standard number 4 sitting right next to it and find myself reaching for it more often these days.
I don’t like to use the thick one because I like to keep it sharp so I don’t have to spend the extra time sharpening. It does look nice and shiny sitting on my bench in my fully restored plane though. I always prefer the ‘feel’ of a standard sharp Falcon (Australian Bailey style) blade shaving through the fibers. It always feels like it’s cutting nicer and I can’t quite understand why but it just does. I think the hard thick irons are great for the first few strokes and thats about it. The edge is probably fractured a lot faster on the silica content in Australian hardwoods making them blunt in no time. The standard blades seem to stay sharp longer and are quicker to get that fine edge back when needed. I know this might be controversial to some and sorry Rob if you’re reading this but in some ways I feel like I’ve been ripped off with my blade. The sad thing is I filed out the throat of my best plane which was the only tool handed down from my grandfather. I wish I’d done it to one of my others now. You live and learn I guess. Thanks as always to Paul for bringing these issues up. The world needs more honest un biased opinions like this instead of coming from the guy selling the product to you.
Usually, it’s when it comes to sharpening that it makes the biggest saving in my view. No matter which way you slice it, thick irons take twice as much energy, cost five times as much to buy, do not stay sharper longer and seem to have many problems that far outweigh the non-existent problem people selling planes and plane irons say is an international problem. I still love sharpening after fifty years plus of sharpening and I am so glad I never went down the thick iron road for more than a few minutes. Remember also, when people say the old planes had thick irons, that’s not comparing apples for apples. The old planes had tapered irons because they were wedged in the plane and relied on the wedging action of the iron to ‘hold’ their position under the pressure of each forward thrust into the wood. Without a taper the plane wood have spit out the iron. So any arguments along that avenue don’t hold water. Thin irons didn’t work until the brilliance of Leonard Bailey, the inventor and developer of the most widely used plane ever made in the whole wide world came on the scene.
Perhaps Florian should consider hard-soldering a piece of brass on the yoke.
I would hard-solder a bigger piece of brass onto the yoke and after that I would shape it with a file. If it fails you can simply file off all the brass.
Nevertheless it is very annoying to spend so much money on a premium iron resulting in such troubles. I hope Florian solved the problem.
Best regards
Dominik
Yes, I agree, you can do many things to make the thick irons work, but already I see the benefit, if any at all, diminishing in the overall scheme of things.
Hi, If this can help, I have retrofitted both my stanley #5 (post-WWII) and #7 (pre-WWI) planes with a blade & chipbreaker from Hock, and they work perfectly well.
Yes, the Hock irons are just a little thicker than the standard Stanley and Record irons and these work with no need for changes. They are also nicely made if you do need to re[lace an iron for some legit reason.
I retrofitted a #8 with a Hock blade and cap iron because the original blade was kaput, but it did not work at first. I was able to fix the problem easily by making a small rectangle of wood equal in thickness to the blade that fits in the slot in the blade and that is bored to pass the cap iron bolt. The length is cut to catch the adjustment pin at the right place. I expected the fragile wooden piece to fail, but it is sandwiched between the head of the bolt, the cap iron, and the two sides of the slot, so it has been fine. JB Quick Weld might be another way to cast something that would work.
The iron cuts very nicely, but if I were to do this again, I’d look for a replacement “old style” blade and save myself the bother.
I had a related but slightly different issue with my old Record No 4. I was advised by a well-known supplier of woodworking tools to replace not the blade but the cap iron with a thicker one to reduce chatter. They did offer me a longer yoke which works well. The problem I later discovered is that the cap iron has a slightly different profile so the locking cap, if that’s what you call it, does not sit so well and has to be pulled back a few millimetres to sit properly on the new cap iron. In retrospect I probably never needed the ‘better’ cap to reduce chatter, just a sharp blade and the oily rag that Paul uses. Beware snake-oil salesmen disguised as experts!
so in shot you simply cant beat what Stanley originally came up with, I was lucky enough to find a box of blades at a junk store for $20 dollars. I got my wallet out so fast I almost hurt myself. Great read Paul.
This goes to tell you that for some, getting a new plane from a reputable manufacturer may be the preferred option. Ready to use out-of-box kind.
Ray
It is questionable though, mostly because all of the planes made by the more “reputable makers” are perhaps mostly more highly engineered than really needed and, indeed, Though I would consider myself a strong individual, I find them much too heavy and clunky for daily at-the-bench use. Especially on the larger longer planes like 4 1/2 Bed Rocks and such.
Paul – Thanks for once again addressing an important subject using facts and squeezing the snake oil out of it.
Used #4: 20£
Clifton Iron: 65£
Having Paul fix it for you: priceless
In all honesty i bought the iron because it is handmade and i work with my hands, too – i encourage and support that.
Plus i do not intend to ever buy another similar plane, why would i?
I own a wooden scrub plane pre WWI from my greatgrandfather and anybody who follows Paul’s teachings knows that you do not need 83 planes to build amazing furniture.
It is true also what Paul said about sharpening, you need some extra time to get the blade sharp but it does add some weight to the plane which feels quite good, too.
I love working with it =)
-Florian
Great thread! Have to say that in my three short years getting into this craft I have bought bedrock planes, wooden planes but no matter what I do I always come back to the eBay Stanley number 4 that I set up following Paul’s DVD.. Silky smooth surface every time. Standard iron. no chatter. perfect design. But I don’t regret trying all the others either! 🙂
Martyn
Thanks for this Paul,as usual that is an excellent understandable explanation.
I have a Marples M4 with a protrusion of 6mm and fitted with a Stanley iron of 1.9mm basically for ease of sharpening. The tip of the yoke does rub the lever cap spring when the blade is retracted. I always wondered if it needed a thick iron and it now seems like it may have been intended for one but I don’t know if it is worth it.
John
I have two bench planes, a #4 Dunlap (a cheap line of planes sold at Sears in the 50s and 60s) and a Stanley Handyman (another cheap line of planes) that is a jack plane.
[img]http://s19.postimg.org/7q767qt43/Planes.jpg[/img]
Both were made in the USA. I bought both at a farmers’ market in Tennessee. I took them home, cleaned, sharpened, and adjusted them. I bought a Hock for the jack plane and it fit and works well. The funny thing is the #4 (Dunlap) has the original blade and it works better than the jack with the Hock iron. The Dunlap produces a mirror like surface. Both of these planes are considered not as good as the Stanley/Bailey models, but they are all that I have and work very well for me.
Here I am a year late to the party 🙂 I am hoping someone can help.
I have a Stanley #5 (Type 9) that I bought a Hock replacement iron for. I did not get the Hock chip-breaker and intend to use the original instead.
All of my (internet) research (including comments in this thread from Paul) indicate that the Hock iron should work without having to make any modification to the plane. I am, however, having issues at the mouth of the plane. When I install the new iron and advance it via the depth adjuster, there is virtually no gap for a shaving to pass through.
I have the frog set flush with the aft edge of the mouth (I have also tried moving it aft about 1/16th of an inch). I have the cap iron set somewhere between 1/16 – 1/32″ back from the sharp edge of the blade.
Any thoughts on this? Is it possible that I have to open the mouth of the plane a few thousandths of an inch?
Best,
Casey
Hi Casey, I am having the same problem, I picked up a beauty old Stanley No. 5 but the blade is badly pitted. I bought a veritas Stanley replacement but there is no room for a shaving….did you end up filing the mouth? This is a very late post!
Scott
Yes you have to file the mouth, this is quite common, there’s a video on it I think. I wouldn’t recommend it though, I did it to one of mine and kind of regret it now.
Do it to an old cheap one that you don’t care about but don’t do it to your best one as there’s no going back! And only file just enough, you can always file more gradually if it’s not enough but don’t take too much off the first time. Check then refile if needed, go slow and get it even. Use masking tape to guide your straight edge and see where to file to.
See my comment above, and others for more insight.
Dear Mr Sellers,
I am wondering if it’s possible to swap the 3.2mm thick iron of the Juuma plane for a 2 mm thin iron while keeping the same chip breaker of the Juuma . Regarding a no 4 smoothing plane.
Thank you
Regards
I don’t see why not.
Every time a restore an old Stanley, I buy a new blade for it but not an “upgraded” model. I just buy a standard Stanley blade. My reasoning is that I don’t want to wear out the original vintage blade so I keep them in a safe place to retain the value of my plane. I don’t buy upgraded blades for two reasons. They are expense, and I don’t really have any issues with standard blades. They work just fine for me. Maybe I just don’t appreciate the improvement in performance a thicker blade offers because I have never used one. But I can’t help but feel that sometimes us humans always “reach for the moon” so to speak just because it’s there.
Hi Paul,
I’ve been woodworking for about three years now. I have a mixture of old planes from 30s with thin irons and new modern planes with thick irons.
I just finished up a big project and wanted to tidy up and sharpen everything. As such, I basically did side by side sharpening of thick and thin irons. There is no comparison, the thin irons are significantly easier to sharpen. I really don’t see any advantage in thick irons at all AND they are expensive.
As usual, you always give solid advice I can trust. Thank you.