Import planes-Part III
Lever-cam lockdown out of sync
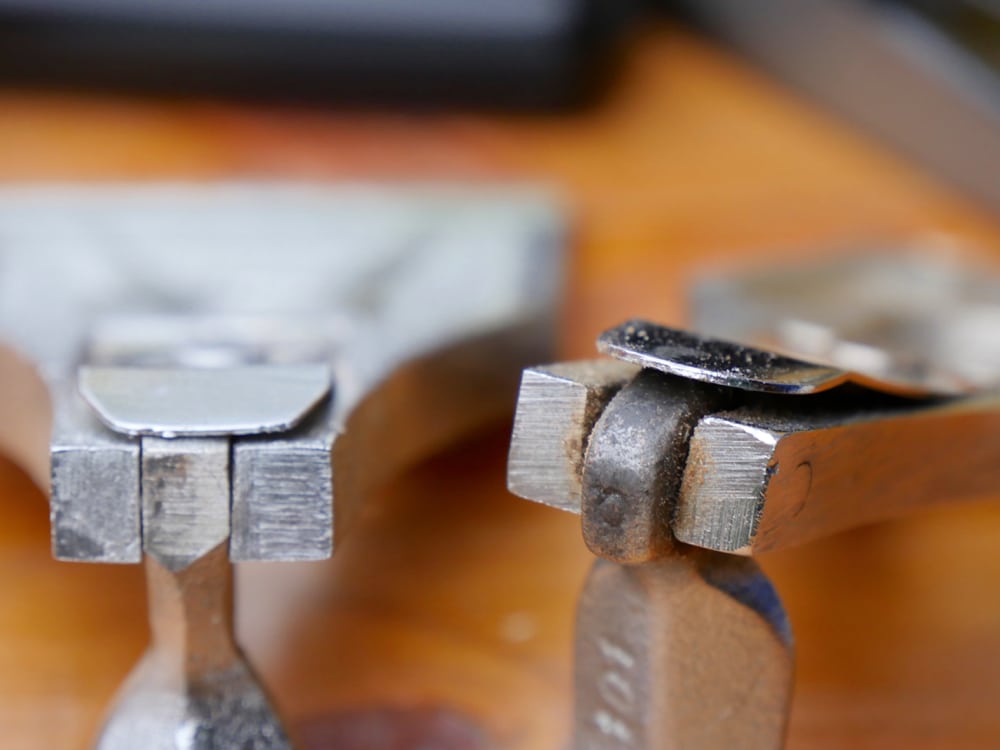
This might seem innocuous, or even not apparent at all, but in the context of functionality this little adjustment assister makes a huge difference to the plane and especially so for the setting of the lever cap in relation to the pressure it applies to the cutting iron assembly. I first used the term cutting iron assembly 20 years ago to describe the united cap iron to the cutting iron as it best describes both parts as a unit. Since then someone enlightened me that therm is a common phrase. So wherever you see me use this term this is what I am referring to. On all of the commonly used bench planes the lever is refined to an elliptical shape so that when the cam-shaped lever is pressed into action from its loosed state the cam lifts the lever cap up from its zero pressure position to apply pressure at two points; one, directly beneath the lever cam near the top or upper end of the cutting iron and then, two, along the full length of the leading edge of the lever cap directly on the top of the hump of the cap iron. This then compresses the cap iron against the cutting iron and subsequently beds the whole onto the frog. The combination of all this effort counters any tendency in the cutting iron to chatter or vibrate under the forward thrust of the plane in the work.
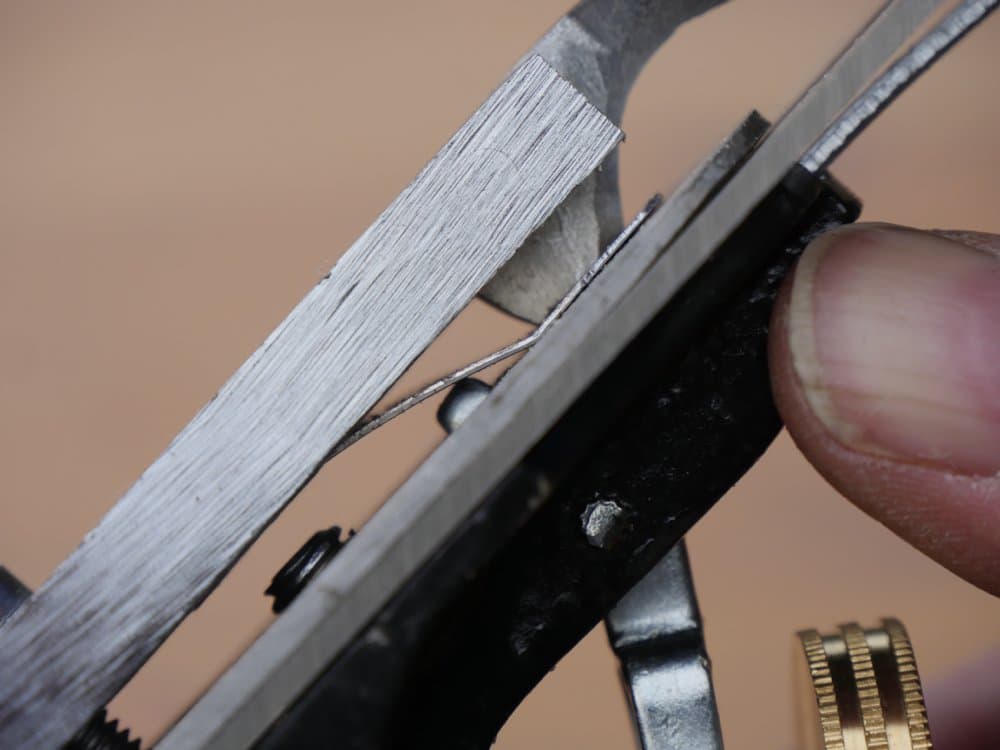
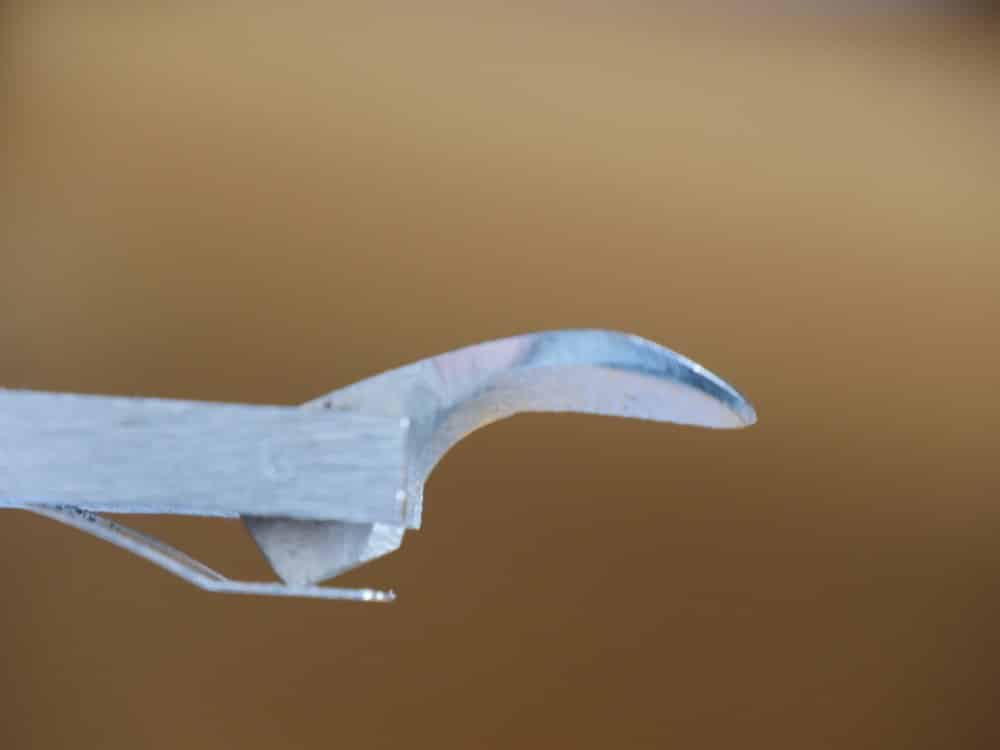
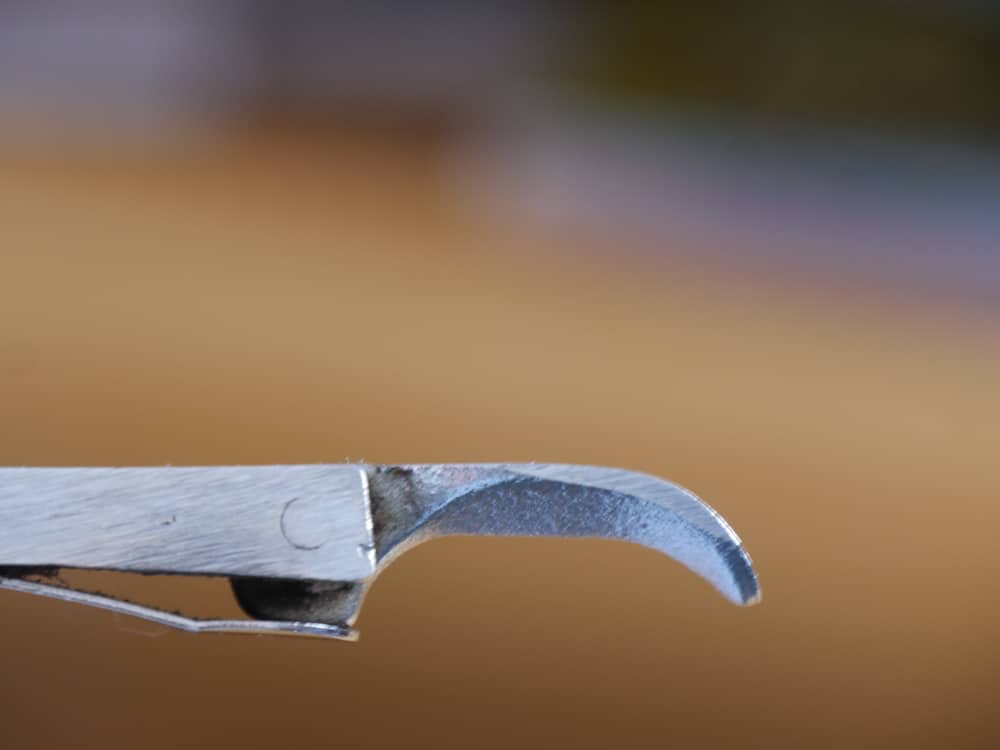
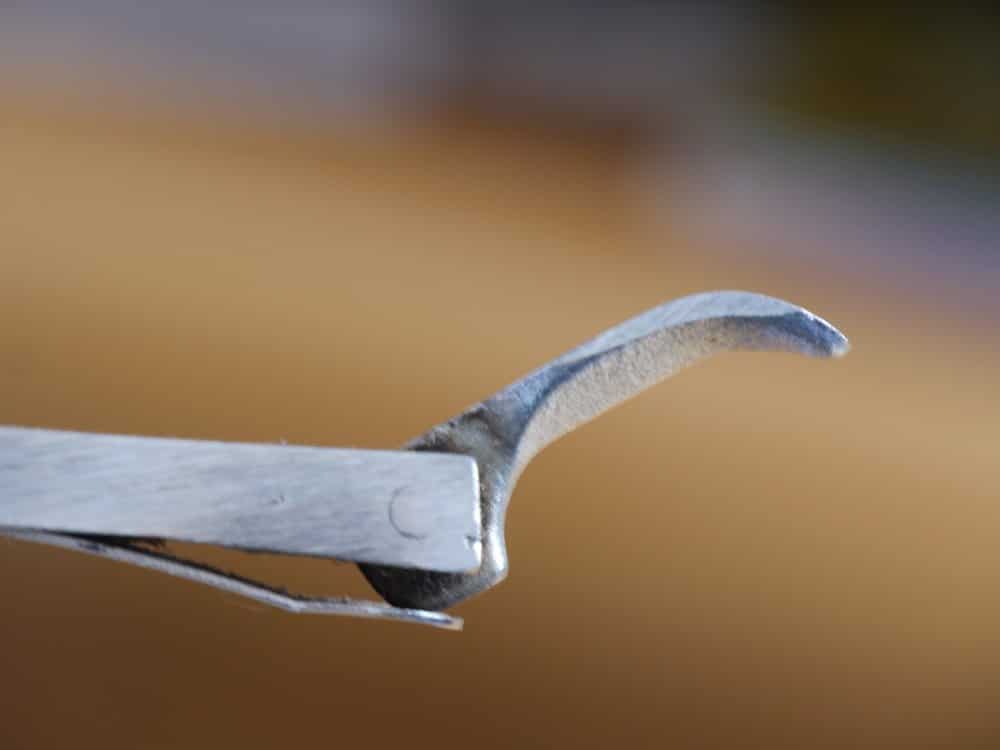
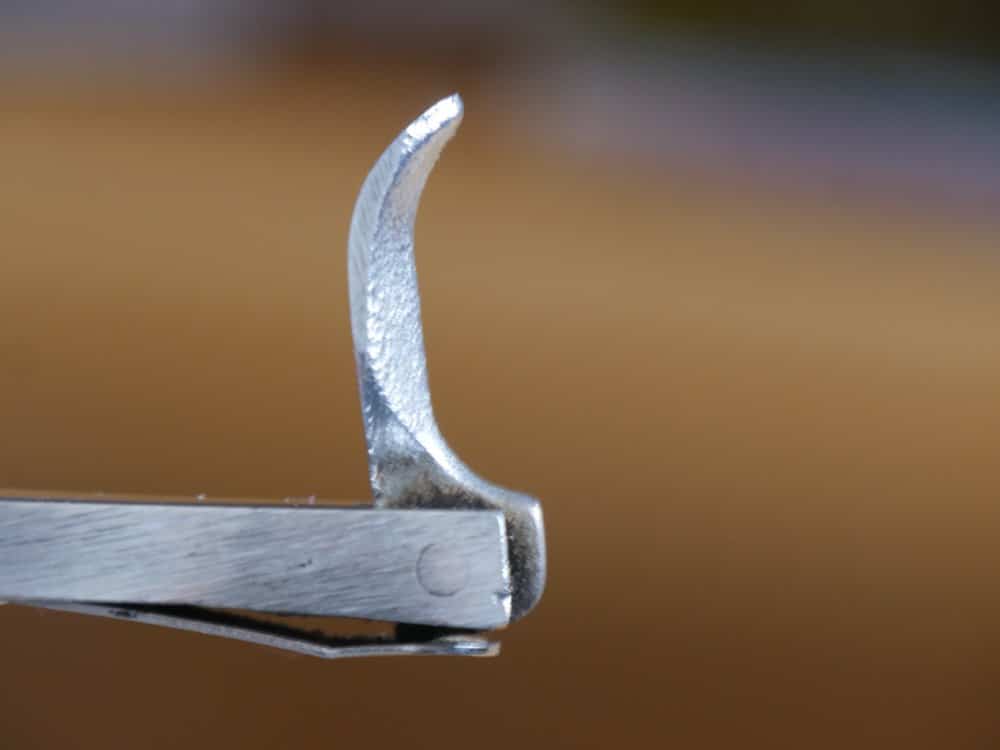
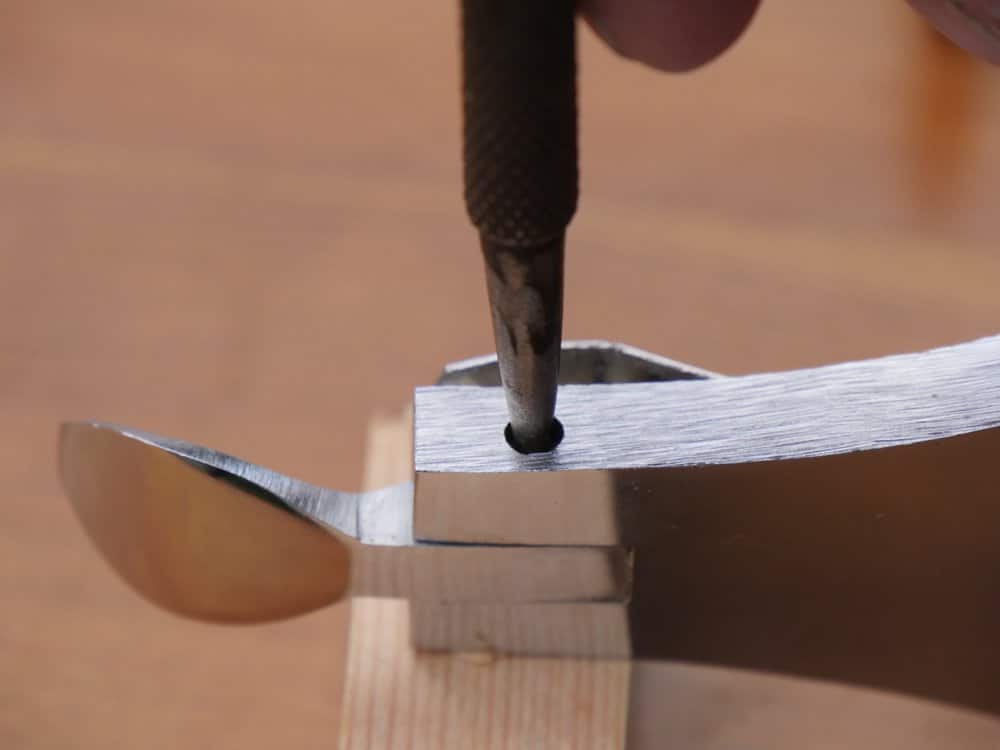
Back to the flaw in the B&Q lever shown in stages of opening above. The lack of creating an elliptical curve increases the distance from the centre pin to what is nearer a more 90° corner. This means that when you set the centre setscrew to adjust the pressure to the lever cam the distance needed is greater than when it makes the full arc to the lock down. With this hard corner creating high ‘knuckle’ point you cannot lock the lever all the way over without further loosening of the setscrew an extra half turn to allow for the added distance. When the full rotation is complete the cutting iron assembly feels somewhat firm but can be moved from side to side on the frog quite easily with the fingers and thumb either side. This then means that the setscrew must be set with a screwdriver ‘after’ the lockdown is complete and this then negates the function and therefor need at all for the lever cam because the convenience is completely negated.
Unfortunately any new woodworker and even seasoned hand tool users would be less current with the workings of the bench plane and feel that it was either a useless plane or a useless them. Neither of which is the case at all. These things happen in organisations like B&Q where things get so big the buyers and store staff get so distanced from the reality of equipment they have no clue of what they should be able to advise on. This is true in the factories too. I actually did not feel this plane was any different than what was produced in the UK Stanley factories over the last half century–poor metalworking standards, assembly line anonymity, unaccountable staff. Stanley does offer a better quality plane these days but what the long-term in-the-field or at-the-bench tests will show will not be apparent for a decade or two as will be the case with this plane too. Now as has been said in previous articles and blogs, we cannot blame the makers altogether because companies give them a price they will buy at and then the workers are forced to work for a minimum wage. These kinds of irresponsible dictates so malign the art and craft of work and workmanship and demoralise people working too.
The staff making the plane can become equally detached from how the plane should ultimately function when completed because that is not technically their job or their area of expertise but one of two things likely happened here. They are so lowly paid and on production that they simply cut out one step that they thought insignificant or they were never trained to shape it correctly in the first place. Personally, for so low a cost plane, I thought that the plane came out pretty well. I think with all of the fettling and such I would have this plane shaving well inside about 15 to 20 minutes, but I haven’t got through everything yet, so when we make the video we will try to do it continuously unless that just doesn’t work or some work is redundant and extends the length without reason.
To resolve this particular issue is simple enough. It is irksome that the work needs reconciling but we’ve been doing that to new Stanleys for half a century and more so what’s the difference? Oh, by the by, I have had to fettle brand new high-end planes from time to time too.


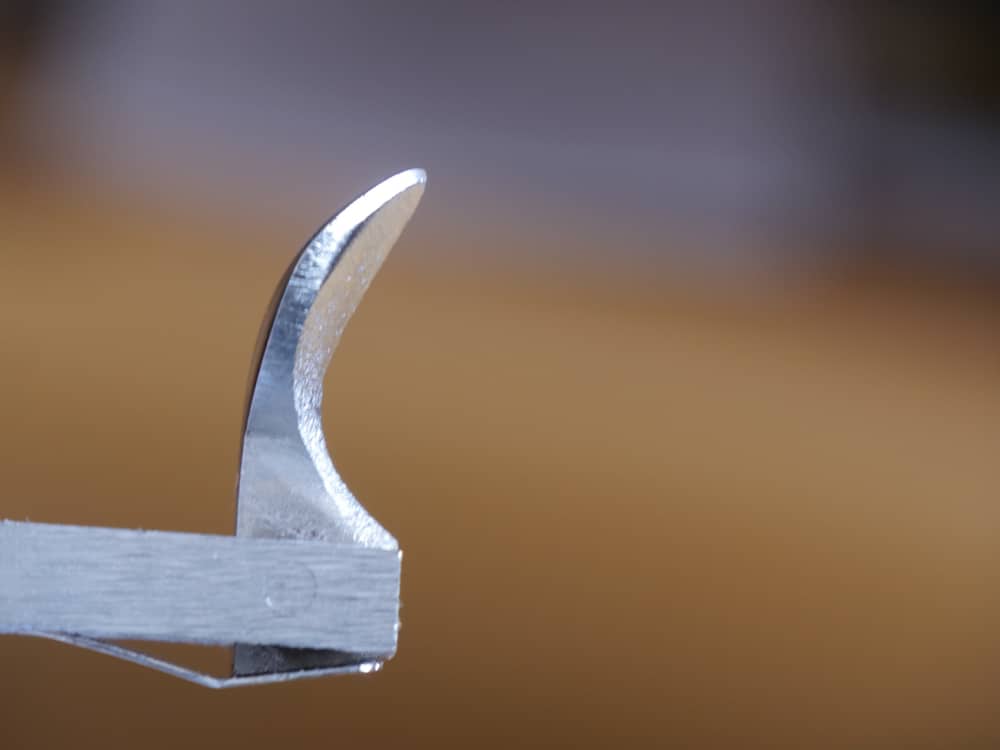
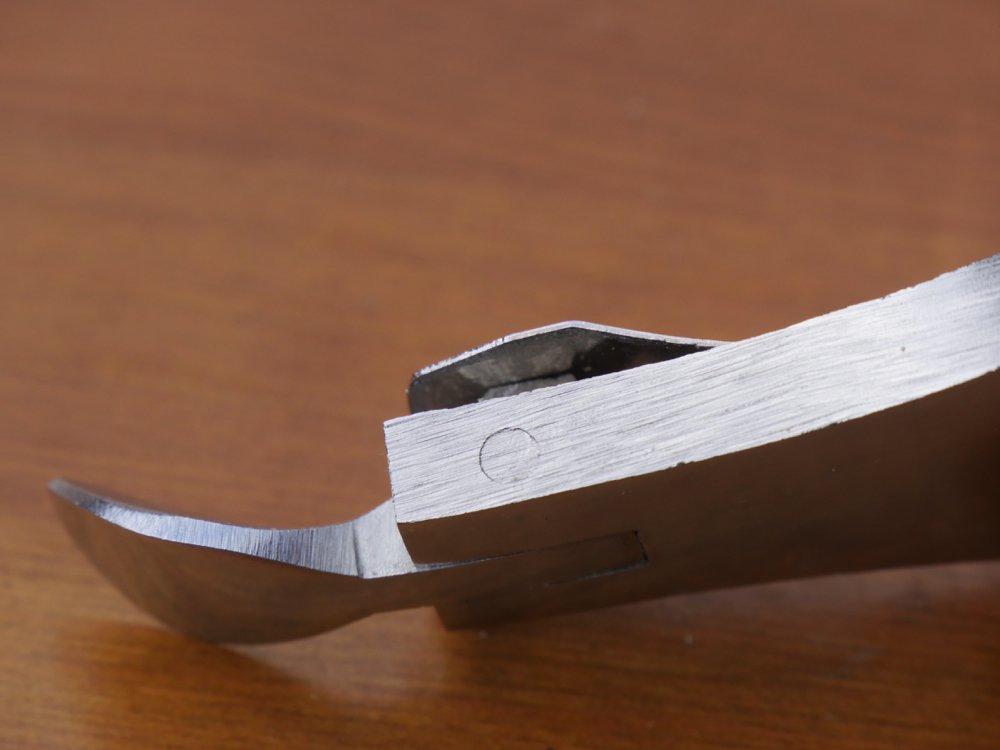
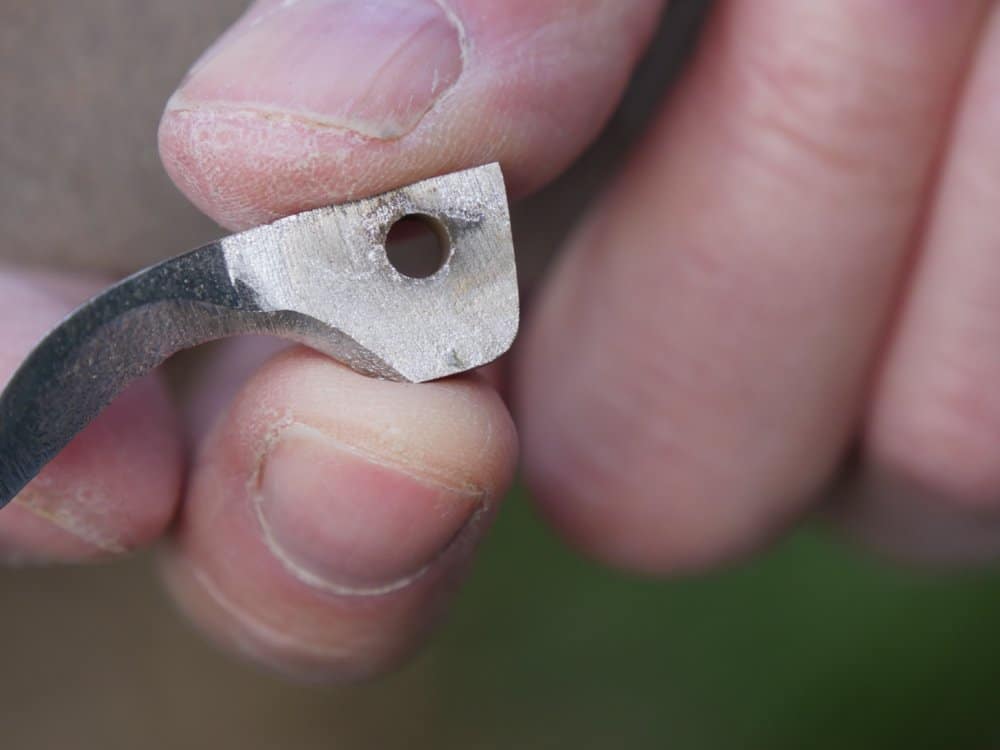
Now I take a flat file to it and remove the hard corner and make certain that the corner is removed sufficiently not to over extend the distance as it did previously. I should point out here that I have had this happen on new Stanley planes where the operator forgot to do this aspect of work.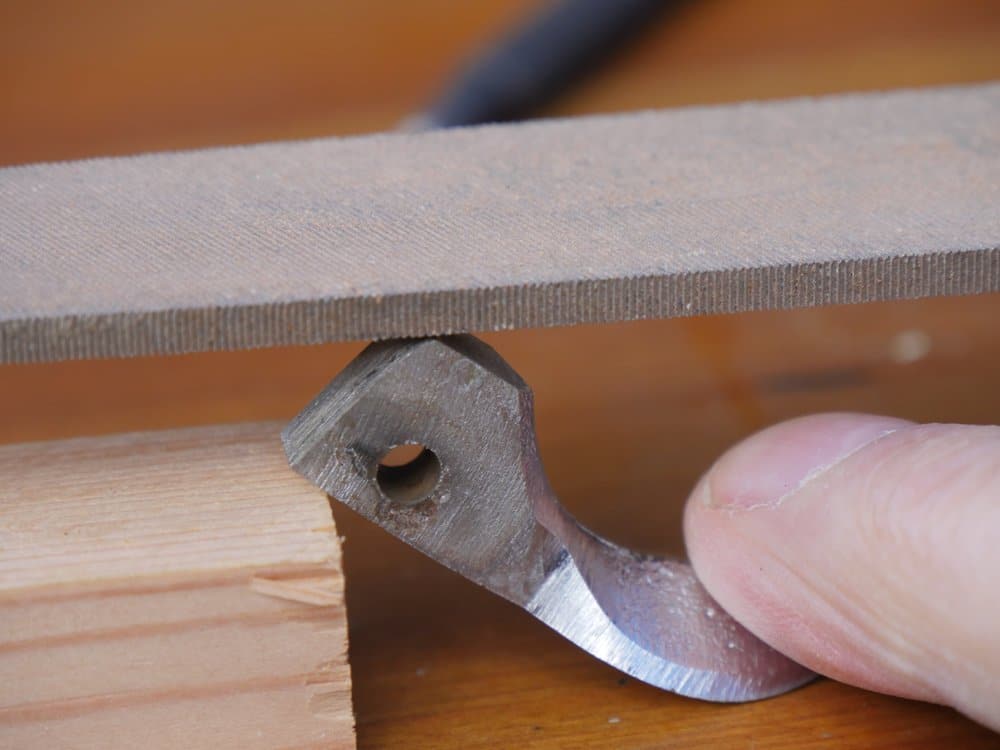
The metal files readily, by the way. It only took 15 strokes with a flat file.
Reinstalling the lever cam is simply a question of insert the lever, locating the pin and tapping it home.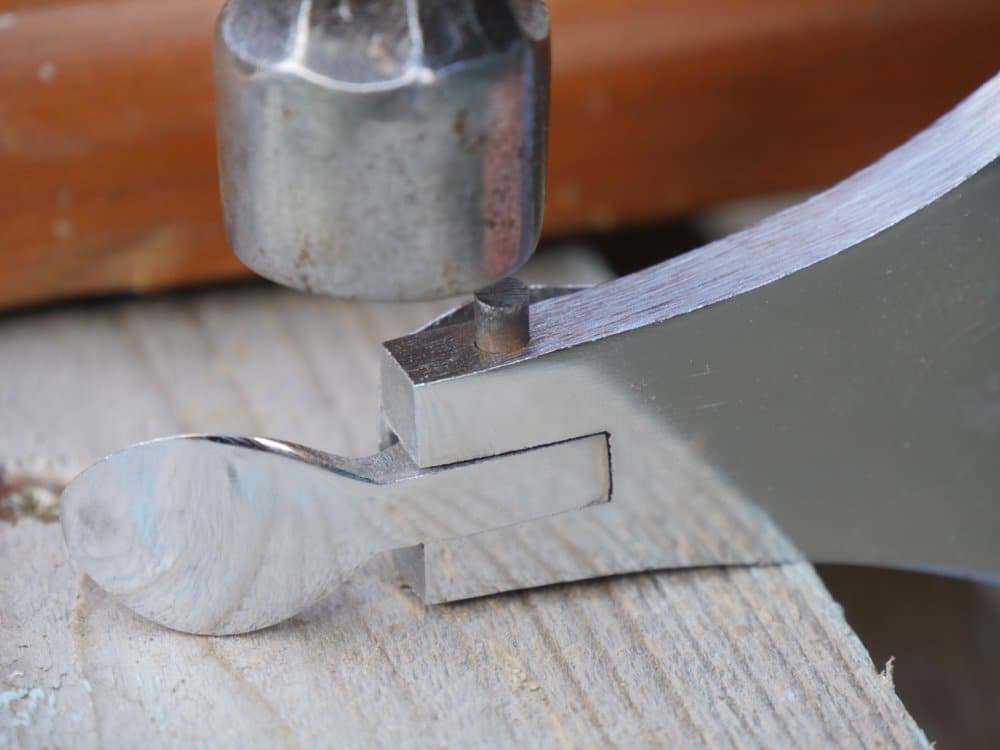
Once this work was done the lever cap worked as well as any I have used.
Excellent! I use and restore/recover older Stanley planes. This is the sort of attention to detail that has made the old Stanleys such a joy to work with. They were made by users for users. Not so much anymore. I doubt the workers assembling these newer planes have any idea how they are used or what the various parts contribute to the overall functionality of the tool.
(One of my latest projects is restoring a No 4 that was found in a bag on a beach south of Boston; a bit more work than your video on Youtube!)
I enjoy your videos on YT and look forward to reading this blog. Glad to see that this knowledge is being saved and passed down, as well as the idea of ‘craftsman’, regardless of vocation.
Tom
Nice detailed explanation and pictures. These are all good things to learn for when any new plane arrives and needs fettling. Thanks Paul.
Excellent analysis and problem solving. I just restored two Stanley #5’s,..one from 1940 war years and one 1910 Patent date. Blade sharpening to come and then interested to see how each performs vs the other. Happy to bring them back into use after eons of neglect.
I have an English 1980’s Stanley #4 (plastic handle, knob and adjustment wheel) that is the worst plane I’ve ever used. Acquired it when I lived and worked in the UK. It’s been needing a long overdue issue fix. I’m sure you’ve seen plenty of them from that era. Burgundy paint color which is still solid but the plastic parts downgrade was such a poor production choice by Stanley. Hopefully you can work some magic with the B&Q planes and get a positive result.
Decline is everywhere,…let’s continue to save as many of the older planes as possible.
Thank you Paul for sharing these types of details. Many “professional” woodworkers would have returned the plane barely opened as it does not meet even the basic requirements out-of-the-box (but most tools seldom do, as you have pointed out on numerous occasions). Being able to “salvage” a low-end tool by tweaking (and re-making) various components and thus making it perform on par with an older quality tool is important. I teach woodworking to disadvantaged youth from our inner city core. They have no hope of being able to afford a quality tool but can refurbish a cheaper Asian model. Learning the skills needed to care for their tools is vital to their overall learning. Thanks again, for taking the mystery out of this craft!!
Paul, you are so awesome!
Again a big thank you. I have this very problem with a No.3 that I have restored and tuned up to that point. Now I can make it work flawlessly! I never ever would have thought about this lever-cam lockdown and that it could be out of sync and that it has to follow a particular curve to work properly.
I have read numerous essays about plane tuning and watched also the DVD from a well known woodworker (unfortunately not Paul’s…) on planes and tuning. But this cam lockdown has nowhere beeing mentioned. And that is so cool with Paul. Never mind how far you go and how much you read and try, he has so much expierience and just never ending knowledge that he shares with us! THANK YOU!
paul is putting a valiant effort into this tool to show the extent you can go to get it to work,
saying that, the time spent on this tool is a lot more than I have spent on any of my ebay old stanley tools ,I can see where MY time is better spent on an old good one ,I know I could get a new one going but now comes the question, how long will it stay tuned,,and at what point do the cost differences merge? will it be worth the $40 dollars I paid for my 1902 stanley in 2130? I am awaiting the future blog after it has a couple schools under its belt,
Hi Paul,
this is really interesting to read.
I have a couple of No4 myself. One ultra cheap, like the ones you are testing here, an Axminster Rider, and an old Record.
In my limited eperience, I find the Rider to be a pretty good plane, costing only a little more than an Ebay plane in good condition. It is not a Bedrock pattern, but looks exactly like the post WW2 Stanleys, weighing only a little bit more (1850g). the finish and make seems good to me. It seems like a quality tool at a decent price point.
Have you tested it? Would it be a good “Old Stanley” replacement if you want to go to a store and buy a new plane?
To me it seems like it, but I don’t have your experience, and I wouldn’t notice all the little details.
Paul
I had to add this comment …..I have sold some lovely old Stanley’s But still have my prized collection of same………..I picked up an “out of fashion” No 5 by Faithful. It works beautifully producing gossamer shavings. BUT IT HAS A CRACKED SOLE FROM MOUTH TO SIDE OF SOLE that is why it was returned to the tool shop!!! So from this I would give a thumbs up for
FAITHFUL
Thank you John
Hello Paul.
Thanks for everything you give us.
How can I differentiate a good old stanley from a newer one if both of them are used? Should I search for date of production on it? If yes, which years are the good years?
All the best,
Rami.
Personally I don’t get bogged down with issues of dating planes simply because of time but more because making what I’ve experienced as a craftsman seems ever more important the older I get.
I would send you to Patrick Leach’s website for primary information as he is one of the originals that didn’t copy others to promote himself but researched himself and came up with his own stuff even before or on the cusp of internet information. Then you can see which strands of the web spin off from there that you might want to follow up on.
Nice work!
Amazing work Paul – as usual.
I couldn’t help but notice in the first picture the depth adjusting lever seems to press on the lever cap thin spring after locating through the cap iron slot. Wouldn’t this effect the cutting edge protruding when fully retracted.
Also I’m curious if the cutting iron was replaceable or interchangeable with a stanley iron. I find it an advantage to have a second iron sharp and ready for use.
I use a an old red Marples M4 and an old Record #5 but the new Stanley iron is almost too long for the Marples M4 while the Record iron does not adjust well in the Marples plane. So I concluded irons may not be readily interchangeable.
BTW I managed to bring the two planes back to life with your videos, 🙂
Thank you for all you do – anyone who goes to this effort to bring woodworking to everyday life means more than you realise.
Regards,
John Meaney
I did not experience any difference between the plane I bought and the Stanley and Record models. Also, I put in a Stanley iron and it worked just fine too.
Thanks Master Paul
My Stanley Handyman does not have the thin spring plate, what could be the consequences of that being missing? I have some issues with it being off to the right, I have to set the chipbreaker offset from the blade to be able to get parallel with the sole. I tried flattening the frog but the depth adjuster is in the way and Im afraid i will break some part if i remove the split that holds it in. I only have this plane that I like (a bad plane is better than an awful plane, ish…) would really hate to break it beyond repair.
Its sprung, so when you open the cam it keeps it open ready for reinstalling. It also lowers friction directly on the blade as the blade is locked in place here the thin plate serves as a barrier between the two and prevents the cam from moving the iron in lockdown. The plane will work fine without it.
Paul,
I live in Florida and I thought that these Planes that you buy at say Lowes, Home Depot were made for the one time buyer and say the weekend warrior that just wanted to try something just for the sake of , Well mostly his honey dues.
So my thinking in the past has always been that the manufacturers are not even trying to make a plane that works properly. I thought their thinking was that there just making the plane so someone who goes to one of these outlets and has something that he/she could spend there hard earned money on so they can make a profit both the home store and the company that makes the product.. Just for a one time deal. I never thought that these type companies had any intention of this customer ever coming back to buy another one.
Also, and I mean this in a positive way not a negative one what so ever,
But you have 50 + years experience. No way a weekend warrior will ever know how to fettle a a handplane. And I’m speaking for myself when I say this. If I had gone in to one of these stores in the past prior to ever knowing anything about woodworking and purchased one of these type of tools I would maybe try to use it once and then the next time I saw it , It would be going to the garbage can.
So with that line of thinking I always have thought that these manufactures know exactly what they are doing and its on purpose that they make them the way they do….
Just reading these three or four blogs that you just put out has taught me allot about planes that I wasn’t even aware of and I almost own every plane that LN and stanley made and makes with the exception of the older stanley specialty planes. So the blog is useful without doubt but am I wrong for thinking the way I do about these less expensive planes that you can pick up from these home improvement stores. Are they not designed exactly they way they are intended to be? Im asking not making a statement . Just curious.
Thanks Chris
When bench planes were made in the past the castings were left untouched for a year and more to naturally stress relieve before further milling and refinement was done. Bit like seasoning wood, I suppose. More modern and perhaps less time-tolerant ways have been established working with temperature extremes to relieve stresses that occur during the pouring/cooling period and this has led to more stable plane bodies all round. The reality is that without this cure time or stress relieving, subsequent machining alters the shape of the material being worked. The claims many makers make today are really just standard engineering processes. It would be a bit like me saying before each furniture piece is made I use a stress-relieving process to condition my wood. This unique processing of the wood ensures that any further movement occurring in the wood is minimised and thus prevents distortion in the finished piece. The process I am talking about of course is plain seasoning or plain kiln drying. Nothing more and nothing less. In woodworking timber suppliers now say that kiln dried wood is superior to non kiln dried wood. That’s not true at all. But no one today could possibly stock wood for natural seasoning and compete with other producers so everyone pretty much uses forced drying these days. When you state it that way though, the suggestion is that the non kiln dried wood is unconditioned when in reality it may well simply be left for a few years to air dry in a warm loft area. In this case the wood would indeed be superior to any kiln dried wood because two things occur at the same time and not just one. In the air dried wood we have both seasoned the wood and dried the wood. In the kiln-dried process the wood is only dried. Some companies use a hybrid method that works well and that is to air-dry and then kiln dry. Often, when kiln dried wood has been more forced through the drying process the wood has tension left throughout the fibres. You can see this especially when you push wood into a machine and the wood closes in or opens out from the cut line. The better the wood producer the more time they allow for drying down and the less stress you get in your wood. Most producers are aware of this and do not ram the wood through the process until you come to building lumber, which is why when they take the bands off the wood the wood crawls across the floor for half a day.
Paul (or other experienced people),
I have a Stanley 4, 5, and a 5 1/4. I’m thinking of converting the 5 1/4 to a scrub plane. (By ‘convert’ I mean sharpen, adjust and possibly file the throat a bit.) Is this a good idea or would it be a bit too long for that? I also have my eye on a reasonably priced Sargent 3411 on eBay that already looks a bit wide in the throat owing to wear – would that be a better choice? Thanks in advance for everything you can contribute!
Gentlemen, pls check the part VI link. It seems to be broken. Thks.
Correcting: Part IV link.
Thanks a lot for this hint! I got a similar plane and it works fine (thanks to you again, I watched most or all of your videos about planes), except for securing the blade. Once I changed it according to your instructions, I can partially lock down the lever cap, fine tune the blade position and then clock it down without moving it at all.
At the same time, I tried to fix another problem: The lever cap moves back, while I am planing, no matter, how much I tighten the screw. So I roughened the area under the screw head. I haven’t tried it out yet, but I cannot move the lever cap once locked down, I could before. And the screw is set to a moderate tightness, even less than before, which I can tell by the resistance of the depth adjustment wheel.