Sharpening Your First Crosscut Saw-PartII
For more information on saws, see our beginner site Common Woodworking.
Let Sharpening Commence
Firstly, let’s assume the saw is just dull but already established as a crosscut saw. My previous blog here shows you what to look for to differentiate between the two in both western and Asian saws. Of course we should assume that the saw is sharpenable and not one of the hard-point versions extolled by the carpenters of our age who generally know very little about hand tools any more. If we do assume that the saw is just dull we can then focus on simply sharpening and not taking care of flaws that necessitate reshaping teeth from rip to crosscut and we also know the teeth can be cut with sawmills too.
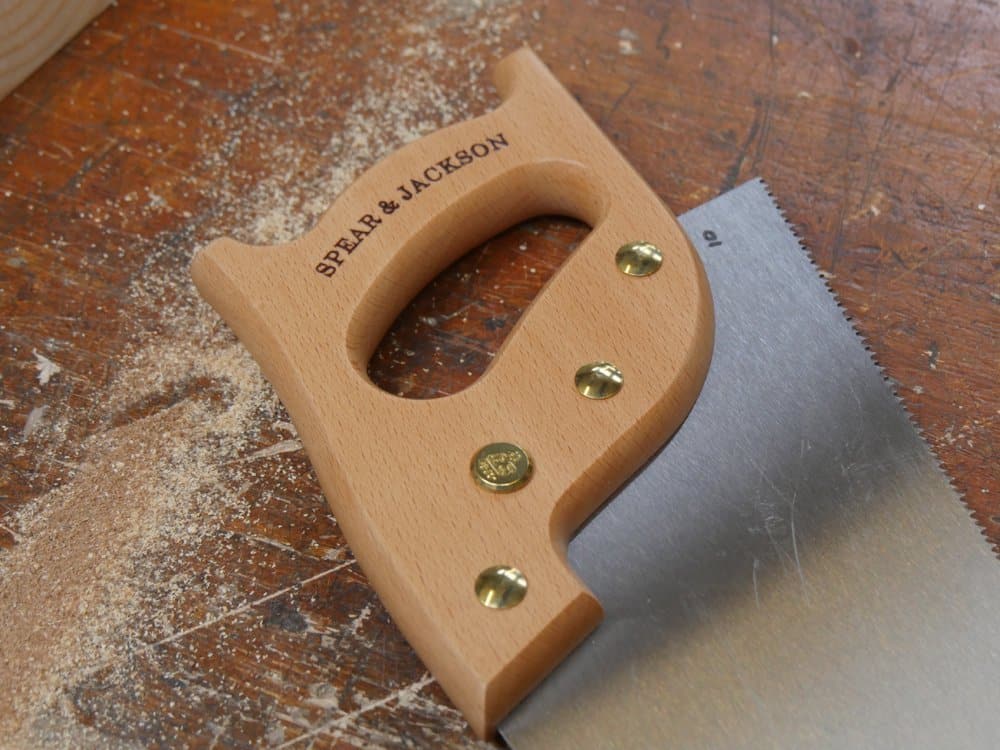
It is important to understand that unless you know what to feel for a saw can feel sharp but not cut too well at all. The S&J is not a sharp saw from the packet but it is a great saw to sharpen and then to practice on for the first go and it makes a decent saw when you are done too. Also, you should know that many (and that means about 99.98%) advertisers selling saws via eBay or elsewhere more than likely know nothing about saws and are indeed selling them because the saw they are selling lost its edge to a point (or lack of it) that it no longer cuts at all well. They will also sell most saws as crosscuts even though it is more likely to be a ripcut saw if it is not a hard point. Of course if it is sold as a crosscut in theory you can return it, but usually they will get around this by stating “the photographs form part of the description.” So let’s also assume a step further that the teeth are not badly out of shape, really rounded over or very mis-sized and so on. This means the saw is ready for just sharpening with no additional complexities. I mean, like you bought a saw new a few weeks ago and now it is not Cutting’s as well as it did when you bought it.
You will need the right sized file for the saw teeth you are filing. The flat faces of the saw file need to be a little more than twice the height of the tooth. That way, as you rotate the file for a fresh face, the file teeth will be worn more equally throughout the life of the file. Files do wear out through use, but a good file will sharpen many saws. It’s not possible to say how many saws a saw file should sharpen because saw tooth hardness is so variable between saws and also between makers. Then, again, file hardness and brittleness varies that way too. For a rip or crosscut 7 PPI saw you will use a 6” extra slim tapered file. Currently, a good saw file make with proven quality for me has been the Bahco range of saw files. This can change as has happened to makers who exported their manufacture to other countries. We take one day at a time with the exalted world of global manufacturing. The standards of western manufacture constantly decline when it comes to quality and honour. If anything reinvents itself it’s national pride.
So, now you have a bought your file and made your saw holder, which can just be two appropriately sized battens of wood, you are ready to start sharpening. One thing strikes me from my experience teaching this task and that is people tend to be aggressively forceful and rock solid rigid. With this impression governing you you will almost certainly lose sensitivity and the flexibility you need to perform saw sharpening to a quality level. You are not a machine and you shouldn’t try to act like one. It’s not a question of ‘bulldogging’ the file to the plate but presenting it carefully and firmly and following through with as precise a stroke as you can muster. I like to work within my rhythm, which is not your rhythm. 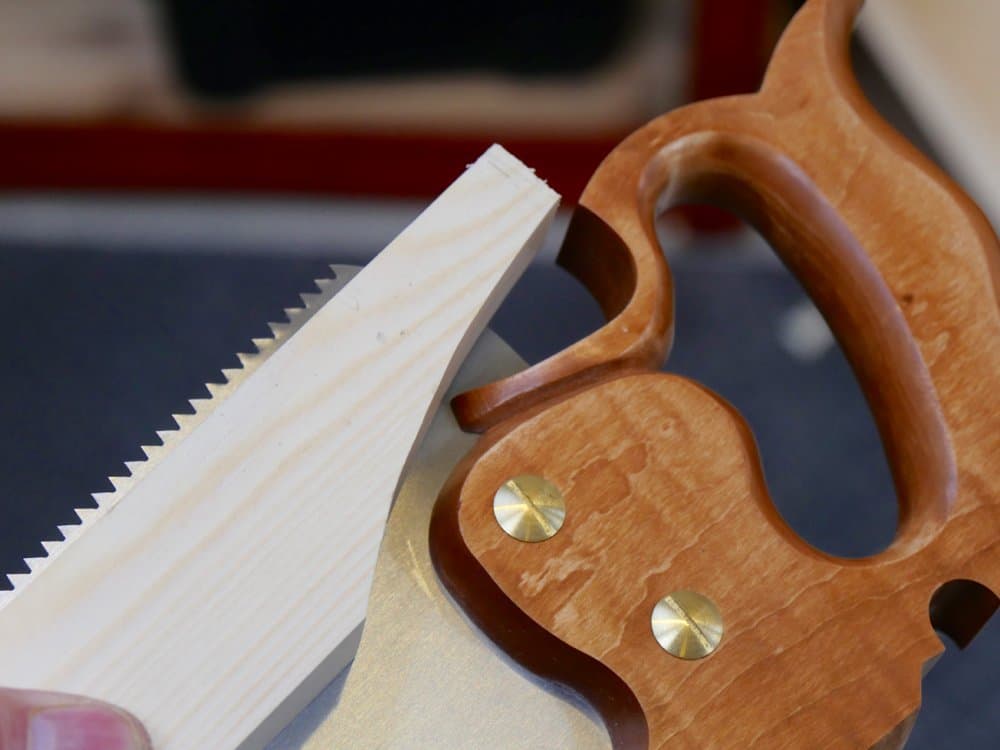

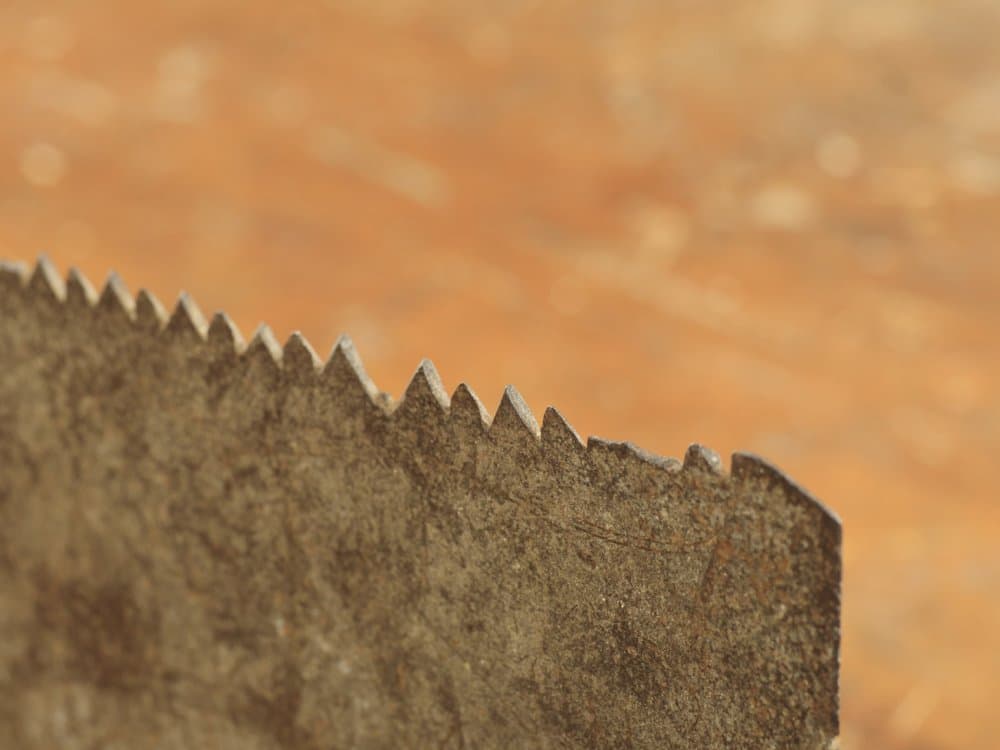
Because the saw is relatively new or even new, the gullet is fully formed and the angles forming the fleam are exact. Because this is the case you can place the file in the gullet and move the file from side to side to feel for its total registration in the gullet. What this action is doing is aligning the file for the optimum cut engaging both facets of the two adjacent teeth. It is giving you the angle of the teeth facets to the long axis of the plate also and then it is showing you one more important factor, which is the orientation of the file along the files long axis which sets the pitch or rake of the saw teeth both from and back. Because westerns saws cut on the push stroke the back of the tooth is unimportant but it is governed by the shape of the file. It’s the front rake of the tooth that is important to our work. The more we rotate the file toward the toe (tip) of the saw, that’s the top facet of the file tiled toward the toe, the more aggressive the cut will be. As I said, with a new saw the angles are set by the existing gullet. After you have sharpened this saw a dozen times you will start to feel truly confident and even consider changing the angles for more or less aggressive cuts that suit you and suit your type of work.
A saying that my teacher taught me was that “we are sharpening the back of the tooth that’s leaning away from us.” Whichever side of the pate you are working from you will point the saw file toward the handle but at the 65-degree angle. When we sharpen crosscut saw teeth we look for the set of the teeth to see which of the teeth are leaning away from us. It’s this single fact that tells us where to place the saw file. If the saw in the vise has the handle to the right and we begin sharpening we must place the file into the gullet, rotate it to match the 65-degree angle and then roll it into set it fully into the gullet. With the file set take a light pass forward followed by a second in the same gullet. Now skip a tooth gullet and do the same to the next. look at the gullet to see if indeed you did file both surfaces and that the file strokes were even and precise. That’s the goal. You must also ensure that the weight of the stroke and the length of the stroke are consistent. If not then the teeth will be uneven in height. It’s just a matter of being sensitive. Work along the saw length until concluded and then turn the saw end for end and do the same but to the opposite teeth. This means altering the angle to an exact counter 65-degrees and again pointing the tip of the saw file toward the handle. Follow through exactly as before and work toward the opposite end. Though I have said work toward the handle, you can in fact work from the opposite end. It makes no difference though you may end up with a preference.
I teach people to use a reference card with angles of 65-degrees marked on the card. You can also use a piece of wood or marks on the holder to guide you too. If you do drift slightly it will make little difference if any to the sharpness or functionality. Just correct yourself for consistency. It is not necessary to go back over the teeth as this will cause uneven teeth. The saw will cut just fine.
Friendly footnote: Mentioning this saw isn’t an invitation to post suppliers via Amazon or eBay. I know that it’s helpful, but people know how to Google it for themselves and keeping my website clean is nice. I generally avoid this myself as much as possible these days.
You never cease to amaze me on the time and effort you take to teach people so many aspects of woodworking that other teachers refuse to do without a price tag. Dont get me wrong I’m not knocking them for earning a living but what I’m trying to say is that you go above and beyond the call of duty which in eyes makes you an honourable man and someone I look up to and aspire to follow in your foot steps. Thank you Paul you are a great role model.
Sawmills?…..perhaps saw files….
As an old machinist, l have had experienced wit saw grinders for hacksaw blades 500 PCs at a time.
Back to the blog
Corrected, thanks Paul.
A freind’s father is a retired carpenter, he was mentioning his dad’s old tools and saws, and was mentioning that no one sharpened saws the way his dad used to. I told him i did, and talked about this community, and got an invitation to go see his dad’s tools tool shop ( he’s been retired for about 10 years now.) thank you Paul for creating a space for us to learn and share. I wonder how many hidden garages and tool sheds are still full of hand tools yet to be (hopefully) restored and put back to use.
I own 2 of those new Spear and Jackson saws and I recommend them too.
A short touch up and they cut like a dream. I filed one to ripcut to have one every task.
Thank you, Paul, for your incredible generosity in sharing all this information, and for your eminently clear and sensible explanations.
One sentence sticks out: “it is showing you one more important factor, which is theorisation of the file along the files long axis”. Perhaps you meant “the orientation” instead of “theorisation”?
Brillant as usual…experience learnt advises. I’m in pain now because e re-cut my teeth from zero and they present have a rip cut shape…is there any trick to start fleam configuration? I’m afraid to doing something wrong..
Great addition to the videos, thanks Paul!
Could you make a comment about the process of setting crosscut teeth? Is it identical to a rip set? Do you take out some of the set as you do with rip saws? I’m wondering if the fleam direction has anything to do with the direction of set. Thanks!
If you watch the YouTube video I show taking the set out. Saw setting is the same as rip teeth. The teeth are always set with the flat face of the teeth pressed out so that the bevels are on the inside of the channel the saw creates.
I missed that one, thanks Paul!
Always appreciate your involvement and replies with your awesome videos!
Like so many others Paul I’ve benefitted from your sage advice and am wondering if I can do something to repay your generosity. I’ve written an e-book (on walking) which I think might interest you as it shares the same mindset of “being sensitive” and not “bulldogging”. I’m assuming you won’t post this comment on the site (I’d rather you didn’t) but even so I’ll post no more details here as I don’t want you to think I’m using your blogsite for personal publicity. I have a new, expanded edition which isn’t up on Amazon yet but I’d love to send you it as an email attachment. (It’s not enormous — only 21,000 words). Just let me know if you’re interested and I’ll send it to any email address you nominate.
One feature of old rip saws ( the original design intention ) I noticed in the ads is the much greater blade depth just under the handle. Cross cuts just emerge about half an inch from the handle. A very common fault with old blades is rust. I don`t know the ideal way to store a file but fine dust will attract moisture and rust .Keeping them low down near the floor in cold air will create rust too. But apart from a nice cupboard ,what material is best if you use for some kind of sleeve ? I think cardboard as they arrive in the post is not a good material longterm . And maybe vertical is better than horizontal (?).
Part 2 . My Dad`s old Canadian Disston Ripsaw cuts very well but I find the top horn gets in the way . I bought an old Tyzack saw and the angle of the curved palm contact is tilted forwards about ten degrees more than the Disston . I love the feel of that saw which is very similar to a Spear and Jackson . Why do they have a difference like that ?
A similar handle angle to the Tyzack is the Sandvik . Holding these saws there is a straight line from the elbow along the arm and the blade . The Disston slopes downhill .