Installing My Under-Bench Shelf
Adding a main shelf underneath my bench is a questionable addition except this time I am going to take control of it. Over the years it proved useful more as a catchall for stuff that just does not fit elsewhere rather than an organised system of storage. It did hold my electric grinder, my metal vise, wet and dry abrasive paper and stuff like that too, but all that didn’t have a slot ended up there. Technically, I don’t use these as much as others might but when I have a metal working project I am always glad I have them close to hand.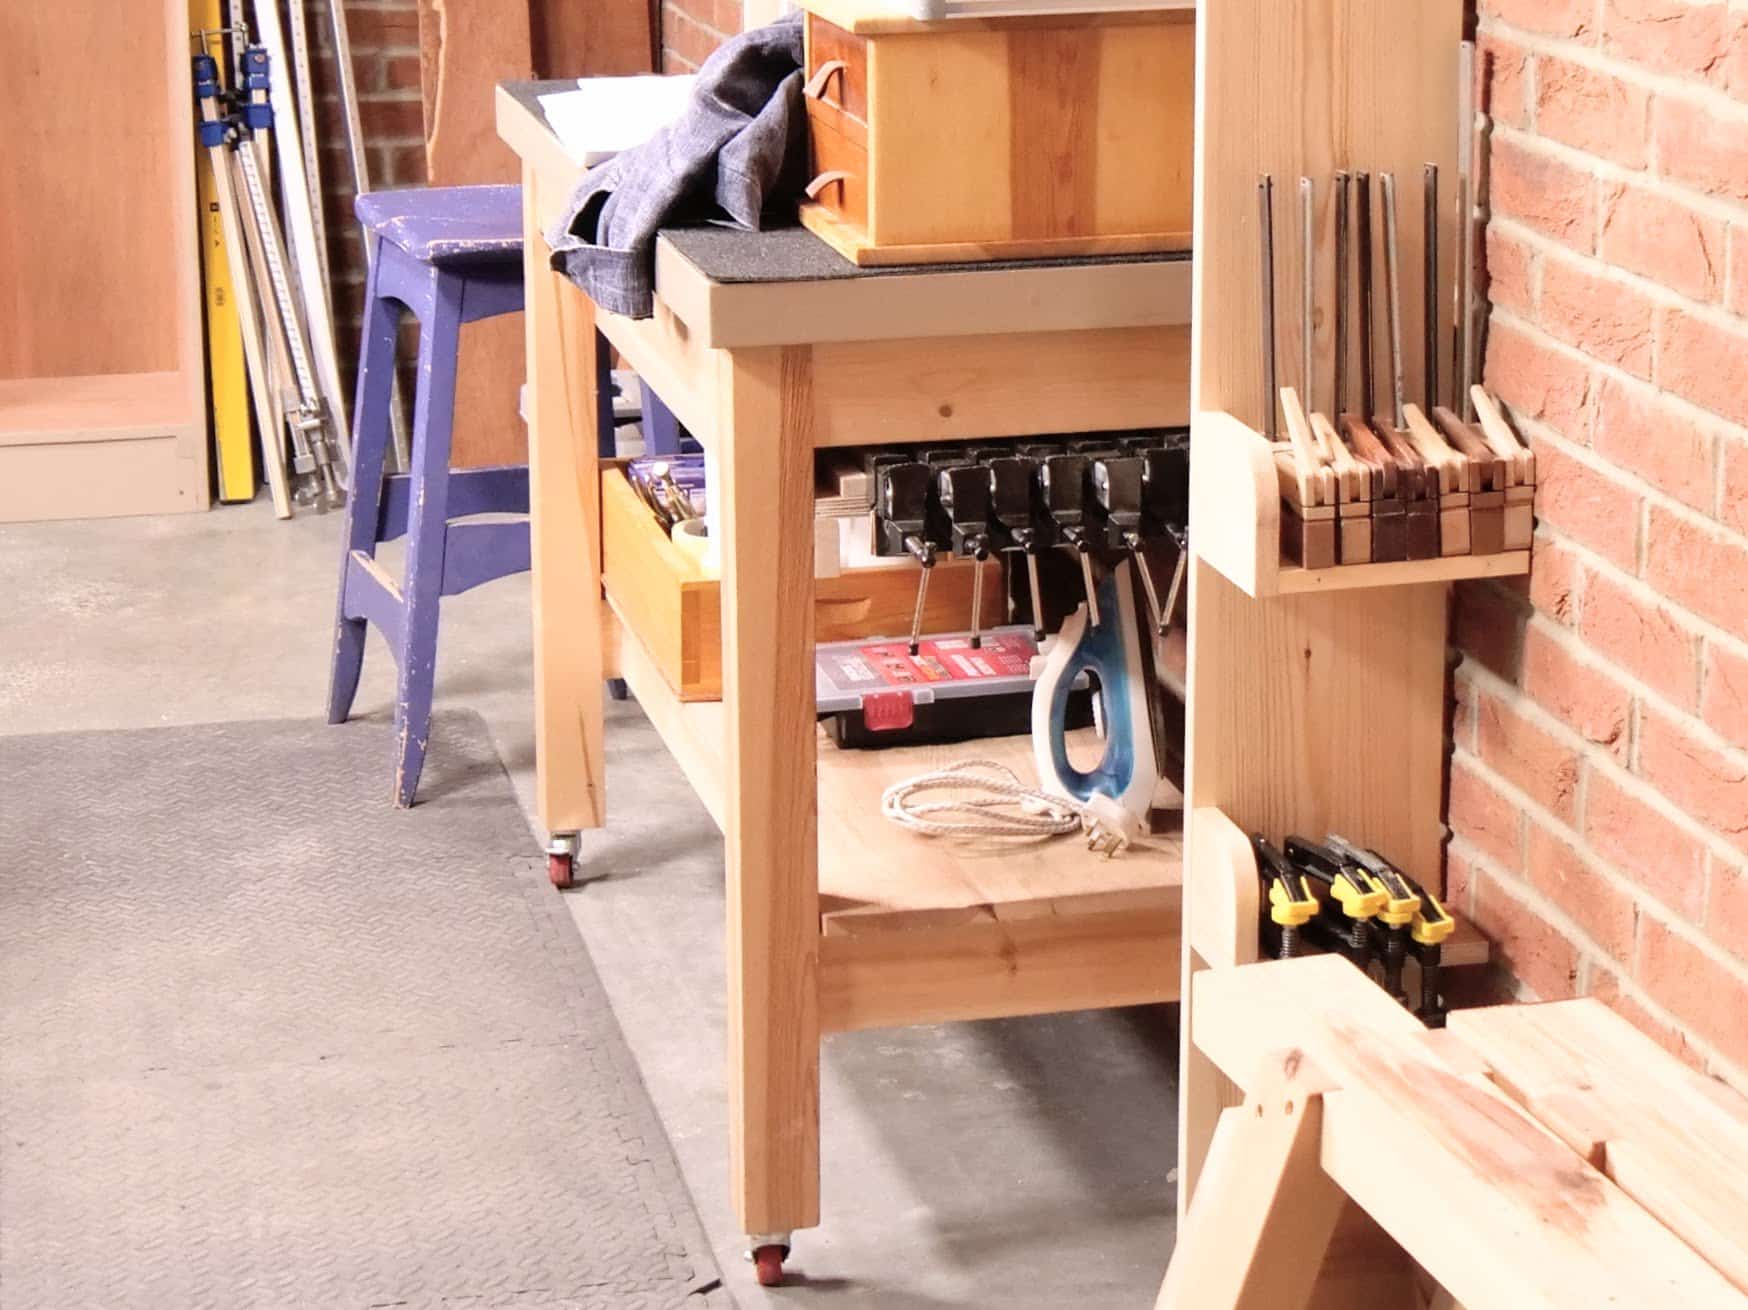
The moving work surface behind me was something I made for the woodworking school a few years back. To stack project wood on mostly. I made two of them and they became ever more useful to me even outside of class time. I find them handy for what they give me because they can be swung in at anytime to support my work and working. The one behind me is already installed and working great for what I need. I can take it completely out or move it along left or right if I need saw horses setting up to rip sheets or boards if I need to. I have room for the second one either side at the end of my workbench and I am thinking of doing just that and installing the vise and the grinder on there. That frees up the underside of my workbench for the shelf and I can use that then for stowing wood from a project, tools, equipment or whatever.
I have fitted many such shelves with all of the benches I have made so my favourite method is the one I am showing you here. Plywood is stable and strong and easy enough to cut and fit. I like to cover the edges so you can’t see the ply edges.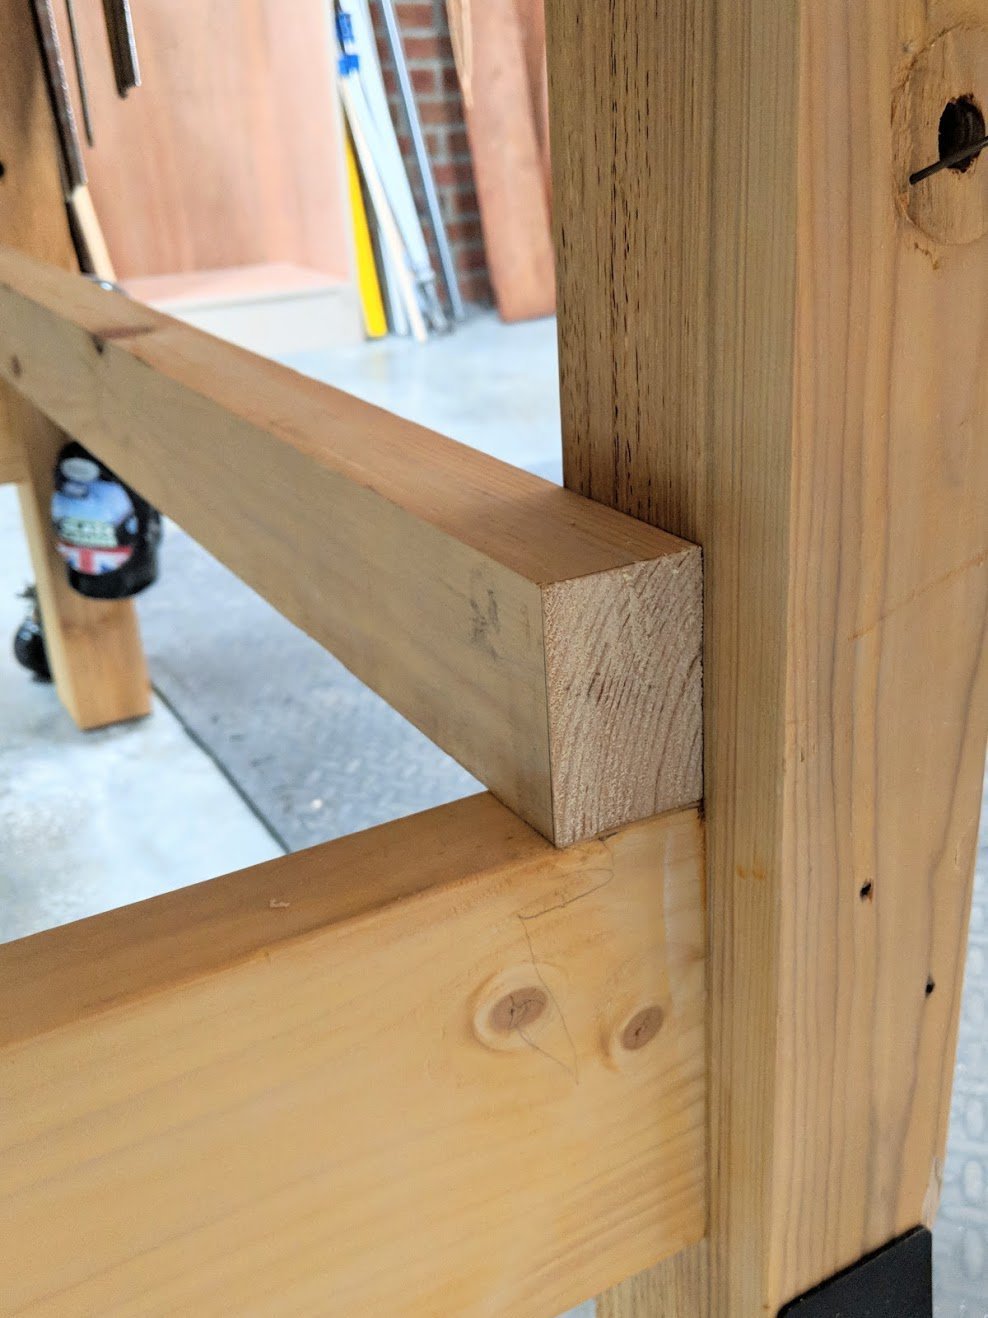
My wood size is 1 3/4″ (44mm) by 2 3/4″ (68mm) softwood but you can use other sized wood. Firstly I cut my wood to length using the outside of the cross rails to mark the distance. This is not the final length. I will cut the final length after some other work yet to be done.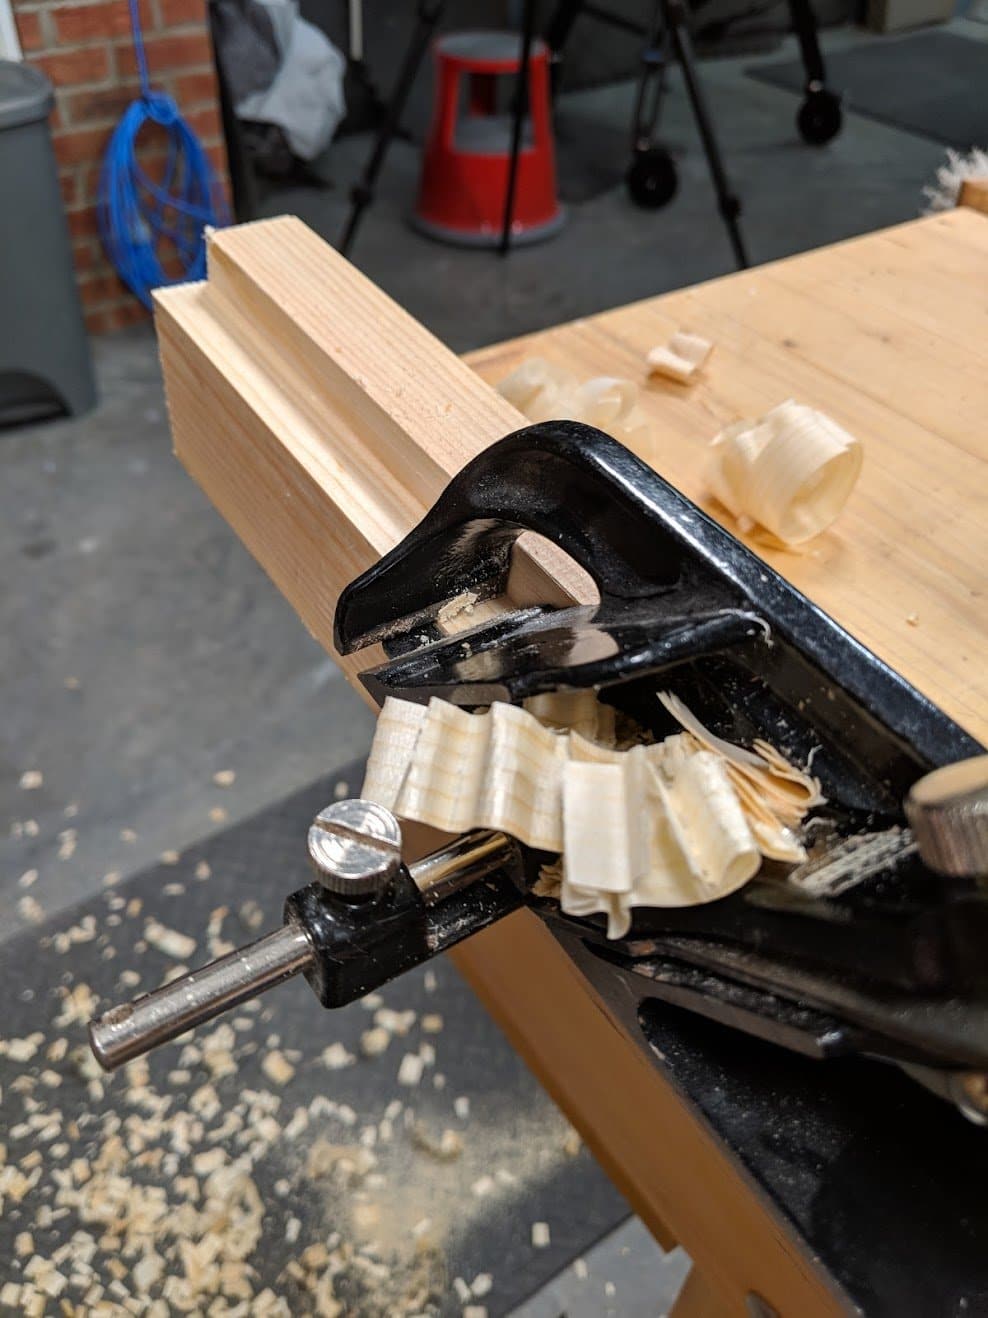
I rebated the lengths with a #78 Stanley to form a 3/4″ (19mm) by 3/4″ (19mm) rebate. This forms the step down for the plywood and gives it good and sufficient support.
With the rebates formed I place the length on the two cross rails of my workbench to mark the internal shoulder lines directly from the legs.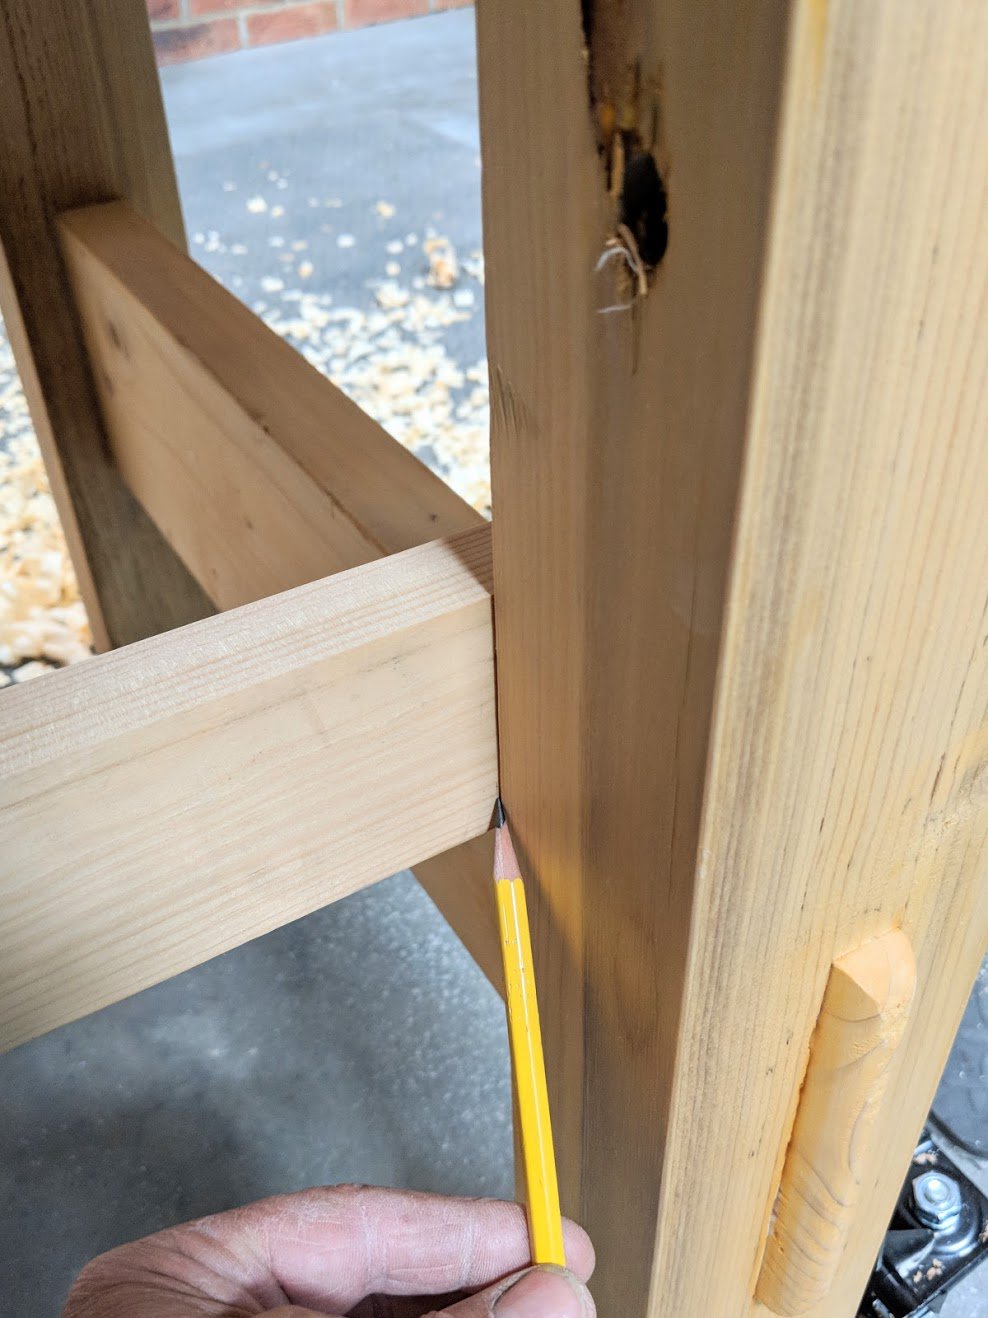
Using a marking gauge I run a gauge line from the rebate onto the end grain and around onto the other opposite edge.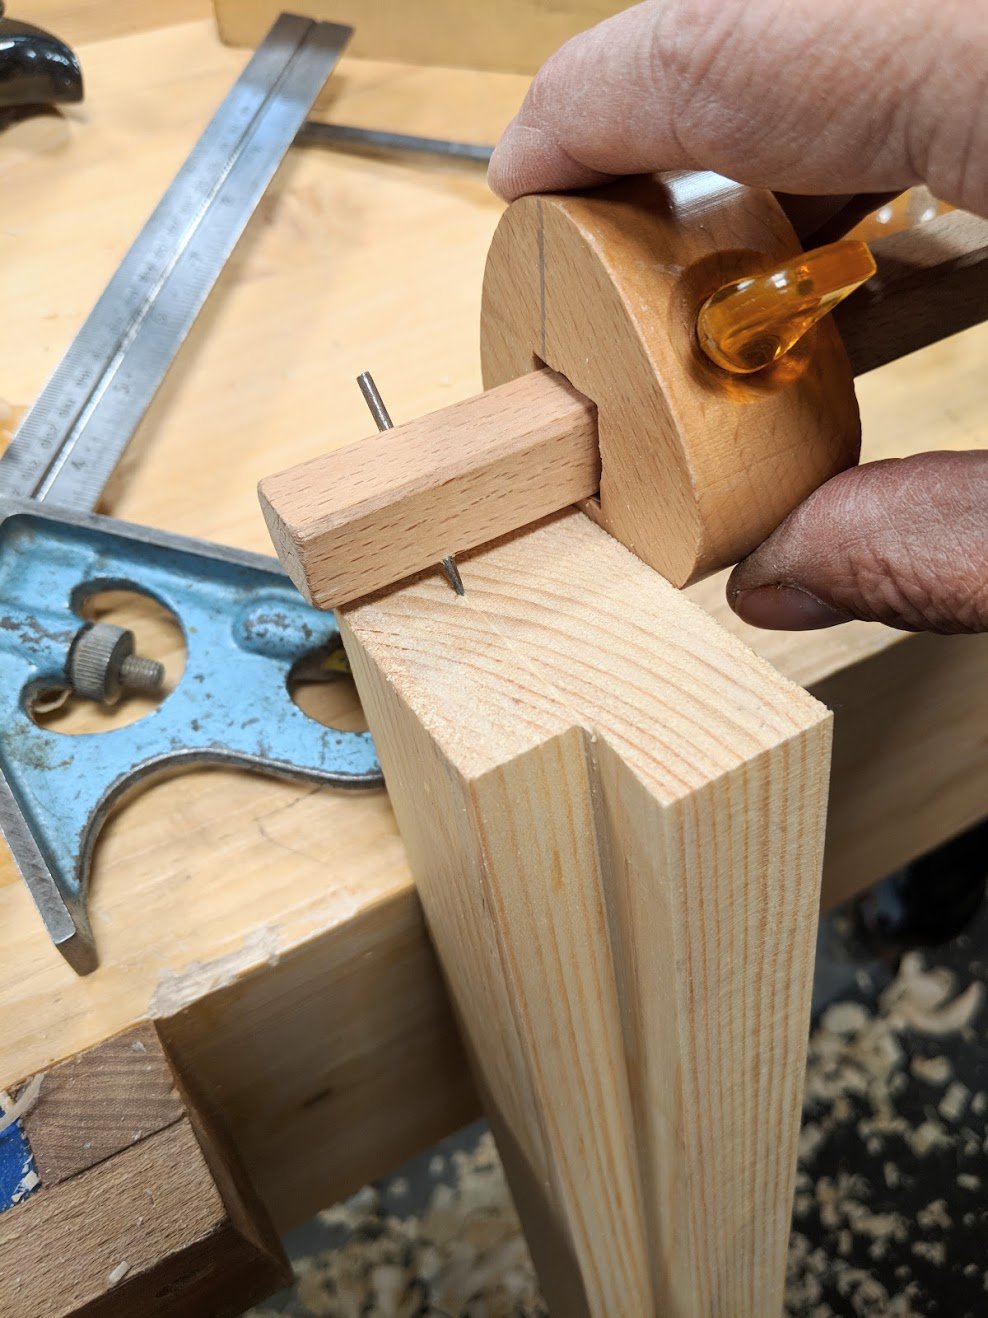
I used a knifewall to define the cut line…
… followed by a crosscut to develop the shoulder with my tenon saw.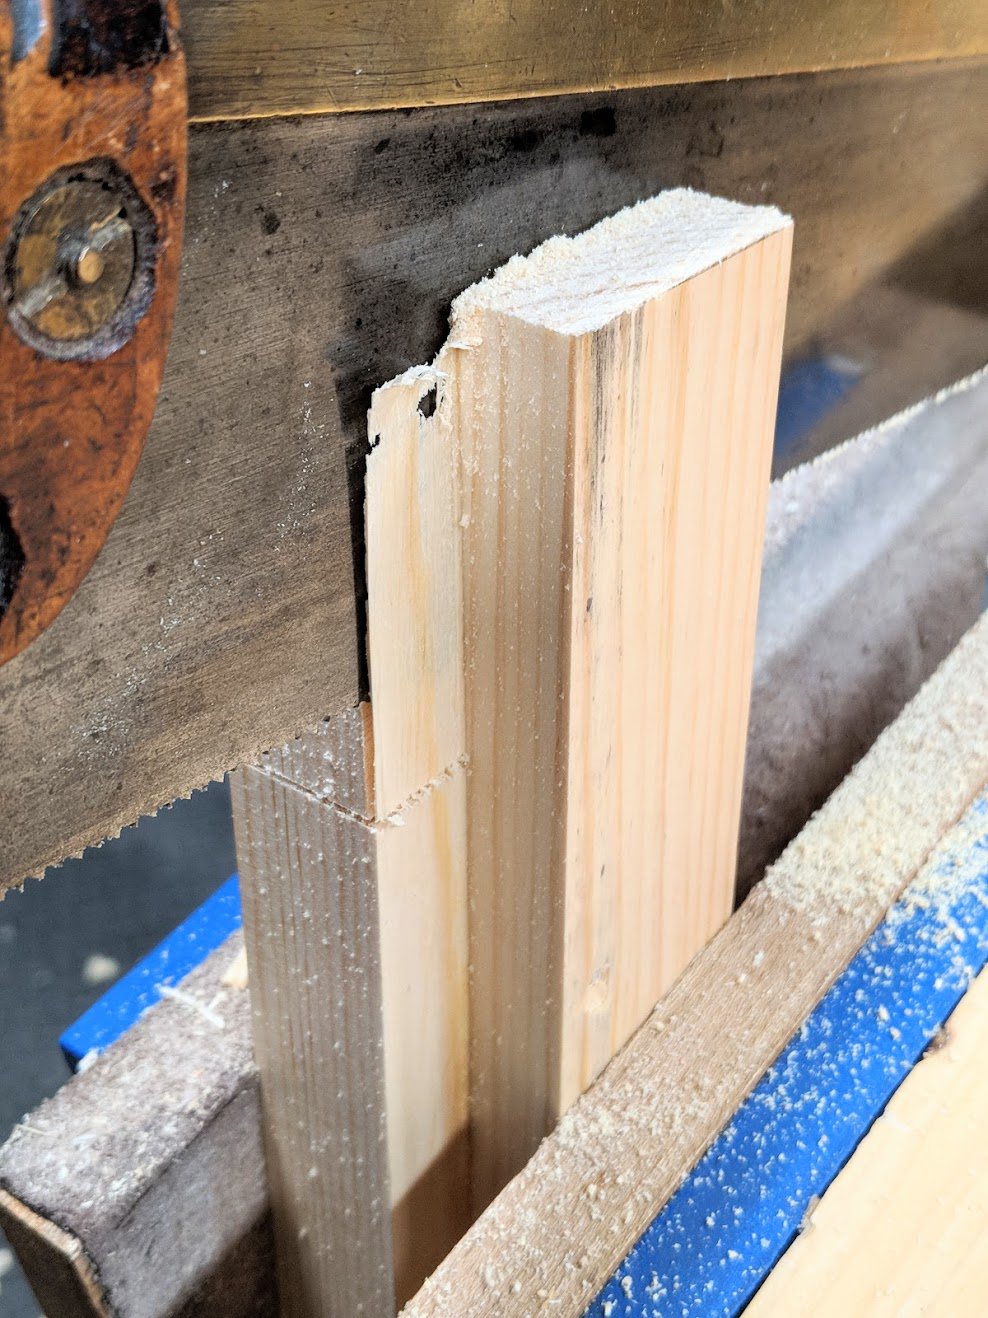
I ripped along the cheek with a tenon saw, following the gauge line.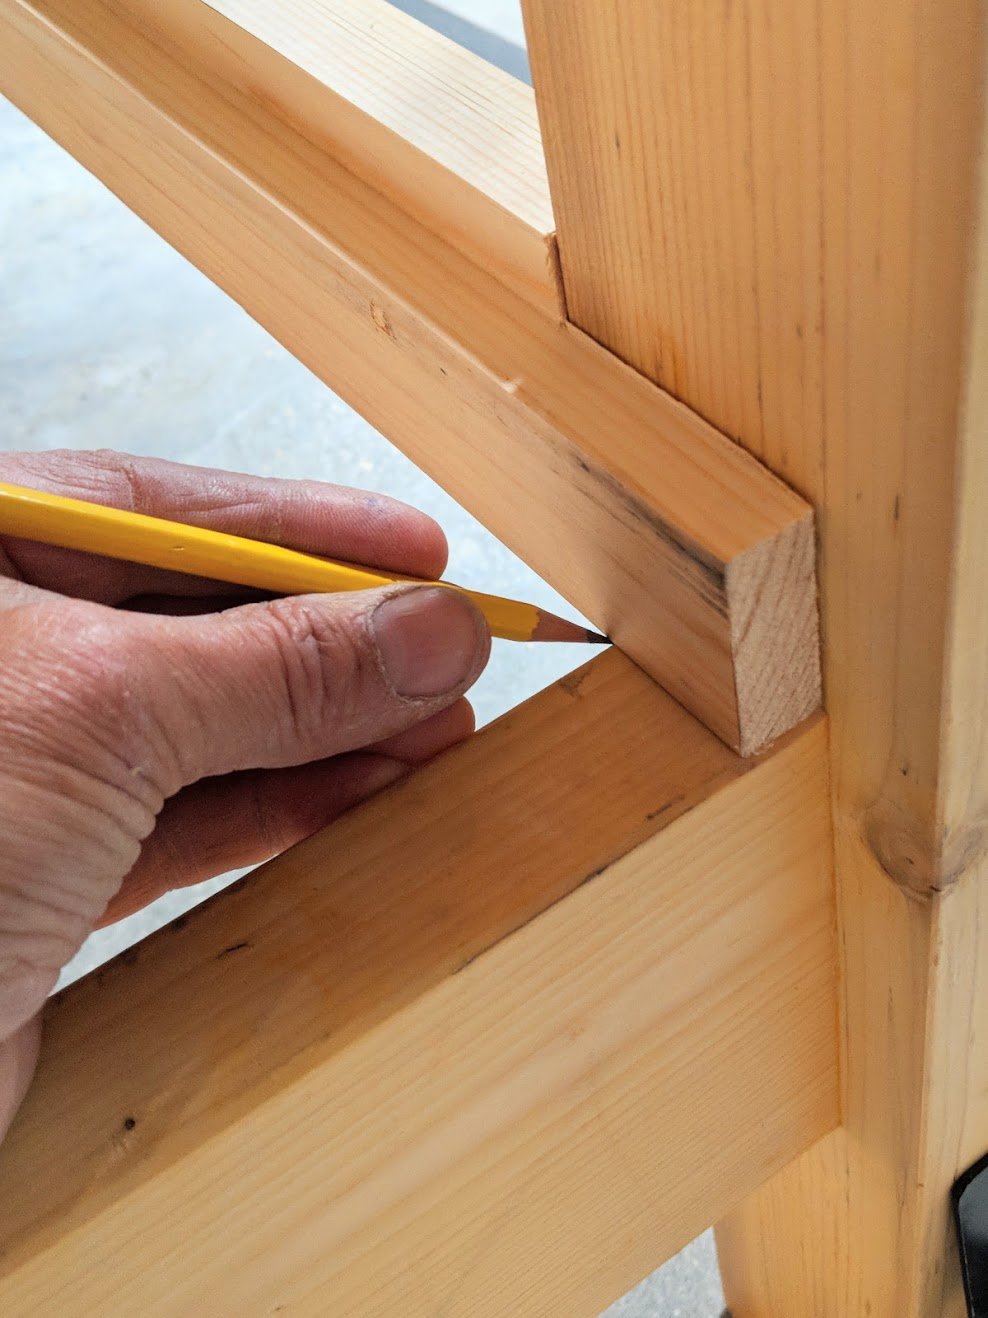
I placed the newly form support rails in between the legs and marked the final length directly off the rails and cut them to length.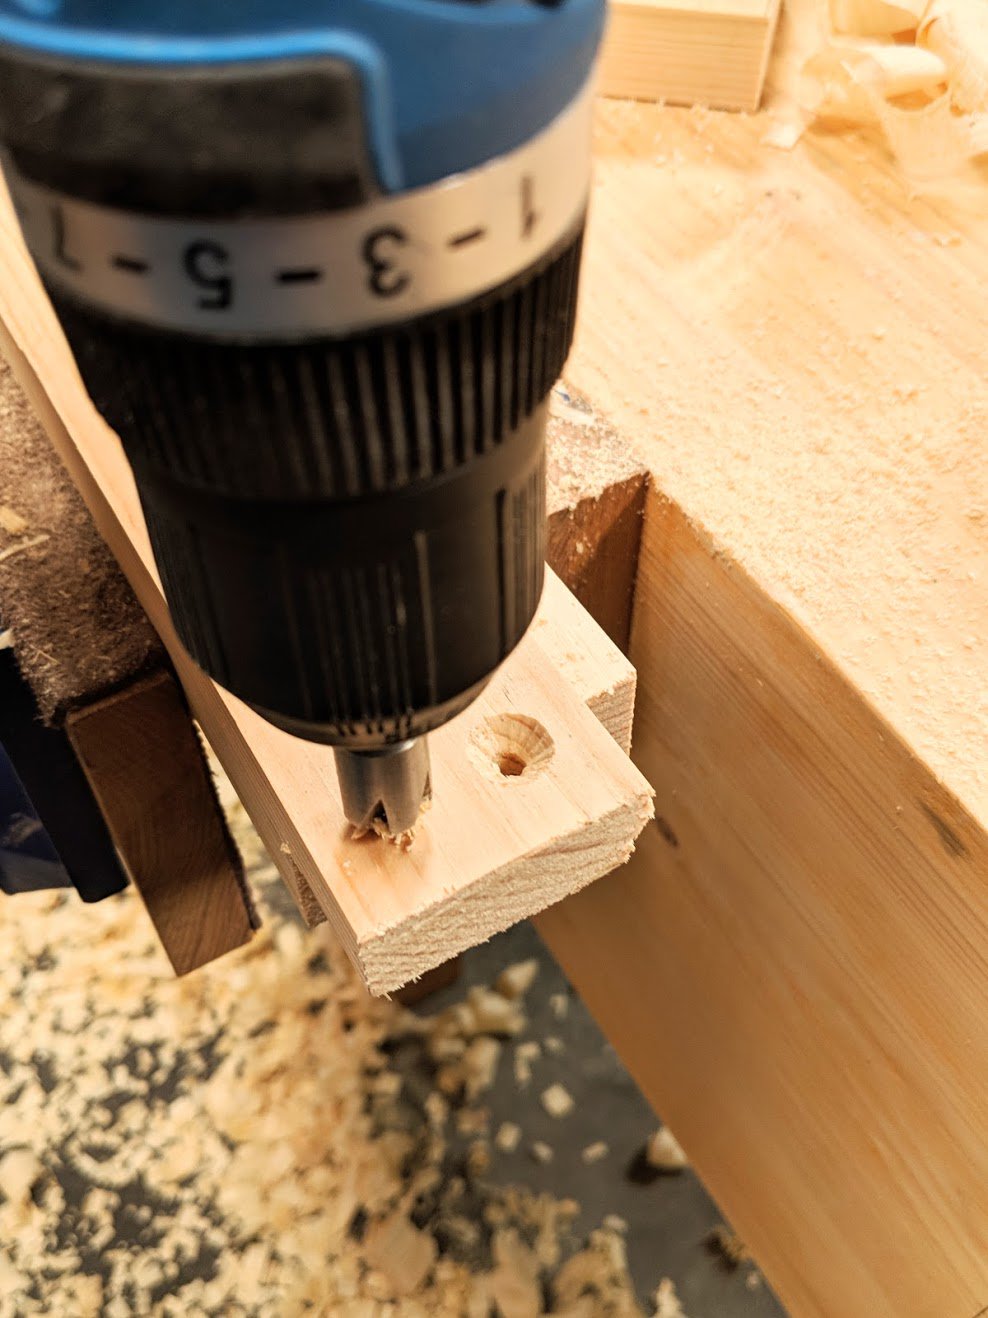
I drilled two 3/16″ holes and countersunk them.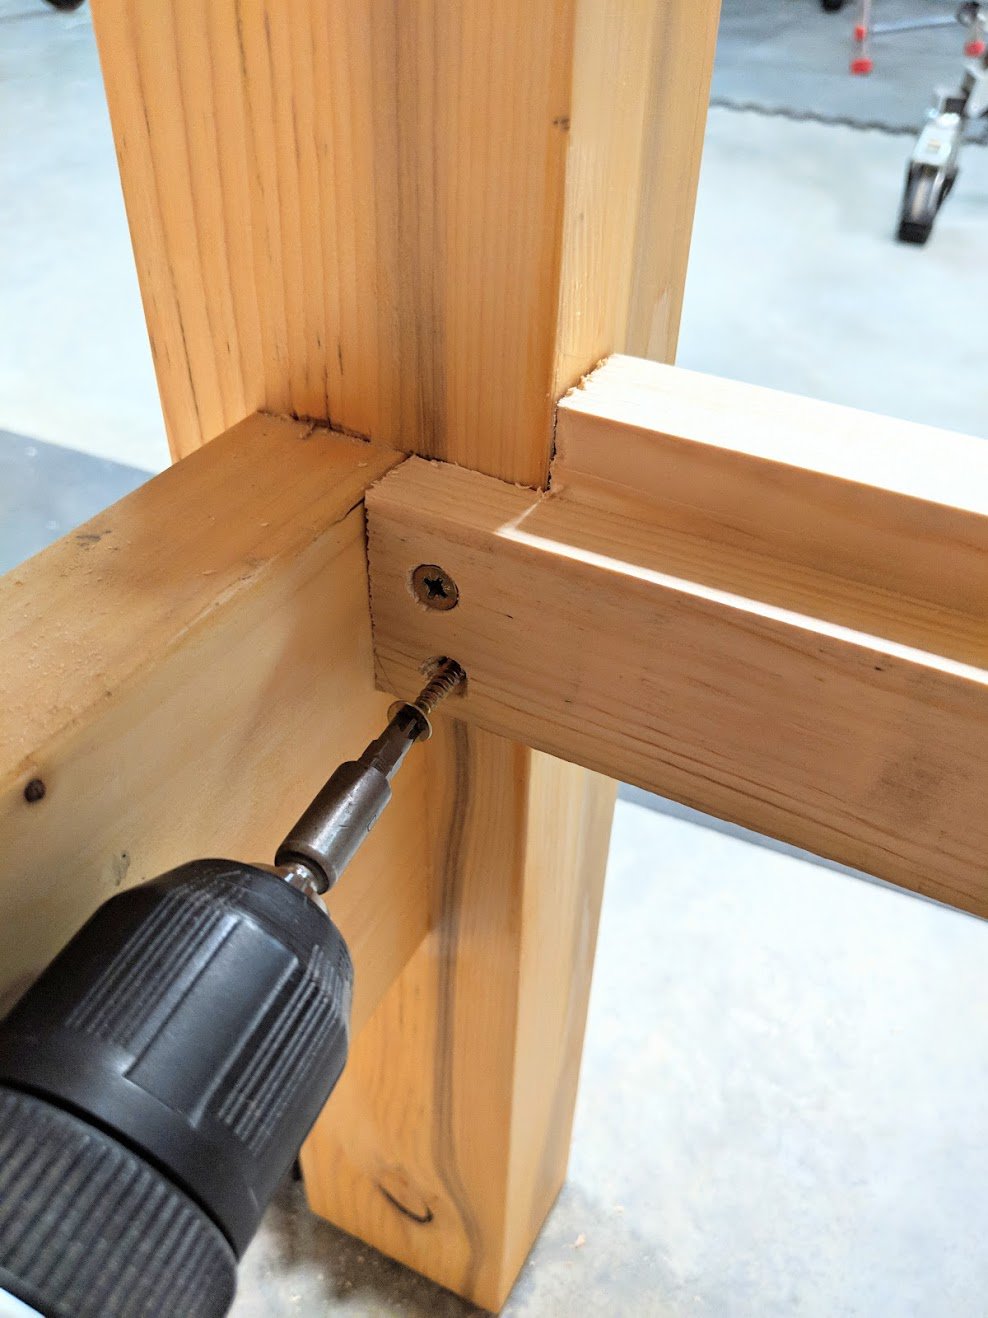
I screwed them to the legs with the bottom of the rebate level with the cross rails.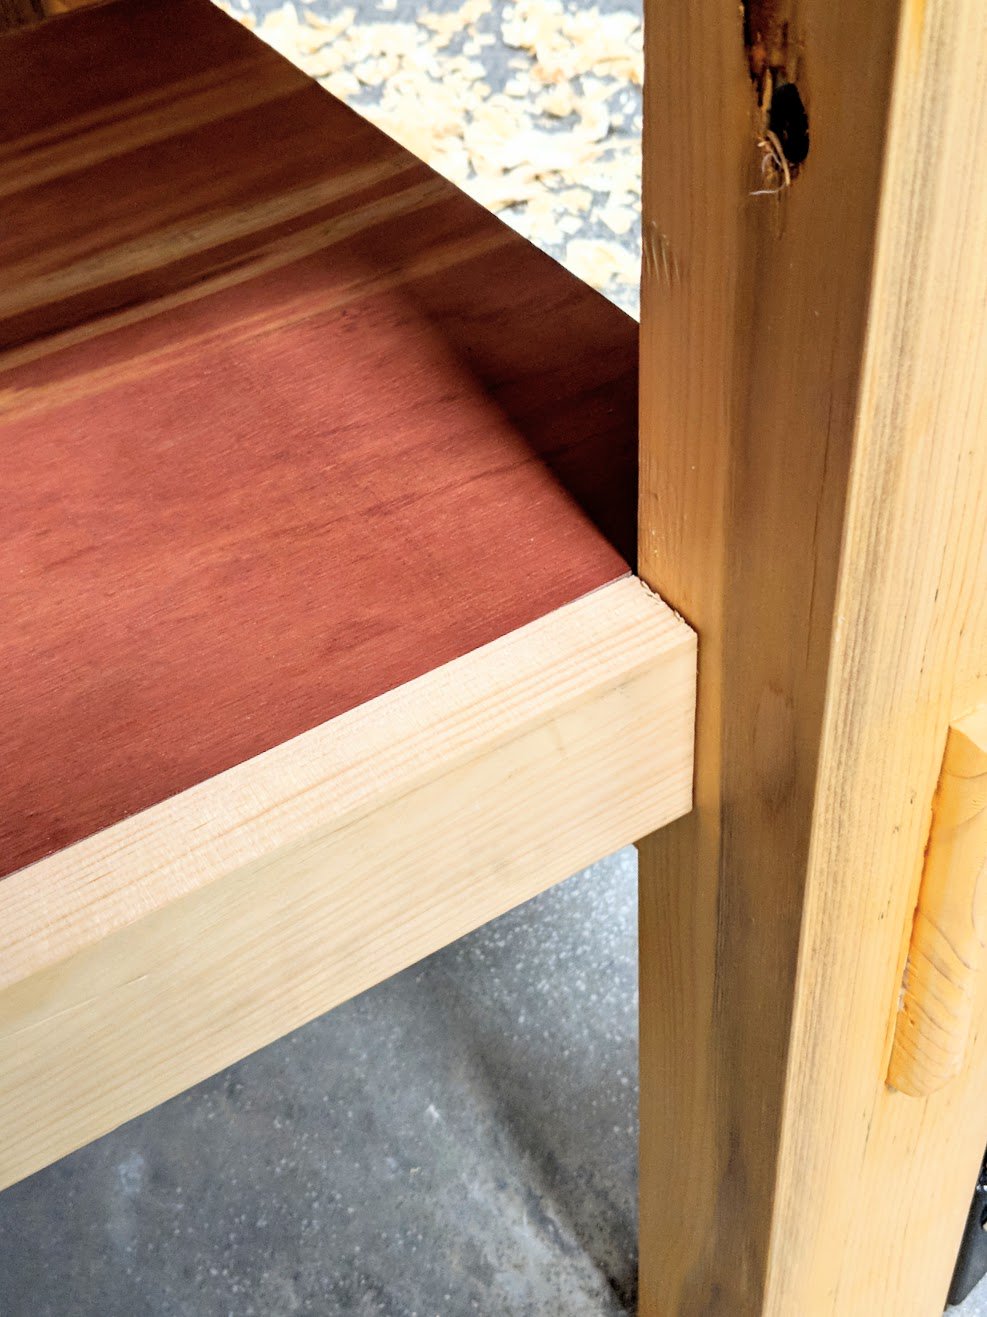
I cut the piece of plywood from scrap I took from another cabinet. It’s just a question of ripping to width and planing to fit.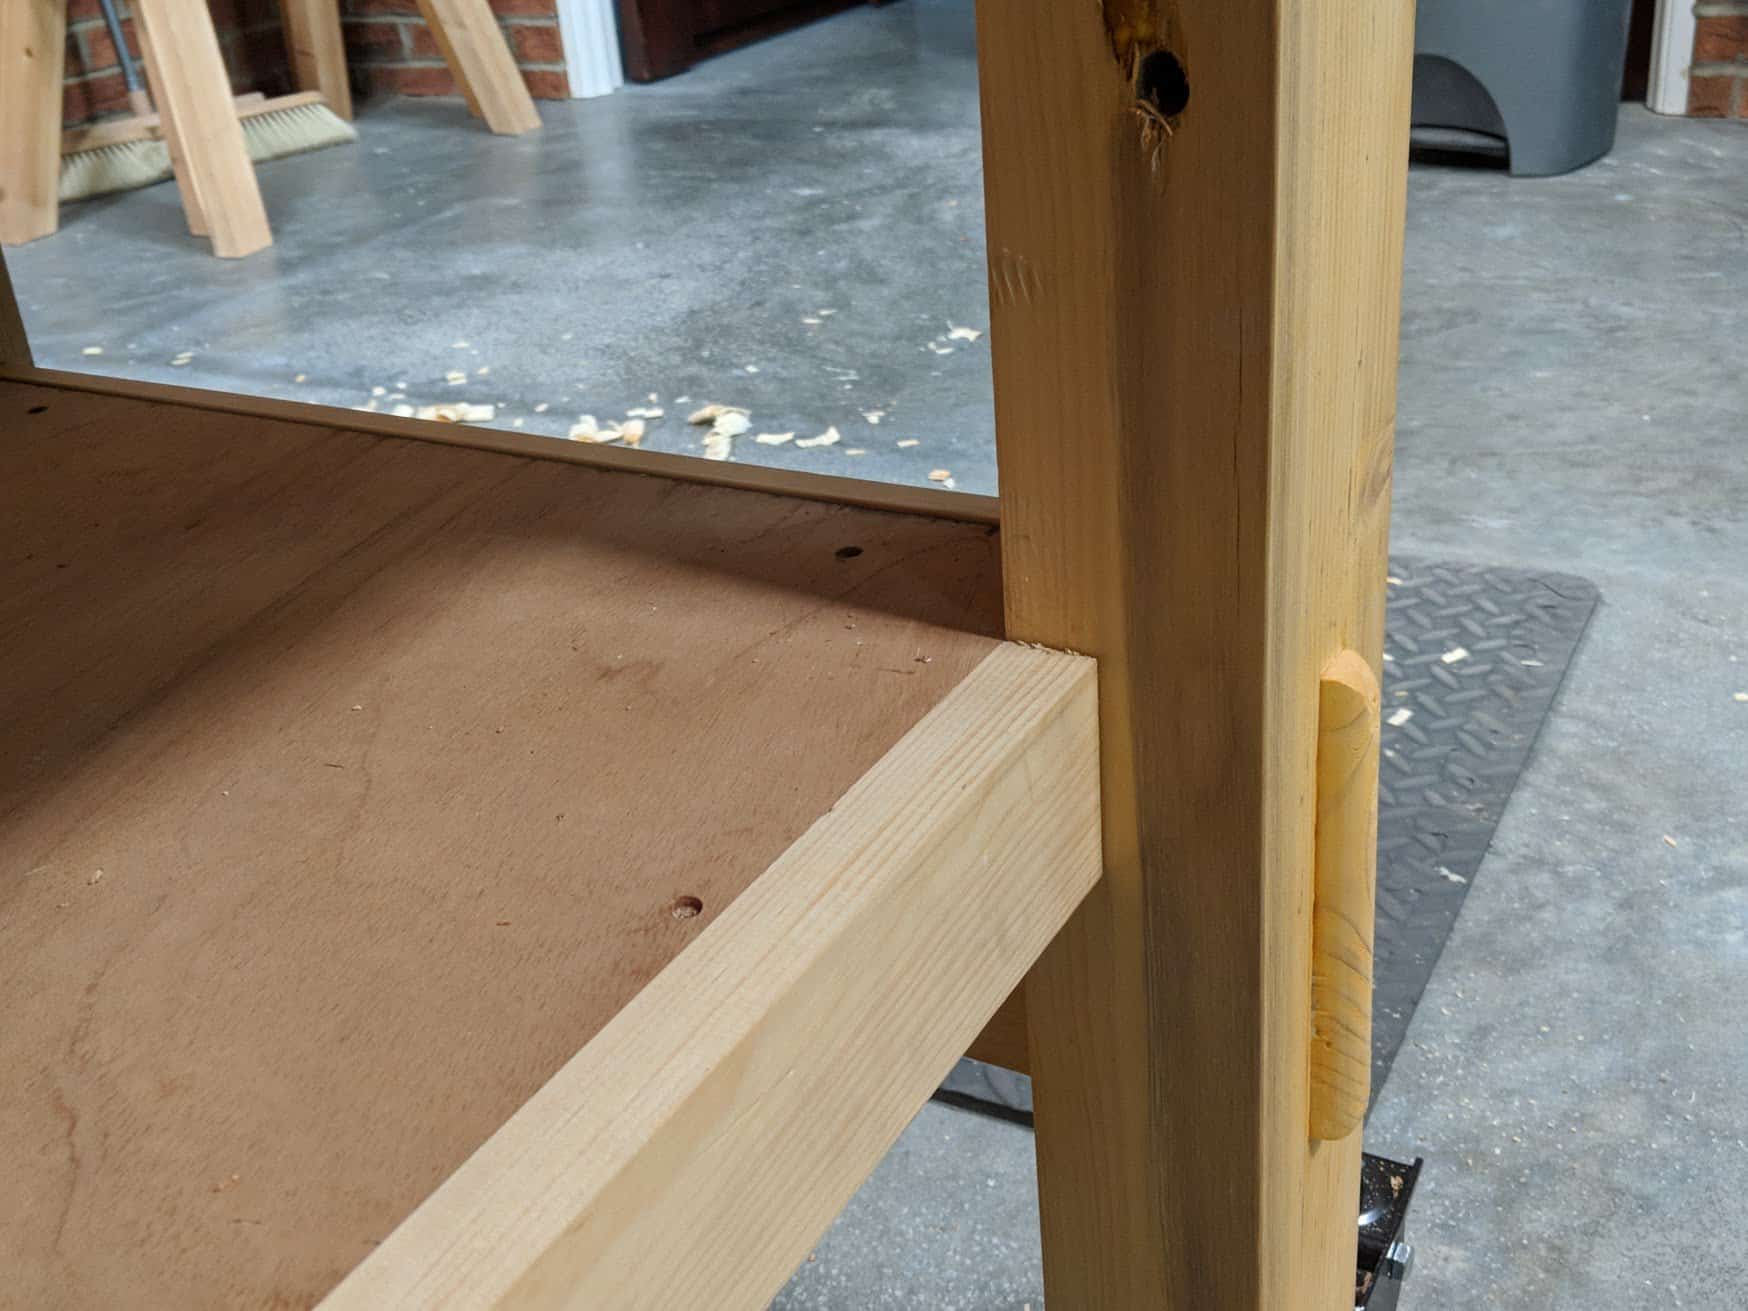
For the edges between the legs along the rails I just used 1/2″ by 2″ trim pieces nailed in place.
I will next use the same furniture oil I used on my workbench for colour and then repeat two coats of water-based floor finish to coat with any-easy clean protective finish.

I have a question regarding cutting plywood – how thick was it and which saw did you use? Was it rip cut, cross cut or maybe something else?
Thanks,
Bartek
Crosscuts work better on most plywoods although arguably this can be affected by the ply type and the size or thickness of the face grain layers. Many plywoods have layers of equal thickness but some have a face grain that is markedly thinner as it is often a decorative or defect free covering layer. The number of plies varies, with the lesser numbers being the cheaper grades and the higher numbers moving towards best. 15 ply would be considered a good to best grade, but this is a lot more expensive and often unnecessary for things like the under-bench shelf here. The long grain facings mean that you have one layer more of a long grain ply so in a 15-ply board you will have 8 long grain layer runs and 7 running the short way across to the short run of the sheet. In theory that means for long grain cuts the ripsaw will cut more efficiently and then for cutting across the sheet, the short way if a full sheet, the crosscut is more efficient. In practice, because the crosscut saw cuts more neatly in crossgrain fibres, I always use my crosscut handsaw.
My plywood was 3/4″ thick.
Downside (having had one for 30 years) of such a shelf, it collect dust / shavings & general muck.
Also (irritating) when I drop screws etc from the bench top, they often fall into the ‘stuff’ I collect on the shelf, harder to find than on a (relatively) clear floor.
I too vowed never to have one again. It’s just too much of a temptation for me to stash a wide range of unnecessary clutter.
Is it not better just to have use of it and discipline yourself to keep it organised and used. I think so. There is equipment as described that is difficult to find a home for. grinders, saw clamps, metal vises and such. I hate to think that people would be put off for a little bit of just keeping one’s self organised. Listen up you other guys, it’s a very, very useful shelf when organised and kept tidy!
I totally agree Paul. I have added the bottom shelf to mine and true it does gather gunk , but I just take my wet dry vac and blow it off ever so often. I don’t like a messy workshop. I don’t know where I would put the stuff that is on the bottom shelf if it wasn’t there.
I have a small workshop and no separate work surface on which to assemble projects or assemblies so I frequently run out of space on the bench top. My workbench has cupboards underneath, but a space between the top of the cupboards and the underside of the workbench. This means that the top of the cupboards acts as an under-bench shelf and it works very well. It does get full of sawdust and shavings, but the time taken to clean it off is a small price to pay for the convenience it affords.
Yep, another first-world problem for sure. We gotta get over it haven’t we!
I fitted a similar plywood shelf to my Black & Decker Workmate, for keeping the small worktop area clear of tools. It adds weight, but also gives stability.
I appreciate the step by step instruction with photographs to answer any questions I had when I didn’t understand the narrative. Thank you, Paul. I will add this to several of my workbenches.
The 1/2 by 2 end trim suggests that the 2 inch trim hangs over the rail. Is there a photo of how the end trim actually looks once installed?
I’m also confused by the dimensions of the end trim. Would you mind explaining just how it works? Or a photo speaks 1000 words.
Thanks in advance
Tim
I missed this, sorry! The plywood finishes flush with the outside face of the rail. Rather than a thin 3/4″ trim to the end of the plywood I made the trim 2″ to cover the end and the joint line.
Perfect, thank you Paul. I’ll do the same this weekend.
I’ve just completed my bench and I’m putting the finishing coats on now .
I think the shelf would be a great addition and will consider putting this on later .
It is indeed a first-world problem and one that I intend to include in my life: my bench will definitely have a shelf when it is completed. I think I might also add a little height to the back cross-rail just to stop things working their way off between workbench and wall. You have got to be alive to have problems and that is almost always a lot better than the alternative.