It’s Been a Good Start!
In the face of a seemingly unending pandemic, give today your best shot! This was my feeling throughout the day today. January came and went with the introduction and recognition of new variants which we knew would happen eventually. With all the blame-shifting and mismanagement going on in most parts of Europe and some other continents too, we must face the future with the hope that we can all do our bit despite the constraints of our humanity. It’s been a difficult start with too much hyperbole for my liking, but then we who make have our workbenches laden with wood and tools and the support that aids recovery through our creativity.
Thankfully we are not Presidents, Chancellors and Prime ministers and nor are we broadcasters who interpret what we all just heard from the horse’s mouth because they think what’s said needs their explanations for us to understand. We know for ourselves what it takes to lick things back into shape because as makers and workers we have that unique ingredient to life, common sense with practical solutions. We can all wash our hands, stay two meters apart and wear a face mask to protect one another so we do it. We need telling only once and accept an occasional nudge to remind us. Covid is a serious issue, want to protect our families and friends, co-workers and fellow students. We also know that it’s in the face of adversity that our metal is tested and our character is formed. With January out of the way, I started February with the equal gusto I started January and the new year with. It has been a truly wonderful start to another difficult year and with over one-twelfth of it already gone, I do not plan to waste a single moment of 2021. Amazingly, we in Britain will soon have one-twelfth of the population of Britain vaccinated against the COVID-19 pandemic. I am grateful that we are all in this together and that we can support those close to us and also those far away. I will get mine this weekend with a follow-up jab two after that. The dates are in the calendar.
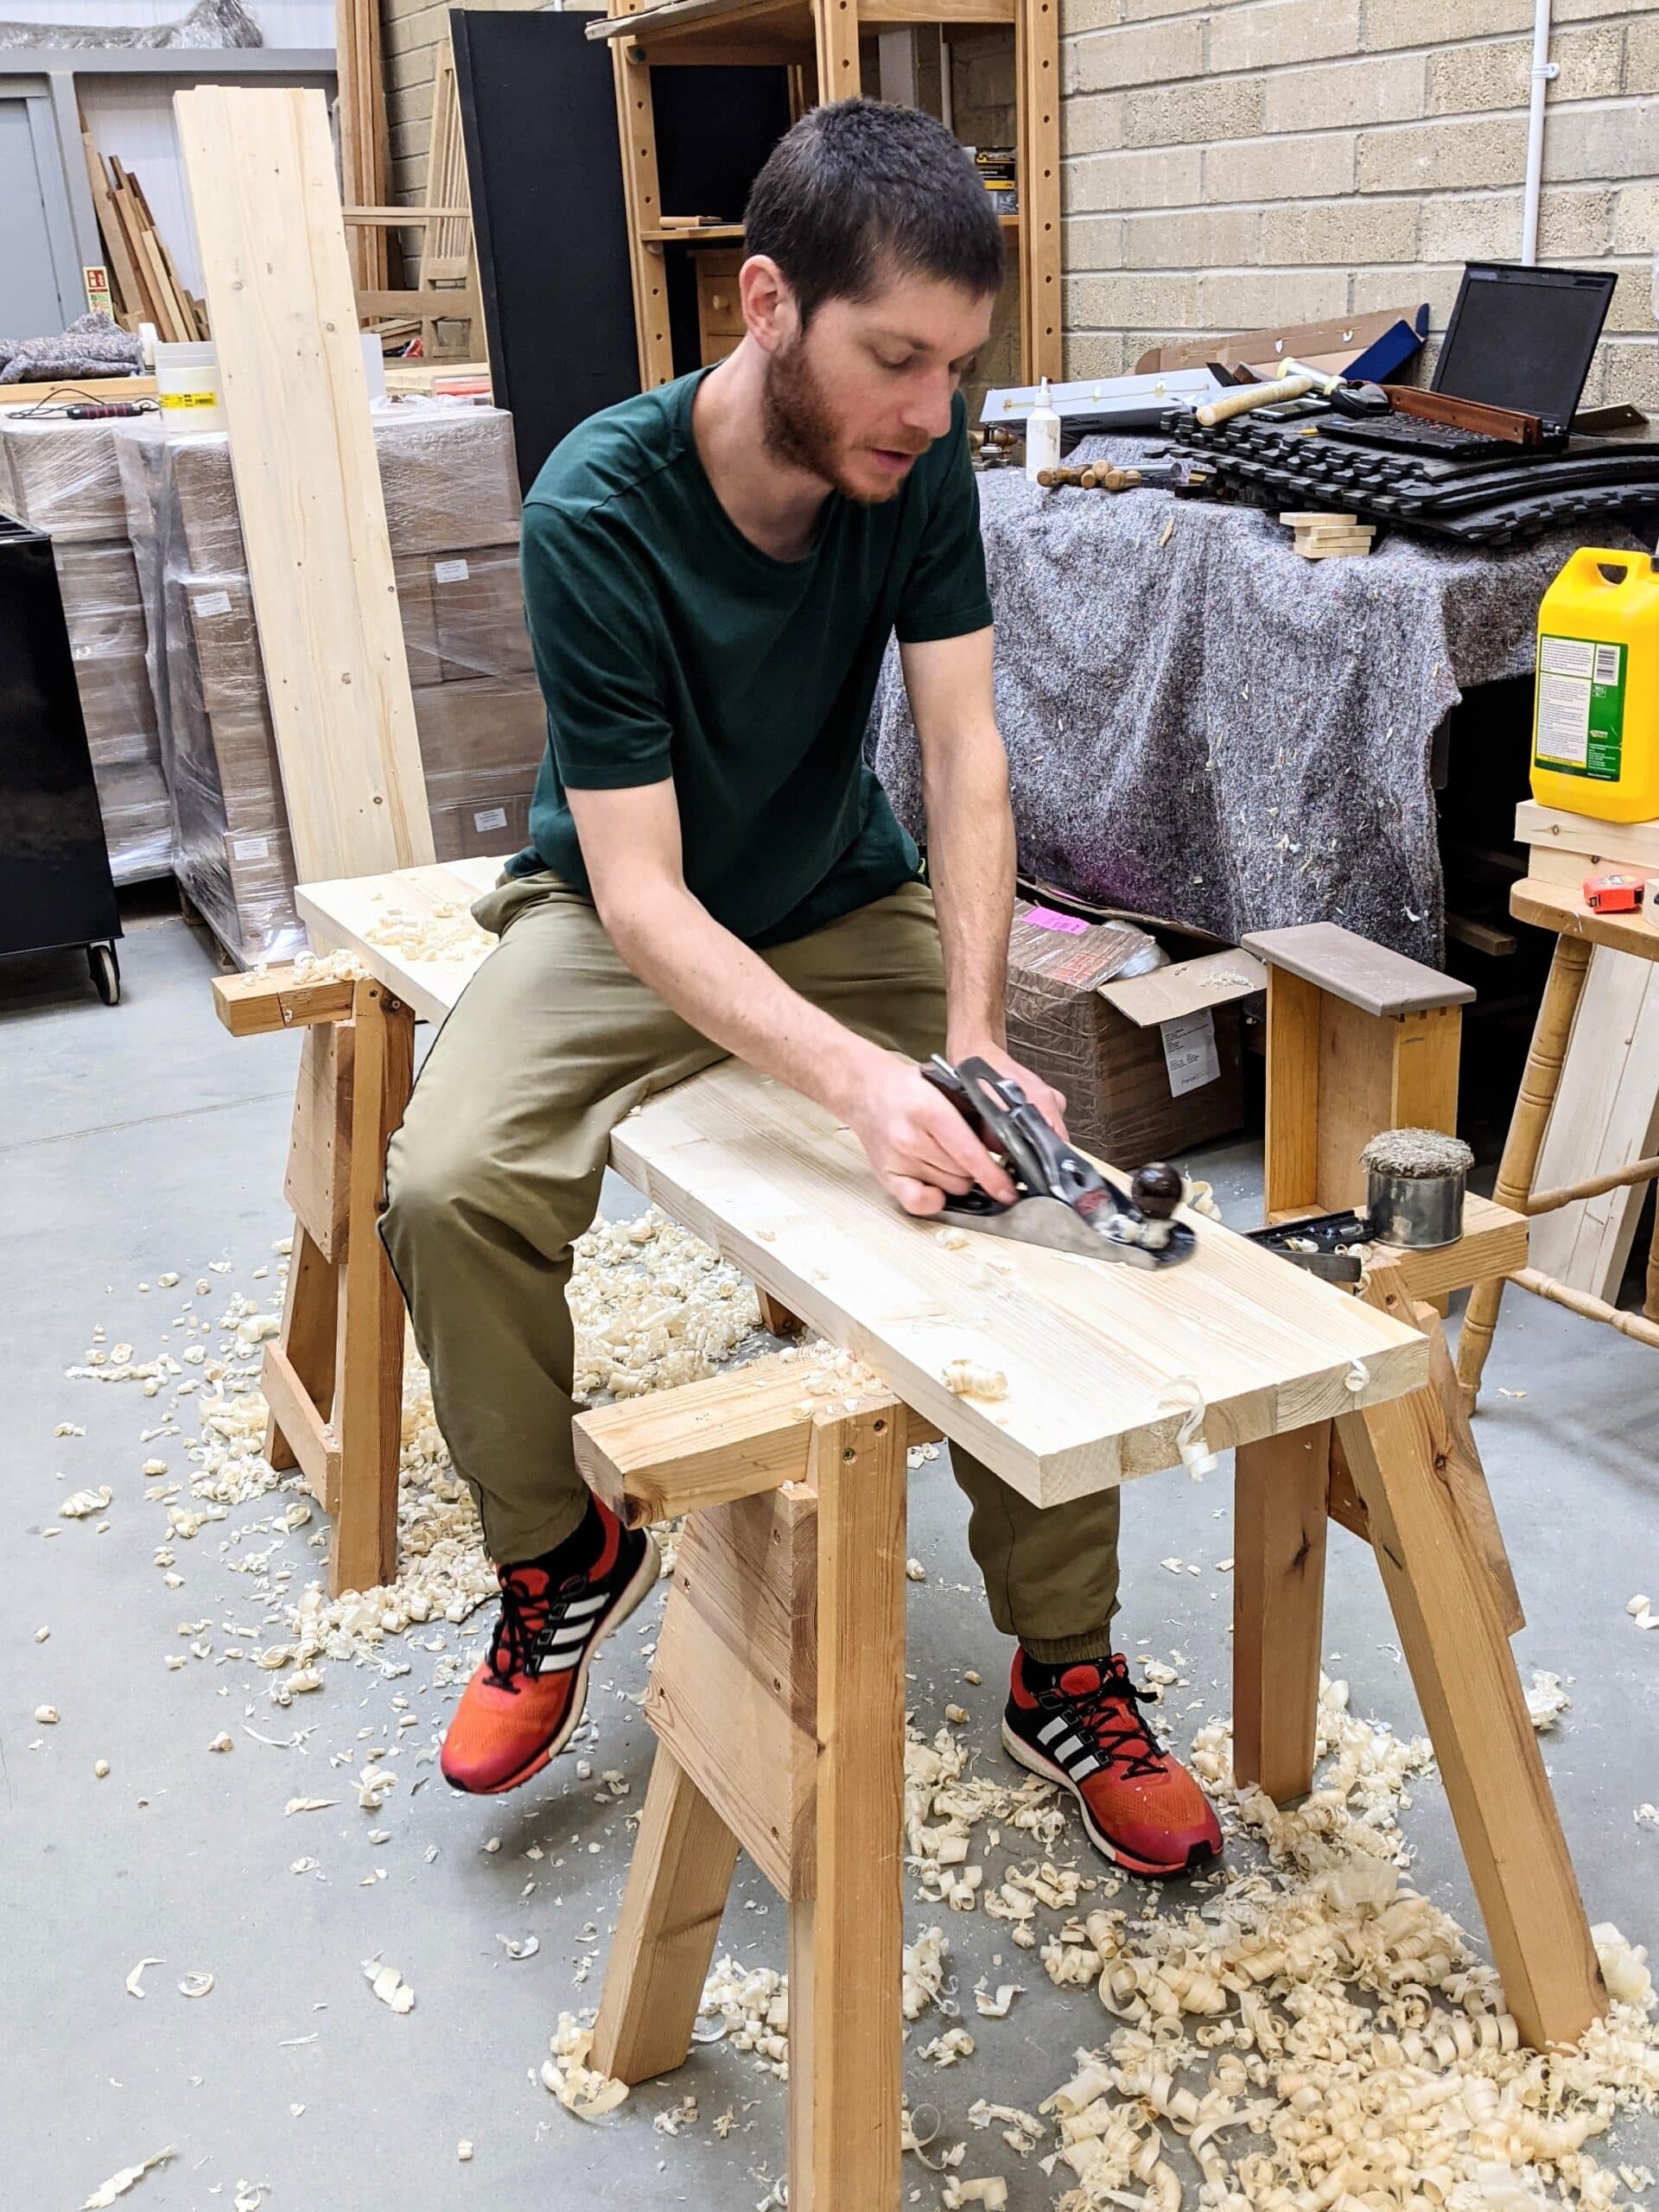
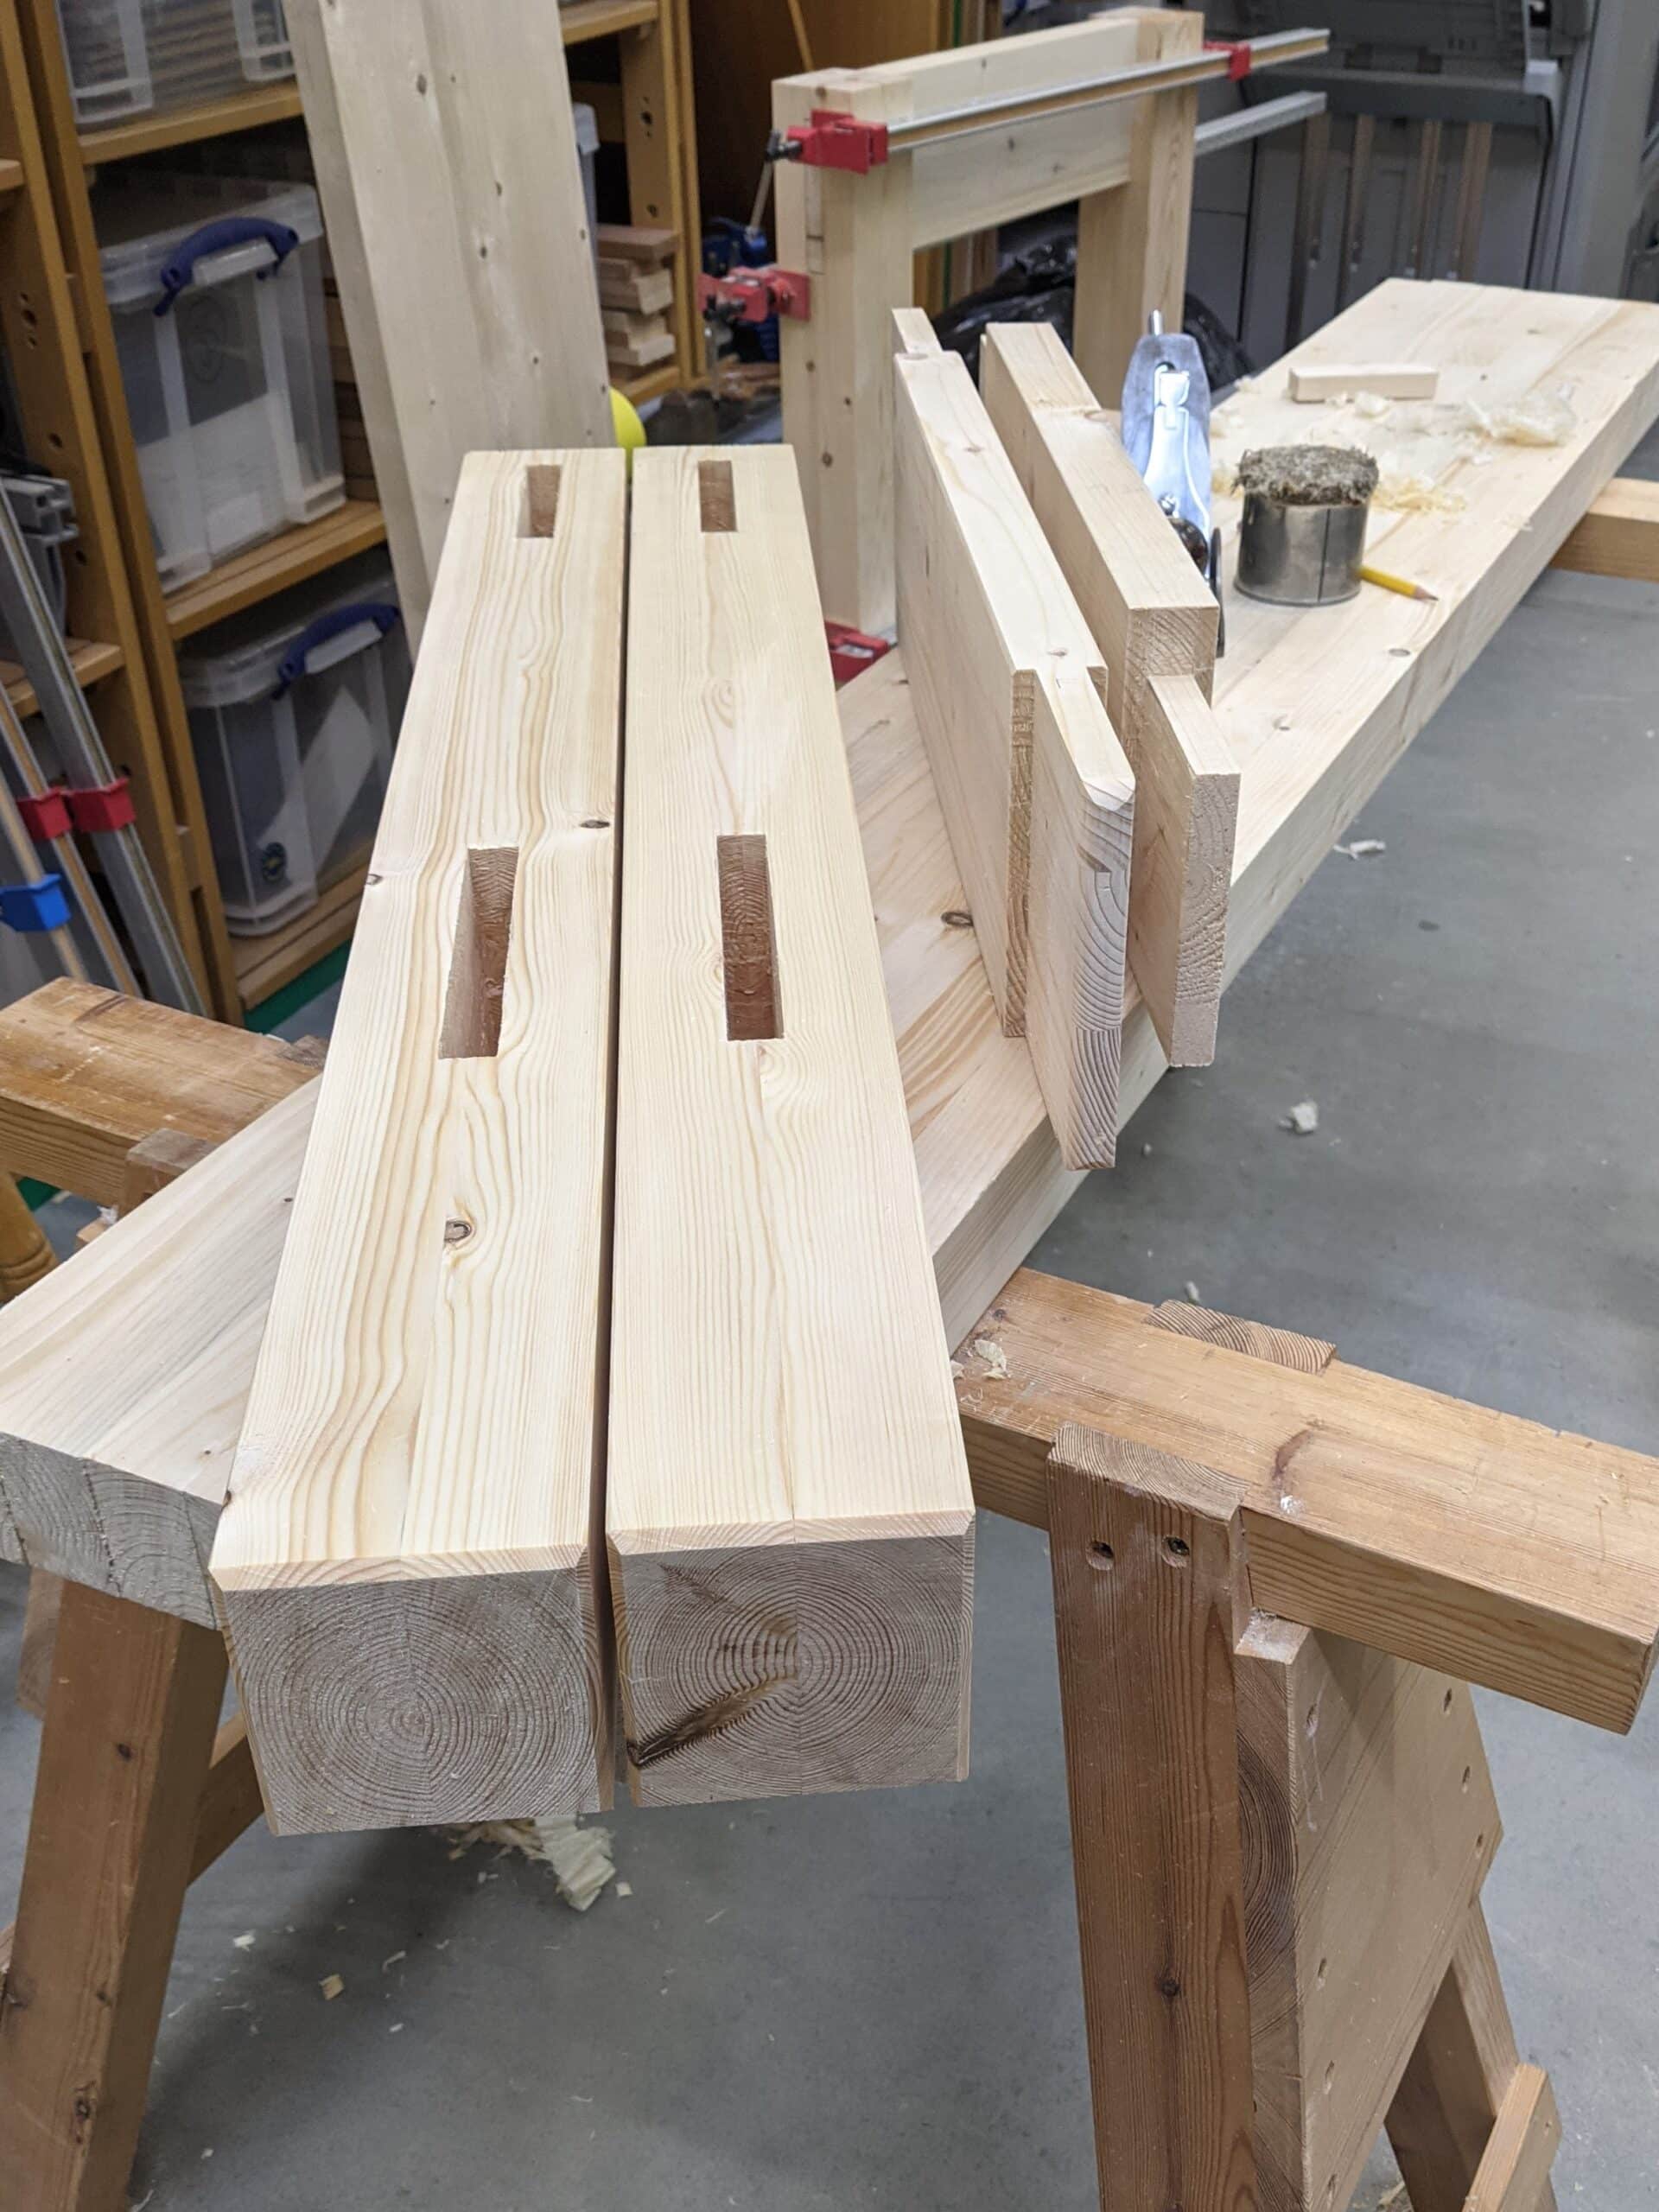
I told you about John coming in to develop his future as a maker which I have anticipated for a few weeks. His bench has come together quickly and he has been following our DIY guide and video to building your own workbench to test out the details. He’s very skilled in is work and very self-disciplined too.
This bench is very sturdy yet simple enough to make and follows a more traditional style as an English joiner’s workbench. In my redesigning the making details, I took into account that my attending students 20 years ago were absolute beginner woodworkers. The design and methods I put together bridged the gap to encourage even new woodworkers to build their own first bench straight off because hand tool woodworking demands a good bench with a good quick-release vise if possible. “Bridged the gap?” Yes, I wanted something that looked nice but then something that also looked simple. I did not want a show-off piece! It’s not necessary. Doing this right from the start of anyone’s woodworking future short circuits the learning curve, you see. Why not just dive in? So rather than buying a new workbench that may not fit the budget or even suit the need, space, etc, why not rise to the challenge knowing that hundreds going before them have successfully made the workbench just following the video or reading about it in my blog or in my book. It worked.
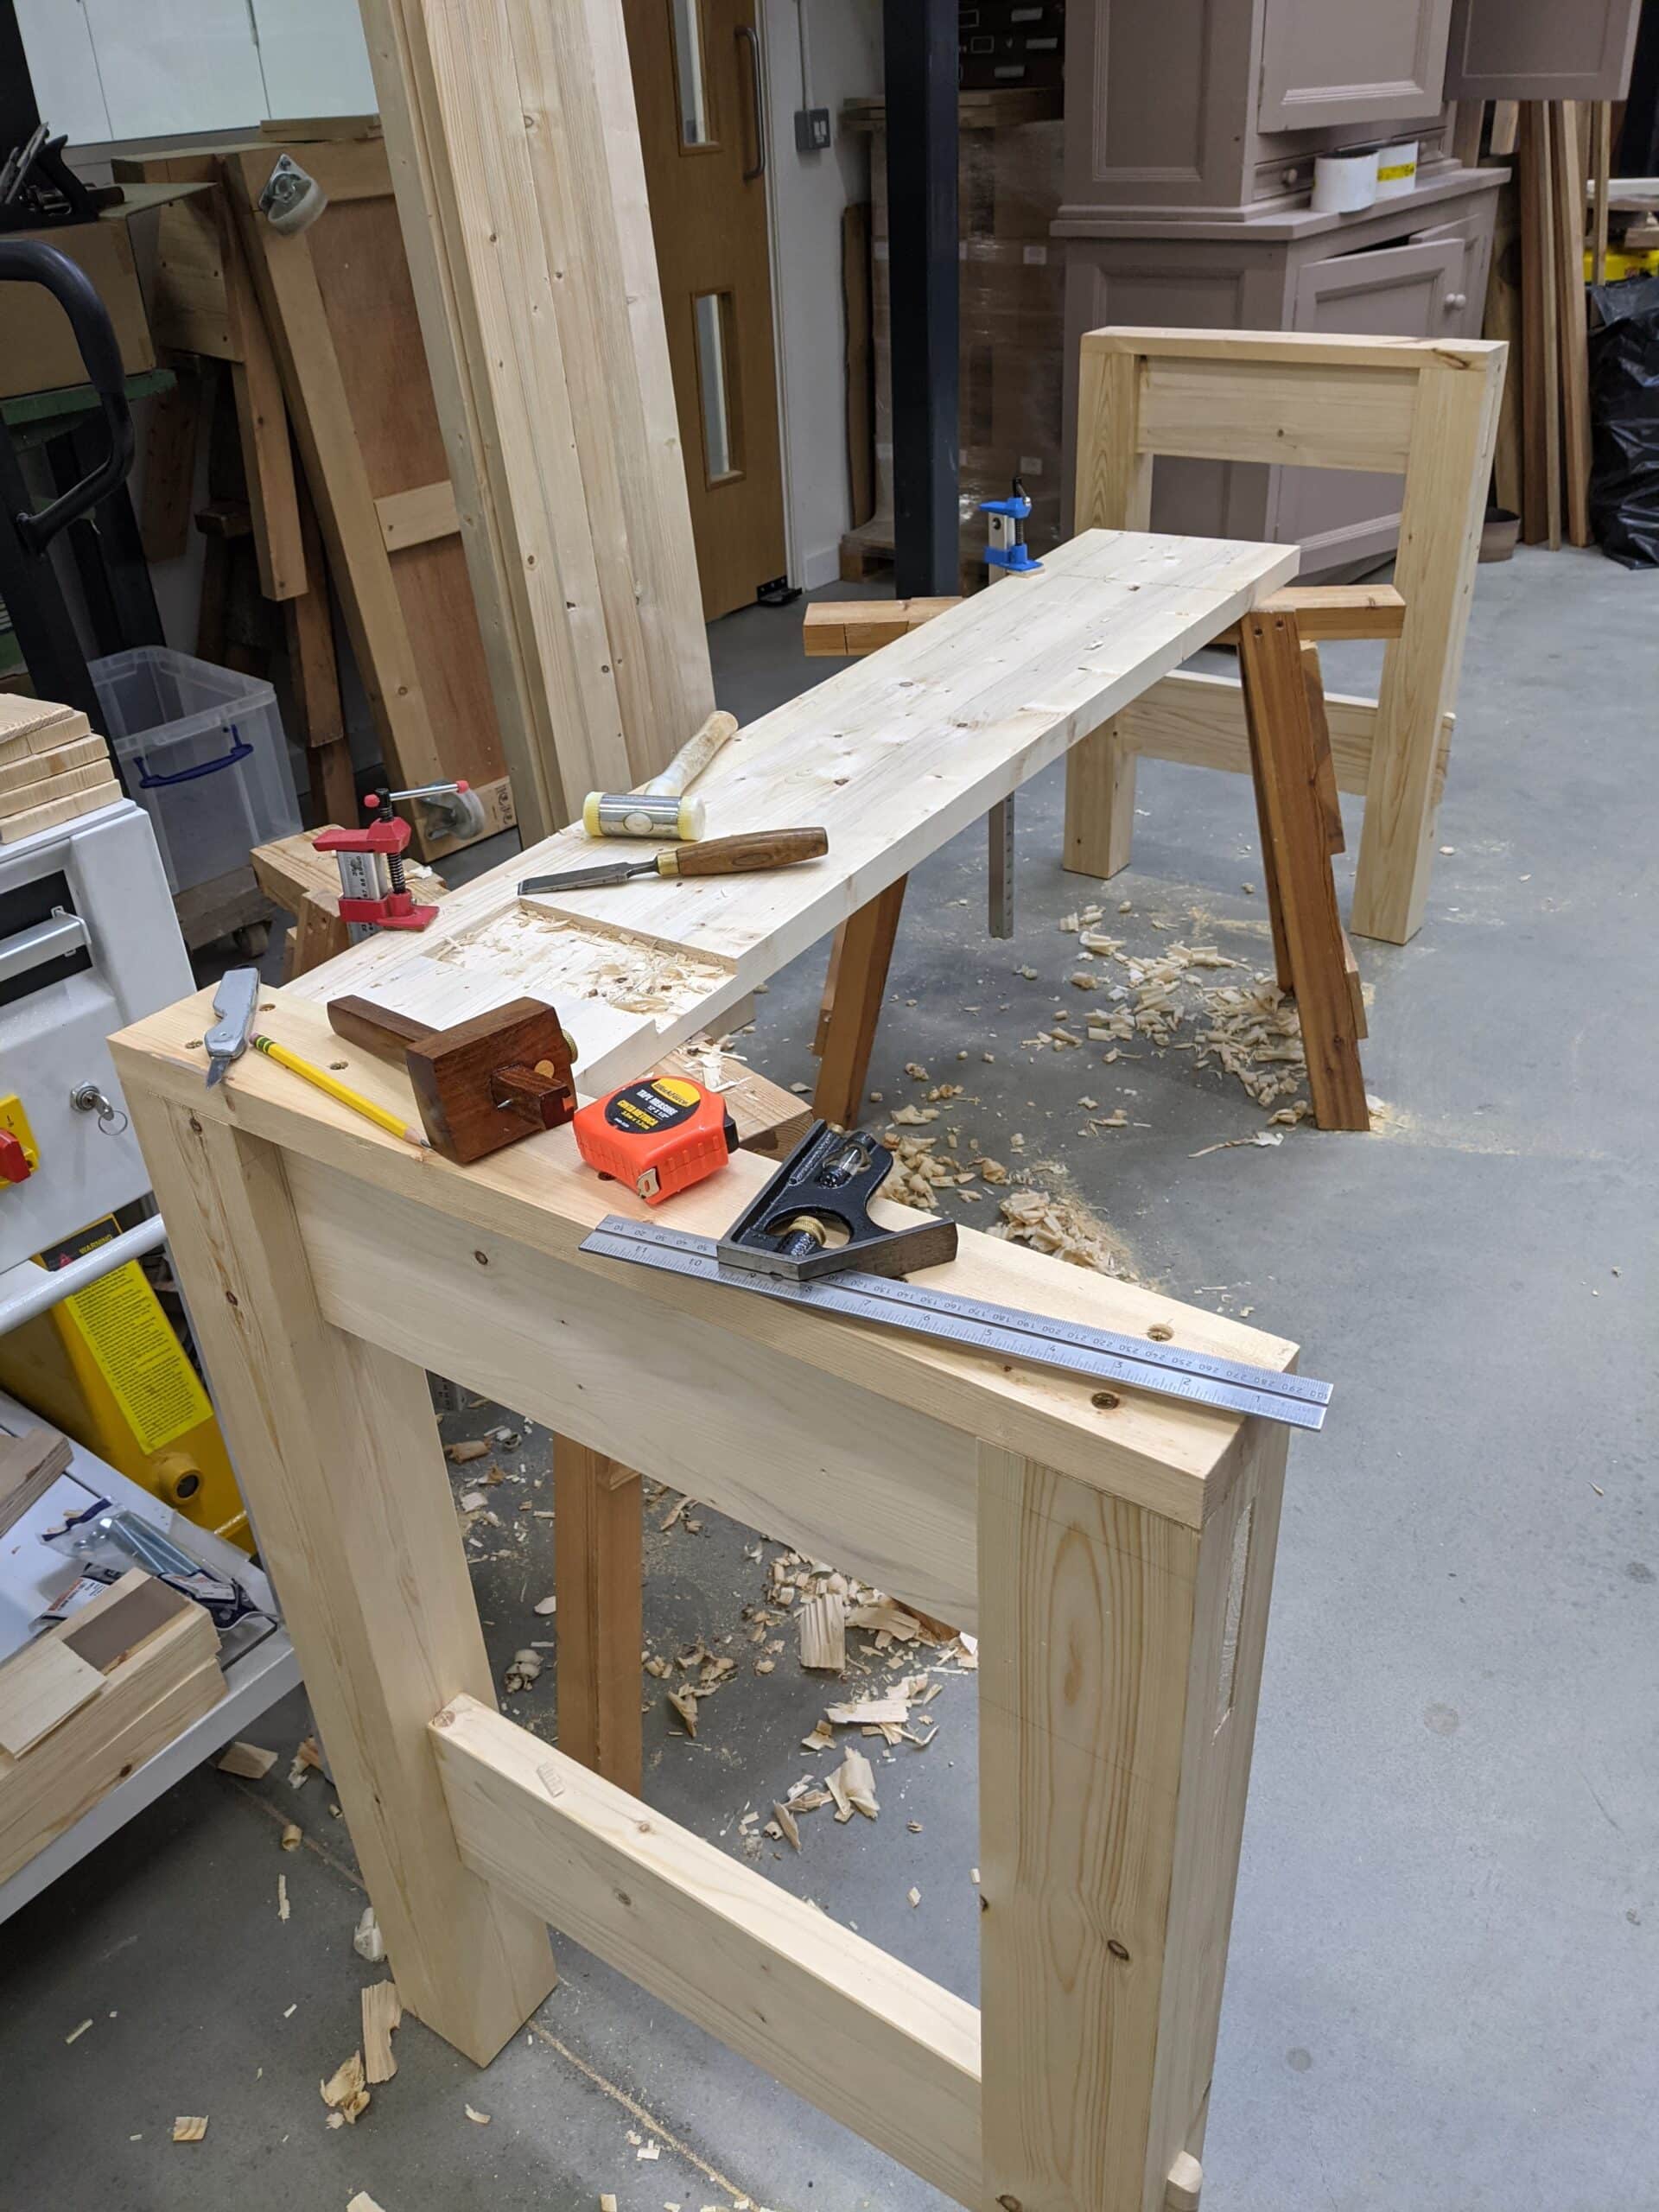
You see even seasoned woodworkers have no need for a fancy workbench but they definitely need one that works and is solidly built. Such benches can be quite the challenge, even for practiced hand tool woodworkers. We don’t need and neither can most of us accommodate the behemoths for any of the work we encounter. To make it affordable and accessibly doable, I chose to use construction-grade wood (as in secondhand studs in my case) and even made mine, the one shown throughout the video we made, from recycled wood from a nearby recycling business. Of course, you can use hard maple, beech or oak. That would be nice too, but perhaps a little more challenging for raw beginner.
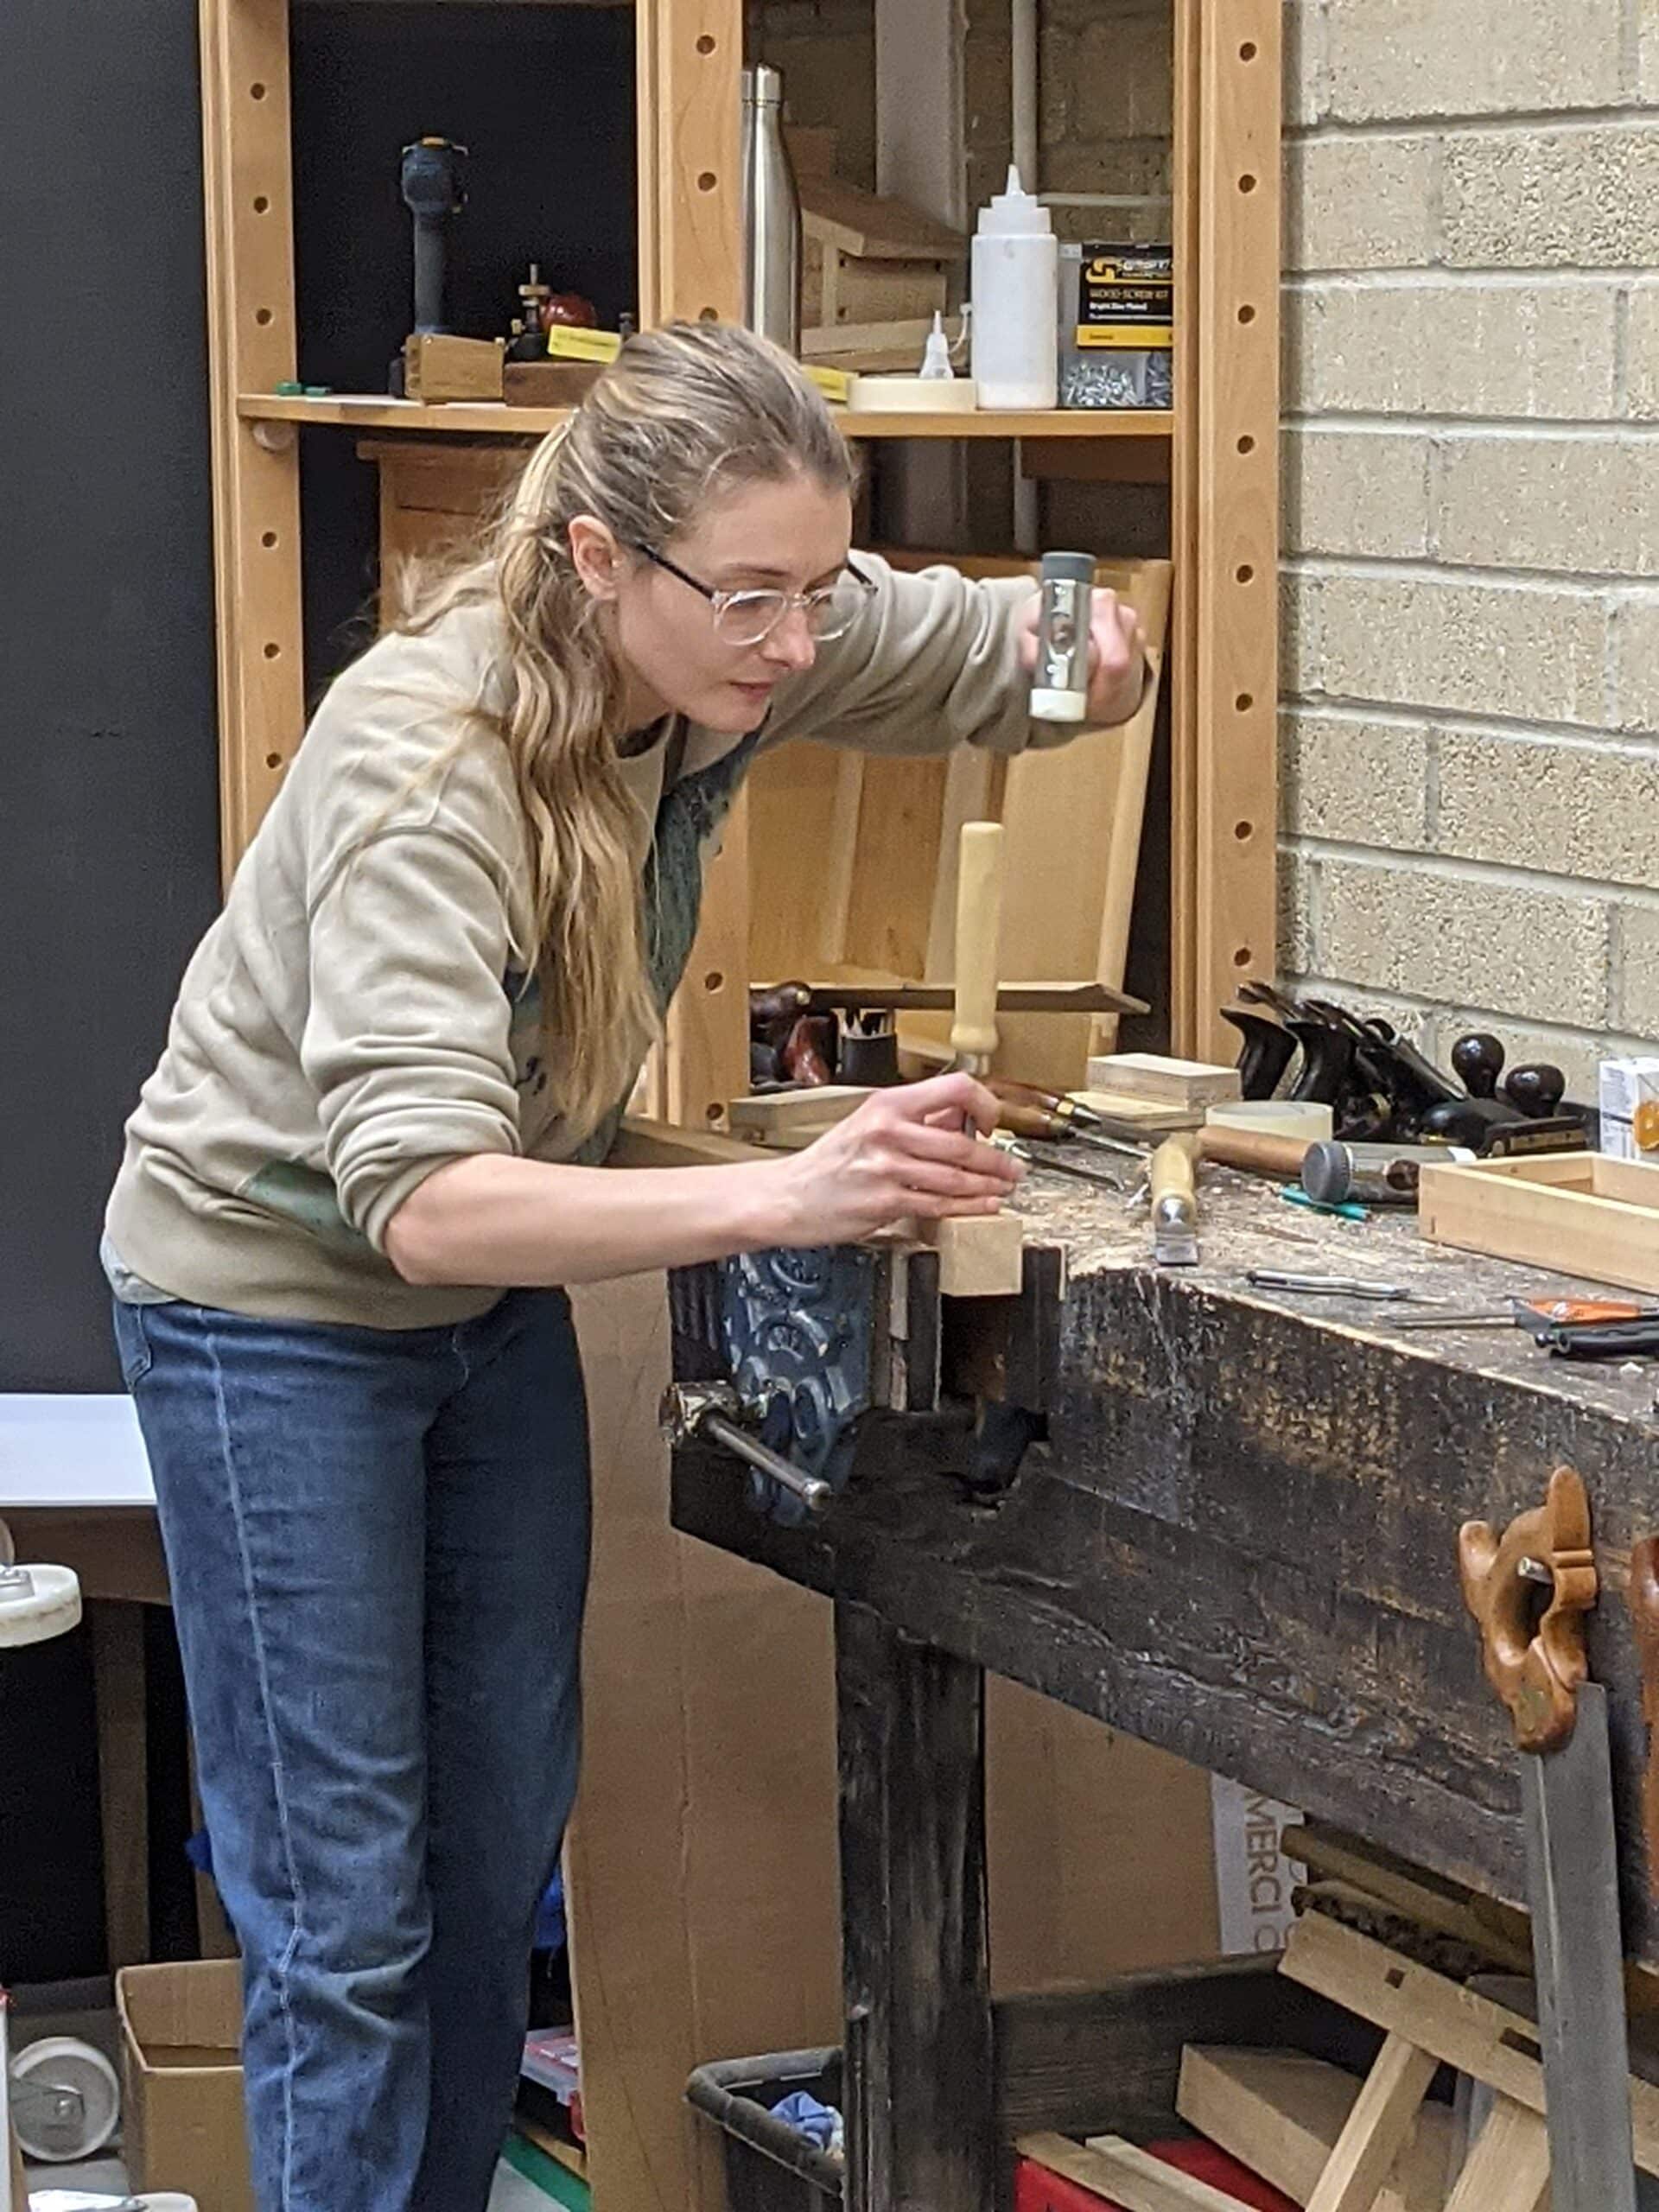
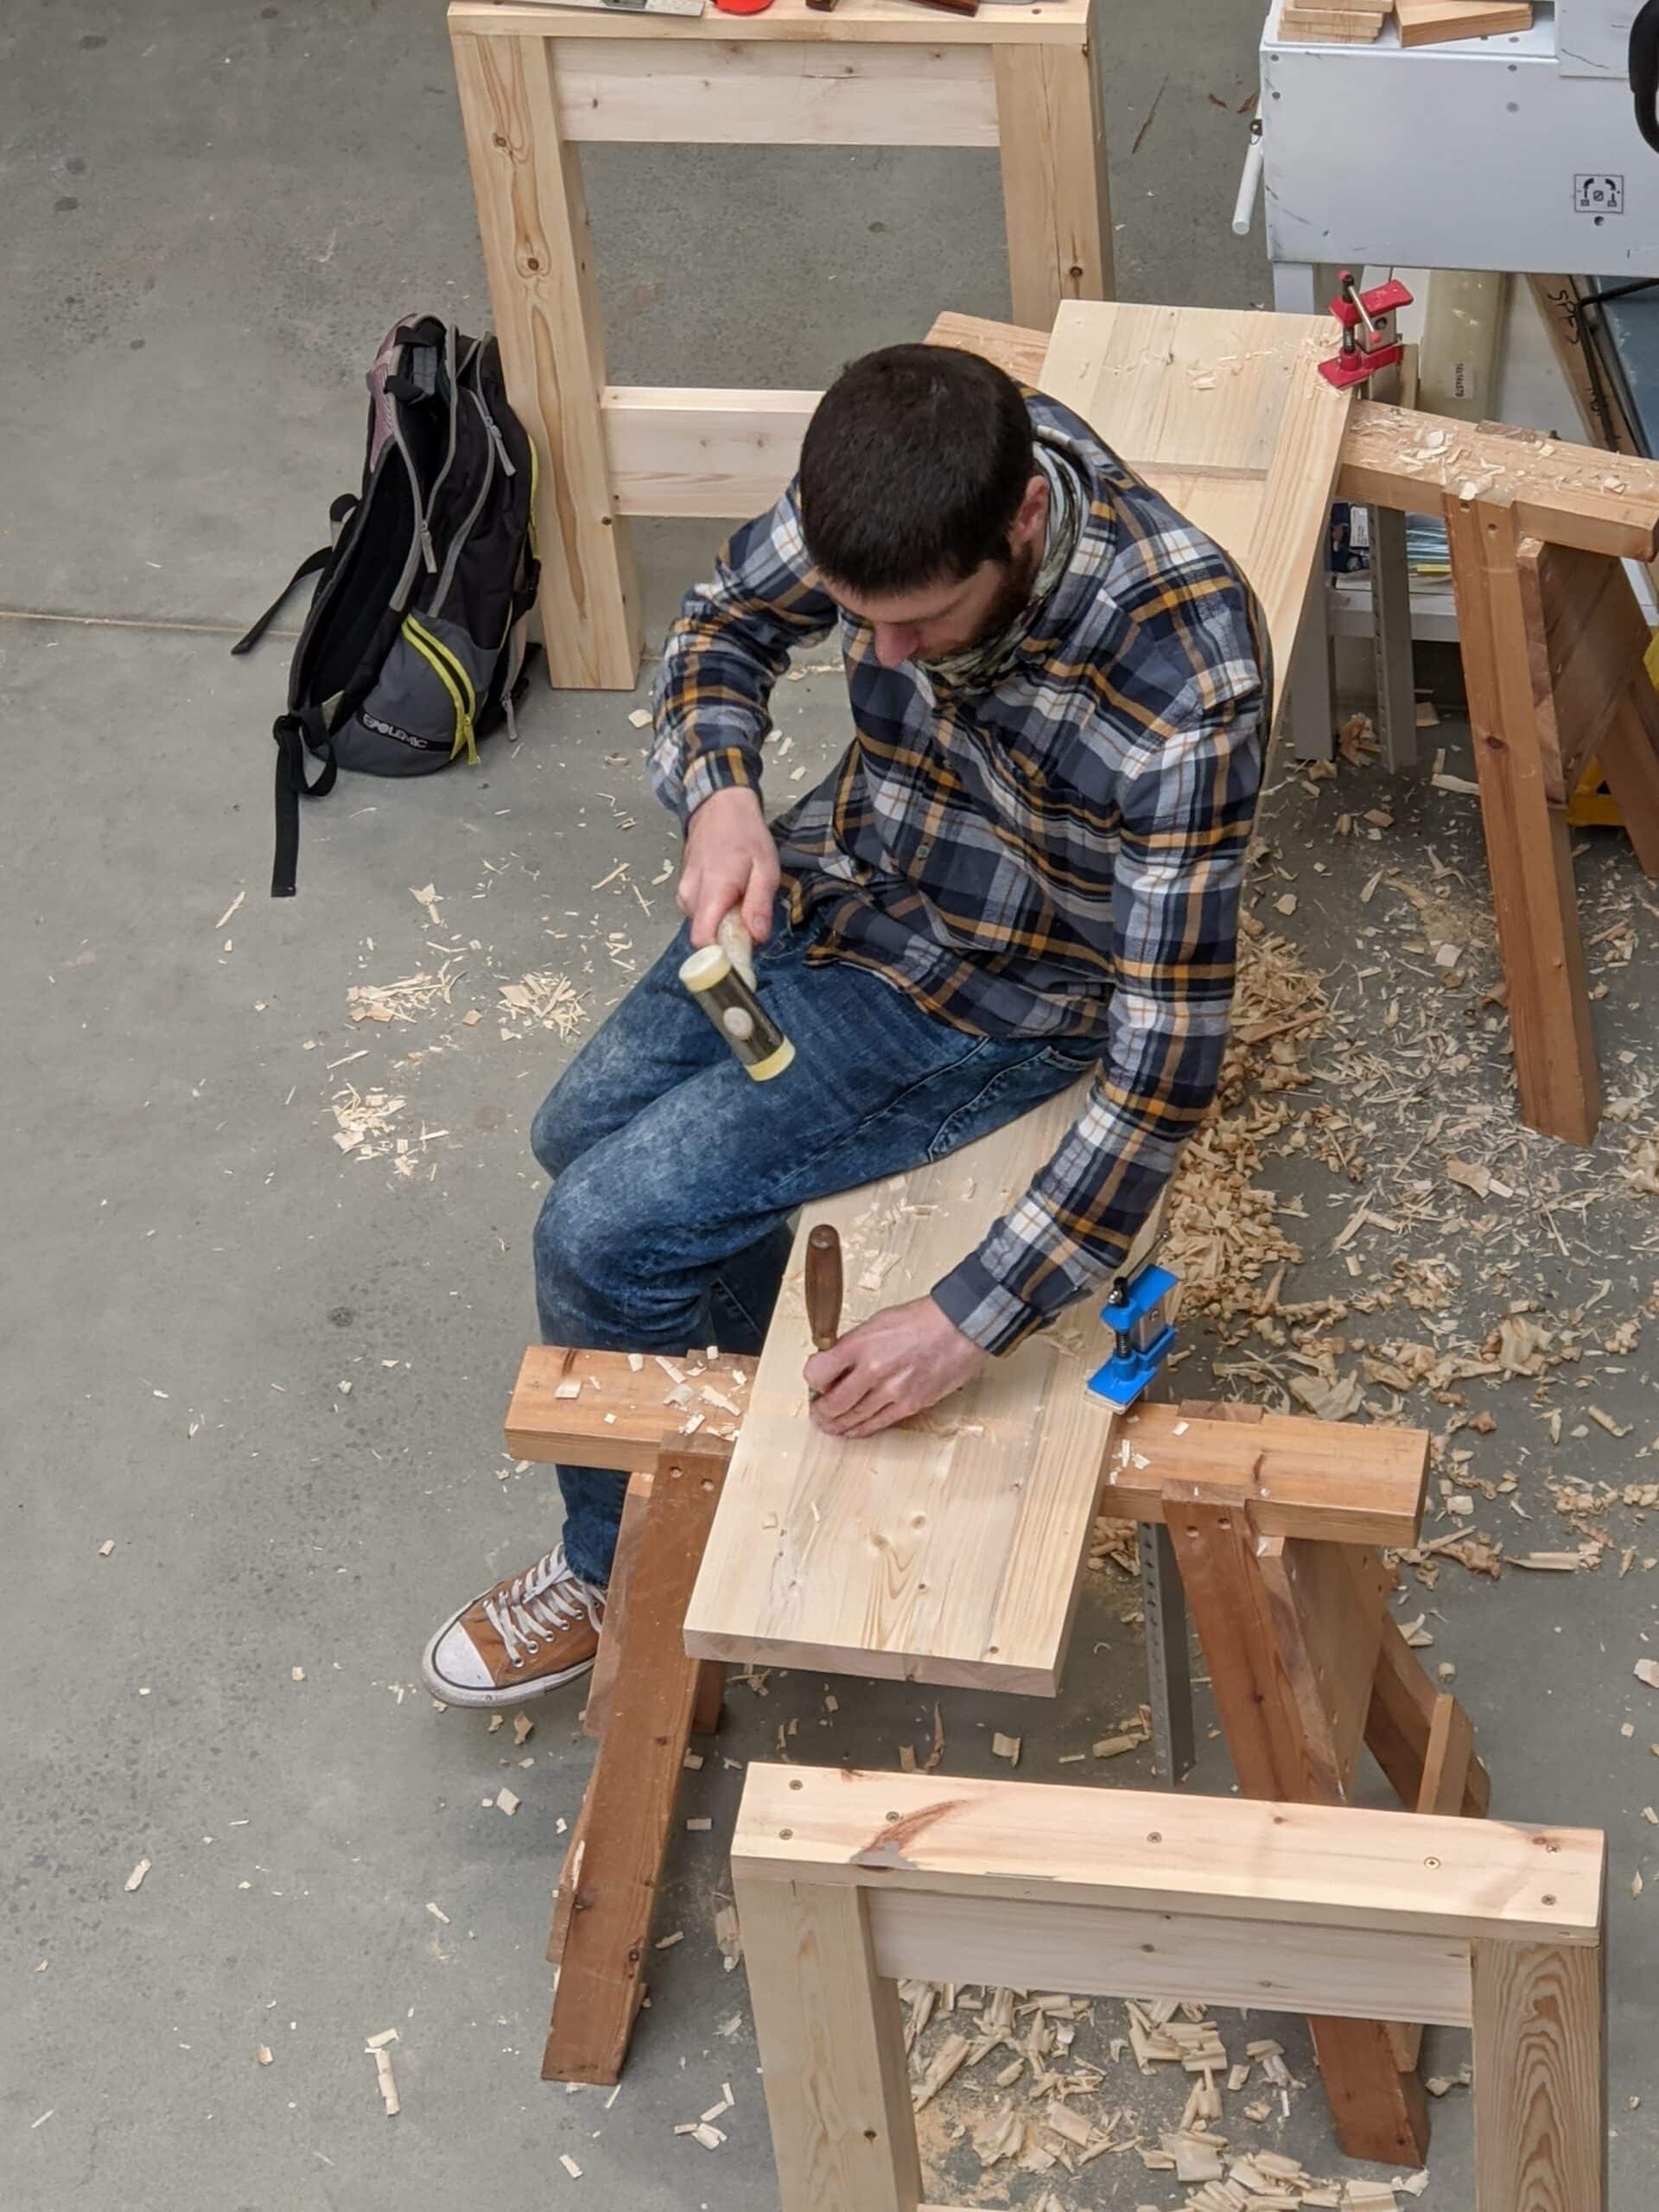
Hannah too has started back with gusto! She is on her Craftsman-style rocking chair which she should finish over the next couple of weeks. She is now self employed in her endeavour to become a furniture maker and woodworker in her own right. She too is gifted at her craft and enjoys anything creative. She has learnt some sketchup to complement her existing drawing and drafting abilities for communicating her ideas. Soon she will be offering her work for sale and I will help to encourage her as she continues to grow.
Since 1990 I have been privileged to apprentice and trained new woodworkers in furniture making year on year. Making will always be my passion but so too helping others who want become woodworkers in their own right. I have lost track of most of them but periodically I hear of or from them in some distant place. My training changed when I started with the online teaching. I am grateful for both opportunity types in terms of platforms because they somehow give purpose to the future by those who dare to dream and then those who dare to live their dreams ambitiously. It would be impossible for me to take in every ambition but now that the online work we do has proven efficacy I am satisfied that distance learning can and does work as well for those who are willing to invest the time in mastering skills.
I for one can attest to the efficacy of the work you all put in to the online workshops.
I never toucheid a woodworking tool until about 3 years ago and now I keep my tools in a joiner’s tool chest I made; I put my baby to sleep in a cot I made; and today my wife was working at the trestle dining table I just finished making (which I’ve had the most wonderful feedback on!). All done out of a sloping roofed, single car garage without any big, noisy machines!
Everything you provide Paul is accepted with great enthusiasm and curiosity. The only way to improve it would be to have you look over my shoulder occasionally and pass on a pearl of wisdom, that would just add the cherry to the cake!
Thank you for enriching my life!
I have build this workbench from the 2012 video and blog post. It is not a nice piece of furniture (recycled wood and want of skill) but it is perfectly functional.
I perfectly happy with it. With its help I have improved my skills since.
“I told you about John coming in […] he has been following our DIY guide and video to building your own workbench to test out the details.”
Two little points of attention:
– the underside of the worktop must really be out of wind at least at the two areas which will sit on the two leg frames; otherwise the workbench will rock on the ground. Although, a well placed shim between the worktop and one of the leg-frame is an easy remedy (don’t ask);
– Although he hole for the carriage bolt in the apron and the leg is to be bored with the leg-frame in place in the apron’s dado with the wedge tightened, I suggest to enlarge slightly the diameter of the hole in the leg-frame afterwards. The idea being that this bolt slack will ensure the wedge will be able to push the leg-frame against the other side of the dado instead of against the bolt, even if the leg shrinks. (This to answer a negative comment I have read somewhere about left-right slack not eliminated by the wedge.)
Before discovering this site and then woodworking masterclasses, I hated distance learning. I still hate a fair amount of it. But you demonstrated how great it can be. The problem with so much education generally and video education in particular is that it’s hard to do it right. Your standards are very, very high. Something that comes from a lifetime of “avoiding all gaps” as you hilariously said in your dovetail boxes video. Avoiding all gaps in your video lessons is what makes this school so spectacular.
Are safety shoes no longer a workshop requirement?
That’s what you need to comment on?
The steel toe dulls the chisel when you drop it off the bench and catch it with your foot, so they’re out!
It’s up to each individual. I don’t police footwear but I do disallow flip-flops, open-toed sandals and also shorts.
Wait. So there is a new workbench style coming out? Will these be all new videos? Avaialble on youtube or just on WWMC?
Having built my ‘English-style’ workbench by following Paul’s videos, like many others, I can attest that is is an excellent first projet. There may be some challenges along the way, including sourcing wood for the first time for me, but the videos are extremely complete and the result is well worth the effort! I don’t think that a shop bought workbench would work better in any way for me, and it’s a moral boosting thing to see and use it! Thank you for making this possible!
I made my workbench following your design, Paul, and it is not only functional it is also something that fills me with that lovely feeling of “I made that” every time I use it. It may have a few flaws, and we beginner amateur woodworkers are the worst at drawing attention to the mistakes we make, but it is *my* workbench. I also get quite a kick out of the thought that should I ever have the privilege of you visiting my small garage workshop you would know where everything is located! I look forward to hearing about John’s progress as we have heard and seen Hannah’s journey. I, like I’m sure many others, am envious of their opportunity to work alongside you.
I do sometimes wish that you were physically present to correct my bad woodworking habits, but one thing I would say is the best thing about virtual learning is that you can literally watch the same video several times and pick up a new nuance that you hadn’t noticed before.
I’m rambling, but thanks Paul for your dedication and passion for hand tool woodworking.
I too built the bench three years ago following Paul from the video in the back garden . Great project, thoroughly enjoyed it and the bench is solid as a rock . Great.
I built a behemoth workbench years ago. It is 8’ long and 3’ wide. I would like to build another one more like Paul’s but it seems a shame to waste my old one. So I think I will gradually rebuild the old one to dimensions and usability more sensible.
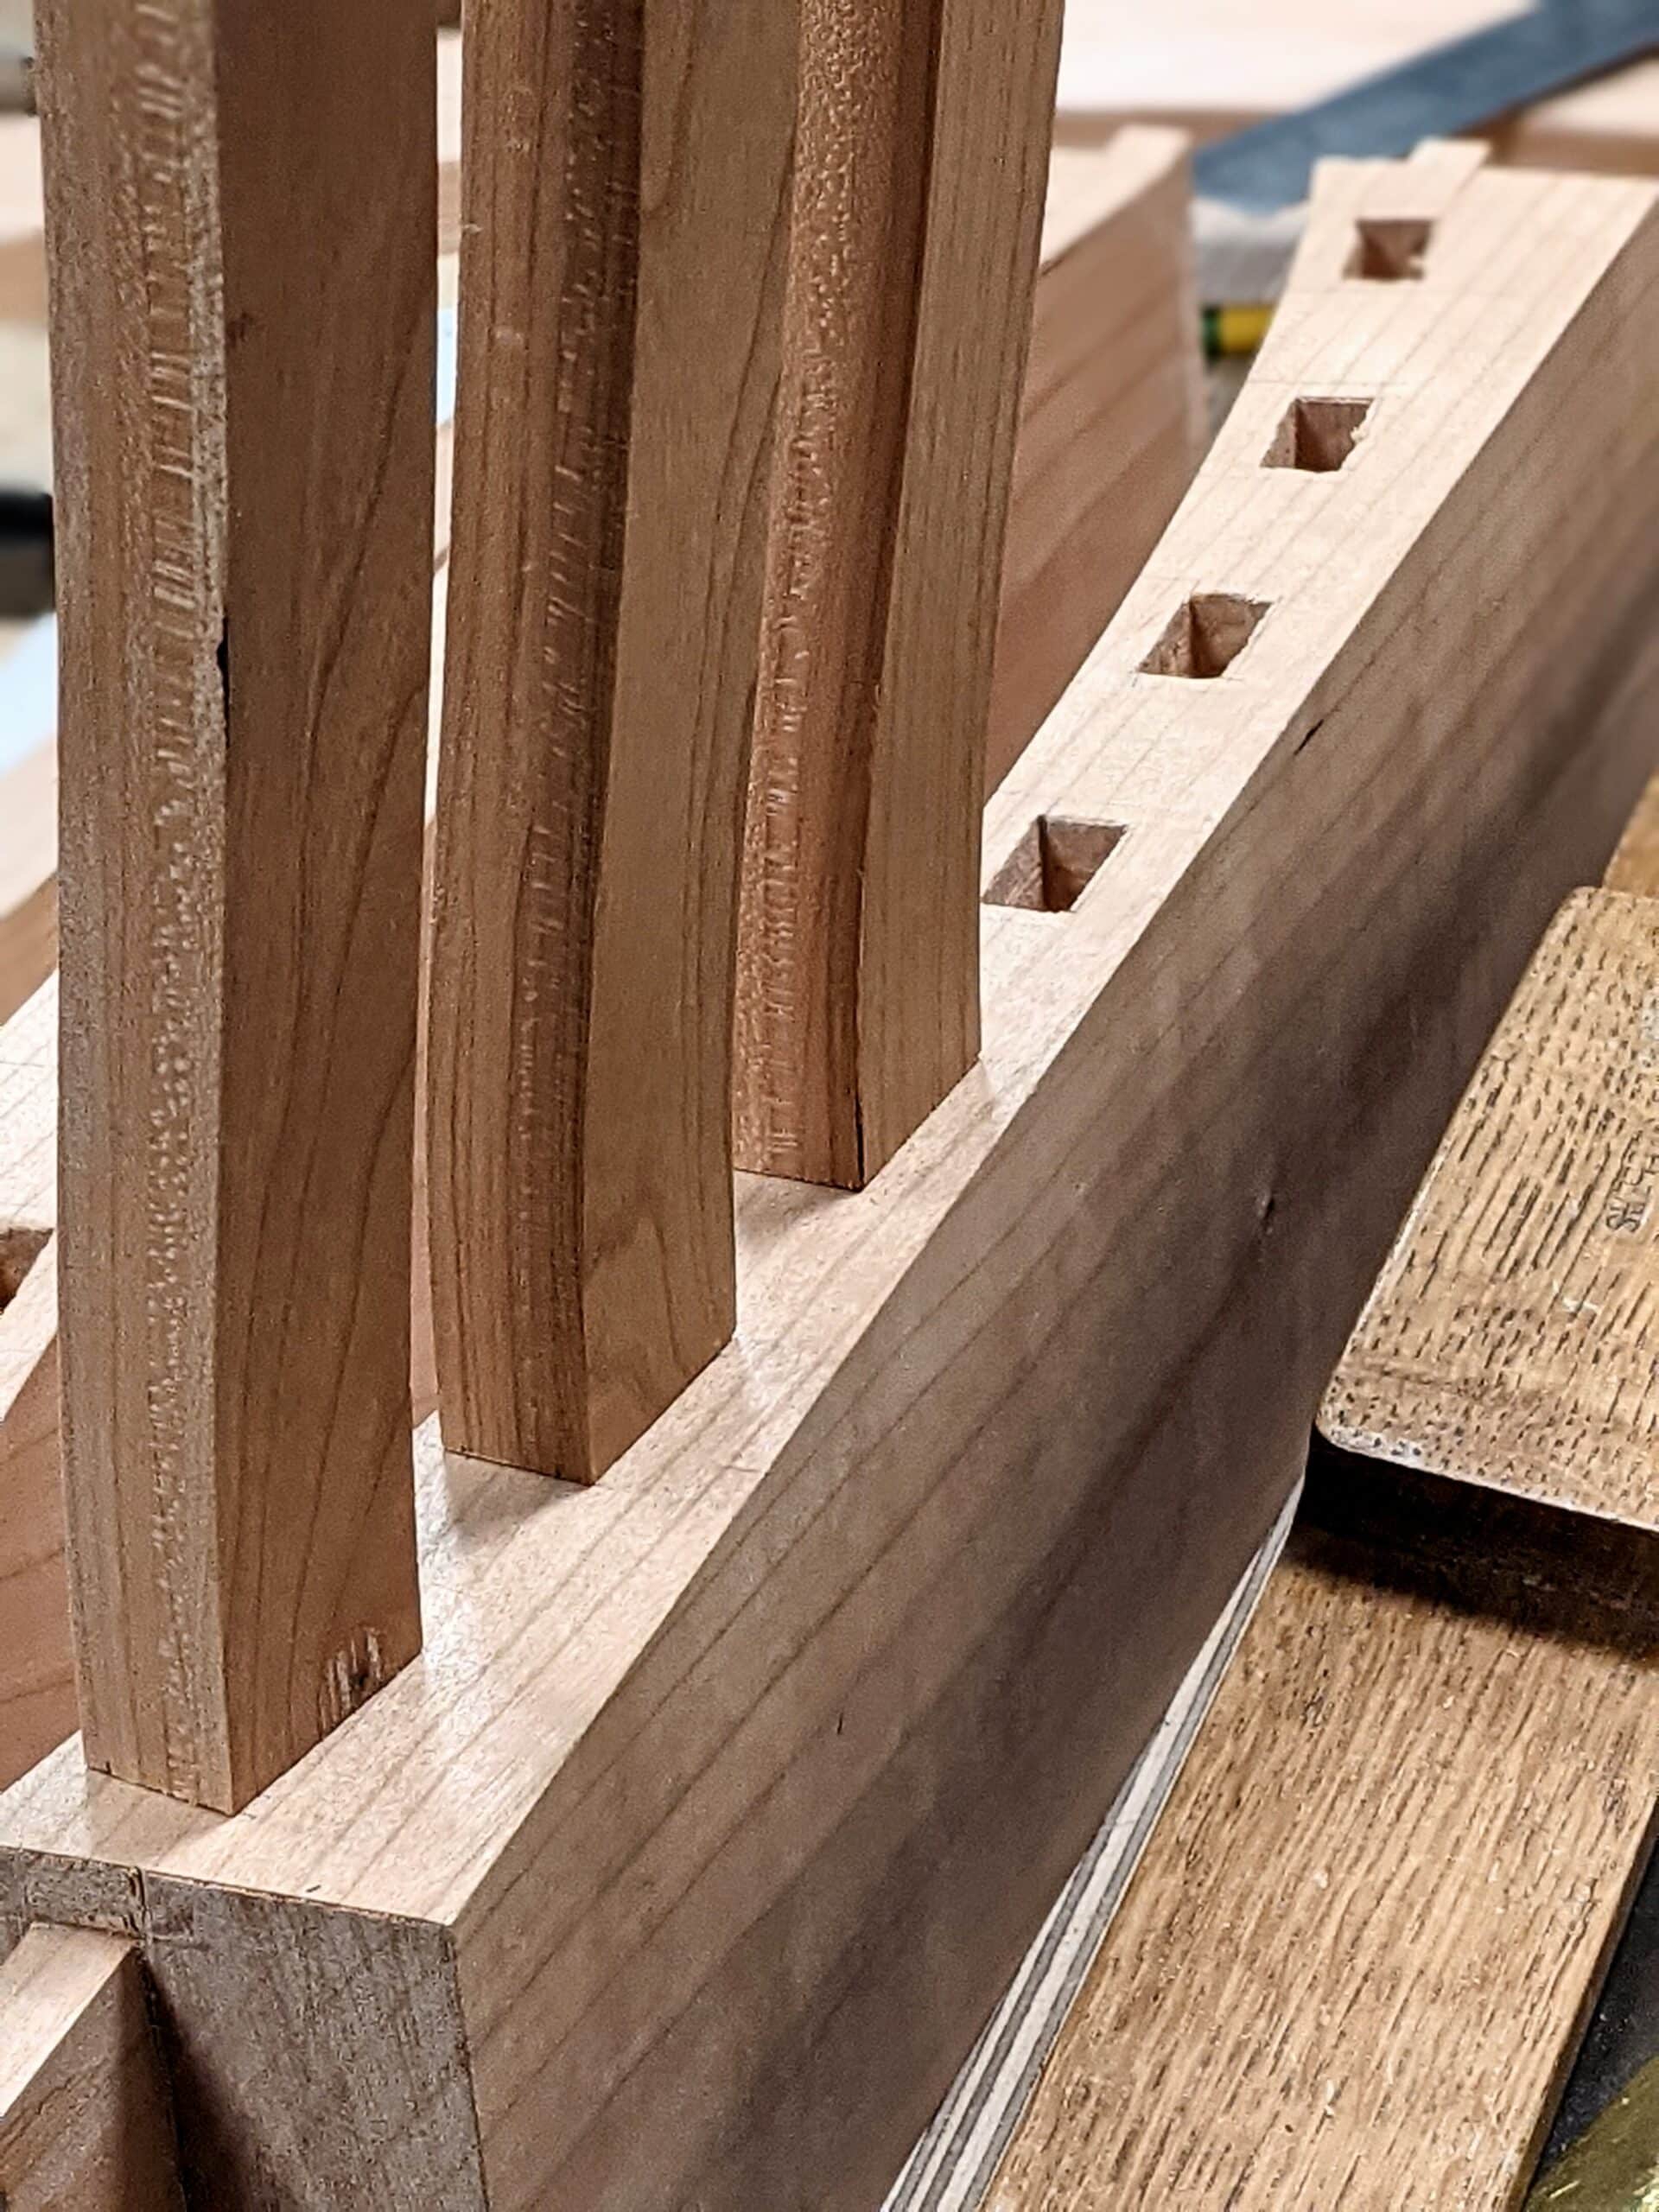
I noticed in the final picture, showing the laminated bench legs, that the mortise holes are in the same plane as the joint. Wouldn’t it have been better (stronger, more durable) to have the mortises go through both laminations, i.e. to have the mortises rotated by 90 degrees w.r.t. the glue-plane of the lamination? I’d think that the tenons might now try to split the lamination. IIRC, you did mention this point in one of your benchmaking videos. (Just looked it up on your blog; in the workbench FAQ, under ‘stock dimensions’, there is this frequently asked question and response):
“Can I laminate stock for the legs?
A: You can laminate the legs, as long as you take into consideration where the mortise hole will be relative to the join.”
I’m sure that mr. Winter, who is not a beginner, had his reasons for doing it the way he did, so I’m interested in learning why. Even if the answer is, ‘it doesn’t really matter very much’.
He made the mistake…..now we’ve drawn attention to it! Hmmm!
Ah ok, even the best horse occasionally trips. Thought it was simply something I was missing. Poor guy, he probably didn’t expect the Spanish Inquisition. Hundreds of woodworking eyes all over the world looking closely at everything one does.
No safety shoes! Mortises in the wrong plane! And did he brush his teeth this morning?! Hopefully he never puts down his plane on its side, or verily a storm of questions will follow….
Well at least he’s not wearing Adidas shoes with a Nike shirt or some other unforgivable mistake.
…if one finds themselves in that situation, maybe clamp the laminations together, above and below, before tapping the tenons home? (When building my bench, I split an unlaminated leg post at the top rail when I seated the tenon at a slightly different angle during glue up than during dry fit. Lesson learned. Glue and clamps set it right.)
Something must have been wrong then, I think, maybe. A lamination should not come apart at the glue line and John’s tenons do fit absolutely perfectly. It’s shame that this has become a point of focus because it really makes so very little difference. Ideally, yes, tenons through would have been better, but this likely good for 200 years.
Yes, my problem was an imperfect tenon. Sounds like lamination by itself shouldn’t be a problem – thank you for clarifying.
Let us just call it “practice for pegged tenon joints” for applications where you just have to do a mortise “between” laminated parts. 🙂
Adam Savage did a video on Tested where he talked about how to cope with the fact that some people does not like what you do, how you do it or something to that effect.
He mentioned some forums where people can post “I made this Star Wars costume and I had only 75 bucks and a rug”, and people will comment on how well the person did – not that he got this detail on the blaster wrong, or that such color did not appear in the original versions before George Lucas polished them.
That is a good thing. Nothing wrong with pointing out errors, if done politely and with the intent to help out. Nemo’s post is a perfect example on that policy.
As long as people do not use pocket hole “joinery” and slobber spalted epoxy all over the thing, I’m generally happy. I can enjoy both pocket holes and epoxy too – even machine cut dovetails – as long as the person made something and feel the satisfaction coming from being able to state “I made a thing”. Which is important, and will make Kamprad’s tombstone twitch.
But I must admit that I will applaud the effort, not the methods, though…
Wow, I did not have a clue about what was just being talked about! Now, because of a slip made by someone else, I have learned a valuable lesson. I can use that piece of wisdom when I rebuild my workbench.
Thanks Mr. Winter !!
I personally wouldn’t call it a “mistake”, because if you make the plywood version of the bench you purposely do that exact thing to take advantage of the situation.
Have the adjustable shelves with the pins in the background of the photo of Hannah been described somewhere?
Does the palindromic one have a youtube channel?
John needs a bigger tote for his plane. I too got into the bad habit of letting my little finger stray outside of the footprint of the plane. It only takes so many nicks, cuts, bangs and bashes before one takes sympathy with the poor little pinky and doing something about it.
If that is his biggest issue today, he’s going to have a great day.
Speaking of things Covid.
Has anyone else noticed how much slower checkout lines go in this age of social distancing?
I made Paul’s design of workbench based on the ‘garden’ one from years back. It is double-sided with two Record vices (one at end). 1m x 1m x 2m. Works a treat.
I am able to rip boards using Roubo resaw with ease; the bench has so much mass there is no movement at all. Added casters to move it about. Can thoroughly recommend the design.
May I make some suggestions: lightly glue some scrap MDF, Ply or softwood to the top of the sawhorses. These will act as sacrifice pieces to prevent the tops being damaged. A few spots of glue will hold them in position, and make it easy to replace. Hannah should put some narrower wood under the stock she’s chopping. It will stop the stock from dropping in the vice. Or clamp it to the bench over the leg with smooth scrap wood underneath, using a holdfast. Clamping over one of the legs will reduce bounce.
I am sorry, Kevin, I would not encourage any of these to my staff or apprentices. Oh, and I hate holdfasts too. Never needed them in 55 years even though I did try them for a little while, and I need holes in my benchtop even less.
Hi Paul. If I may add one more voice to the crowd of others – thank you for the effort you put into the workbench project that aired on Youtube back in 2017. I chopped the first mortise of my life while making my own bench of your design. I have now progressed through other WWMC courses, most recently completing your blanket chest. I am now working on a coffee table of my own design. It is not an understatement to say that hand tool woodworking has transformed and enriched my life and looking back now I can more fully appreciate the choices you made in that workbench design. I will be forever grateful of this gift you passed along, and the many many other techniques you have taught.
I very nearly attempted to make a “show-off” style bench out of maple instead of your bench out of pine, and I am so so glad I didn’t get pulled into the glitz and glamor woodworking that others on Youtube present.
Good day Paul I recently built a Morovian style work bench for convenience sake.It is very stable and versatile as I currently have no space to set up a permanent workshop.Apart from the top it was made with no metal fastenings.Not exactly true to that design but it is all I need. The material was all recycled and this bench can be taken down in a minute or two. I put a removable tray come bottom shelf in it to store bench hooks clamps and other gear.Also I have a removable bench jack for long stock.I went for a Record style vise but a Japanese copy.Whilst it’s probably not your cup of tea I reckon some of your readers could find a M orovian style bench just the ticket for limited space.It can do every thing that other benches can and doesn’t need to be in the way 24/7.My bench is 2.400 X .600 mm + a 2.400 X .200 X .75 tool tray.
Keep on chipping on.Cheers
Isn’t it marvellous (i.e. something to be marvelled at) that – thanks to technology and Paul’s generosity – we can all benefit from his and each others’ efforts and opinions? I wish you all well from New Zealand where, apart from a near complete absence of foreign visitors, life is almost normal.
yeah wishing you all well too from Australia .Does John really need a bigger tote ?cause there is nothing there to hurt his fingers and I know even a big hand is capable of changing a grip to suit a tighter situation.Hell I sometimes rip with two hands and still control my saw well.Hanna needs blocks to do her work properly ?I doubt it cause using sharp tools appropriately does not necessitate heavy blows that dislodge wood from a good vise whilst chiseling.Best lesson my departed Dad taught me about carpentry and joinery was do everything in moderation.If one rushes a job poor workmanship results.Dads apprenticeship was from 13 years old until he was 21 years old.Except forWW 2 his whole life was wood work. He was a garrison engineer in the war too.Hey life is too short to be criticle of folk.We can all learn together and have fun at the same time yeah!
Richie
Keep on chipping on