Experience through Experiments
As you grow older you perhaps consider doing what you are used to to be a better thing and might not experience by experimenting because, well, you might over-stretch your comfort zone to the point of extending yourself too far. The root of the word extension is to ‘stretch out‘, and we don’t necessarily find ourselves so willing to stretch as our flexibilities are more affected by our comfort limitations. Sometimes, considering our comfort zone might limit our understanding and learning and of course, such things can be a waste of our most valuable commodity – time. I spent a day developing an idea. I wanted to create an 11″ wide, bent drawer front from laminated plies of oak to find out different things. I used six layers 43″ long and 12″ wide taken mainly from sequentially cut layers from a single board and ripped on the bandsaw I have. Because the bandsaw would only allow 11 3/8″ high stock, I considered removing the top guides and that would have easily worked but I calculated that I ultimately needed only 11 1/4″ and that with judicious alignment I would need only minimal trimming so I left the top guides in place.
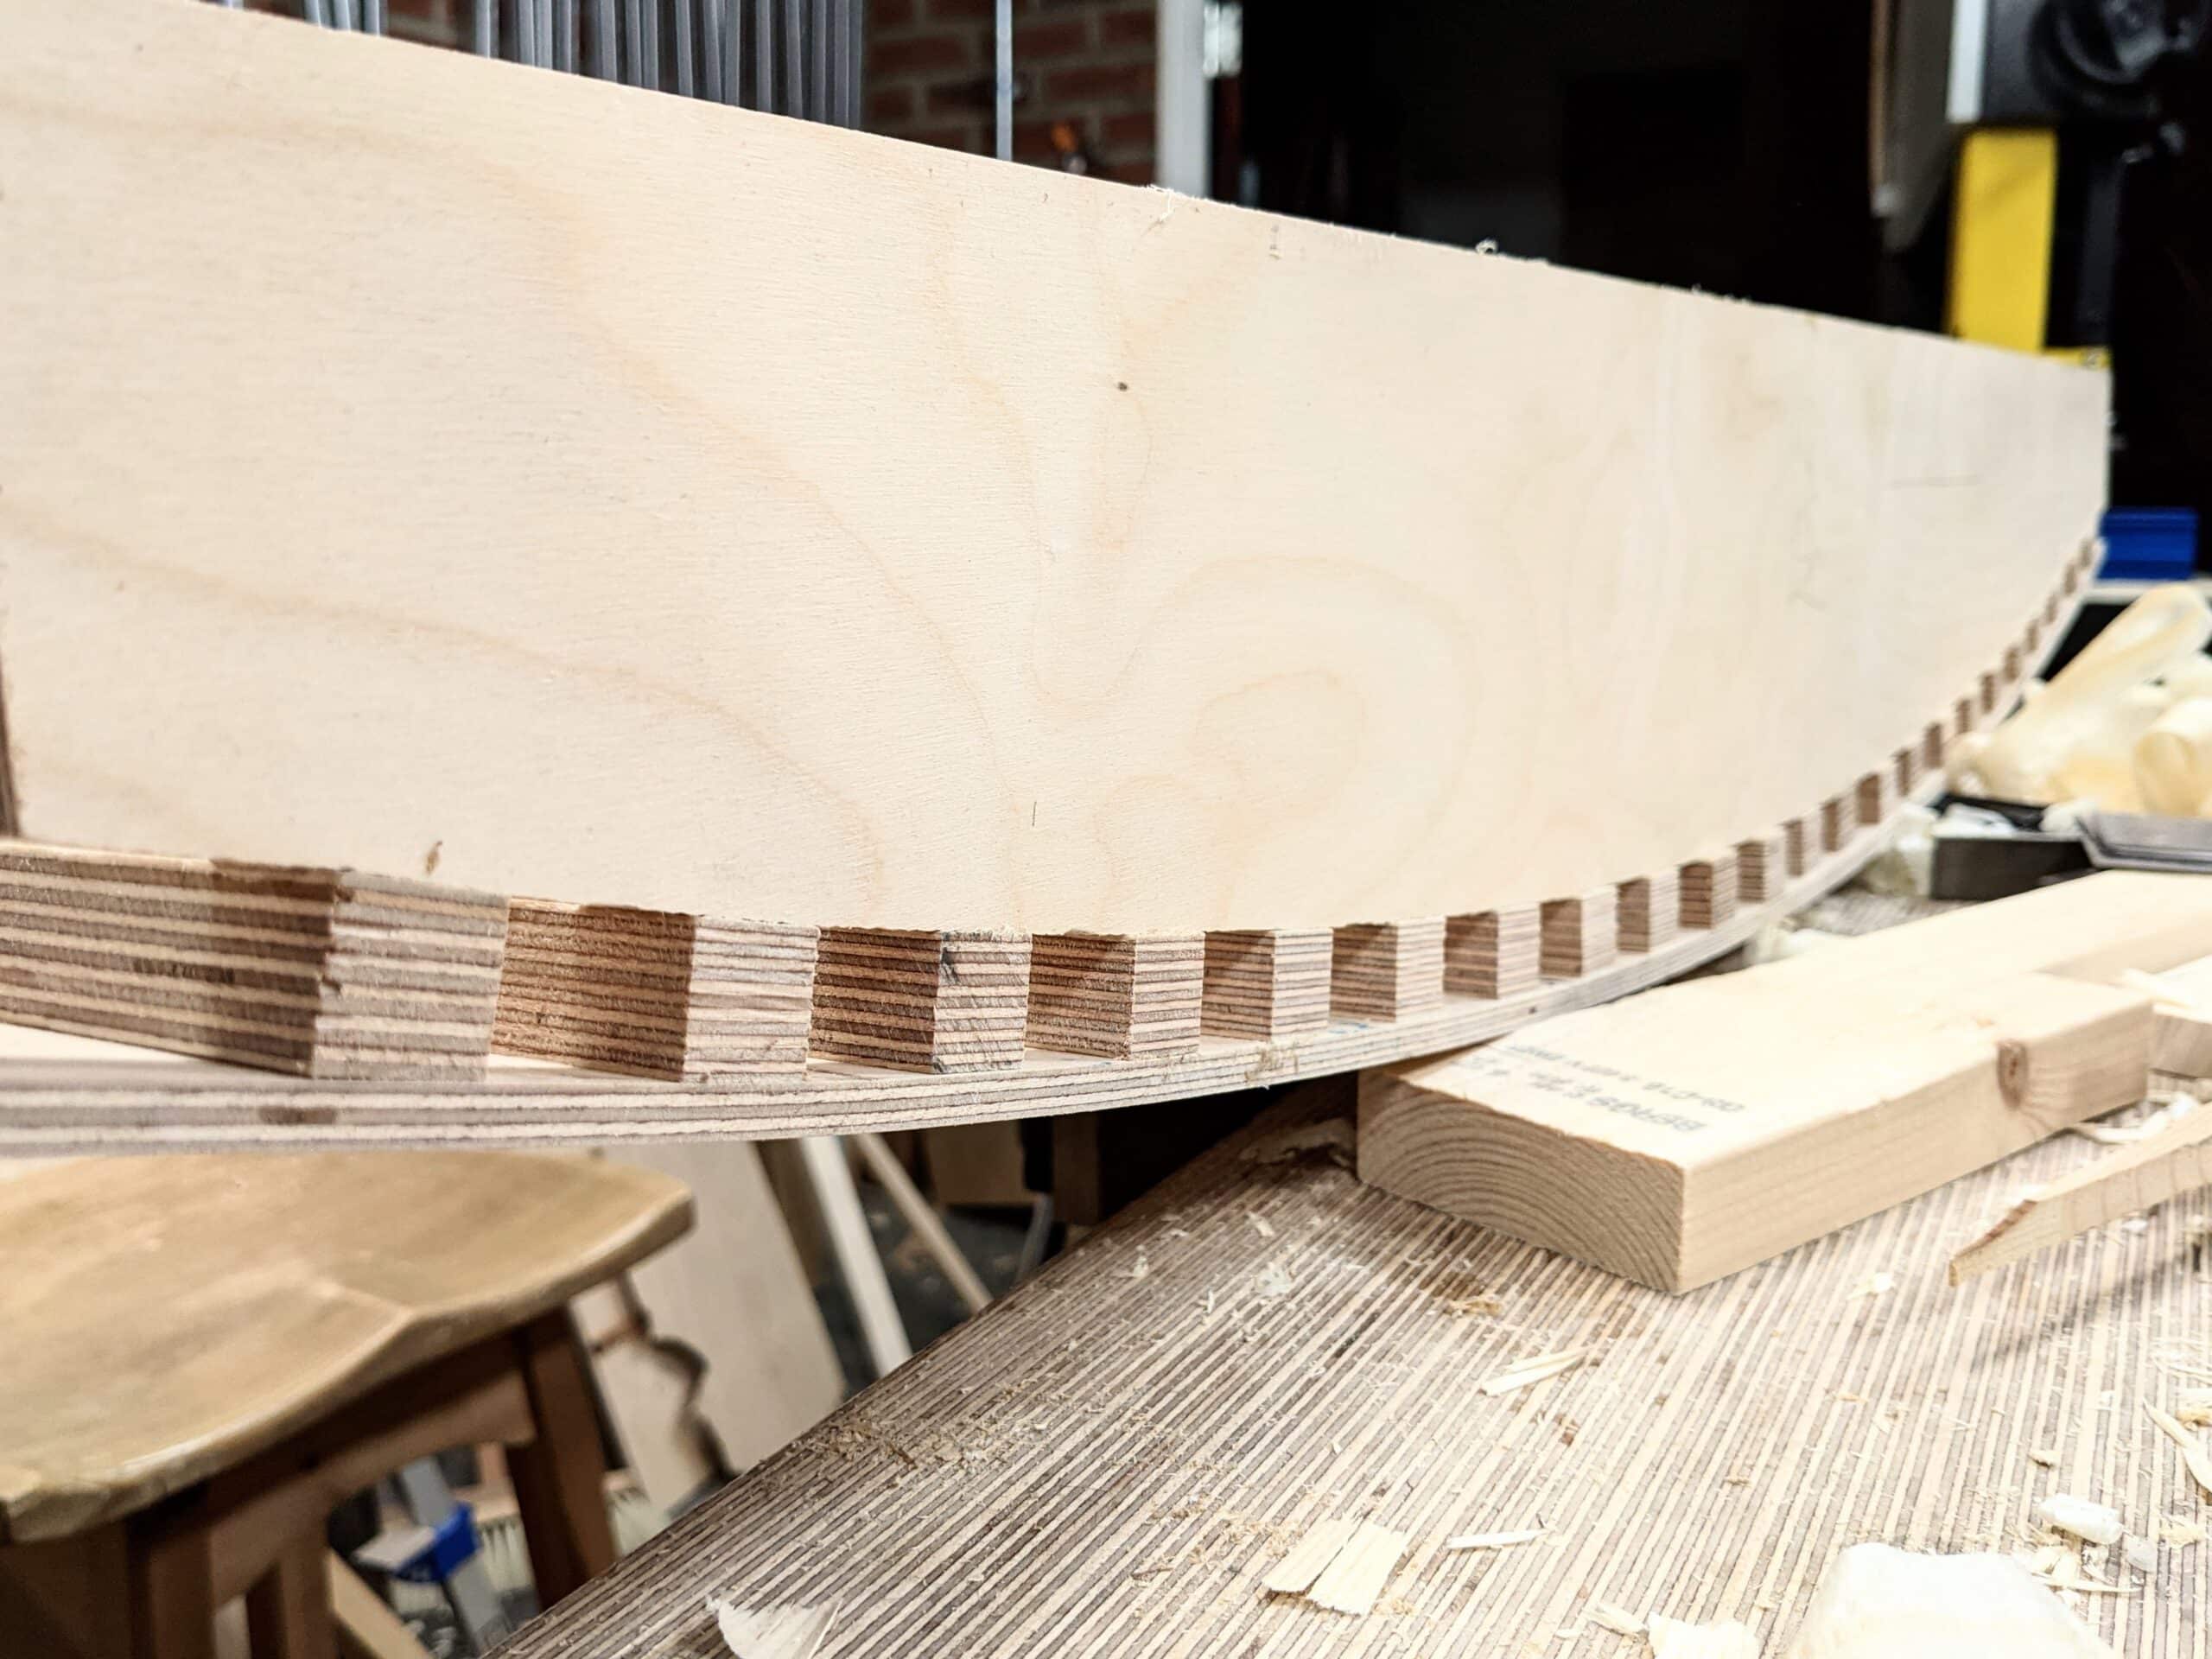
I built a platform from 3/4″ plywood that gave me the rigid resistance to any flex that I needed. Experience told me that the thinner the layers the more readily the wood would conform to the bending process and more importantly that the bends would not spring back as much as when using thicker layers. Were I able to cut thin layers of say 1/16″, retention of shape would be as near perfect as possible, but the issue then becomes consistency in thickness and the possibility of a certain amount of bandsaw drift, blade bulge and so on. A bandsaw blade, no matter the level of sharpness, no matter the tautness of the blade between wheels, feed rate etc, will usually still tend towards that inevitable path of least resistance. Such straying on so thin a material as 1/16″ will often end up with the blade popping out the side of the wood. Going thicker resolves this and will also allow for further planing and scraping if needed or you choose to. Also, planing thinner stock that wide and that long can be problematic – one section in a panel with opposing or rising grain, a swirl here, a knot affected area there, will tend to tear or rip out all the way through the layer. (Those with a wide belt sanding machine, please desist from telling me you have no problem with such an issue. We all know!)
For the four core layers, I decided on 3/16″ stock and that I would not plane in between the cuts at all. I chose this because removing undulation would be a major investment of time and felt this was unnecessary because the undulations would each be commensurate the other. Also, as we generally roughen the surfaces with a toothing plane or such, I could simply use the saw kerf to my advantage. Taking the slices successively meant each would compensate for any discrepancies whether bulges, parallelity differences or whatever. I did plane and scrape the outer faces of my 1″ thick board though. The addition of the two outer layers were not from the same board but chosen for their even grain pattern, colour and texture. I also book-matched the face grain lengthways albeit not chosen for distinctiveness but for evenness of colour, grain configuration and texture.
Firstly, I bent the four core pieces, glued them and conformed them to the former. I checked for bendability with a dry bend beforehand, just so I could check for conformity and gapping. It was fine. Fighting off the guilt feeling for doing something that might waste time and wood, I continued with the glue-up and left the whole for a day before removing the clamps. In past experiments I have always seen shape retention miss the mark by a small margin. Memory in the wood resists bending without the essential ingredient of using heat. I, on the other hand, was resisting the use of steam and water because it is messy with such work and it takes much more effort with little if any advantage.

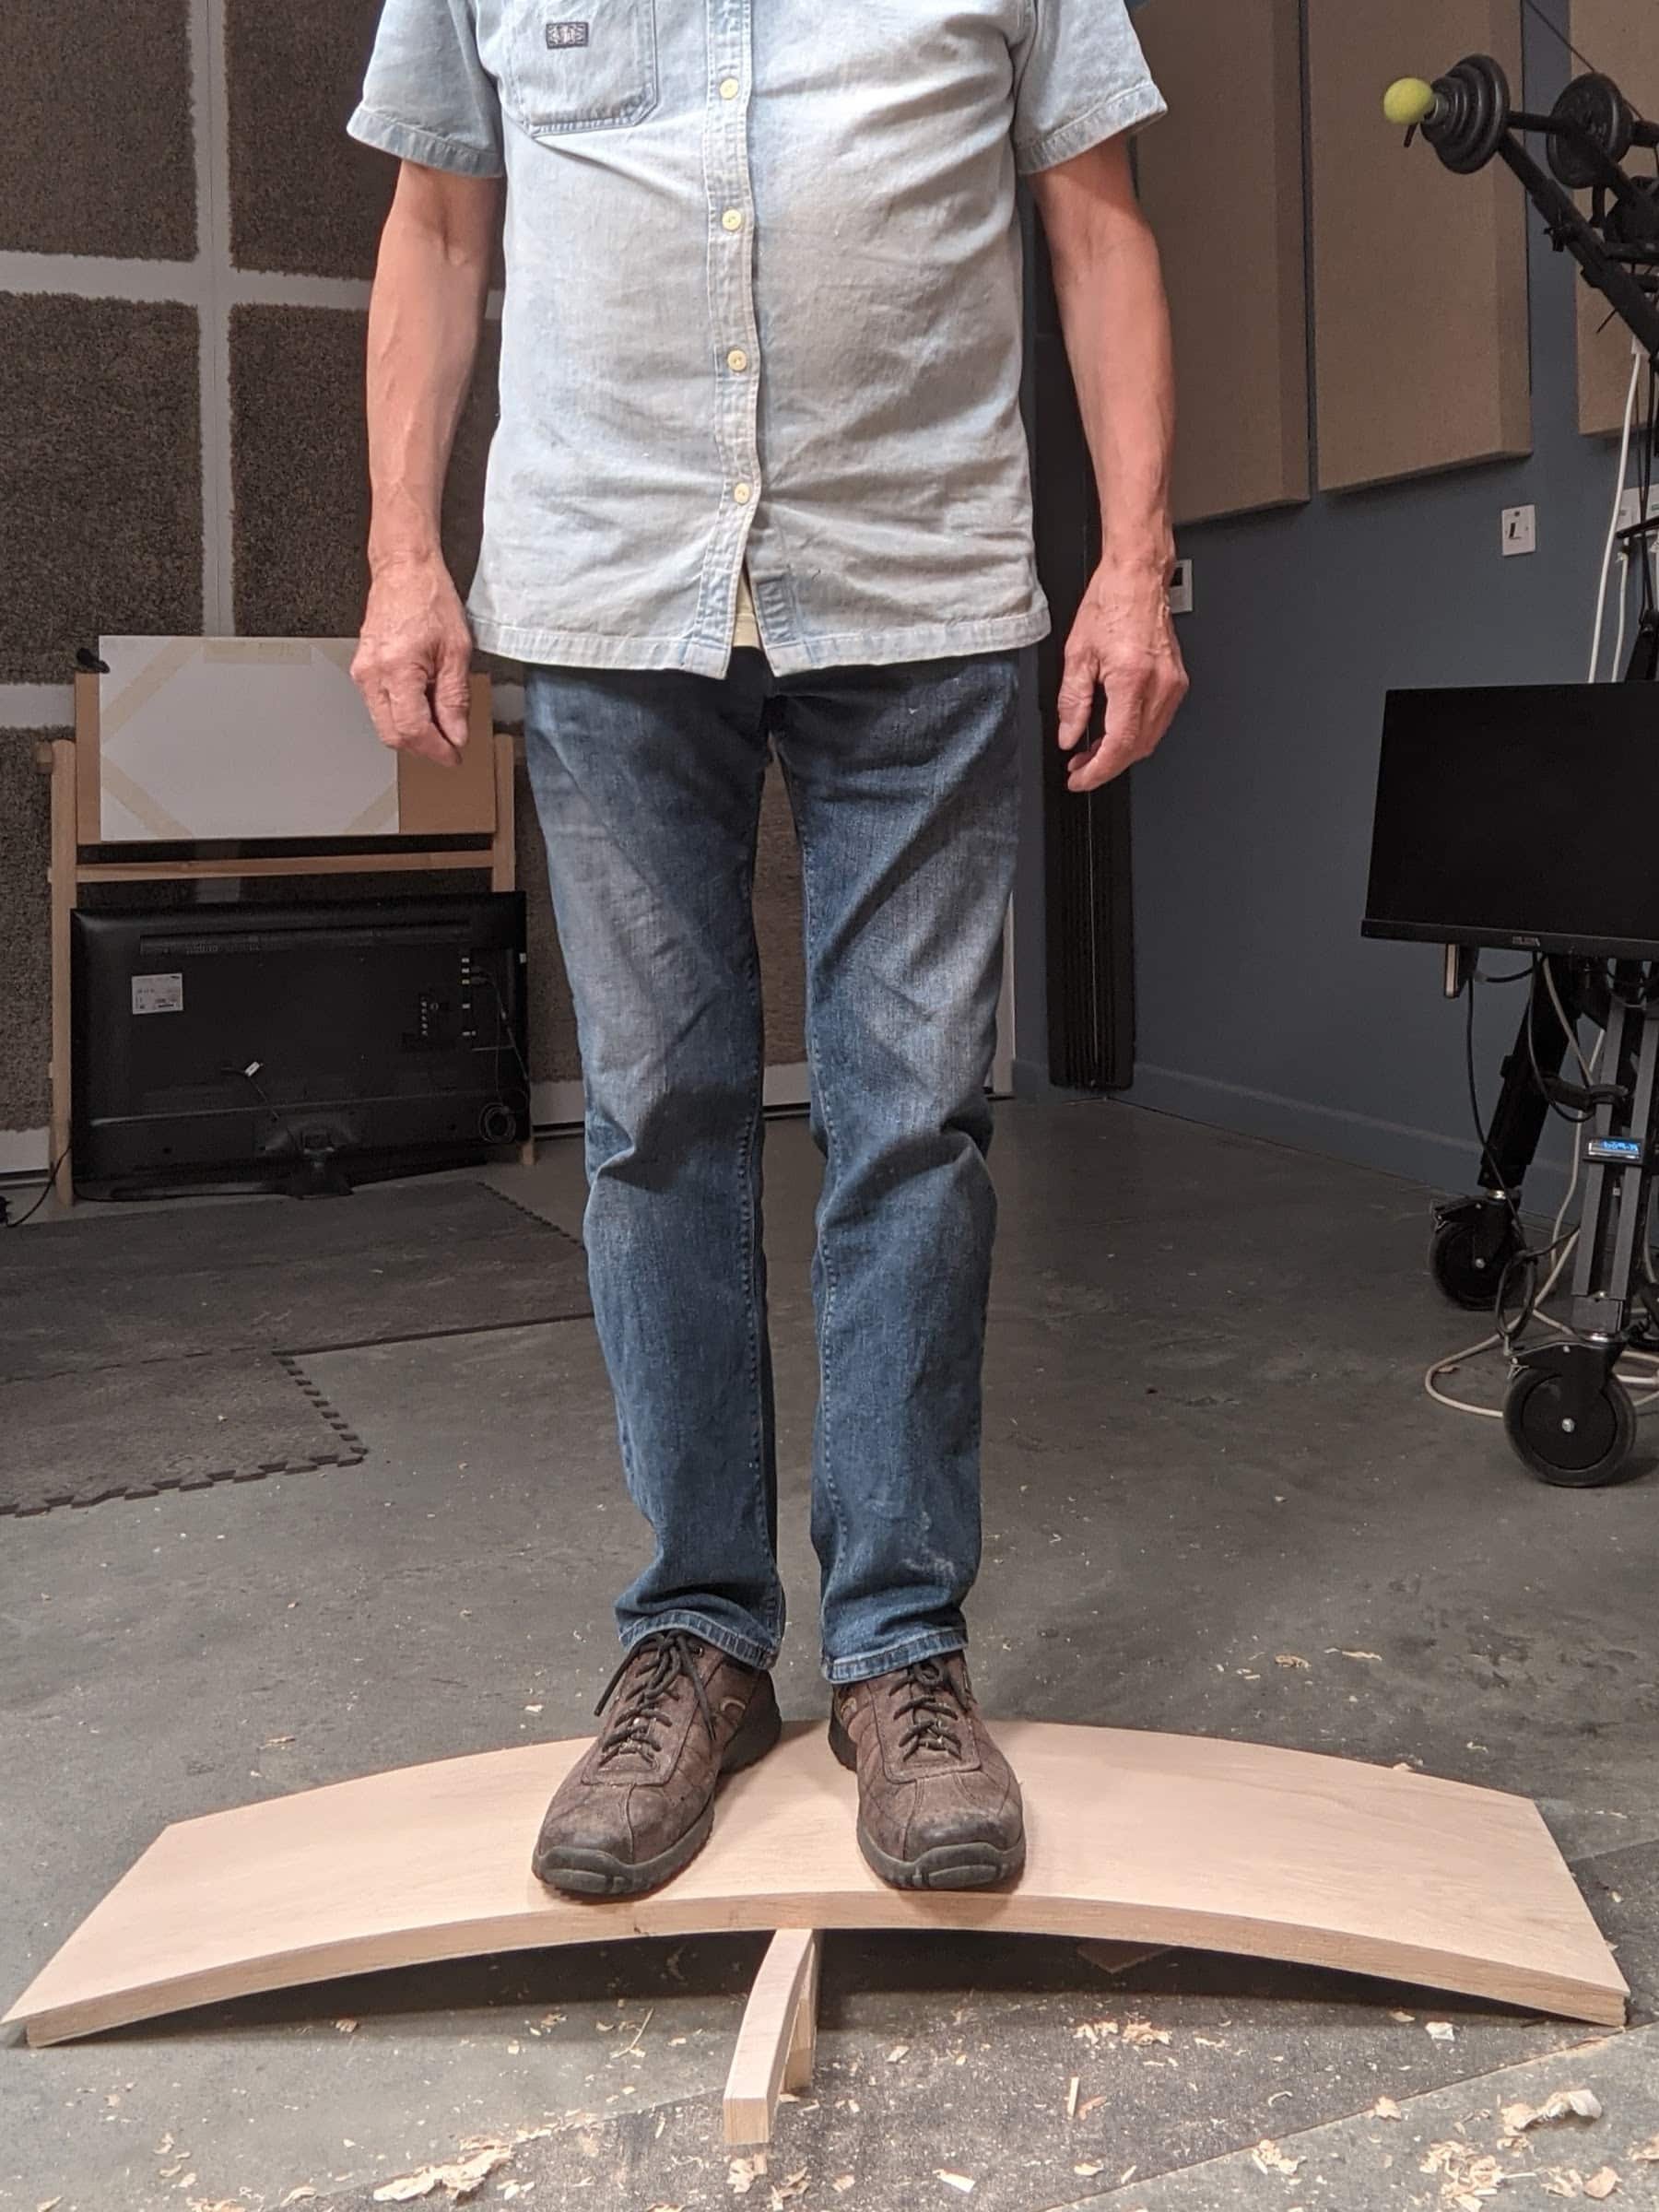
I ended up at just under an inch thick. The strength arching adds is incredible of course. My weight of 165 lbs (75 kilo) made barely any impact on the flex. In fact, it gave just 1/16″ (1.5mm). It feels so rock solid when you stand on it as I did here. What will I do with the experiment now? Not sure, but it will get used I assure you
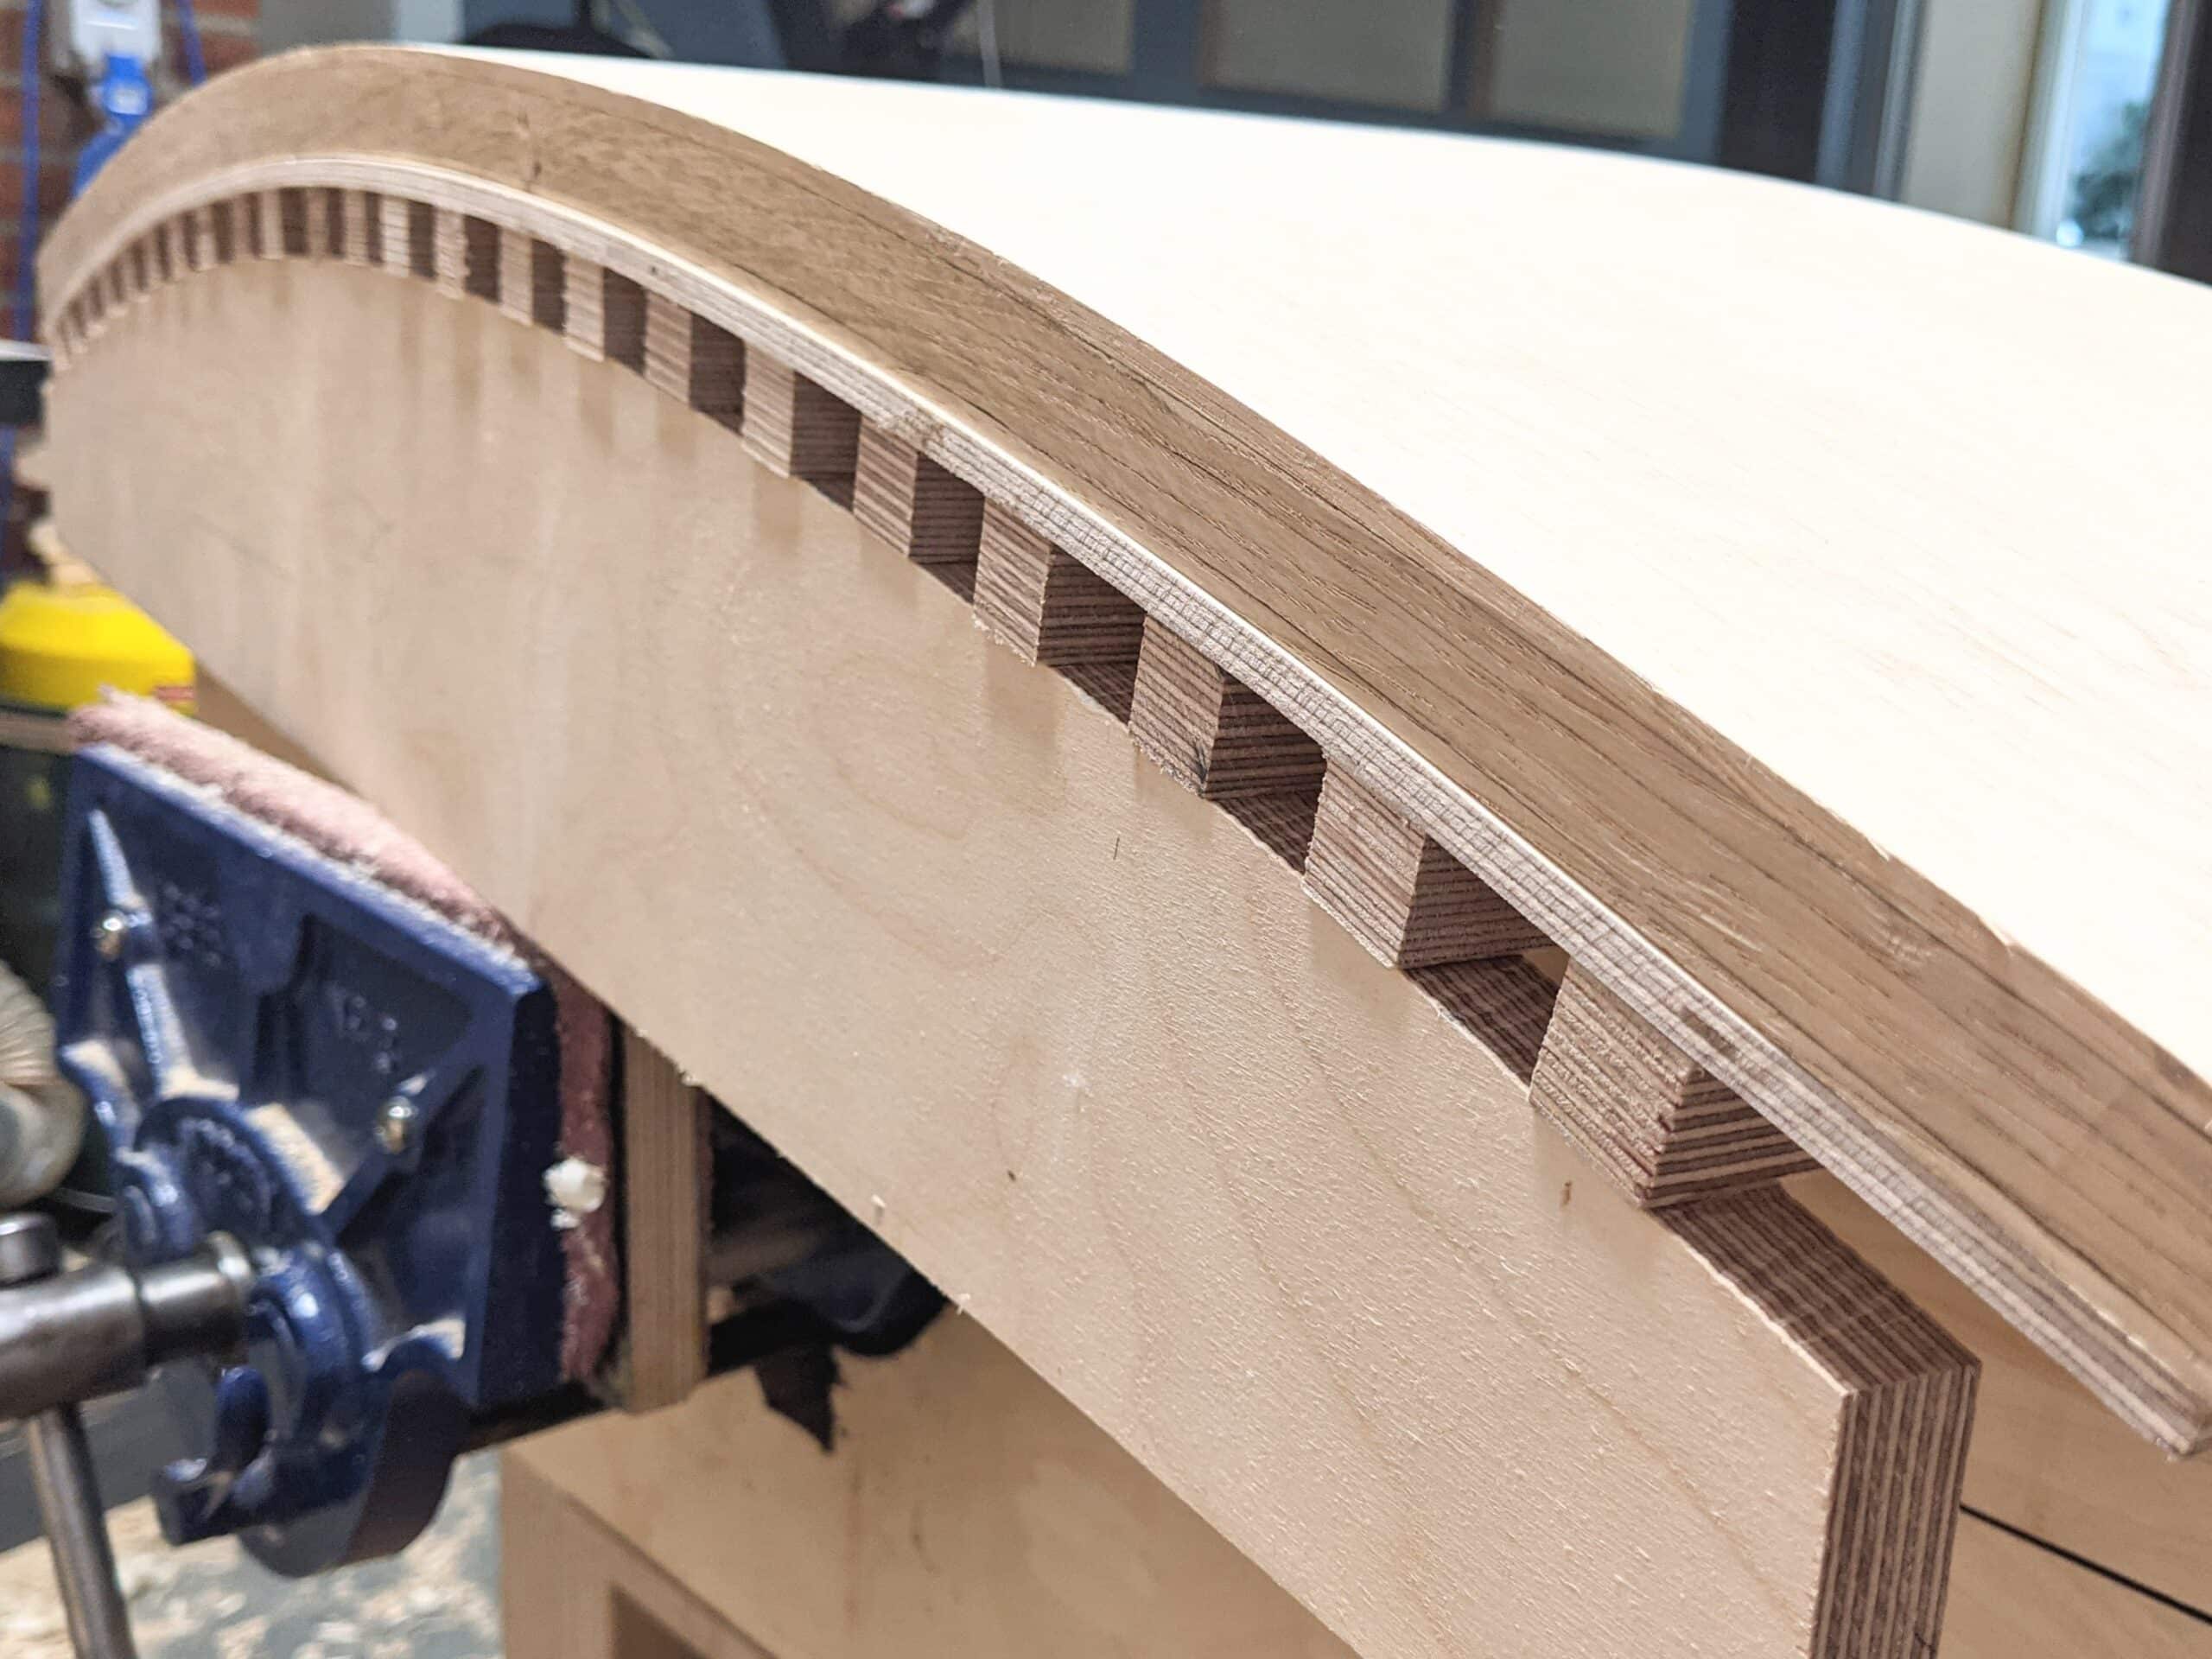
With my core bends completed, I compared the results to my bend lines and there was a 1/4″ discrepancy from my 76″ radii goal. I expected this, which is why I went for the two-step process. If I added a single layer to the inside of the cove, the glue could snatch and pull the curve into a tighter bend – I knew this also, from general veneering practice. I used a 1/8″ veneer on the inside face and a 3/16″ layer on the outside. I left the glue-up clamped in the caul until the following day, sixteen hours, and when I removed the lamination it matched the original line of my intent to perfection.

Adding an inside layer in a second phase to compensate the spring back.
Great idea.
I learned of this effect back in 2008 when adding a 1/16″ veneer to a 7/8″ (22.22 mm) panel and the panel curved a little but more than anticipated. I expected some curve but someone didn’t. I must admit I was surprised by the amount of curve. Correction was easy, it came through a standard backing veneer on the opposite face that straightened the whole. The panel? It was on one of the White House pieces.
I thought the added layer was just acting as a void filler but if I understand correctly it has, in some way, shrunk.
A long time ago, somebody gluing a poster (a geographical map if I remember well) on a panel explained me that one has to glue a paper layer on the other side to avoid cupping. He used newspaper as backing paper.
“I used a 1/8″ veneer on the inside face and a 3/16″ layer on the outside.”
One has to carefully choose the different thicknesses to correct the curve in the correct direction.
So the 1/8″ [2/16] shrunk more than the 3/16″?
The thickness of the veneer influences the bendability, so thinner veneers bend much more easily and retain the new shape better. Though the veneer layer does expand with the water in the glue, this depends on the speed with which you apply the veneer. You really don’t have but a minute or less because the atmosphere pulls the water from the glue immediately if you are in a dry atmosphere. The ‘snatch‘ or ‘pull‘ of the glue itself is what causes the curving. In other words, it’s like glue shrinkage rather than wood shrinkage that causes the pulling.
I have a friend who’s dad is of a very big stature. He has very bad knees. Because he is heavy and has bad knees he plops down heavily when he sits and tends to wiggle in the chair when trying to get up. This has resulted in several embarrassing situations of broken chairs. I have yet to build a chair but thought it would be a good opportunity to build one as a gift. I experienced from building your garden bench how incrediby strong the mortice and tennon joints are. I absolutely love how solid the bench is. Would it make sense in designing a chair to be as strong as possible to use laminations for the legs instead of solid wood?
It’s difficult to advise you without much more detail. Laminations can be strong and strengthening but the joining and joinery must be balanced and measures. The chair style and type also determine what you can and cannot do. You say politely;y that the friend’s dad “is of a very large stature” and that he can crunch chairs with his inability to fully support himself to sit and stand. This does pose issues. What might help is if you see a chair that he regularly uses to examine. That way you can see how it holds up, gauge sizing and so on.
I would think that solid wood, would be ideal for the legs, as any glue joint would be a weak point. The technique Paul is showing hear would, however be a good option for the seat and back. Maybe, with less radios though. Just my thoughts.
Please – what glue did you use? Thanks
Here again, experiment leads to experience. I used PVA wood glue, the most commonly used and accepted glue for woodworkers. For structural laminations such as load-bearing beams and arches you are best considering alternative adhesives that are substantially less affected by moisture and even fire. Furniture pieces are generally fine with PVA.
How do you like Old Brown glue/hide glue? Pretty traditional stuff, I really enjoy using it overall.
Whereas I do like hide glues, the Old Brown Glue might well be a cost factor for us Brits where a medium-sized 20oz bottle costs almost £30, £5 more than a whole gallon of Titebond PVA. For specialist work such as instrument making and then too repair work on old works, it will work as well if not better than other hide glue makes and types.
What glue are you using- thanks
Hey Paul, this is pitty, I’m not following at all…too much ” inches” and too few pics for my autism…cannot read the text because of all those ” that drive me crazy. can you maybe do a vid on this ? just talking through would mean a lot….grtz, Chris
Hello Chris, I am afraid we don’t really have the time to film my blog work because of all the other work we do filming. I do understand the issues for you though. Are you following my woodworkingmasterclasses.com work? The free aspect of it where you subscribe? Just wondered.
Hey Paul…yes I do, also ” commonwoodworking and I went through almost al of th YT vids so far….it’s because of thiscovering the last I picked up woodworking…could tell a lot but that would be a book to read for ya :)….thnx again
oops…autocorrect got me…thiscovering must be DIScovering
Excellent post of the process of your “experiment”, although you knew the result. Age, wisdom and all that. Great all around. Since I assume you will veneer the top, bottom and ends, why not use poplar commercial veneers? Or did I miss something?
Excellent show that!
Hi Paul,
What would be your thoughts on using this type of laminated method for a curved chair back instead of steam bending? Would boring holes for the spindles be a bad idea because of the glue joins?
Thanks
Laminating is a delight. I made curved tops for garden trellis using gorilla glue. After proofing, these are out in all weathers and have lasted many years without de-laminating. Once the glue was set, each curved section felt so strong and solid, yet light in weight. I noticed that where the glue is exposed to light (UV) it discoloured. But I’m not aware to any other adverse effects.
I am a bit off topic – but your thoughts on stepping out of your comfort zone limits your learning curve is spot on! I’m new to wood working, a little more than 4 years (even thou I am 65 never to late to start). I try sometimes to venture out to some other wood workers that pop up on you tube search but they typically show how fast they can do things or how expensive and pretty their tools are which takes the soul of woodworking and turns it into a competition in a sense. I just want to say, and I usually never leave comments… that you are true to your craft and encourage the art and soul of wood working in all that you gift us. Thank you
Off-topic is great in my world, Florence, and thank you for encouraging me. Speed and getting things done yesterday without smelling the roses come from some more modern and dare I say seemingly advanced cultures. The ancient arts still and will always give the greatest rewards of peace and skilled craftsmanship because the only reason for the kinds of speed you speak of is because some types of makers never knew nor mastered skill and see handwork only as tediousness.
Hello there Paul. I was an Organ Builder for many years. When making pedal boards, which are often curved and radiating, we would make the top cover board in exactly this way, by gluing together two laminations on a former. We always used hot animal glue for the heat and moisture element in glueing up the two pieces. We never had any problems with shape retention, strength, or delamination of this often heavily curved piece. Shape retention was important otherwise the piece simply acts as a spring to strip out the screws once mounted at the back of the pedalboard. Have you experimented with hot animal glue in this process, and what do you think of its suitability for draw fronts, etc.?