Sharpening Narrow blades
Here is a recurring question that many woodworkers as me about and it’s not just new woodworkers either. Even though being out of square usually doesn’t badly affect the functionality of an edge tool, without correction, theedge can worsen and this does affect how the tool works. Sharpening narrow blades of 3/8″ and less often results in the cutter ending up out of square and with the bevel being rounded both ways and ending up domed too. Though the cutting edge may still cut, usually, subsequent sharpenings make matters worse. Whereas we may get better with practice, it’s the in-between bit that’s troubling and sometimes, often, we don’t altogether improve our technique. We often reach for a honing guide to help correct our out of squareness honing but these rarely cater well to narrow blades either. Mostly it is to do with our holding the narrower cutter or chisel and moving backwards and forwards over the abrasive no matter the kind. This guide takes the awkward hold of cutters and chisels out of our hands and puts a controlled abrasive into them instead.
To make my jig resolves the issue and takes only a few minutes to make. I used an offcut of poplar and a scrap of cherry for the wedge. Almost any wood will do if it has enough density for resistance and some absorption of pressure to compress just a little. That’s almost any wood you care to name from the western hemisphere.
I don’t usually go for the more recognised twin bevel approach of recent decades to sharpening because I prefer the more traditional continuous camber that occurs naturally by freehand holding and sharpening the cutting edges of my tools. `I generally don’t use a honing guide because, for the majority of my sharpening, freehand is very freeing and it gives me the gradual quarter ellipsed camber and speed I need to get on with my main woodworking. In this case, because of the recurring question, I decided a simple jig that’s easy to load and use would be the answer for many. I made a jig that allows for a double bevel, be that a primary bevel and secondary bevel or a primary and a micro-bevel. The difference between these two types lies only in the sizes of the secondary and micro bevels. It makes no difference there at the business edge.
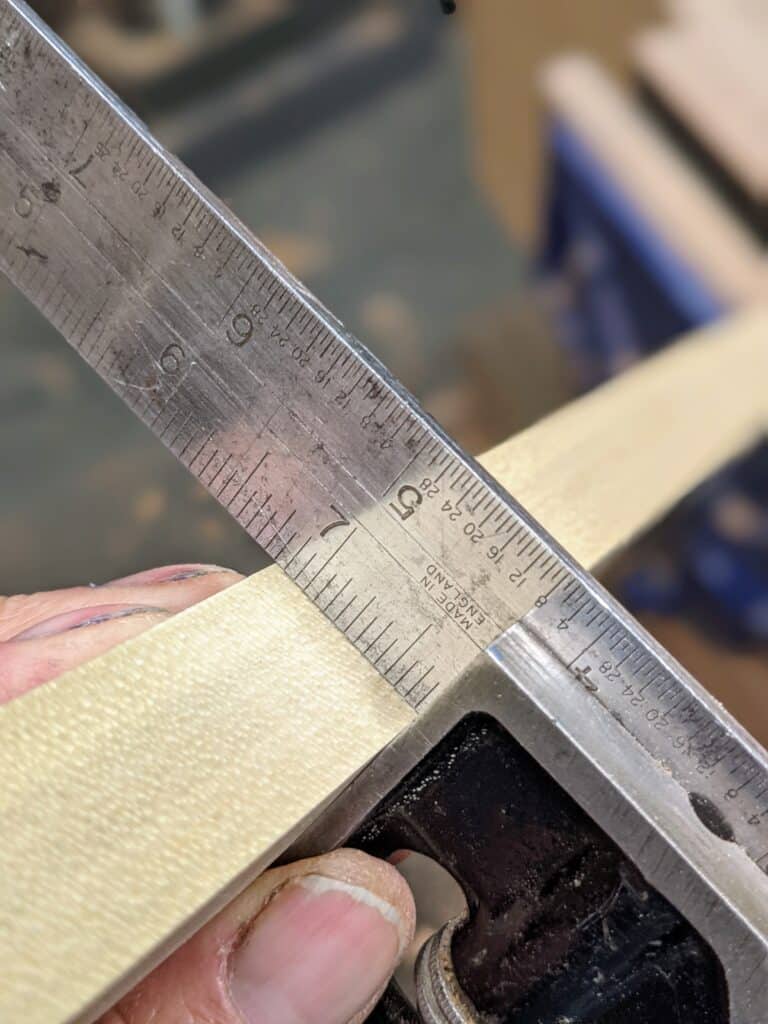
True up your wood to make sure it is square.
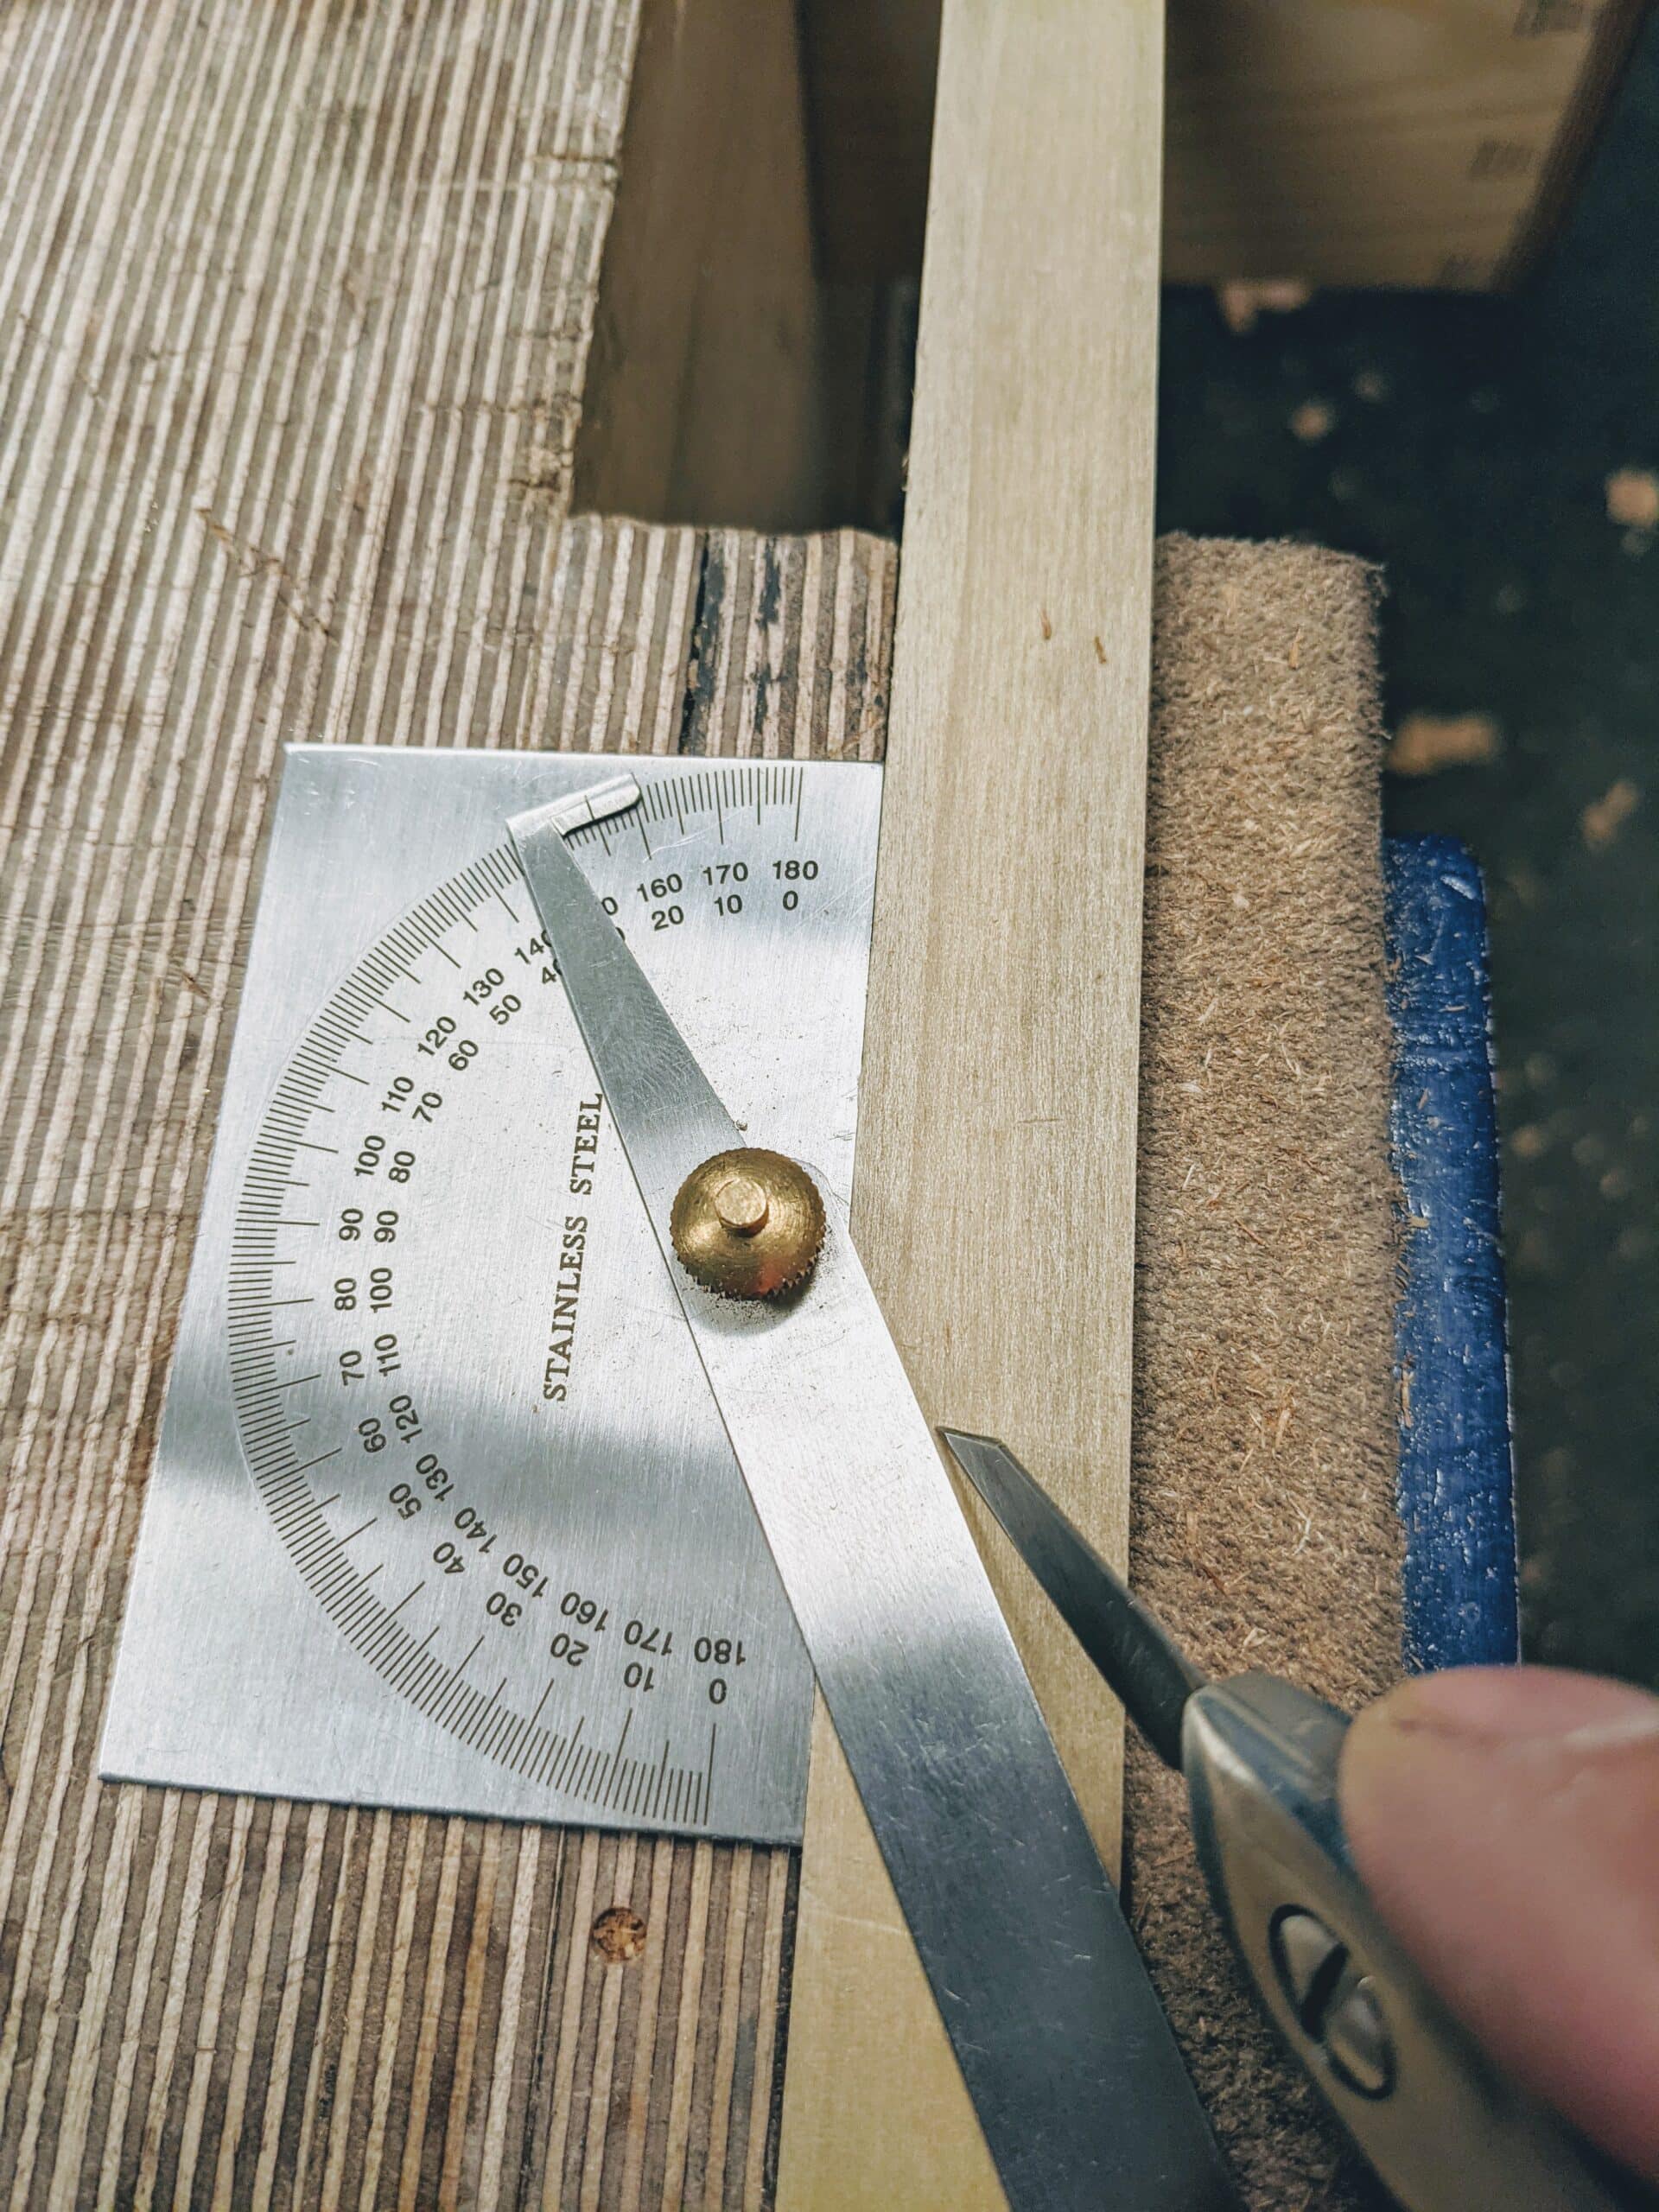
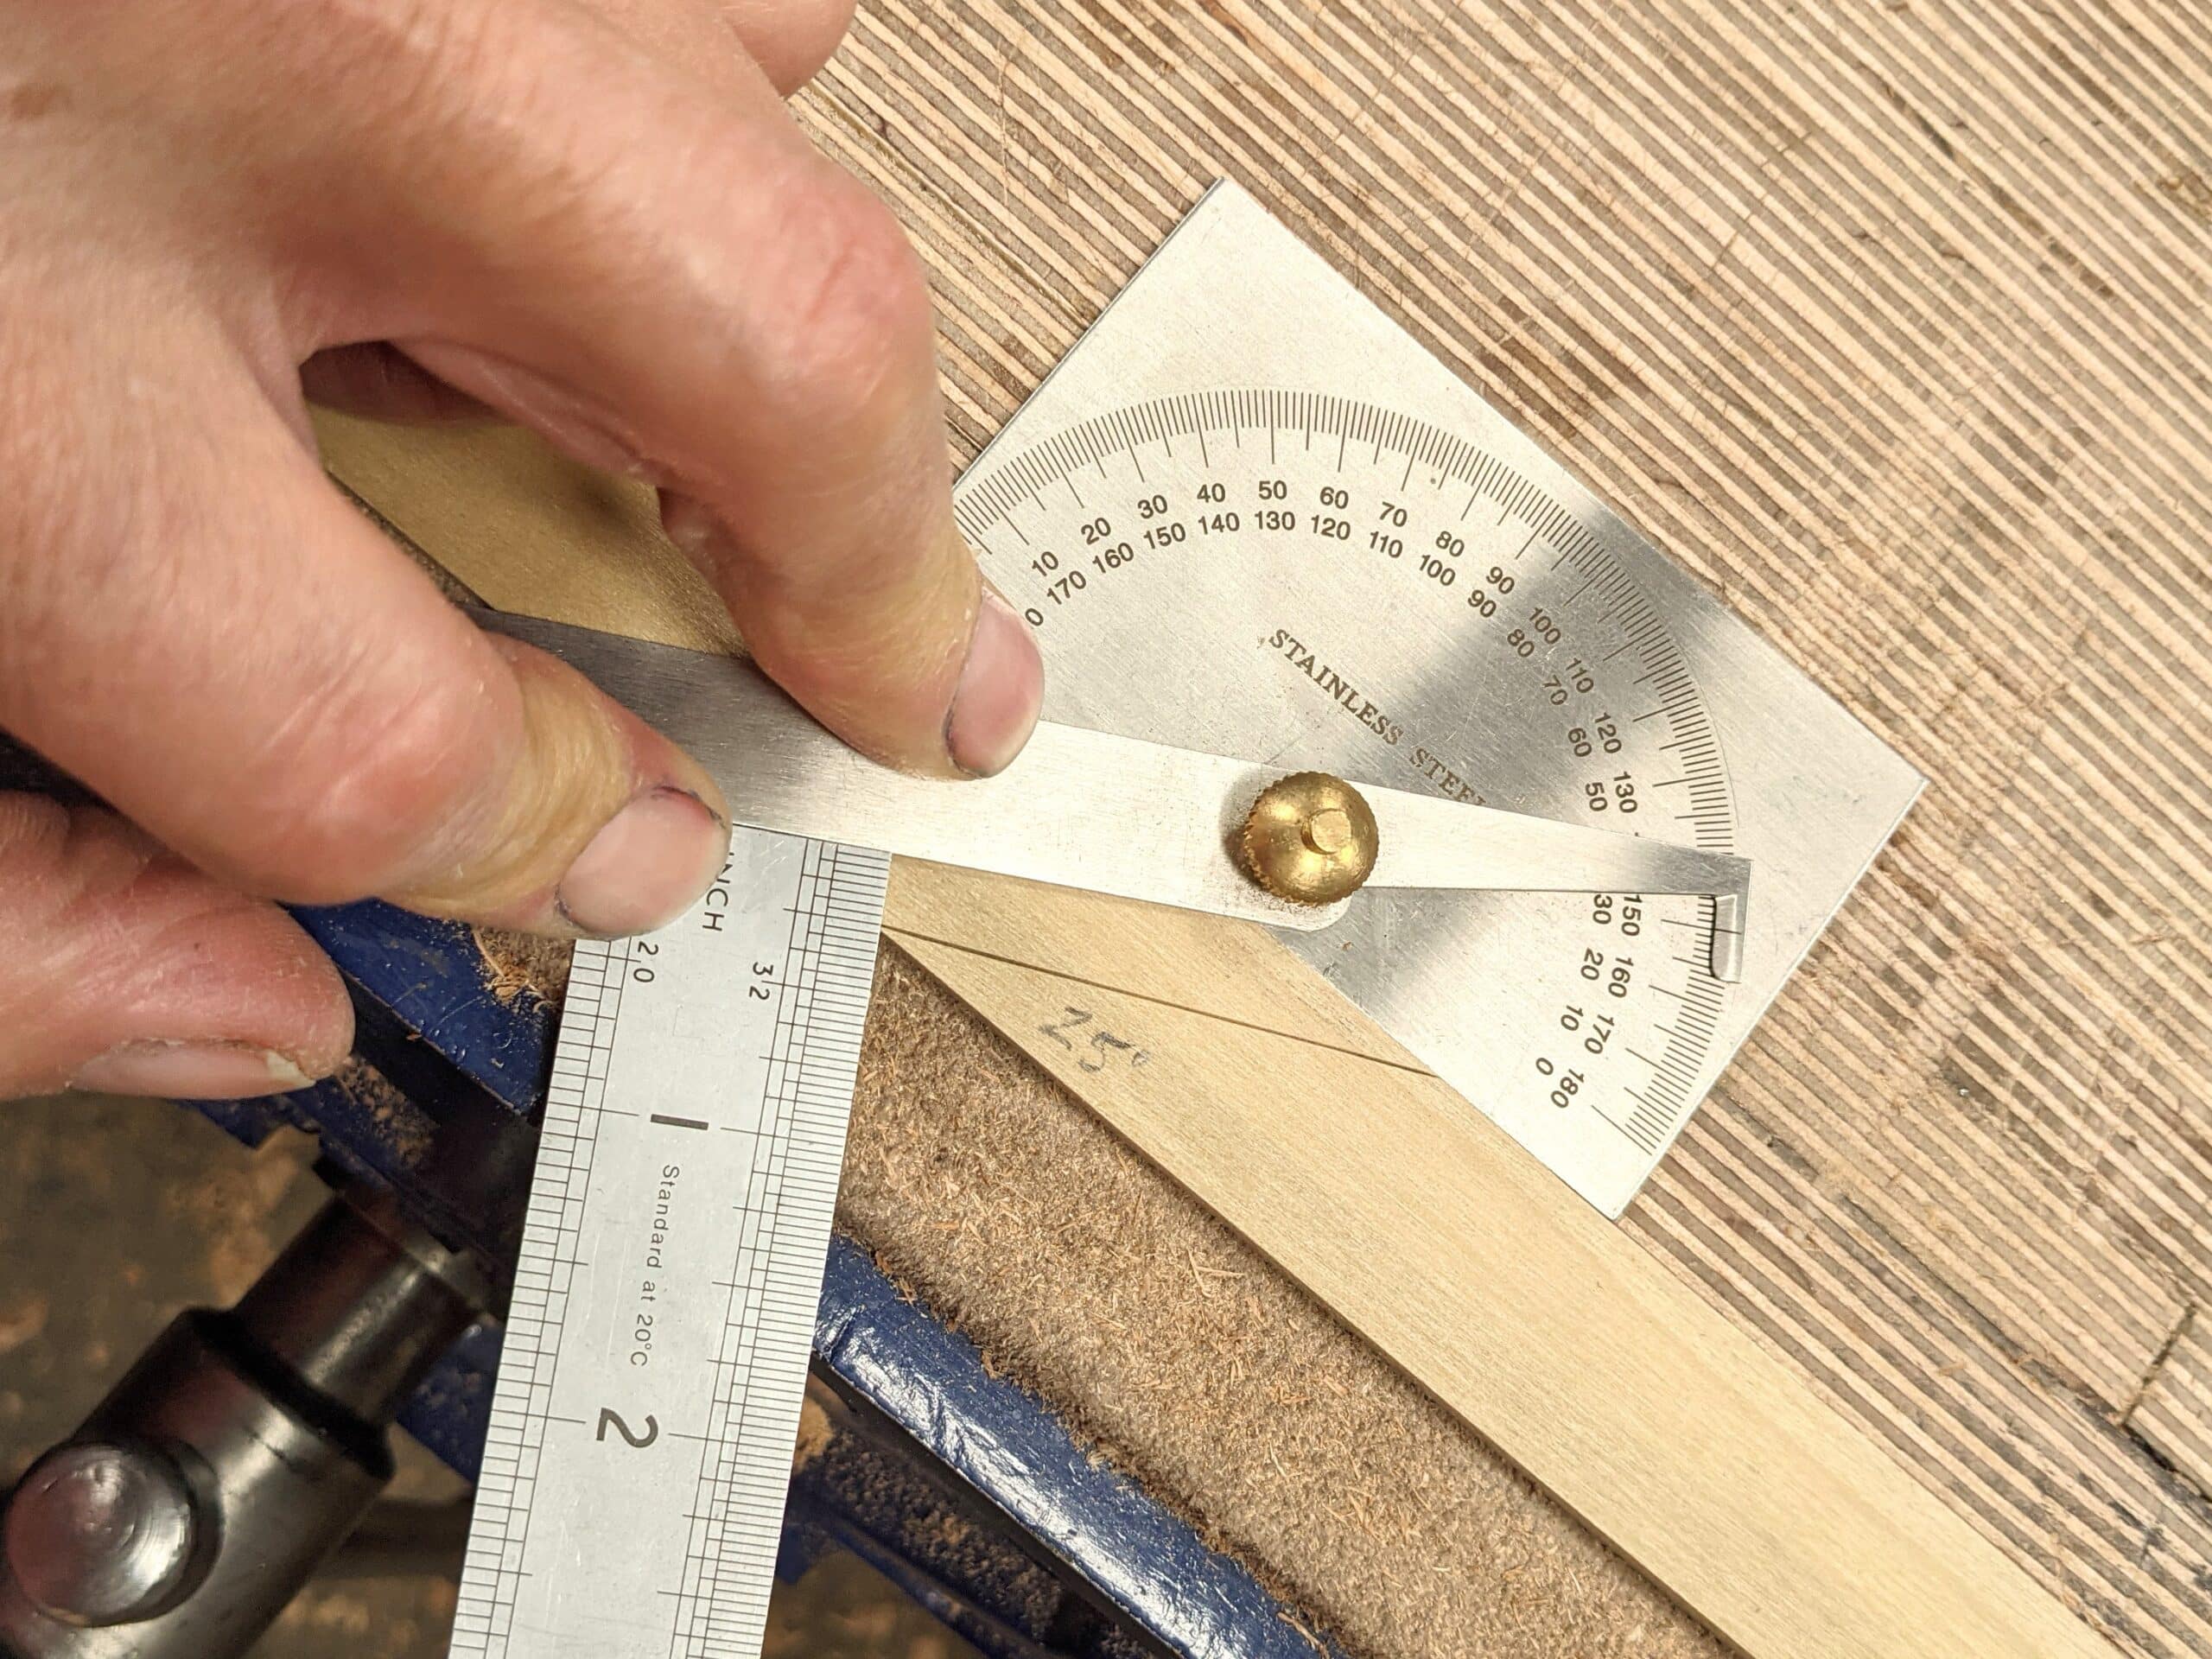
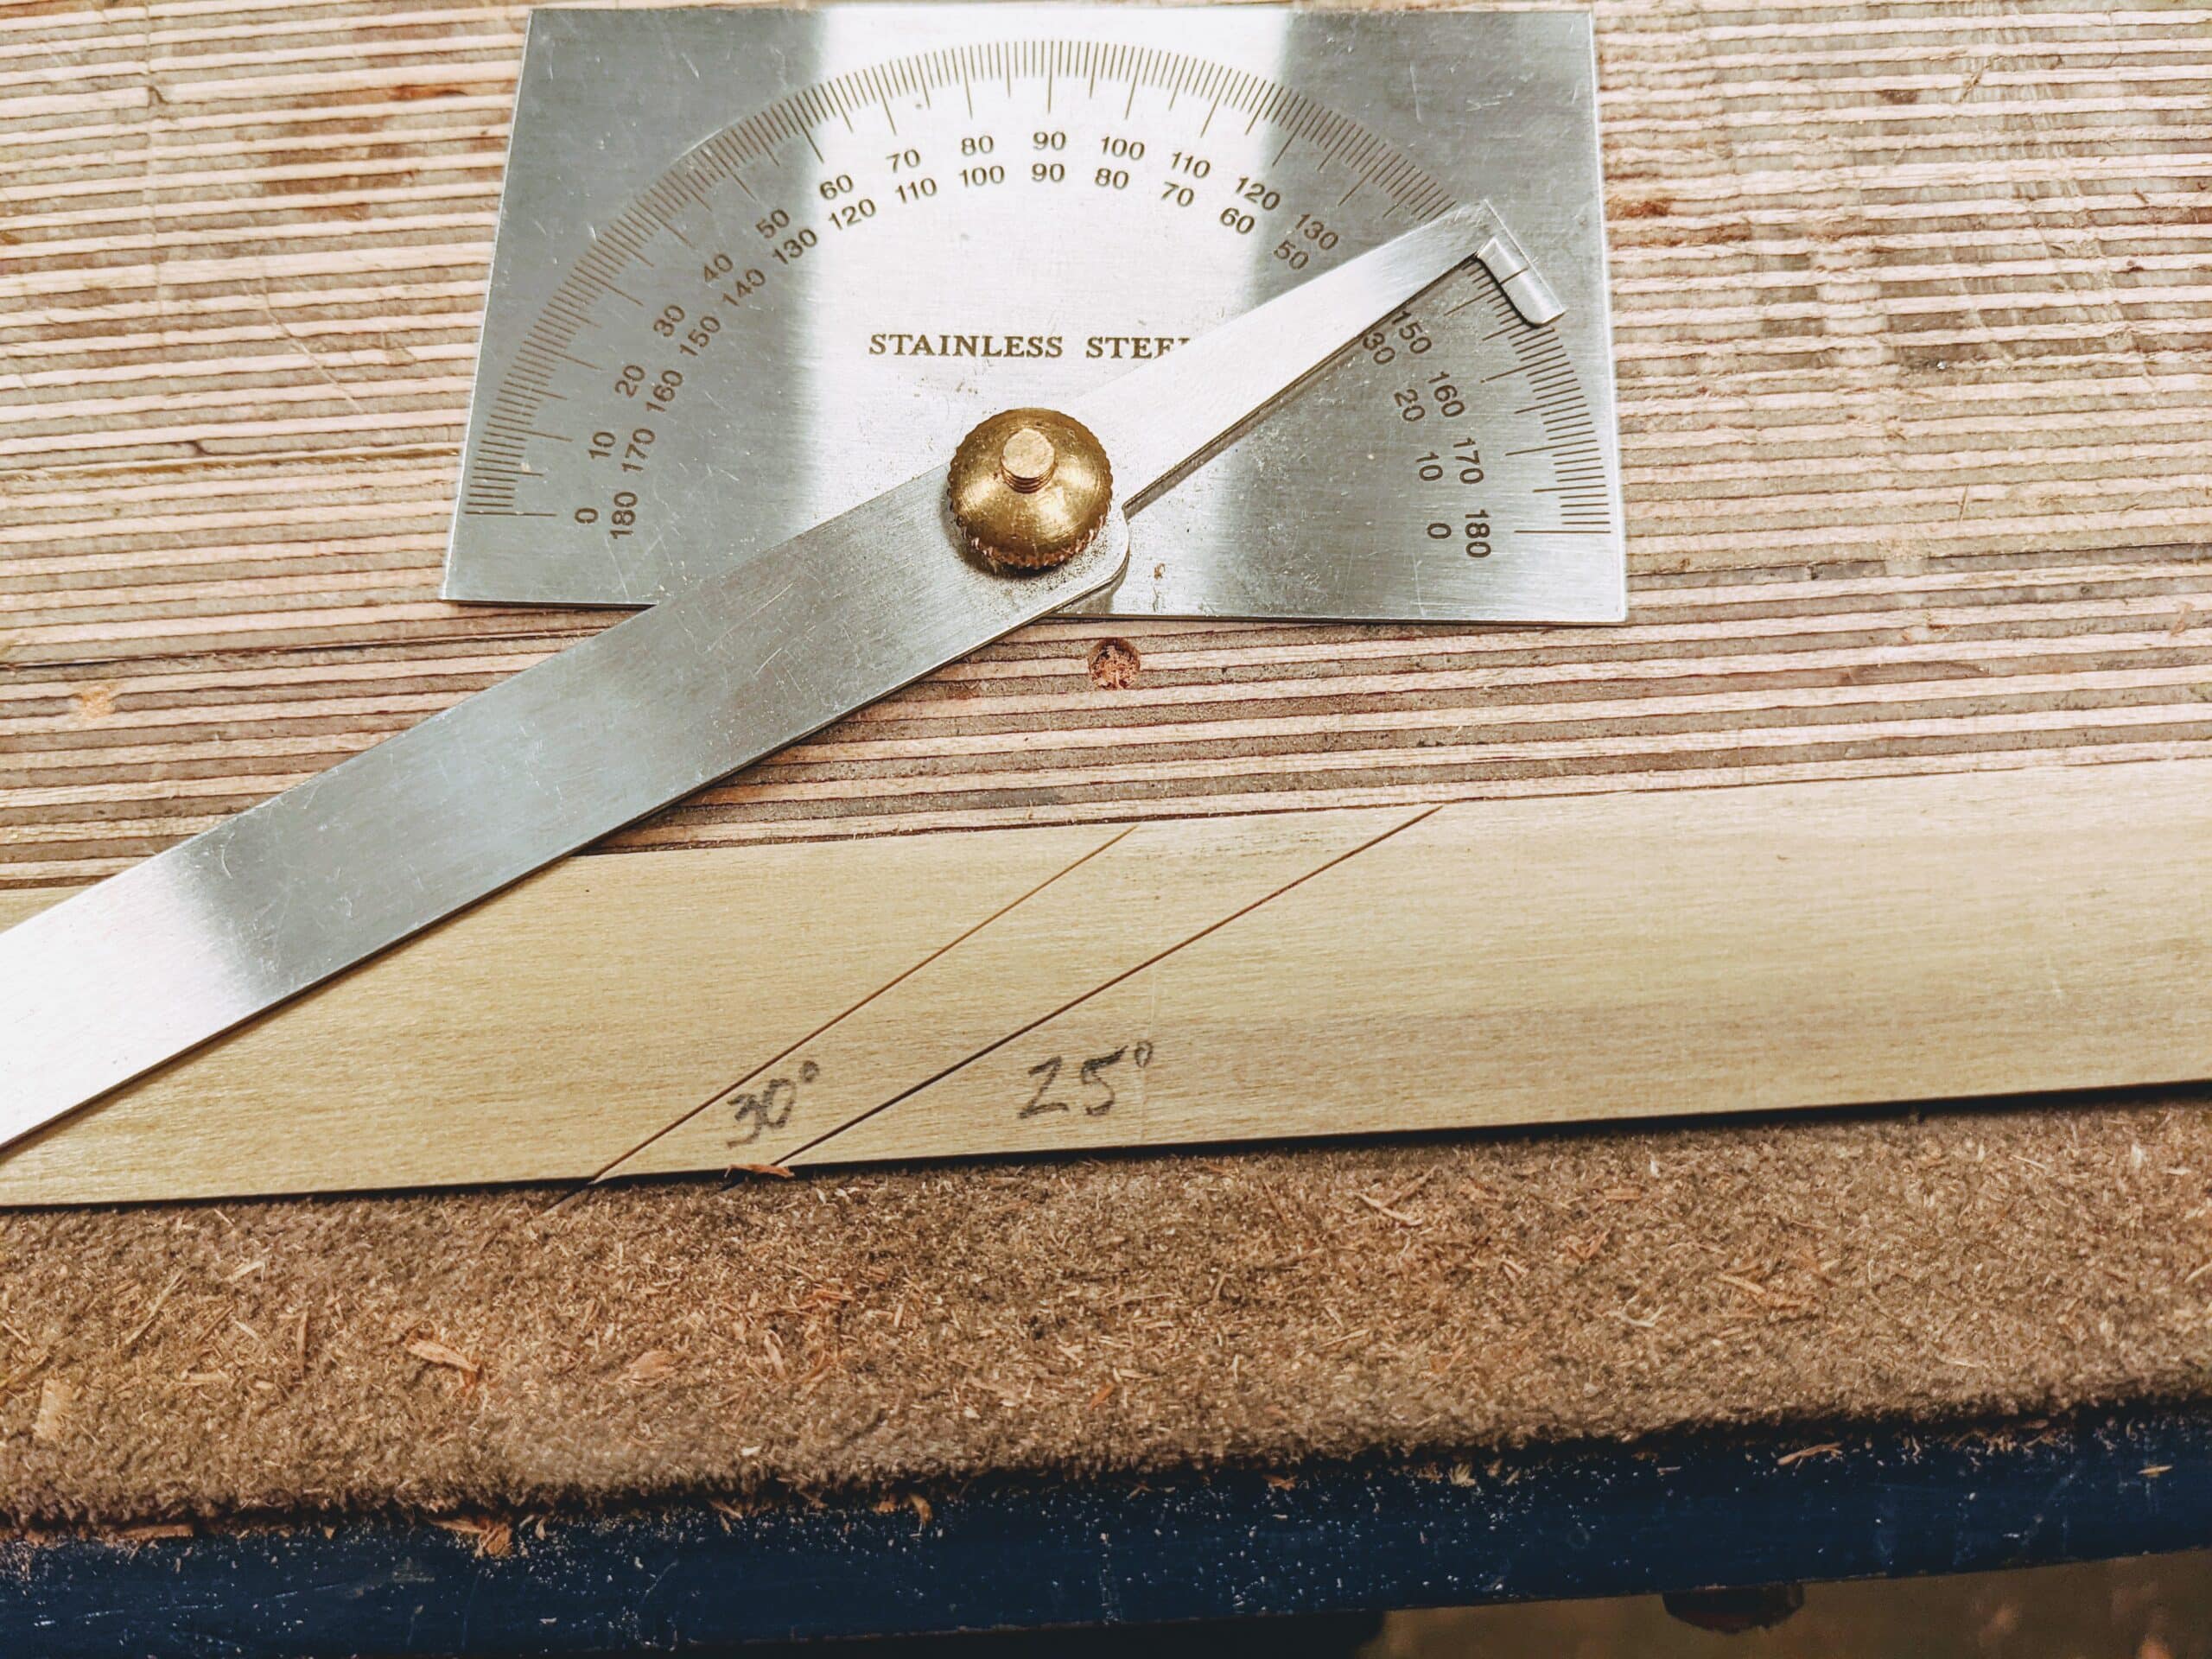
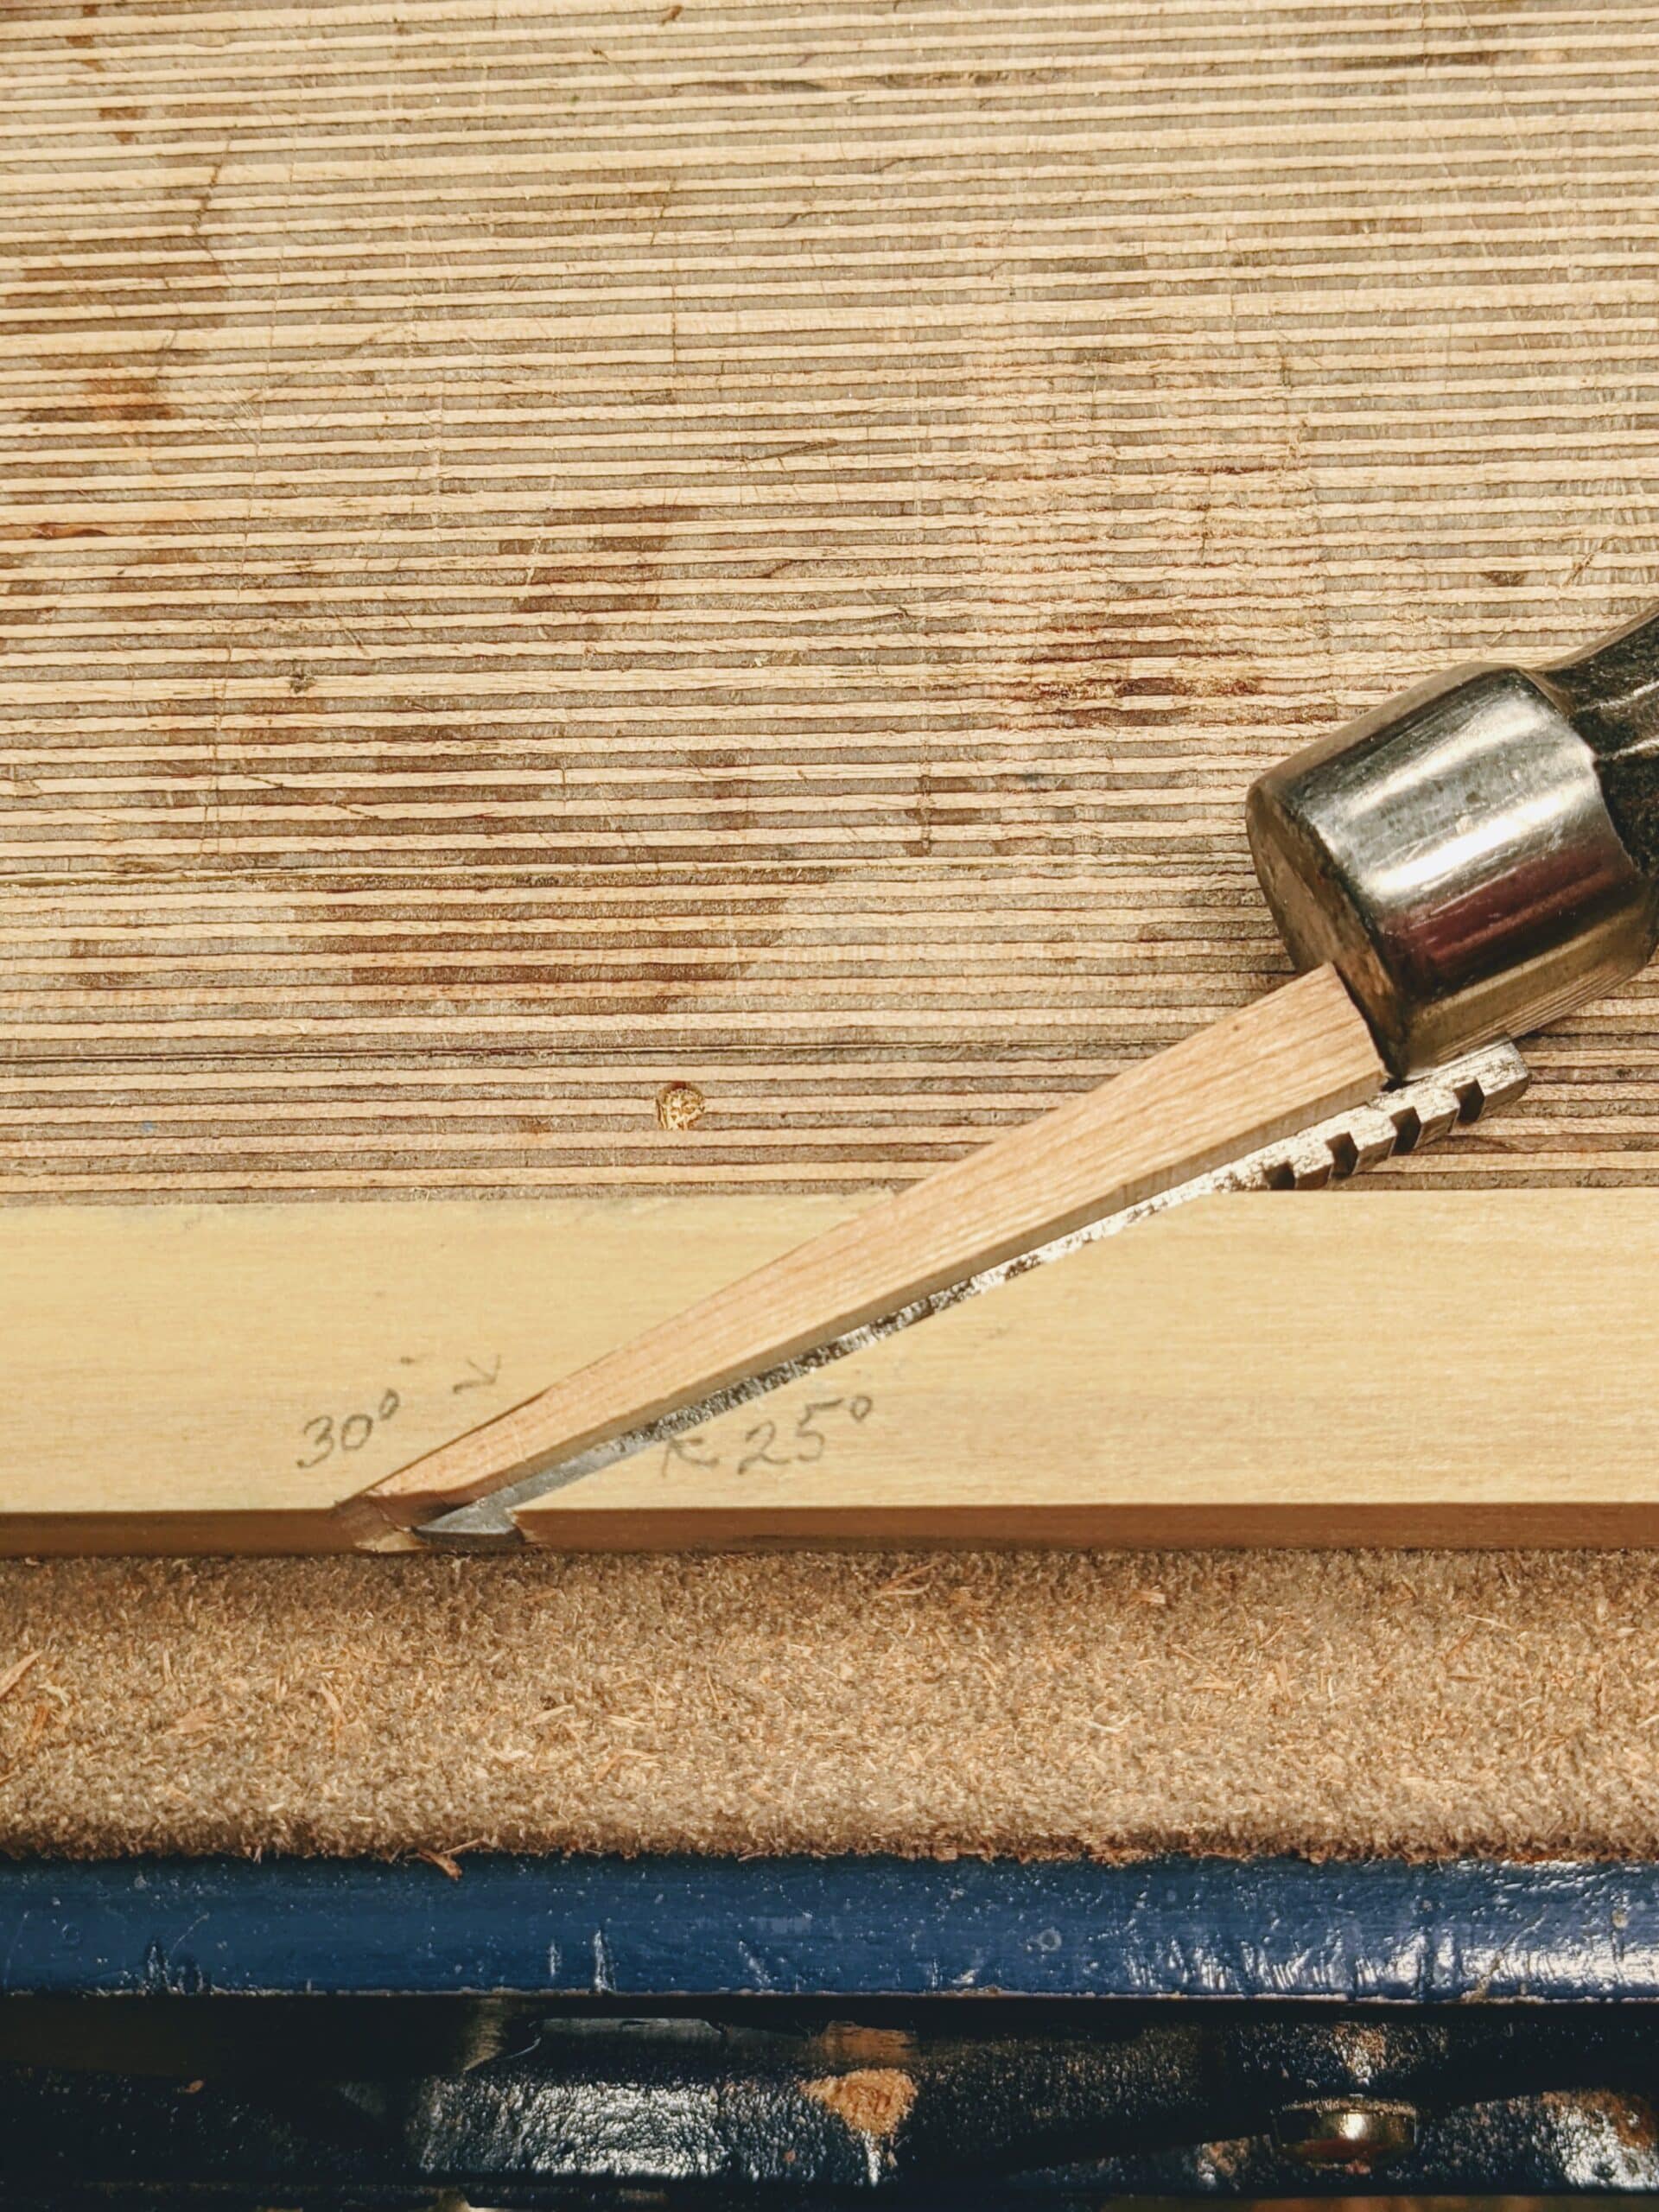
Use a sharp knife to establish the first of two knifewalls at 25-degrees.
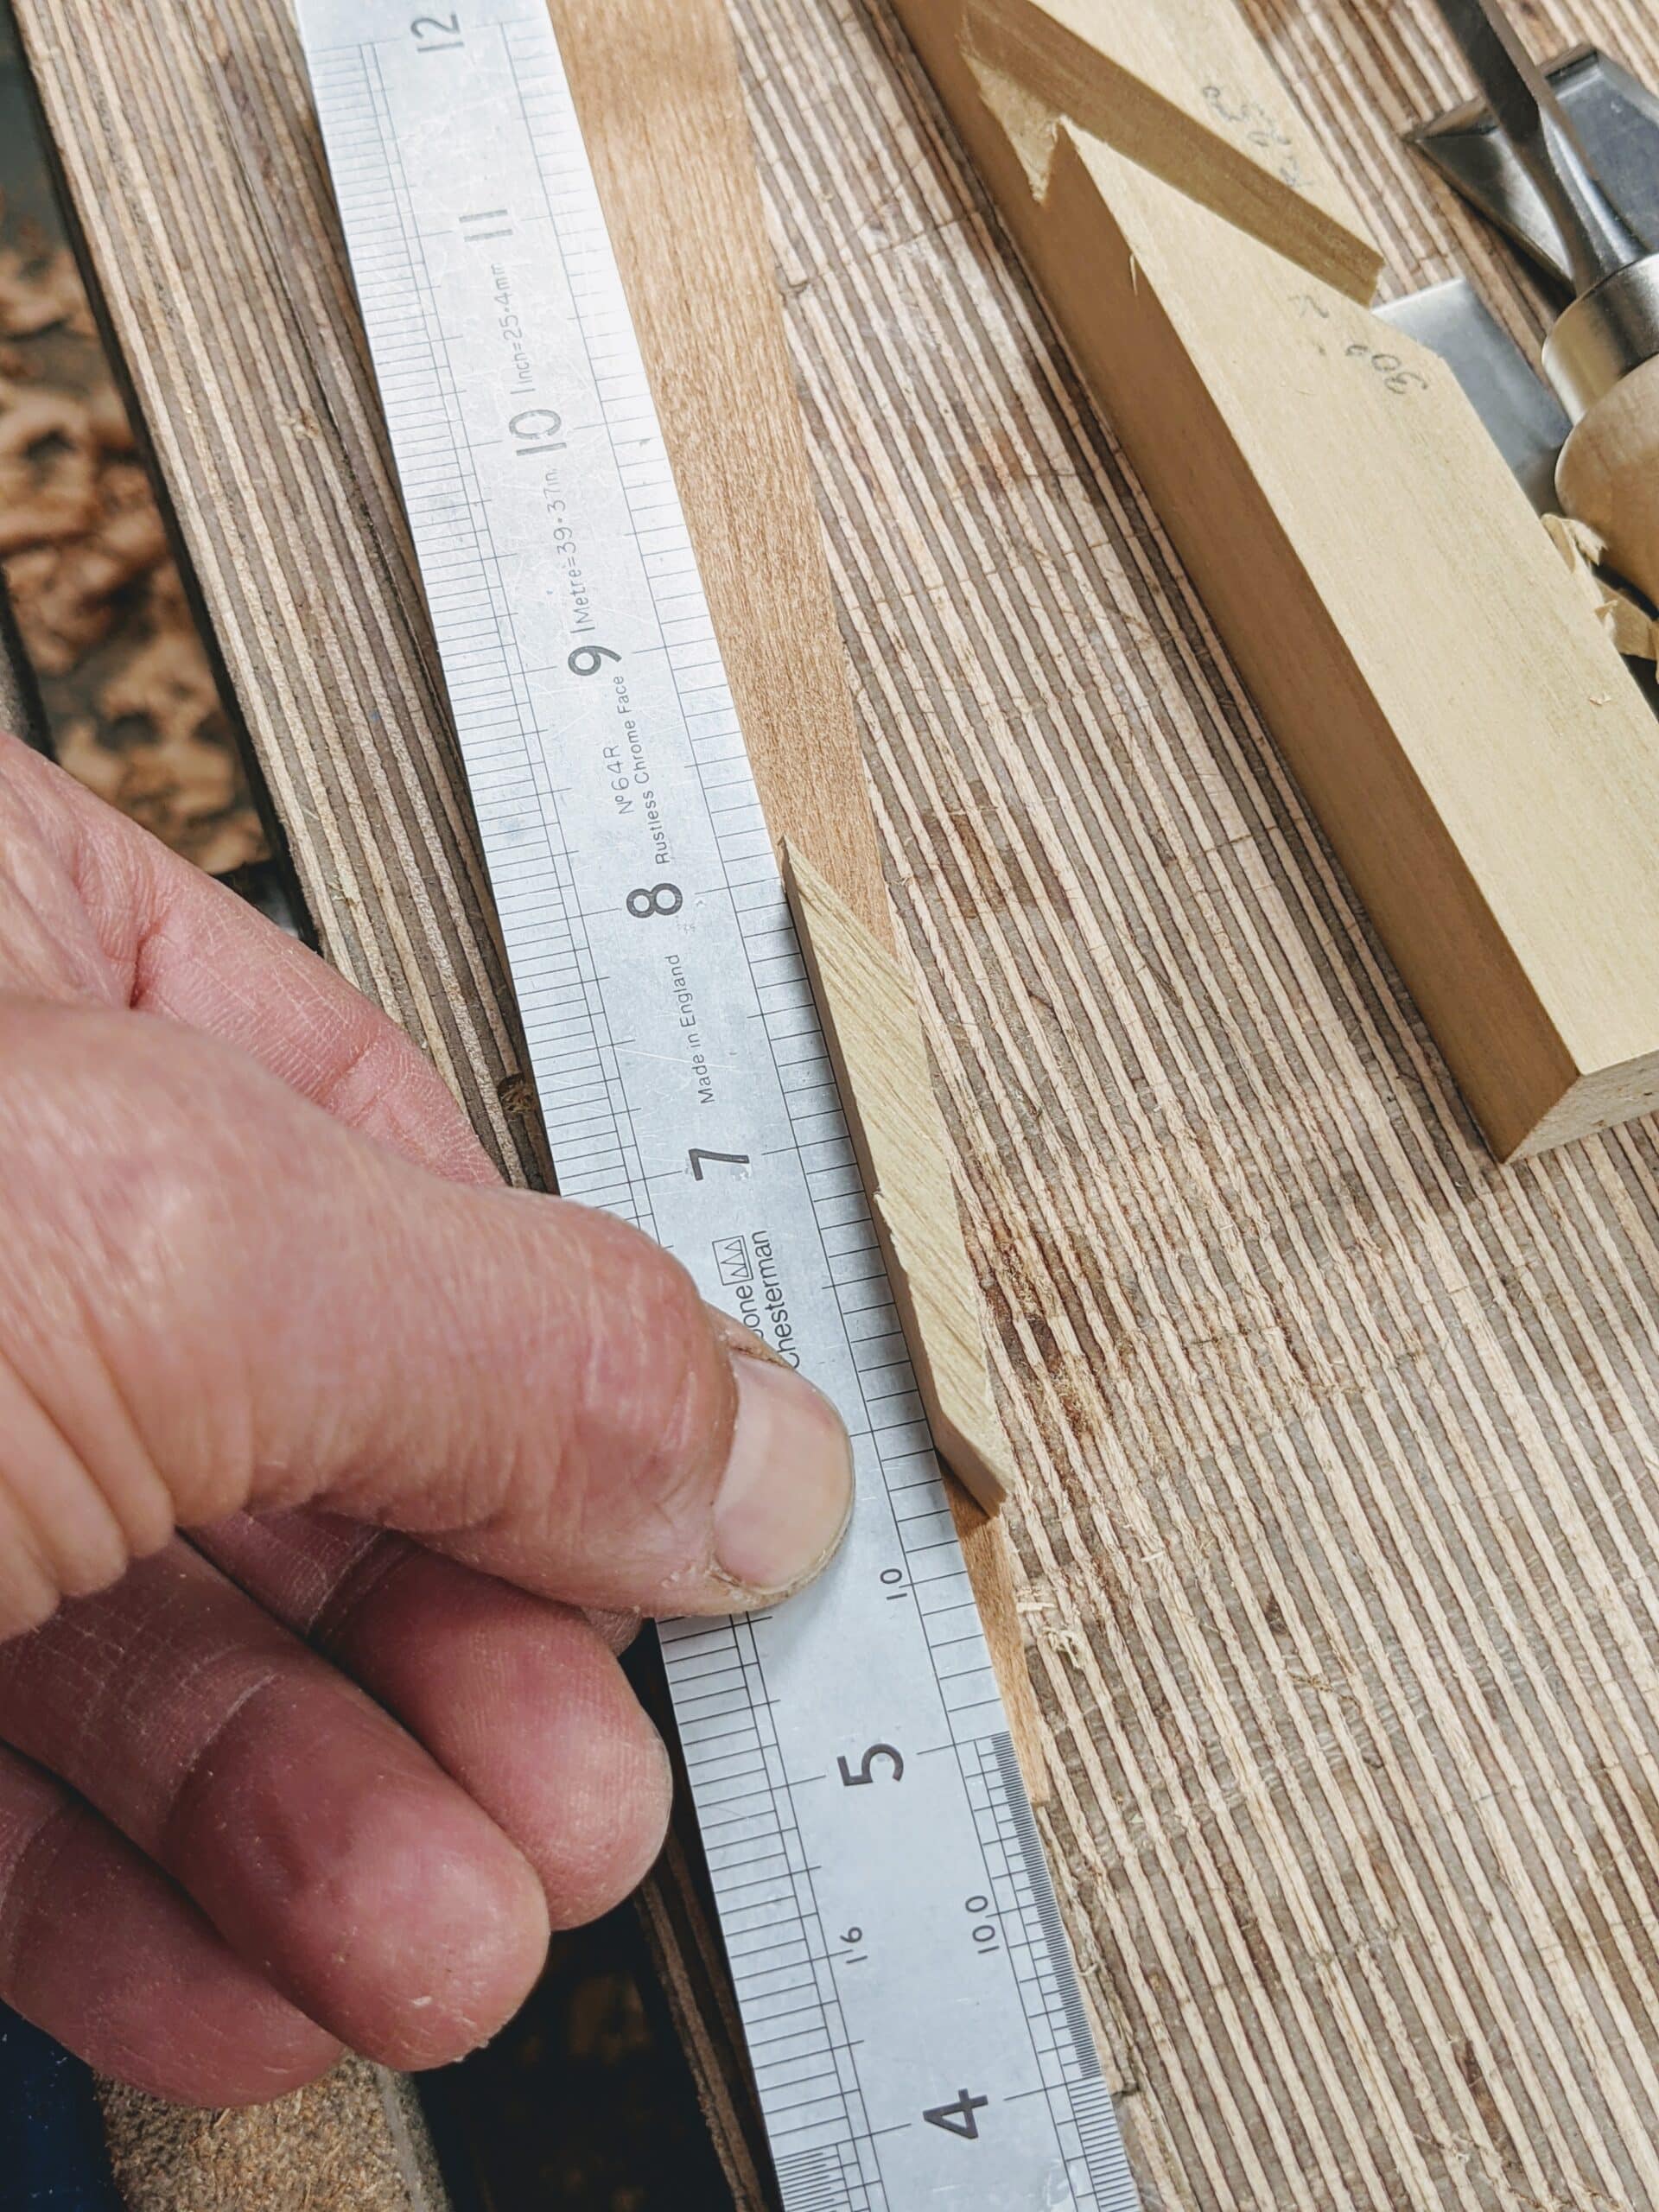
Merasure from the knifeweall 1/4″ to establish the 2nd knifewall position . . .
. . . Square down the knifewalls onto the adjacent face, ready for sawing and . . .
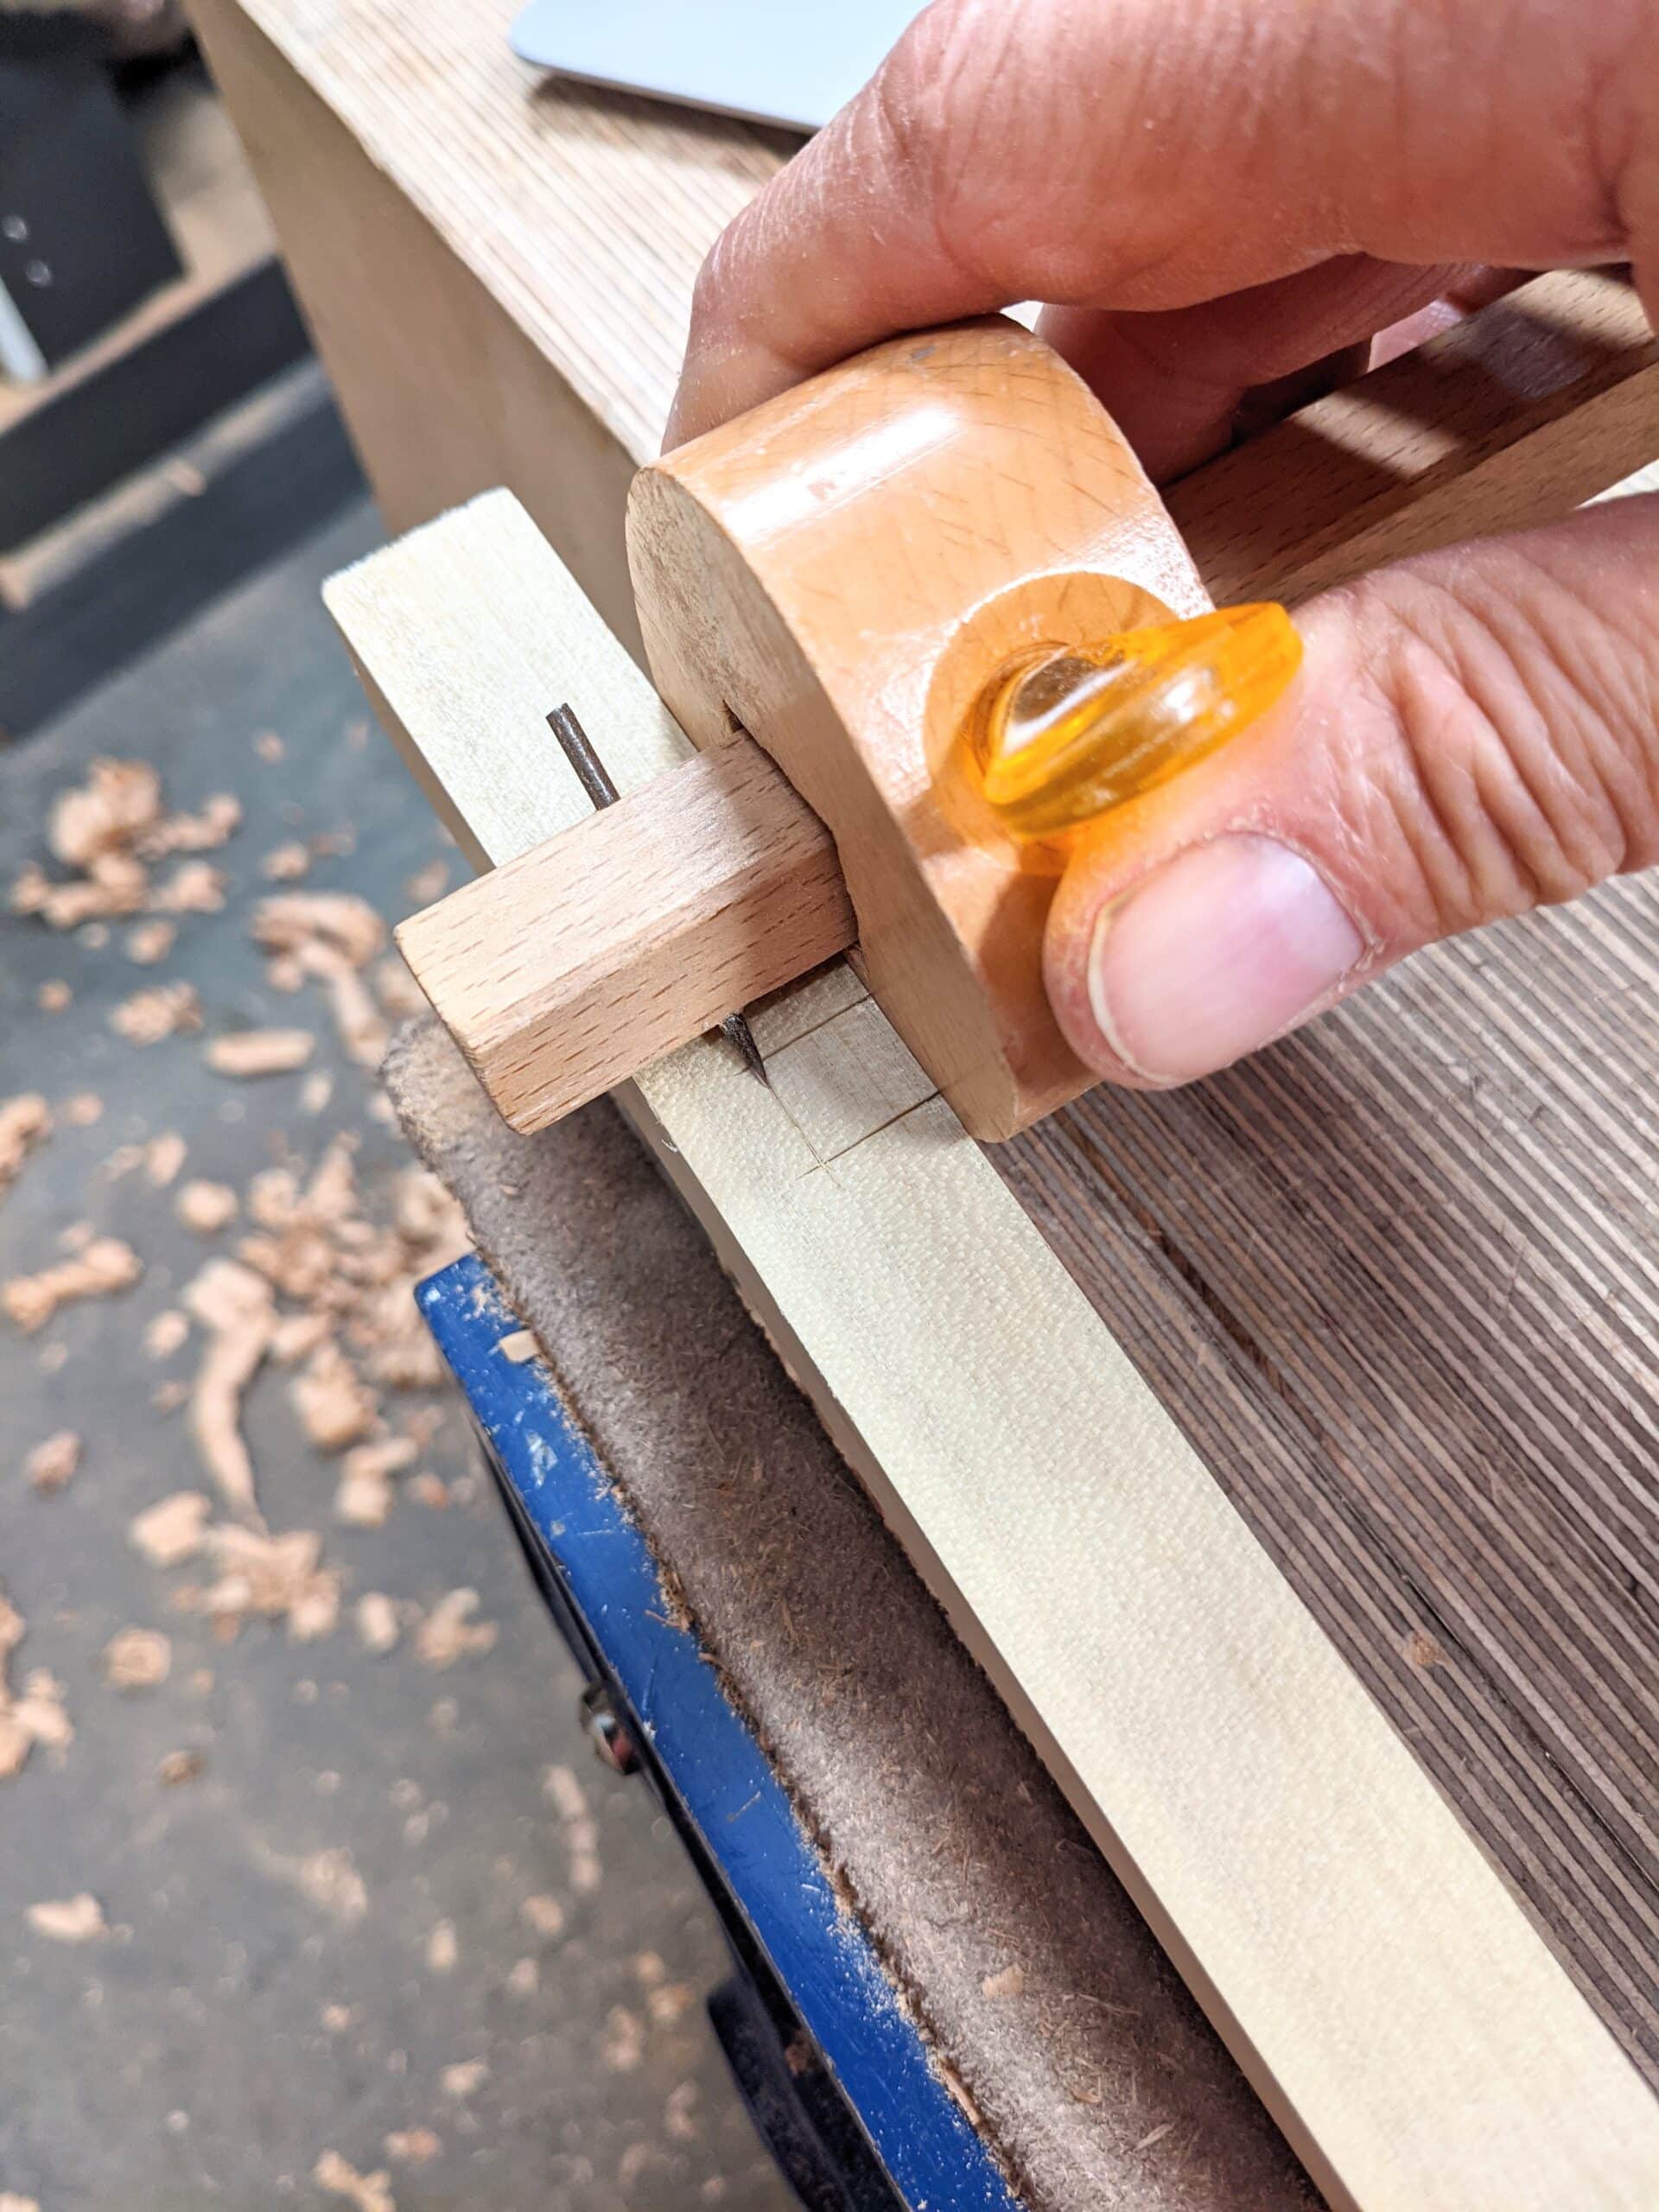
. . . use a marking gauge to ensure a consistent depth across the width of the material. My material is 23mm (7/8″) square but any scrap of wood will do.
saw both knifewalls to a depth of half an inch or so.

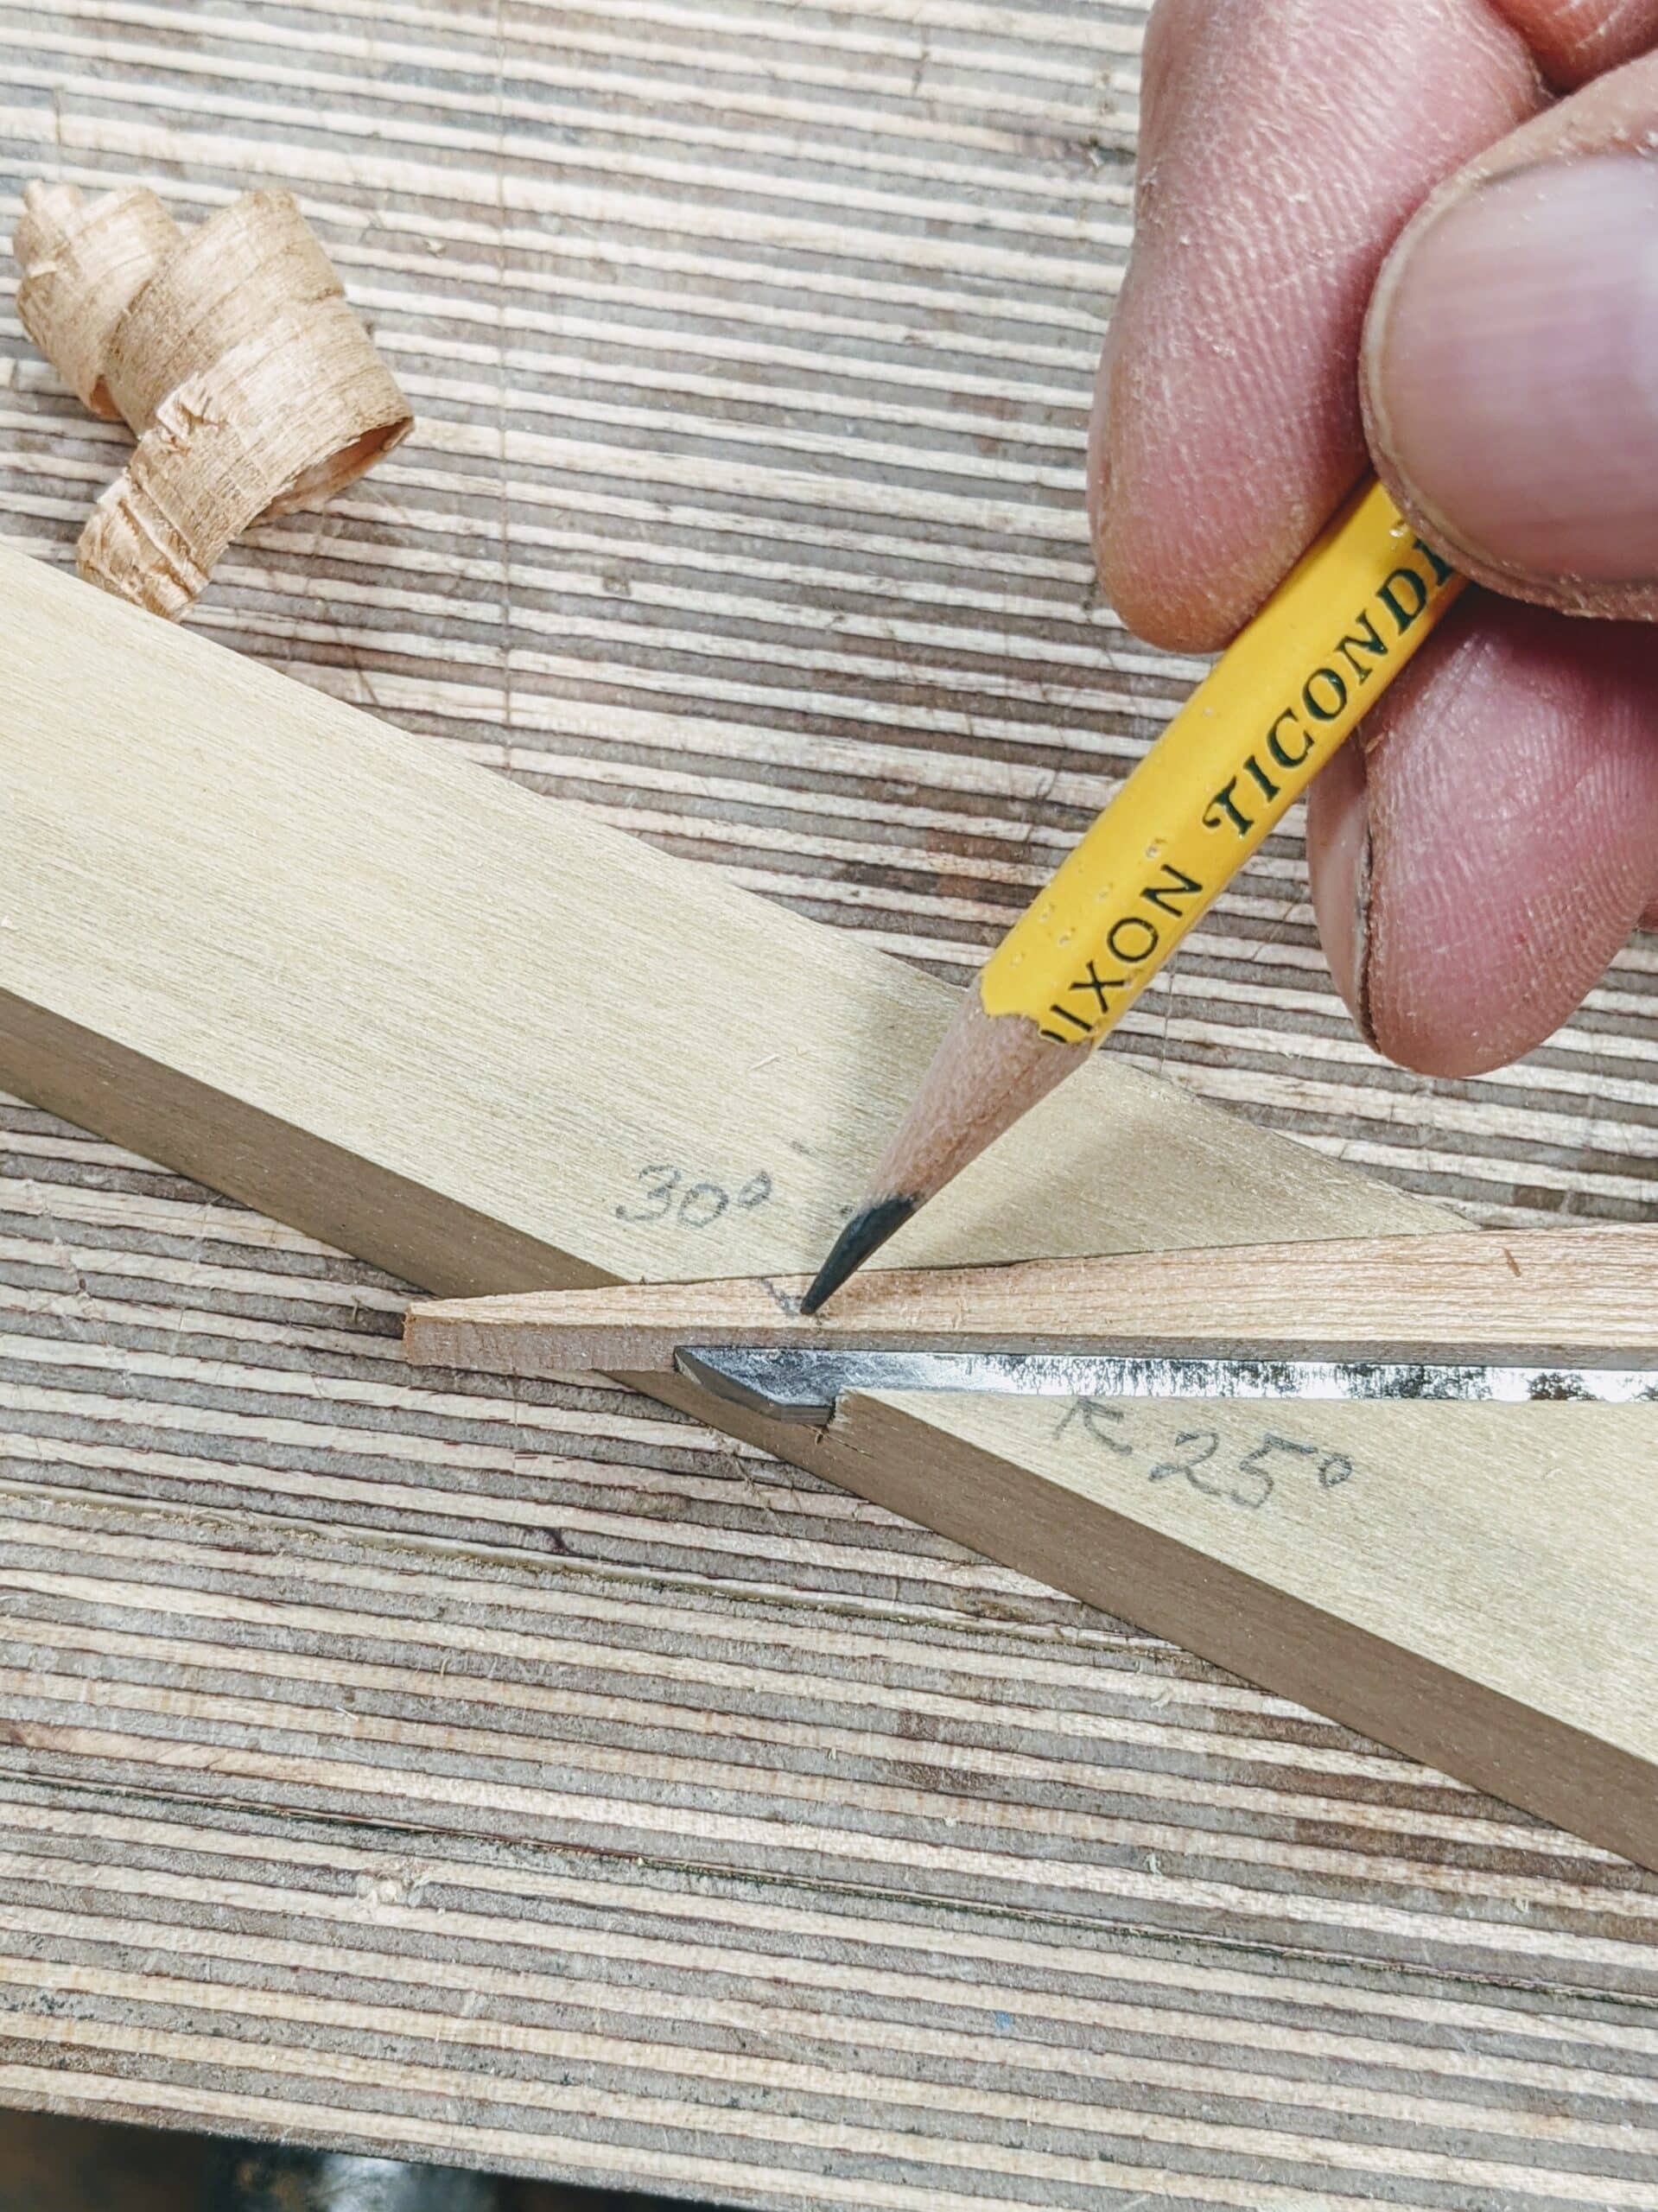
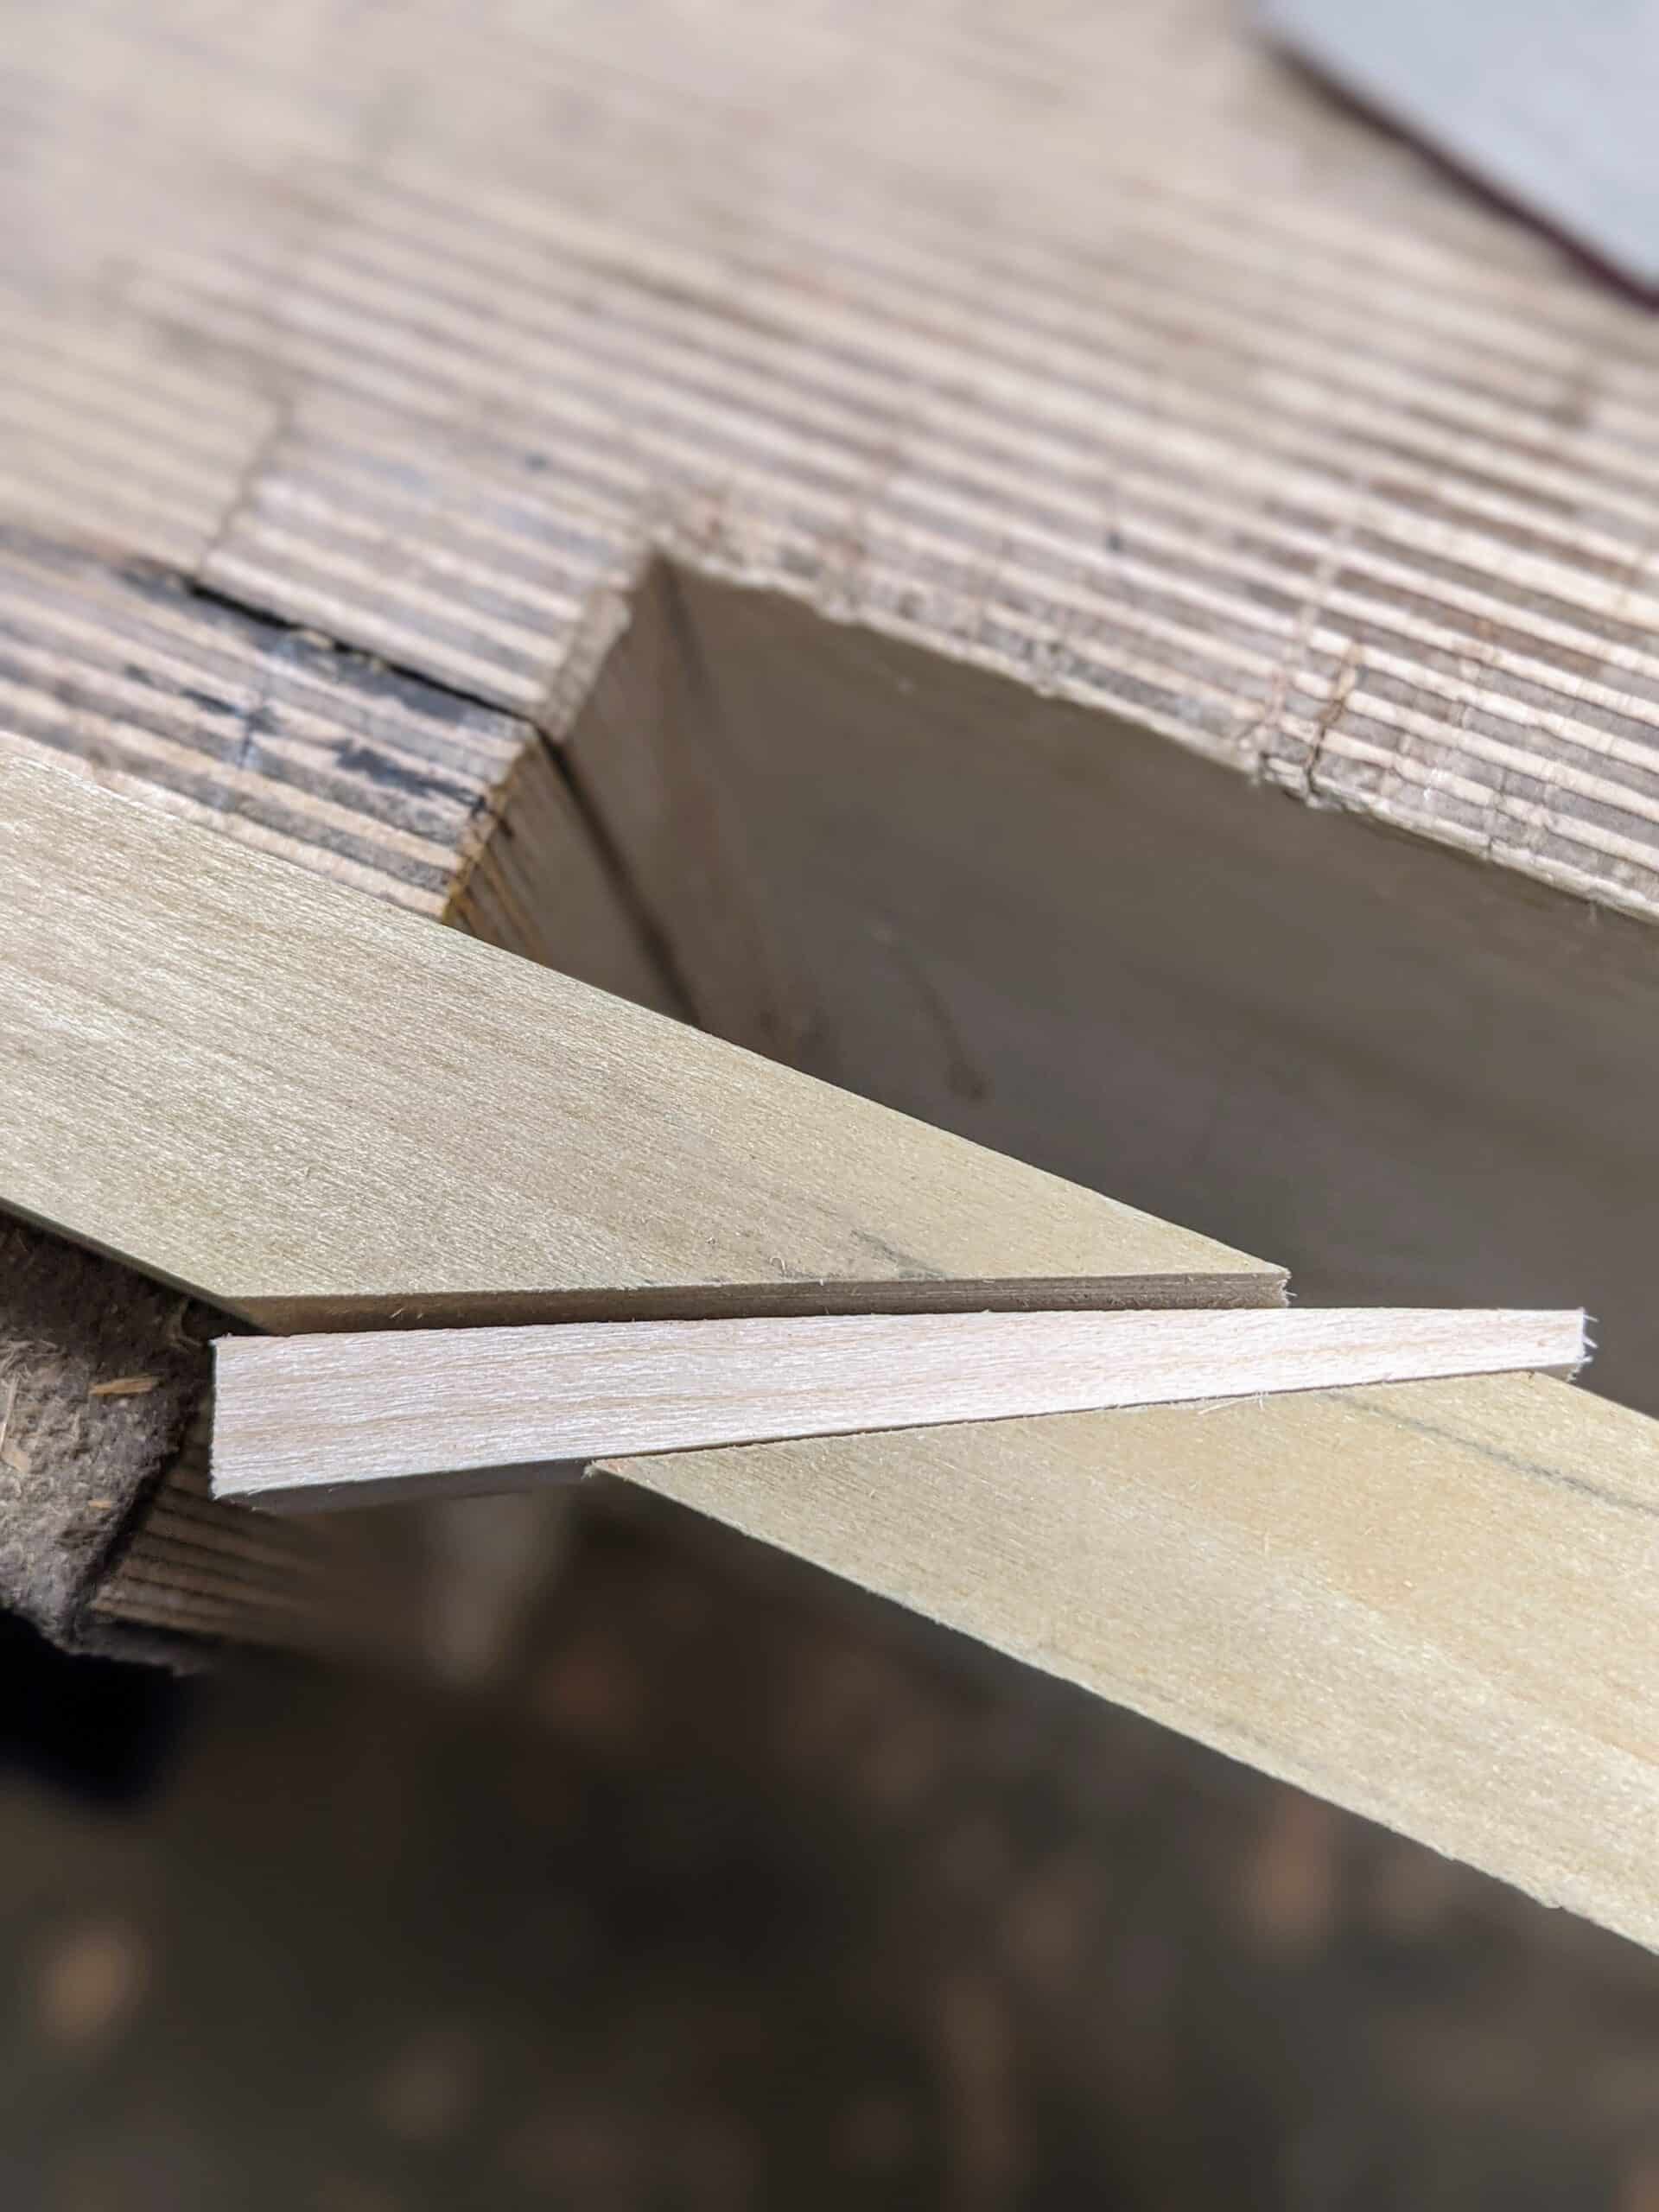
By splitting out the waste deeply you are more likely to remove a chunk that can be used as a guide for the angle of the wedge you will cut. The wedge will be narrower than the recess to allow for the thickness of the cutter alongside it. You may need two or three wedges, each refined to compensate for chisels that may have a tapered rather than parallel blade.
Now use the waste to establish a cut line on a wedge piece that fits the recess.
With a cutter in place, mark a length that is about 1/8″ from the outer edge of the guide.
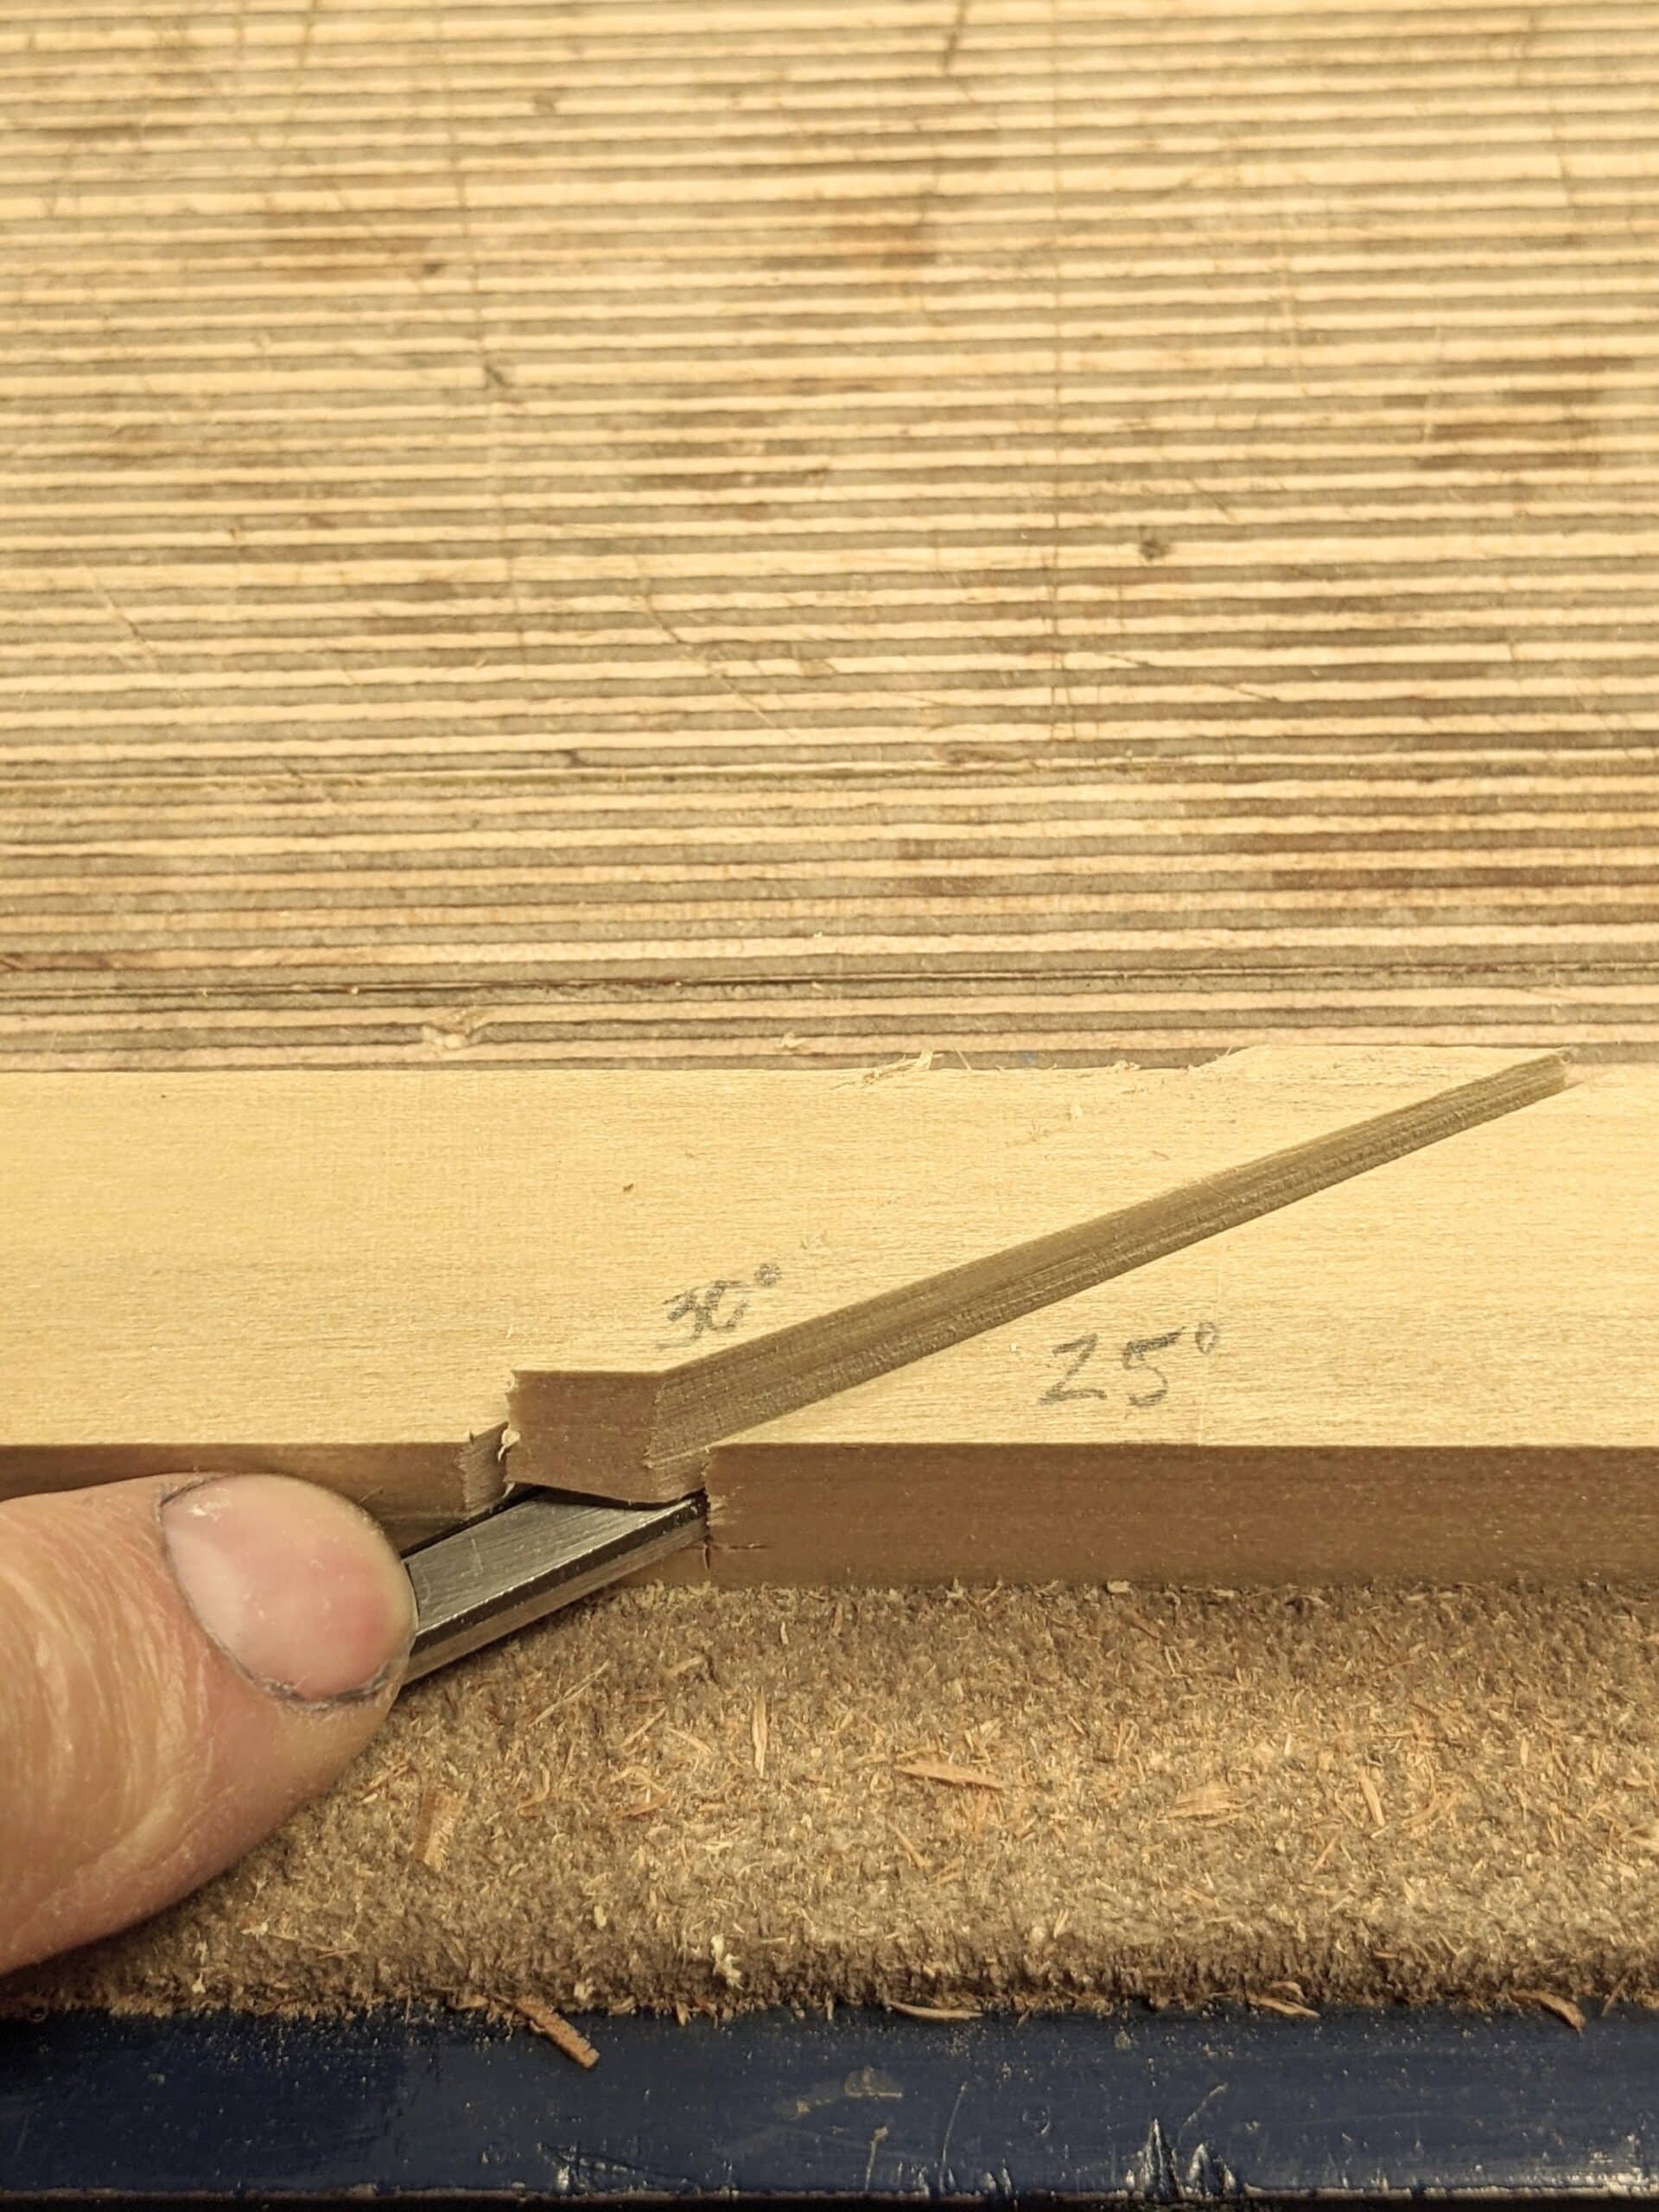
Once fitted, slide the wedge and cutter in place and tap the cutter until the cutter protrudes by the smallest amount and push the wedge in tight to hold position. Note here that we use the 25-degree rake first. This establishes the primary bevel.
Once situated, tap the wedge tight with the hammer.
With the primary bevel abraded, now remove the wedge and move the cutting iron to the other side of the recess fro the 30-degree abrading and abrade the bevel with a finer grit.
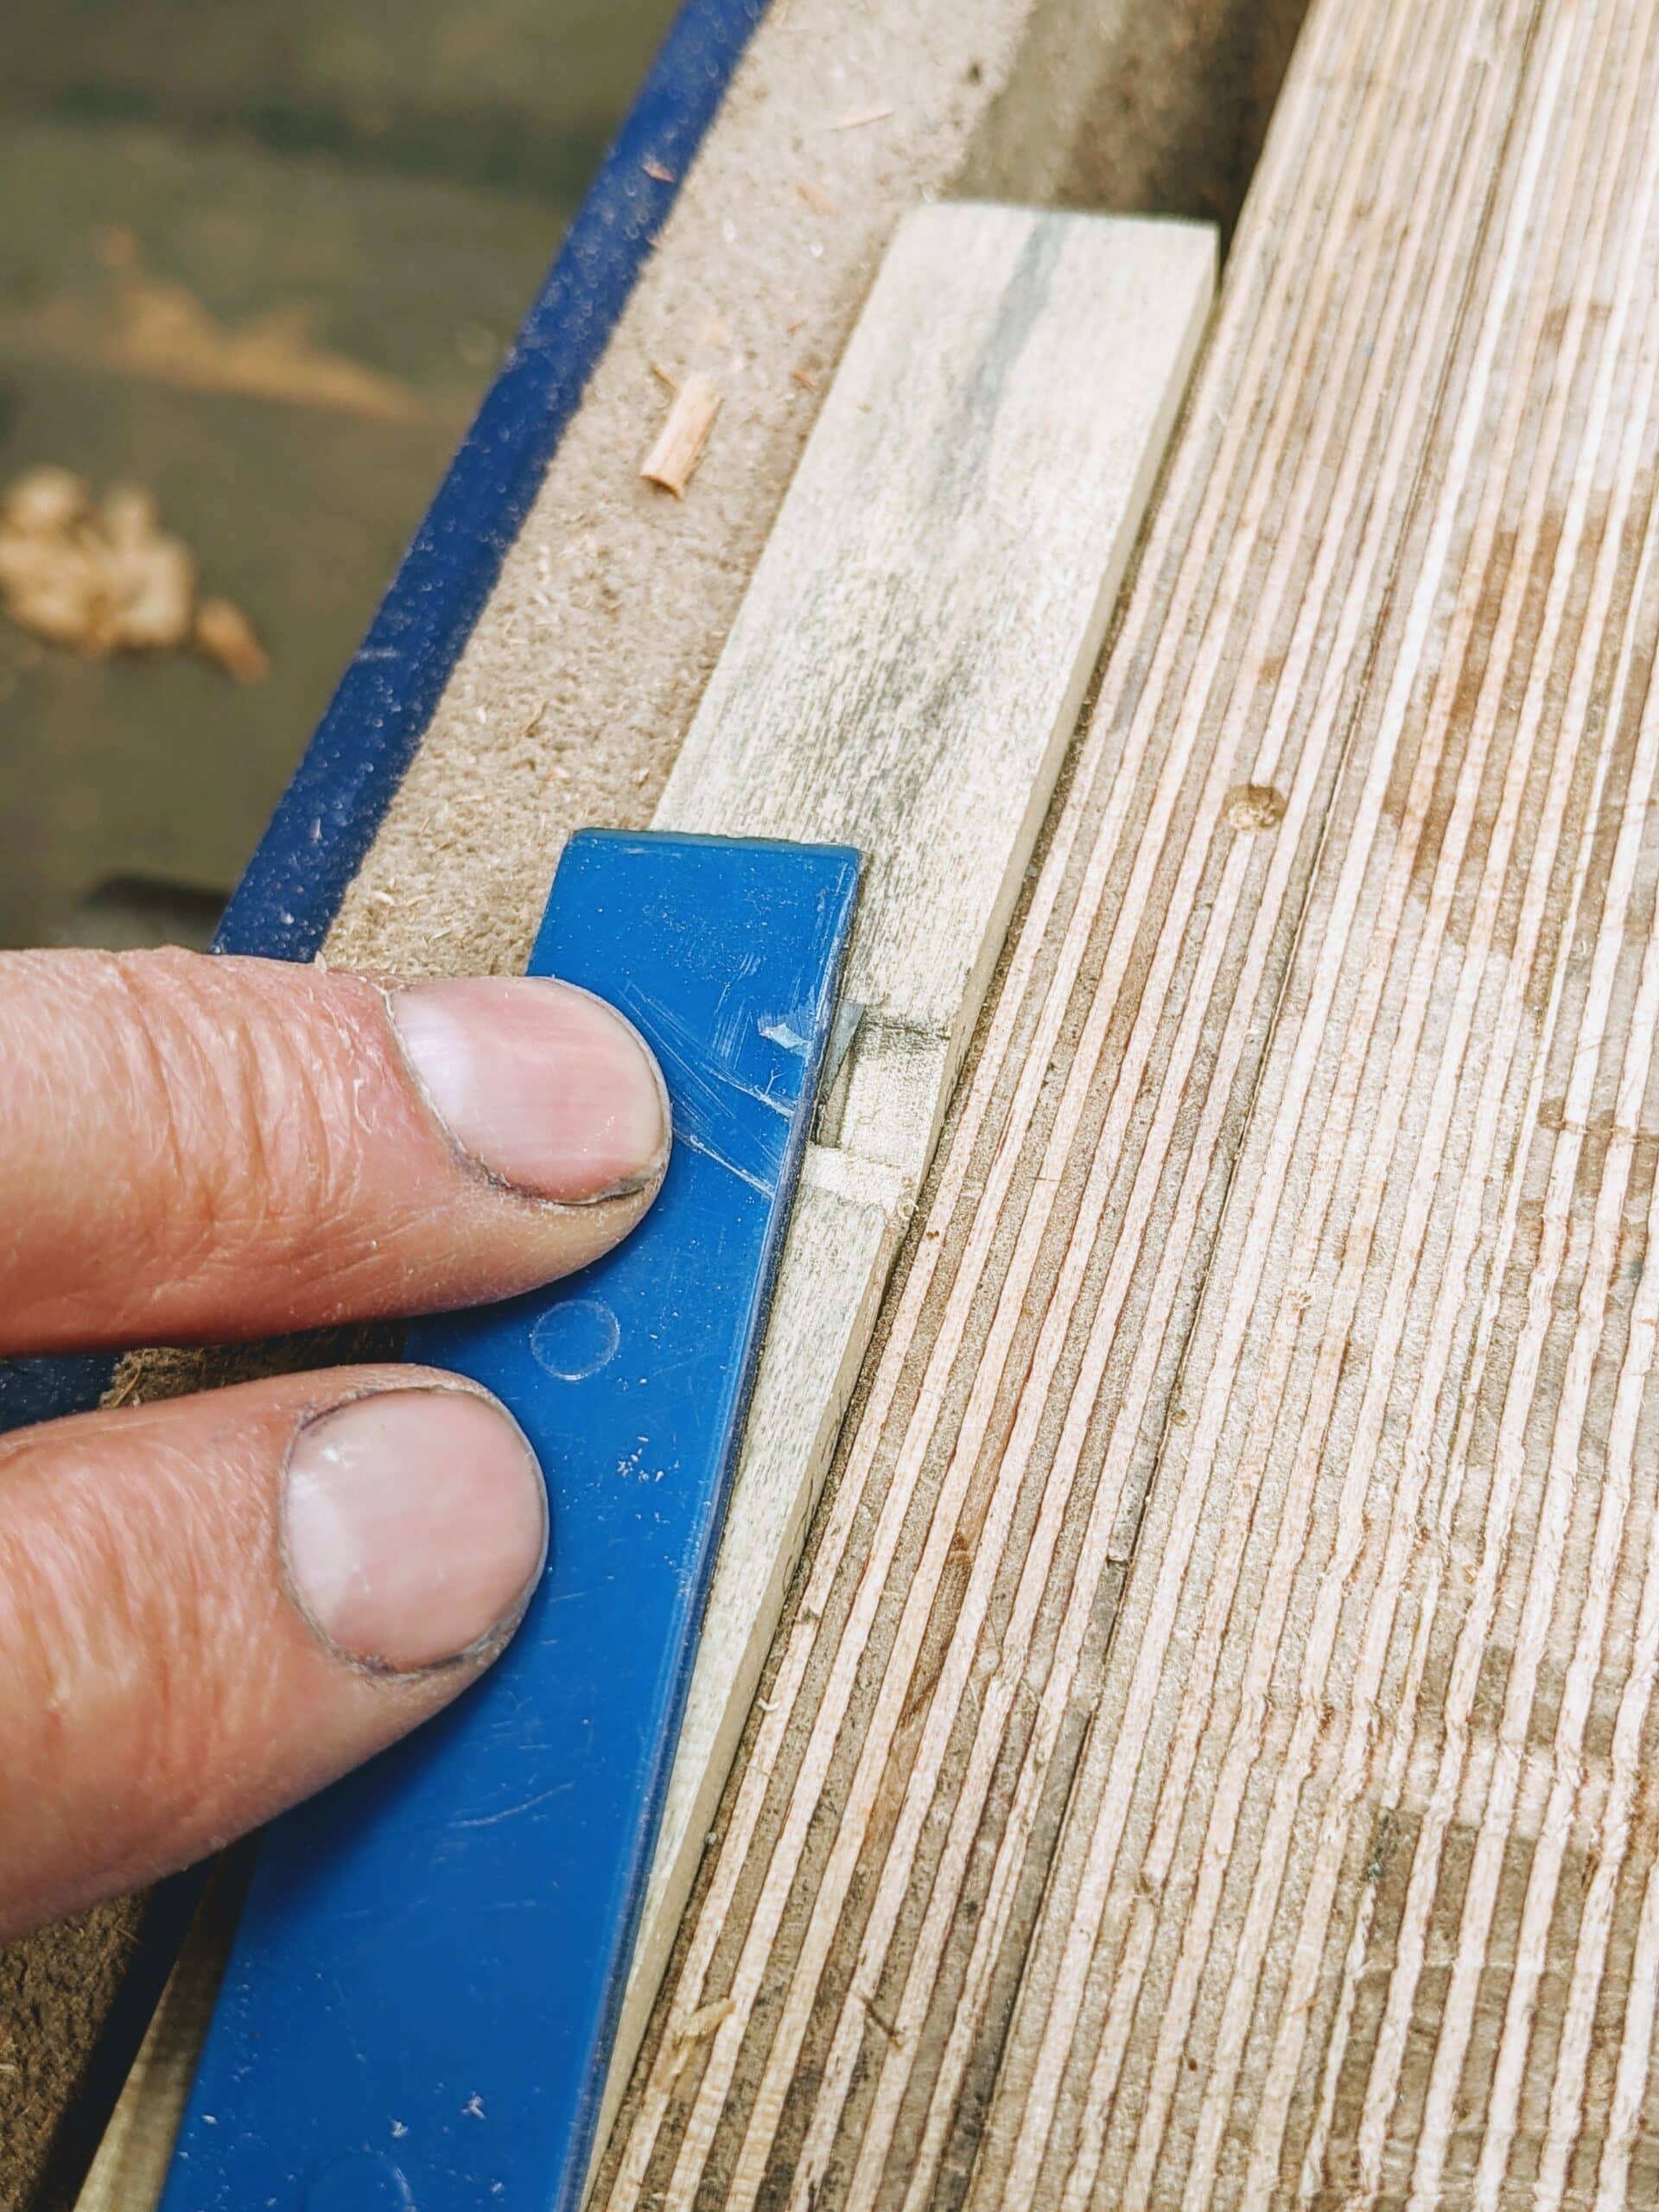
Wedge again with the blade in place so that the blade is ever so slightly protruding. Clamp in the vise securely.
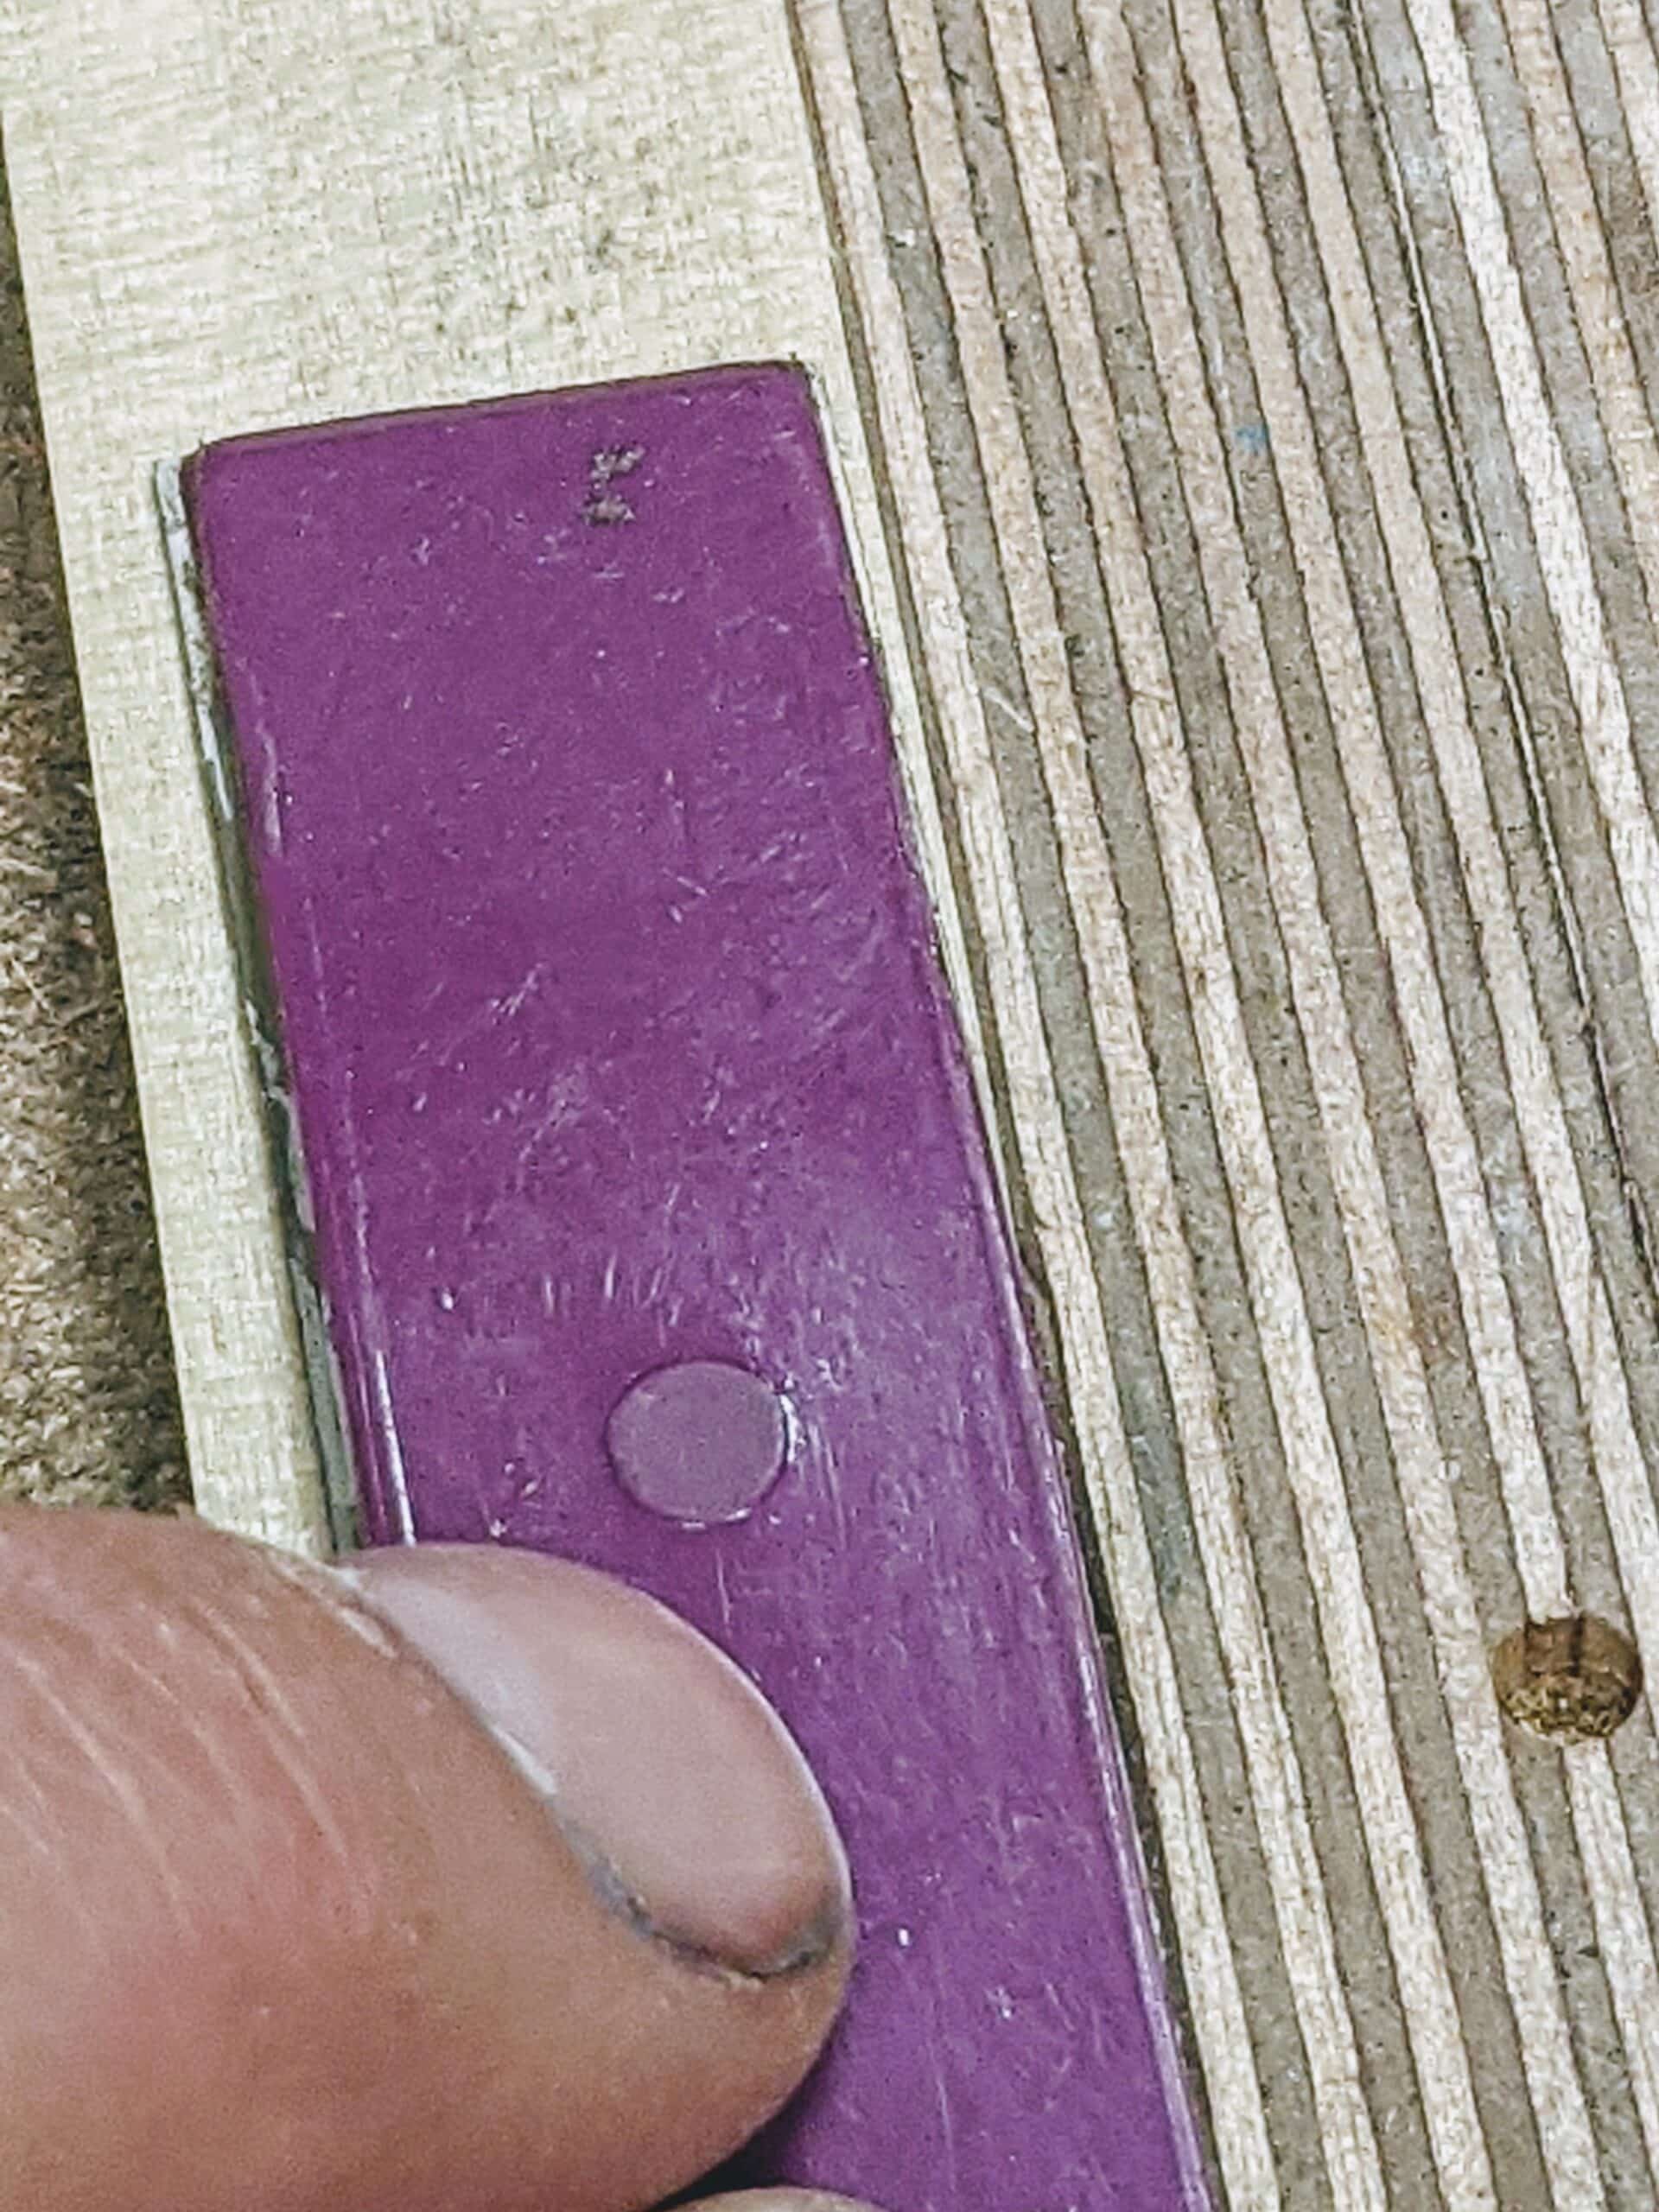
Note: If you don’t have diamond hones use abrasive paper adhered to wooden paddles . . .
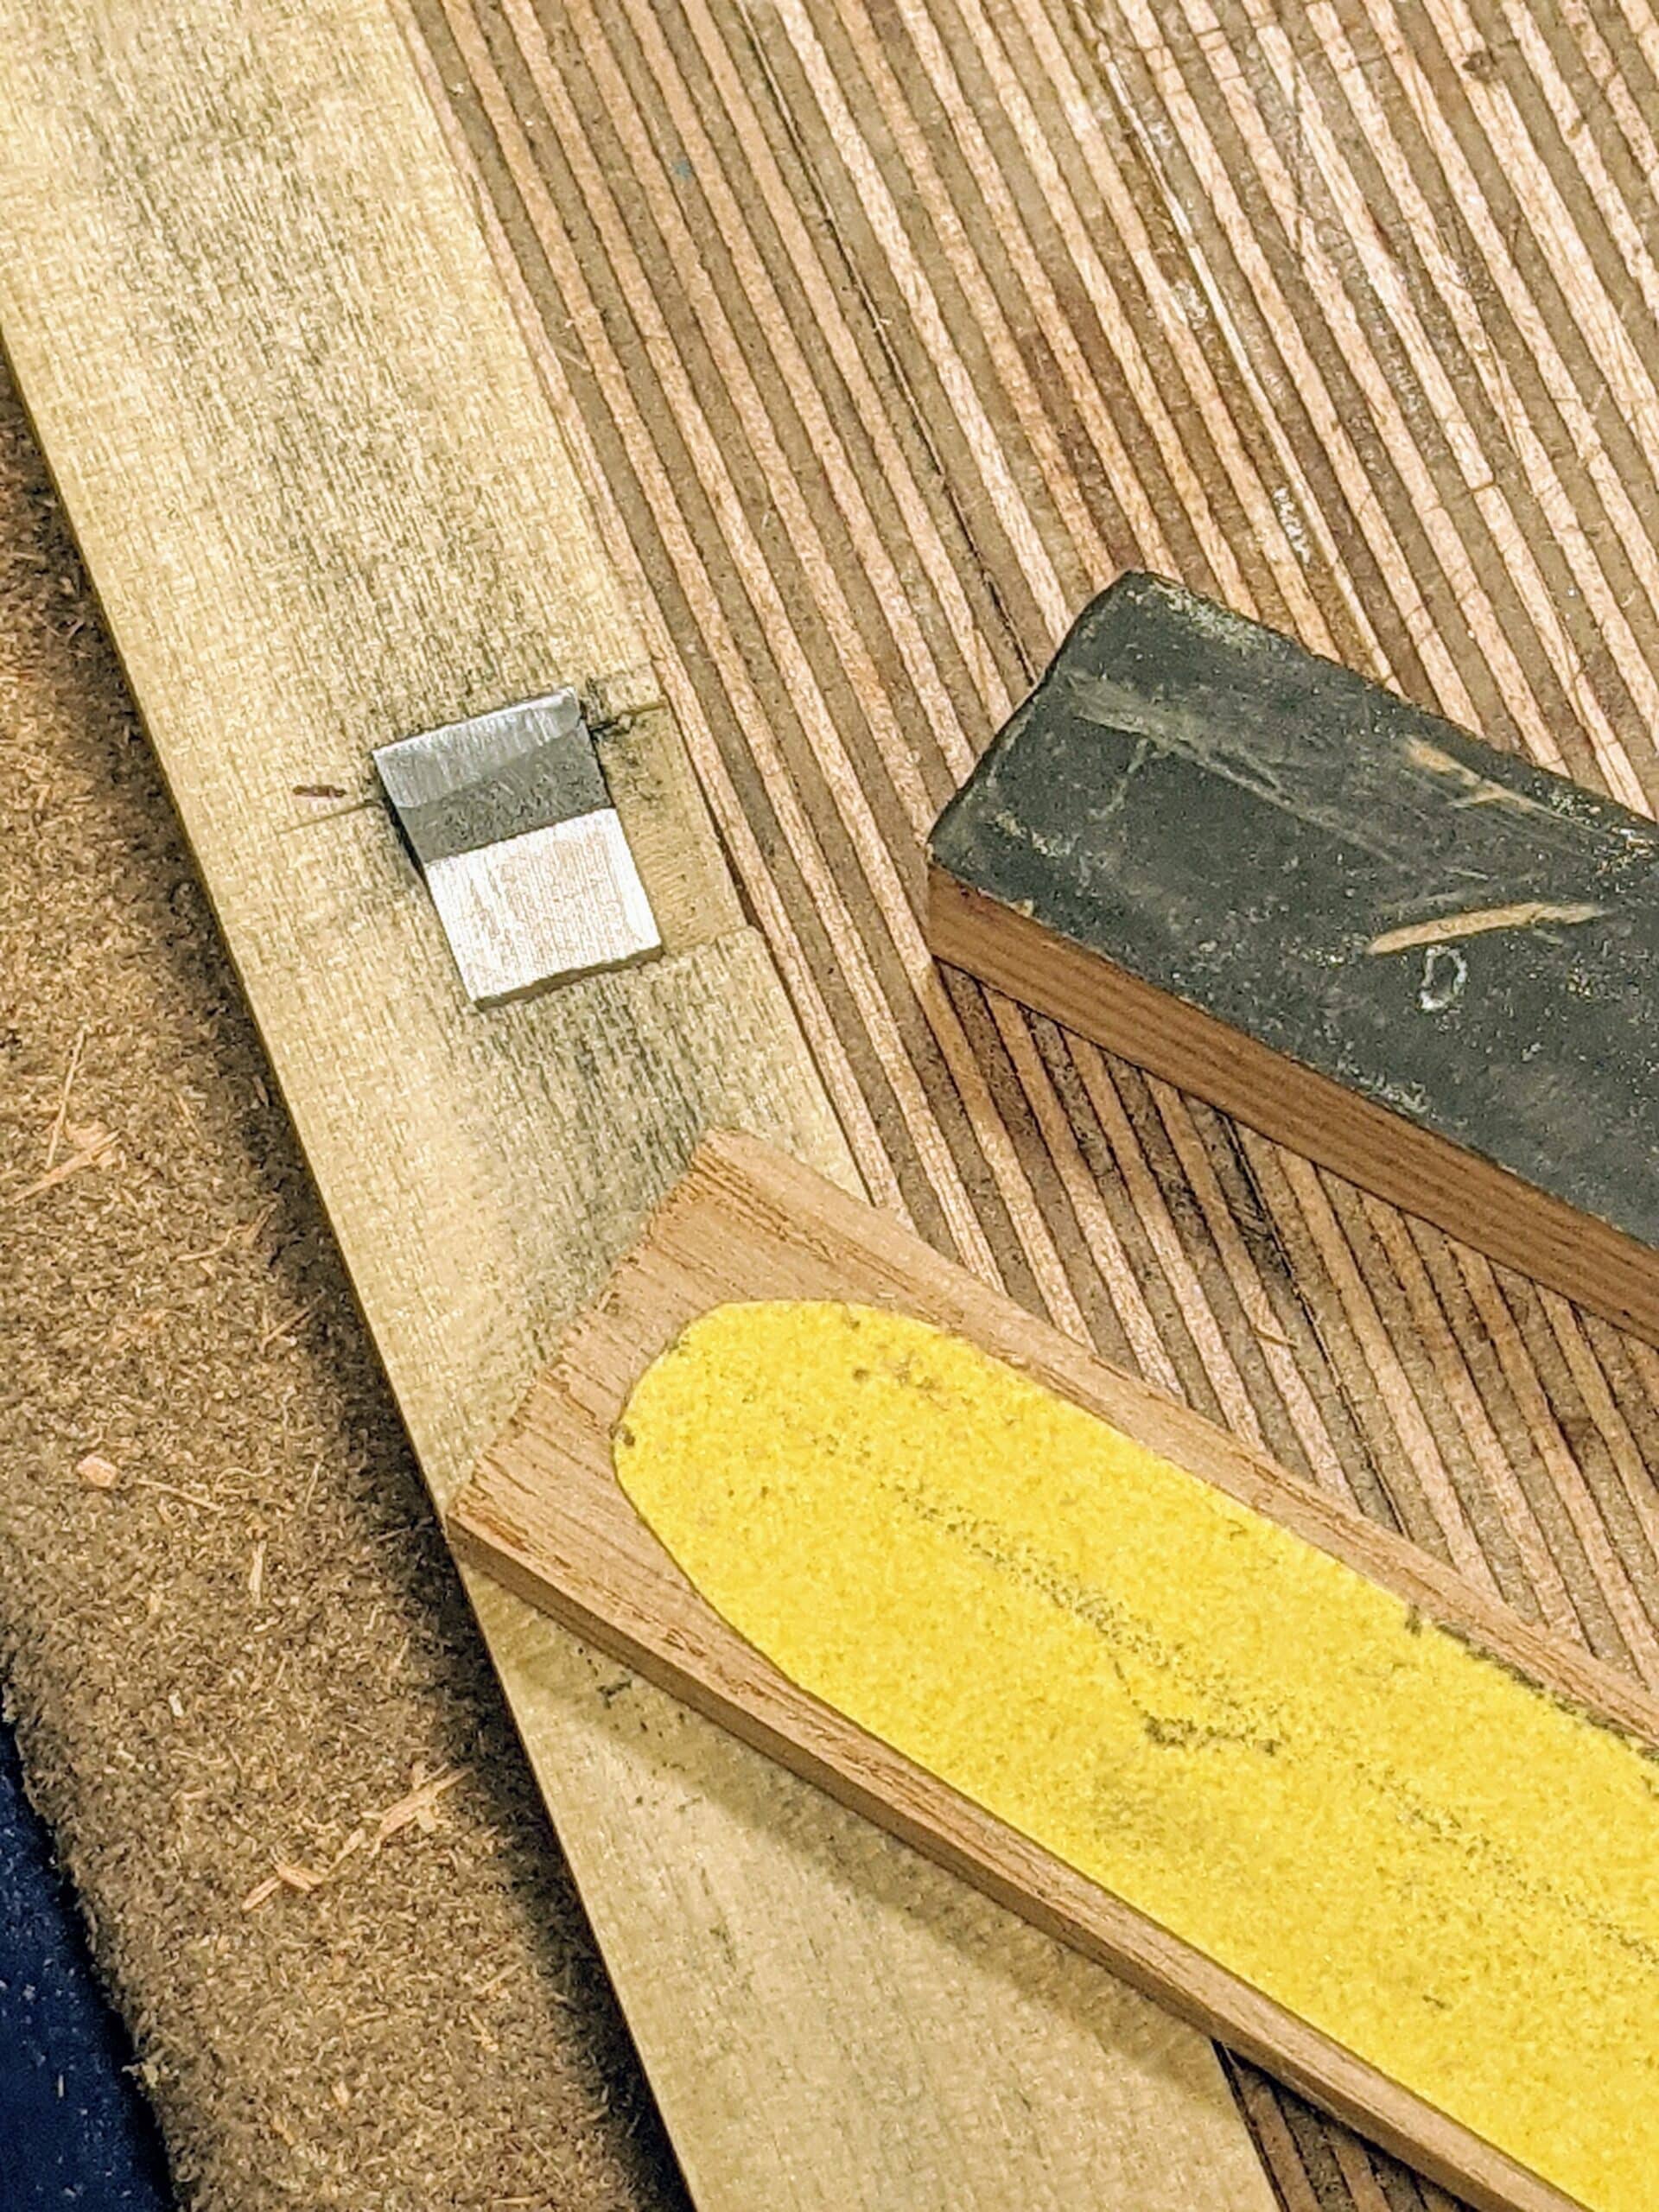
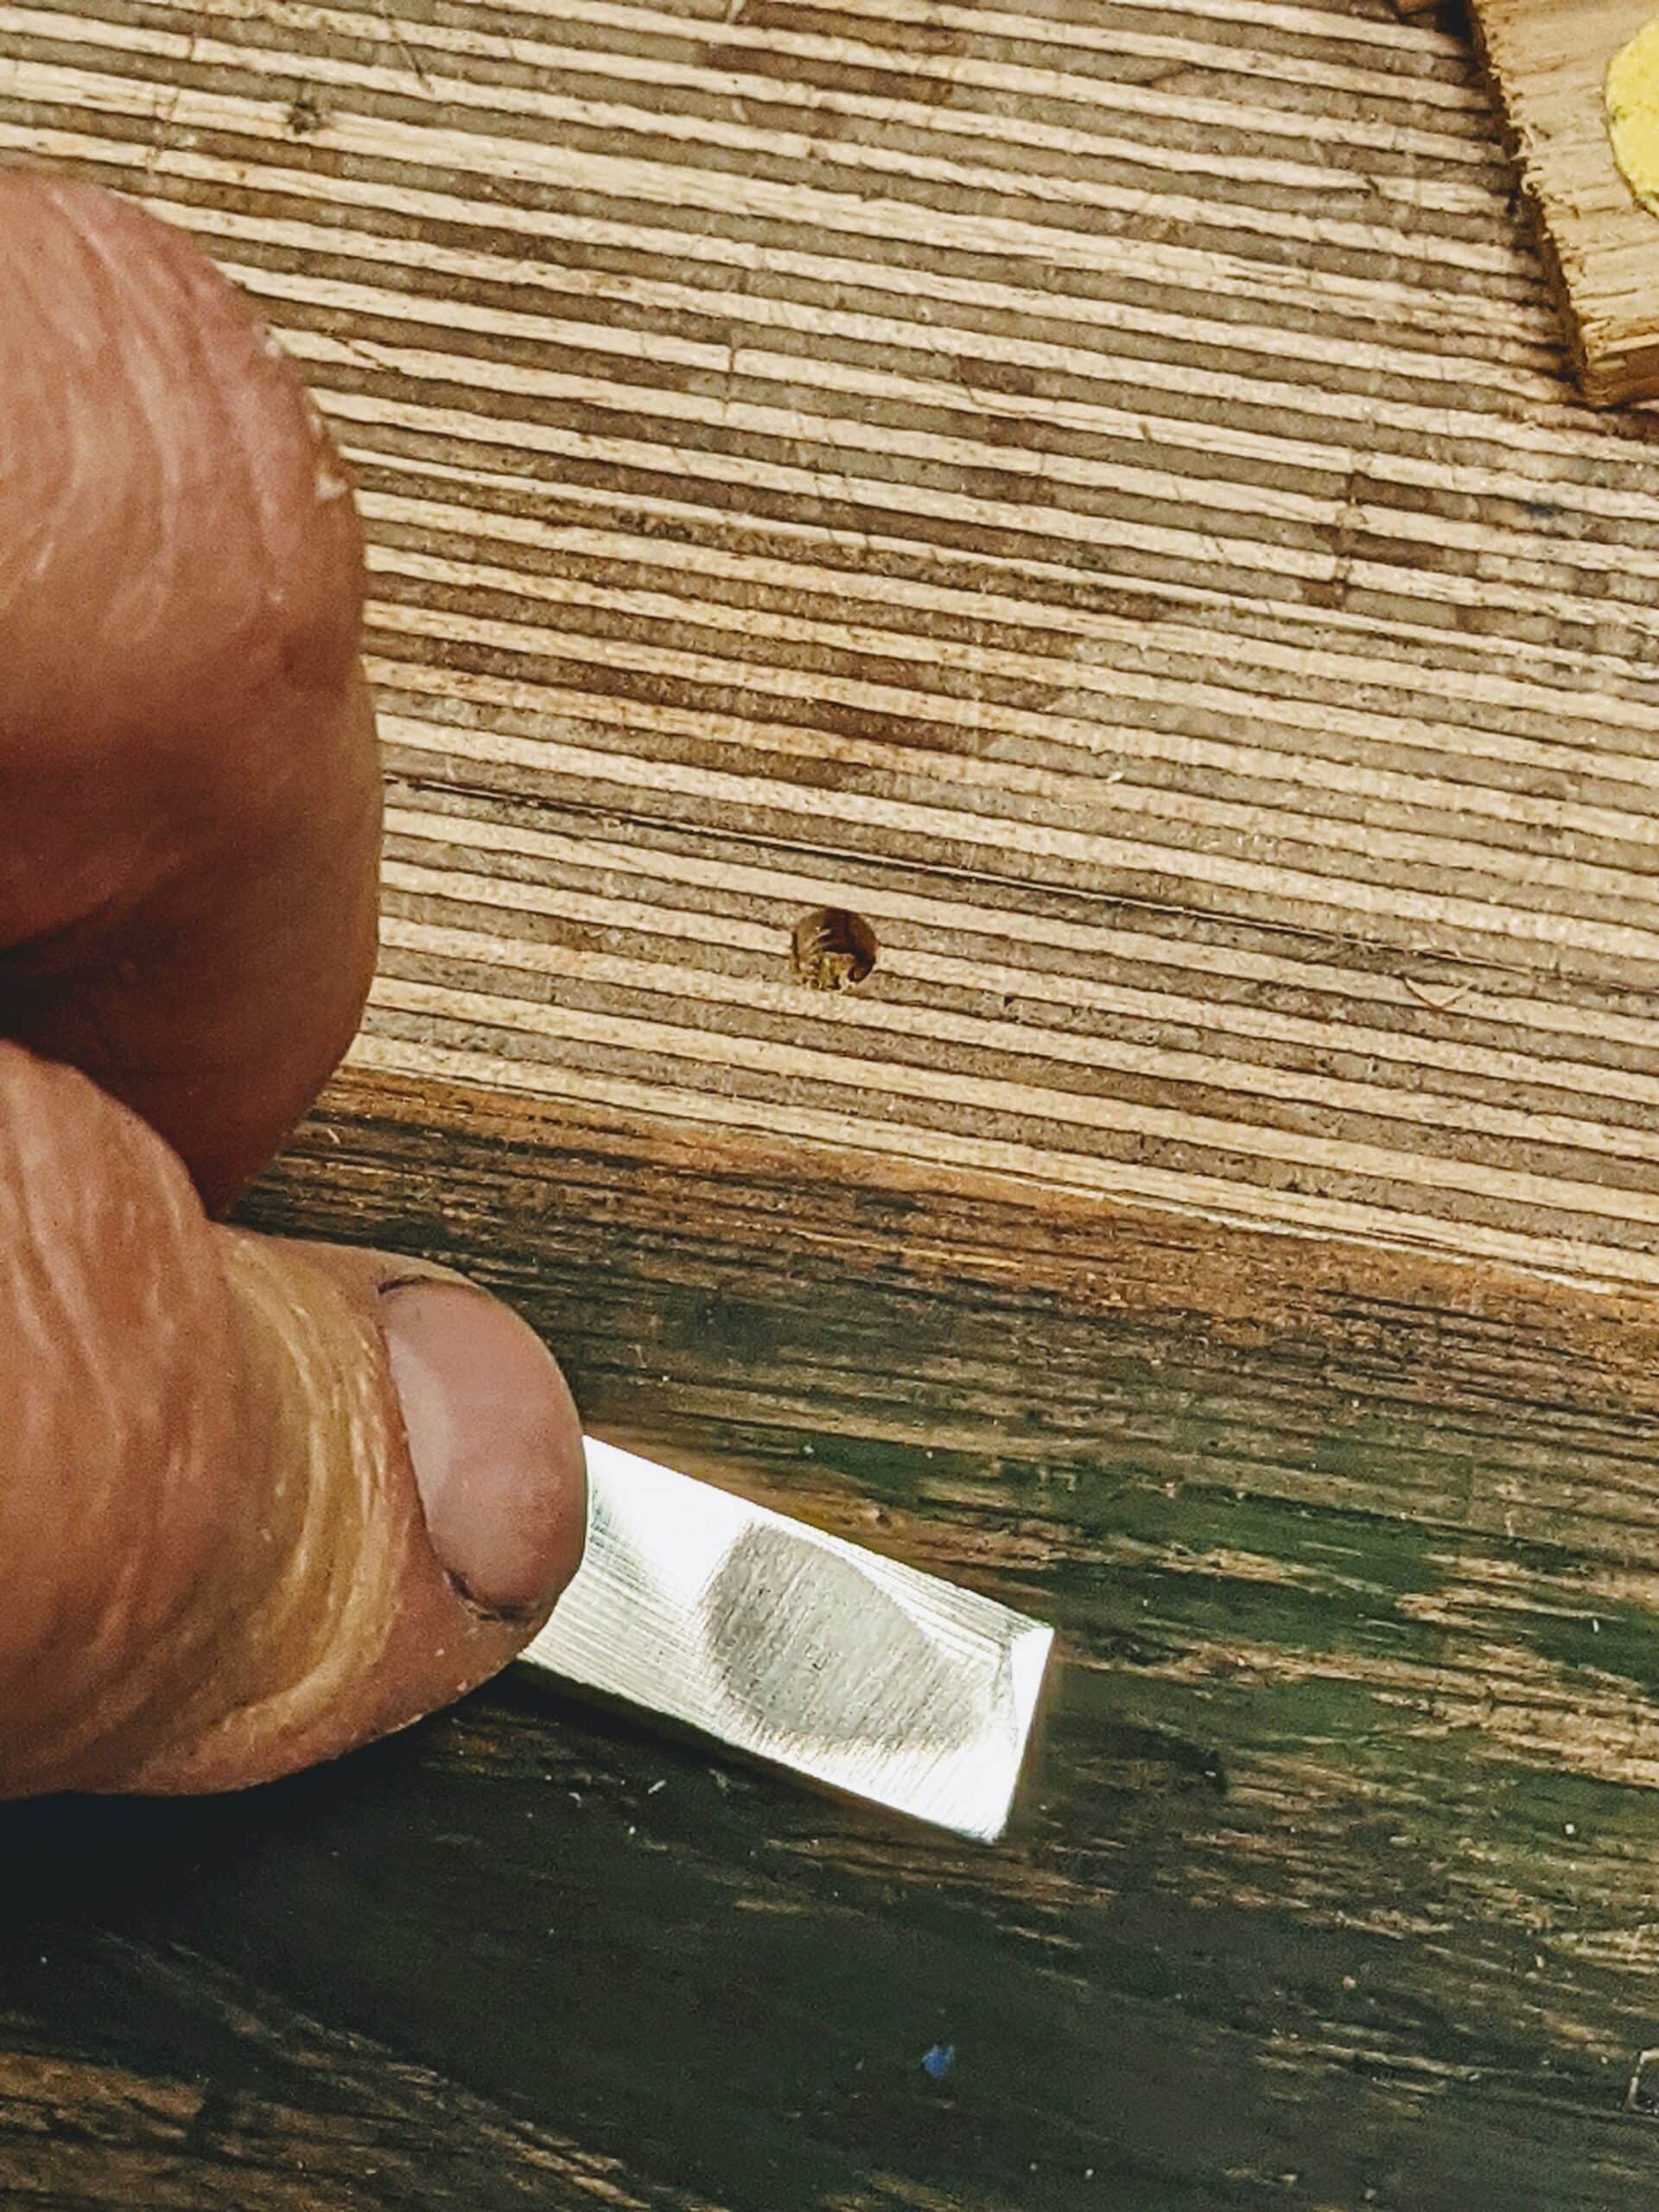
. . . go to 400- to 600-grit and further refine the bevel keeping the handle end of the abrading paddle firm to the surface of the wooden holder. Rub just a few times as the second bevel is soon established.
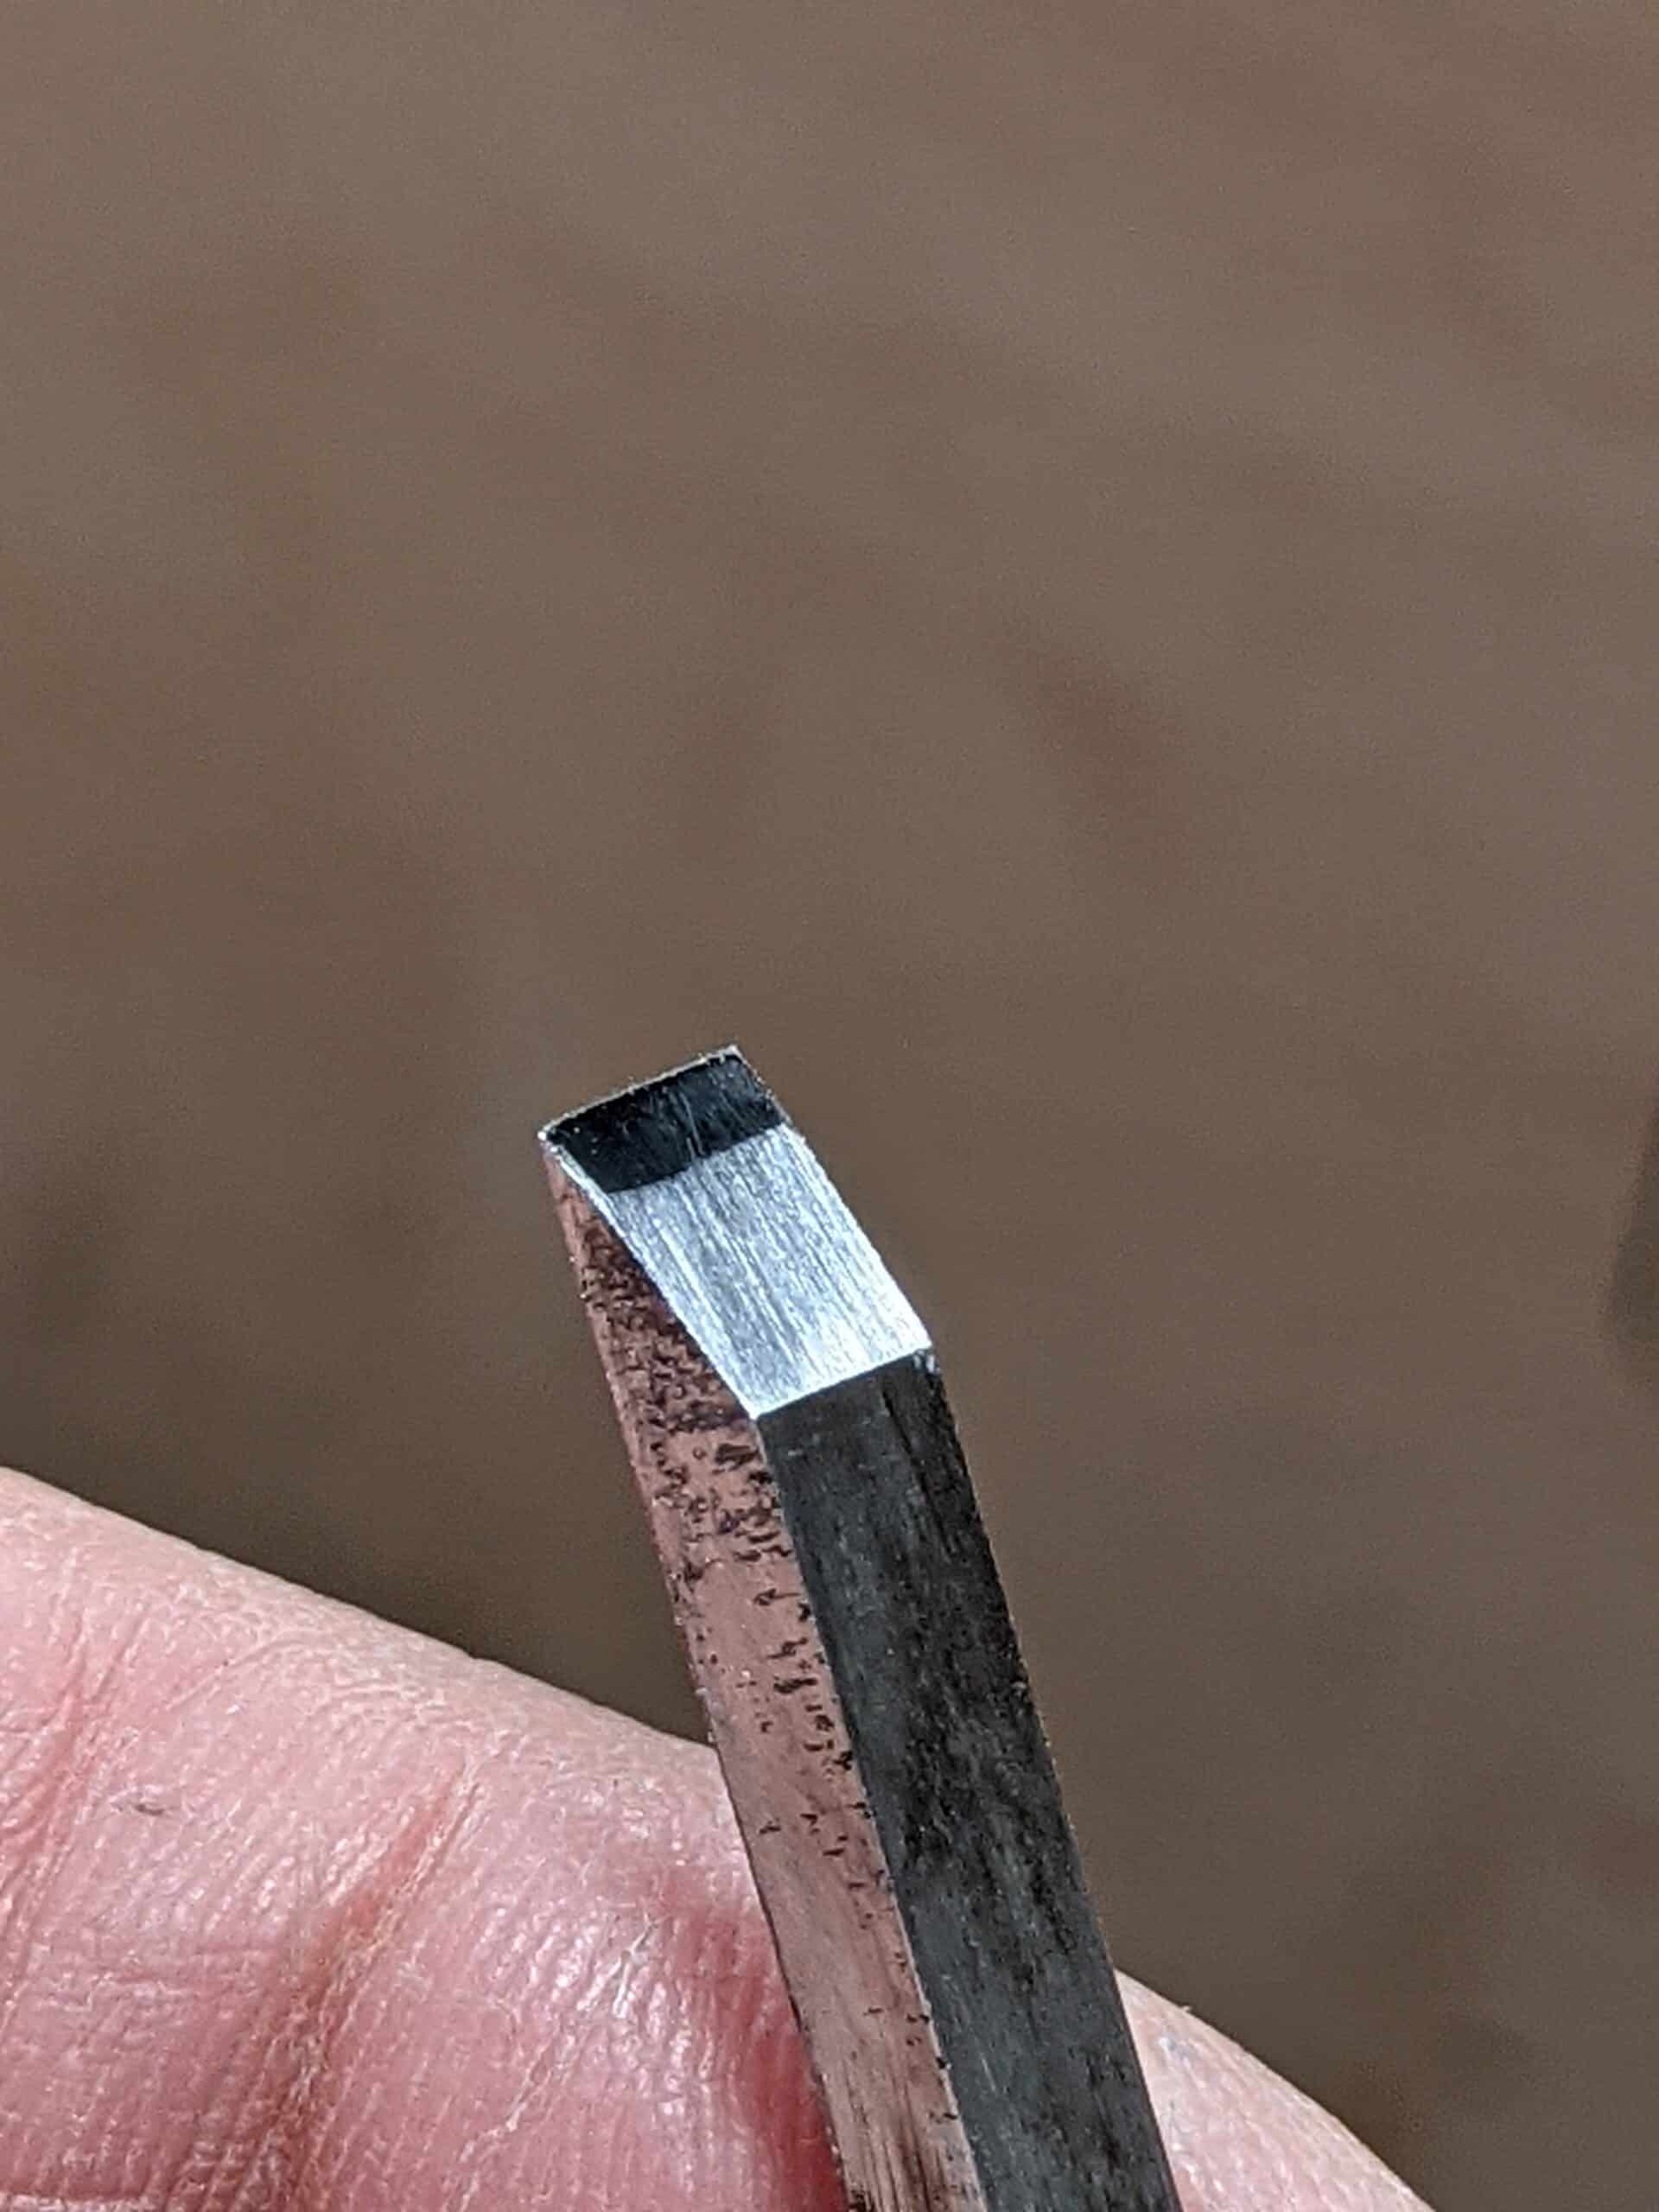
The final hone in the holder will be to whatever you want. Wet and dry of 1,000 to 2,000 will give an excellent bevel.
Buffing out further is really not always necessary but I often do so just for good measure, even on 1/16″ wide cutting edges. Apply buffing compound to a piece of wood to buff out to around 10,000 on both sides of the cutting edge. You should be able to handhold this.
A brilliant little guide, that once again has taken me from not knowing where to start, to having a clear path forward to success. Everything from lightbulb of the knife wall has carried me forward. Thanks Paul.
Why not just use a commercial honing guide?
With narrow blades, it’s tough to keep the honing guide perfectly straight and keep the blade square. I have trouble with 1/8″ to 1/4″ blades when using a honing guide. I still use it but it doesn’t come out perfectly square. With the honing guide being heavier and the contact point of the blade being 1/8″-1/4″, keeping that perfect balance while sharpening has been tough for me. I’m guessing Chris has the same issue.
Not happy with the impact that rolling wheel of the guide has had on my diamond stones. I’m sure it has compromised the grit rating in the quite limited area of the stones it tracks on. I now prefer free hand after a reasonable amount of practice and frequent checking with a small engineers square. Narrow blades however remain a pain. This jig is a clever repurposing of the rebate plane design
The ones you need are rather pricey. I decided to buy the Veritas honing guide MKII, with all the bells and whistles sans the skew guide. I can sharpen my 3mm chisel with the narrow blade attachment and get consistent results. I also can use it for my spoke shave blades, so it is a very nice and versatile guide. Very consistent.
But as I said: it is rather expensive! I am fortunate in that I can afford / prioritize so that I can spend a bit of money on my hobby throughout the year. For me, this was a good choice. I try to do resharpening and stropping freehand to gain experience and control. Eventually I hope to be able to do it freehand from A to Z, but I’ve found that so far I can’t achieve good enough results. I’m on the steep end of that learning curve, slowly ascending. 🙂
Small tricks like this is of great value. After all, there might be instances where even the expensive toys can’t solve the problem, and we need “oldies goldies” like this.
Thanks for the tip Paul, I’ve been struggling with my narrow chisels and spending a lot of time trying to get them right.
It would be fascinating to see very highly-magnified photographs of cutting edges in the ground-, sharpened- and honed states. Also after use on different woods, to see how the metal structure is affected by wear. Microphotography of a fine edge must be a very difficult challenge.
That’s not the challenge at all, Andrew. The challenge is doing it and having the time.
LOL! “Well, there is that”, as a dear lady of my privilege to know used to say.
Theres a book titled The Perfect Edge which utilizes a lot of microphotography, if I recall correctly. In my opinion, the book turns sharpening from a means to an end to an end in itself, which isn’t really what I’m after. But to each their own.
The book The Perfect Edge uses a lot of microphotography. It risks turning sharpening from a means to an end to an end in itself, in my opinion, but very full of information.
Excellent reference. I was going to suggest it to Andrew myself. There are micropscopes specifically developed for metallurgical purposes. They employ down-the-barrel reflected light. The chief difficulties are lapping the metal and mounting the specimen. Some ‘scopes are designed to allow close examination of large objects.
Thanks Paul! I have 1/8, 3 mm, and 1/4 inch chisels as well as groving plane cutters that can benefit from your excellent solution.
Now what to do with the $200 worth of Veritas honing guides (original and MkII) that deliver a consistent but not square square edge?
I have a Veritas marking gauge (that I never use, but bought when I thought I needed it) and I hate it for that very reason. I can’t believe they didn’t include a reference edge of any sort in such a premium (expensive!) tool! When sharpening chisels with it I just couldn’t get it out of my head that I’d levered the handle end slightly when sharpening and knocked it out of square. I gave up with it quite quickly. I always meant to get one of the cheap eclipse sharpening jigs instead, which at least hold the blade at a consistent angle, but I just freehand everything now instead.
To me, it’s a version of the poor man’s rabbet plane. Smart!
Absolutely brilliant idea yet again, Paul. We owe you much for these little pearls of wisdom. My wobbly bevels will be a thing of the past!
Did anyone else, I wonder, have one of those “Why didn’t that ever occur to me?” moments after reading Paul’s blog?
Or is it just me?
Chris
Yeah, why didn’t I think of that?
Cause you have not been doing it for a quarter century? Yuk!
Excellent!
Thanks.
Brilliant. My narrow blade chisels are all exactly as you describe.
Paul,
I just experienced my first hand tool working injury today (cut fingers aside!) and thought I’d enlighten your readership!
I was planing a tapered dovetail wedge, around 60cm long, to go into a dovetail housing to hold four boards together in a panel (I might need to take them apart).
Tapers are a pain to hold of course, and especially dovetailed ones. I used my vice, bit as the taper got ever thinner, the vice was struggling to grip. But I was getting by.
As I gripped the wedge in the vice for the 800th time for some “fine tuning”, I set my no 4 plane down to begin planing. Making a heavy pass, the opposite thin end of the taper slipped from its grip like an out of control trebuchet, battering me straight in the face, leaving a large cut on my forehead!
I’m contemplating whether hand tool working is a safe environment for someone as clumsy as me, and considering turning to the safety of the machine tool world where nothing bad could ever happen.
You have got this complete;y turned about, Rico. machine woodworking is the most dangerous of all machine work in any trade bar non. You made a mistake you are unlikely to make again and it is just a question of persevering unless of course you absolutely feel that you cannot change in which case you should follow your gut feeling. ~I have had periodic injuries but stitches have fixed them. These more serious mistakes were on machines and not hand tools.
My conclusion to return to the machine world was just an attempt at humour Paul! If I can injure my face while planing, I’d hate to think what I’d do at the router table!
Ah! I am being dull then, sorry!
Oh dear
lol
My turn…
No need to be so blunt about it, Paul!
I was going to laugh, but your experience was a little too much like mine. Though I am hoping that an old injury to my fingers means my fingerprints have changed, in case I make a career change to a life of crime.
Thanks for the laugh.
I had an epiphany at the router table years ago, something hand tool work would never ever have given me. I needed to cut a VERY shallow T profile in some stock (I think it was just 1 mm rabbets on each side), and for some reason unbeknownst to everybody including myself I carefully measured the correct distance between the router bit and the fence. Some of you might see what comes next. I certainly did not back then.
Do you know how those ball cannons work? There is a wheel spinnin’, maybe two. A pipe or channel where the ball is fed into the spinning wheels, and off it goes. Up, up and away.
The piece of wood flew out of my hands and made a L-shaped (this was the first cut) in the pine board covered wall 8 feet away.
I changed my pants, adjusted the fence and put the experience in a drawer for experiences labeled “hold my soda” (I don’t drink).
Oh, well. If I have to do the same thing again, I’ll reach for my Stanley 50S over the Bosch GOF 900 squeeler.
I had a similar experience cutting strips off of a fifteen foot long board with a tablesaw. The wayward strip of wood shot 75 feet, between two co-workers, through a glass door, under the break room table and chairs, and stopped with a loud bang on the cabinets in there.
Paul,
This is great stuff! But I tend to sharpen small blades having been inspired by your “wooden spokeshave sharpening” video. I hold the chisel rigid, either clamped or just held firmly against the bench, and then bring the sharpening paddle to the blade, using the bench top to guide the paddle. It’s really fast and accurate enough…
Best regards,
Jason
I think it is important for me to show that there are alternative methods for doing things and that these ways add to your versatility in the saddle of day-to-day working.
Thankyou very much Paul for this. This happened to me with a few of my narrower chisels and I struggled to get the back square.
Is there anyway you could do a quick video of making and using the jig?
Maybe post it up on common woodworking.
This is an invaluable jig!!
Thankyou
I’ve been using a bought in honing guide for small blades but it didn’t completely solve the problem as I discovered that, although I got nice straight edges they were difficult to get square to the blade. Not as simple to set up as they would have you believe and even if you get the tool square it can still slip in use. Grrr….
Your solution is very elegant. I’ve got a little scrap of English Oak that has this thing written all over it!
Hi Paul
Great little and simple jig, thank you.
Hope I am not too late in asking this question(s), if I may. In your opinion, (i) do you get a better cutting edge from your freehand sharpening than you could ever get from using only a honing guide, and (ii) does a honing guide limit the sharpness you can achieve because of, its arguable, lack of flexibility? I would be fascinated to see you restore a couple of no 4 planes and when you sharpen their irons, use your freehand method for one and only a honing guide for the other and see if it produces any noticeable differences to your expert hand when using them.
Many thanks
Steve
The advantage of developing the ‘eye‘ and ‘feel‘ for sharpening freehand is speed and efficiency. It’s a sad thing that people in amateur realms can spend their time, and it is their time, just sharpening. I think there are different camps and one of them is more like obsessing over sharpening just for the shavings you can get. My camp is always making and whereas I can get as good an edge as anyone freehanding most things, I do want an outcome resulting in something made that has true value. On the other hand, if shaving is therapy for some then I think that that can be the end result for them. Also, whereas you can set the guide to any angle you want, I don’t use a two-bevel approach as each step you take with a guide slows down production time making what matters.
What great learnings in this blog. Made my life a lot easier, thank you
I made one of these jigs tonight. It was a pretty quick process and boy, did it work well.
It took me almost no time to square and sharpen a badly out of shape 1/4″ chisel.
Thank you Paul!
Up until the next Monday, I used to have (each of) one 6, 10, and even 12-milimetre wide chisel blades completely rounded off and perfectly ruined from the squareness viewpoint because of my hands’ clumsiness.
On the other hand, my newly bought 6, 8, 10, 12 and 14-mm wide chisel blades came out alright after my initiasing them freehanded, according to your latest tutorial, using diamond (as “diamonds are forever”) stones.
However, my restoration work on my forementioned three chisels will definetely start after doing my best to copy your jig.
Thank you very much indeed, dearest Sir, for sharing this uncountable example of expertise, engineering knowlege and, most of all, CARE for all of us!!!
Not related to sharpening narrow blades, but looking through the archives(which is fun to do). I found a post from August 8 2011 talking about a book and dvd about woodworking planes Paul has relied on throughout his life. Did this ever materialize?
If so, where is it available? Thanks.