More than a Scrape
I scrape a lot, and I mean a lot and most days scraping is part of mu=y daily ritual in dealing with hardwoods like oak, sycamore, cherry, maple, walnut, ash, teak and so many more. Scraper is of course a misnomer for what a card or cabinet scraper is and I have never understood how the name became so fully adopted in the first place as this tool does not in any way scrape at all, it slice-cuts like no other edge tool and has the most sophisticated cutting edge of all the woodworking tools there are. I cover this extensively in my Essential Woodworking Hand Tools book too, how to create the edge you need to take care of every kind of wild and contrary grain. This cutting edge deals with everything you encounter and can be used quite locally with a simple flex of the steel beneath your thumbs or the heel of your hand. The question came to me as to whether the tool could be improved on and the answer is yes it can.
You can usually pick up a scraper like this for around £5-7. I just bought a Bahco 6″ (150mm) by 2 1/2″ (63mm) by 21g (0.80mm) thick for £6.42 with free delivery through Amazon. Often they are overpriced so shop about a bit. Amazon had the best prices for now. Better than eBay. I also found some Irwin Marples 5″ there for £4.25 so the cheapest and bestest yet. But please, no one write in and tell me you can make one from a worn-out throwaway saw plate. Buy a proper scraper and amortize the cost over 80 years of daily woodworking. That works out at.02916 of a UK penny a day or 7/240ths of a penny a day. if you spend around £7 a pop.
The scraper I converted in about ten minutes max is a pretty standard 5″ by 2 1/2″ and .032″ or roughly 0.8 mm thick. No need for thicker or thinner. It flexes just fine. These scrapers are mostly made from sharpenable high carbon plate steel which is quality steel with great spring so it can be flexed to task and retains its flatness no matter how much pressure you apply to it. The Irwin Marples is also cold-rolled, hardened and tempered to Vickers 470 so 47.5 Rockwell. I like both sizes of 6″ and 5″.
The radii are different for different applications and you can sharpen all for corner edges according to preference. use them interchangeably and you have a cutting strategy at your fingertips for just about any grain you might encounter. Radiussing your scraper edge is amazingly beneficial. To localise an area within a greater surface means you can flex for depth and feather out to the outer reaches so as not to indent the surface noticeably.
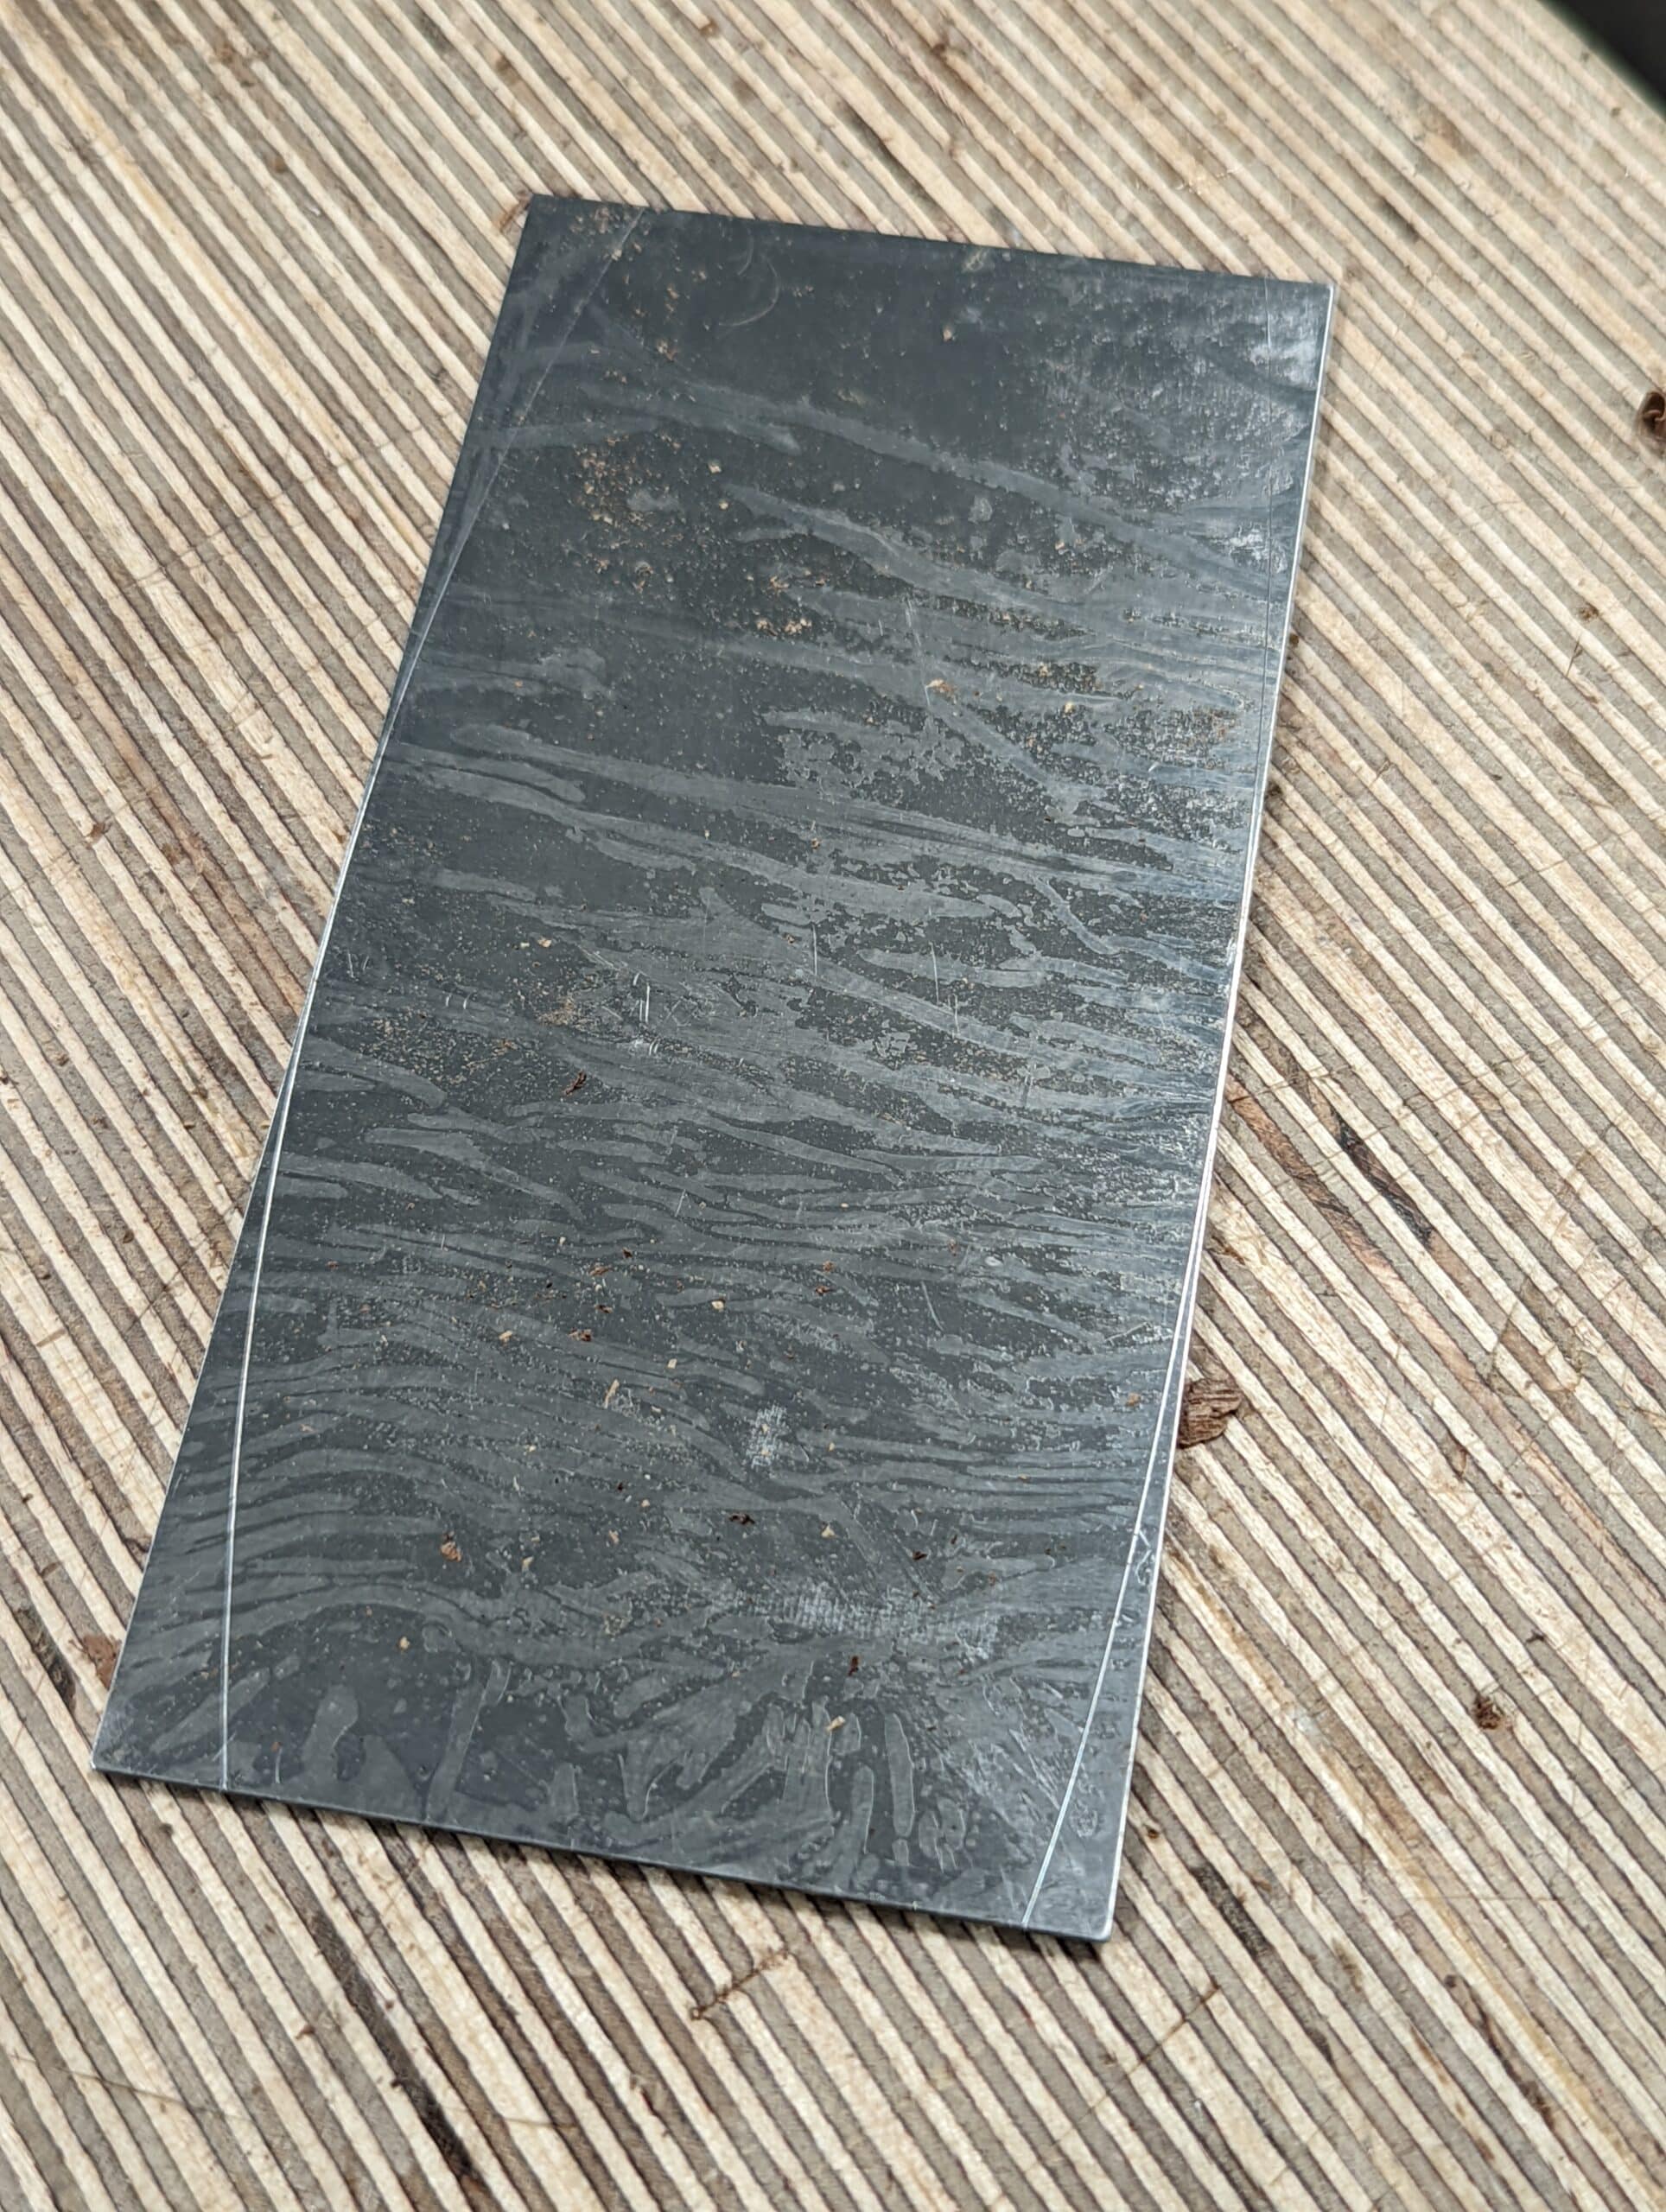
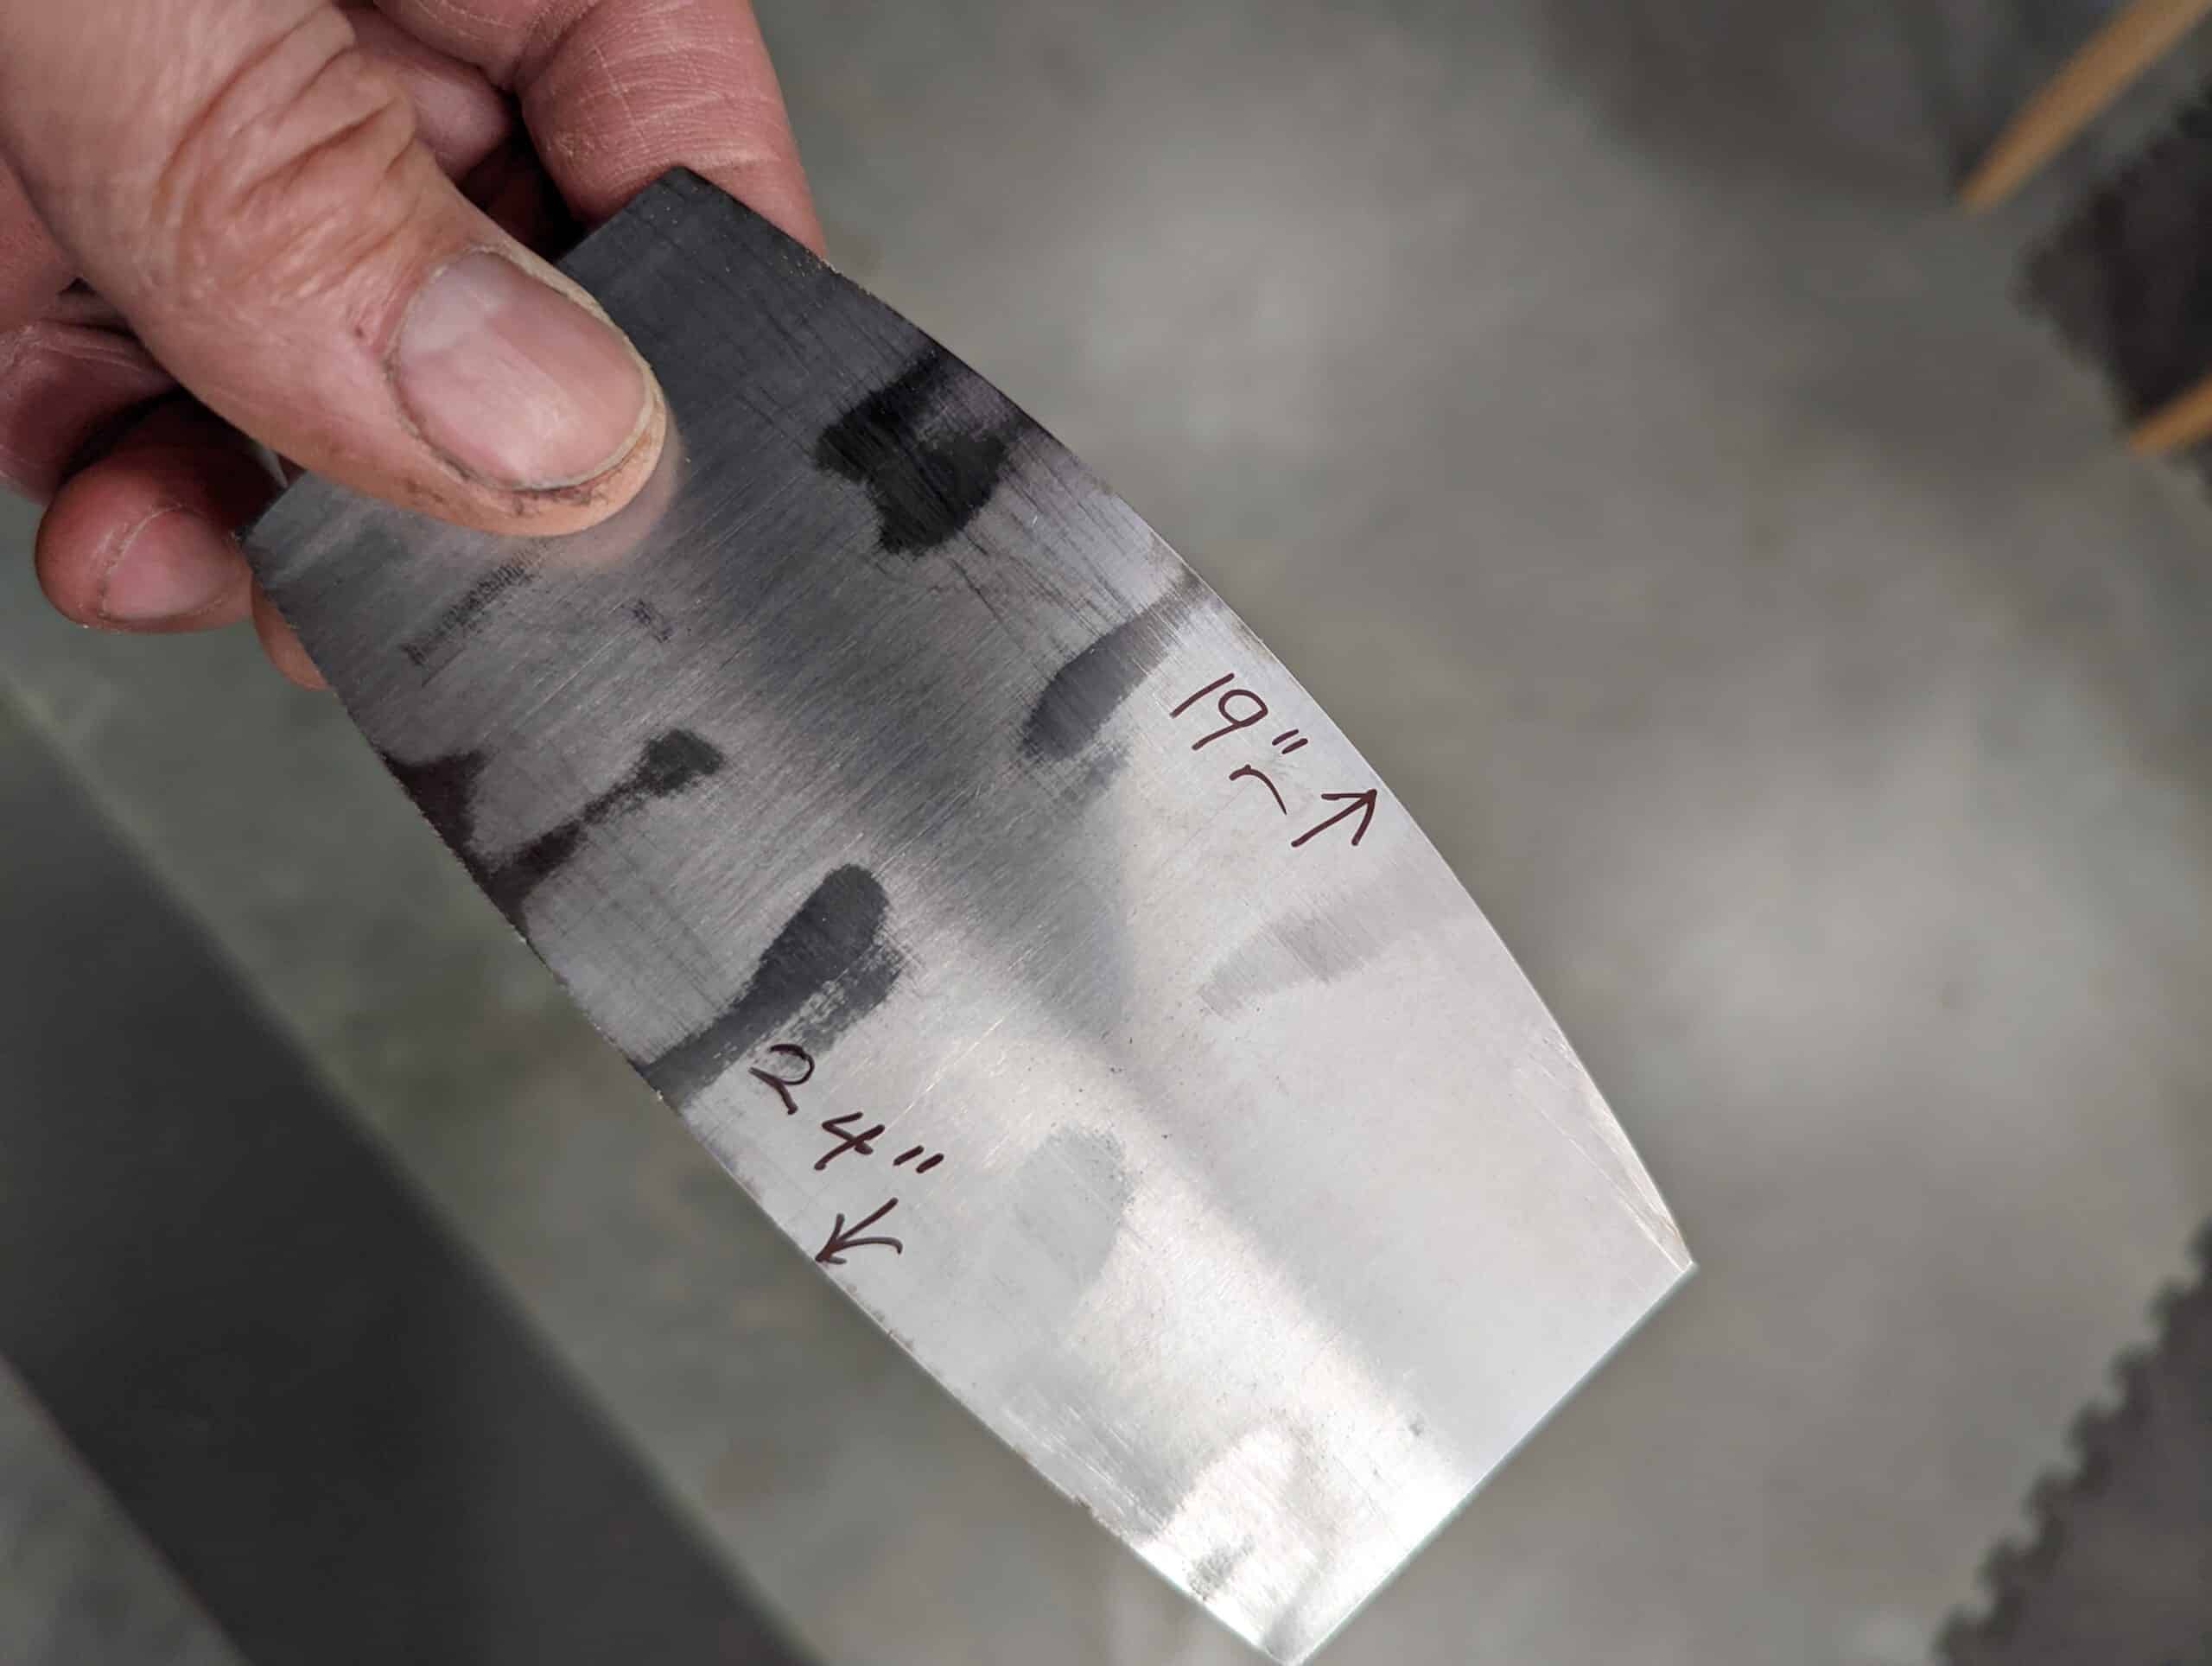
Scribe the radius onto your steel plate with a steel point marker. An awl will do it. Use an upturned bucket or can to a similar radius to strike the lines but don’t go with too small a radius. I think for general surface work the 19″ radius is the best.
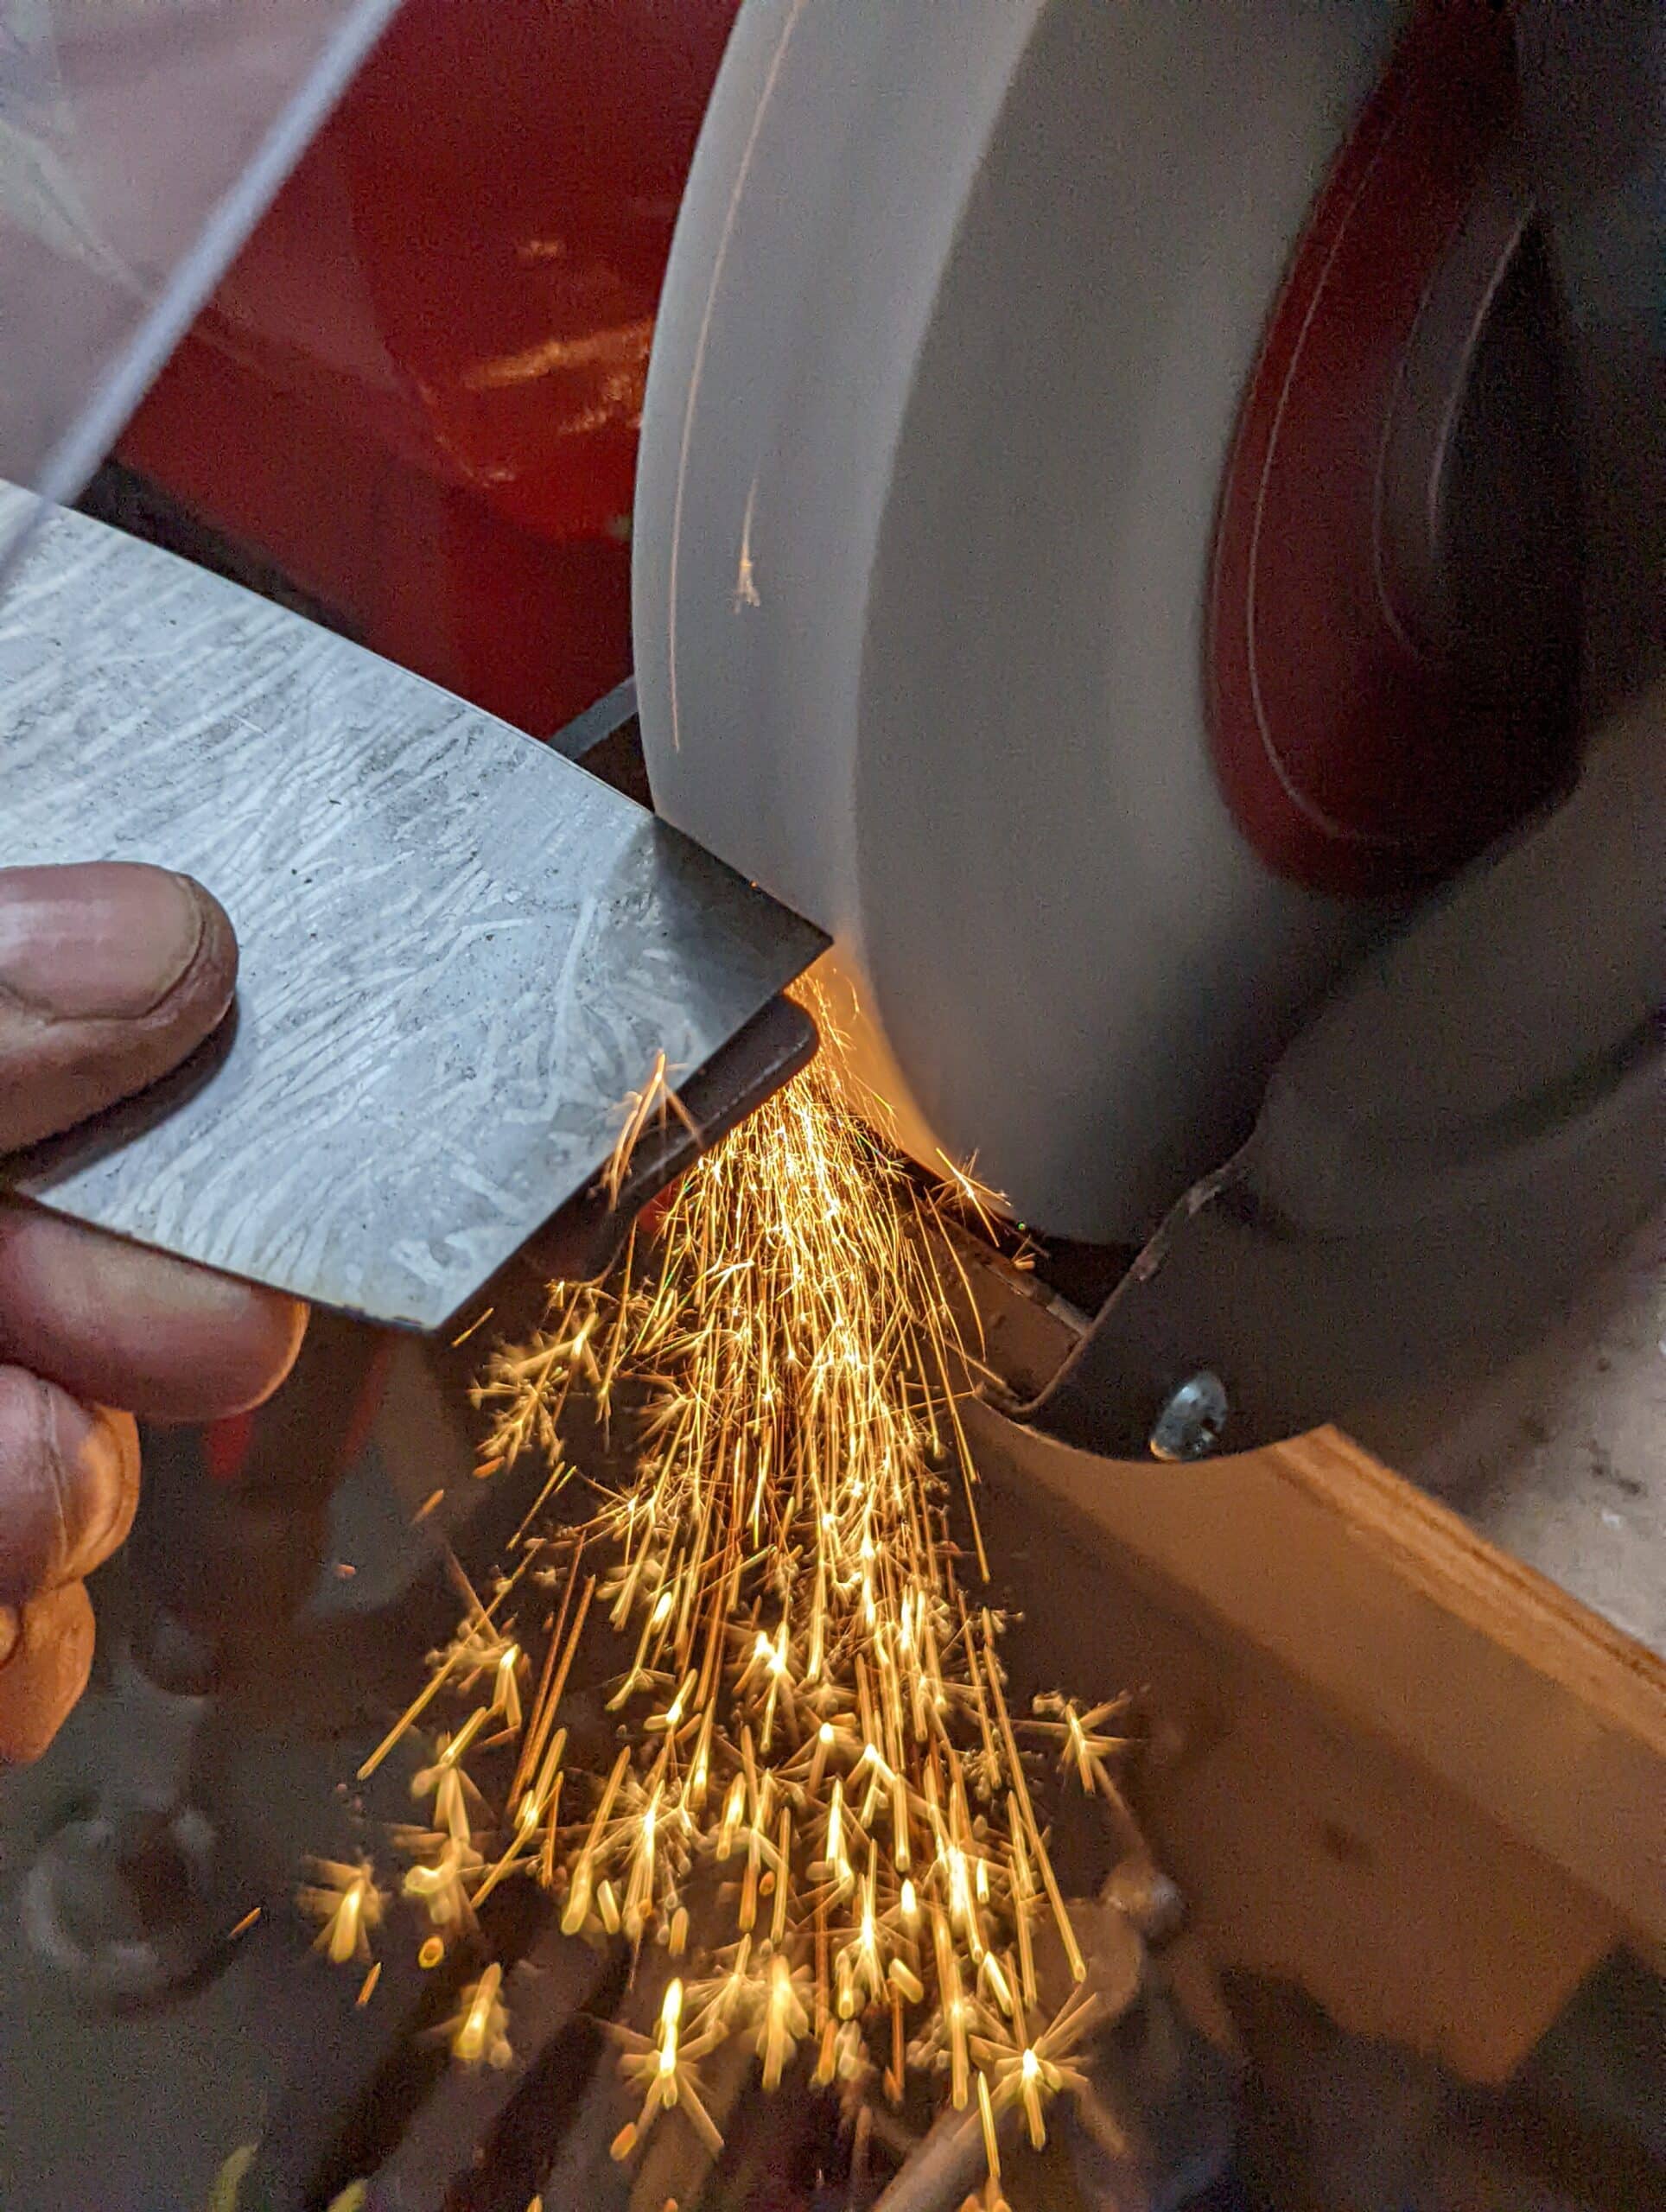
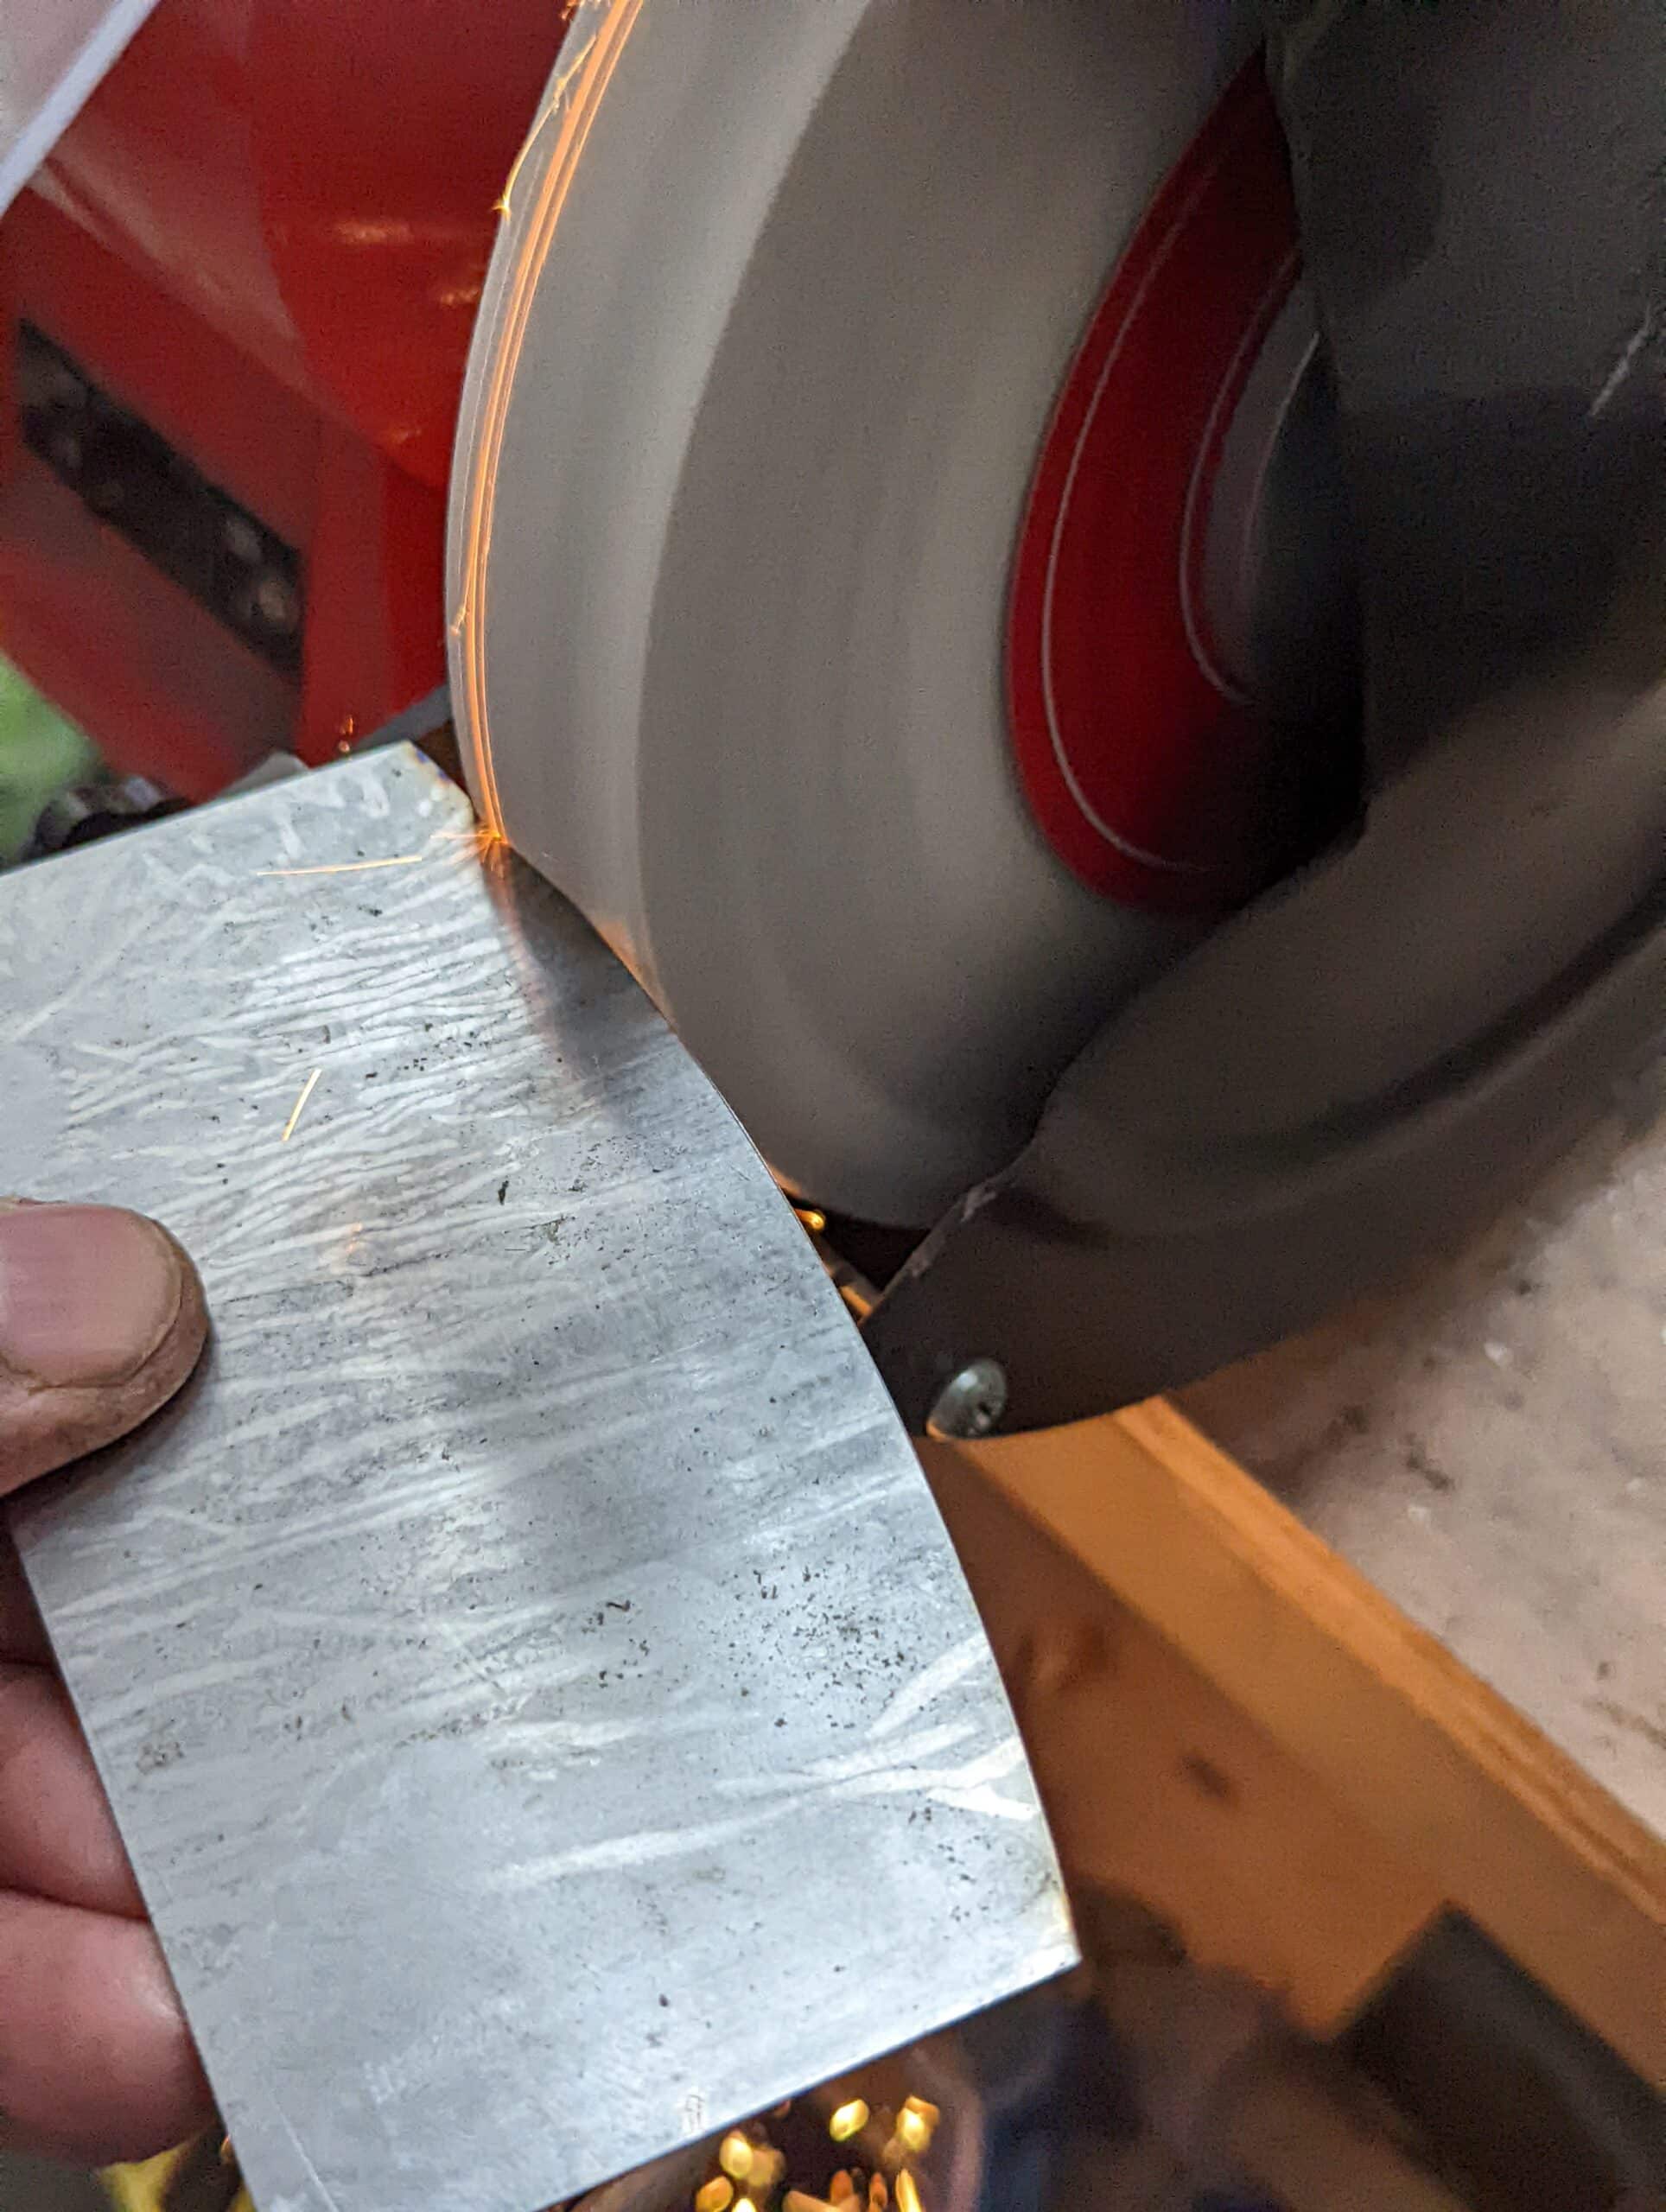
Grind or file the shape to the lines. Takes two minutes.
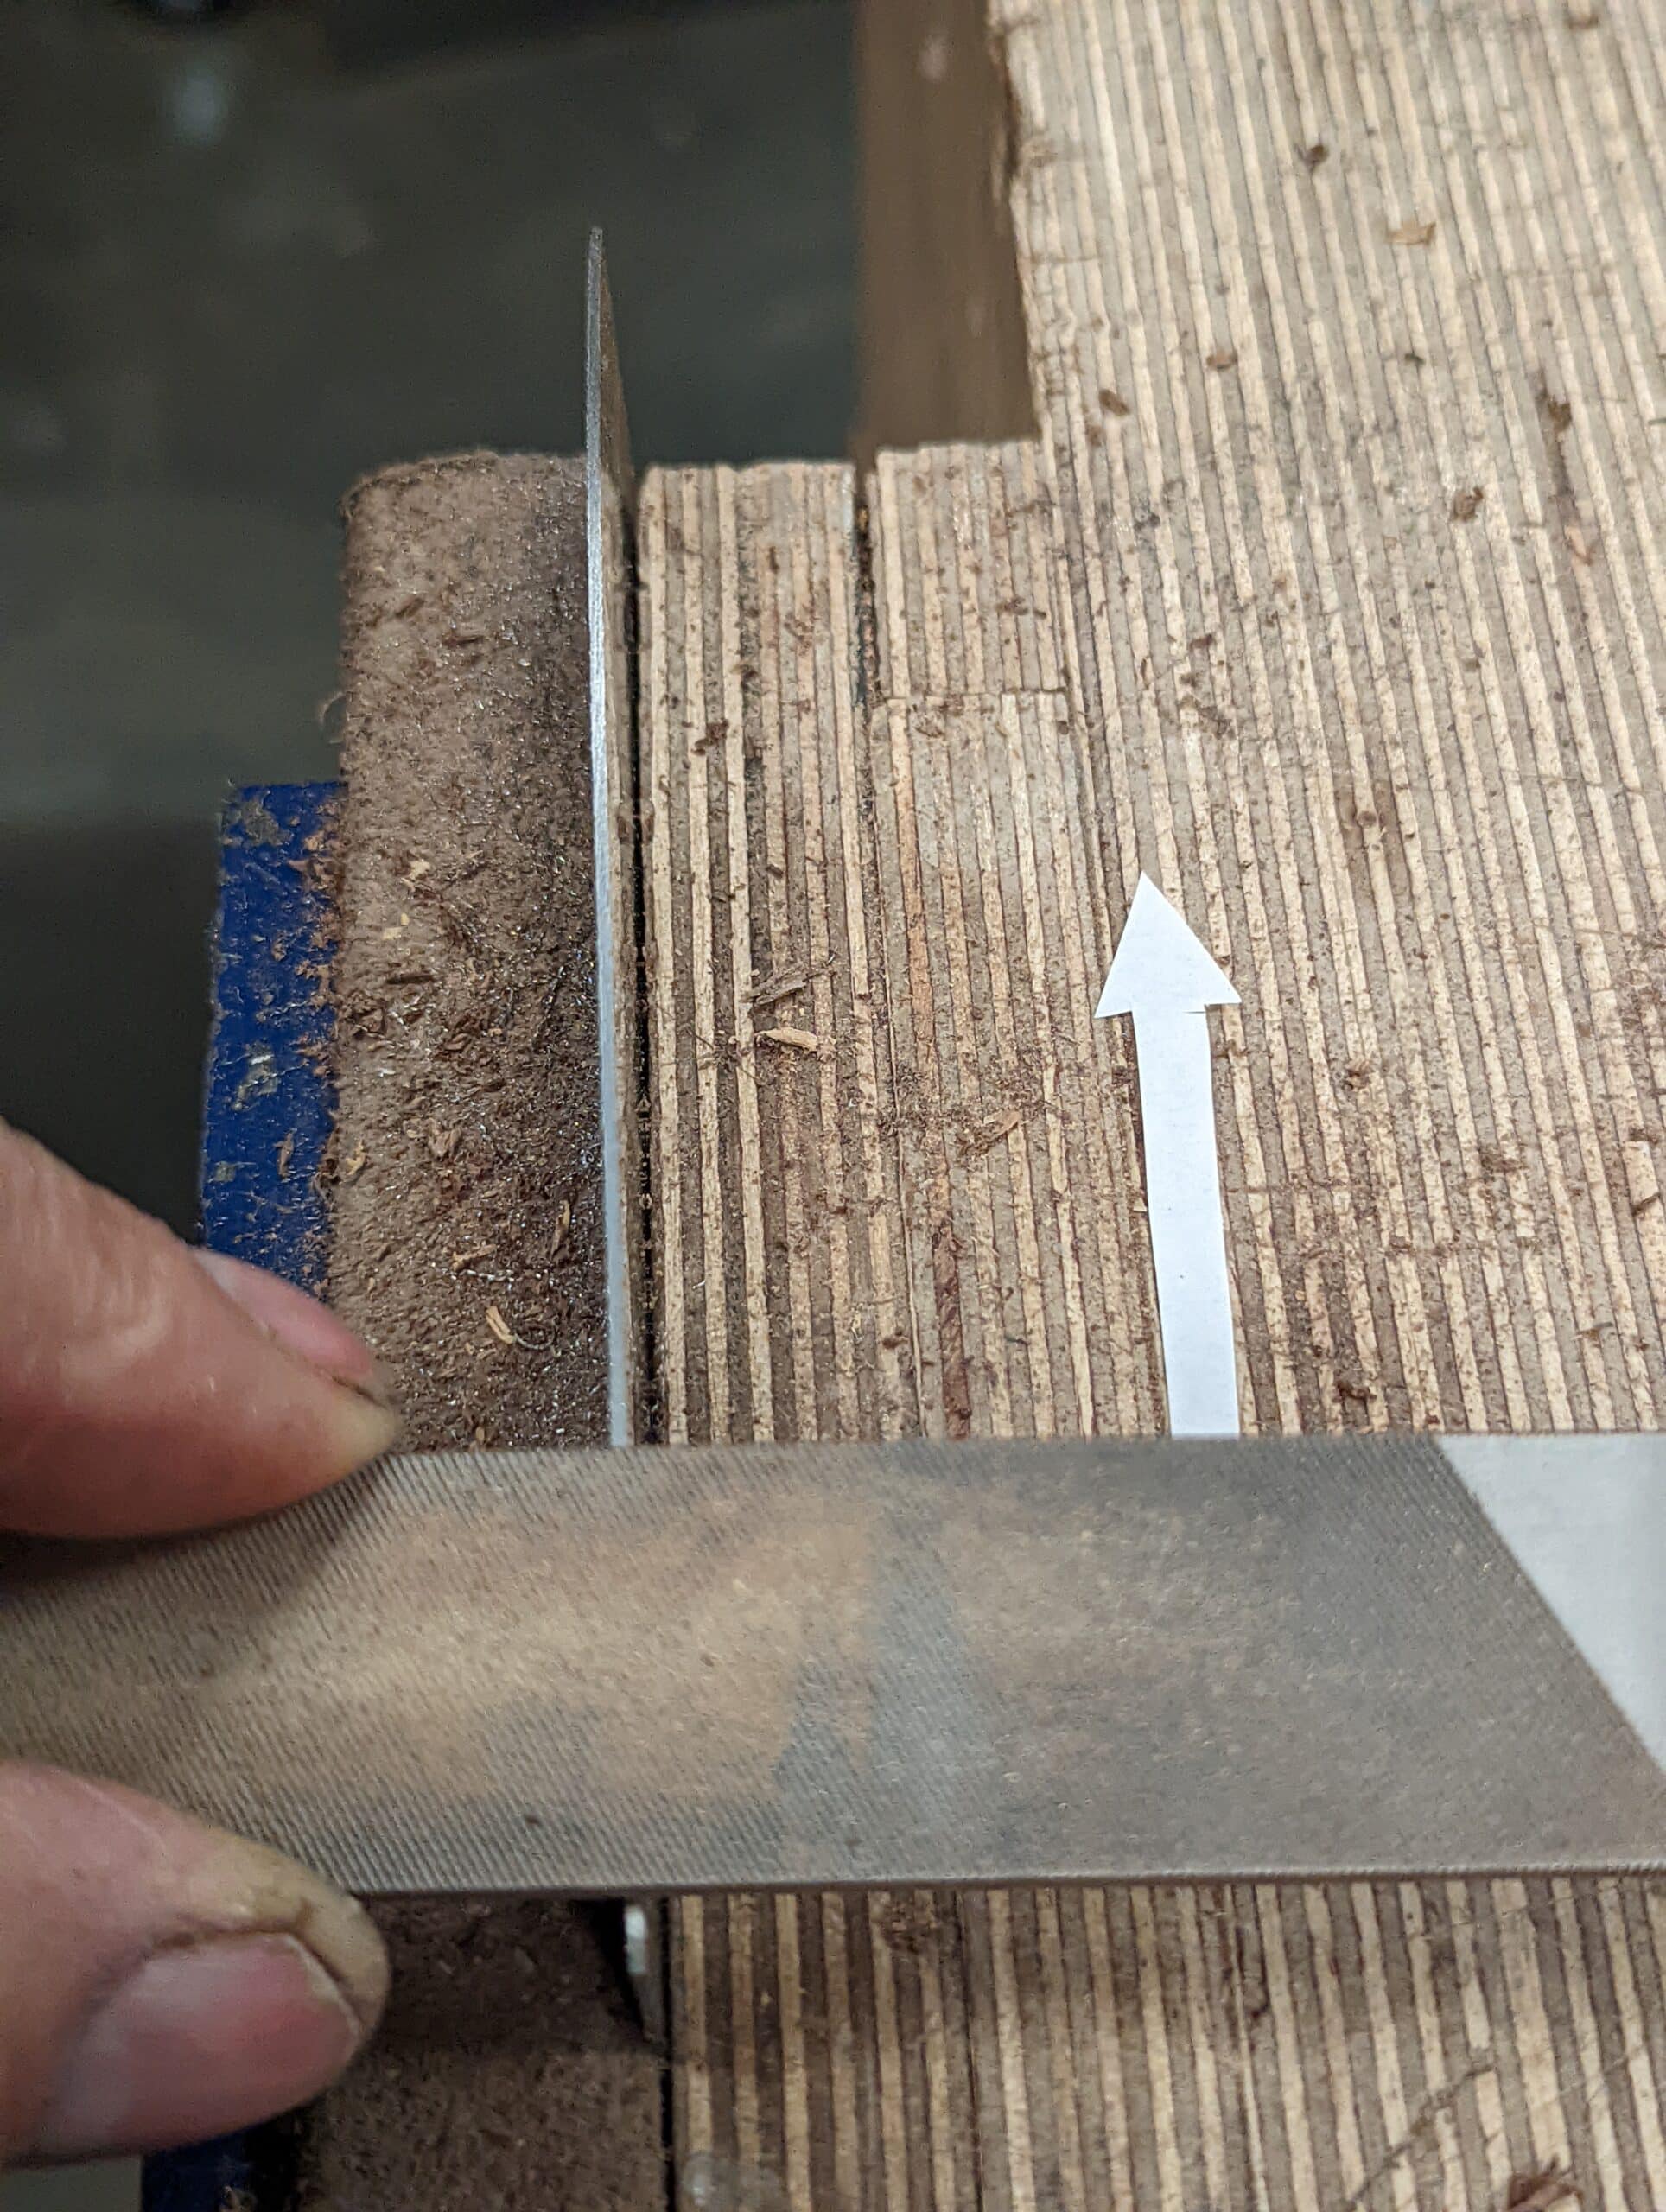
Draw file the edge square or near to. Another two minutes for both edges.
Hone on a fine stone as per usual for scraper sharpening. I just sue the fine diamond plates. No need to hone to too fine a detail as consolidating with the burnished takes care of any deep score marks.

Hone the outside faces to lessen the burr. . . the burnisher removes most file burr.
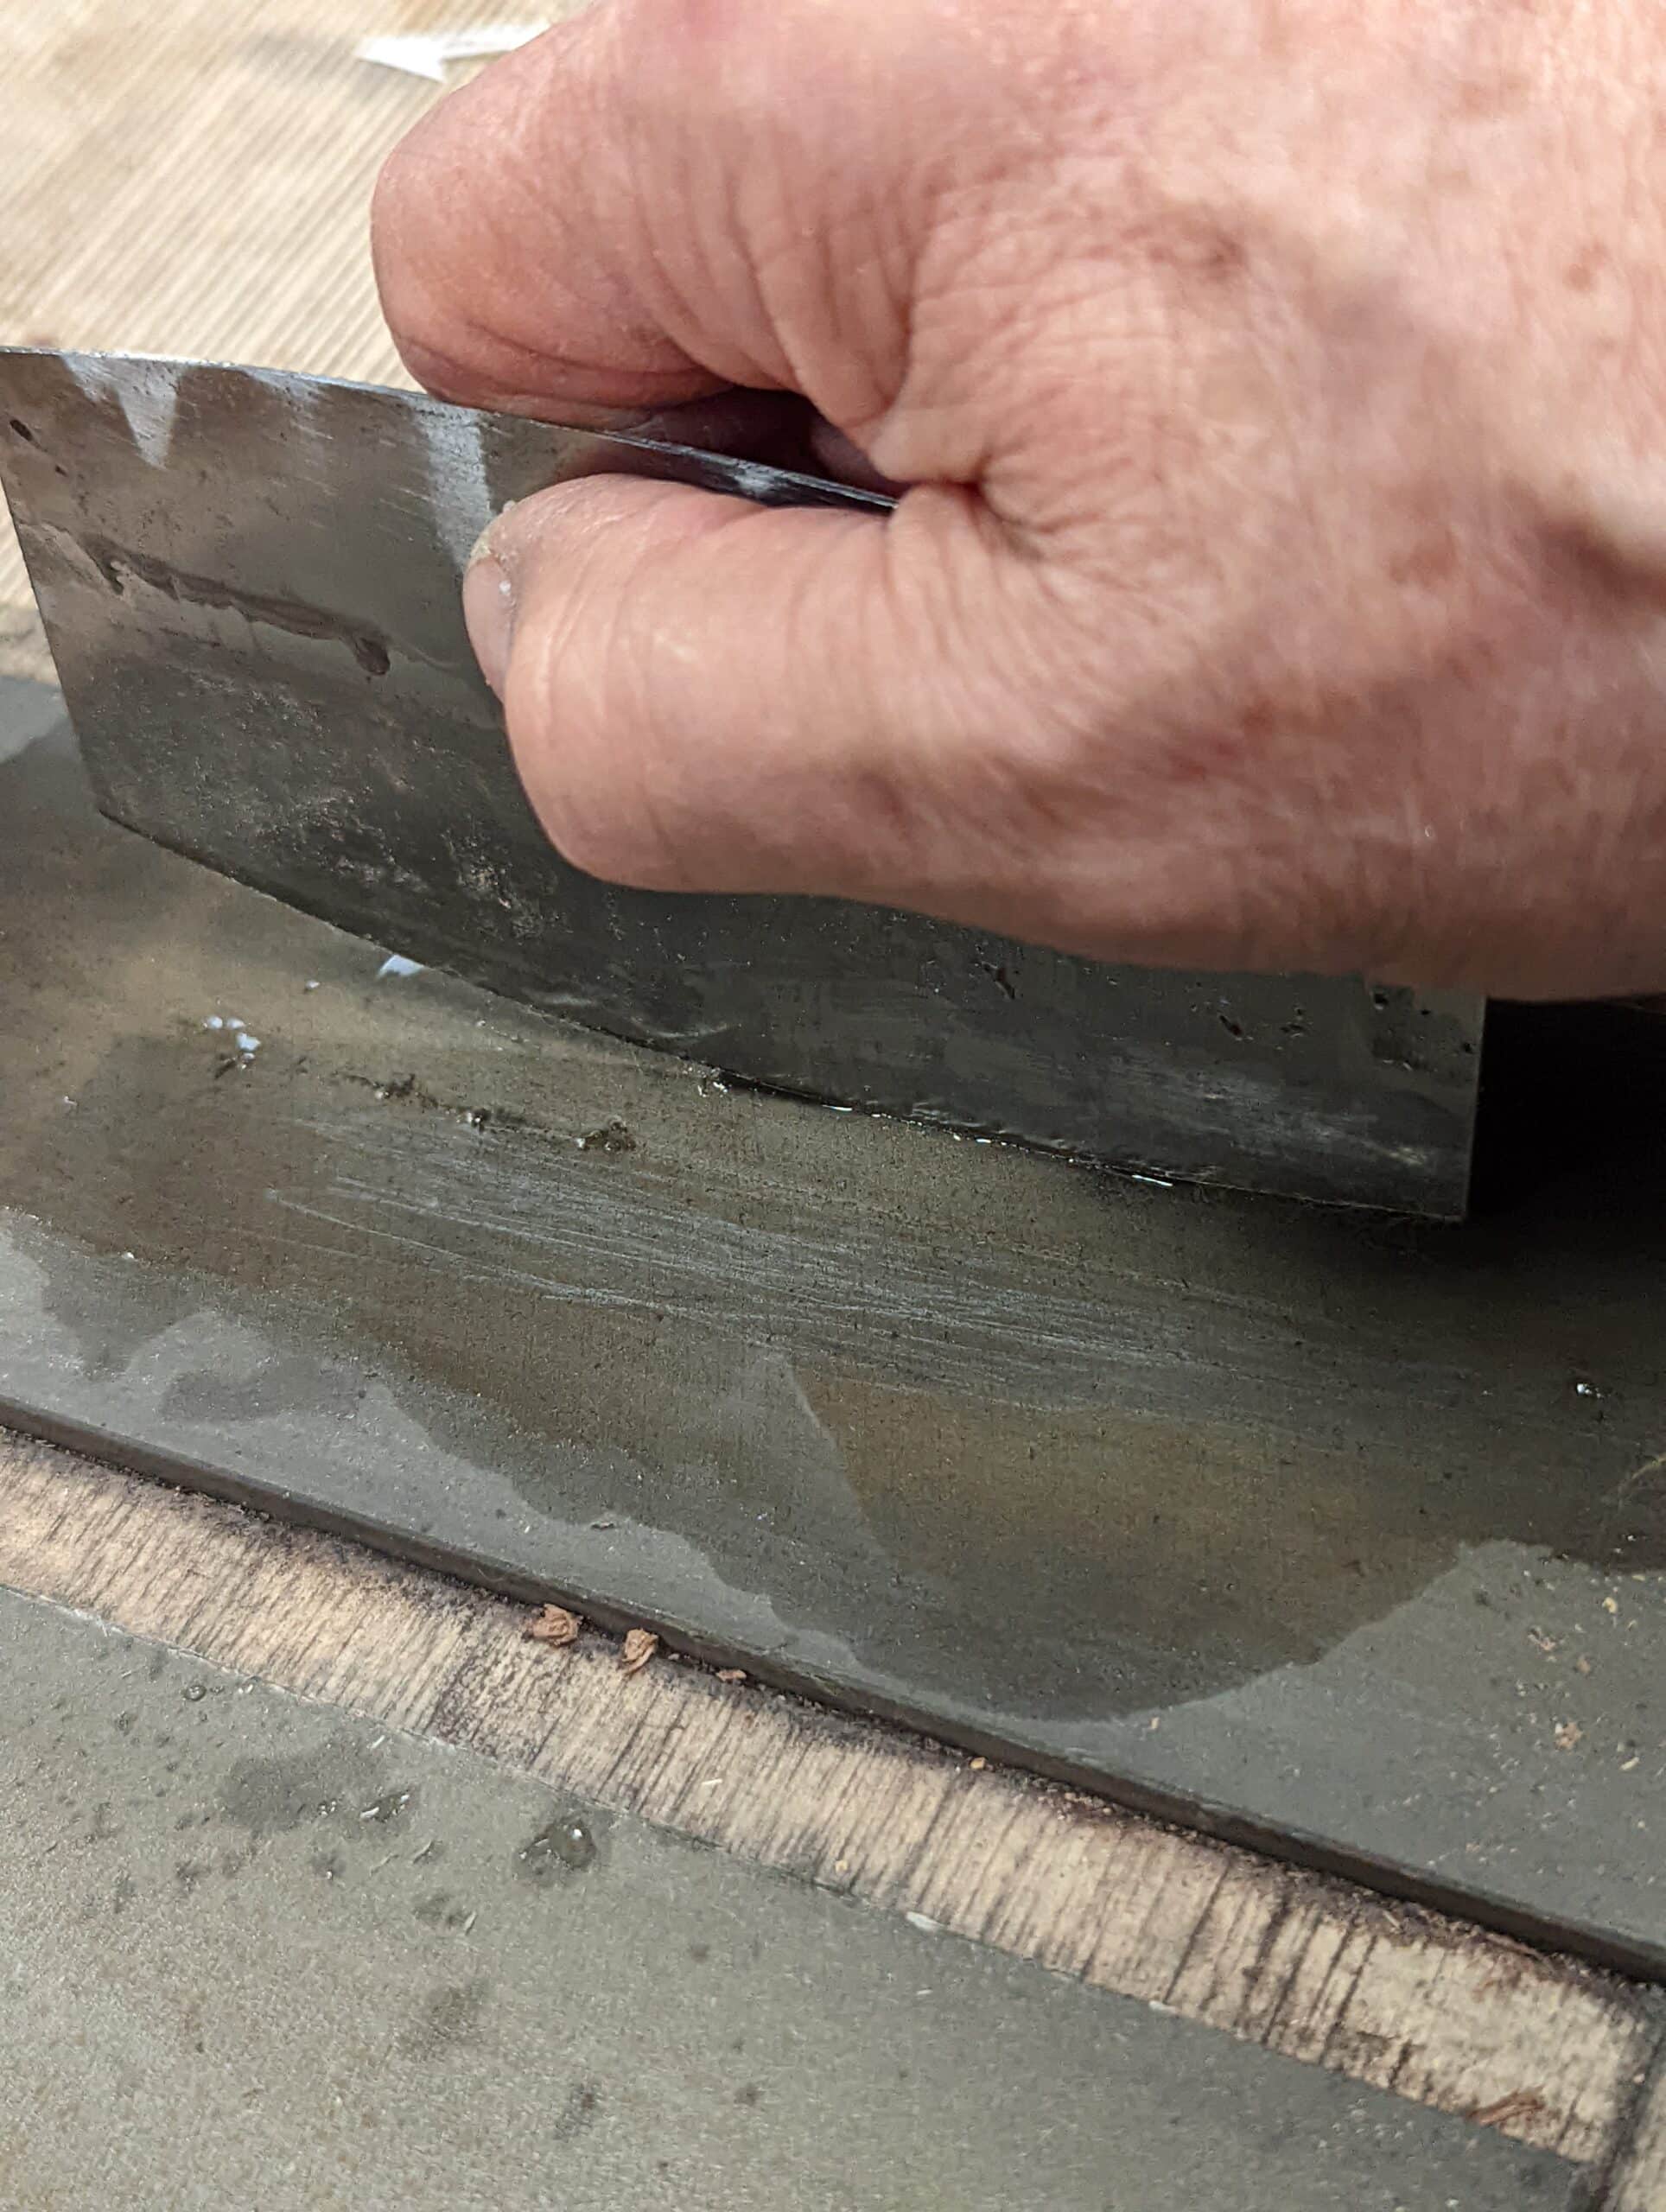
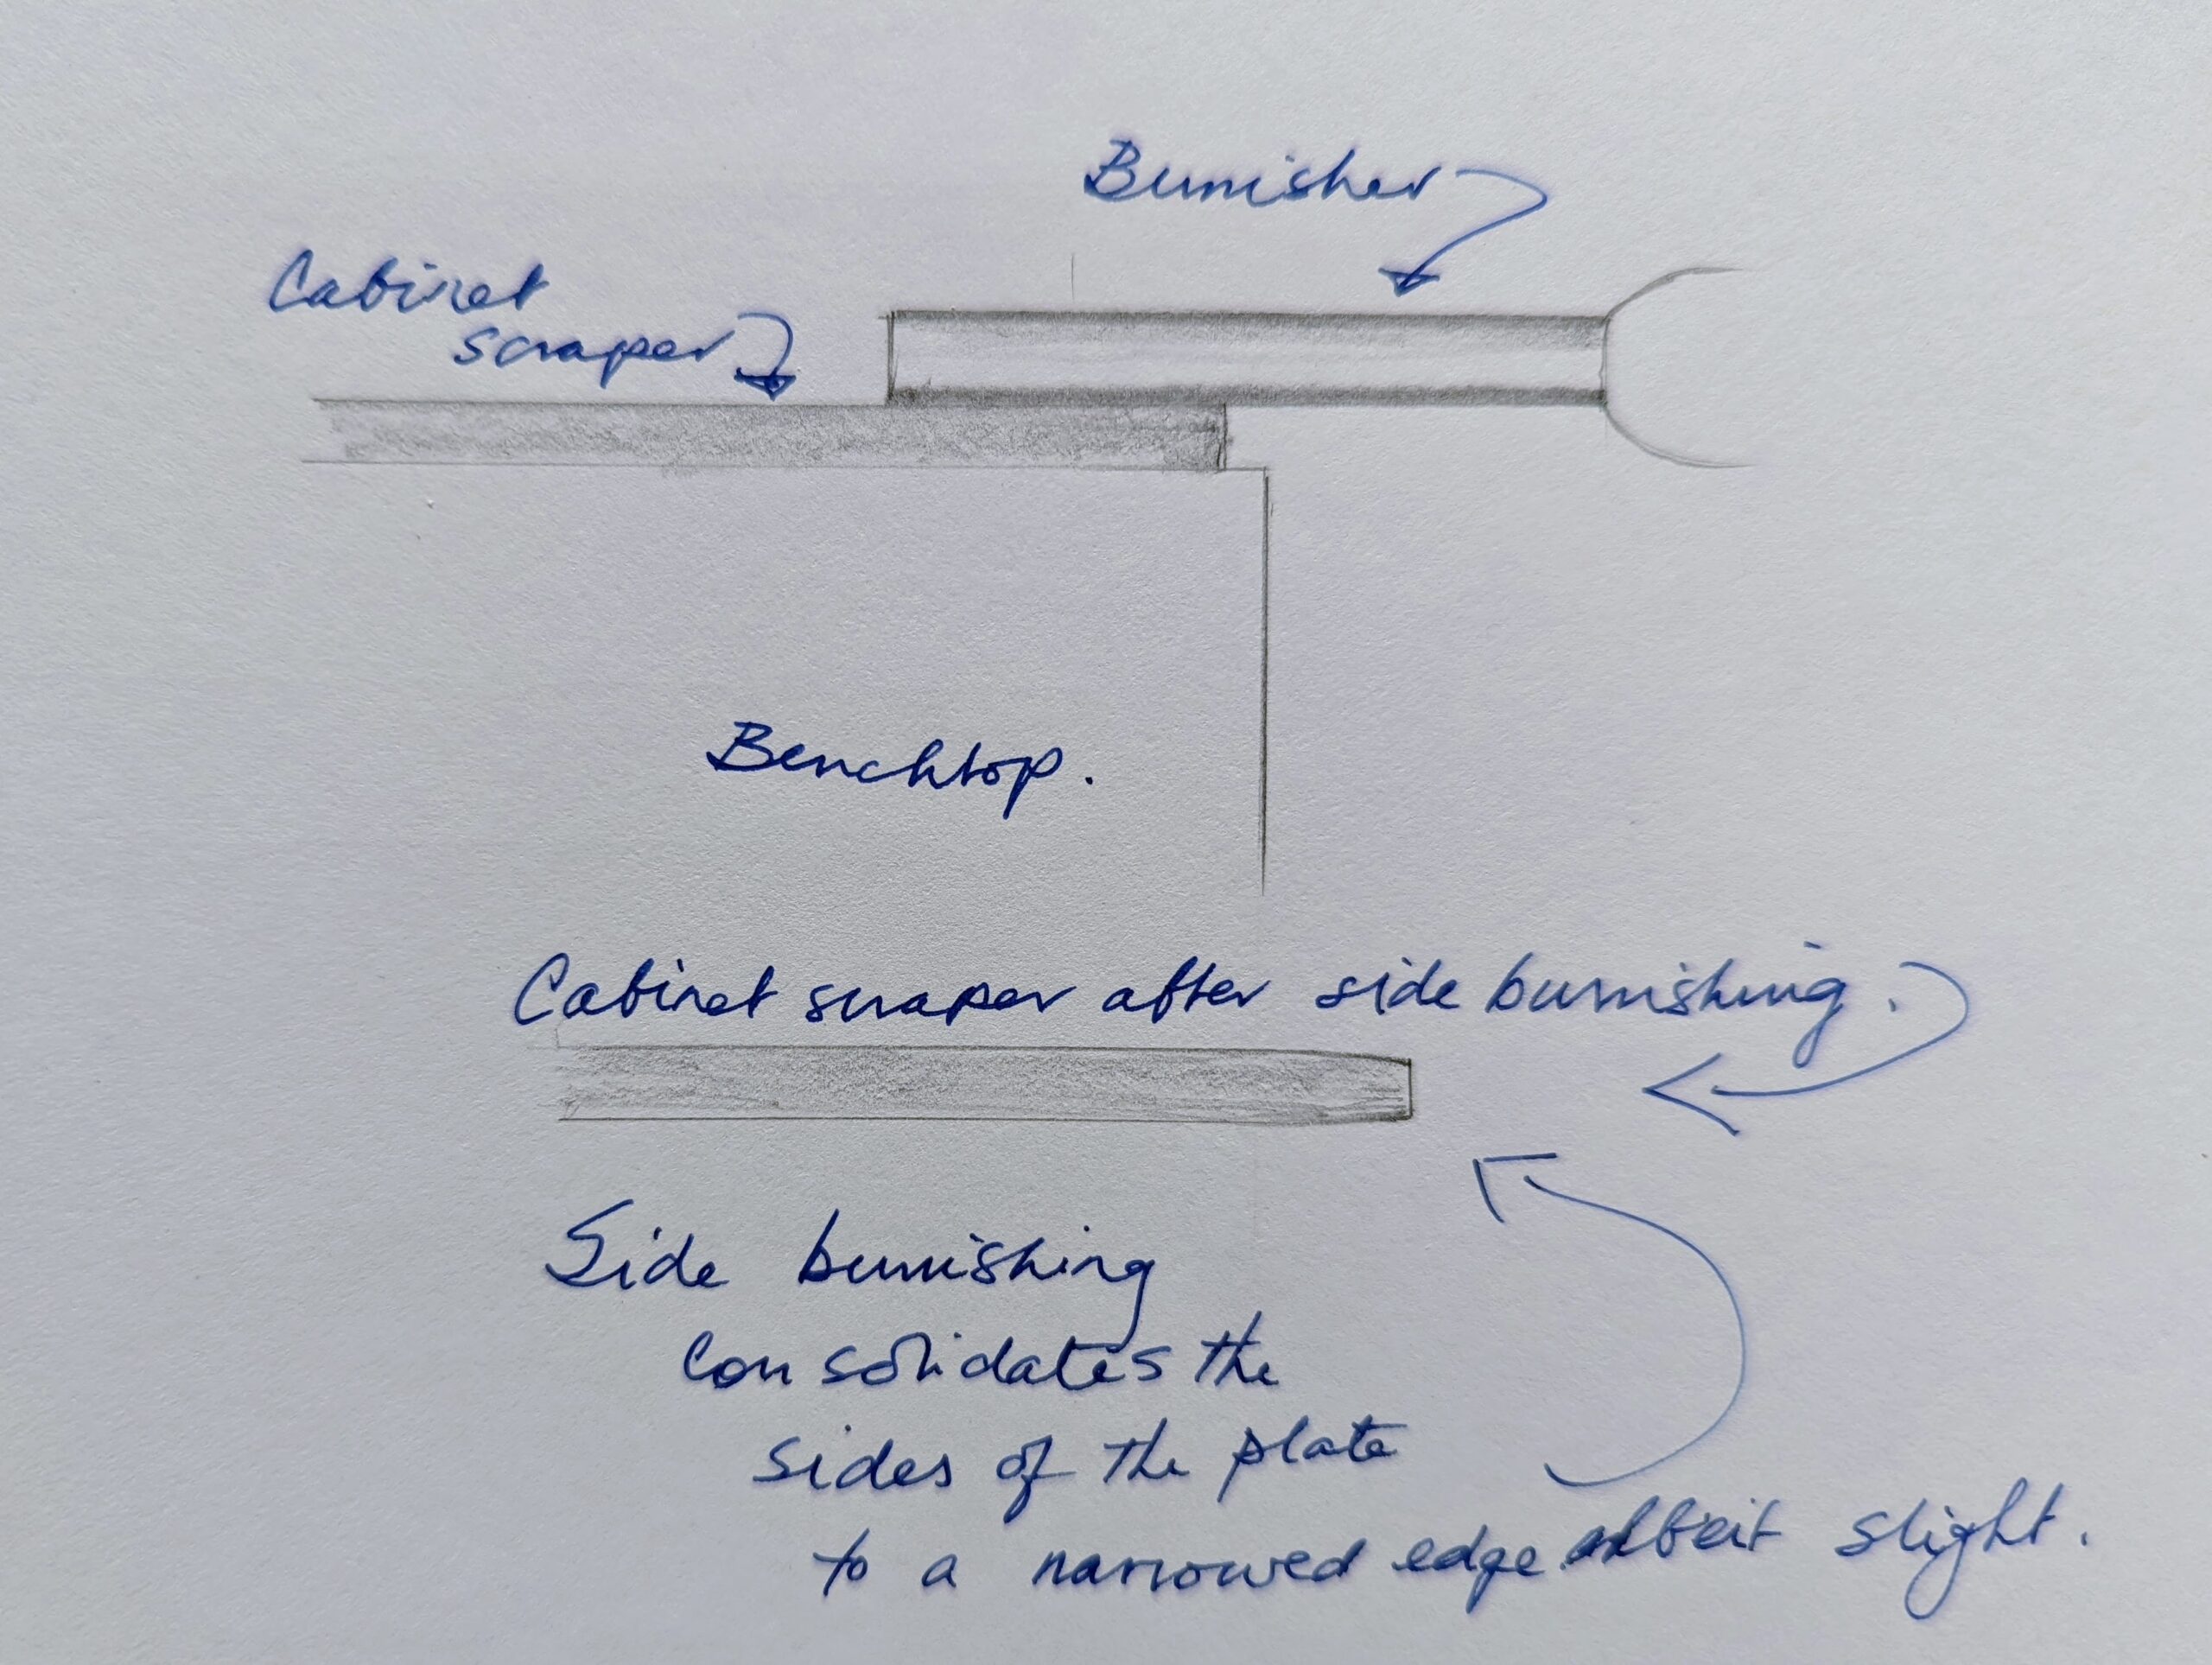
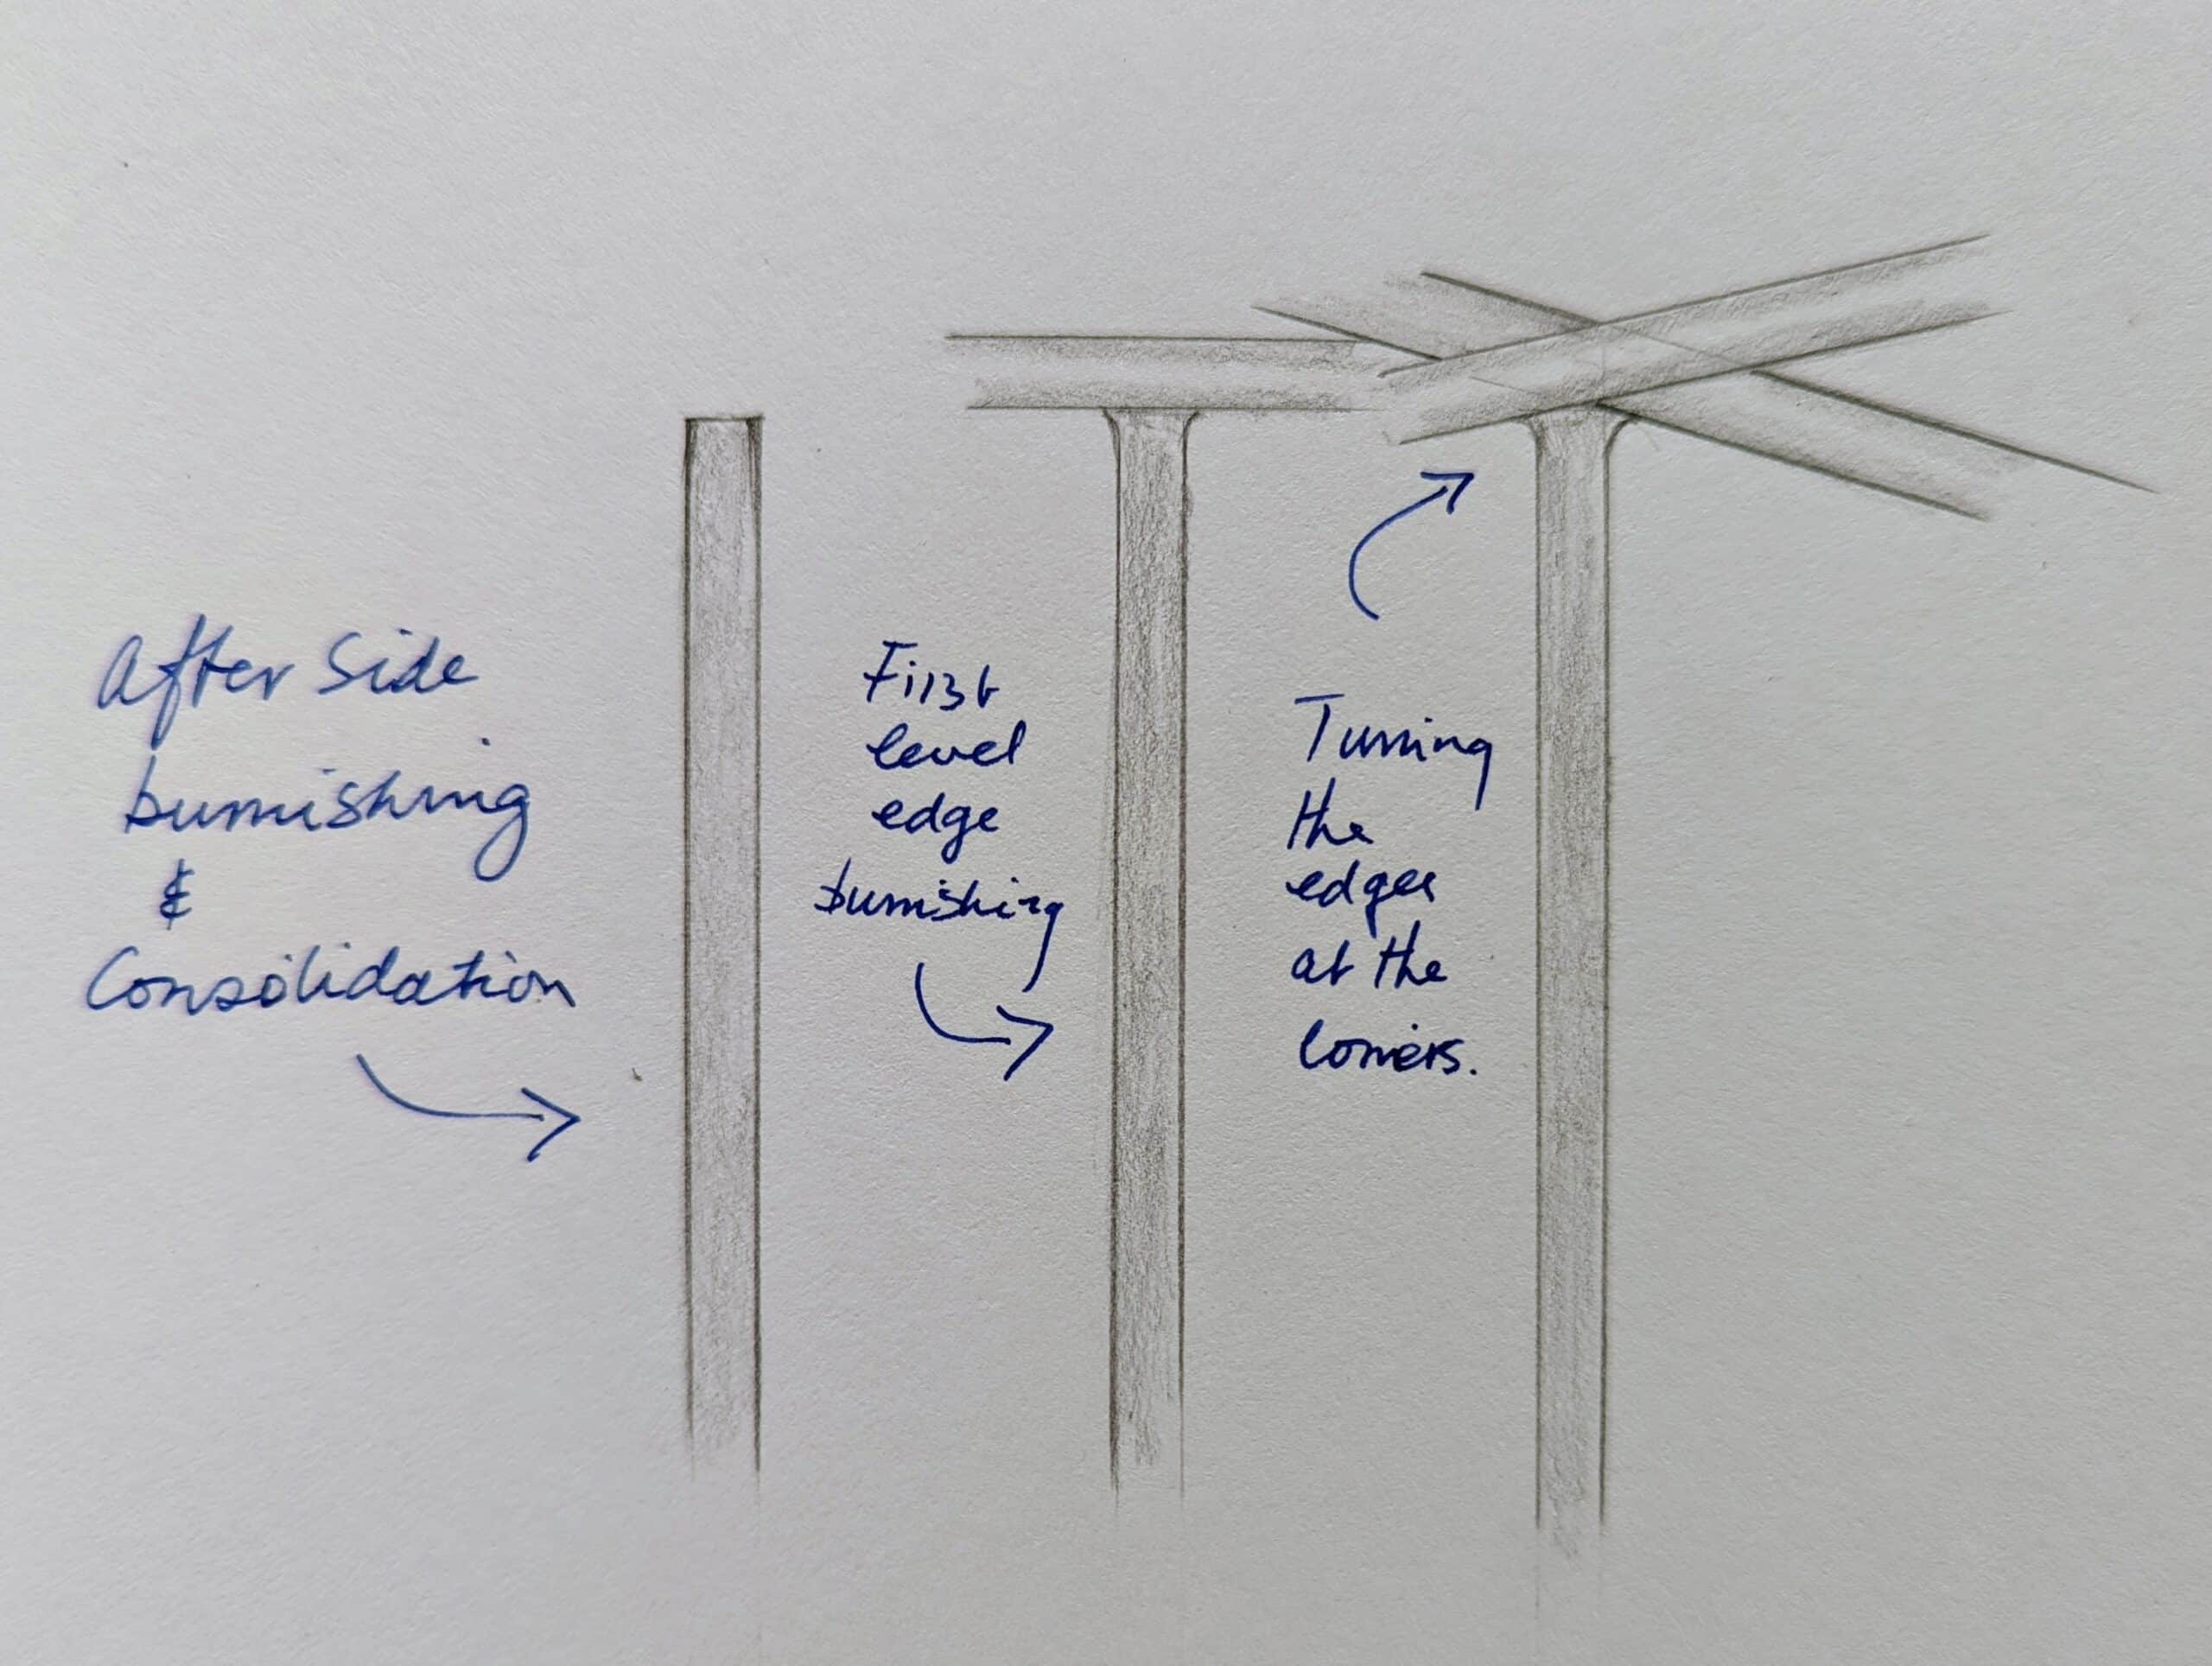
Consolidate both sides of the scraper plate on the benchtop 30 or so times. This sends the steel down into itself and also gives a super-polished edge ready for turning.

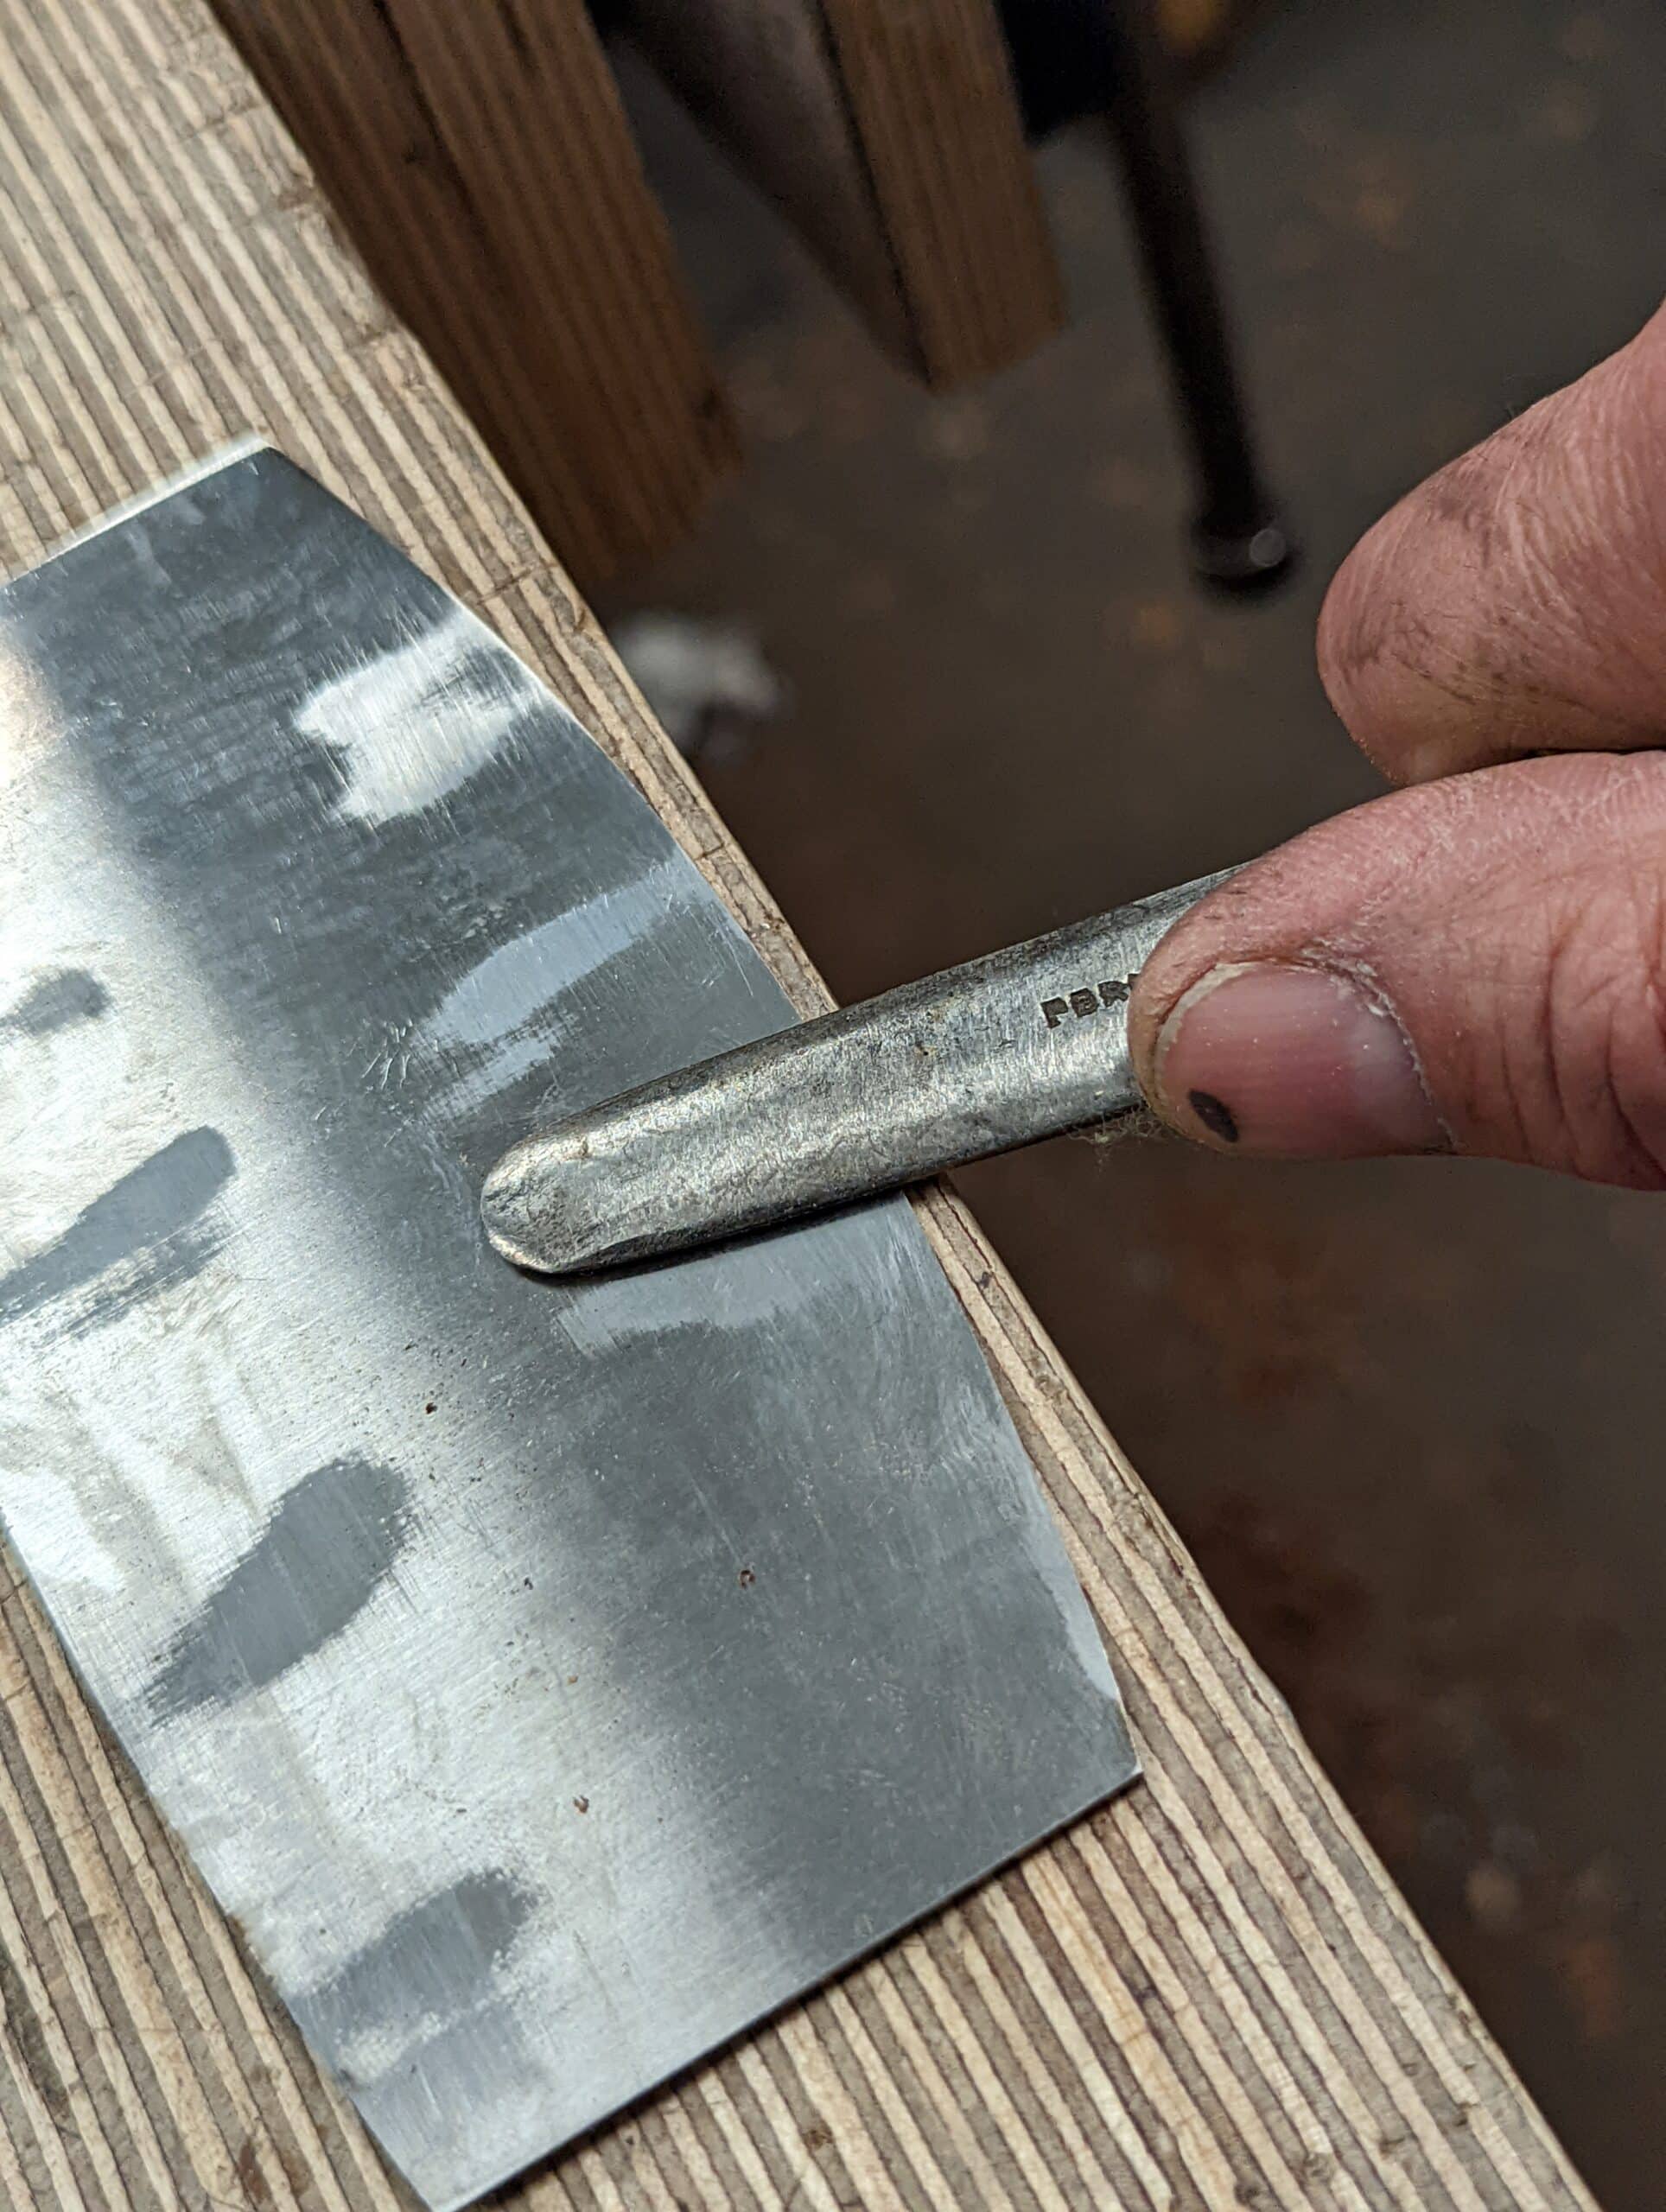
Consolidate the edge square across at first and then . . .
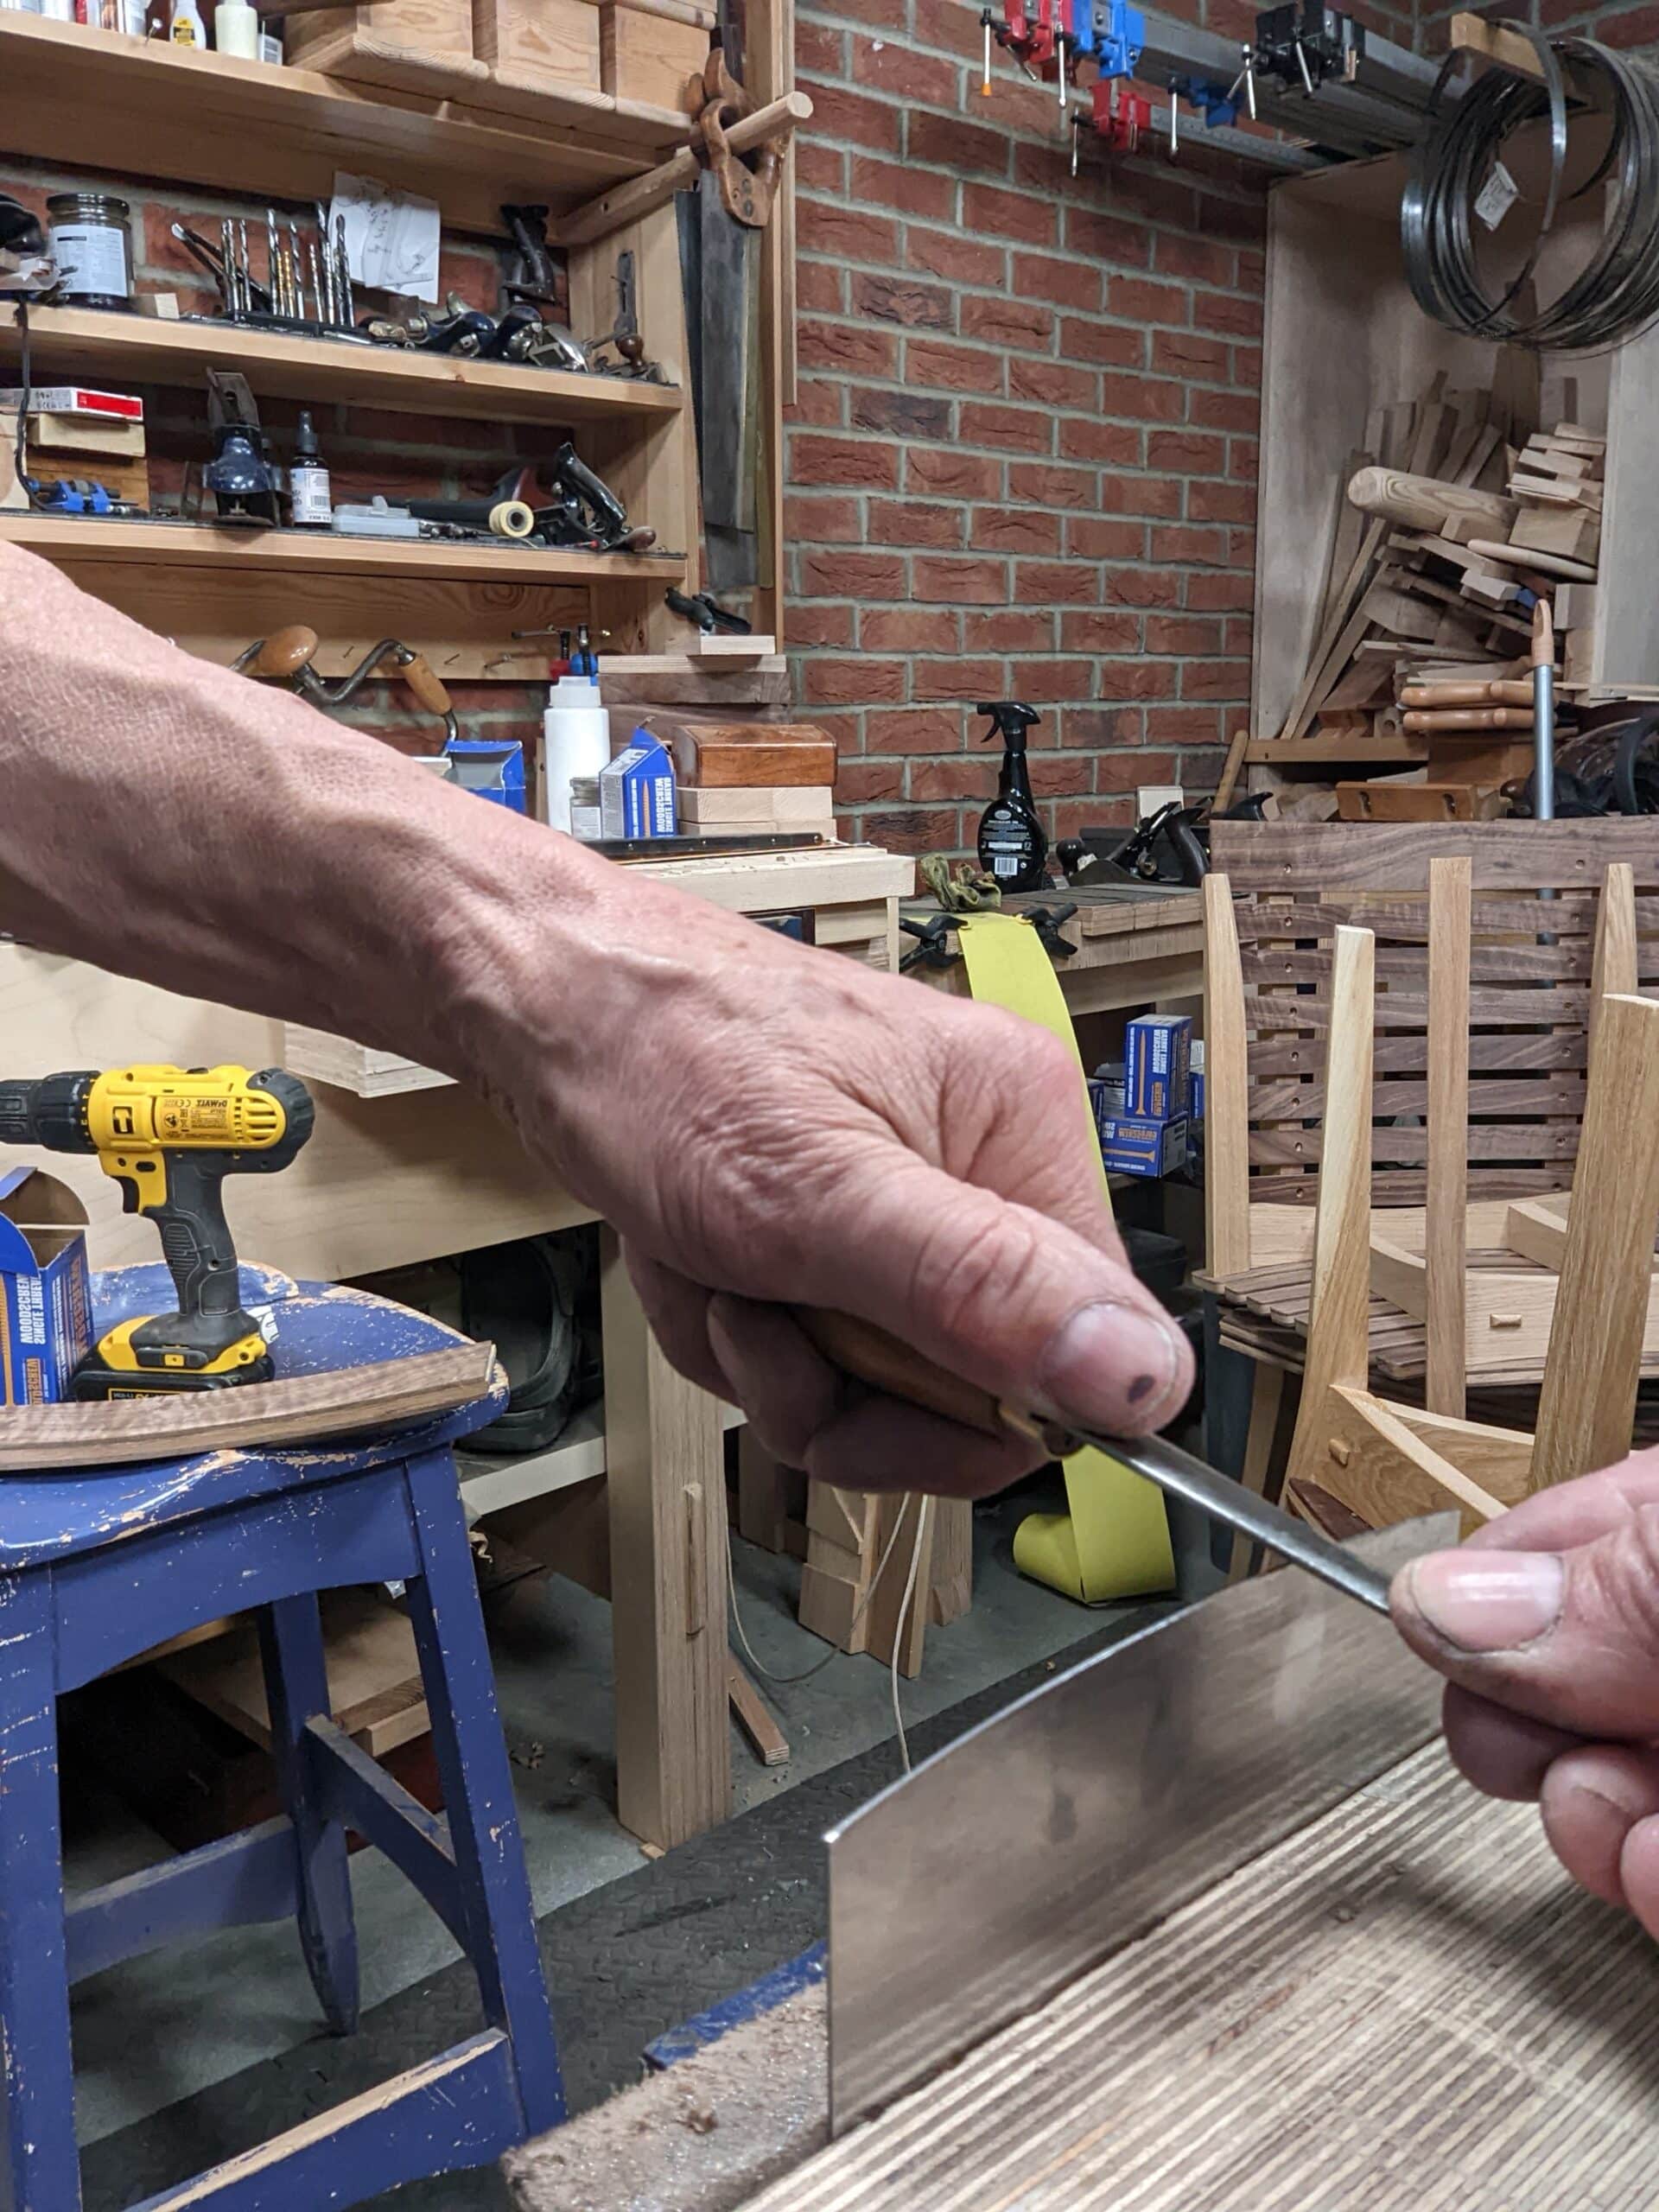
. . . angle the burnished over gradually so as to ‘turn‘ the edge into the hook you want.

I prefer a light hook to one edge corner and heavier to the opposite in the same radius edge. That way I can go heavy and soft with the flip of the scraper.
The end result is a marked improvement on a flat scraper giving you the power you need all the way through scraping a tabletop and a narrow surface adjacent to other sections too. You might consider this closer to the equivalent of a scrub plane in relation to a jack or a smoothing plane. The 19″ radius is quite aggressive but not too much so. The advantage in use is that it minimises the need for constant bending of the scraper as with a straight-edged version. so, it is much more user-friendly. If you want localised aggression for deep and significant removal of stock then make the radius greater by pressing hard to make the scraper more cambered. This will give you twice or three times more than a straight-edged version.
Interesting. I’ll try it
Just like the Crucible version based on an old chairmaker’s. I do plan on making this. So you made one side 19” radius and the other 24”, do you find you use one more than the other?
As it is with many hand tools that offer slight variance alongside a like tool, we tend to be governed by our gut feeling and that without thinking. I flip this scraper to all four corners according to feel but ask me what that feel is and I doubt I would even have noticed that I flipped.
Hi Paul,
I noticed that sometimes, my card scraper will leave a mark (a sort of step down) at the starting point. A mark similar to that of a plane whose heel was not lifted at the end of a shaving. Except that it is at the starting point of the cut, not the end. I’m guessing this is due to pushing too hard at first. Or maybe the angle of entry was too steep and the scraper gets caught. I’ve played around with the pressure, the starting angle, etc. But I almost always leave a mark.
Is there a proper technique for starting the scrape?
Thank you
good question, i have had this problem also – if anyone has suggestions?
I begin with scraper at approximately 10 or 20 degrees to the surface and increase the angle by raising the top of scraper as I push the bottom through the cut with my thumbs
I think mostly it surrounds the developed sensitivity feathering into the start and also easing out of the cut too. You mention the planing technique of lifting the heel of the plane on the outer extreme of the cut. It is similar bu in reverse. Also, trty a curved scraper as suggested in the blog too. These scrapers require zero flexing so there isn’t the tendency to apply more pressure to get the scraper to cut.
I was hoping for an answer to this too! I use my scraper a lot (especially on the knotty pine I often have to work with), and I’ve managed to not have this problem anymore. I have zero idea how and when I managed to correct the issue though, so I was intrigued to hear an explanation. I think Joe’s angle of initial attack might be the key, but it is one of those things that you just “feel” maybe. It’s only very occasionally that I “dig in” with the scraper, so it was definitely a case of practice making perfect(ish!) for me. Hopefully someone will know the science behind it!
I’m a bit late to this but the cutting angle really depends on that previous sharpening and will differ this requiring sensitivity. I’ll be contrary and suggest you start with a too high angle and work your way over to the ‘bite’ then you’ll find feathering easier. As always, if in doubt grab and offcut and feel your way to the edge.
Thanks for the excellent, clear, explanation.
What about the virtues (if any) of a scraper plane like the Stanley #112?
I believe the #112 is essentially just a different form factor of the #12. I’ve not used these so can’t speak about their use from personal experience. I do own a couple of the #80 cabinet scrapers and use them frequently and to great effect. Paul has quite a bit of material on the #80 and it shows up in many videos. The #80 is great for several reasons. If you have a large surface it really makes a difference having the handles so you don’t wear out or burn up your thumbs. A card scraper will actually get quite hot under heavy use. The #80 also has a simple adjuster to flex the scraper blade as Paul describes doing with the card scraper. Another great advantage of the #80 is that they are common and not too expensive. Some patience with ebay will get you one for $30 USD. When I have large flat surfaces I almost always use the #80 and then use my card scrapers for localized work. I believe the #12 and #112 are similar in spirit to the #80, but they don’t have the adjuster to flex the blade. They also seem to be (in my experience) quite a bit more rare on ebay and quite a bit more pricey. If I ever bump into a #12 for a decent price I’ll likely grab it. I curious to use one and compare first hand to the #80. The superior works: patricks blood and gore site has great detailed write ups about all of these items. For those not familiar with this resource, it is a great compliment to the always valuable knowledge found here.
I much prefer the 112 to the 80 for scraping large areas. It can adjusted for angle and can be firmly locked in. The #12 has the same mechanism, but I don’t own one.
Between a card scraper and a #80 I can achieve everything I need quickly and effectively. I never liked the scraper planes and left the one I did have for some friends to use and keep in the USA.
I have a quangsheng no 112, and I like it! I only bought it because it was half price due to a defect of some sort. I have a cheap (ebay!) maple butchers block kitchen worktop that I use for my workbench top, and when flattening it, the 112 was really useful. It wouldn’t have been impossible with the card scraper, but just a lot of work. I’ve used it a few times since on some fairly stubborn grain and it’s always worked well. I’m glad I have one, but I wouldn’t pay full price for one, and it would be in my list of “sacrificeable” tools!
It’s actually like many things we all buy these days. Those things you buy for the odd job that never see the light of day again, or you use once a year. My power washer, the thicknesser, the electric hedge trimmer, the scythe, the spiraliser, the electric whisk, the slow cooker, the pressure cooker etc. I have lots of these things, that would be far better situated in a local community “tool library” and shared with others for the one day per year that we’d all use them. The scraper plane would be a great example of that. Unfortunately, we don’t have such a thing! In short, you probably won’t ever get the use out of the 112 to make it worth your while buying it, and the occasional sore hands from too much scraping (in part solved by Paul’s modification above) that you might get will not likely justify buying either. Unless you have an arthritic condition or some such of course.
Looks like a great idea! Will it help with the issues I have for using the card scraper on pine timber? Thank you for all of your advice!!
I just finished taking one of my rectangular card scrapers and putting the different radiuses on to each opposing side. Also flattened and reground my rectangular one and my curved one. And did the prescribed treatment to all four long sides on each scraper. Night and day difference. Thank you Paul for teaching everyone how to do this. Wishing you well from the states.
I made a series of 9″ long scrapers from thick saw plate that are 1″, 1.25″, “1.5”, 1.75″ and 2″ wide with the radius the same as the width. I use these for scraping spoons and love the flexing that the long “handle” gives. I can get a particularly smooth and thin spoon bowl with them. Give it a try you’ll be impressed.
Only for scallops though, as in bowls and spoons.
Yes, of course.
Do you have to heat treat them? Or do you simply cut the desired pieces from the saw plate and then file? I’d probably be more likely to cut one of my existing card scrapers into strips than try this, as I’m not really sure what I’m doing when it comes to repurposing saw blades!
No, scrapers are not heat treated. They are jointed with a file, diamond plate and or stone, consolidated with a burnisher, and hook turned with the burnisher. This is done frequently in part I suppose because they are not heat treated. But I think if they were heat treated you could not turn a hook.
You can buy from saw makers left over saw plate scraps. They often sell them for use as scrapers. However the thicker plate that is purposed for scrapers will work better.
Actually, they are heat-treated and you can file and sharpen heat-treated metal as long as it is annealed. It’s the hard-point saws that can’t be resharpened at the teeth because these are not annealed.
O.K. I see my mistake. Its the annealing thats the difference. I guess the point is if you cut a piece out of saw plate you don’t have to *again* heat treat it .
That’s right. The fact that it retains its shape went bent and springs back means that the metal is spring steel created by heat treating. This part of the saw should, but is not always, fileable. I have known saws where the teeth could not be filed and where the teeth broke off in setting. This is where the plate was inconsistently hardened and tempered or annealed. Turning the edge on steel that’s overly hard simply results in an inability to develop the consolidated and turned edge we need or an edge that edge-fractures very early in use.
I can finally comment here with (a small degree of) expertise.
Once upon a time I ran a bandsaw producer (for sawmills). Sandvik was our primary steel provider for our band saw blades. Among other customer applications, we did make the then largest bandsaw blades in the world (60-1/2 ft long, 16″ wide x 10 gauge thickness – too thick for scraper blades). This was a truly scary monster, especially when it came to crating it for shipment. Only a couple of mills used blades that big.
Bandsaw/strip steel is a special “high carbon alloy” steel that is purchased in bulk post heat-treating and tempering, and is very (!) consistent (for durability / avoid delamination). By contrast, circular saw blades are usually hardened by the saw manufacturer post (laser or punch) tooth cutting.
Thus, yes, scrapers are made from hardened steel as the steel has been heat-treated and tempered. Saw steel (plate or bandsaw) is typically 42-44 HRc (Rockwell C) hardness. This is softer (and more ductile/flexible) than the tool steel(s) used for chisels, plane blades, etc. which are typically more than 55 HRc hardness after heat-treating.
I think there would be less confusion if the terms of the heat treating trade were used more precisely. Essentially, when steel is heated to its critical temperature the crystal arrangement of its atoms transforms. We say ferrite has transformed to austenite. If the steel contains enough carbon, anywhere from .2 percent to 1.5 percent, and is then cooled rapidly enough, or quenched, the crystal arrangement changes again. We say austenite has transformed to martensite which is a very unstable state of matter. Martensite is very hard, very brittle and cracks too easily to be of any use as a tool. If the steel is then reheated to a temperature lower than the critical temperature, most often much lower, the martensite will be transformed into a more stable crystal, or likely several stable crystalline structures. This reheating is called tempering; it tempers or reduces the hardness of the martensite. The higher the tempering temperature, the softer the hardened steel becomes. However if the martensite it reheated to too high a temperature and allowed to cool slowly all of the martensite will transform back into ferrite, all of the hardness will be lost, and we then say the steel has been annealed. We may also say the steel has lost its temper or the temper has been drawn. Accordingly, tempering martensite to a reduced hardness suitable for a tool is entirely distinguished from annealing steel back to its completely unhardened state.
To continue with the example of hand saws, those saws we sharpen with files have a heat treated saw plate, hard enough for its teeth to cut wood but tempered soft enough so that the plate will bend rather than snap if the saw binds in the cut. Modern hard point saws are cheaper to produce because the saw plates are not heat treated. Rather, just the edge of the saw plate with the teeth is heat treated. Since the completely soft saw plate will never snap, the teeth themselves can be made especially hard so they stay sharp longer. This pinpoint application of heat is done with electricity, thus the term inductance hardened.
I just went out to the garage and sharpened my first scraper as shown here. The new scraper and burnisher had been sitting there for months. It seems to work pretty well. However, I noticed something that may be blindingly obvious to most. When I flexed it, only about 1 inch had contact with the wood. Looking at Paul’s radiused versions, that would also be the case.
Is this how they are supposed to work? Is flexing a control mechanism? The thing worked so well it deserves more experimentation. And Paul’s rediused version? That looks like only about an inch touches the wood in an unflexed position. Correct use?
Inquiring minds. What if I cut a scraped one inch wide and six inches long,and wrapped it in a handle. Would its one inch edge work as well as the wider flexed or radiused versions?
Let’s rename the cabinet scraper. It is a silly name.
How about the grain shaver? That’s what the burr does. Rolled burr hook…the roburhook! Wood razor. Wrazor.
Wild grain tamer. Grain tamer. Gramer.
Someone help me with this. Another great game changing article!
Paul,
Thank you for the post… this is a whole lot cheaper than the Crucible Toolworks identical scraper at $23-27 USD. Don’t get me wrong, Crucible Tools makes some good gear; particularly their Lump Hammer since it’s an alloy that contains just the right balance of chromium to provide a tool that will remain rust free for generations (Patina is a wonderful thing, but not when your continually fighting to keep it from contaminating your work; IMO). As for their scraper, they do add a plastic magnet to the tool which prevents the thumb burns, but essentially it’s the same as what you demonstrated here.
I guess for many, they’d rather just buy a ready made scraper of this design, but I have two thoughts to throw on the fire.
– (1) This card performs amazingly when carving seat blanks. One of the best (of many) things I’ve learned from Peter Galbert is that you take each tool to the work until it’s very end. That is, you adze until you’ve done all you can do with the adze, before moving to the scorp… you scorp until there is nothing more you can do with the scorp… then you use the travisher until there is no further refinement that can be accomplished before finally moving to the scraper. The idea follows the idea of coarse work, fine work, finish work, but Peter brought me to the realization (and it’s true), that if I move from the scorp to the travisher or travisher to the scraper before I fully run that tool’s course, that I will actually take much longer and end up with less refinement. I might add that you compound the need for sharpening too, because the edges on each successive tool are more fragile and refined. Making a scraper specific to the task has some of the same benefits and I’m pretty sure that if you’re making chairs, then you’re not going to think twice about tweaking that scraper to fit your need ideally. This can translate to any aspect of wood working and I will be the first to parrot men like Paul who encourage you to craft that tool to meet your need right at the apex; and not just at ‘good enough’. It surely has helped develop my skills and more importantly my intuition and joy in the craft. Go for it.
– (2) Paul has been an ambassador for making the craft more and more accessible to all people. He’s not ever been the snobby elitist and intentionally shows folks how to accomplish things with even the most meager of beginning kit. Some scoff at his almost universal use of a No° 4 handplane for example; but we all know, that if you can use a No° 4 to flatten and joint broad faces and long edges that are flat, square, and can be tweaked to create the finest single clamp joints, that when you do pick up that No° 5-1/2 or No° 7, that you’ll be an absolute machine and your enjoyment reaches new levels. Handmade rabbet planes, completely jointing a saw and creating your own variable pitch tenon saw, building a classic wedged block shooting board… these are all gifts that have and will have great long reaching benefits to the craft for many years to come. This card scraper mod, just like building your own first scrub plane is part of that education that I would say is quintessential Paul Sellers.
I love every single hand tool I own and I’m certain that a brand new woodworker would be intimidated if his first introduction was to my Dutch Tool Chest, but I’d be doing that person a disservice. Regardless of all efforts to demonstrate humility and accessibility to such a person, I’m certain they’d feel a certain and daunting hill ahead of them. I’ve built my kit over a long period of time and yes it has come at great expense, but the deliberate piece by piece search for and acquisition of each tool, the mental gymnastics we’ve played when determining what was next most important to us to acquire, and the enjoyment and frequent frustration we traveled along through that tool’s learning curve is going to be wholly missing in the perspective of a new woodworker. Paul is doing the genuine kind of instruction out craft needs and is inspiring folks each day.
If you’ve read this far, I appreciate you tolerating my fractured thoughts. I’m not ashamed to ‘fan boy’ on Paul and I’m grateful for him to the extent I don’t have words to do justice for.
Paul,
I will often spend my evenings simply reading the mountain of entries you’ve shared with us over the years and typically have 4-5 tabs of your articles open that I wish to revisit so as to make a note here or there in my shop diaries/project notebooks. I appreciate you very much and I’m certain that if my shop burned down tonight, that I could start all over again with a set of Aldi chisels, a tolerable No° 4, and a saw. Thank you and I do hope my comment finds you and yours doing well.
Semper Fidelis, Shannon
I’m afraid I missed something. How does one consolidate an edge? Is that something like filing? I haven’t seen that term before.
Thanks,
Jason
It isn’t discussed these days but in times past when Record produced scrapers the small booklet talked about consolidation as part of the sharpening process. I describe this in my book Essential Woodworking Hand Tools because I consider it so essential to developing a good edge to both types of scrapers, the card scraper, and the #80 scraper. Effectively, we press the burnished into the face of the scraper along the edge and pull 30 times along each face adjacent to the edge and on both sides of the plate and along each of the two long edges. This sends the steel down into itself, consolidation, before we focus on the edge itself. Once done, we consolidate the edge into itself by keeping the burnished square to the edge and drawing the burnished along the edge about 20 times. This sending of the steel into itself my be the equivalent of the smith hammering steel as in forging a blade. Once done, the edge is then ‘turned‘ to develop the cutting edge.
Consolidating an edge means nothing more than burnishing an edge. We burnish with a tool called a burnisher. We may think a shiny steel surface is smooth but any polished surface, no matter how fine the abrasive used to prepare it, will be left with ridges and valleys that might take a microscope to see. A burnisher can be any piece of steel that is harder than the scraper although there are advantages to certain shapes and to burnishers that are considerably harder than the scraper. When we apply pressure and move the burnisher along a surface of our scraper it pushes the ridges into the valleys. Paul says we send the steel down into itself but I doubt that means we force the iron atoms closer together in defiance of the crystaline structure–I think that is impossible to do with the force available in the human hand. A surface is burnished, or consolidated, when the all the ridges are pushed into the valleys carved by abrasive particles so the surface is as smooth as it can be, smoother than any abrasive could ever make it. Of course, once a surface is burnished smooth we can continue to burnish and push a scraper’s edge into the shape we want for cutting wood.
Thank you Paul. I think I’m going to try this on a little scraper I got from an old Stanley scraper but which I use as a card type.
Does the burnisher you use have a flat face on the face that is actually on the edge of the scraper?
I am hoping since we are on the subject of card scrapers someone can help me. I can’t for the life of me get any significant hook. I have done as close to exact as Paul’s instructions specify. I have tried and retried. All I get is dust when I use it. My fingernail feels a little hook but not enough to do the job. I get frustrated and put it away for a few months and the try again. I figured since this is a topic perhaps I d ask.
It sounds as though you are getting hook but perhaps you are turning it too much or too little. Just file off and start again. You have to master this and getting the angle right is all that it will take. Start with edge consolidation at 90-degrees or close to and try to keep it steady at that. Use a guide block square to the edge to prevent you from flip-flopping. Lower the guide block a tiny amount and drop the ‘turn’ gradually to this and try the scraper. You can reinstall the plate to add further turn of needed.
Your method is the best and easiest i’ve seen! For what it may be worth, I like to put a tiny drop of light machine oil (like 3-in-1) on the burnisher. it makes turning the hook smoother & easier.
The Gods of Woodworking have decreed: the card or cabinet scraper is now called the card or cabinet shaver! Those who call it a scraper shalt be smitten with hemlock splinters henceforth.
Oh, dear. I shall need some tweezers.
Great advice, dear Paul! Just wanted to go in my garage and find a scraper to convert. Found, that in a set I once bought there already is one with approx. the two radi you suggest. Eager to see how that all works on a board of cherry!
Best,
Christian
Ok. After some fiddling… I watched the short video of Paul on sharpening the Card Scraper. I built the roughly 50mmx70mm jig for holding it in the vice.
The key for me was the gradually (!) lowering of the burnisher. I moved the burnisher slowly (there is no rush whatsoever), horizontally, but with some (some, not a ton) pressure. Then I really lowered it ever so slightly, a couple of strokes. Little more … Continued until burnisher hits surface of the jig. It matters how wide (here 1 inch to each side, 2 in total) the jig is as that (together with how far the scraper is above the surface, Paul suggests 3 mm if I remember correctly) determines the maximum angle of the hook.
I use the Veritas file holder for getting a perfect 90-degree angle at the beginning. Probably with some training not needed. But on round shaped card scraper, Paul’s usual trick for flatting the edge (edge only minimal above the jig) does not work that well any more).
Now shavings rather than dust 🙂 Thanks Paul for making that “new” tool accessible.