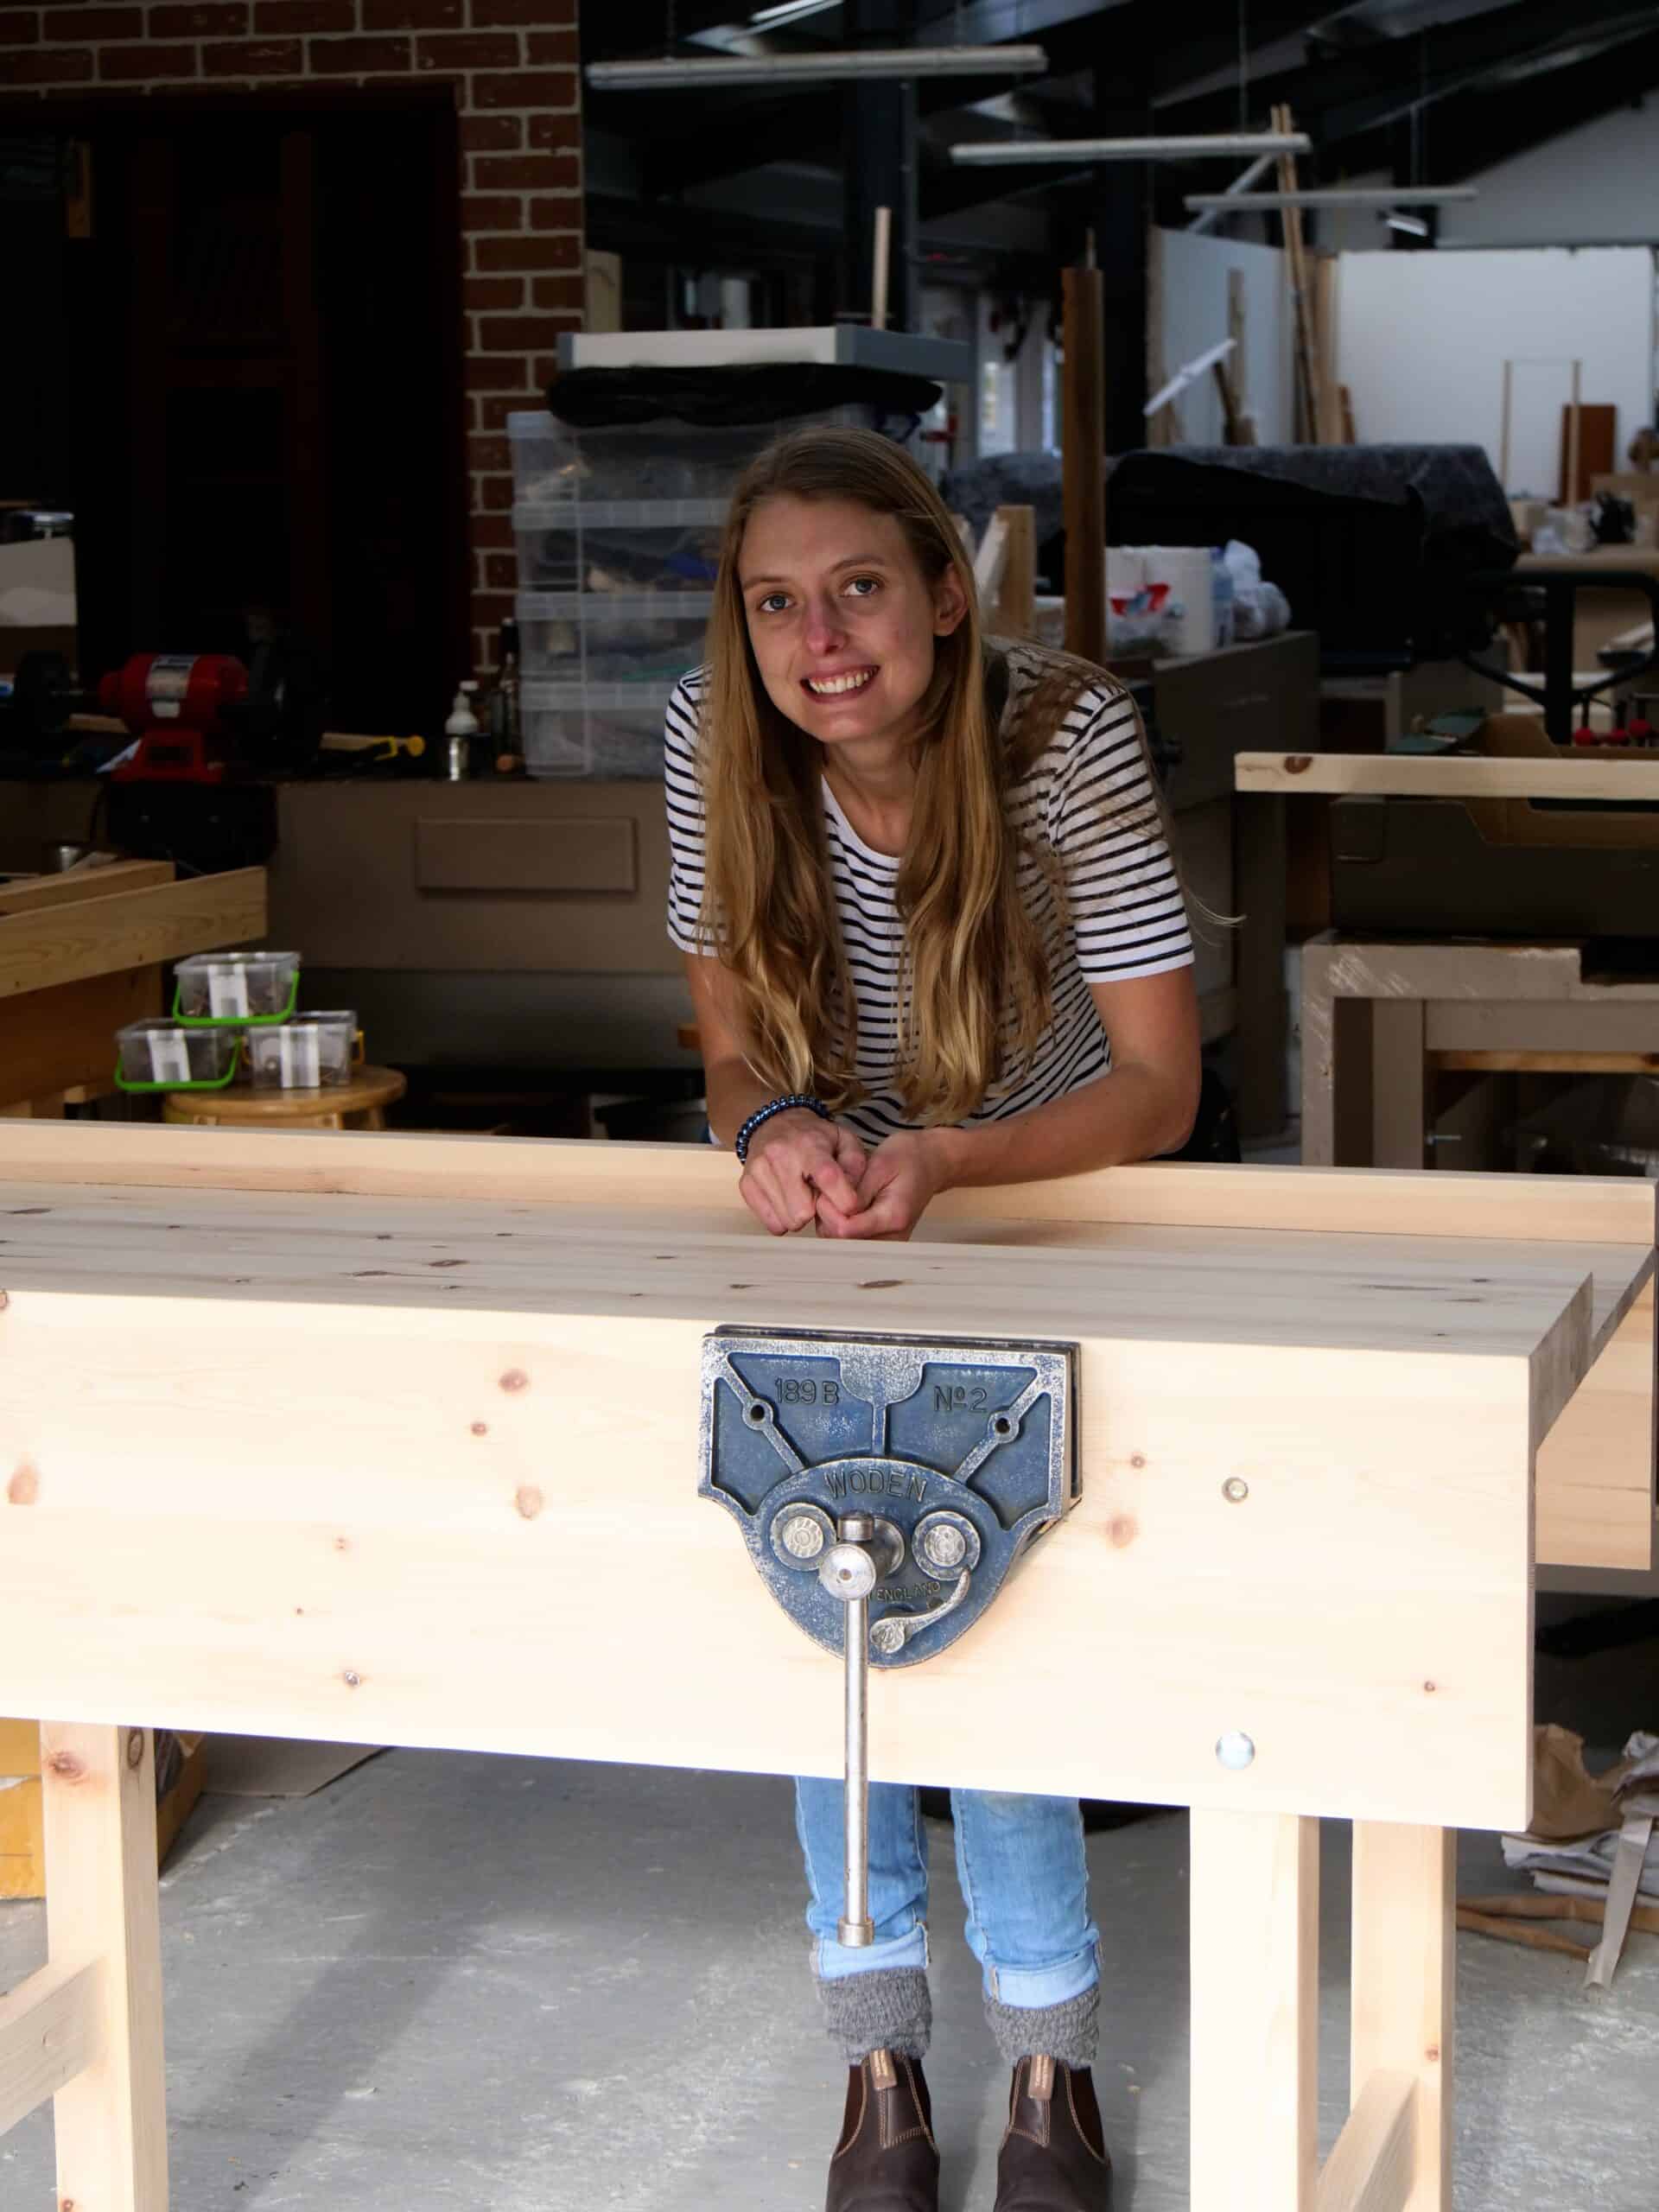
Workbench – Make it!
It does seem that those new to woodworking are a little intimidated by the thought of making the workbench they need yet they definitely need it to get started. My workbench is a dead simple workbench to make. I designed it in the face of the massive behemoths woodworkers in lofty realms seem ever-wont to make. Mostly this expresses little more than pride and also puts the first bench out of the reach of new woodworkers. Two woodworking schools I know of here in the `UK installed massive workbenches into their schools and left no room to move around them. It was silly and came from inexperienced woodworking teachers who for some reason completely misunderstood the reasoning around workbenches. Truth is, you don’t need much, you never need to make a hounds-tooth dovetail to make one, you DO NOT need hardwood to make a lifetime workbench, and what does it matter if the tenons are a bit gappy and so too the shoulder lines. Even a poorly made workbench will build your confidence, give you a place to work at and better still, you will have made it. You will be building your skills from the get-go and almost everything is fixable and it doesn’t need to be there and then.
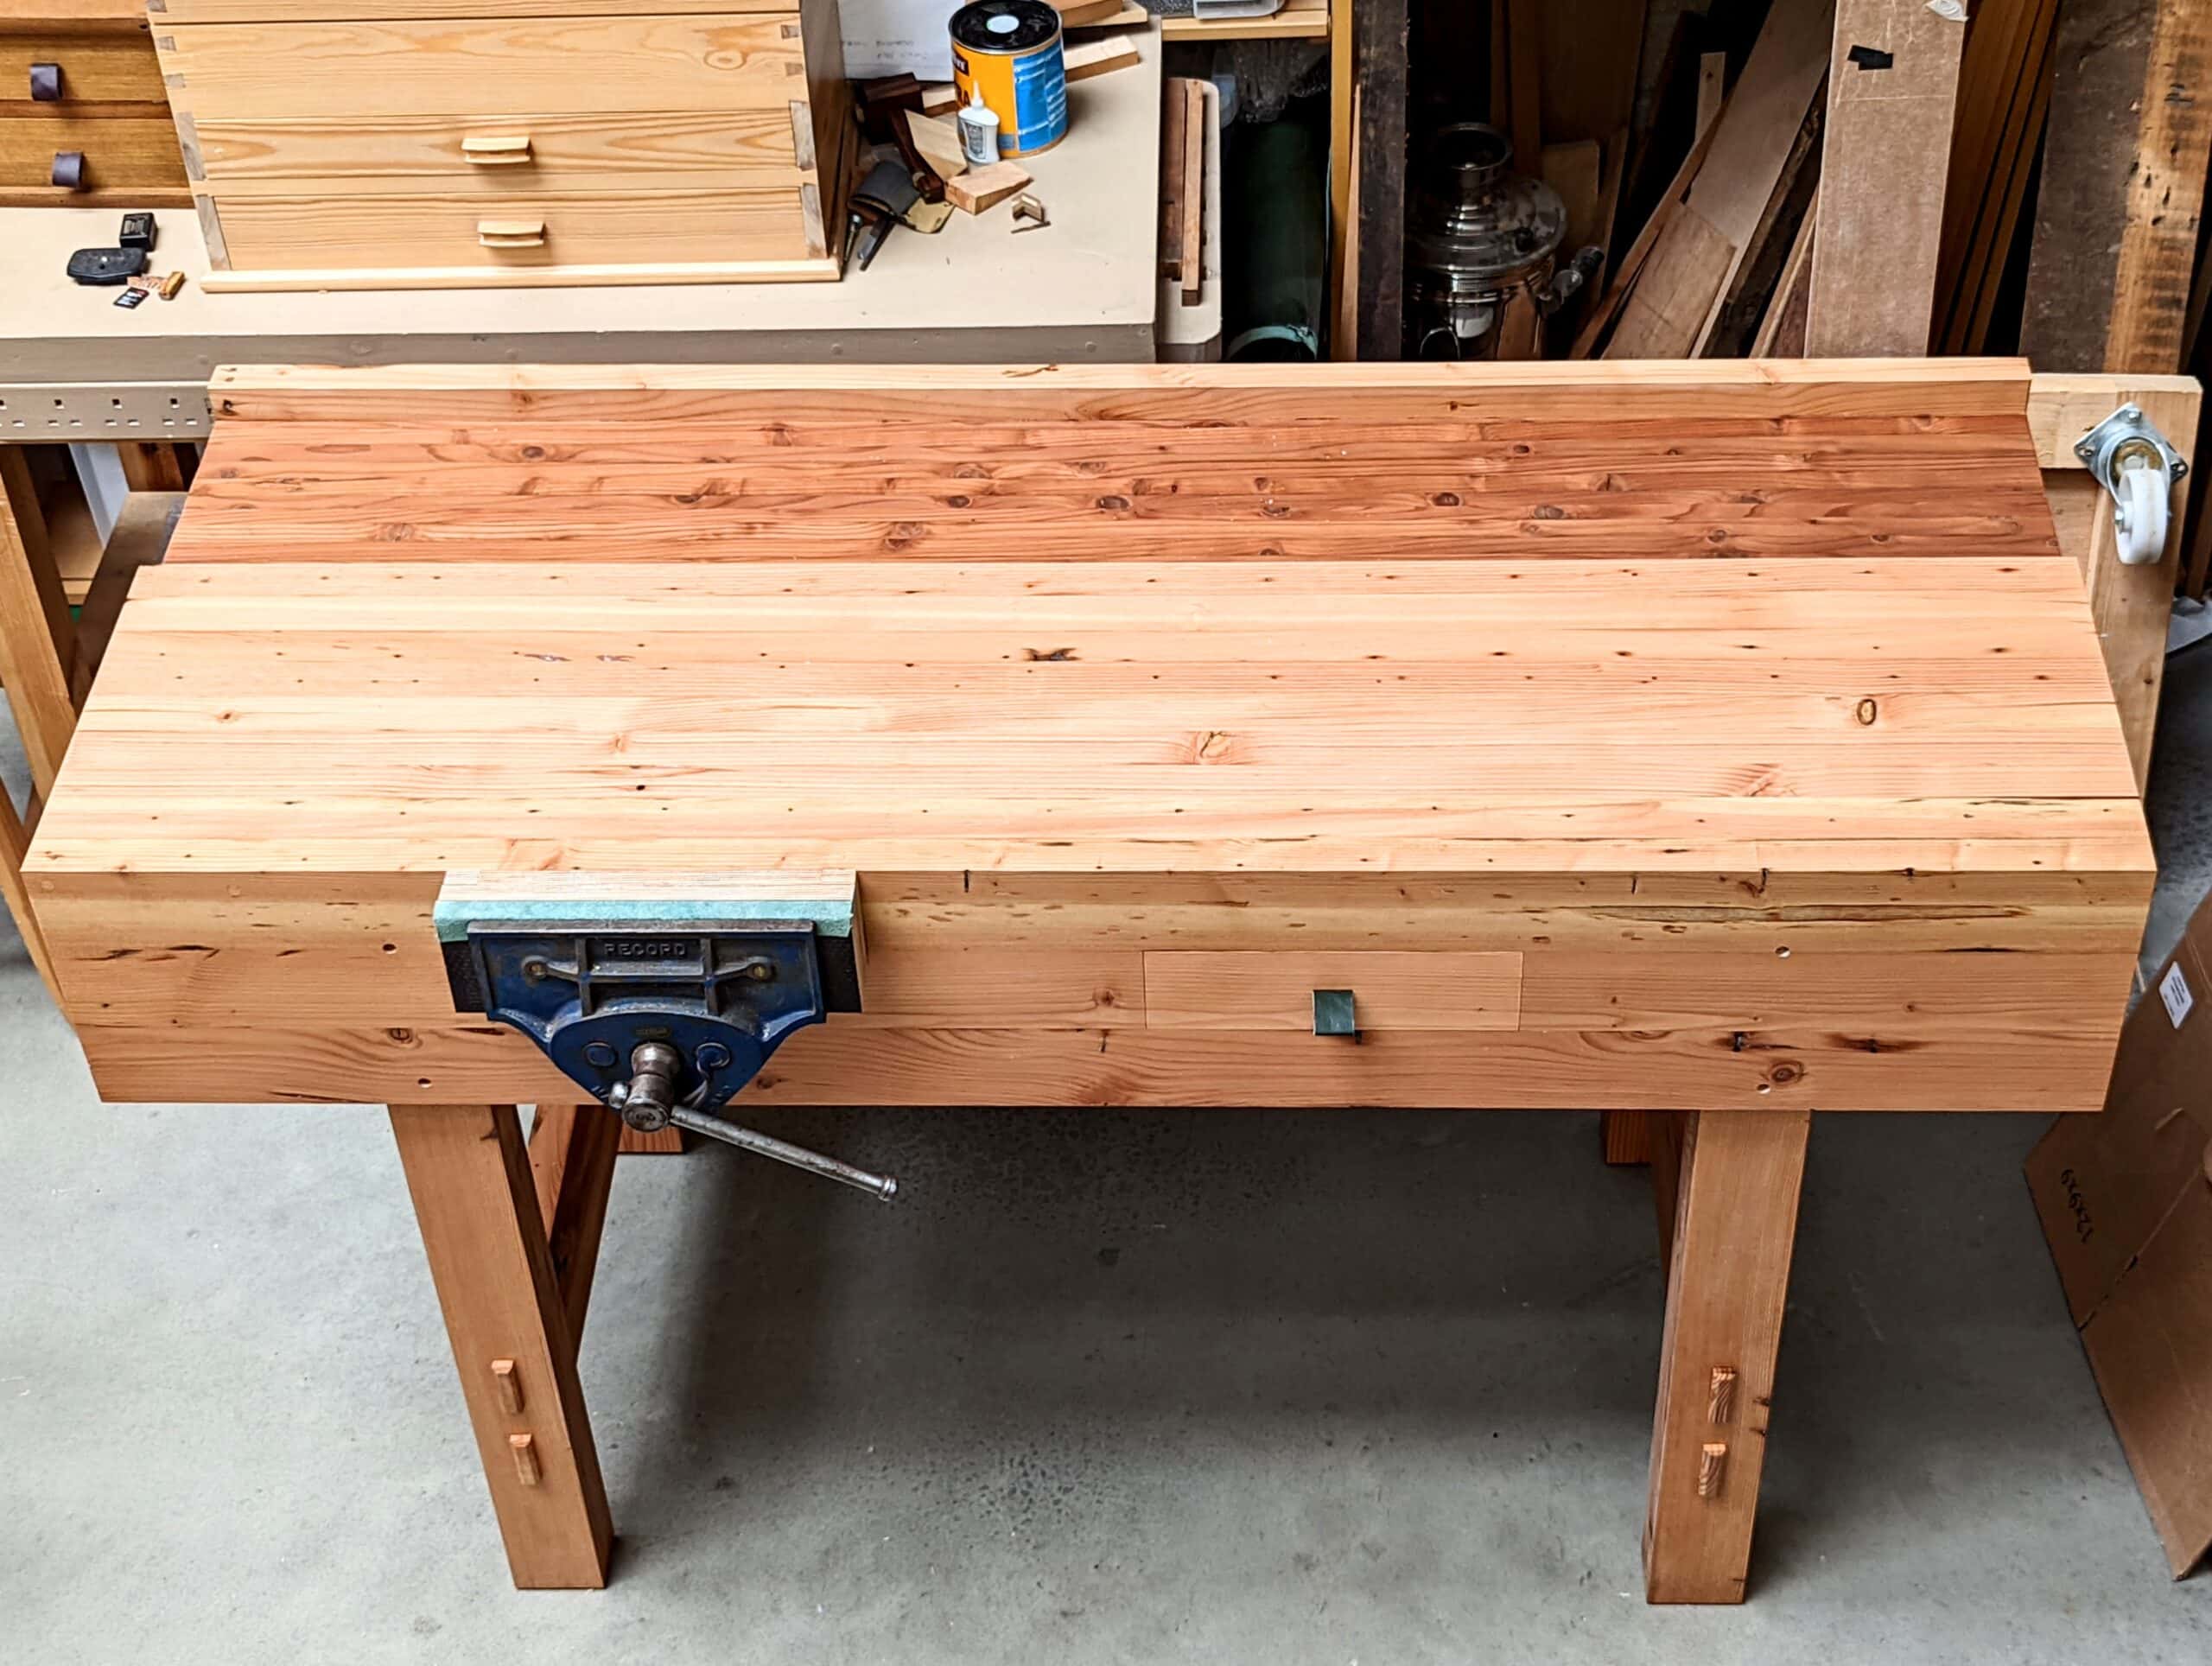
Texts and emails come in and it is obvious that it’s more the size of the project that puts people off. I have worked from a two-foot by five-foot workbench for decades. When I made lots of window frames and doorframes I needed I wide and long bench. 3′ by 8′ long in fact. It took up too much room. I refined my needs and today my benches are all between 5-6′ long, always about 2-foot deep and never higher or lower than 38″ tall. Never ever go for a low bench unless you are particularly short. The rubbish of needing to bare down from overhead on the work to plane and saw is indeed not true at all. 6,500 students worked at my benches through thirty years and no one ever said the bench was too high or too low.
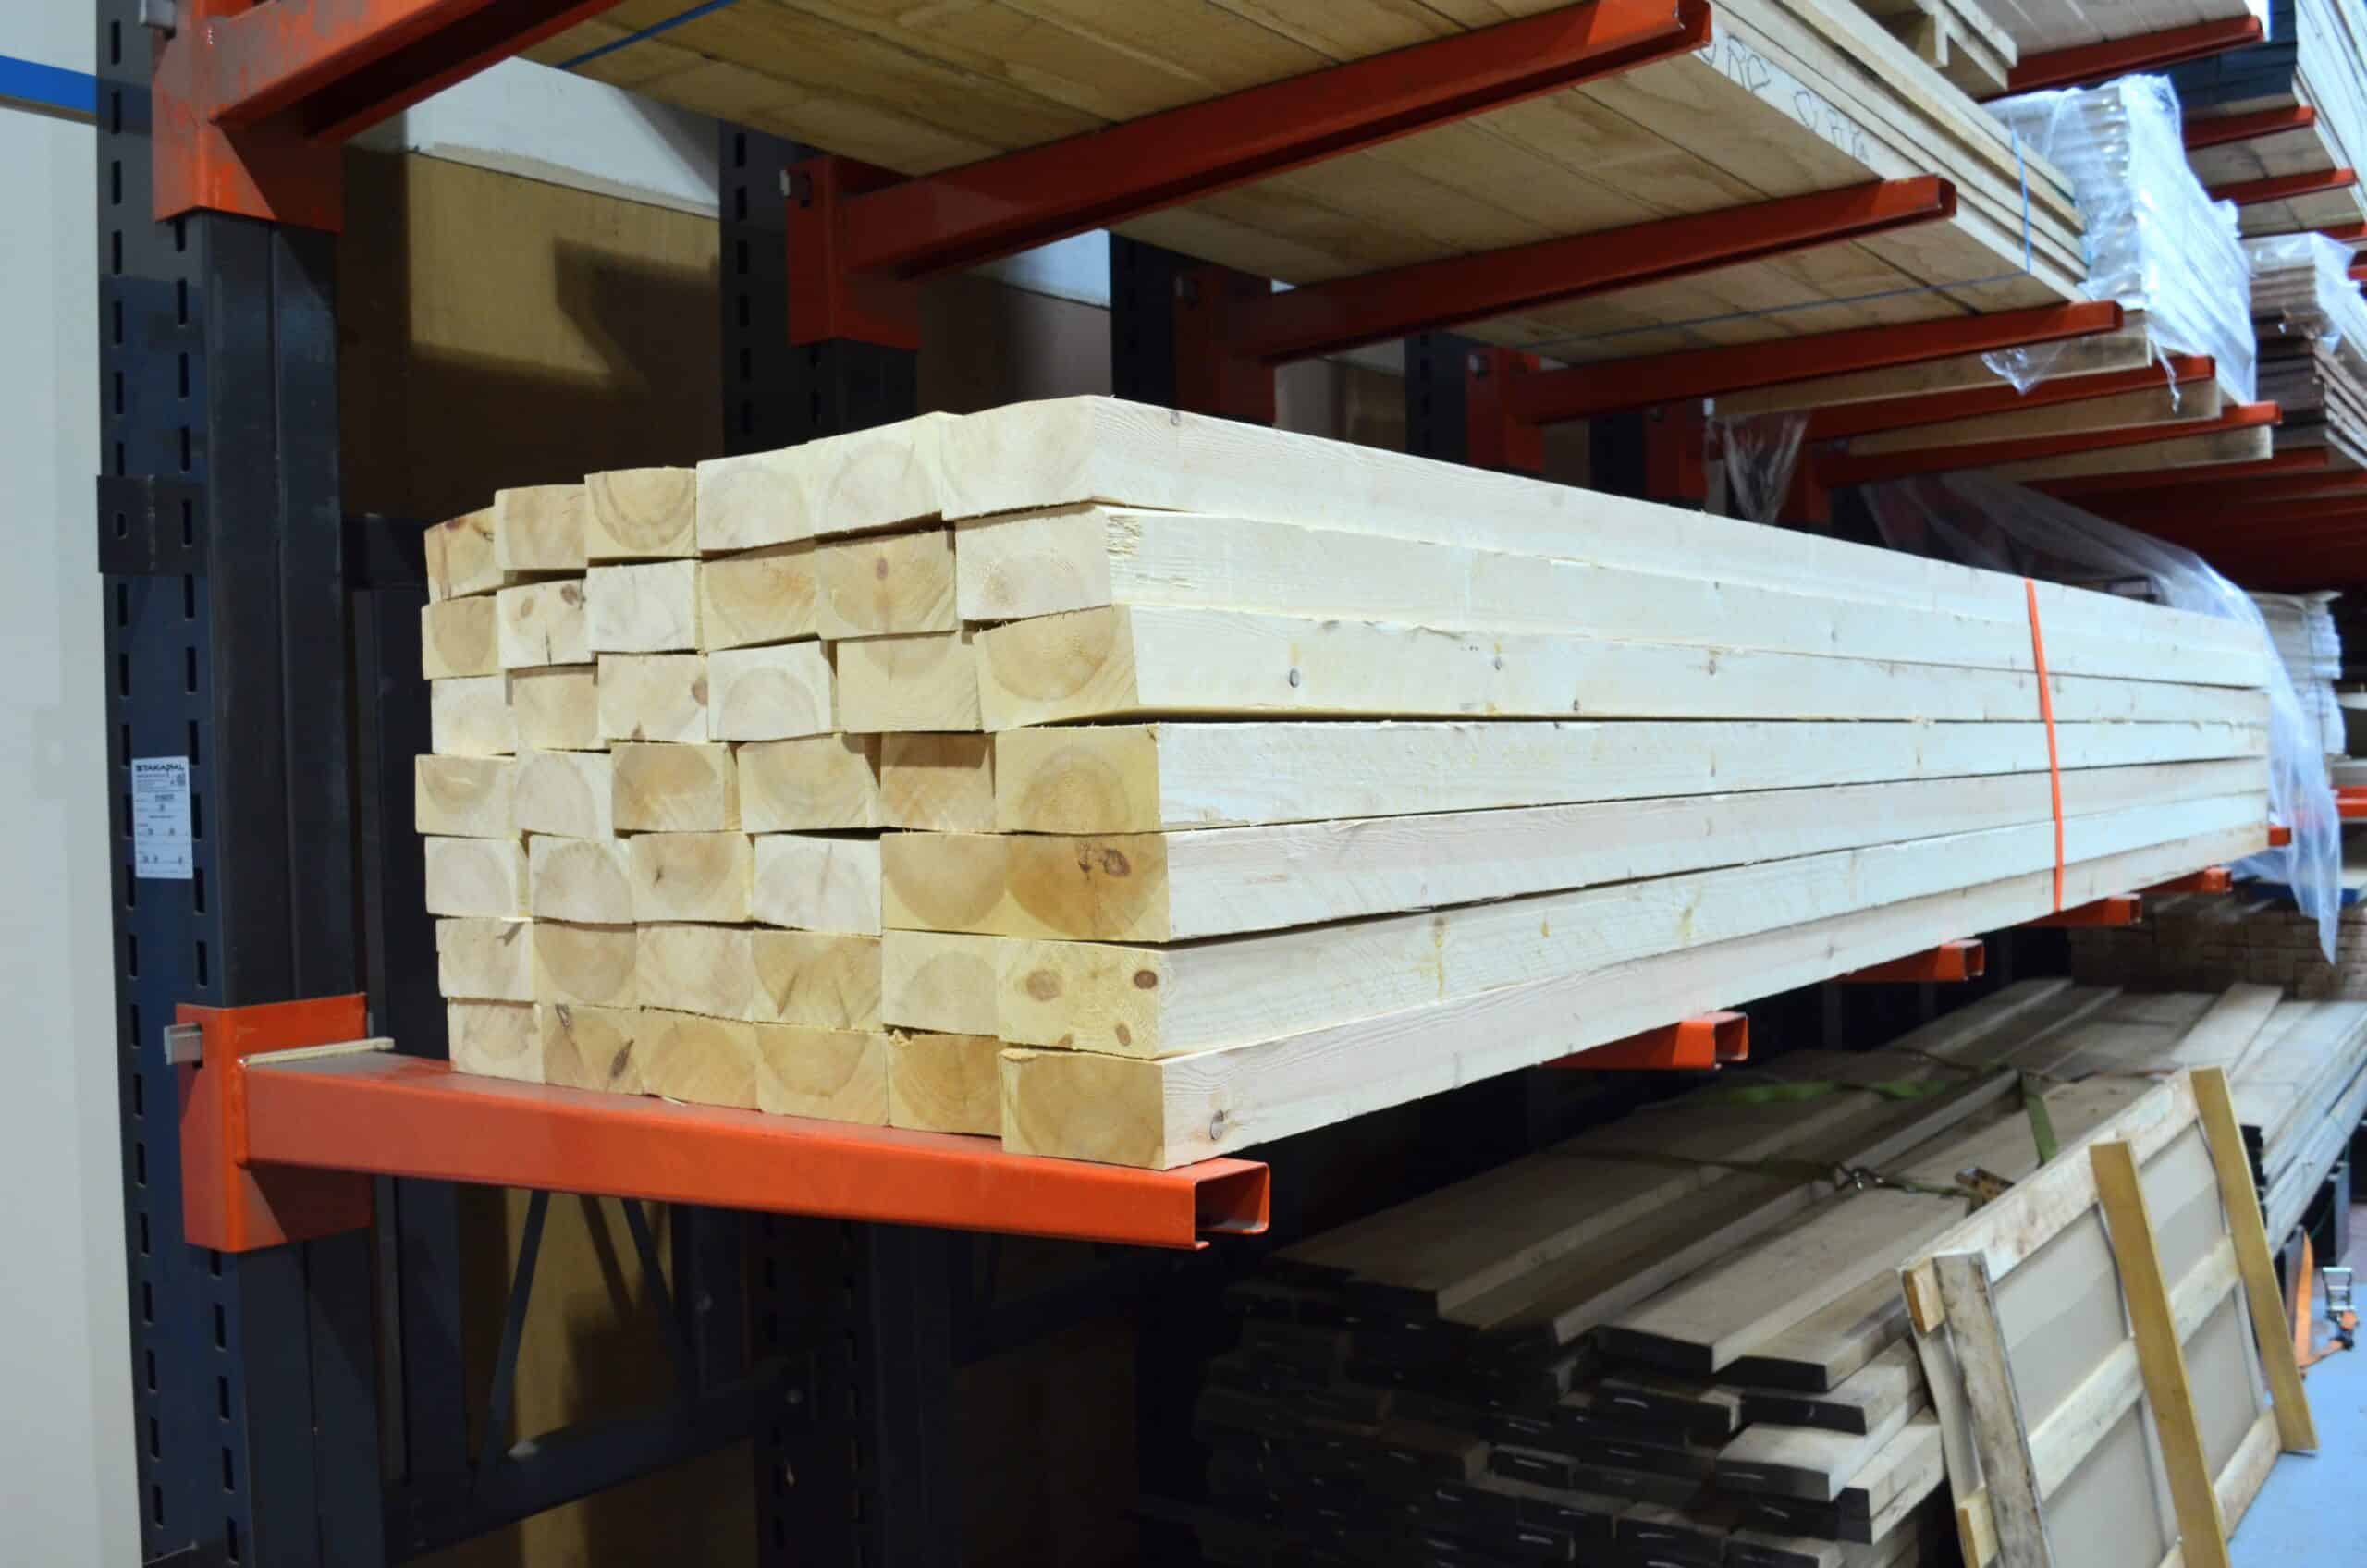
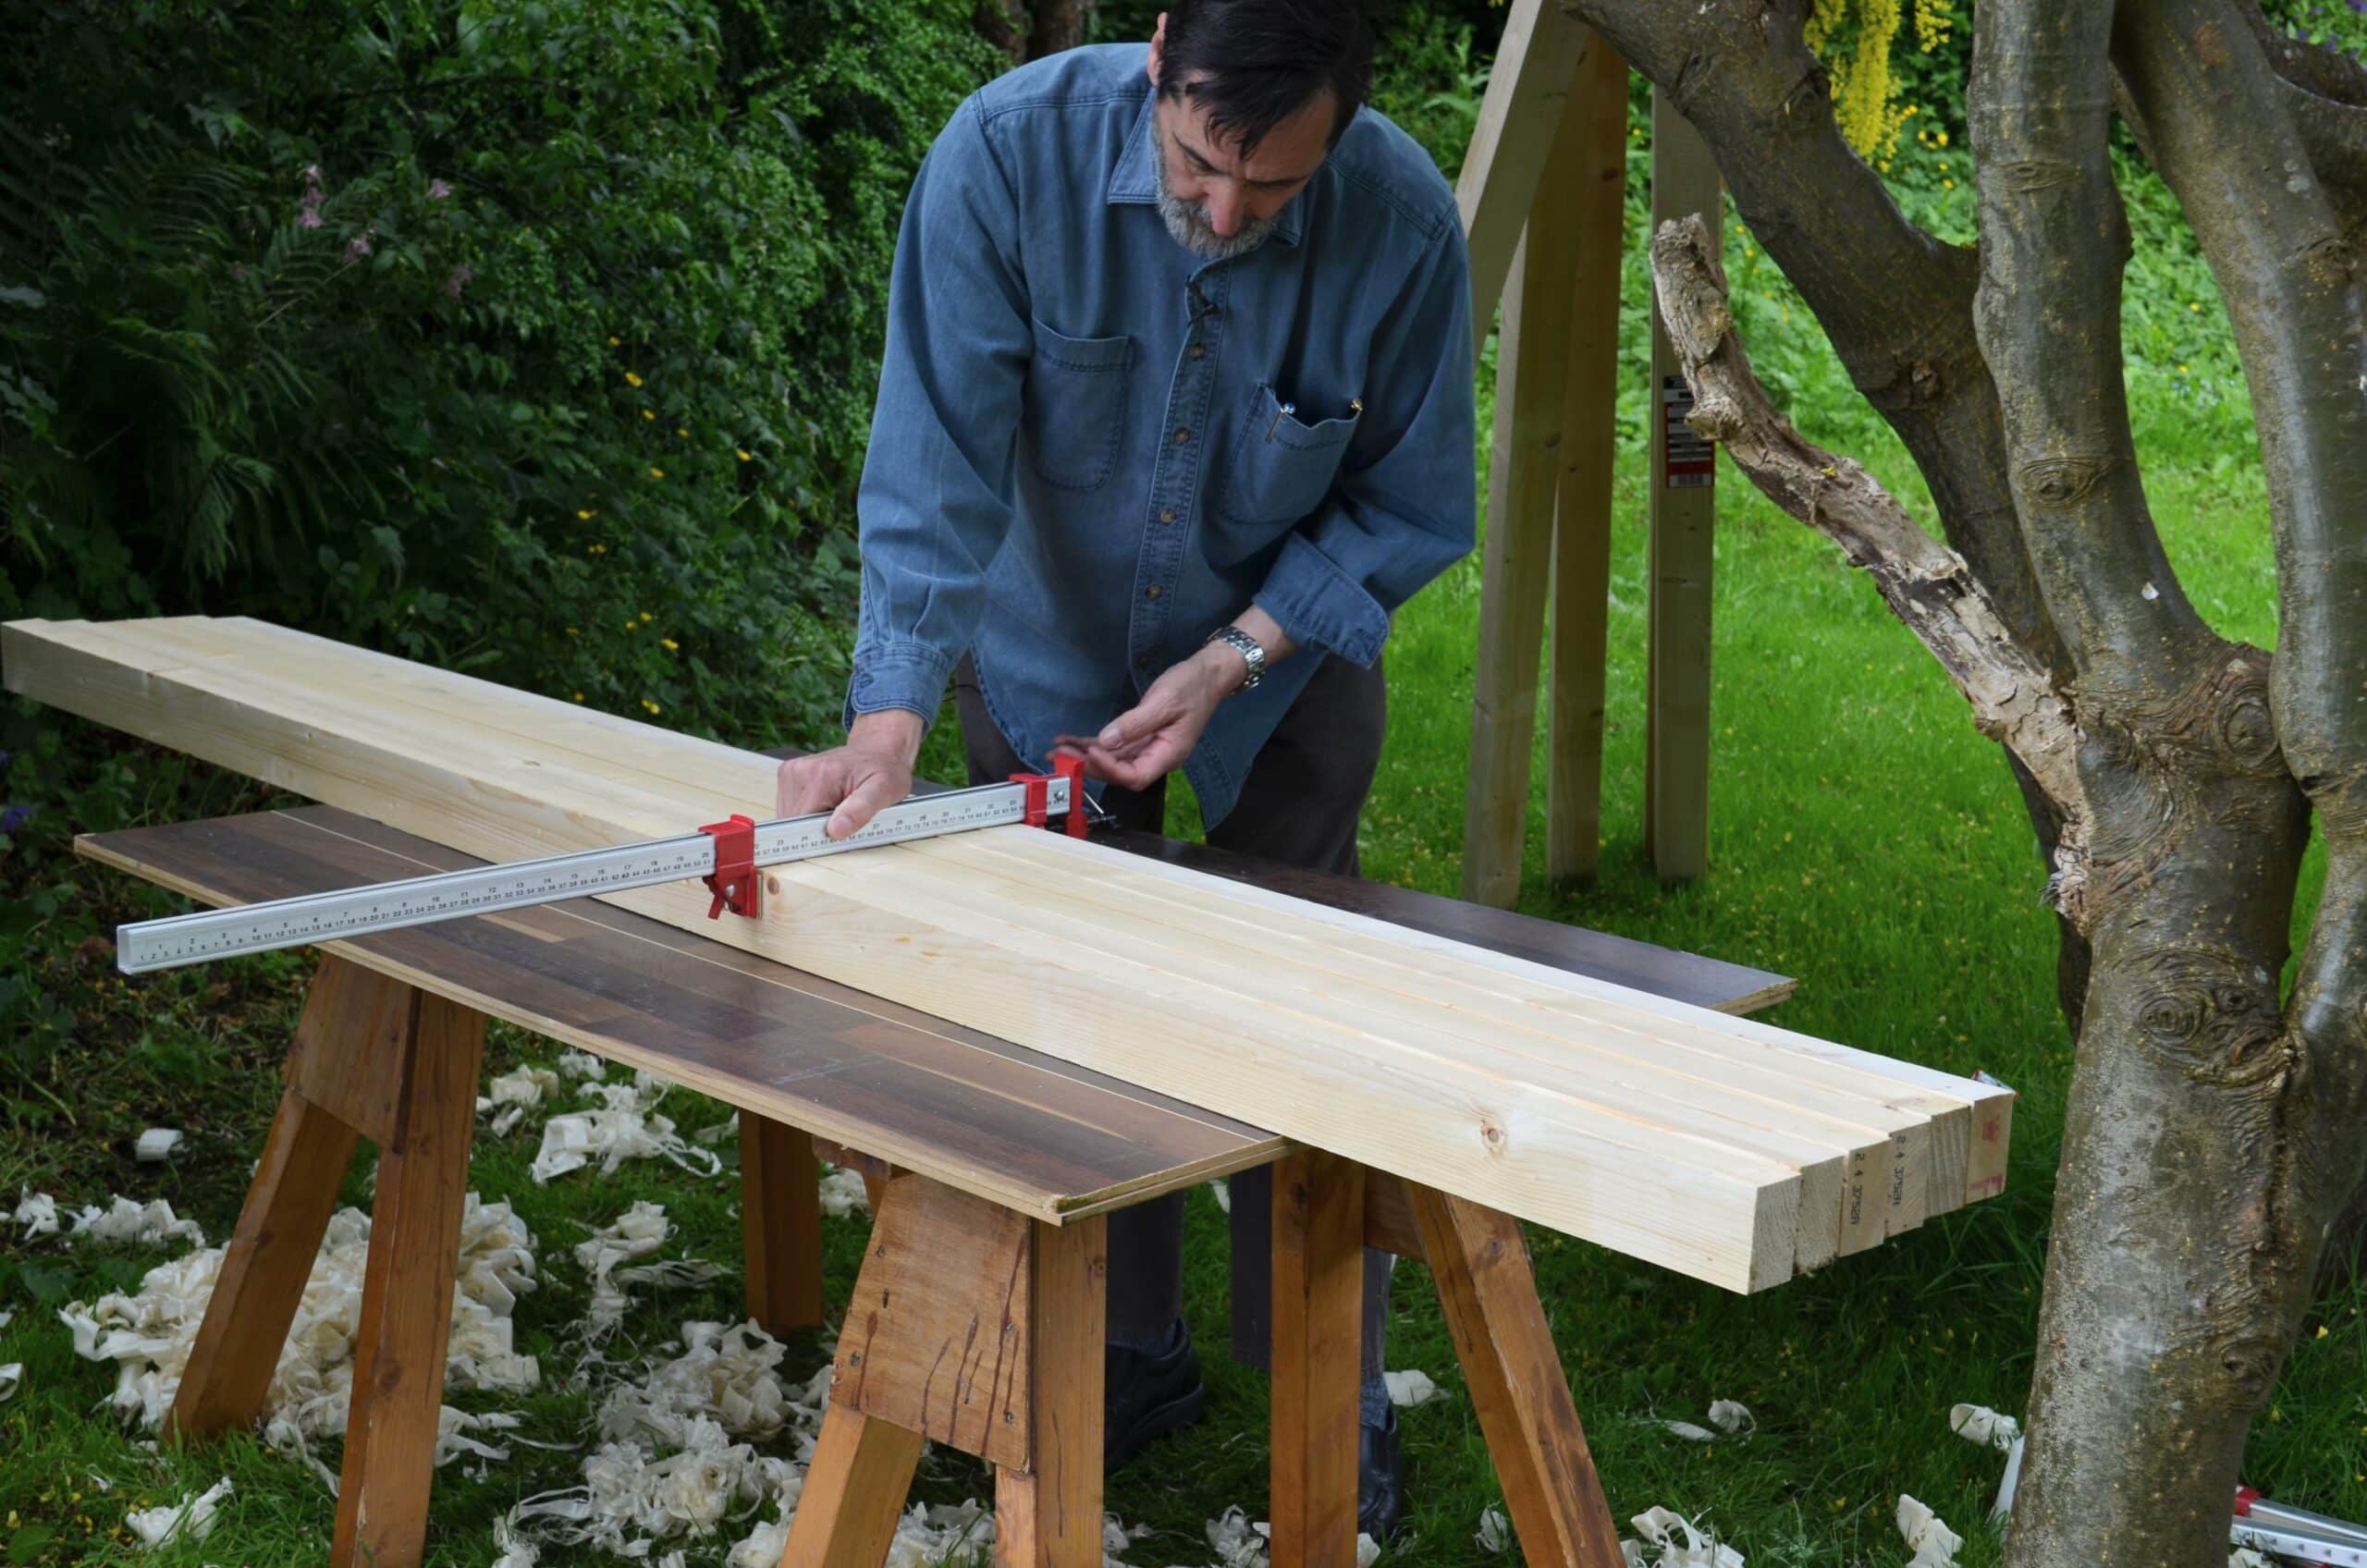
So, wood from the lumber store (US term) or from the builder’s timber merchants, building supply is graded differently. It will be kiln-dried but it’s not likely to be low moisture content so expect or plan for considerable shrinkage. I still work from a workbench that is now 13 years old and it shows no signs of any deterioration at all. It’s a wide-topped bench which I will never build or work from again. A complete waste of space with no place to keep tools out of the way. A bench with a well is worth two or three of a wide topped bench. Best thing to do is to stack studs on end against a wall with free airspace around them for a few days. Studs will dry down remarkably quickly. You can make the top as thick as you like but you really don’t need anything thicker than 60mm (2 3/8″). If you can only get US stud size 90mm (3 1/2″) and don’t want to rip just use that width. It will work fine. Legs and rails as per my original design should come easily enough. You do not need to plane wood dead true, just take a whisker off the face to create a good glueing surface. Studs are often rammed through the machines leaving uneven surfaces that don’t mate too well, or they have been saturated stacked out in rain for days and then dry unevenly. A surface skimming creates a good surface and clamping will take out curves and such and the glue will indeed hold forever.
No as for joinery – we woodworkers think a workbench needs to be like a piece of beautiful furniture. Why, oh why do we think like that? It doesn’t at all. Is it because we are trying to prove something, be accepted by our peers, or be seen to be something special? We’re ordinary, friends! Plain people. We can live without being and admired and we can enjoy woodworking admirably well with a rougher-than-normal workbench. Of course, it’s not likely to be a rougher-than-normal workbench by the time we have actually done it. Basically, you have twelve basic joints to make. If you make eight quite simple mortise and tenon joints that are somewhat loose they will work perfectly well. The housing dadoes for the aprons don’t even need to be tight and if you wanted to dispense with them and just glue and screw the aprons on that would work fine. From there on you only have laminations left. “the well board does not have to be grooved if you don’t want to so you see you shouldn’t be intimidated at all.

Now the tools are pretty minimalist too. a panel saw, a tenon saw, a bench plane, chisels, combination gauge, square, knife and a poor man’s router plane takes care of everything. Now go for it. Get making. One frame and then a second. See this as your training project. In a couple of years, you can make another if indeed you feel the need to. You make a bench for yourself for you to work from, nor for friends to admire or to validate you in some way. Just enjoy!
I think it was right before Roger Bannister ran the first four-minute mile. The wind socks showed the wind to be against him when he was about to run. His quote? And I paraphrase, “If the British wait for good weather to do anything, they will never achieve anything!”
Roger Bannister! There’s a name few of us remember, but fondly nonetheless. Question: do you not use dog holes for holdfasts? I could see where softwoods would wallow out with repeated use, but I do enjoy using my holdfasts and bench dogs. So primitive but so enjoyable.
I never used holdfasts after seriously trying them and I hate holes in my benchtop. To be honest, though, I have never needed them. Same with tail vises and such, so many things being advocated today that we never really used and none of the men I worked with did either.
My experience is that when boards happen to 5 ft long and narrow then they would naturally bend at the ends when hand planed (with vise only) thus causing problems for accurate joinery. I spent long days and weeks hand planing like that and came to the point that it would be better to have adequate support for the ends of the narrower boards. That is either in the apron or resting flat on the bench top with some holdings. I used Paul’s workbench for couple years but ended up boring 1 hole for the holdfast and works great for me. It also works as a stop for some planing jigs.
Sounds like you were just heavy in the start and end of the cut. Practice gives you the advantage of unhindered vise work as I have never had any such problems. So, I would encourage everyone to persevere in practice and not give up.
Hi Paul: I am about to embark upon making your workbench and am truly excited! I just bought an old 9” Record 52 1/2E. It is really greased up and I’m worried that sawdust will stick to it terribly. Should I completely degrease it and lightly lubricate it? If so, what do you use on yours?
I would just rag the excess off and use ot for a little while. Vises need lubricating every few days to operate well. In other words, the lubricant is dried up because of the grease, oil or whatever is used.
I’m told I was the inspiration for this post. I’m not sure if I should be excited or dismayed but hopefully these words help a few folks out there on the fence.
I’m not on the fence and have never been. I’ve been an avid watcher and WWMC member since probably the beginning or close to it. I enjoy watching. But doing has been a struggle.
My first issue was finding the tools, and then it was restoring and sharpening them. With Paul’s techniques and equipment suggestions it took a while, but was doable, to get through second hand planes available on eBay. Chisels I just bought a nice set to start out with – finding the Aldi ones in the states is very rare, but sharpening isn’t hard. Second hand hand saws are another story, especially a panel, when it comes to restoring, shaping, and sharpening… I fought with one for weeks before giving up. I feel like having a workbench can help in learning this over time, and trying to restore messed up teeth and an uneven saw is probably not the best place to start. This was all before the readily available S&J 22″ was really a thing. If I couldn’t get one I’d probably buy a few tempered steel ones just to get going and figure out the rest later. A saw holder for sharpening is only so nice without a vise. Other tools weren’t too hard to find.
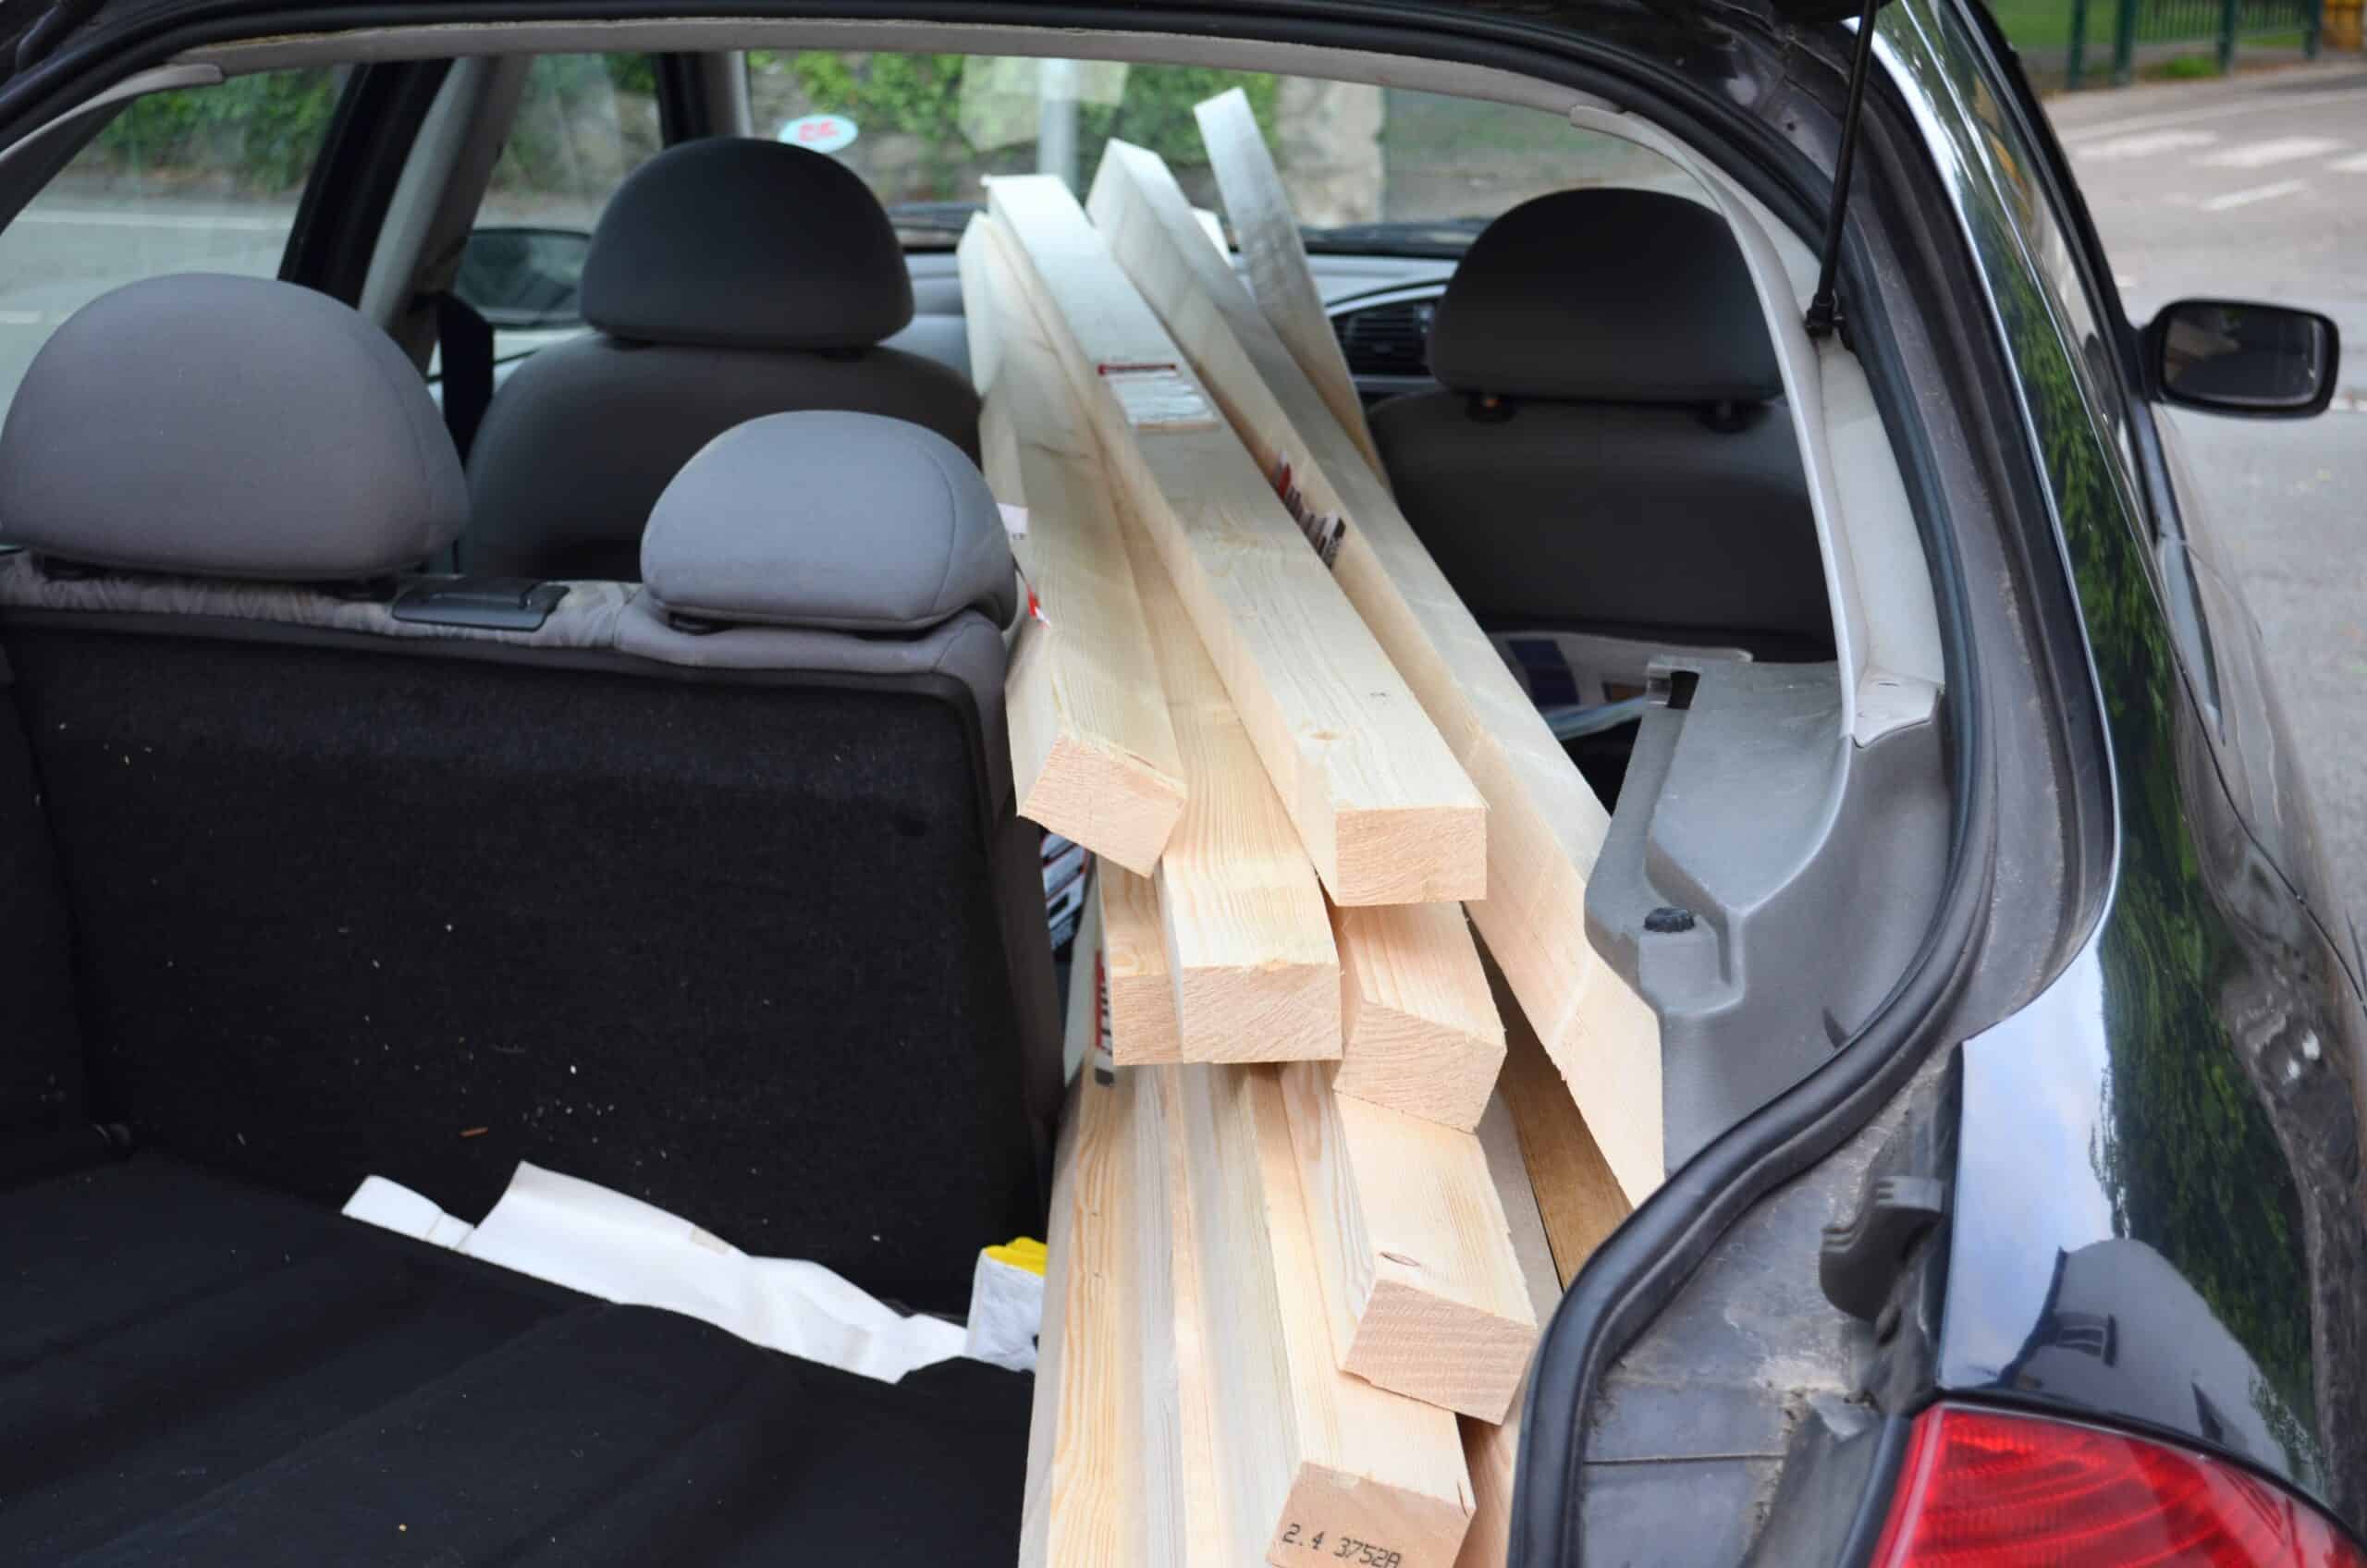
The next hurdle is wood. Around the Midwest in the US I find nearly zero lumber yards within an hour or so distance, more like 3-4 hours travel required. And in the US the construction lumber is extremely young growth due to heavy usage that seems to bow and twist a lot. I tried southern yellow pine instead but also young as I can only get it from construction stores, and it twisted and bowed worse than the rest. I ended up with a bench that didn’t clamp the bows tight, boards that took quite some time to surface plane, and an end product that after many weeks of planing after work was still bowed / bellied noticeably. Add to it that everything around here has rounded edges all the way across and it’s just a lot for a first timer. I’d say to be very picky about your boards at the hardware store, and dry them before cutting on them, and try again if any are significantly bowed or twisted after. And if you can find something without rounded corners. I suppose the non-flat surface isn’t a huge deal for medium to large project sizes at the end of the day though. If I ever get on with this I’ll probably just buy in bulk since the nearest mill is 3 hours. As for planes too, restoring soles flat and getting a blade ready is quite a project for a newcomer, but grinding and sharpening an iron for scrubbing is even more so… though it should help tremendously.
The next issue is warping. Stuff that was straight wasn’t for long in my garage. 110 degrees Fahrenheit, 95% humidity summers and -10, 10% humidity winters, it’s quite swingy and unless you have a climate – including humidity – controlled garage with a good deal it’s quite difficult to keep anything wood in one shape for long. I’ve since moved and have a better space for climate control to even be able option so hopefully that helps some.
Learning the knife wall, stop cutting, chisel work, planning, cutting a saw straight, two joints, on a workbench rather than after one is quite a lot for me. My bench doesn’t have to be perfect but the sheer amount of things is hard for me I guess. That’s after learning the tools, what to have from were, restoring and sharpening it all.
Hopefully these words help someone else from the region. I’ll never give up but for a complete newcomer, at least around here, it’s a lot, even if you’re okay with gaping joints and screwed-on sections for the first bench. I suppose if you had machines though the plywood one looks quite easier. I certainly don’t care what others think of a first bench, though.
My current status is I have sharpened planes and chisels, and a S&J saw. I’ll have to scour a dozen or more near-ish big box stores and see if I can find anything that’s straight and hopefully without rounded corners, being very picky about what I pick up, and maybe eventually accrue enough, but I have my doubts. With the super young, less straight selection here I may have to go basic hardwood and that added cost just to get something workable in the US but we’ll see. Then let it dry a while and hope it stays straight. Then, skip out on as much joinery as possible so I can have a bench vise with which to practice said joinery.
Sorry if this is a bit rambling. On my phone and it’s very early in the AM. But I also wanted to provide others in my situation something to read and identify with.
I’ll update here too on what progress I make if any so that all can see.
My point was that they don’t even have to be straight, just planed to skim off for a decent surface to glue and clamp to. If you get two long bows in a length put these face to face when you glue one counters the other. You don’t need perfectly straight wood. Twists are a little different. Avoid these.
I’m not sure what happened, but my first two attempts had a few bows that clamped to straighter material didn’t close quite all the way. Glue held so so but definitely not straight and definitely twisted. That was some southern yellow pine from a hardware store that was probably young and not so dry. The hardware store 2×4 attempt was less twisty but had a similar bow. It is good to read about some allowable imperfections. Now that we’ve finished our move and got some things in order, we’ll see how the next attempt goes. I’ll let everyone know of course.
As an old carpenter on a building site once told me (a student volunteer at the time),
“We’re not building pianos- we’re building roof trusses.”
I think the same principle might apply to some extent to workbench building. IMO it’s more about the skill-building journey than about the resulting workbench.
Just keep at it – it has been about 10 years since I was bitten by the Paul-Sellers-bug and it’s quite remarkable how my skills have improved through building very imprefect projects.
Paul, my interpretation of your words matches the saying that “Better is the enemy of good enough”. At my interview as a young engineer for an airline post I was asked “Are you a perfectionist?” I answered “No, you’d never get anything done “. That must have been well-received, as I spent the next 33 years there.
It might be worth a 3-hour drive to find a sawmill that will sell you rough-cut hardwood. Your construction lumber is about like mine; I hunt for houses that are undergoing renovation or demolition. You can usually score some 2-by lumber from their dumpster. But pine, after 50 years standing in conditioned space, is so hard that you have to drill it to put a nail in it. Maybe after that many years, it gets stiff like we do 🙂
Why would I drive three hours for hardwood when I wouldn’t want hardwood for a workbench-that’s six hours on the road? Also, I can buy hardwood within 20 minutes if needed to. It was obvious in the article that you can build a great workbench from softwood, and I am talking a lifetime workbench even if you are just 18 years old. Then you tell an untruth that pine after 50 years becomes so hard you have to drill it to drive a nail into it. That isn’t true at all. The bench at the head of the article is made from softwood and has only hand cut joints and no nails. It’s obviously a beautiful piece-vibrant. I’ve been working with all woods for 57 years as a full-time professional woodworker and they all work just fine no matter how old.
If I were to build another of these benches, I would replace the wedged housing dados in the aprons with simple battens glued-and-screwed directly onto the aprons on either side of the legs (plus a wedge per leg). That could cut back on the complexity some.
A year ago, this was my first woodworking project. So glad I went with this design as it got me going quickly and has worked wonderfully. Since then I have successfully built two dining chairs, a half dozen boxes / chests, and a half dozen side tables — if we were to include unsuccessful projects then all of those numbers would be higher! The instructions for this workbench really are a great service to anyone starting out.
It’s such a good design that I have been making furniture on the same design for the past 57 years and that includes two pieces for the White House
I really enjoyed this post. I don’t read much woodworking literature as I find that a lot of the fun comes from learning from experience.
That being said, I am doing the complete opposite of what is recommended here and have been for some time. I wanted my first bench to be a large one and still fit in a small car so it’s built with some compromises. As it was my first bench, I had to go through a number of iterations and designs which took a great deal of time but I wouldn’t change that. There’s a great deal of satisfaction that comes when completing your first large mortise and seeing it improve or even figuring out how to counter your mistakes!
I think I will try a smaller bench in time to test your assertions. I am sure both will serve me well. I must say that starting a workbench without experience and a solid surface to work on is daunting but your videos and blog are going a long way to remedy that. Thanks
But we do disallow the wood from movement and so risk the very probable cracking of the aprons. Not a good alternative as was not my suggestion to glue and screw the apron to the leg frames. You just have to be aware that’s all. Then the choice is yours. I am surprised that you suggest the housing to be a complication though.
When I built mine, I did miss out the wedges, but didn’t glue, legs held by a coach bolt and coach screws holding the top down. At least a decade old now, never had any issue with it racking. My intention at the time was to retro fit some, if needed. I may have been lucky, joints where tight and when I built it the timber was really dry, so may have swelled and tightened the housing joint even further. I did make the legs “6 by 4” by laminating 3 “2 by 4″s.
I enjoyed the planing, the intensive course improved my ability. However, I didn’t worry too much about the rounded corners on the base of the top, out of sight. Mine was the original double sided, larger, design and has an end vice, which I use a lot.
Happened to be in B & Q earlier, the timber on top of the 3 by 2 pile looked pretty ropy. I have, since making mine wondered if there is any advantage in laminating 1” beech on the top, but suspect that it might expand and contract at a different rate to the softwood base. This is mainly due to the rising cost of CLS, so the price differential with beech is now less.
I know what you mean about the B&Q 3×2. I normally end up checking numerous lengths, and choosing those which are good. Watch out for those which have dents from the plastic banding tape which holds deliveries together and is ratchet tight. It is however very good value, and I’ve used it many times.
The band strap marks steam all the way out with an electric iron and a damp cloth in a matter of seconds.
I did my own reviewing in both B&Q and Homebase yesterday and they had 2 x 3 and 2 x 4 that was ready to go and would need only minimal clean up small knots and straight or straight enough.
The rounded corners on construction grade lumber/timber has never bothered me in building benches. I just plane a bit more. Or cover the top with 1/2″ Baltic Burch plywood.
What does bother me are dead Knotts and twisted pieces. I’ve been known to use shipwrights patches to eliminate the former and just passed on the latter.
I’m on my 4th bench build, two for me, one for a friend and one for the wife.
Ben,
While a laminated bench is really nice, the strength of the English style work bench is that they are torsion boxes. Carpenters here in the US used to assemble them at a job site from construction lumber. The tops were often rough-cut (full sized) 2X8s. Two or three made the top. They discarded the bench once the job was done. No lamination is even needed unless you want it to last your life time, and you can build a nice life time bench using a simple carpenter’s bench. Built in cabinetry, doors, and windows were frequently fabricated on site, since the peculiarities of individual houses sometimes required custom fitting.
Another gentleman I follow buys 2×8 or 2×12 lumber 12-20 feet in lengths. That seems to be better material than the 2x4s. It does add to the milling time, but it might be worth it for straighter pieces.
I “cheated” when I built my bench. I got a piece of bowling alley from a friend. The frame was built from southern yellow pine. It is no beauty, but it fits my needs and I can add to it as I see fit. My next addition will be a vise. I am still ruminating about that.
I have made mine (moravian) workbench from scraps of construction lumber. It was a lot of long nigths in a garage, but it turns out to be wonderful piece of equipment, even without finnished tooltray-two rough saw boards just lays on the leg frames after more than year of making anything on the bench.
Mister Sellers attitude has great pushing effect – I was affraid of making something with so few hand tools.
I thank You, mister Sellers. I owe You a lot.
My only regret is to have procrastinated too long.
My P.S. workbench is far from a nice piece of furniture because lack of skill at the time.
But also use of knotty recycled wood from an old pick-nic table with old bolt holes in it and some construction grade wood which my son found in the attic of his house.
At that time, I have used two cheap saws (with hardened teeth), Chinese chisels bought for a few Euro on a flea market and… a workmate I had bought 30 years before. What I did bought specially were diamond sharpening plates, a #4 lookalike from Silv*$%µ and the kind of light aluminium clamps Paul uses. . I also used self made P.S. winding sticks, a combination square and the recommended marking knife.
Not all the boards used for the top were good enough to be used with only a light planing before glue up. So I have glued the three or four best ones first.
I then planed the edge of this slab square to the face. Those boards too warped were cut in three or four pieces. Each piece was then planed straight and out of wind on one face. Those pieces were then glued (staggered) to the planed slab edge. The new edge was then planed straight and square to the face of the slab. Repeat with the next warped board. Extra work but I wanted to use this well dried and free wood.
Two points of attention:
– The bottom of the workbench-top must be out of wind, otherwise the workbench will rock (assuming the top of the two leg-frames are parallel). Although, a shim well placed between one of the leg-frame and the top can correct this.
– The carriage bolt securing the apron to the leg should not hinder the lateral action of the wedge (make it ineffective). I suggest making the hole in the leg with a diameter slightly bigger then the bolt diameter. Use a big washer on the nut side.
After too much hesitation, I have chosen this design for the following reasons:
– It was simple enough;
– it could be done in my backyard;
– it can be knocked down if necessary (it is now up in my attic 48 steps higher);
– the apron glued to the top makes a very rigid “L” beam which makes the workbench rigid;
– the wedges will take care of shrinkage;
– i don’t need a fancy workbench.
It was done before the new videos were published. So I had to adapt the dimensions of the workbench in the garden to the material and space available.
My workbench isn’t pretty but it is rock solid an perfectly functional.
It is about 5′ X 2′. Anyway, most of the time the work is done in the vise.
I have added the drawer, the shelf below and the lateral shelf between the apron.
In my use of salvaged wood from broken down old furniture to build custom pieces I come across the problem regarding old bolt or screw holes. I try and use these pieces where they are not visible and drill them out and plug them with some of the wood from the same furniture. My customers either don’t see them or don’t really have a problem with this practice.
I love this, thank you. As a typical USian raised on Norm Abrams, This Old House, Woodsmith, and all the other sponsored programs made to sell expensive power equipment and shop furniture, your teachings are correct and much-needed. (Don’t even get me started on spending days building a jig to safely make a couple of small cuts on a table saw, when you could have it done in a minute with a hand saw.)
I take issue with one item: workbench height is important, and one size does not fit all. Proper ergonomics ensure correct body alignment, and minimizes repetitive strain injuries. Necks, shoulders, and wrists are of particular importance. If your bench is too tall you will strain your shoulders and neck, expend too much effort, and have less control. When one part of your body is strained, there is a ripple effect to your whole body. Sometimes it takes some trial and error to get it right, which is good experience for learning to shorten or lengthen your workbench legs. Or, to build a custom platform or two to stand on, or to have a Moxon-style vise or two for different projects.
Proper body mechanics and ergonomics are of equal importance to developing good sharpening skills; if you get these wrong then your woodworking will be frustrating and uncomfortable.
It is also important to have nice deep toe kicks, so you ‘re not standing too far away from your work. I’ve seen a number of bench and machine stand built on the TV shows that do not allow room for your feet. It’s like they don’t use the items they build.
You’re right, Carla. I should have been more specific. I was simplistically countering the silly low bench advocates who use overhand over the workbench body positioning for planing and many other tasks. My suggested height is for the average male of around 5’9-10″ and in good physical health. Take an inch off for 5’7-8″ and go down gradually after testing over a period. I am guessing if you have read much of what I write that you already know that and I certainly didn’t say that one size fits all anyway.
I am regular visitor to your blog and your sites, and I have not seen your other articles discussing this. Thanks for the clarification. There is a lot of weirdness about workbenches (as there is about woodworking in general), and I appreciate your discussing it.
In response to the title of the blog, I did. I made 2. I have a small Record vise in the first one and a larger Record vise in the second one. The only things that have loosened are the bolts that secure the vises underneath the benches. They rarely loosen though. I have made everything with those benches. I have a third Record vise that I’ll probably use as a tail vise. Not sure if I’ll do that but I am thinking of it more and more. I plane everything in a vise and sometimes use the clamp-in-the vise method as well. If I do add the tail vise I’ll add it my older bench to see if I like it.
Getting the wood for a bench is a big hurdle for many people. Once I decided on the P.S. bench it was off to the home centers to shop for lumber, but that didn’t go too well, all the 2×4 where horrible, and I went back many times to see if there was ever an improvement, but it was not to be. Not to deterred I decided on 2×3,s using a technique another bench builder I studied had used, gluing one by pine underneath and holding with screws that were to be removed later, this has proved to be working good 5 years later. For the legs I got 4×6’s legs free from a friends patio tear down. The legs were thick enough to recess skirts in, and flush with skirts. the wedges are a brilliant idea in my opinion and contribute to rigidness greatly. I my case I used the 1 by pine laminated on inside of skirts too, and wedges are incorporated into that. I wanted a bench thick enough to retain hold fasts, which I enjoy using very much. Paul is right about just having to surface plane 2x’s for laminating top, it worked well. On my first time watching bench build I was under impression that they need to be perfect but that proved not top be the case. What is ironic is that later trips to home center I noticed all of a sudden the wood had improved, but oh well I couldn’t be happier with what I ended up with.
I think that this depends on where you live in the world. It seems that in the USA things have badly deteriorated and naturally so. My annual visit to the US attests to that when I see what’s sold there today over even a decade or so ago. The USA had a long period of being advantaged by inexpensive wood for decades and centuries having it right there in its own backyard. Here in the UK, equivalent stores to the Home Depot and Lowes stock 2 x 3s and 2 x 4s that you can pick from and get some decent wood for benches. I have never had any problems since my return to live here I 2009. None of this is the same as 50 years ago though. I buy my European redwood pine from a small builders chain with good success but I pay for it. European redwood makes the greatest woodworking workbench – strong, resilient and perfect density.
These days, a great deal of the material at the box stores is close to garbage. I am just theorizing, but between the high demand for wood from the hurricanes that have occurred over the recent decade, plus the housing boom, materials seem scarcer and poorer quality. New home construction around here uses largely pre-fab subassemblies, e.g., trusses, walls, engineered floor joists. I’ve wondered whether much of this is made up with finger-jointed, shorter material. Compare that with my friends 200 year old barn, which has 2-foot wide chestnut planks for its roof sheathing! I suppose that’s not really relevant, but it amazes me and makes me envious. I covet my neighbor’s barn roof. Materials for your bench design should still be obtainable, but it may take some patience to cull the stacks over repeated visits to the box store. I tried a local lumber yard (not box store) and it wasn’t very different.
I’m from Sweden and am a bit (more than a bit acutally) envious of people in the UK and US who seem to have lumber in a lot of varieties available to somewhat reasonable prices.
The European redwood (Pinus Sylvestris) that you talk so warmly about grows in large quantities in Sweden but seems to be mainly exported, sold to industries/professional woodworkers or used as pulp for paper.
What is used mainly for studs and is available in big box stores/lumberyards is Norway spruce (Picea abies) which I find a bit too soft for a workbench. The smaller dimensions like 2×3, 2×4 is normally quite bent/twisted/knotty and have high moisture content – but is serviceable for construction work.
To get better quality I could go for classified lumber in wider boards like 2×8, 2×9 (which are the widest boards/studs available, we can just dream of 1×12 or 2x12s..) and then rip them using a skilsaw or panel saw if you want the work out. Then I can get rid of the pith too.
Using classified timber will usually mean straighter boards, smaller knots and less twist but after ripping all bets are off regarding bends and twists as all lumber is kiln dried.
Trying to get hardwoods is hard (sic!) as a hobbyist unless I want very small dimensions like 15-20 mm thickness in widths from 50-90 mm and lengths of 1-2 m. This is available to horrendous prices in oak and sometimes beech.
Other spieces of hardwood is very hard to find generally but some are available but only to professionals as the stores who sell then only cater to that market and will NOT sell to private persons.
This in a country with a major lumber industry but where, sadly enough, small scale furniture making/hobby woodworking has all but disappeared.
Especially if you live close to the major cities as there is next to no small saw mills closer than 200-300 km away.
I’ve never understood it either. I lived two decades in Texas next to a pecan orchard where they had the native versions and the commercially raised larger ones and they and others sold Pecans at twice the price of the rest of the USA and the world. I came back from Texas last year and bought very good quality pecans (I’m an expert) from Lidl at one third of the price. I sympathise with you. Maybe you could establish some kind of cooperative to buy in larger quantities. I saw this done in Texas where a couple of guilds got together to stock their own wood. It seemed to work just fine
And Paul,
What if pray, you wanted to build your bench and not use a cast iron vise, but planing stops, a crochet hook,…?
How would you imagine a Moxon vise clamped to your bench?
Cheers,
Jeff
No idea, never considered it and always felt that it didn’t come close to a QR Record or Woden. I used one (forced to cos no alternative where I was visiting) for a week when I was teaching elsewhere and was very glad to get home and to not need to use one again. Of course, you get used to anything. I am sure that in their day they were adequate.
I have a 36″ x 5.5″ Moxxon clamped on top of the front apron on Paul’s bench. I use two vertical 24″ clamps to hold it. It is clamped directly to the front apron. It’s very solid. Since my eyes aren’t what they were 50 years back, the Moxxon elevates dovetails to just the right height for cutting. A separate piece of 5.5″ stands free behind the Moxxon and holds the back of the horizontal tail board when marking the pins. It takes about two minutes to set it up or take it down. I bought the hardware on Amazon for $45.
Hi Paul. Like many others I’ve built your bench. I’m slowly getting better at sharpening up my planes and using them to effect. But something I haven’t got to grips with is fettling the blade advance. I have one plane (an old US Stanley) that simply works – I can advance and retract smoothly, just as I see you doing in your videos. But my others, and I’ve a mixture of old Sheffield Stanley, Record and Woden, all seem to be very stiff and tight. I can make them advance or retract, but it takes a bit of heft, and I notice after advancing there’s some residual slack if I then wish to back off slightly. The same again applies in reverse. It’s not that the planes aren’t cleaned and oiled – they’ve been fully stripped and reassembled by me. And I’ve used a couple of them pretty regularly over the last year without them loosening up much. There’s something I’m doing wrong, but I’ve no idea what? I’ve read many many of your articles, but I’m not sure I’ve seen this issue referred to – which makes me worry I’m doing something particularly daft. Any advice on what I should look at? If they all worked as smoothly as my US plane I’d be a happy man.
Alan,
This might be a really stupid suggestion (for which, apologies in advance!), but are you perhaps over-tightening the screw that holds the blade in (that the lever works against)? I have a couple of old stanley planes, both of which are very easy to adjust, but I have a newish wood river no 5 which takes quite a bit of force in comparison. I assumed that stiffer adjustment was specific to the newer, heavier, thicker blade planes, but perhaps not.
Rico.
Thanks Rico. No such thing as a stupid suggestion in my book. I don’t think I’ve over-tightened, but I will give it a try to make sure. I’ve just rewatched Paul’s set up video and the other thought I had was to smooth down the frog face on my diamond plate. I will try that too, to remove the remaining machine pattern in case this is a source of friction. Thanks for the helpful suggestion.
I’ve build that workbench 3 times. One for me and the others for friends. Honestly, the first one I build have some gap in all legs mortises and I didn’t use a tongue and groove joint for the tool well. I end up with an 1/8″ gap on each side. The only downside is that I often loose my rules in the gap. It is a wonderful design, simple to make (and really fun to do!) And very cheap. When I work on it, I don’t cry when I damage it or chew the side with my saw. Thank you for sharing that design and the how to vids are so fun to watch that I still watch them occasionally.
Paul, I agree completely with your advice on making your own workbench. I made mine in early 2020 during the beginning of Covid. That was my jumping in point to hand tool woodworking. I’ve made many nice pieces since, and it’s largely due to the confidence I gained by building my first workbench, planing it flat against an old cherry tree. I’ll never buy one, and the dimensions you recommend are perfect. Cheers!
Making my workbench was a wonderful experience! It founded my growth as an amateur woodworker. Making the workbench was proof (to me) I could make anything from wood.
I had watched Paul’s videos (the garden series and the garage series) and with the pdf printed it was all very clear. I used pine and spruce.
I would love to see on this site or on woodworkingmasterclasses.com an interactive map showing the number of Paul’s workbenches around the world. In a simple form the users could upload their name, one picture of their workbench and their geographical location…maybe the year also. It would be quite beautiful to see the map showing the number of workbenches per state. Then one could zoom in to see the distribution in different cities and then access a city gallery with workbench pictures. Some interesting statistics would come out also.
Hi I have to support Paul and say just do it! I procrastinated for weeks/months before I took the plunge. This project really set me up to understand so much, sharpness of tools and how to achieve this, knife wall technique, measuring, planning, everything in fact, including purchasing tools from EBAY and restoring them as per Paul’s excellent videos. From purchase of first tools to completion of my bench took almost 4 months. The result is not perfect but its absolutely solid has rounded tenons, has a flat surface and a really lovely reconditioned vice, which holds all my work securely. At the age of 64 you are never to old to start, I did think of sending a pic to the Gallery, but thought it would be over shadowed by buy the wonderful pieces on show. I am so proud of my bench and cannot thank Paul and his team enough for giving me the confidence and skills to pursue something I wanted to for many many years. Thanks so much.
I’m with you on this. The best way to learn is to do.
I built mine out of 2x4x10s cut in half, so my bench is a little shy of 5 feet long and the top is only 12 inches wide, plus a 6 inch wide tool well, which I made from scrap wood I had from a construction project. I also used a 10 foot 2×10 for the aprons. I only have 2x4s as the legs, but they have been holding up just fine for the past 5 years, although I plan to upgrade them to 4x4s in the near future.
For tools I used a very bad Harbor Freight plane, which I have since replaced with second hand Stanleys, Harbor Freight chisels that work quite well, and a $5 rusty saw that I cleaned and sharpened up.
About the only thing that cost anything is an old Eclipse vise I was able to find.
Cost with buying cheap tools, wood and hardware, I think ended up around $125 – $150.
I’ve made several projects on this little bench, even my first commissioned project —fortunately it was a rustic farm house style which left plenty of room for errors.
Building the bench taught me a lot about joinery and has been indispensable as I improve my skills.
Very glad I just jumped in and built it. Its not pretty or big, but it’s easy to move around in the small space I’ve been using (about 5 feet deep and 8 feet long) and is more than adequate to plane, chisel and hammer on.
I’ve got the legs for my workbench made, housing dadoes in the aprons, but it has been sat for months waiting for me to find a tool to groove the wellbore. Now I’ve read this I’m just going to push on and get the thing finished, and won’t bother with the extra tools I’m missing! Thanks Paul, I was enjoying it until I stopped!
I also didn’t have a effective tool for grooves that long when I built my bench, so I used battens instead. They are simple lengths of ~1×2 scrap screwed to the apron on one side and under the benchtop on the other. I didn’t glue the battens in case I ever acquired the proper tools and wanted to replace the wellboard according to Paul’s design. It’s solid and I’ve had no issues (other than some slight gaps at the edges of the well that aren’t noticed unless you look for them). I also want to add the drawer eventually, so I planned the length and placement of the battens to not interfere with that.
I’ve since gotten a #45 from ebay, and around the same time my 9-year-old asked if she could have a bench of her own. So I built a kid-sized version of Paul’s design (except the dimensions are 32″x18″ and ~30″ high), complete with grooves and rebated wellboard using the #45. Obviously her bench has no gaps in the well. 🙂
Point being, if a #45 is out of reach, battens have been working perfectly for me. In this case the well is mostly held by the leg frames, and the battens just prevent sagging.
We spent the winter (2021 / 2022) in Arizona and I spent a lot of time thinking about how I needed to redo my workshop. Too much time to think and idle hands … I thought about it all the way back home to BC .. then I headed out to pick up some lumber. The worst time to do this. Not a usable 2×4 to be found. Ended up with 2×6’s that weren’t bad. Ripped them in half and used those to make a bench top .. used a fair number of 5/8 dowels to key the pieces while I set them in place and clamped them. All worked out just fine.
3/4” plywood? Not a sheet to be found, so a combination of 5/8 and 3/4 from various scrap piles in my horde – just enough …. But I ended up with a new bench – #3 – exactly what I wanted and well used so far. The new Paint/Stain cabinet is as ye unbuilt – waiting to see decent plywood in the store – it’s all fun. The bench is just a tool. And it works like a charm so thanks for a good design.
I would not recommend deciding to largely rebuild your workshop in the midst of a global supply crunch when decent lumber is almost impossible to find.
I made the bench straight from the lumber shelves at the local Lowes. Cheapest stuff they had. I has been a spectacular success. After three years it has absolutely zero racking or movement. Dead solid. 38″ high.
All the 2x4s had those rounded edges, so I used cinder blocks in the driveway to support the top while I sat on it and planed…and planed…and planed. Neighbors gathered to watch, comment, and offer free advice. Lots of head shaking. “Isn’t there some kind of machine to do that?” Planed both sides. The laminated top hasn’t changed shape at all in the wild Florida humidity changes.
I confess I did not think the wedged dadoes would work. Intellectually I knew they would because so many others had built it. But something deep down just doubted it. Yes, irrational. When I set the first wedge in the first dado, all doubts fell away. It’s an amazing joint. I wish I could find somewhere else to use it.
An abandoned 100-year-old vise from Abernathy of Chicago was rescued from an old shop in the path of urban renewal, and completes the bench. The vise looks like it was used every one of those 100 years. It works perfectly.
I employed a friend to replank my deck. There was material left over so he made some garden furniture. One of items was a sun lounger which lasted until my wife tripped over it. I made its legs longer, and with some sturdy bracing it became a solid bench with a particle board top. I keep seeing plans for new benches from Paul and others and thinking about a new bench. But I’ve modified it with drawers, storage space and it houses my dust filter, so it will have to plod on. Maybe I’ll treat it to a new top though.
Every time I put something into my vice, I am grateful for you teaching us *not* to make the vise jaws flush to the apron like all the modern gurus say to do. Regarding vises, the other day I worked at a friend’s bench. She has one of the fancy, old pattern maker’s vises with jaws that adjust to out of parallel, swing around, etc. I’m sure they are great for oddball shapes, but I gave up trying to mortise in that vise. I could not get the mortise jig to stay tight up against the work because of the vise. I put that bit of work aside and did it when I got home where I had my Record style vise. Your approach works.
I have a lot to thank the Covid lockdowns for. Firstly I cleared out my garage and rediscovered a wooden trunk filled with old rusty hand tools that once belonged to my Great Grandfather – he was an apprentice boiler maker in the late 1890s. Secondly, I used your YouTube videos and brought all of the tools back into working condition. I noticed your workbench videos built using the same sort of hand tools I now possessed. This was a thing I needed and the design was practical, straight forward and rugged; importantly it was a much cheaper alternative to buying one. I purchased the wood and then made excuses not to start the job. As a DIYer I only ever bodged jobs. Making a workbench was in another league all together. I found the whole process of task avoidance intriguing. After a few days I ‘bit the bullet’ and started by making my first ever knife wall followed by a saw cut using my Great Grandfather’s tenon saw ( a strangely emotional experience – my hand matching the patina of wear made by his hand on the handle). In two weeks or so I had made the bench – the sturdiest one I had ever used. Over the next month or so I customised it with drawers, shelves and tool rack. This project has given me a real sense of achievement. I have learned so much about different aspects of woodworking and about myself! I have made a good number of dovetail boxes and caddies and improved my skill level at the same time. I have designed and built tool boxes and a small chest of drawers, which gave me the confidence to go further. I have designed and made a pair of bi-fold farm gates for one of my daughters. For the other daughter a French window surround comprising of 2 cupboards and shelving units plus a connecting bridging unit. Added to this I am passing on woodworking skills to a neighbour’s boy, who needs a physical outlet. All of this has only been achievable because your videos gave me the courage to give it a go – thank you Paul, keep up the good work.
I’m glad you always encourage starting cos I need this! Cos what can you do if you don’t start!
I have been following Paul now for quite a while and as a result have slowly built up a lovely collection of restored old tools.
Desperate to make this bench but lack the nerve to get started. As one of the commentators above said, purchasing the wood is the intimidating bit – I don’t have any timber yards local to where I am in the UK and aside from the CLS, the wood I see at Wickes or Homebase isn’t available (as far as I can see) in the dimensions that Paul has suggested.
I get particularly stuck on finding wood that’s dimensionally correct and would work for the legs and the apron.
I realise that it would be best to just rip off the bandaid and try something even if it fails but I am one of those people who prefers to learn by replicating.
I suppose the reality is that until I make this bench (which I hope will be a gateway to other projects), I don’t have the self confidence to go “off-plan”.
Has anyone successfully made this bench from the dimensional wood available from Wickes or Travis Perkins?
If so, would you be willing to share the dimensions you purchased?
Yes, I have. Several of them. The bench top can be made from their 2 x 3 studs. The legs from two 2x4s glued face to face. The aprons from 2x4s edge glued three of them.
Thanks Paul! I honestly had not thought of that.
I’ll order and finally crack on this weekend
Joe, Forget who’s going to see it when it’s done. Even forget planing the round corners to square if you want to. As long as the faces meet pretty well the bench will be functional. I regularly visit both Travis Perkins and HomeBase, B&Q just to check the quality of what they have and if when I am there I find a really good batch I buy twenty or so studs for stock. No, I am not going to build stud walls or another stick-frame house in my life. I just use it for a variety of things. My greenhouse door was made from six studs as was my shed door. I think just relaxing and challenging your fears and doubts is 98% of achievement. We all fight those demons. Here’s a poem I wrote that might help:
Comfort zones are like cages
Dwelling on the reality of comfort zone
It’s the monkey kept caged
all its life when its master one
day forgot to turn the key and
the door to new freedom fell open.
The monkey went out, found the key
and returned to the cage, closed the
door, put her hand through the bars
and locked herself back in.
Hand tools open the door to freedoms
yet unfound that challenge those
who search deeply to become
skilfully able and capable of more
than they ever dreamed possible.
You were created to make and to make
well what can be made, cook food
and grow the essentials to face life
as a maker, a grower and a cook.
Step out of the cage and throw away
the key of comfort that has become
your locked-down, locked-in self.
Become your future.
The world is waiting for you!
Hello Paul,
I have a few questions regarding your workbench design.
1) If one doesn’t not plan on moving their workbench to a different area, would you recommend glueing the leg assembly and wedge to the aprons? What about using lag screws on the front apron?
2) Would you recommend making the top wider and having a smaller tool well or possibly making the top the full width between the two aprons?
Thanks in advance!
Gabriel, Perhaps you have not read much on the design and the whys and wherefores–it’s a conclusive design in and of itself and spans a 57-year history in my life. What evolved is a design I feel keeps it simple without being simplistic. From this workbench, I made museum pieces for the White House Cabinet Room alongside every kind of furniture you can imagine. I have made 12-foot long, five-bar field gates, all the doors and cabinets for my homes and the homes of others and for the past 11 years many a dozen pieces for woodworkingmasterclasses.com. All in all, I have made thousands of pieces from this workbench. In other words, I can’t fix what ain’t wrong!
So, 1) Whether you move the bench or not is nothing to do with the design. The atmosphere exchanges moisture levels minute by minute. Fixing the apron immoveable with glue and screws will work but most likely the aprons will split somewhere along the road. The design allows for movement but changing it by glueing defies the main feature of allowing aprons to move according to atmospheric changes. Glueing in the wedges defies the design too as the wedges are intended to self-tighten with the movement of the bench by planing and sawing. In this way, the bench is always rock solid. You can also tighten the wedges by hand should something come loose between the legs and apron/bench top. Lag screws will be fine but allow a little looseness around the holes so that movement is allowed. The art of joinery is to work with your wood and not to try to rigidly control it.
2)As I said, the bench evolved to what is for me a perfect bench. Most people advocate a wide top as you say and you would think there would be a good reason for that yet I have never seen any single good reason for what to me is very much a waste of space. Tools are always, always in the way, roll around and create clutter where it is least needed. I need no more than 12-14 inches along the long axis of the bench top with 95% of work being carried out along a two-foot length of the one corner in and around the vise. The tool well is the greatest advantage to the whole workbench. All my tools are easily accessible right where I need them close to hand. Ask yourself this. Why have I made many a few dozen workbenches to the same or similar specifications and design and not made a single one of the changes you suggest might be some kind of improvement? The answer, of course, is that they would negate every advantage of the design. I have trained 6,500 students one on one at benches made to this design and no one ever complained about functionality. That will further reinforce why this bench is so very good. Thanks for the questions and the opportunity to answer this for any other who might read it.
Hi Paul,
I appreciate your response and details as to why you designed it as it is. I’m new to woodworking and hand tool woodworking. I’m also an engineer and early on I learned to ask questions if I didn’t understand. I wasn’t sure if glue would have an adverse effect on the construction. The other question I asked about was width for the top and that was purely based on what I’ve seen on YouTube. You see guys with massive hand tool workbenches that were all made with machines. I’ve also watched your masterclass videos and have never seen you limited by the width of the workbench top.
Thanks again, I’m always learning something new on this blog and your videos!
My experience with big workbenches is that they just get filled with the extraneous stuff. if you need a large surface it is almost always for assembling big frames and carcasses and that is best done on two trestles or saw horses and a sheet of plywood. It saves a lot of space which according to the statistics we have gathered from my audience is always at a premium so `i too work in the same space they do to make sure I work in the similar conditions they do.
To anyone considering a workbench I’d also say just get on with it. I recycled redwood posts from an old conservatory dad made an the cls timbers from b&q were fine. It’s up to anyone to decide for themselves but for me softwood is the way to go. I’m not particularly fond of the resistance and sounds of copping on a hardwood top.
If you want to deliberate then do so over the vise. Poor quality vise’s will probably bring regret. The tool well is vital for me – since I didnt fix tool containers on the opposite apron I can clamp long pieces there for planing if needed. I do have a planing stop at my vise end (2 holes for broom handle pegs). I also have long piece I clamp into my tool well which sticks up 5 mm. Both these mean I can plane n pick up and plane etc.
I also have a couple of holes in my apron for pegs – no power saws so this helps with supporting my resawing.
I’m happy now I’ve had it for long enough not to care about the dings n cuts in it.
The design works and pondering too many whatifs is only stealing time at the bench from you.
If youbthen find you want something different then this time you have a bench to build it at. 😉