My Workbenches
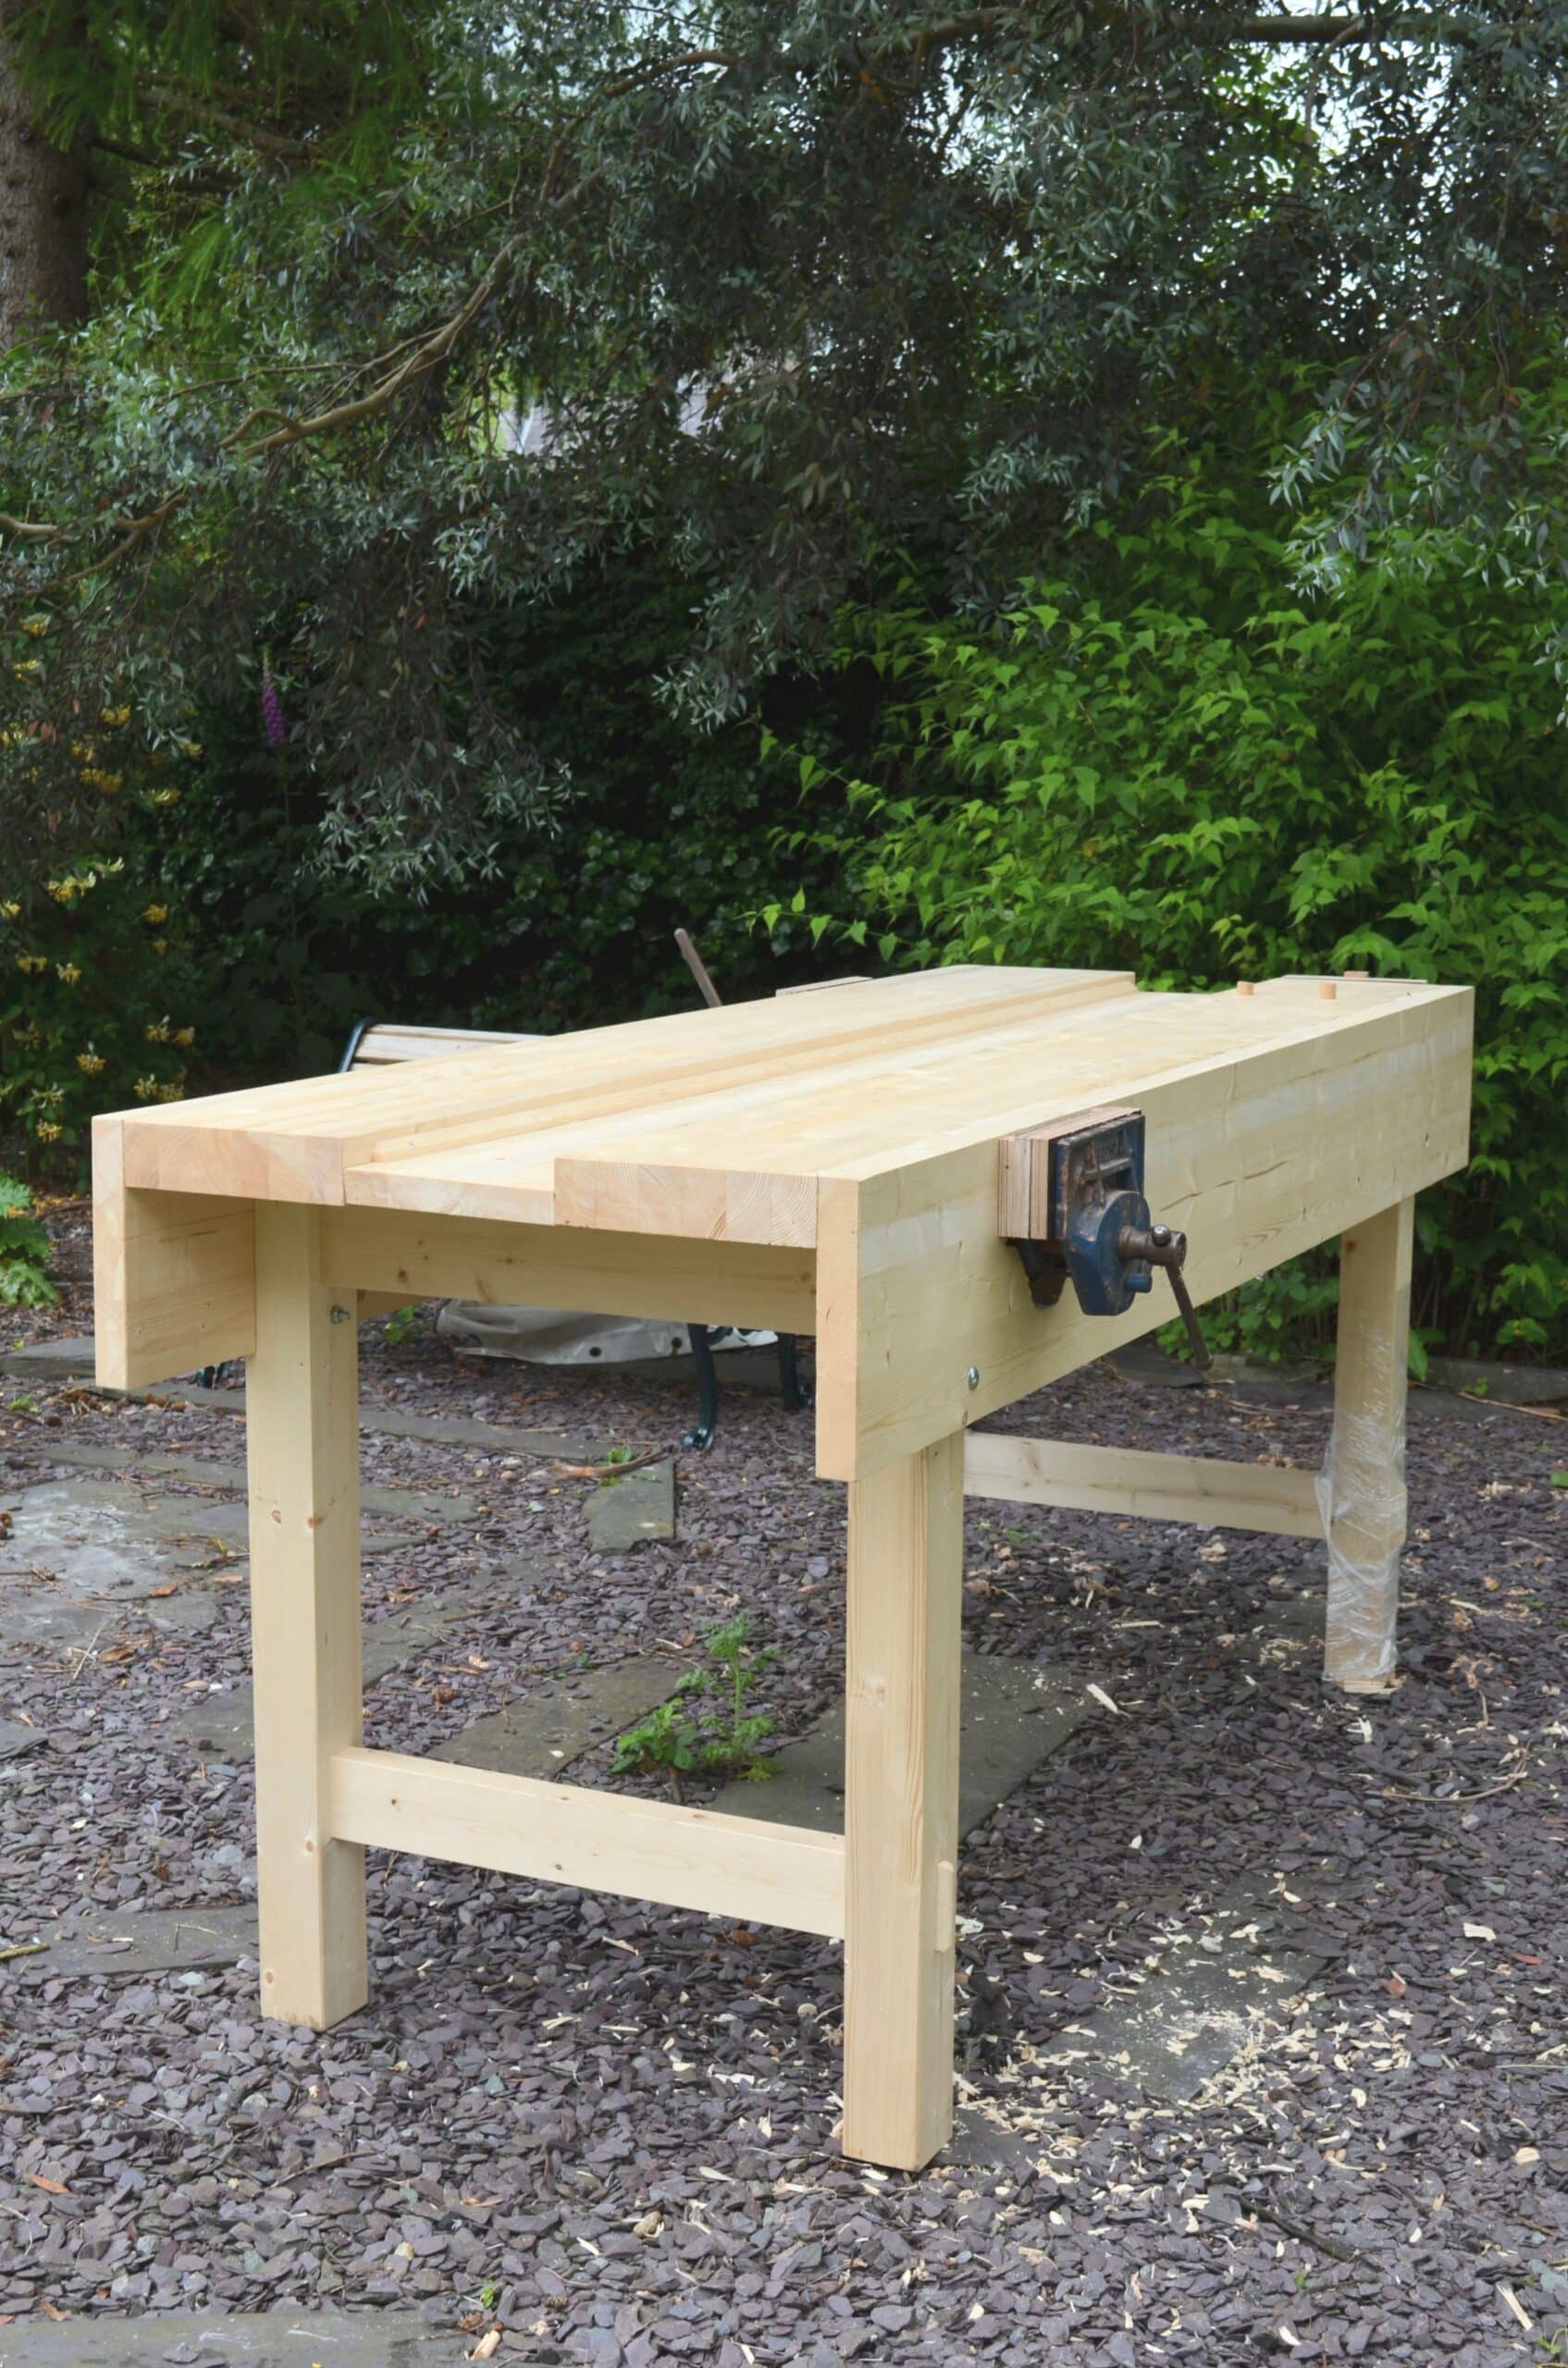
The first workbench I ever made was back in 1967. Aproned benches were the commonest of workbenches for a variety of reasons, not the least of which were simplicity, stability, strength and functionality. In a good day’s work, two or three for some, you have a quick-release (QR) vise installed in your just-finished workbench and you’re in business. By the time 2012 came along I had made many a dozen workbenches using my own upgraded version refined by using the same bench style for almost six decades. I may be biased but having worked at many different types of workbenches through the decades, this one is the best and for many good reasons. I have made them from everything from construction-grade pine, secondhand reclaimed wood, and every kind of common pine to hard maple, oak and others. They’ve ranged in size from 5-foot-long versions to two-man ten-footers with a vise at opposite ends and opposite sides. I refuse to fix what just ain’t broke’. Anyone can make it!
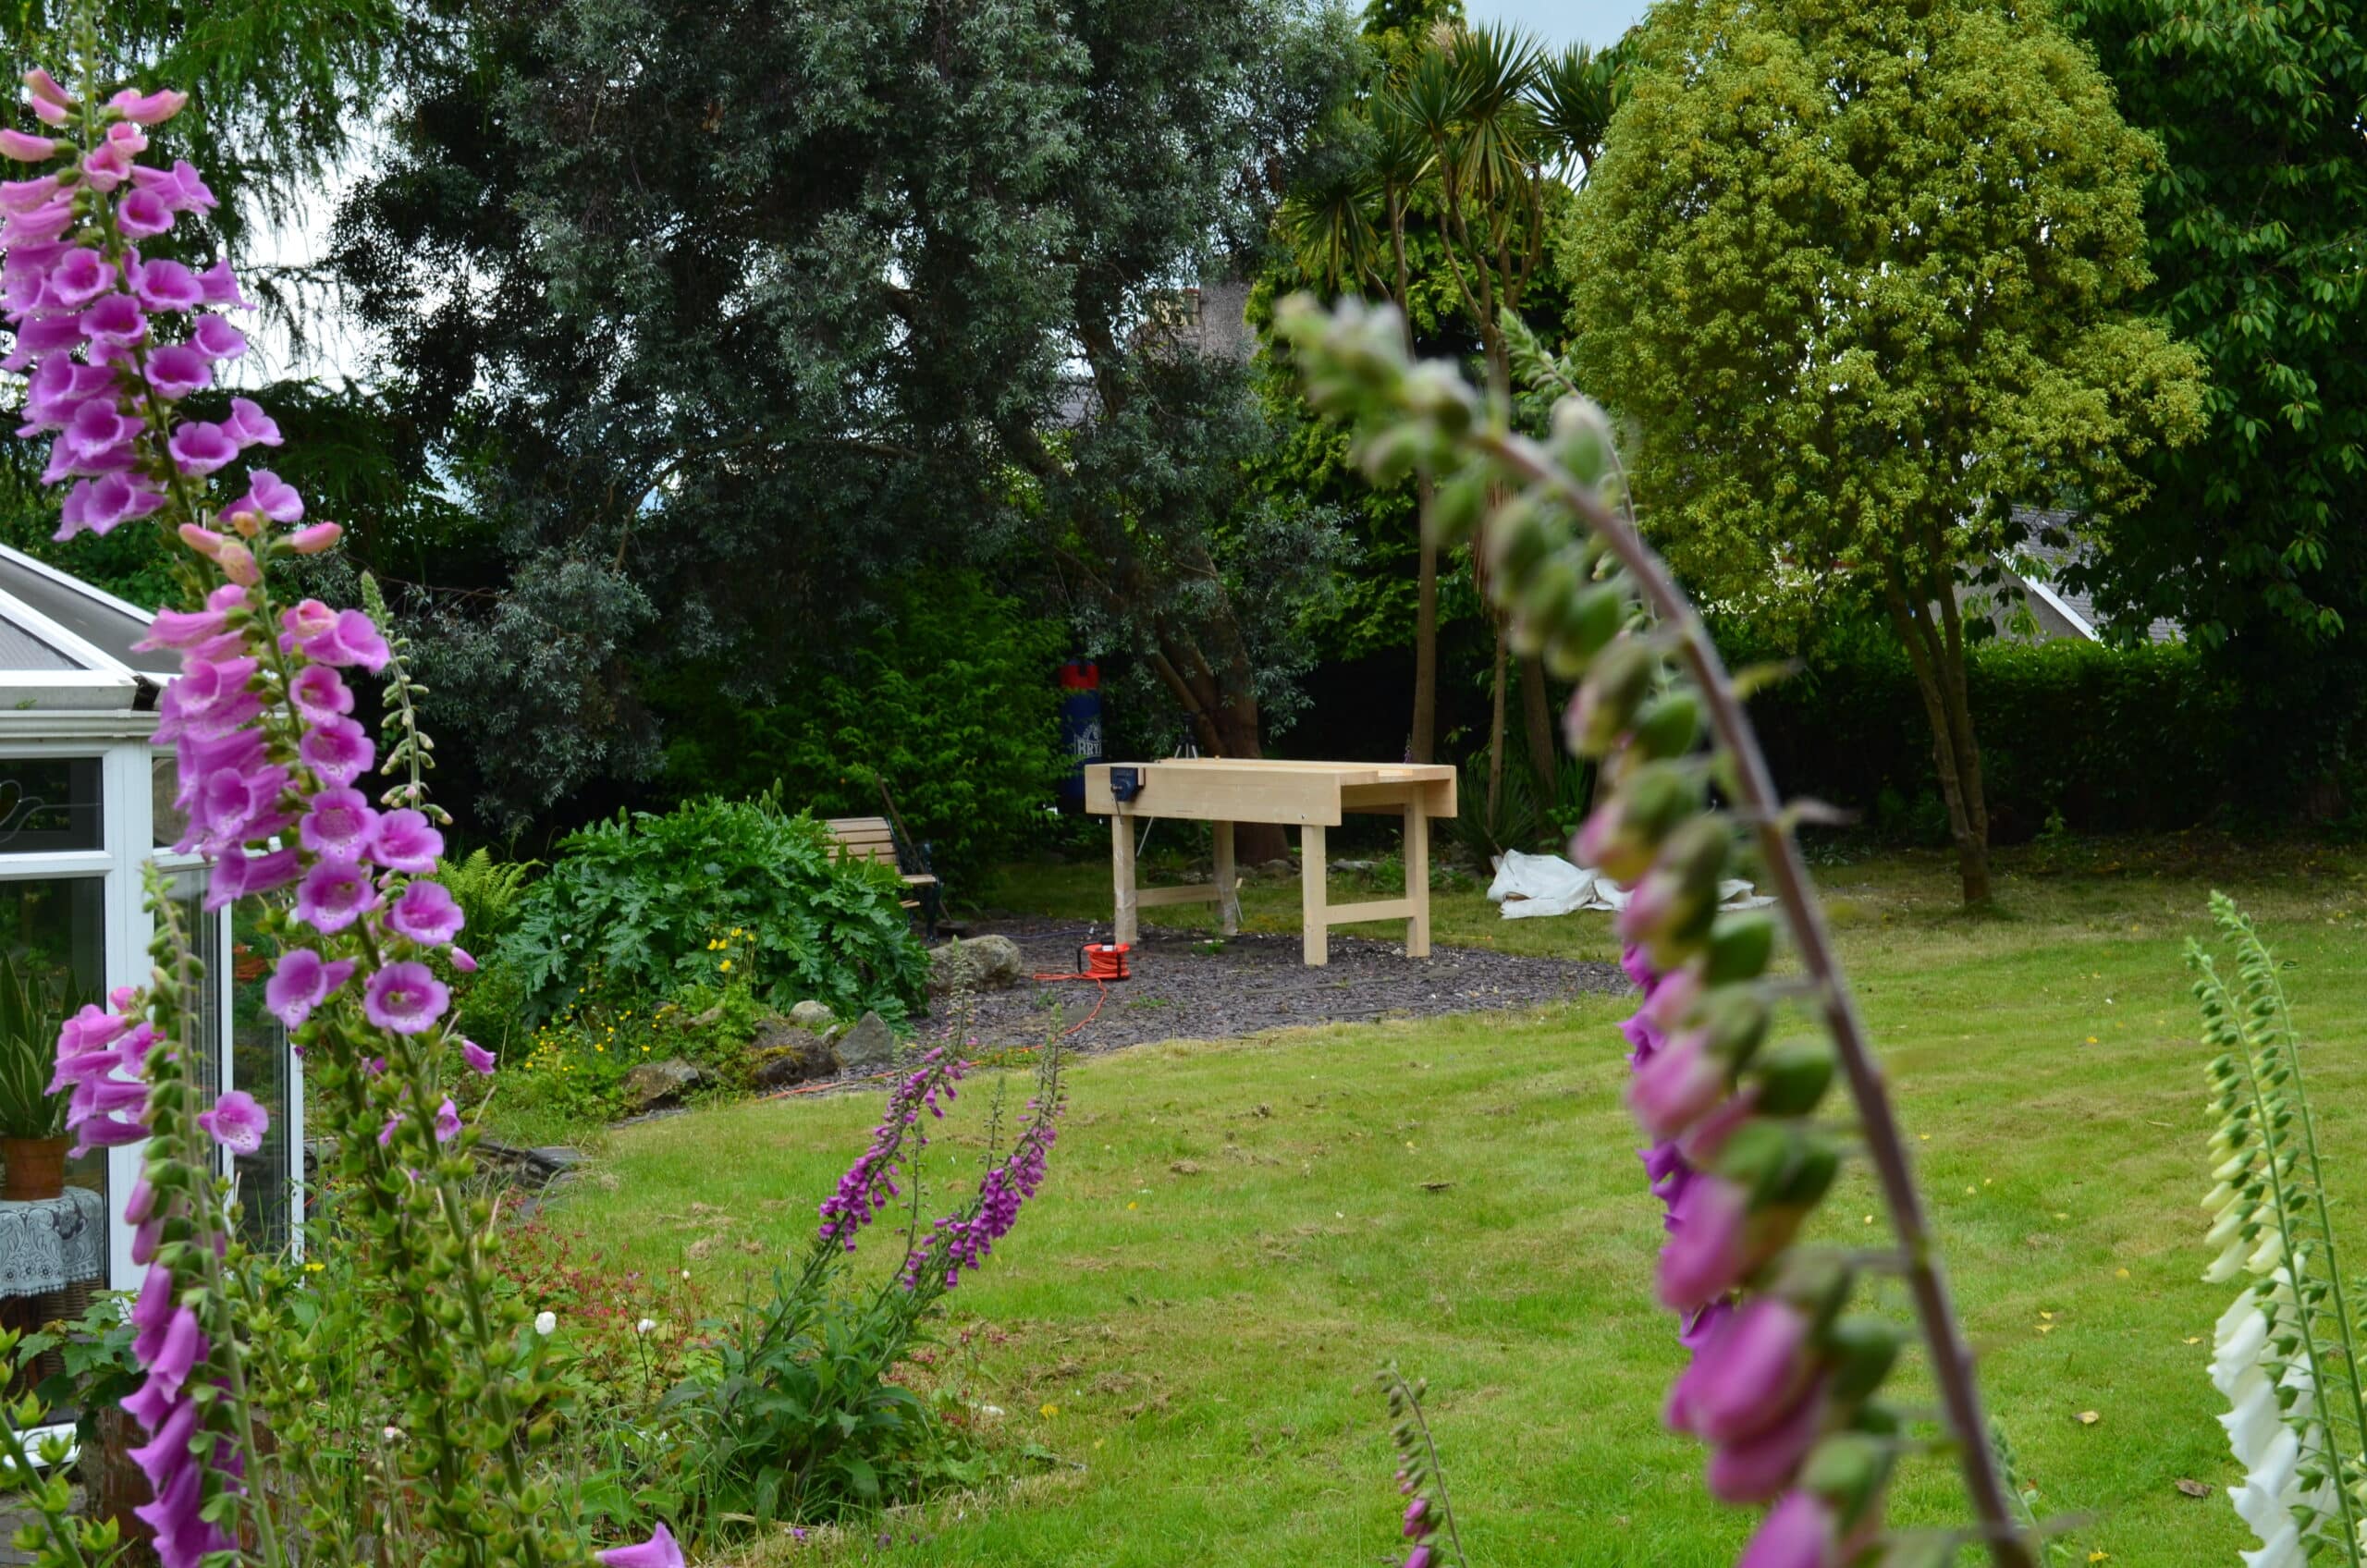
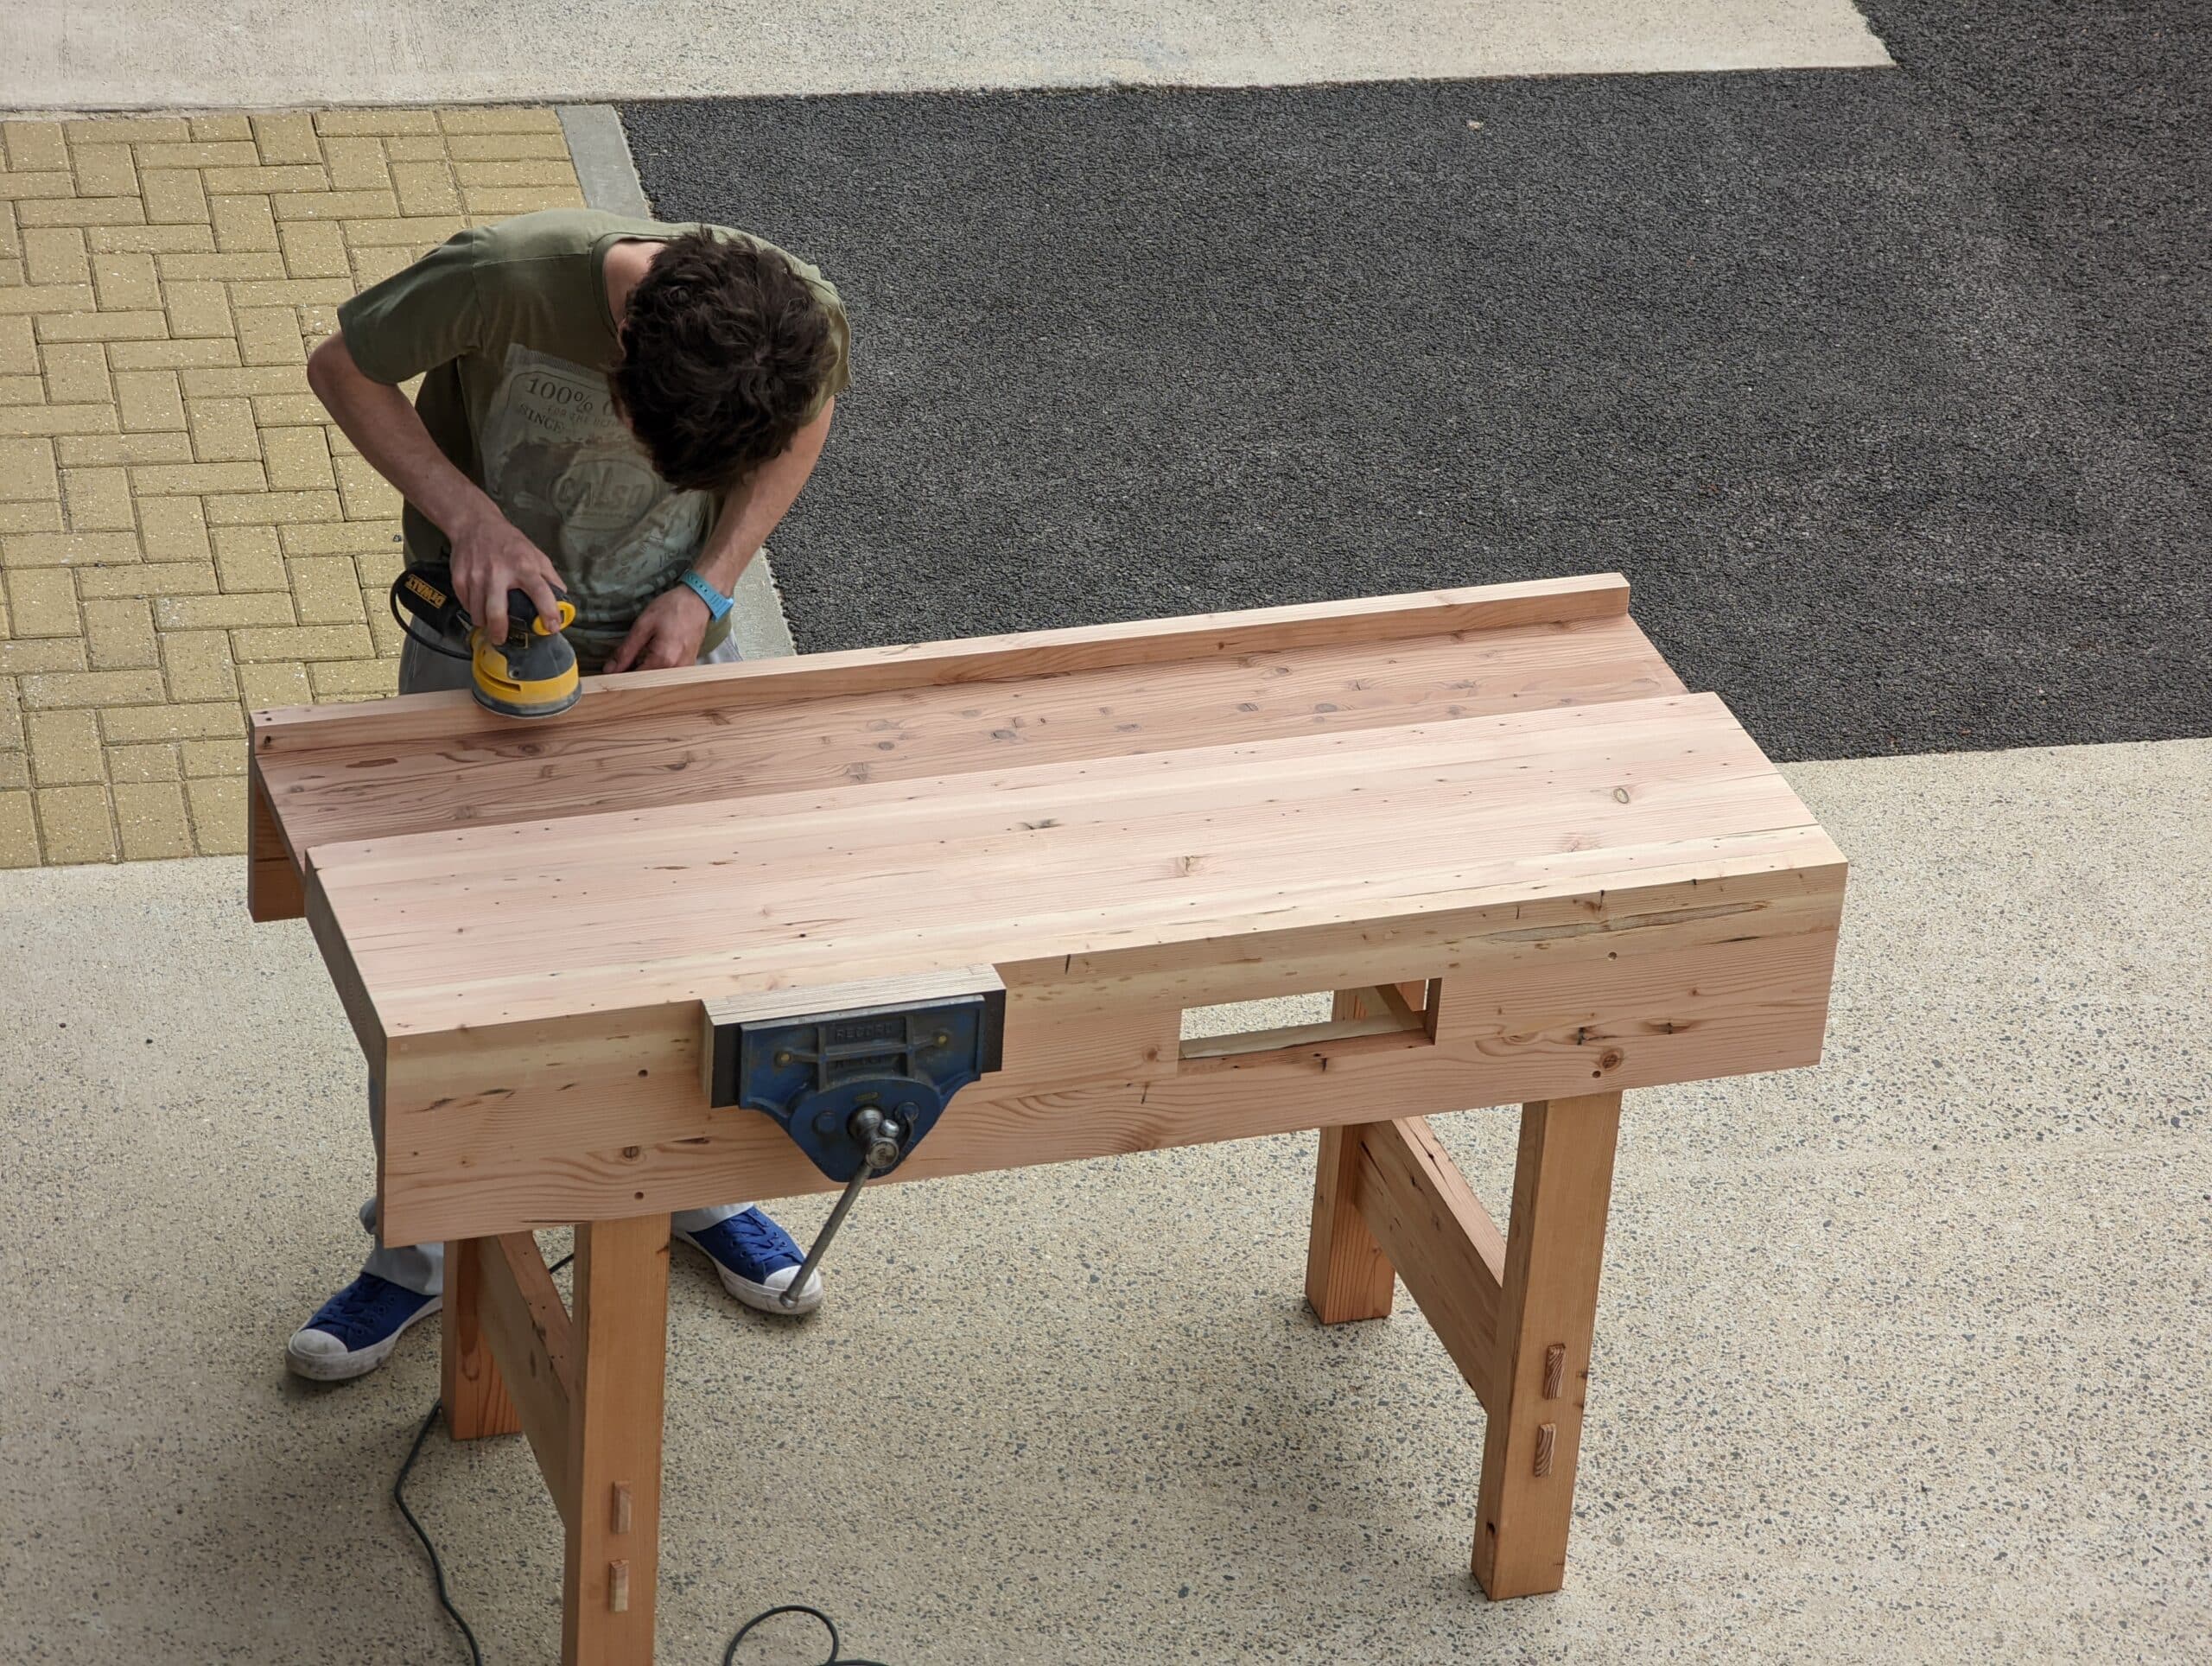
It was in 2012, following a dispute with the publishers of my first book that Joseph made a suggestion. “Why don’t you do what you’ve always done and show people the real you and the way you sometimes found yourself doing real woodworking in less than ideal working environments and often on your hands and knees or on a collapsable workstation? When someone needs a workbench it’s often because they don’t own one or have access to one–neither do they have a workshop to make one in. Why don’t you build a workbench in the back garden (yard USA) and we will film the whole event right there to teach and train others that they too can do the same?” Here is the link to episode one if you didn’t catch it.
In June 2012 we did it. Back then I had a really fine workshop, twelve workbenches, full sets of hand tools to each bench. All setup and ready for the usual students in my newly set-up school in Penrhyn Castle on the coast of north Wales, but that would not have been real enough. We could have made it there on the benches but we wanted the realities others might face. We made an eleven-part series with the first episode taking in a million viewers and subsequent episodes around half a million each. It was the best thing we ever did. Who knows how many felt the inspiration to build their own first workbench from a few sticks of construction stud material?

Was the bench in any way inferior to the solid beech behemoths many now advocate as the only way to go? In no way. Fact is 95% of the wood we work in furniture making is under a metre long with most of that being around two feet or so long ready for making frames. My present workbench is around 5’6″ long and two feet deep. When it’s bigger it just gets crowded out with stuff. My bench is action-packed with everything I need close to hand. I can make anything from it.

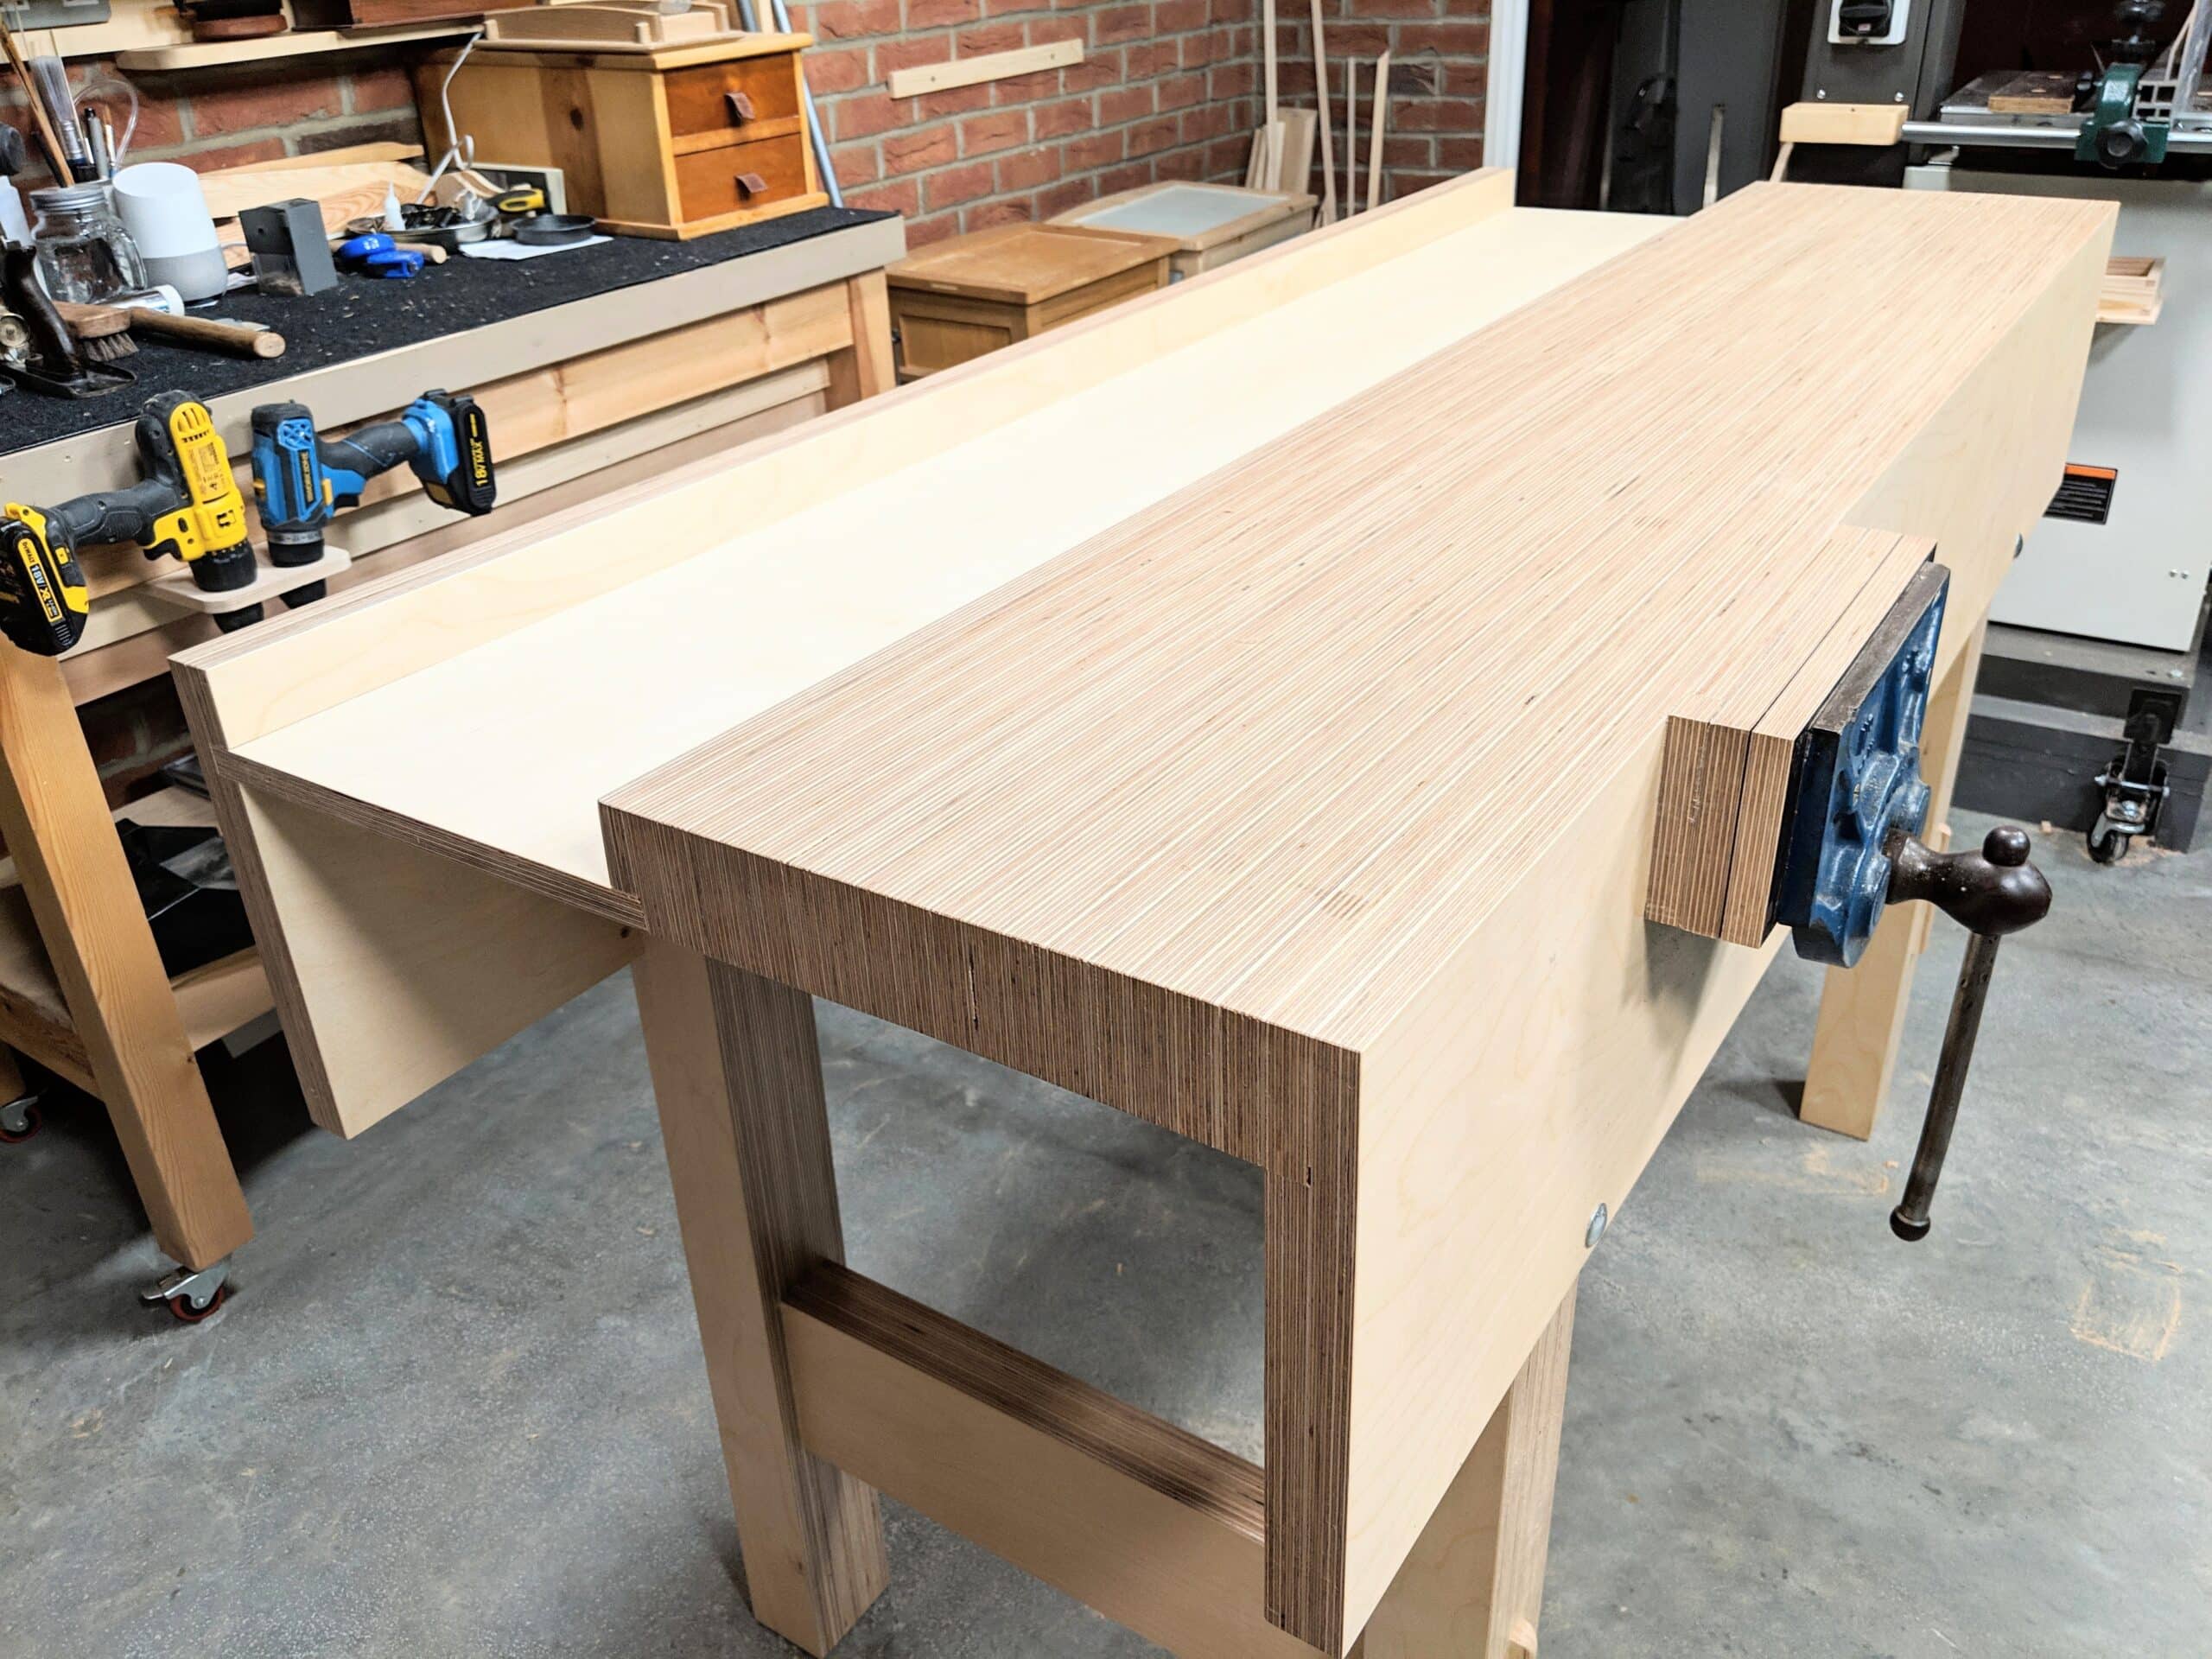
Back then I had written my first book and filmed the series with a professional team. It wasn’t fun at all. Events like that can be a takeover and that is what almost happened, sad to say. Since then I have recovered every element of my decades of work and own all of my intellectual property. Today, I work with an amazing team who strive always to make my dreams come true. Since 2012, when we went it alone and put the new team together, it has been inspiring for me to enjoy all the young people I still work with and have worked with through the last eleven years. We have filmed additional bench-build videos to offer variations and some improvements. My innovative plywood workbench made from better-grade 15-ply birch plywood is in full-time use these days. I like it. Do I like it more than my spruce construction stud version? No, not really. In fact, because I added a large catchall drawer underneath the aprons, I made it too heavy to move without lots of help yet I like the bench to be rearrangeable for bigger pieces in my compact garage workspace.

Hard even now for me to imagine renting part of this castle for my first UK-based workshop and teaching school. 60 acres of beautiful grounds and woodlands surrounded the space. It was a good starting point for my restructuring my life and work in the UK.
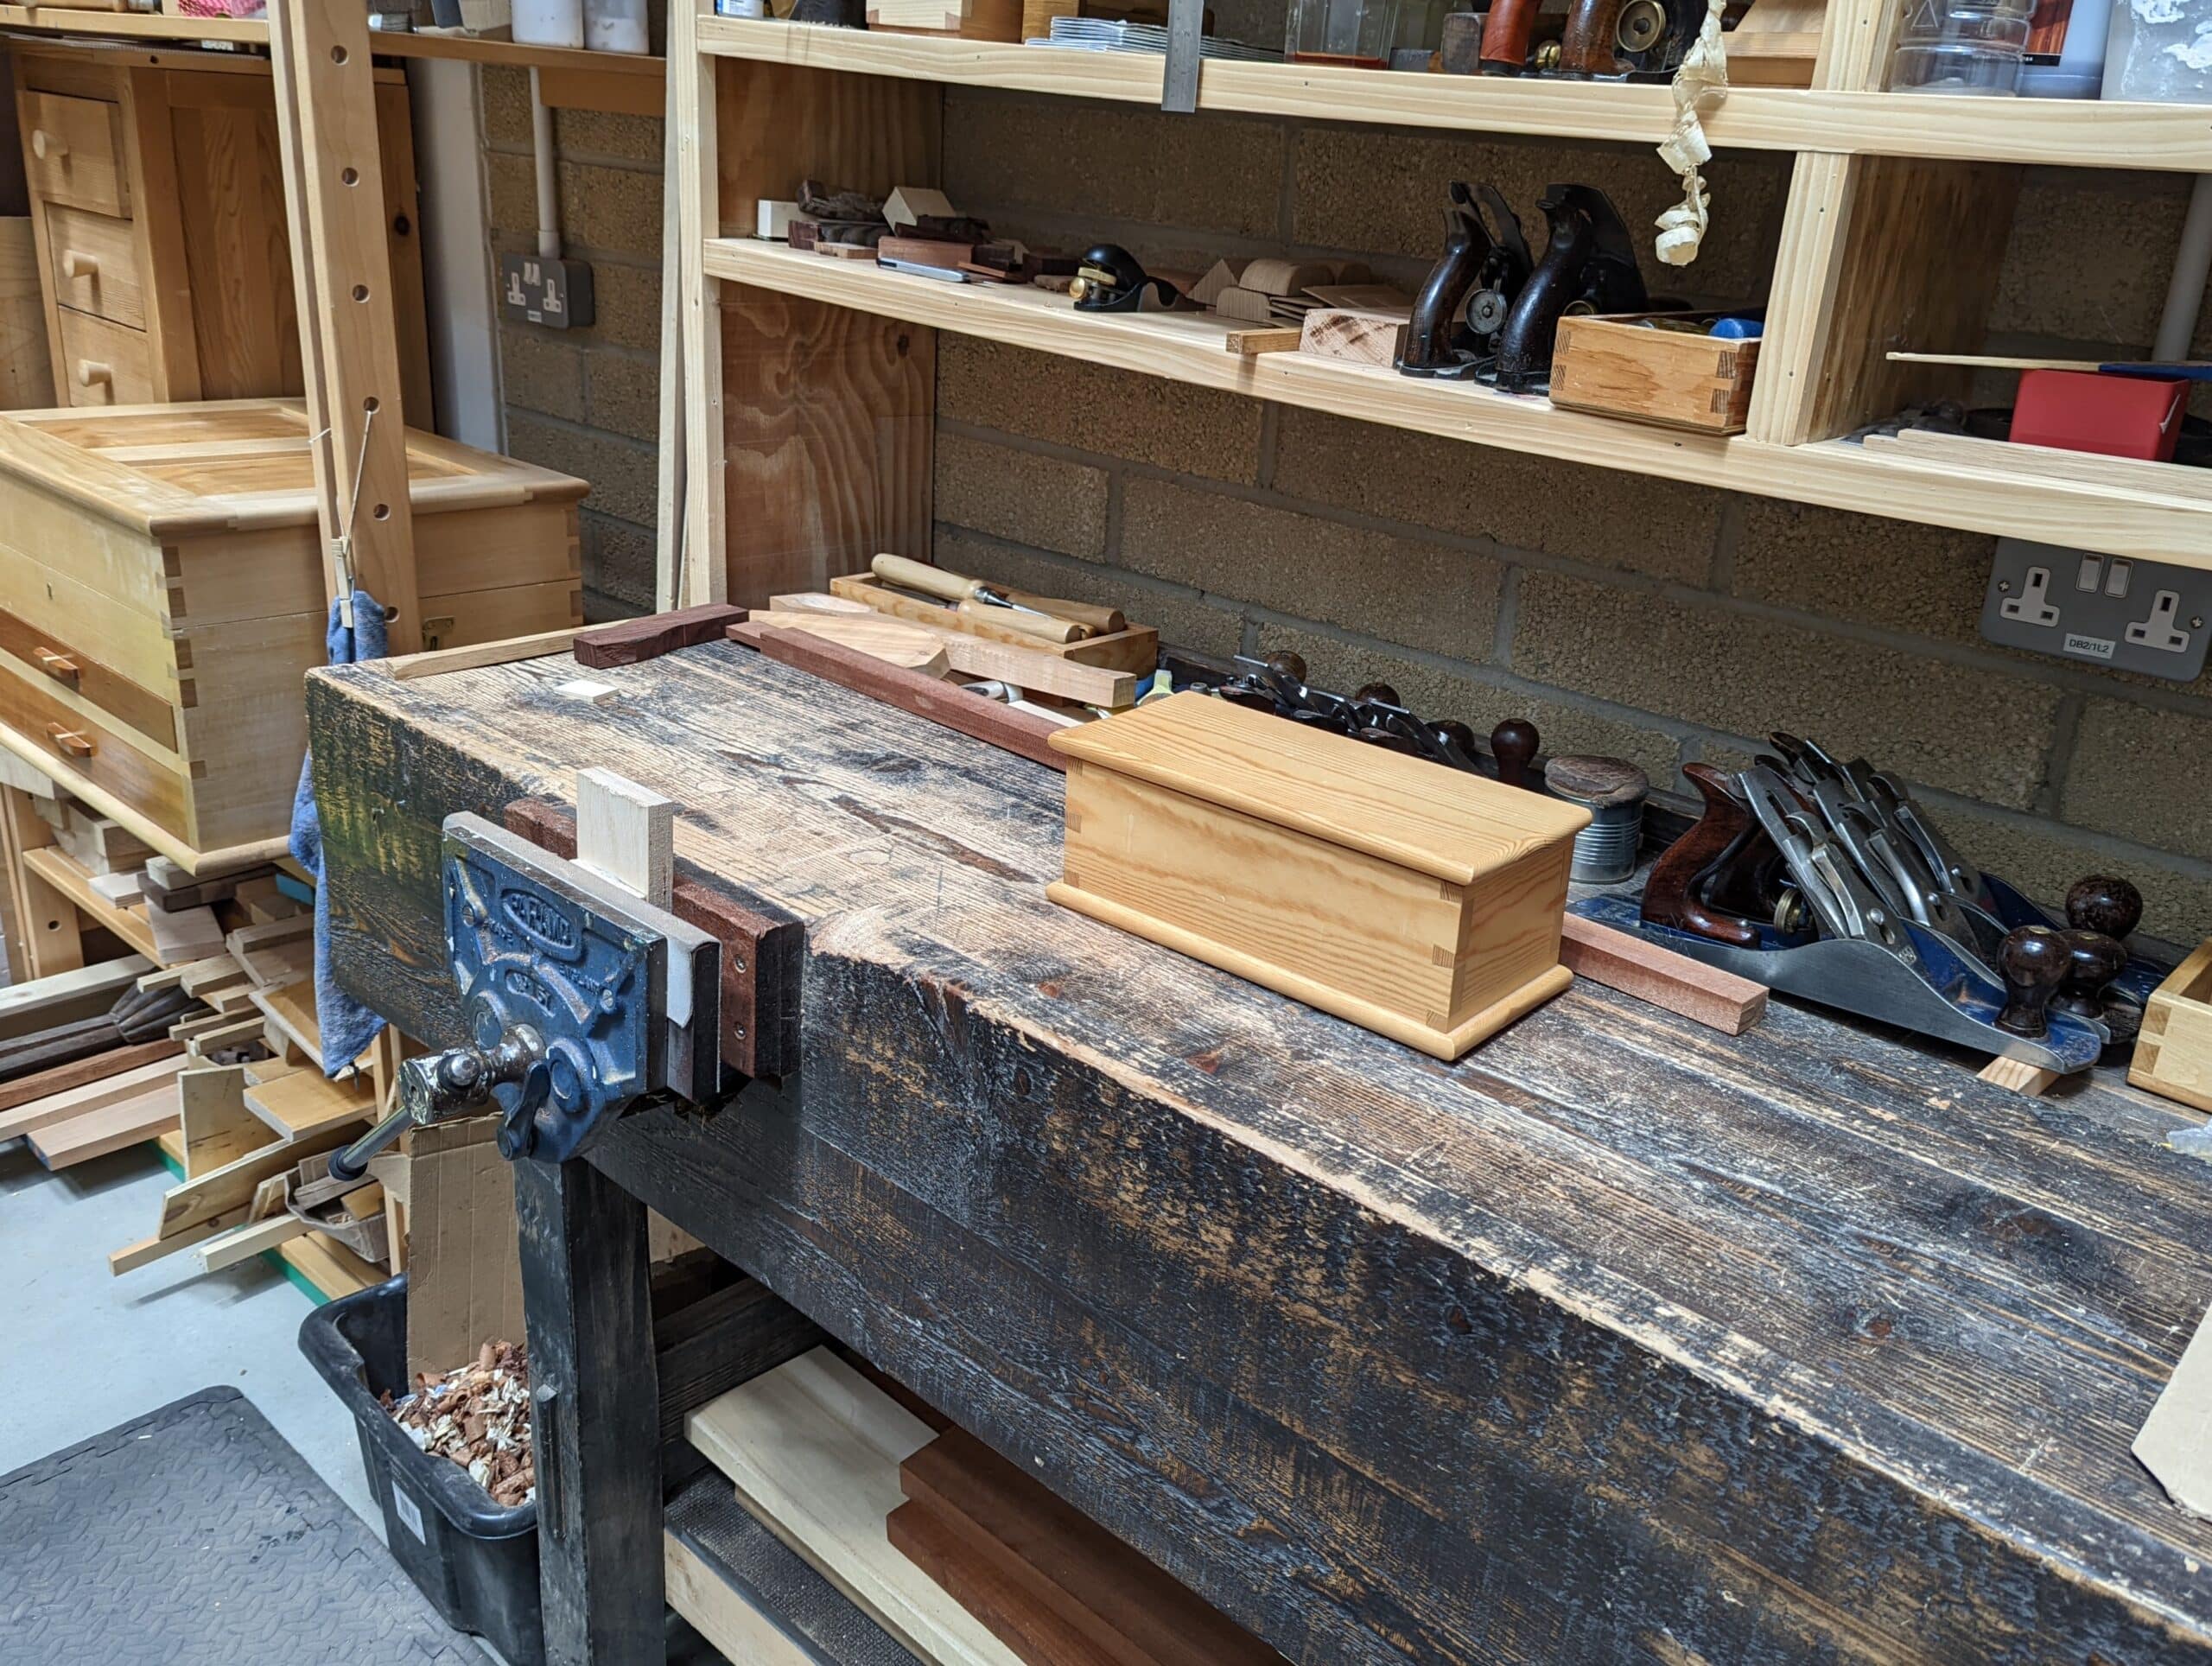
This is Hannah’s workspace and she works at a bench that’s 7 years old I made it from secondhand and recycled, upcycled wood. It follows my usual pattern of homemade workbenches but I left the wood rough to give it the old appearance when I applied the antiquing look.
John made this workbench from the roof timbers removed from the roof of my house when we restructured the roof for a third-floor bedroom. He added a couple of features like the twin tenons but otherwise, it’s intrinsically the same.
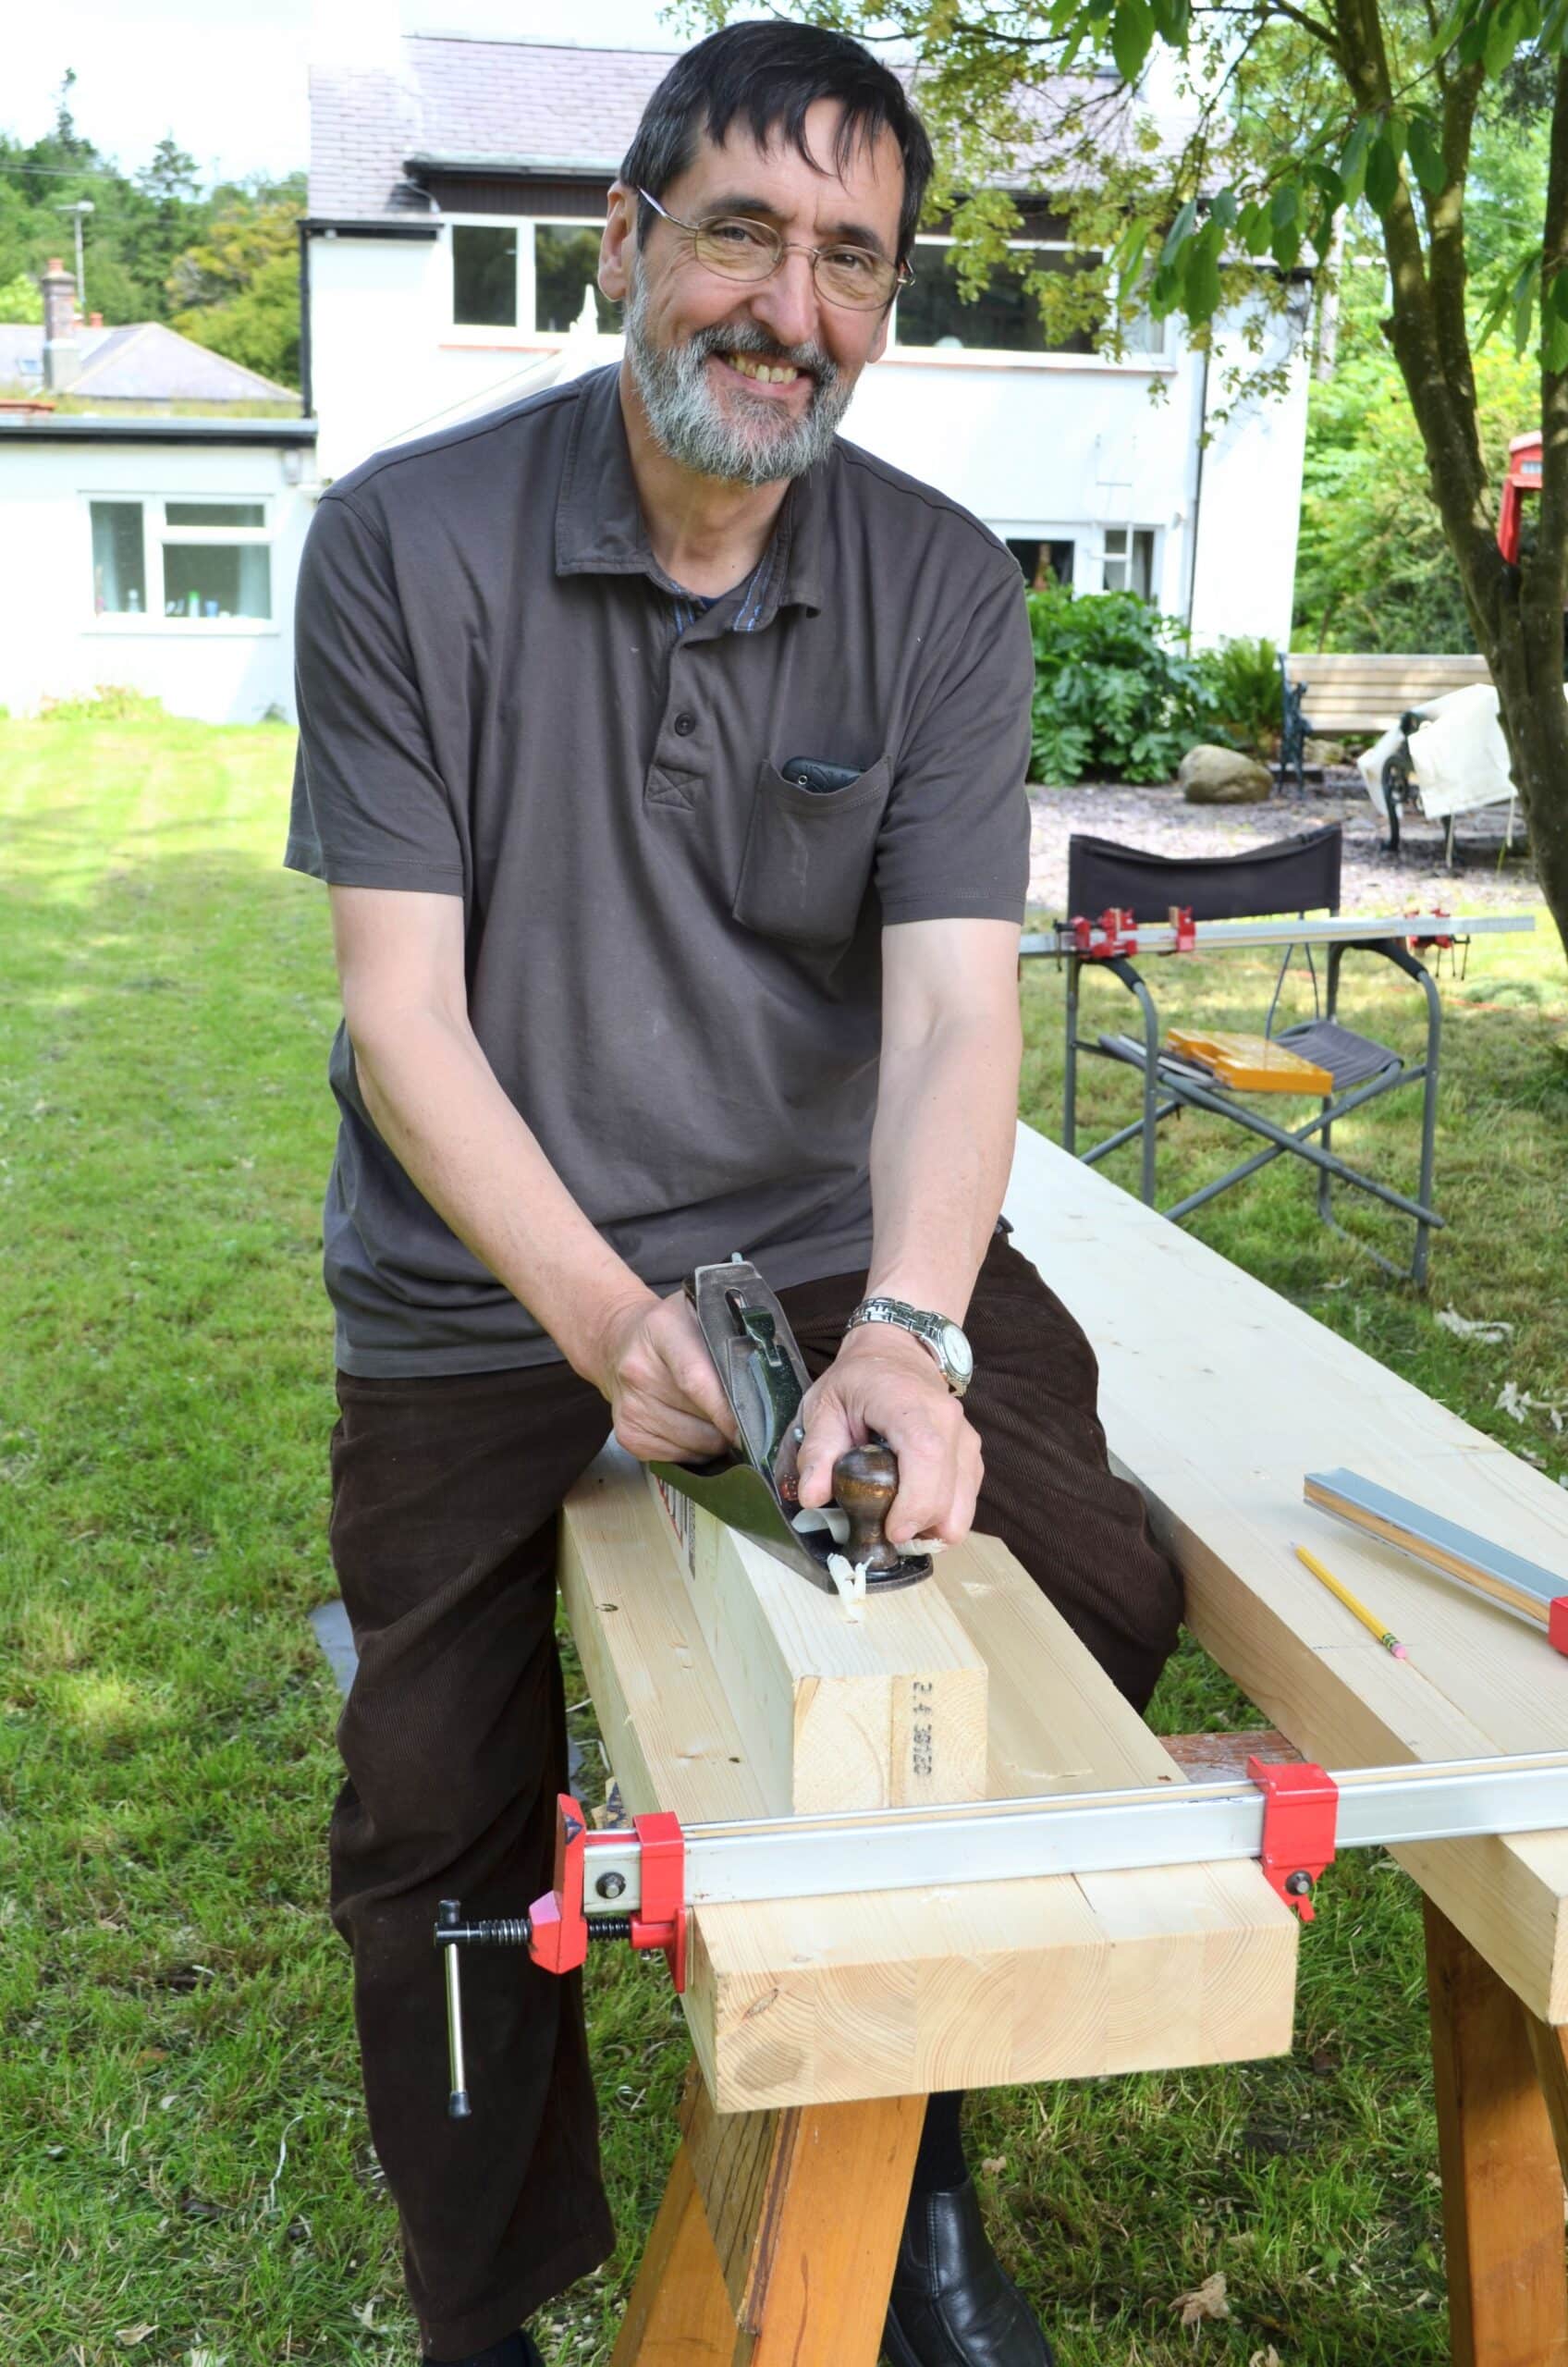
Seeing Paul planing wood on a shaky little table with a tree as planing stop was inspiring. “I could do that”.
Although I procrastinated a little more (should I spent money on a workbench while I am not sure I would really like woodworking?). I finally made one with free recycled wood (some month before the new solid wood workbench video serie).
My only regret: having waited so long.
This workbench is easy to make, even by a newbie.
It can be knocked down if needed (I made mine in the backyard and moved it piece by piece to my workspace in the attic).
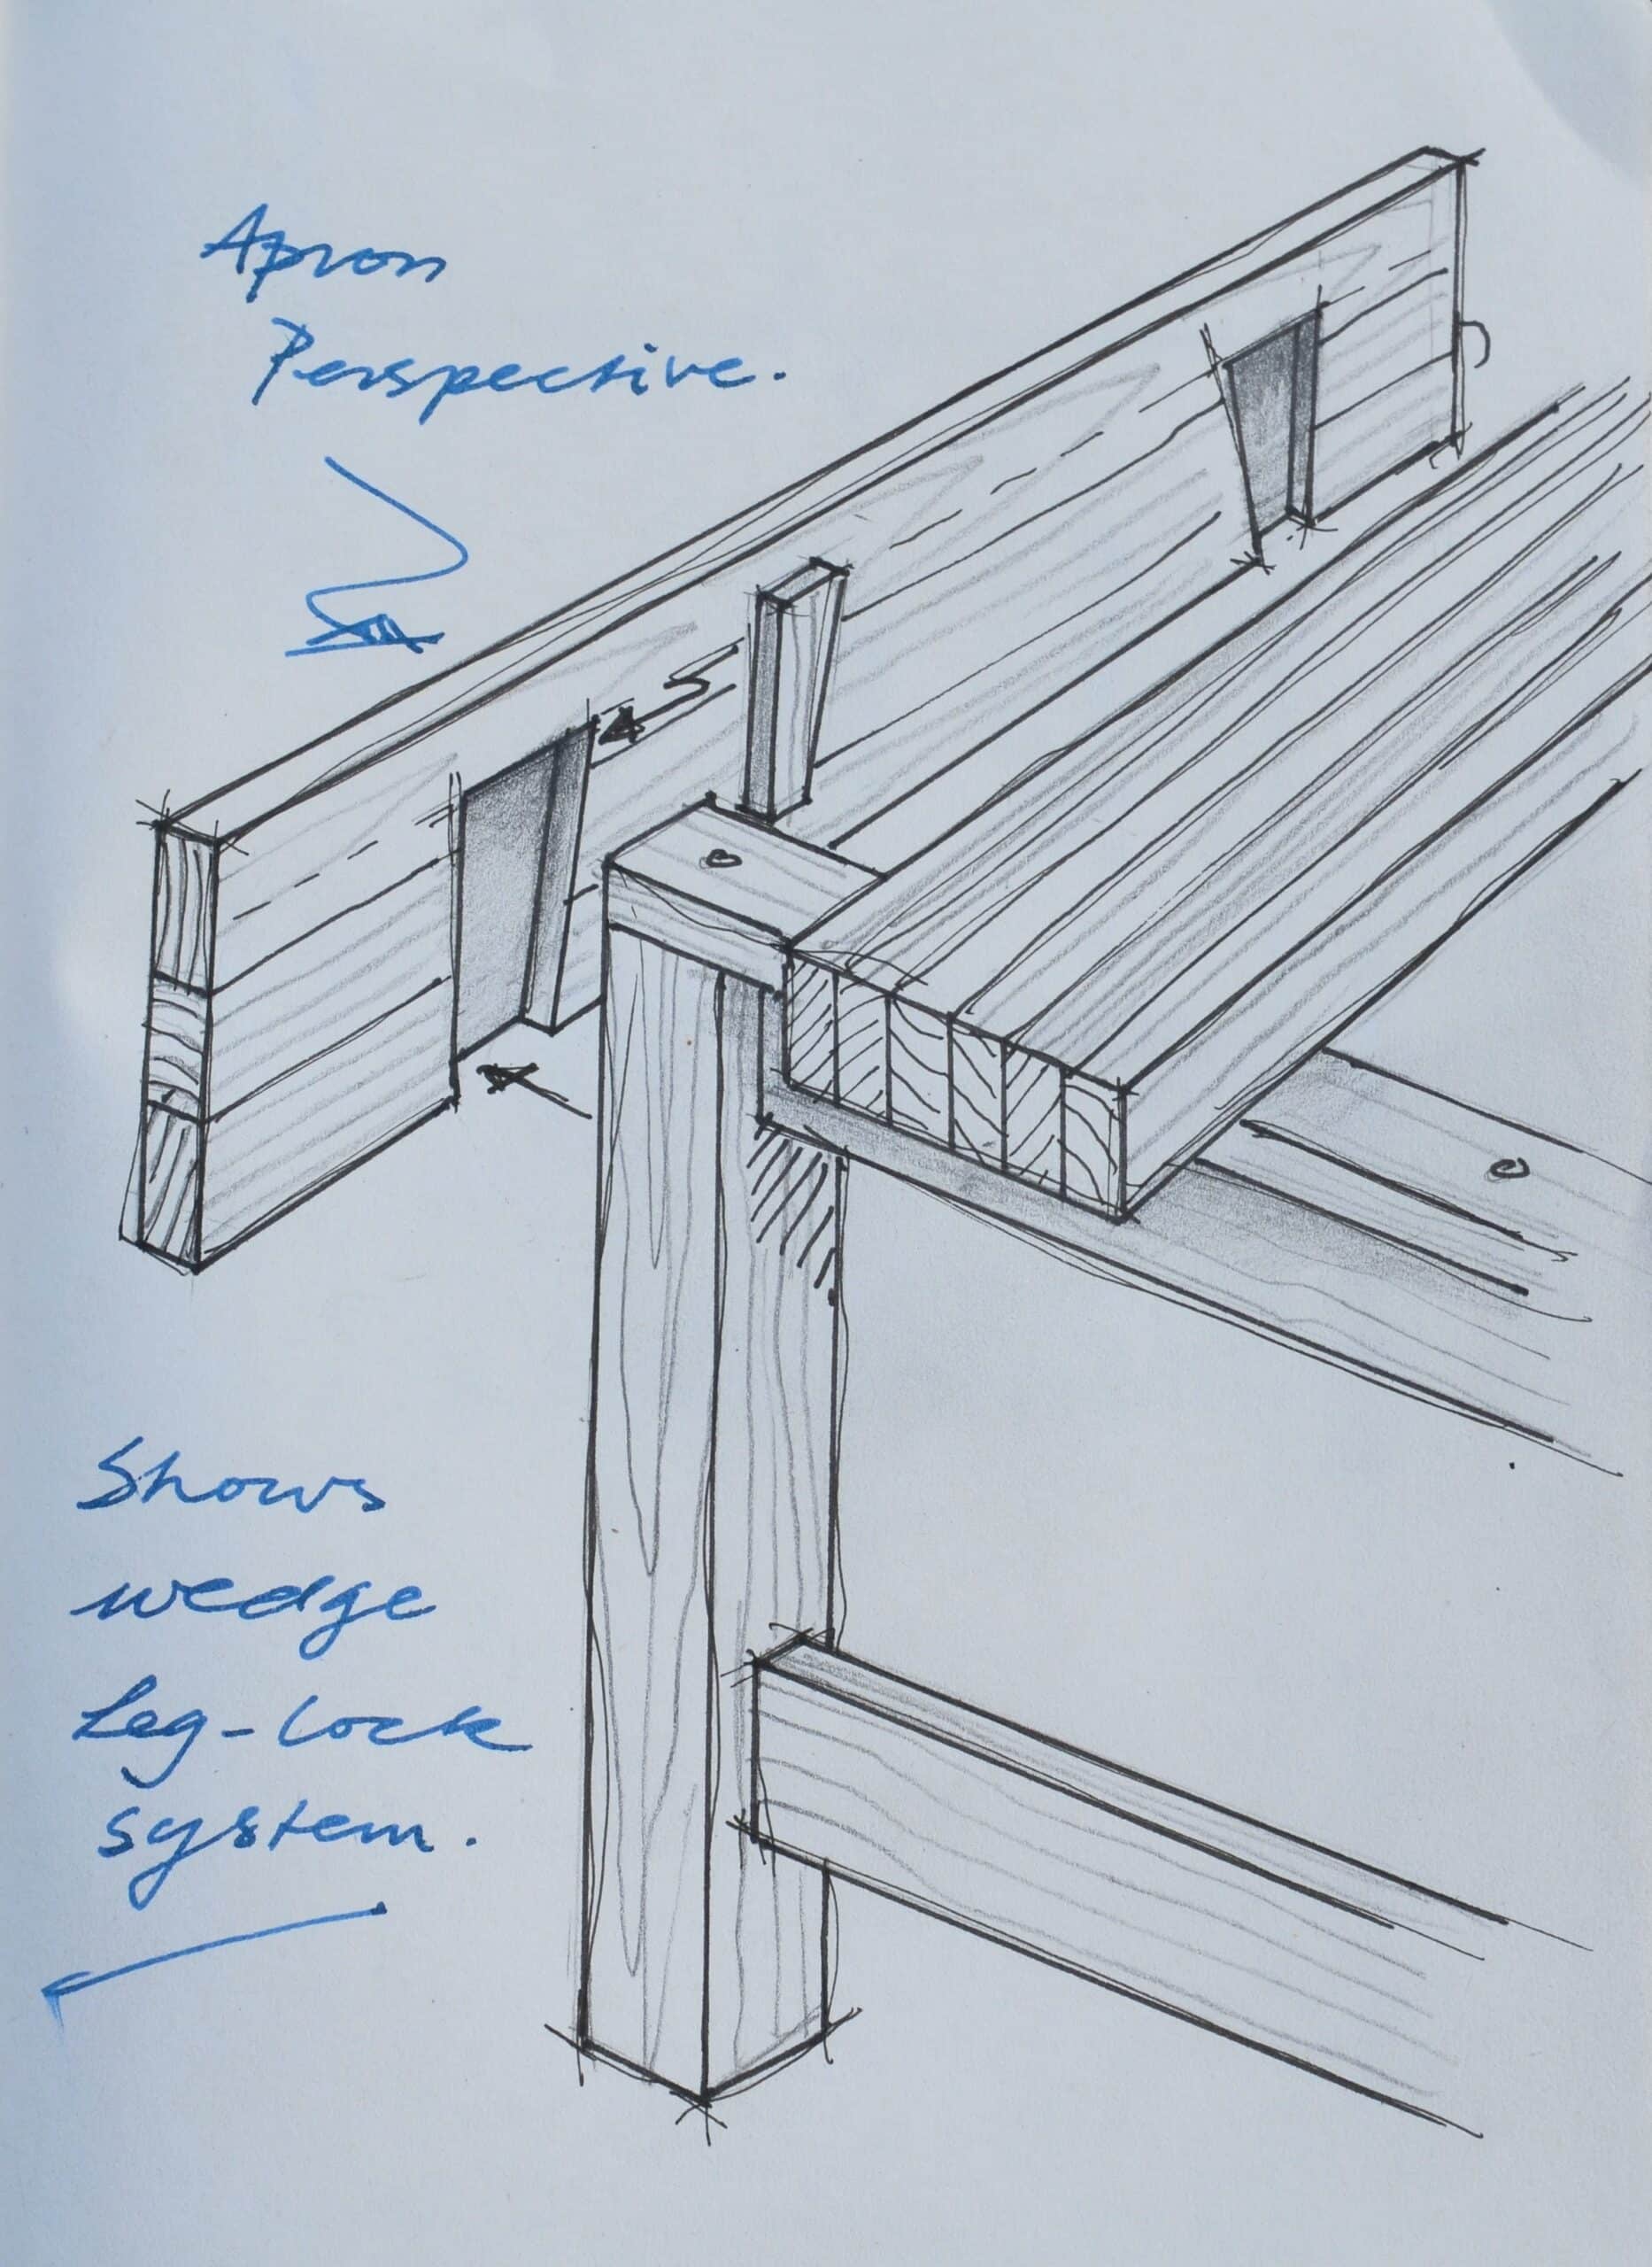
I like the wedges usage which ensure it will remain rock solid even if the legs were to shrink.
Trying to mimic Paul’s way to work, means working mostly in the vise.
So, I rarely need to work on the workbench-top itself (mainly while making knifewalls).
The 1.5 m X 0.60 m (tool well included) is big enough.
I am happy with the recommended height (I am 1.7 m high).
I’m scared I’ll wreck a lot of wood Sylvain! I have the wood at the ready, but fear keeps me back! And I can’t understand the well part well enough to really grasp how to measure and cut and all that. Its a shame because I *REALLY* want to make that bench.
As I said: my only regret is having waited so long before doing it.
It is a workbench, not a nice piece of furniture.
Paul made one intentionally rougher looking. See the workbench used by Hannah. (Though, I am sure the joinery is perfect).
Mine is not very good looking (partly due to the use of recycled wood), but rock solid and fully functional.
Of course with the added experience it would look (much) better; but I have no intention to make a new one for myself.
(Later, I made a Moravian one for the son [because I thought he would want to knock it down when not in use]).
Thank you for the thoughtful reply, Sylvain. It was very kind.
I did make a workbench on the older design…it was somewhat functional but not what you’d call functional. Or level. And the mortises were nasty. Lots of torn out wood where I smashed the chisels through like a caveman. I had to shim the legs to steady it and stop the wobble. For a first attempt it was something you could chop stuff on and not care if it looked dinged up and gross. I got frustrated with my plane not planing level and leaving step down marks and decided the faster way to flatness rather than planing forever was to glue on boards of hardwood on the top of the douglas fir benchtop. I reasoned the harder wood would resist dings better. The glue I used was too much and seeped out of every crack. Then I couldn’t get the super hard modern glue off the wood without gouging it all to heck. I ran out of hardwood boards so there are step downs where the boards don’t fully cover the benchtop on that bench.
I’m a Common Woodworking level learner. Following instructions is extremely difficult business for me.
One of the best bits of advice I ever received was “hasten slowly”, otherwise expressed as “go slow to go fast”. I heard it first from a rowing coach, but I’ve found it applicable to just about everything.
Patience is a key factor, but it does require practice.
“I’m scared I’ll wreck a lot of wood … , but fear keeps me back! Yes, as it does most of us, Sylvain. Look at it this way, you’ll never learn how to swim if you stay out of the water. The only way to lear how to do it is to “Do It”. Otherwise you’ll spend the rest of your life wondering if you … ? (Just like playing the guitar, if I had never tried to learn, I never would have done it for a living.)
Hi Jeff, make a start on it what have you got to loose ? watch the video again as the well is pretty well explained. I made the legs first and then glued up the top and planed flat. all was made from reclaimed joists and rafters, once you plane them smooth they could just as well be brand new but you know that it’s probably 100 years old. I finished mine with several coats of Danish Oil from a local supplier that sells screw fixings. that was 5 years ago and it hasn’t let me down yet. so a bit of thought as to height and size draw a design on paper and just get on with it, you will be surprised at your own ability. Best of Luck and enjoy the experience.
Julian,
Great points, I feel you are probably wiser and much better at this stuff than I am. I have a Yankee disability in that I always think I know more than I do and am somehow smarter than the average bear. But I can’t perform like I imagine I will. In fact, it is the opposite. I try to follow instructions and then get frustrated that I don’t know what I’m doing and say eff it and try creative solutions. Well, that works in improv comedy, not so much in woodworking…or cooking…or taxes.
As I told Sylvain above, I didn’t know how to fix my plane from digging into the wood and leaving these 1/8 inch deep gouges…and I had make a PS Scrub plan to scrub off the rough spots, so I took matters into my own hands and glued on hardwood boards reasoning, the machine left a flat surface on the boards and it would be flat if I glued them to the benchtop. Comedy of errors ensued.
Ya, I got a bench, but it really sucked and we moved. So now I’m working a jury rigged plywood thing in my shop with an eclipse vise and at least I have a place to tinker.
I’ll probably get some cheap Southern Yellow Pine and try again, maybe build a little model version maybe 1/10 the size and see if I can figure out in my ADHD brain how to do it.
Sorry Paul: don’t mean to make this a forum instead of a blog!
Hi Jeff
It really is not difficult to do. It seems to me you lack confidence and are afraid to mess up and you probably will make mistakes but you have to start somewhere. Do you think that as brilliant and skilled as Paul is that he does not make mistakes I urge you to think again as no artisan is perfect, in my humble opinion it is how you recover. So you screw up here and there big deal, figure it out fix it or try again and improve. At the end of the day unless you point out the mistakes to others only you will see them.
Go to it and show us the results and enjoy the experience.
Jeff,
You have to grab your chance and go for it. A year from now you will have a workbench and look back at not having one. I think you are caught in “analysis paralysis”.
Paul,
Could you do an article on beginning projects. You are the perfect example because I can’t imagine a beginning project and your planning for a move from staid old England to the Wild West of Texas. Making a workbench, a toolbox, or a chair are like and will follow most of the same planning steps.
What is a knifewall?
Hello Jay, The knifewall is a cross-grain knife cut for cross-grain cutting. Using the square or straightedge to guide a thin cut, we then chisel into the cut to create a step down for subsequent cuts with a saw, chisel or even the knife: hence we have created a wall made with a knife so knifewall has become the accepted descriptive term. The step-down guarantees accuracy for shoulderlines to all joinery and has been used in traditional joinery worldwide for centuries but never really had a name until I named it. The fact is, it was called a knife mark but that rarely actively described what was made.
Yup, that video series completely changed lanes for my woodworking. Away from machines towards hand tools. I still use machines for some tasks (the band saw is indispensable for me!), but hand tools are my preferred method. The bench I built works great, although I will probably add a tail vise at some point. Holdfasts – and especially a holdfast and batten – plus planing stops is a good combo too.
I think the thing that “nailed” this for me, is the fact that you used a bush in the garden as a makeshift planing stop. “Gravel building” the bench (building anything in your driveway, often on bare gravel) and have it come out flat and square, proved to me that one does not need big, expensive machines to be able to build something. What a fresh breath of air that was from all the podcasters and youtubers with machine shops rivalling smal businesses…
The sounds from the nearby school just made the whole video even more “real”. No polished production, but real content value!
I am glad you did that, Paul! Thank you!
Seeing you build that bench out of box store lumber changed my whole mindset. Instead of waiting years to save up the cash for hard maple and then being afraid to use my gazillion dollar bench, I have all the nice pieces of yellow pine acclimating in my shop as we speak. I’m going to give it about four more weeks and start building!
It does everything I’ve needed it to do. One advantage of it being disassemblable is that changes can be made if you find that you’d like to try something else. I switched from the tool tray to a solid top (with a gap in the middle) in an afternoon. Added a shelf underneath, then later removed it. Etc. So in that sense it’s a very low-risk option. If you built it too short, probably the worst-case scenario, you could still keep your top and aprons and just replace the leg structures.
On a slightly different note on benches I was re-watching one of your bench videos and you addressed the height of benches. Afterwards I raised my bench from 36 inches to 40 inches. My 6 foot 4 inch body thanks you from the bottom of my heart (make that bottom of my spine). At nearly 83 the lower three vertebrae in my spine tell me when I have worked too long at my bench.
I think that you experienced the practical find informed difference between someone’s opinion and in-depth research that took place over my fifty years working at the physical workbench six days a week 52 weeks in a given year. It is NOT a question of your body adapting but your body being damaged by the opinions published and verbalised through the decades. I measured people, benches, physical differences and much much more to get where I felt it would give a more informed approach for individuals. I grew tired of people telling me to use the sternum, the tip of the pinky finger, the wrist, the elbow and much more. The fact is we all have physical limits be that mental, physical and practical. My recommendation is based first on national and international height for men and women. This is a datrum point. It has never failed as far as I know.
Paul, I appreciate your video on the subject. One thing I think a lot of those researchers didn’t factor in was the height of the people using those historic benches. In general, europeans 200+ years ago were a little bit shorter than today. The Napoleon complex is a common trope, but in reality, he was about average height for the time period. So, if folks back then were 4 inches on average shorter than today, it makes sense that their benches would also be about 4 inches shorter than what you recommended.
Whereas I am sure there is some credibility to what you say, I am also convinced that many decisions on heights were either not researched in any way or in fact they were established by nothing more than opinions. I don’t want to get into some details because to do so would mean naming names when I think it was probably ignorance on the part of some rather true consideration. In my world, both as a full-time maker for almost six decades and additionally three decades within those six decades teaching and training about 6,000 students working at workbenches of 38″ to meet the needs of the average male, or indeed, adjusting bench heights or the person to alternative heights according to extremes in height one way or the other,I consciously and diligently ensured that students were comfortable and indeed took written or tick-the-box feedback for two decades. So I do think this, though not entirely scientific, comes closer to being based on fact rather than mere opinion. Additionally, even commercial bench makers have failed to establish any realistic criteria for establishing bench heights to match the person. Even highly commercial makers offer standard heights of 33 1/2″ with an occasional one at 35 1/2″, so still inches far to short for good body stature and workability to match the shorter end of average height people.
Amen to that! I’m nearly 82 and feel the discomforts of standing while leaning at my humble benches. I’m a taller person as well…needing the extra height for a work surface. Thanks
hi I watched the video of Paul in the back yard. my neighbor tore out a room in his bwasasement. that gave me all the free lumber I needed so off to the build and that was 3 years ago and just like that I have a very fine bench. and started to build my shop. THANKS PAUL for starting a fervor to do my passion for wood and craftsmanship.
Great article. I just finished constructing a 6’ bench out of construction grade lumber. By being very selective I got some great material to work with. It has a front vise.
Do you ever use holdfasts with your bench? I have a couple and am considering adding holes to use them.
There is one thing I would be concerned about regarding using holdfasts in construction grade (i.e.: Softwood) lumber and that would be premature wearing out of the dog holes by the way holdfasts are tightened and loosened over and over again – forcefully, as they angle their ⅝” shaft into and then back out of the ¾” dog holes they’er used in. If I were going to do that I’d seriously consider making 1¼” diameter dog holes, inserting 1¼” dense hard wood dowels (like maple, ash, beech, etc. and orienting their grain to the grain of the top) and then drilling them out for your ¾” bench dogs as usual. It’s more work, yes, but it should make your bench work with holdfasts and bench dogs more reliable and longer lasting before you ever have to refurbish the bench top. Its a thought.
I remember watching all those videos in 2017 and hearing the children playing in the background. Those videos inspired me to make my own workbench from materials I had been accumulating for several years. Actually my grandson and I both made our own benches. He is much taller than I so his bench is about 4 inches higher. Both are in my workshop and I have so enjoyed working on a rigid bench that does not wobble and walk across the floor when hand planing a board. It has all these species of wood in it: Poplar, Black Walnut, Cherry, White Oak, Red Oak, Pin Oak, Black Locust, Rosewood and some species of Spruce. It turned out beautiful, but usable. My wife said she wanted to put it in our house, but when I told her she would have a hard time keeping the sawdust, chips and shavings off the floor she changed her mind. She still says if I should die, that bench is coming in the house, LOL. Thanks for all your video mentoring over the years.
Jim Light, Goshen, Ohio USA
I made my bench from pine lumber that I saved after removing old cabinets from my garage. The wood is from 1948 when the house was built and bears little resemblance to the stuff you now get in big box stores. I used some of it to make a roof ladder for doing repairs on the steep garage roof and then broke the ladder down for using on the workbench. I’m happy with how it turned out and like the patina and nicks from the wood being recycled.
At some point I will want to make a version to hold an end vice, but that would mean some re-engineering for the top rail to make it work. The bench does everything that I need it to do and I always get a good feeling seeing it as I step into the basement to do some work.
Truly wonderful benches!
As a volunteer for the Earth Trust I help out with maintenance at their centre on Tuesdays. I had a helper last week who was assembling children’s wheelbarrows on a bench ready for the charity’s forthcoming lambing weekend. Entirely unprompted, he commented on how nice and solid the benches were. I replied, that’s because they were designed and made by Paul Sellers who kindly donated them to the Trust when they became surplus to requirements.
I just thought you’d like to know Paul that the benches are still being put to good use, not always for woodwork admittedly, but I’m gradually educating their maintenance guy to the benefits of using hand tools rather than automatically reaching for power tools, so hopefully that will change.
I made my first bench based on that first video series. When I first watch the video, I thought to myself “what is with all this hand planing?” I’ve been a loyal follower ever since, a convert you might say. I’ve since build a basement workshop, two more benches, two dozen of his projects from masterclasses. I have rehabbed a dozen planes, learned to sharpen … etc etc etc on and on and on. Thanks Paul.
Thanks Paul. Your building that workbench in your back garden might be my favorite video of yours (either that or the first dovetail video you did). What I liked about the garden workbench build is as you pointed out, the honest simplicity of it. The birds and at some point the children playing in the nearby school just make me smile. It just feels like real life. When I’m working in my garage, I hear neighbors mowing yards, talking, kids across the street playing basketball. It’s all muffled but it is in the background. I love the ebbs and flows of life around me as I woodwork and I think that is what makes that video so appealing.
PS I also enjoyed some videos where you worked in a larger shared space. You could sometimes hear muffled other noises in the background. What was funny was your subtle visible reaction to it, sound proofing to minimize it. I get it, you want to give us the best quality audio and video possible. Still it added a humanity to it.
Paul, Long, long ago, I asked how to level / flatten a wide bench with two work surfaces separated by a central well, like the bench you show in your 6th photo here. For the life of me, I cannot find your reply. It was in one of your blogs. Your response began with something along the lines of you first thinking that it wasn’t something to worry about or obvious to figure out, but then you decided it was in fact worth explaining. I wish I could find that old blog post!
I made one from the first video series. It was a little easier as I already had one I had made previously. It has an end vice as well as a side vice. I omitted the leg wedges, it has remained solid. When I made it the cls was really dry, so if anything the joints would get tighter with moisture.
I added the front drawer, built with thick sides that I use as support when really long pieces are in the vice. Also added an oak batten, held with a coach bolt and wing nut, against a leg, as a planing stop.
Really pleased with it. Most of my benches previously were old chest of drawers.
Underneath as well as storage I have a set of drawers on casters, many of my planes sit on top of this, so are close to hand.
Thanks
I saw that video purely by chance back in 2016 and I made it in the following summer. I didn’t think I could do it , but I did – no previous experience of any note.
The whole series was an inspiration.
Paul, I just an article you wrote for the June 2004 issue of the magazine “Woodwork”, quite interesting.
Woodwork–Yes, that was the best US woodworking magazine when John Levine was the editor. I wrote regularly for them back then. Unpretentious and very real. Eclectic, I’d say. But then it was bought out and thrown under the bus by another magazine that hated competition and it became our loss.
Here I am, another one who took inspiration and made his workbench from construction wood surplus and with hand tools only. Now its wonderful piece of equipment for me and our 2 daughters (6 and 3 yo) to work with!
Thank You from Czech Republic.
This was the video series that introduced me to Paul Sellers. I was searching around for information on building a bench when I came across this and started to watch. One of the better decisions I’ve made. Thanks!
As another aspiring woodworker motivated by Paul’s Garden Bench Build, I’d like to say thank you to Paul and all his people for sharing real woodworking with the world. I still get sidetracked by loose tenon machines and track saws but at least I know the truth. One day I hope to have more time to do what I want with my time and less with what I have to do. Thanks again!!
I made my woodwork bench after YouTube randomly pushed Paul’s video series on the recommended sidebar. I hadn’t done any woodwork since school 30yrs earlier. With mass timber shortages during lockdown, I improvised with combinations of pine, ply and merbau, using a saw, chisel, #4 plane, and a hand drill.
After a successful reunion with woodworking from this project, it needed a home. My deteriorating colorbond shed got demolished, and I built a new timber framed replacement. I’ve now built doors, windows, shelves and racks, and got it wired up. Quit the man cave.
Whether I thank Paul or YouTube, I’m nowusing my hands, getting away from screens, and have a long line of projects I want to get stuck in to… don’t delay and start building that workbench people!
I came across the first workbench video less than 6 months ago and was totally enamored with the presentation and the work. Having procured some planes years earlier, I started to dig into Paul’s other videos as well and am tuning those up one by one. I love Paul’s natural, authentic, and practical presentation where he generously shares his lifetime of experience with us. It’s great when something doesn’t go right (chisel dropping, sawhorses moving) where we get to benefit from watching Paul work through it. I’m currently building my first workbench from box store materials and reference both the original and newest videos. Thank you, Paul, for this treasure of resources and inspiration.
Recently moved into my “forever home”. After moving around for a career and living in more homes than I care to count, I’m finally going to build my bench.
One question I have is regarding the legs/feet. My garage floor is sloped toward a drain in the center. Anywhere I place this bench will be uneven. How do you address wobble?
If it is permanent you can just use a level and shim each leg with wedges. I slide the wedges in place until stable and add a drop of superglue in the corner where the wedge meets the leg. Alternatively you can scribe each leg but then the bench is useless on a level floor.
The good news are:
– the bench-top glued to the front apron makes a rigid L beam;
– the leg frames are not permanently attached to the top and aprons.
When I moved my workbench to the attic, it was rocking.
A well placed shim between one of the leg-frame and the workbench-top has fixed the problem.
The shim will not move as the bench-top is screwed to the leg-frame.
If I had to move the workbench to another place, I could loose the screw and remove the shim or place it between the bench-top and the other leg-frame depending of how the workbench would rock.
(Although I didn’t verify if my bench-top was level. It didn’t seem necessary until now)
I built two of Paul’s trestles in my empty garage, then built his bench. At the time, I knew many people had built the bench and it worked. But when I got the first of the wedge joints together, I really became a true believer. It’s been over four years now, and that bench is like a slab of granite. I used garden variety construction lumber from Lowes. Thirty-nine inches high with a 100-year-old Abernathy vice.
Yup, I built your workbench last month (it took a few weeks, on and off, but was much less effort than expected). It looks and feels grand! I went for 90cm height, which I find more comfortable. Buying the timber new was – surprisingly – cheaper than reclaimed in my part of the world. In any case, I spent more on glue, ironmongery and osmo oil than I did on the timber.
I had been thinking about what work bench I wanted and thought about building a super fancy Roubo style work bench but was very intimidated. Then I saw Paul’s series on his work bench and thought it was brilliant. I decided to make it all with hand tools only (I needed the skill building) and it turned out marvelous. Not only is it rock solid, but very functional. The skills and confidence I gained from this have been incredible. I then turned to making his Shaker candle box with only hand tools and that is another piece I am extremely proud of. I look forward to working on this bench for years to come and continue to work mostly with only hand tools. (Safer and far less noisy). Thanks Paul for inspiring me and sharing your knowledge.
I just reflattened my bench and reguled some lamination that let go. I also added an end vise. It is so nice to run your hands over it, it’s new again after 26 years.
This video series is how I came to know you and is still my all-time favorite. I loved your matter-of-fact style and your candid opinions. It was in this series that I learned of knife walls and how to use a square and how to chop a mortice and so much more! There were other work bench videos that were about an hour or so and they paled in comparison to the detail and work that you put into yours. I also loved hearing the sea gulls and school bell in the background. How refreshing and authentic! Thank you, Paul, for giving woodworking a richness in my life.
After studying Paul’s workbench videos and plan, I built my own about 7 years ago from 20 foot long 2×10 gymnasium bleacher seats (fir) recovered by a firm here in Milwaukee that guts old buildings and resells various architectural features and materials. Prior to that I had worked on plywood benches in my garage. Now, in a proper basement shop, this bench is by FAR the most useful thing I have ever built, all the joinery by hand (my first try at through tenons), and I enjoy it every day. Hat’s off!!
If I may ask a question Paul? Have you ever made a bench which is fitted with Castors? I was thinking about the heavy duty type with nylon wheels and a brake/locking system operated by by a foot lever. I love to work outdoors whenever possible, and would love to have a bench that I could wheel out from my workshop when the weather permitted. I currently have an old bench outside covered with a tarp, however this is a far from ideal situation.
One of my benches has the foot lever that lifts and drops the bench back onto its legs when the lever is kicked.
Great timing seeing this blog post! I had been researching my first bench build (currently have an old “portable” bolted together wood bench I was given) and started with the Sellers design at the start, and ended with it after seeing the other options and costing them out, comparing them to my space, and to how complex they would be to build. I’d love a Scandinavian joiners bench at some point, but I will need a much larger shop to even fit it let alone justify the cost of building it. For what I need now and in the future the Sellers bench is more then enough!
Living in the grain belt of Canada means wood is very expensive as it needs to be brought in, or I have to go to the north of the Province and get it custom cut and dry it myself. I was lucky enough to get in contact with a fellow who takes down old barns and grain buildings (which most farmers just push over and burn) and resells the lumber for a very reasonable fee compared to new wood. He set me up with old growth Douglas Fir rafters that are very dense, tight grained, and with minimal knots. I’ll have to live with black nail holes but after some cleanup with the planes it is very lovely wood. I hope in the next few weeks, as the wood is acclimatizing to my shop, to start on my own bench. I may even have enough over to start on the Seller bookshelf as my first project on the bench!
That all being said I love how the rough reclaimed bench looks in the photos. I want the practice of cleaning up my boards, but otherwise the bench would look very similar!
Is there an advantage to the tool well location of the current design vs the “Garden” design where the tool well is between two working surfaces?
Practically, the two-sided bench is a two-person bench like the ones used in my apprenticeship where the apprentice worked under supervision on his side and the craftsman the other. 99% of woodworkers don’t need that scenario and I redesigned the workbench for real woodworkers working as hand toolists rather than machine-only people. I came up with the sizing through testing with my own workbench and then too hundreds of student visitors and apprentices working in their own space. The well is essential and whereas woodworkers build flat tops the reality is that we only need and use the immediate side nearest to us. The will part stepdown gives a perfect out-of-the-way place for tools so that they are totally accessible throughout the working. Not something non-hand toolists need. Additionally, a two-sided bench of the size in the garden is quite a luxury for the majority space wise.
I saw the videos of you building that workbench and really enjoyed it. It showed you didn’t need a bench to build a bench – critical knowledge for someone starting out
I am one of those who built my first bench following your backyard series. I love it and use it as often as I can. Thank you for the inspiration and knowledge.
I have not bought Alaska Yellow Cedar for 3-4 years, but it used to be somewhat cheaper than douglas fir, pine, etc. Like maybe close to 30%? Not sure about now. In relativistic terms it is very dense, very straight grained, harder and tougher than any softwood I have dealt with. Weathers better than red cedar, so I am told. It is used often here in the very wet Puget Sound in Washington state for outdoor decks. I used it for the framework for a so called barn table a few years back. My two complaints in my limited use are that it does not stain well (it’s natural color is sulfur yellow); and ripping it with a 40 tooth circular blade was a very slow process. I don’t recall if I tried other blades. That is an experiment for another day. I am thinking this could be a great substitute in some areas for a work bench etc. One more bonus, I recall that the majority of the 2 X 4’s were generally straighter than fir or pine at the lumber yard.
I have literally spent hours watching youtube video’s, reading blog posts, deciding what bench to build and what to build it out of. Should I put on a leg vice or go with a standard bench vice.
Finally I have stopped procrastinating and glued 8 B&Q 2×4’s together. They are planed and true and barring cutting to final length I now have a bench top. Just making it through this “small” part 1 (about 2 weeks of effort spread over 6 months, when I found the time) feels absolutely amazing.
Don’t be a procrastinator. Be a doer willing to learn from your mistakes, because everyone makes them!
Hi!
I have looked through most of the different videos, read the blogs and other text materials and pondered the different drawings. I’m still in the process of planning my workbench build.
As it is I will have to make some mods to Paul’s design though I actually like it a lot.
The easy mod is that my bench will perforce have to be shorter, about 1 m.
The more complex one is that I need something easily knocked down and reassembled as I woodwork in a corner of an apartment living room. Not a true portable but something of a semi-portable that will stove a way rather compactly.
Any ideas for simple mods?
Just make the frames and screw all together without glue in the joints. Use screws or bolts to assemble. Shortening to a metre long is no problem but keep the frames say six inches in instead of the 9″. We own one of the benches cut down to about that size and it works fine
Thanks!