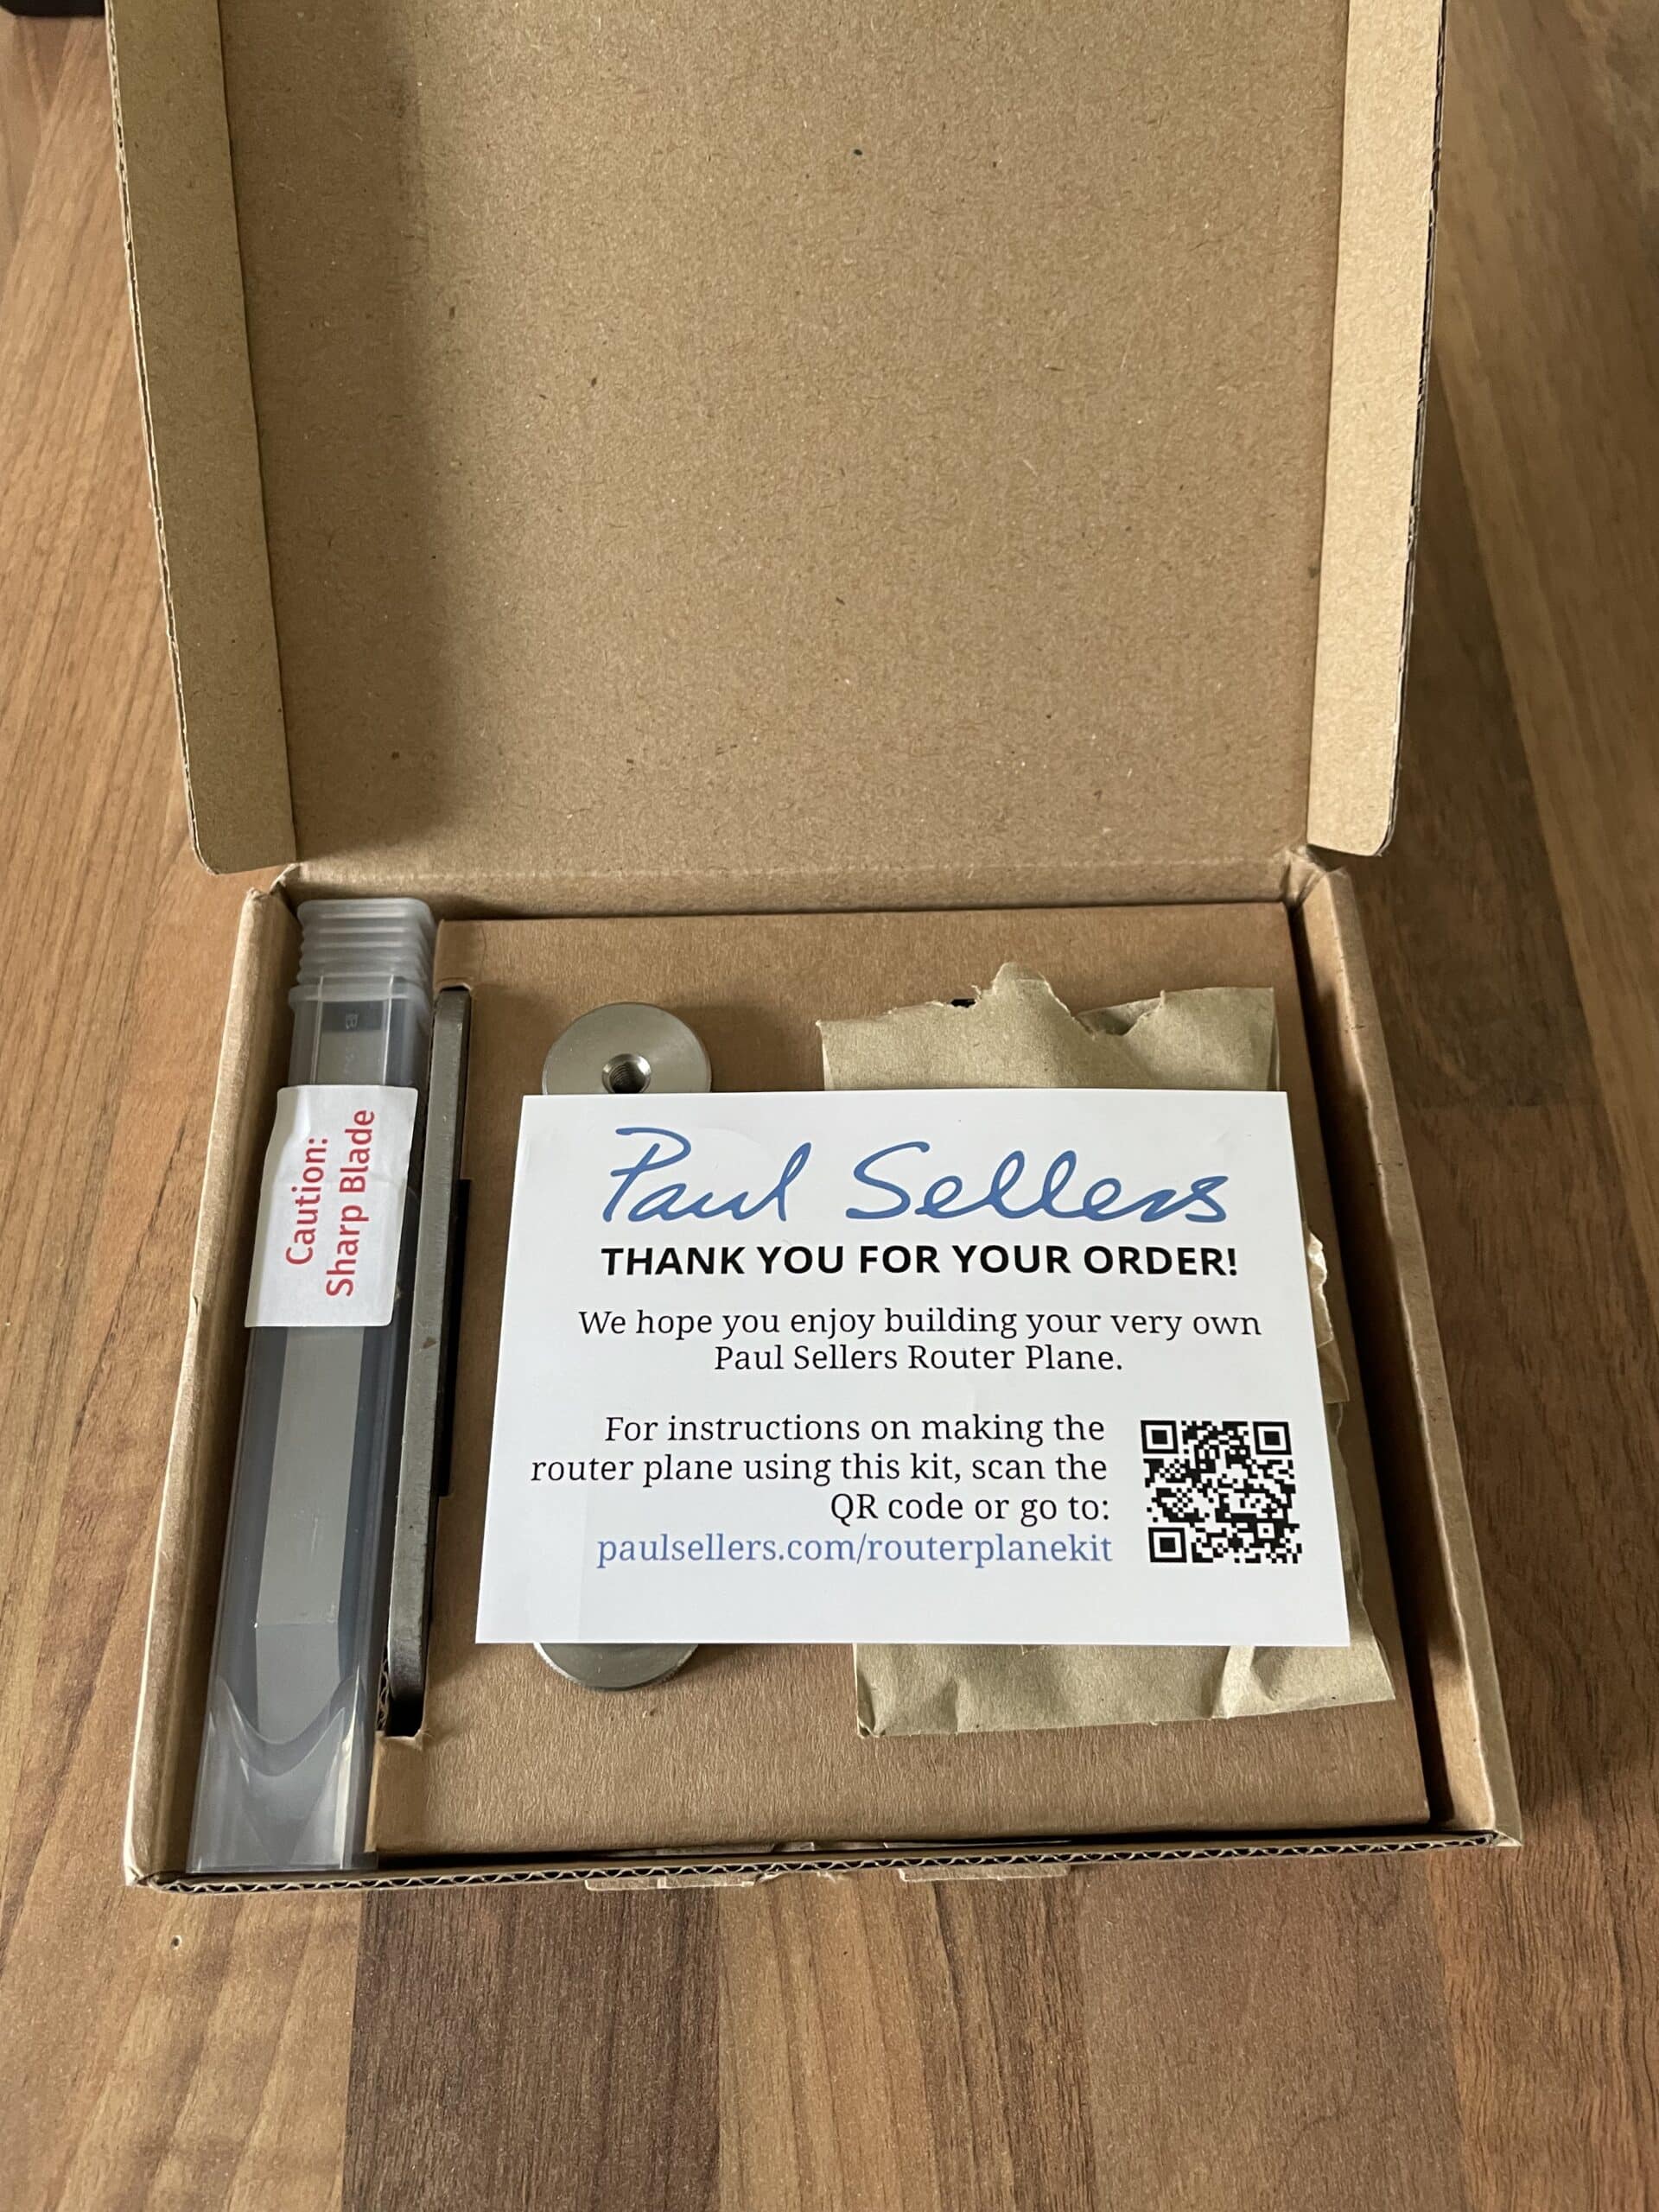
More For My Router Plane Kit
I am hoping that most of you have made the upgrade to the Paul Sellers’ Router Plane because once you have made your own from the kit and used it just once you will most likely never go back to an all-metal version.
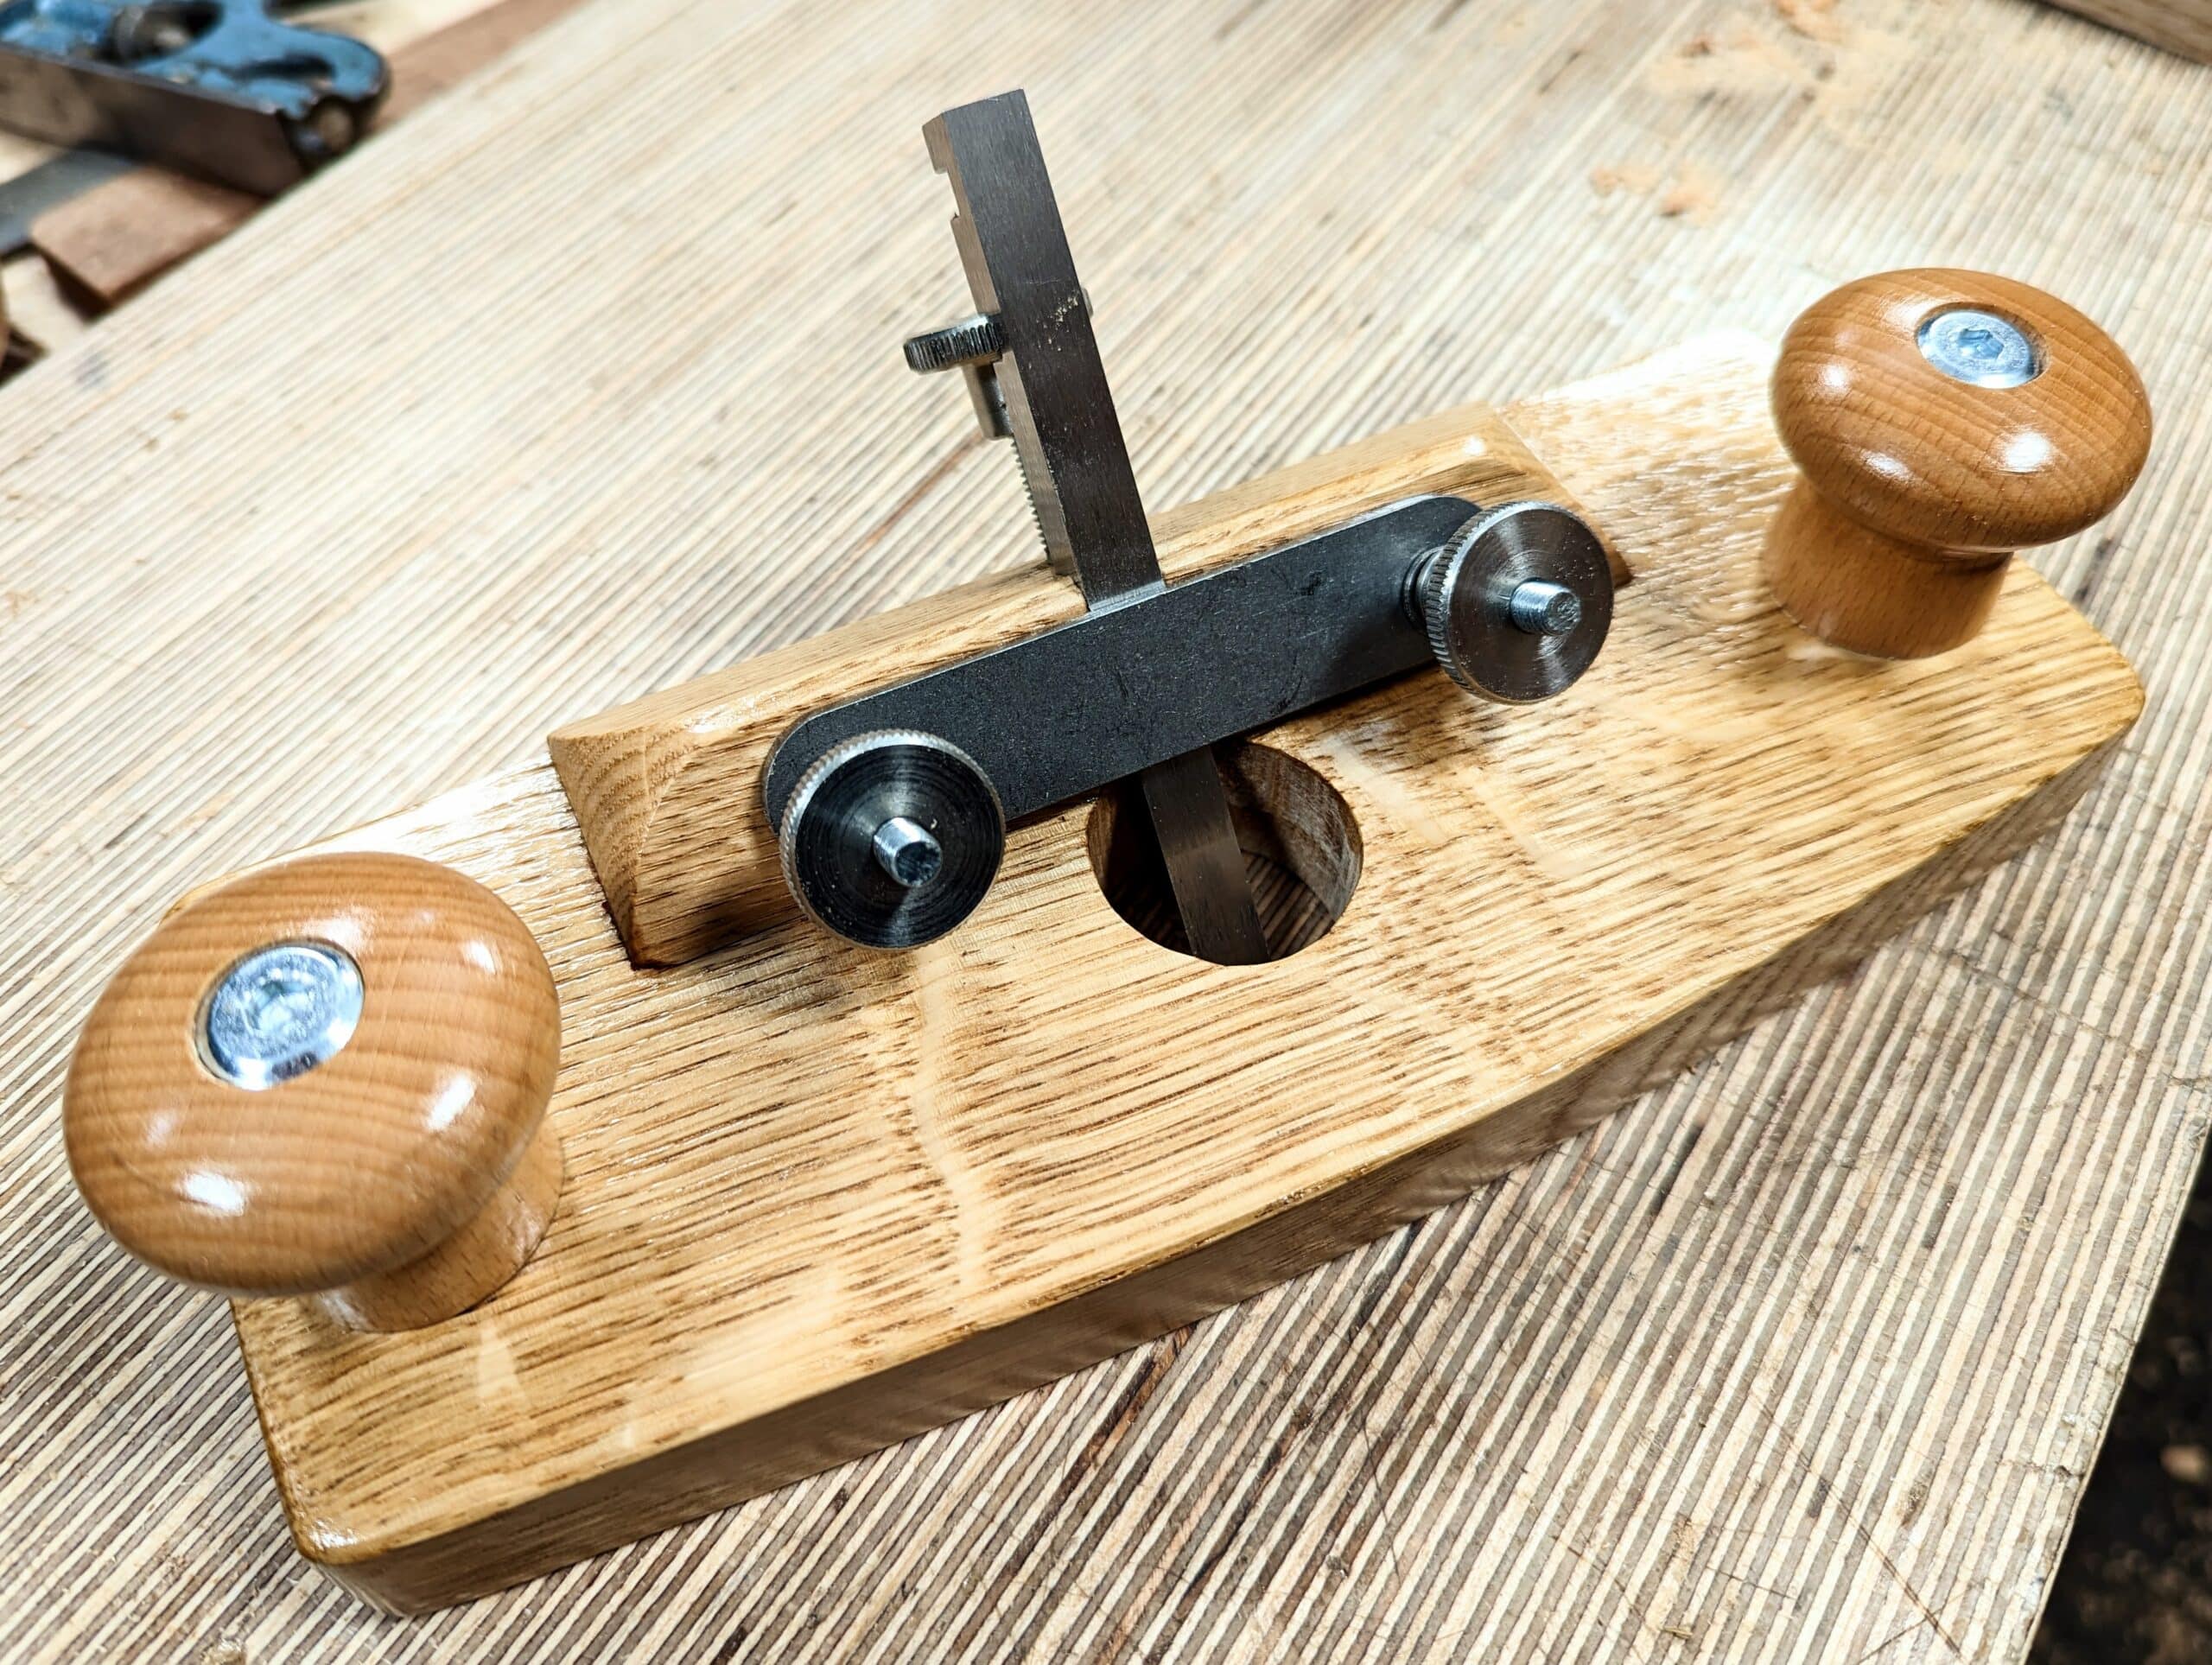
The router plane kit comes with a Sheffield-made, 3/8″ (10mm) ready-hardened tool steel cutting iron which works for 99% of router work be that levelling the bottom of housing dadoes or surfacing tenons for guaranteed parallelity to the outside faces either side of the tenon.
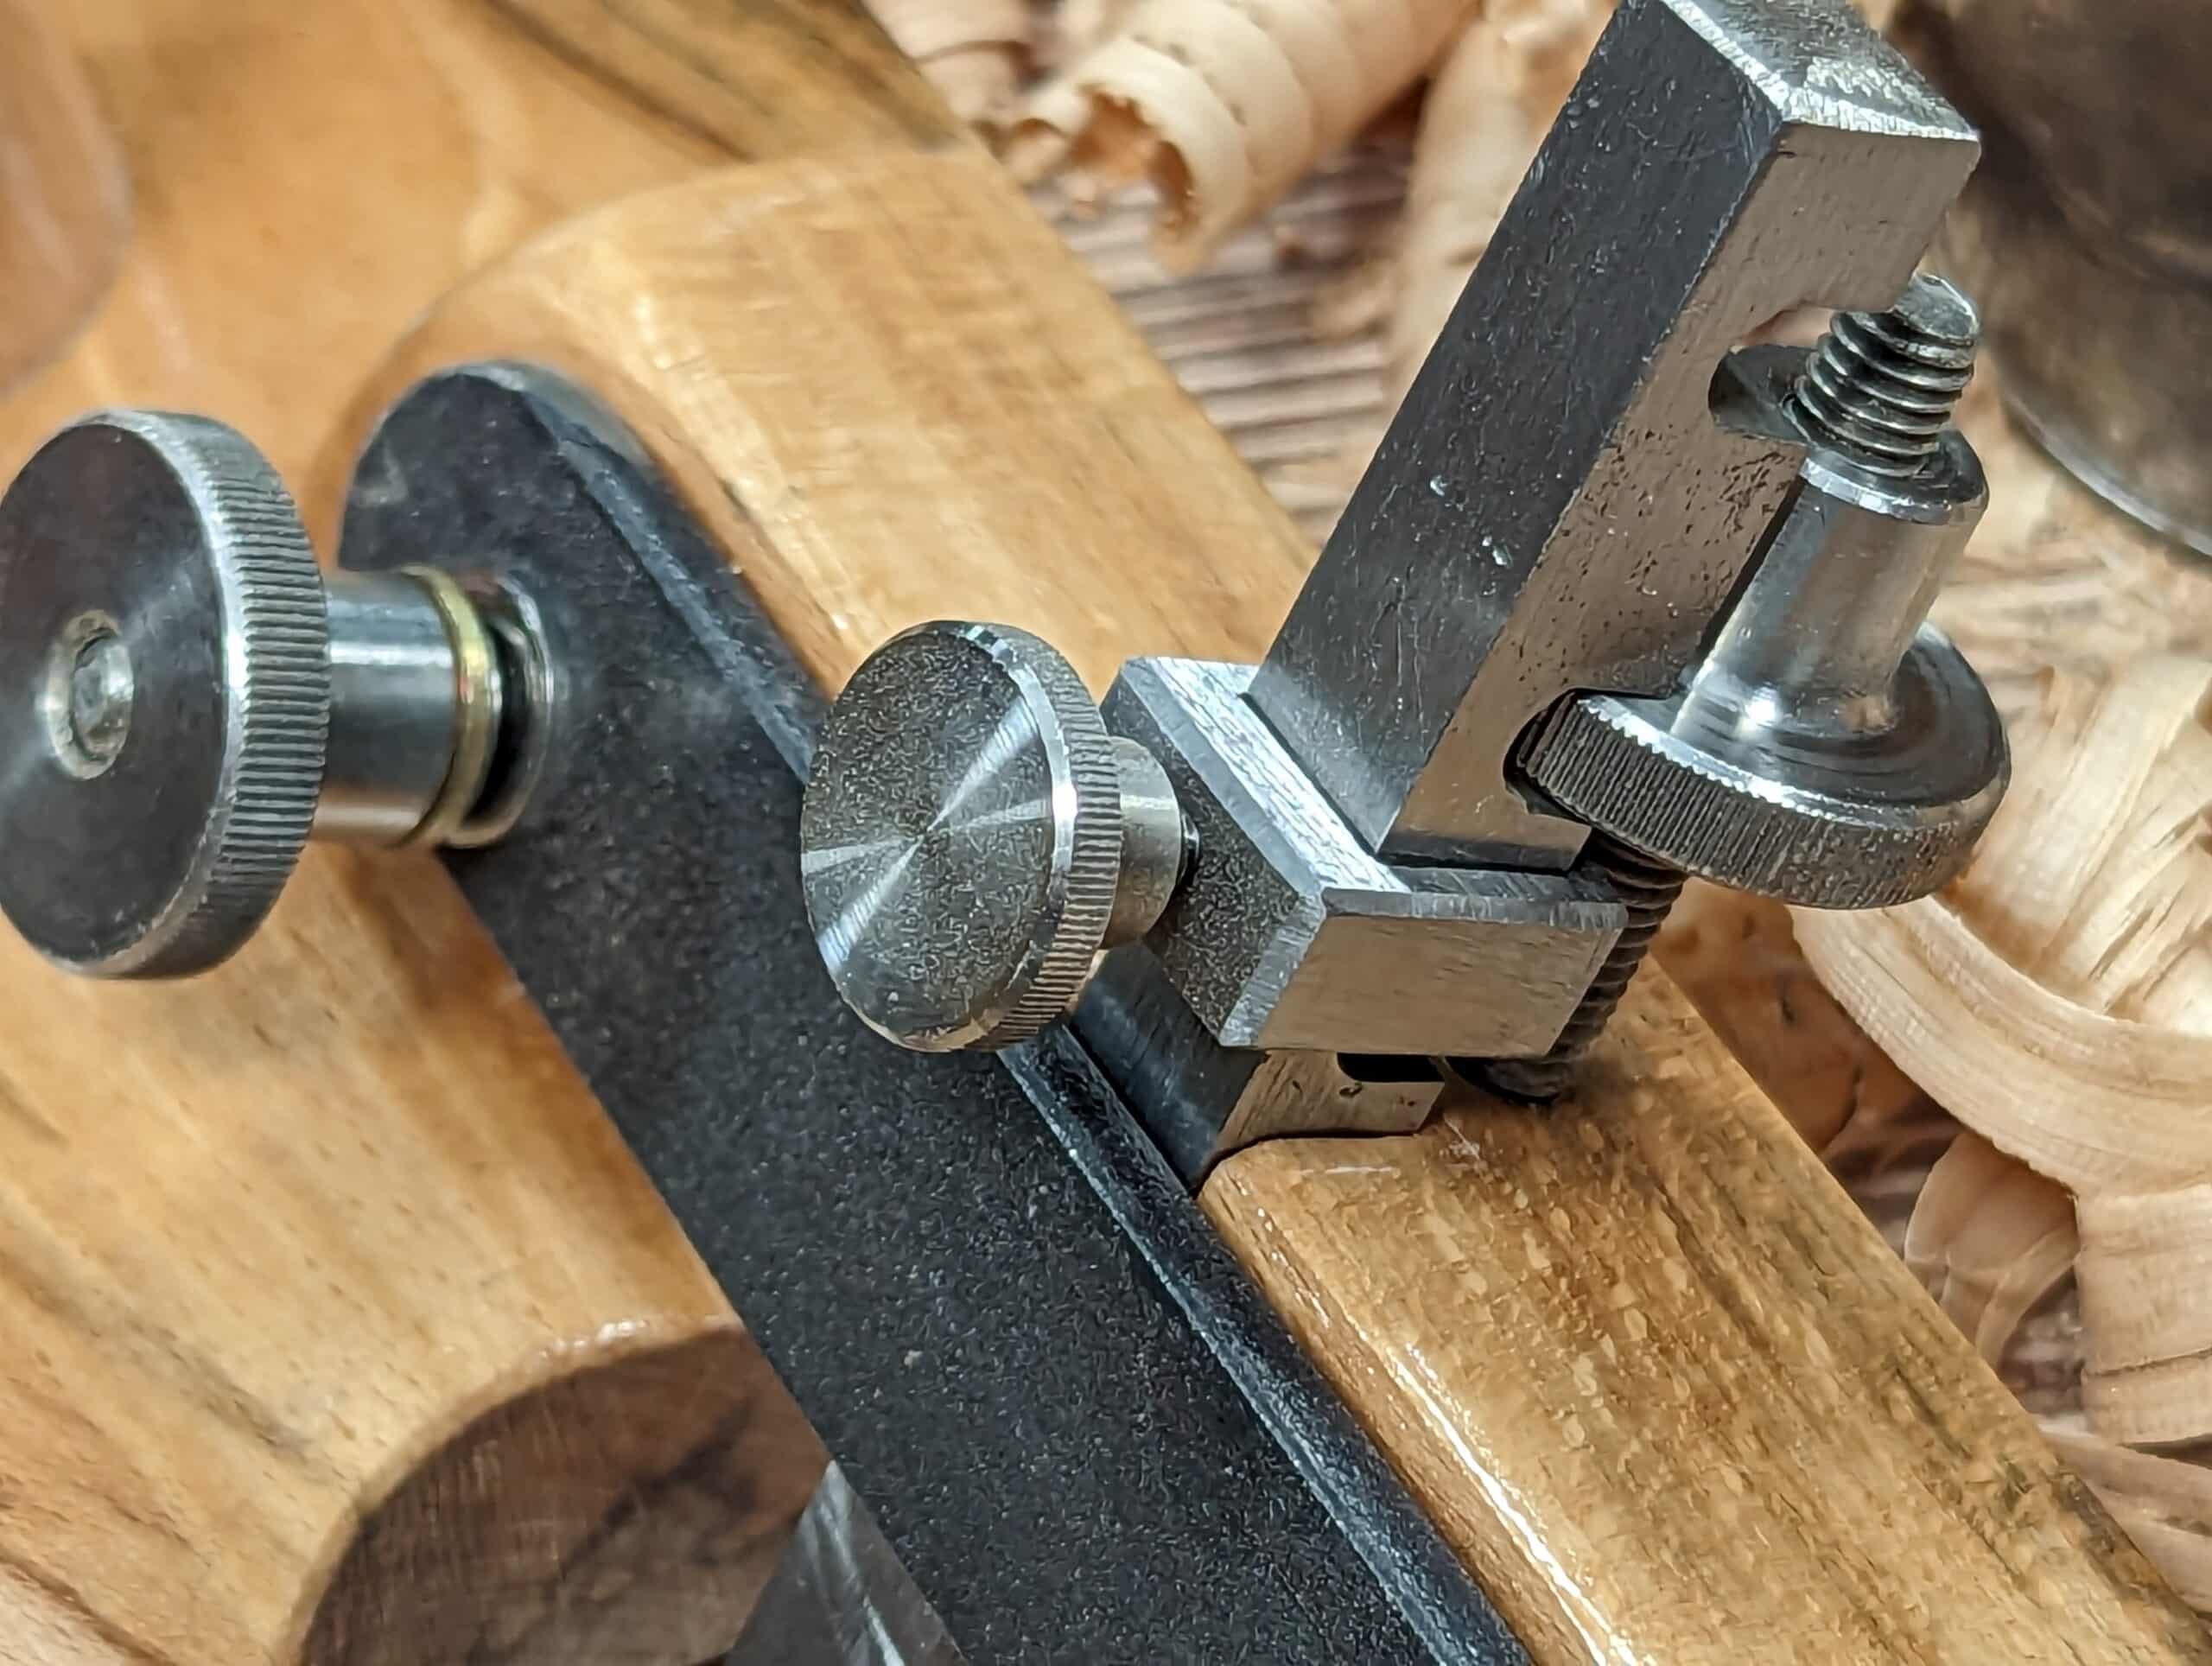
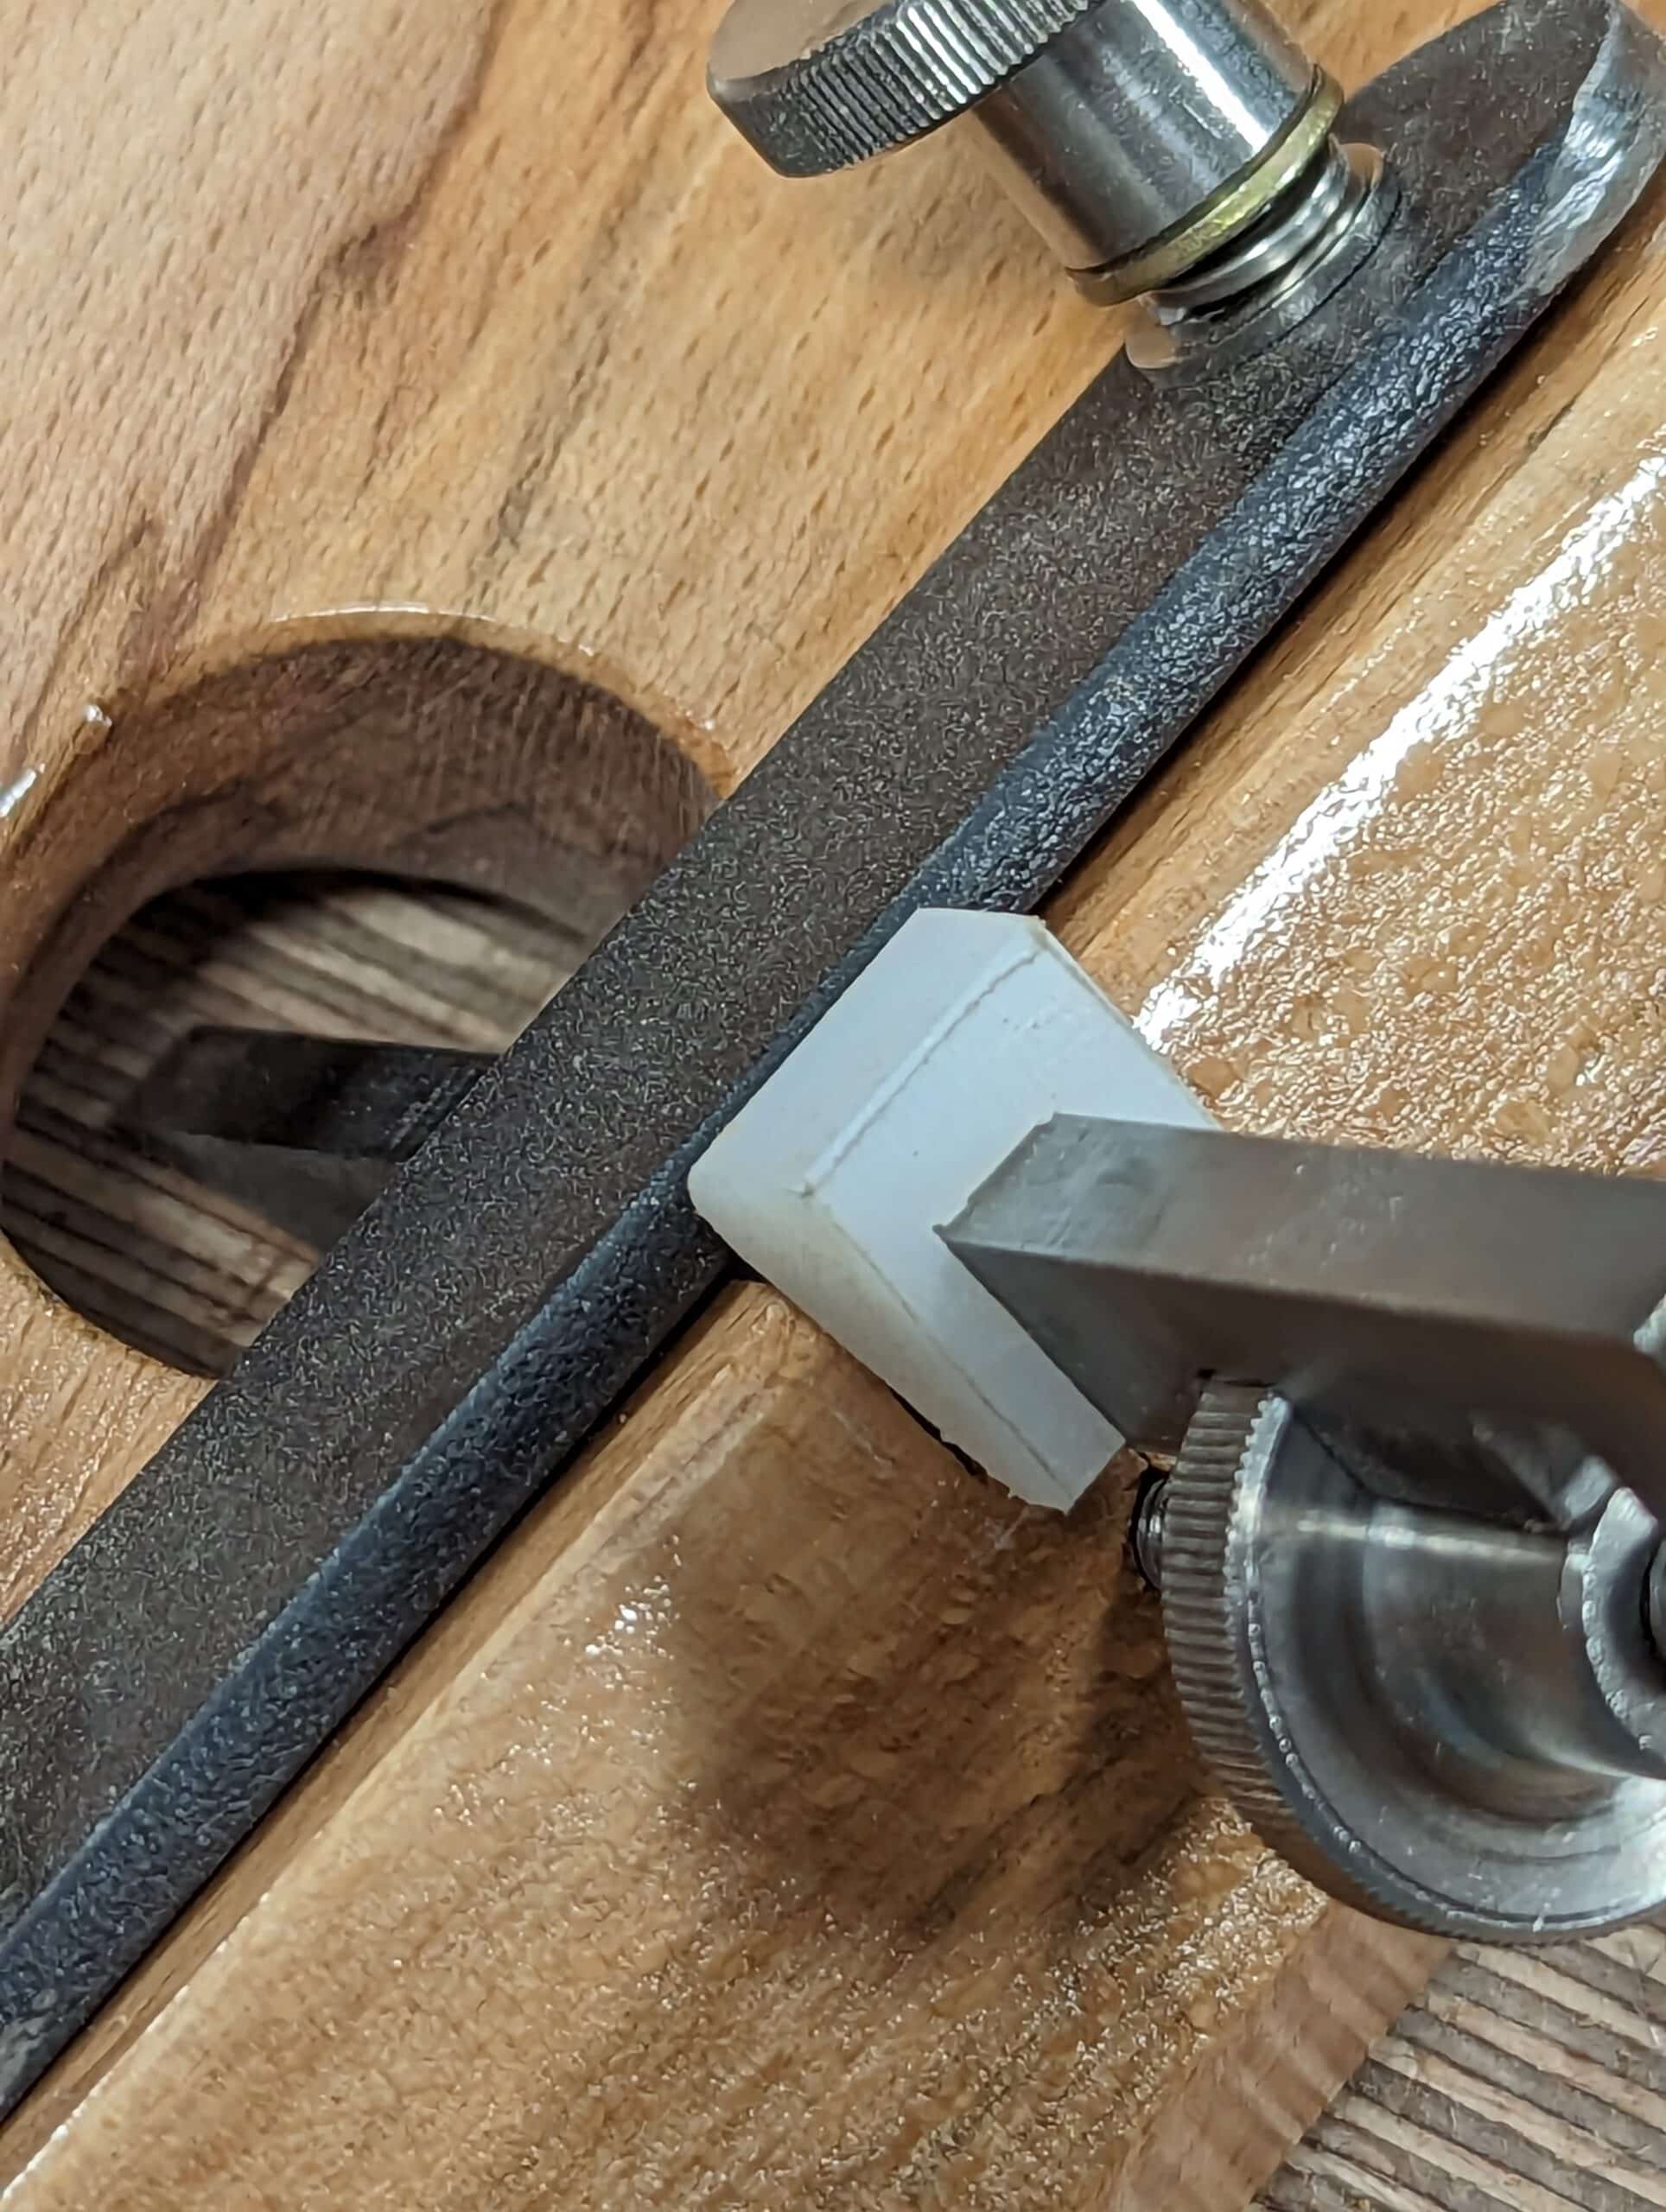
I have added two accessories to my personal router plane that adds to the functionality of the plane in two key areas of routing: one, this collar gives me repeatability of final depths for say guaranteeing the depths of several housings or dadoes as in bookshelves and drawer backs, and two, the installation of a narrower cutting iron for narrow housing, small areas and such.
I will be expounding on making these additional pieces on my blog to show you how I did it in the near future, meanwhile, if you haven’t yet ordered your Router Plane Kit here is the link to get you going.

Really looking forward to the additional information for this! I love my P.S.R.P.!
I have your router kit and it looks very nice and I can’t wait to make it. I might have to sell my Stanley hand routers now. Your accessory upgrade sounds great.
I have a nice piece of box elder, would this be suitable for this build?
As this wood has been used for centuries in constructing wooden hand planes it should work. I made mine using alder.
Elder and Alder are different woods/trees 😉
Btw my wooden planes appear to be made of beech as far as I can tell. 😉
No Kidding, I never new that!! Just kidding, you think I just fell off a turnip truck.
They do however have much the same workability and can put up with a bit of wood to wood sliding together.
if I thought the gentleman needed a harder wood I’ve had said so.
have a nice day.
Thanks. Appreciate being referred to as a Gentleman too 🙂
Any wood will work really. My initial prototype was made from a softwood stud and it was very soft yet it is still a productive router plane.
Great! I will be making mine out of Red Velvet Mesquite, since I live in South Texas and it is in abundance here.
will you sell the narrow irons too?
No. I make mine from aa worn-out file. Heat it with a barbecue file and let cool in the air and it will cut like mild steel with a hacksaw and file. Shape it and then harden it with a blow torch or in a fire pit and quench in peanut oil and you have your cutting iron.
Can you make a video showing how. to do this?
Check out some of Paul’s older videos there’s definitely one I remember watching about hardening tool steel for a wooden handplane. The same info might translate to this??
For all you home-brew hardeners. Be sure you follow up with the tempering process, because the initial glowing red / quenching process leaves your iron brittle. All your hard work could drop onto a concrete floor and shatter!! Cook your finished iron in an oven for two hours at say 300 – 350 degrees F. to remove the brittleness. Look for YouTube videos on knife making.
I hope you’ll make diamond point irons as well.
Andy
No, we won’t be doing that as they cannot work on the inclined plain.
Hi Paul. I see that you have added another notch to your 10mm cutting iron. Also that you have turned the thumb nut upside down, I did the same in order to gain greater depth. Unfortunately my router is a lot more addhock than yours. I only wish I had known about you and your chanel earlier than I did. Kindest regards Geoff Maddison
I am eagerly awaiting the arrival in the post of the router plane kit. I haven’t decided yet what wood to use. Maybe I can find a nice piece of maple here in Canada. An aside: I see that Veritas has produced a kit to outfit a wooden bench plane. The photos and specifications make it look more or less like the equivalent of a number 4. Assuming a) that I am able to make a functioning Sellers router plane and b) that I enjoy it, I will have a go at the Veritas kit.
I recon the Veritas kit will be more than the Paul Sellers kit. I just made my own kit,instead.
Respectfully…Phil Blanchette…
Good Mourning Paul.
I had made 3 of your router planes, after nearly 3 weeks of scrounging and waiting for the thumb screws to arrive, before receiving the 3 kits. A much better way to shop.
I had a blank set up and ready for when they arrived and just put it together last week.
I’ve made one 1/4″ by cutting down the knife edge but leaving the shaft the same.
They work … in a word… perfect!!!
Regards, john.
You are absolutely right Paul. I’ve made three of your router planes and can’t remember the last time I reached for my metal Stanley one. Yours are so much nicer to use and, having made more than one I now have the luxury of being able to set one as marking gauge and for final depth, then another to work down to depth – a method you’ve shown us many times! Thank you.
Sounds like a useful addition. I’m still looking for a pair of knobs for mine. It’s just about done
except for putting on the knobs.
You stated that the: 3/8″ (10mm) ready-hardened tool steel cutting iron. Does that mean
I do not have to fire of the touch to hardened the tool like you did in the video ?
Paul has a video where he makes a front knob for a plane.
I used that technique to make the knobs.
Bonjour Dear Paul, i am currently manufacturing your router plane, a great pleasure … remains the metal parts to install. Regards to you and all colleagues hand-workers
Thanks Paul, bring the router plane new accessories on, I am ready to purchase them if you offer them for sale.
Cheers.
Any idea how long it takes to receive this kit in Wisconsin. I ordered it on April 5th and it was shipped immediately but have not received it yet
Another low-cost depth stop is a simple nylon lock nut on the depth adjustment stud. Works great!
Bought a kit and made a router using some spalted beech. Got a working tool and learned a lot but getting the hanger bolts in was a real struggle and I found that with a 4.5mm hole they drove about half way and then were almost impossible to get fully in, or indeed unscrew despite being waxed. I finished up using pliers to screw the bolt in and then using a die to re-thread the machine screw part. For the other 3, I switched to using a 5mm drill after making the initial 3mm pilot and all then worked as advertised. I suggest measuring the thread before drilling the hole rather than the other way round which was my mistake.
Same difficulty. Although the 4.5mm drill seemed to correspond to the screw core, I also used a larger drill..
I used two nuts locked one against the other and a wrench to turn the screws. So It doesn’t mar the machine thread .
Hello Paul.
I would like to thank you for inspiration jow to make router plane.
I made my own! I have collected iron parts in my shop and finally I got it! Made it from beech wood and works really nice. I cant add here a picture of this but looks great! I’ve temperet iron myself in oil and works with oak great.
Best regards from Poland.
Big thanks again!
Now I try to make router plane much smaller but with your idea!
Thank you, thank you, thank you!
Thanks Paul. I bought a kit from you last month and made my Router from a piece of Beech. Just finished making a set of four wardrobe doors and used the plane to cut the 64 joints required. It worked perfectly.
I love the idea of the kit, and the improvements; and I may yet get one. The problem is, I love the one I made from your video and plans last year. I have used it a lot, and I’m currently working on a project that has me using it a couple hours a day this weekend. It’s pretty hard to improve on. That original design is really terrific. That plane is a really great tool that I enjoy using.
Thanks so much for sharing it!
I really enjoyed building the router plane from the kit! As several folks have mentioned, I would still like to find some better knobs.
A depth stop and narrow blade adaptor would be a great addition!