A Good Blade
In building our latest project in the Sellers’ Home bedroom series I relied on my bandsaw for many of the long and often heavy rip cuts. I expect many of those building the same projects might well decide to do the same. Mostly, this was to do with the type of different and often random widths I decided on for the panel strips and framing superstructure. The alternative is either a lot of hand sawing or machine milling in some other way. I am constrained by a single machine in my workshop,. This lone bandsaw handles everything for me perfectly. And the outcome of the final design made my use of it well worth it. Mostly the tedium was my choice throughout the different settings of narrow strips to develop texture and laminations in each of the pieces I designed. In the wardrobe I just completed there are over 200 pieces in its building and, of course, many following here do own a machine or two set up in their garages and so some may well do the part of or the whole project by machine. I always go through the hand methods I use in any project thoroughly for those who want to further develop their skills, gain the true benefits of the added exercise hand tools give and then too the high-brain demand handwork challenges us with, it’s all there. Hand tools remain current technology for woodworkers today but the loss of skilled long-term teachers from an artisan maker background lessened with each decade. This does not mean the methods are old fashioned and outdated, just that they were never intended for mass producing repetitive cuts as were machines.

My point here then is that if you are bandsawing your material it’s worth using the best blade you can, one that’s hopefully in the affordable range and one that gives a decent clean cut when the two parts separate. Ripcutting and resawing are one and the same mostly. In our benchwork, we are not usually slabbing tree trunks but down-sizing thicker and wider sections to reduce cost and labour. The bandsaw removes the smallest kerf, tackles cuts twice and three times deeper than most tablesaws and when set up correctly needs only a few light passes with a bench plane to prepare the wood for 250-grit sanding smooth if wanted. About the downside to bandsaws is that they are restricted when it comes to crosscutting anything longer than the diameter of the bandsaw wheels minus about a half inch. Does that mean buy a chopsaw? I certainly wouldn’t. I have two options. I either use my handsaw or, if I have a lot to do, I will use a jigsaw. Would I use a Skilsaw? No, not usually. The only time I might use a skilsaw is on sheet goods but even then that would be a big ask of me. I doubt I have used mine in the last two years or more. Too, too messy and invasive for me and totally unnecessary. A decent jigsaw is certainly good enough for my initial rough cut and the ends can be trimmed later when I get to the actual joinery or whatever. My strategy is to crosscut by hand or with a jigsaw, resaw, true up and size by hand plane and then use the table sled on my bandsaw to trim to final length and square. But in equal measure, I will also use purely hand methods, crosscutting with a handsaw and end-grain planing with or without a shooting board or my planing stop system.
I installed a new blade into my bandsaw well over a month ago. I generally rely on a premium 1/2″ x 3–4 TPI (tooth per inch) vari-tooth blade for a couple of good reasons but the main ones are the strength the weld gets in a 1/2″ long weld and then of equal value the beam strength/resistance this affords the blade against thrust pressures. Beam strength is extremely important for heavy and deep rip cuts and of course, this is all relative. Take a commercial machine with tungsten carbide teeth on a steel band 4″ wide. Driven by a multi-horse-powered diesel engine, not much will stop and each revolution of the blade can take travel run of 3″. Compare this to my 1/2″ blade ripping 8-10″ deep wood at a feed rate as low as it gets to one delivering slabbed boards 24″ wide at a metre every few seconds and you’ll better understand what I am saying. The beam strength resists blade-twist in the face of your push-power into the teeth of the blade. If the blade is not taut enough then it will tend to flex sideways one way or the other and follow the easiest or weakest path the grain in the wood offers. Any grain opposition such as knots, the wood surrounding knots, crotch-grain, growth ring hardness and density variation will divert the blade from your straight and intentional line. The more taut the blade the less deviation, generally speaking. The difference in tensionability between a 1/2″ blade and a 3/8″ one is, well, 25%. In the face of diverse grain patterning, any shift in direction can flex the blade and no matter how minimally, this can set a different course pulling the wood according the the softer grain and a path of less resistance. This happens and the more we can do to minimise it the better the outcome in finished cuts. The 1/2″ blade resists side flexing by the allowed extra tension we can apply to the blade when we stretch it between the two wheels. Offering a good and broad weld along the joint lines to create the band means that the blade is less likely to snap through the tension applied and then too blade fatigue at this critical weld point. The weld on blades is often the weak point in the circle and after the blade has been used for a while this will be the point where the blade usually snaps if it is going to snap at all. The strength of the weld is important because the strength of the weld allows the application of adequate tension to keep the blade taut between the two bandsaw wheels. Remember too that ‘stretching’ that blade is not simply a question of applying as much tension to the blade as you can through the tensioning wheel or lever. Finding the balance as we tighten the blade to the two wheels takes precision and our sensitivity is important. Too much tension can be as adverse as not enough. You can watch my video here on how to establish a good balance in setting up your bandsaw which includes setting the blade tension.
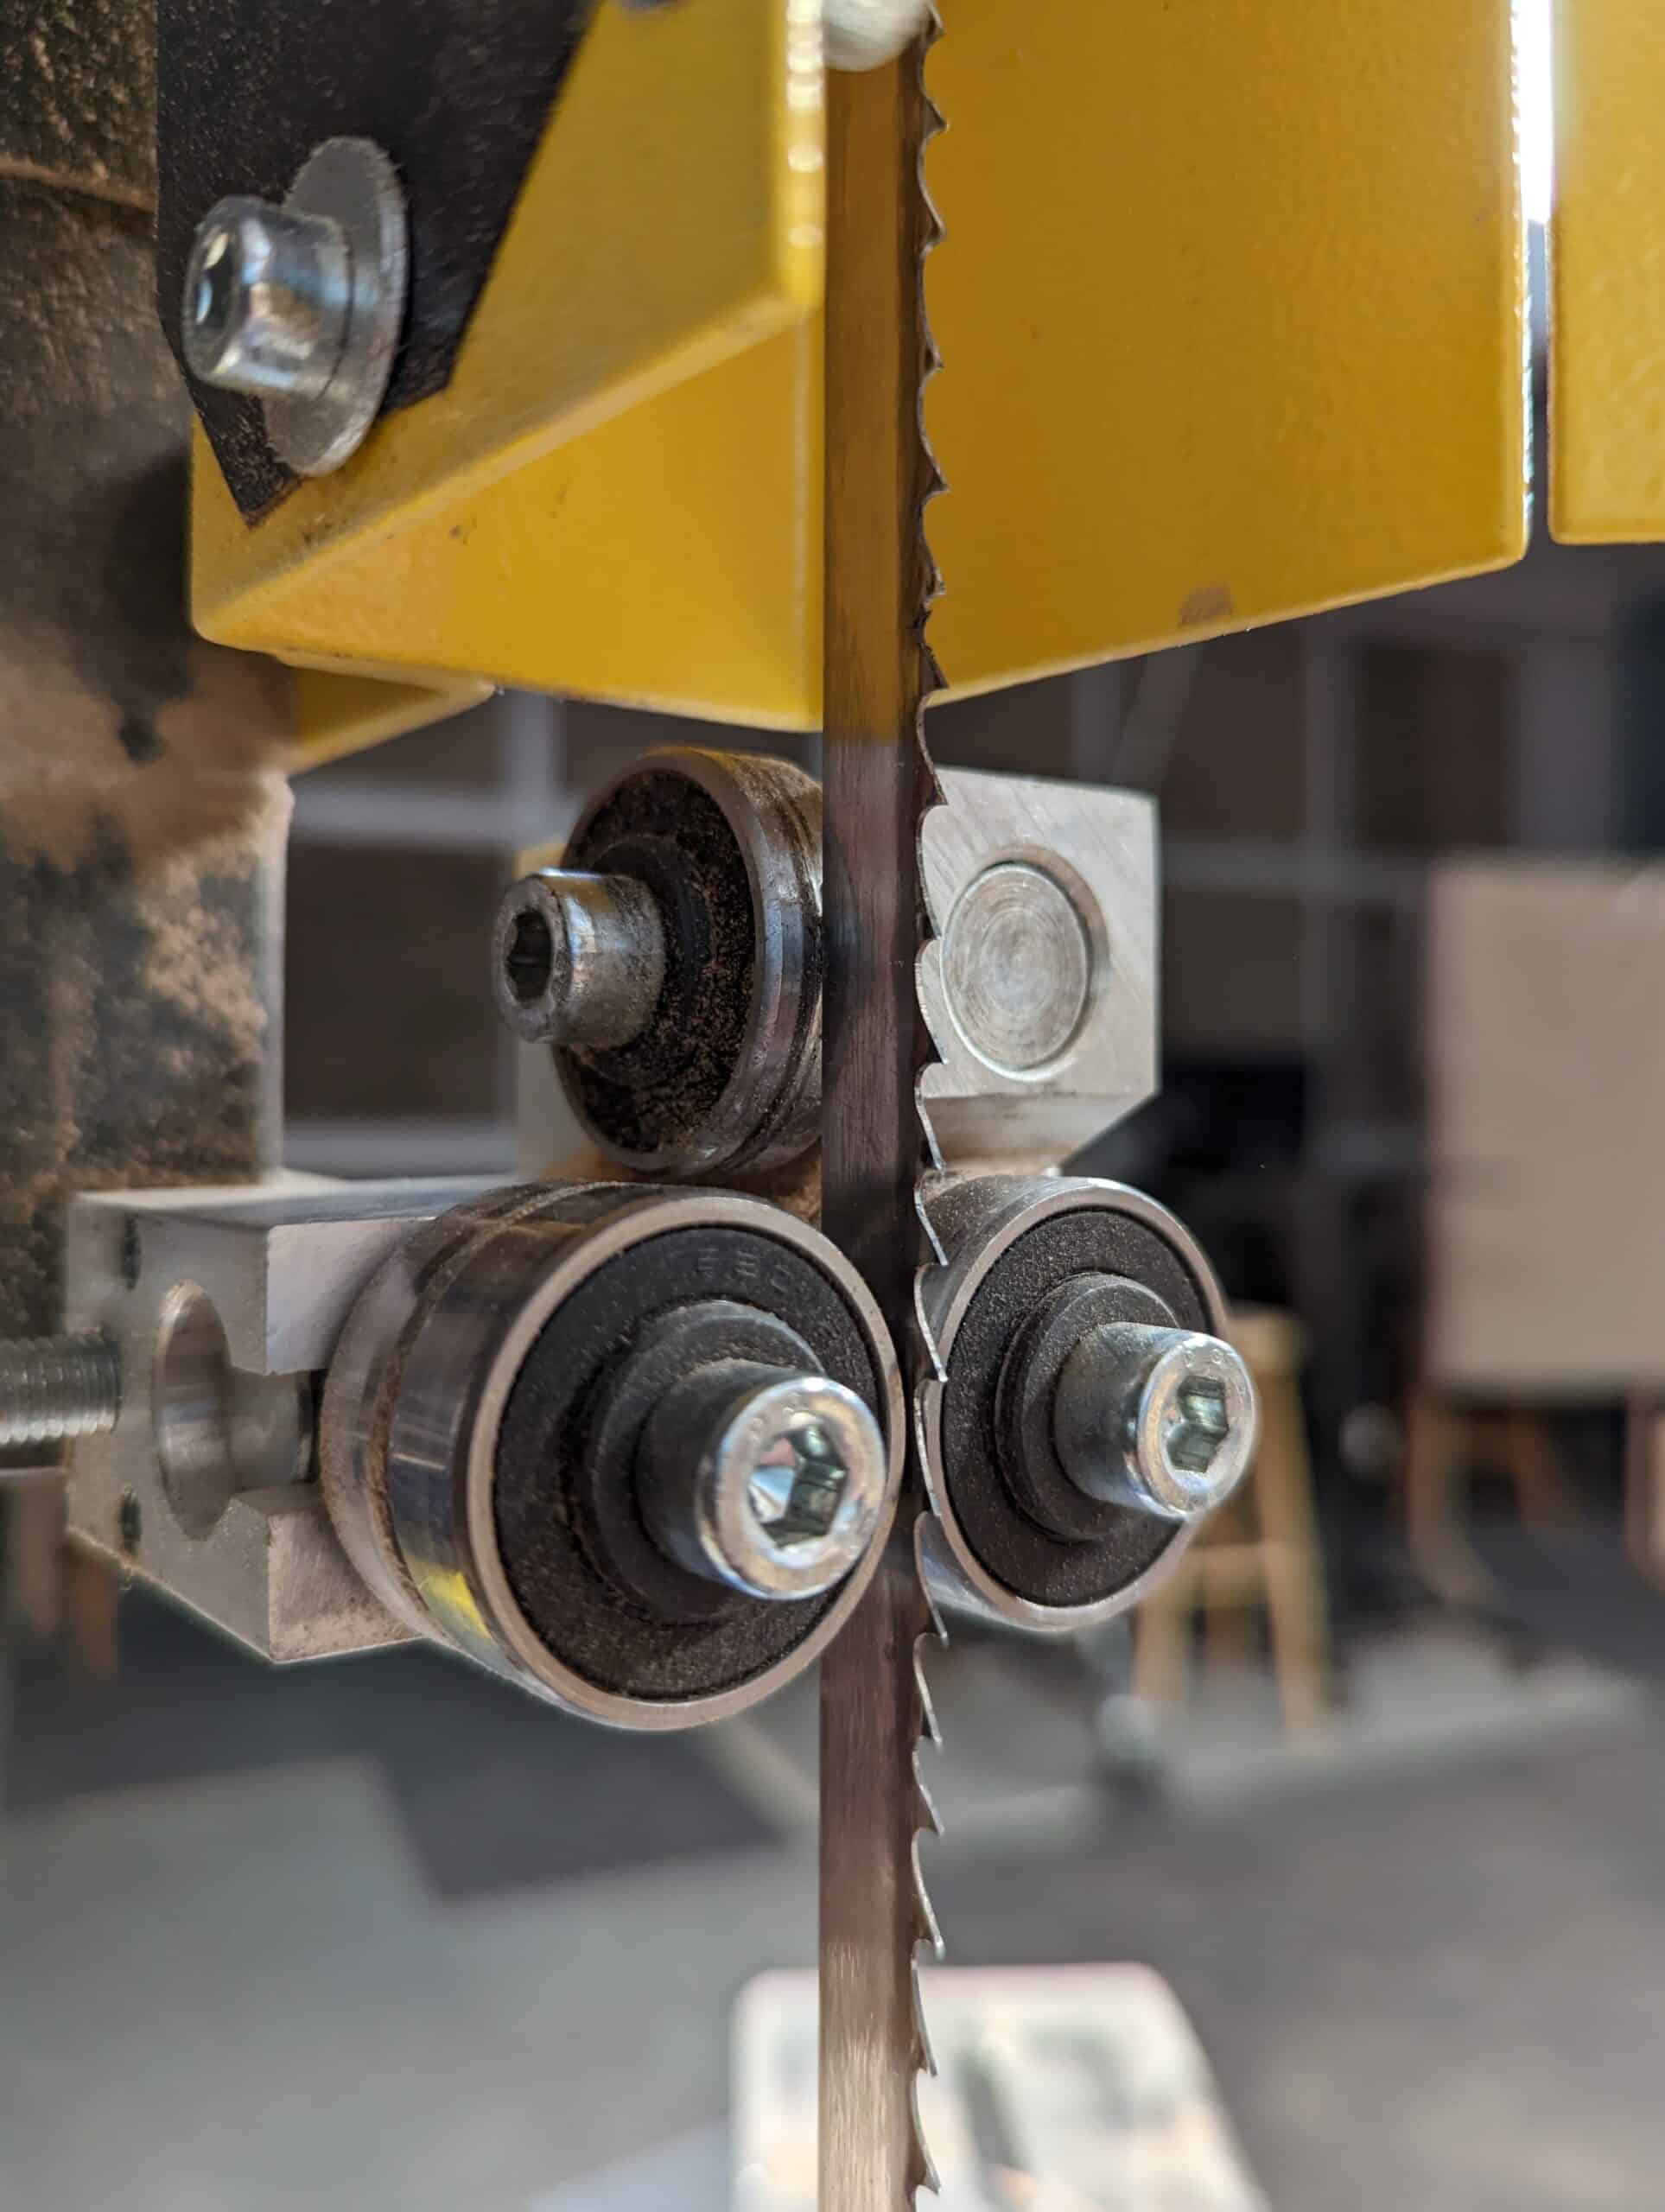
I cannot say exactly how many rip- and cross-cuts I made in cutting the 200 pieces for the wardrobe from the original commercially cut and rough-sawn boards before hand planing but I can offer a guestimate minimum of at least a thousand long-grain cuts ranging from 1/2″ to 8″ deep. Choosing the best blade can be confusing so my best choice of blade might help. It’s a blade I have sued for a long time and one that meets all of my criteria day to day. I look for the gold standard as I do not want to always be changing the bearing positions to accommodate different blade widths and types. Thinner and narrower blades have their place in different work. If you make bandsaw boxes with super tight curves into corners then a blade wider than 1/4″ will be pretty useless to you as anything above 1/4″ is best for straight or gradient curves as in long rip cuts with no tight turns. The narrower the blade, the tighter the radius that can be cut. 1/8” to 3/16” blades tend to be used for cutting extremely tight radiuses with 1/4″ blades being the most common width for general radius cutting. Whichever blade you choose, adjustments to the side alignment guides will be inevitable to ensure the guides maximise alignment in relation to the beam width of the blade. My bandsaw has twin, side-by-side bearings of 10mm each so about 3/4″ of blade can be fully supported if ever I need it but I like the tensionability a half-inch blade gives me in my usual work.
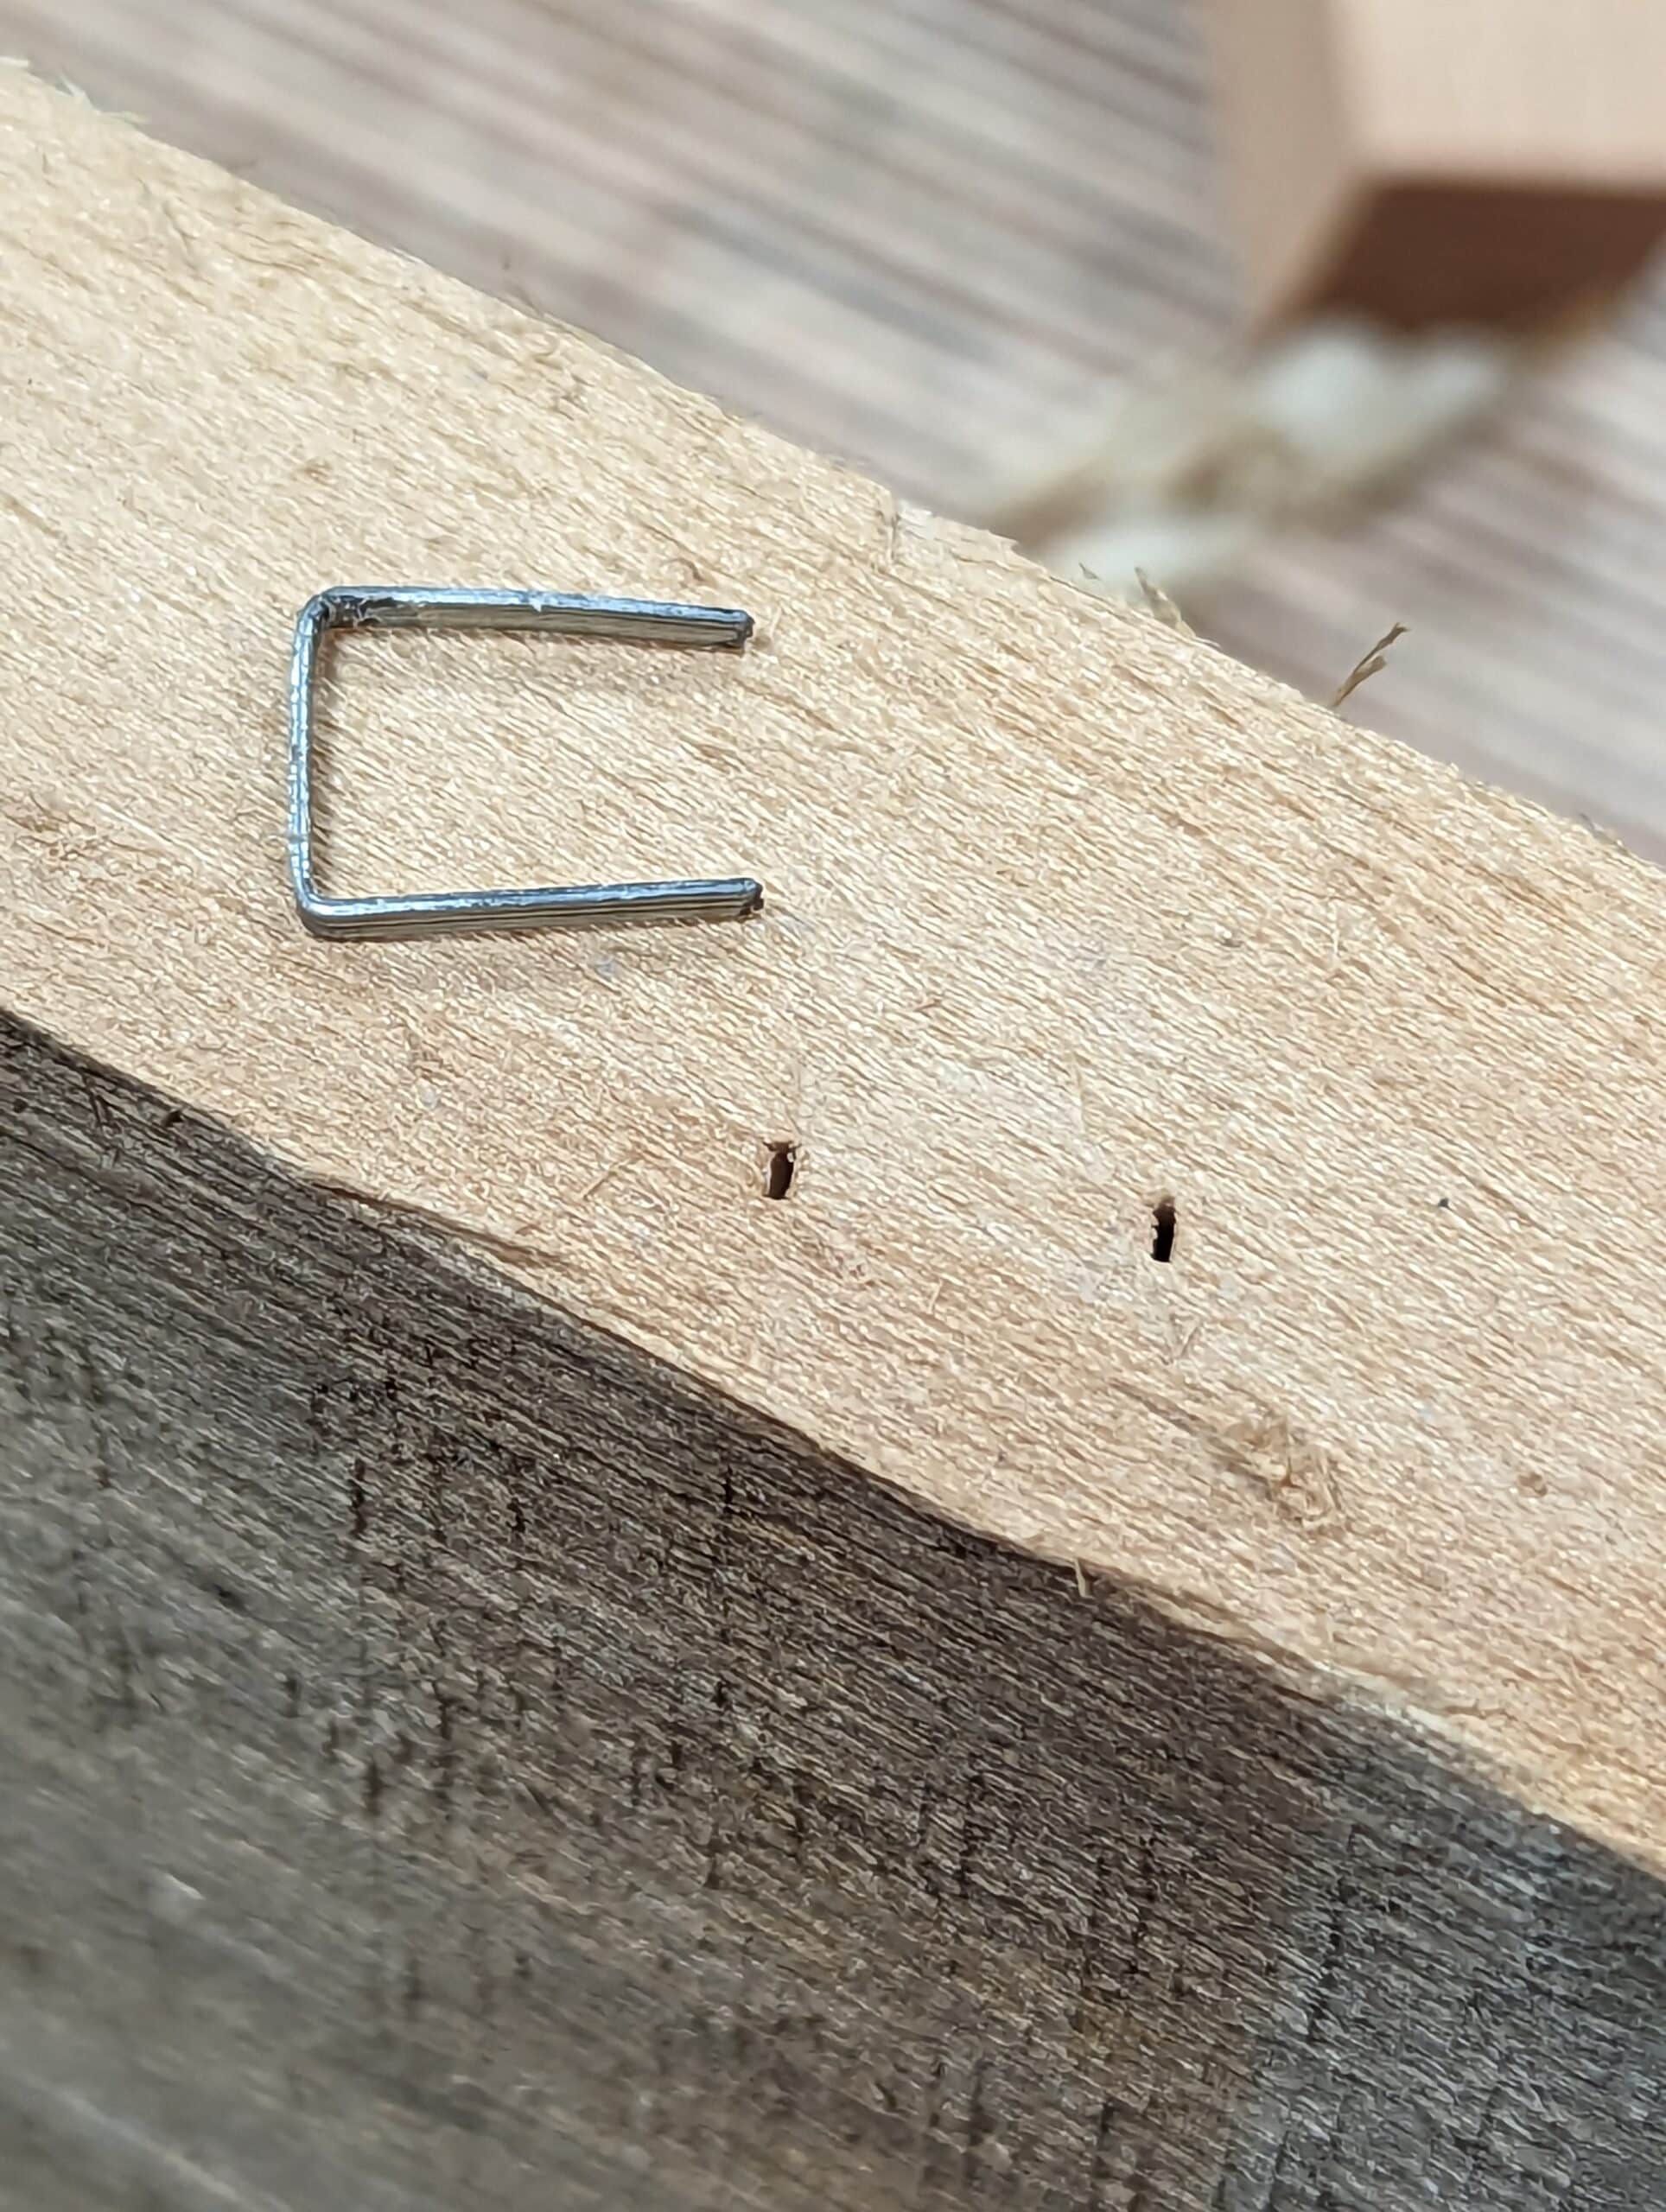
I’m always careful with my bandsaw and the blades in place. No pallet cutting unless the blade is near done with and for good reason. It’s not just the obvious nails and staples but the broken-off ones and the pebbles in the underside slats that embed themselves in the wood. Stones and staples are the worst things for even the hardest teeth as they are fully hardened throughout. I just picked up some walnut at a cost of £240 for just two wide boards seven feet long with a band of staples all the way along one edge.
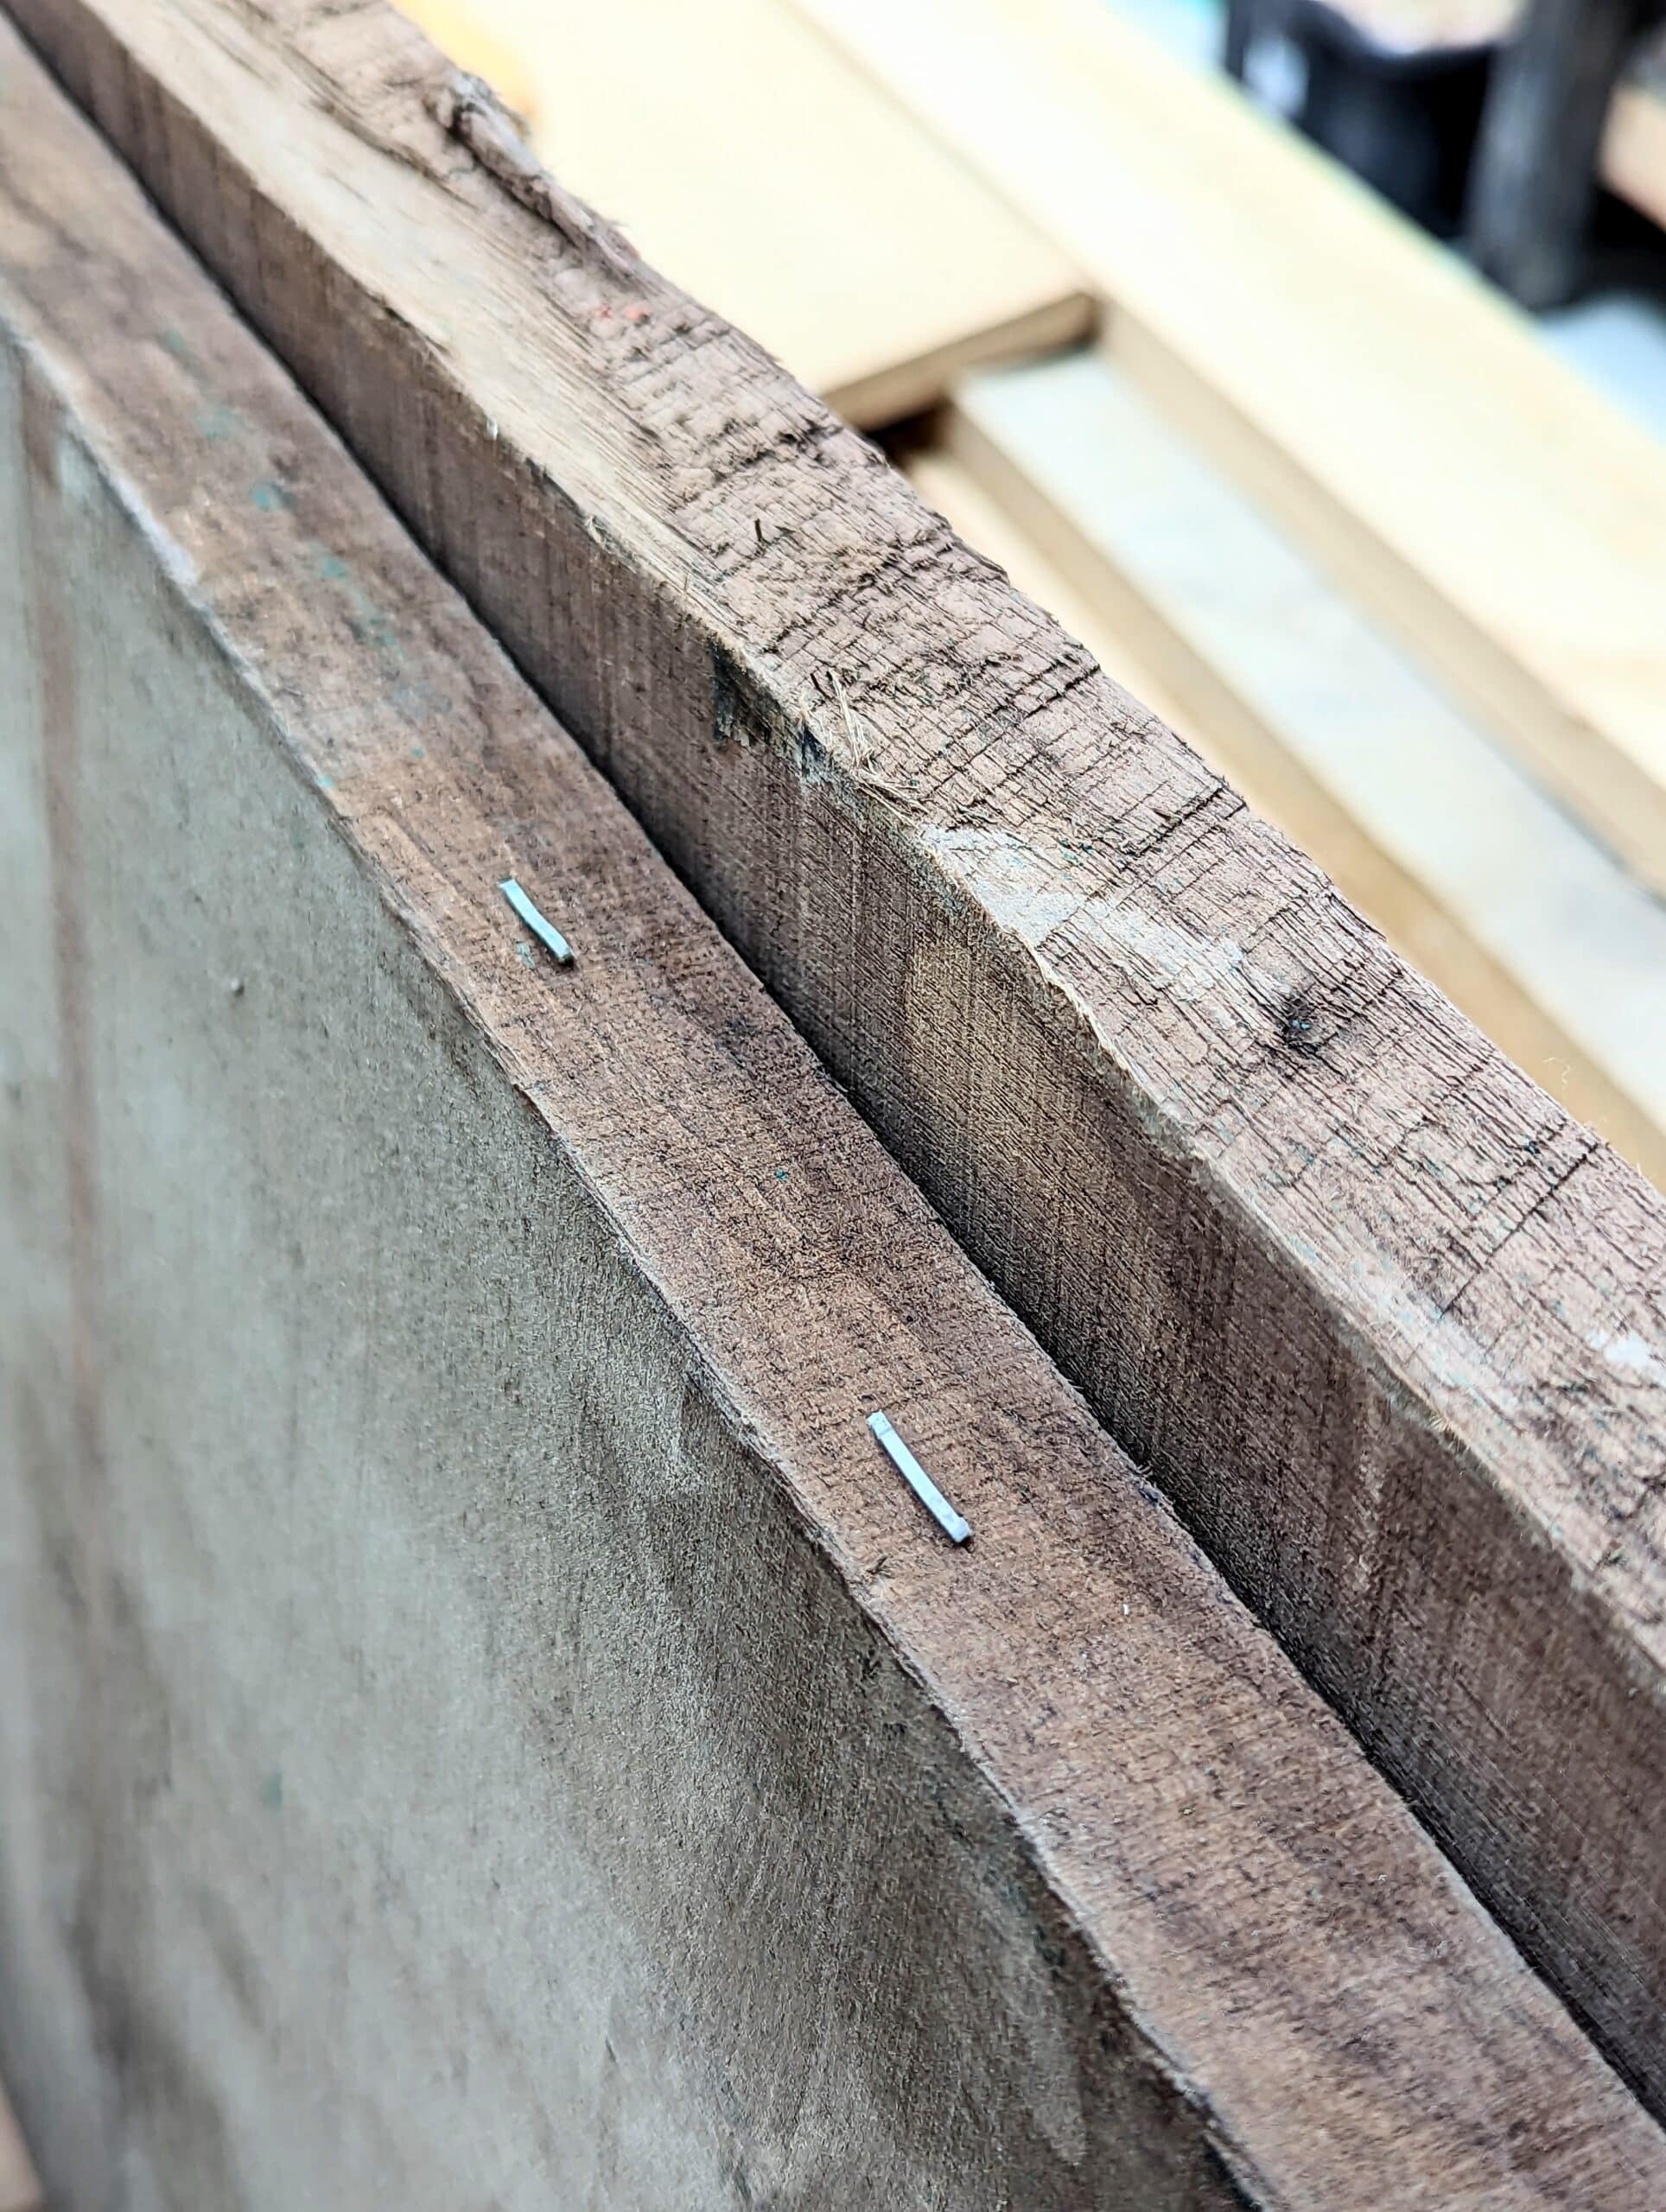
Yes, I can pull the staples, but there are no guarantees that they will always pull cleanly or indeed someone else less connected didn’t leave a staple point in there when they pulled the tarp. I will look for any telltale holes.
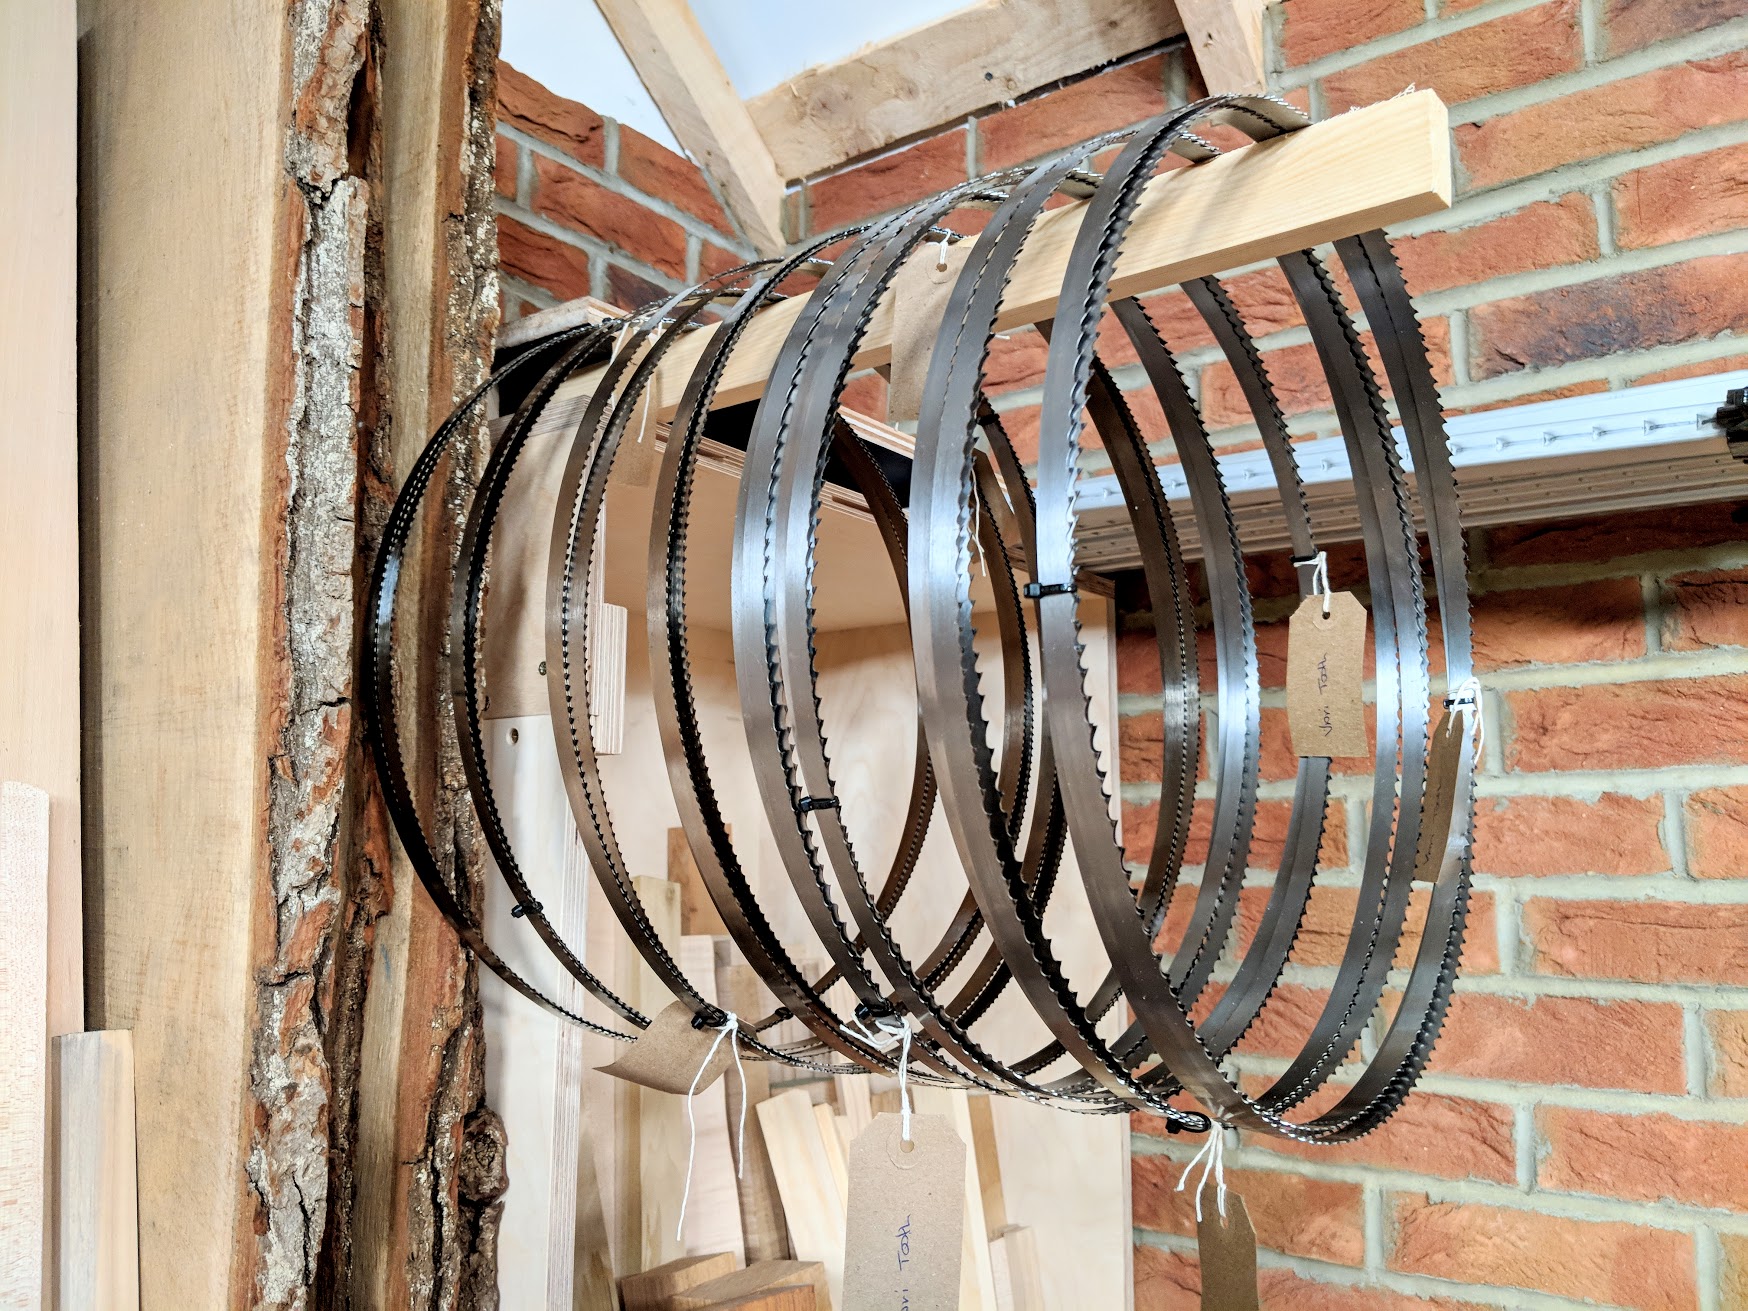
My favourite blade for the type of work I generally do which is predominantly ripcutting wood but also crosscutting too is the Tuffsaws 1/2″ vari-tooth. The ‘vari‘ part is both the size of the teeth, determined by the distance between the teeth points and the various depths of the individual gullets. The 3-4 means the number of teeth can vary between 3 and 4 to the inch run of saw blade.
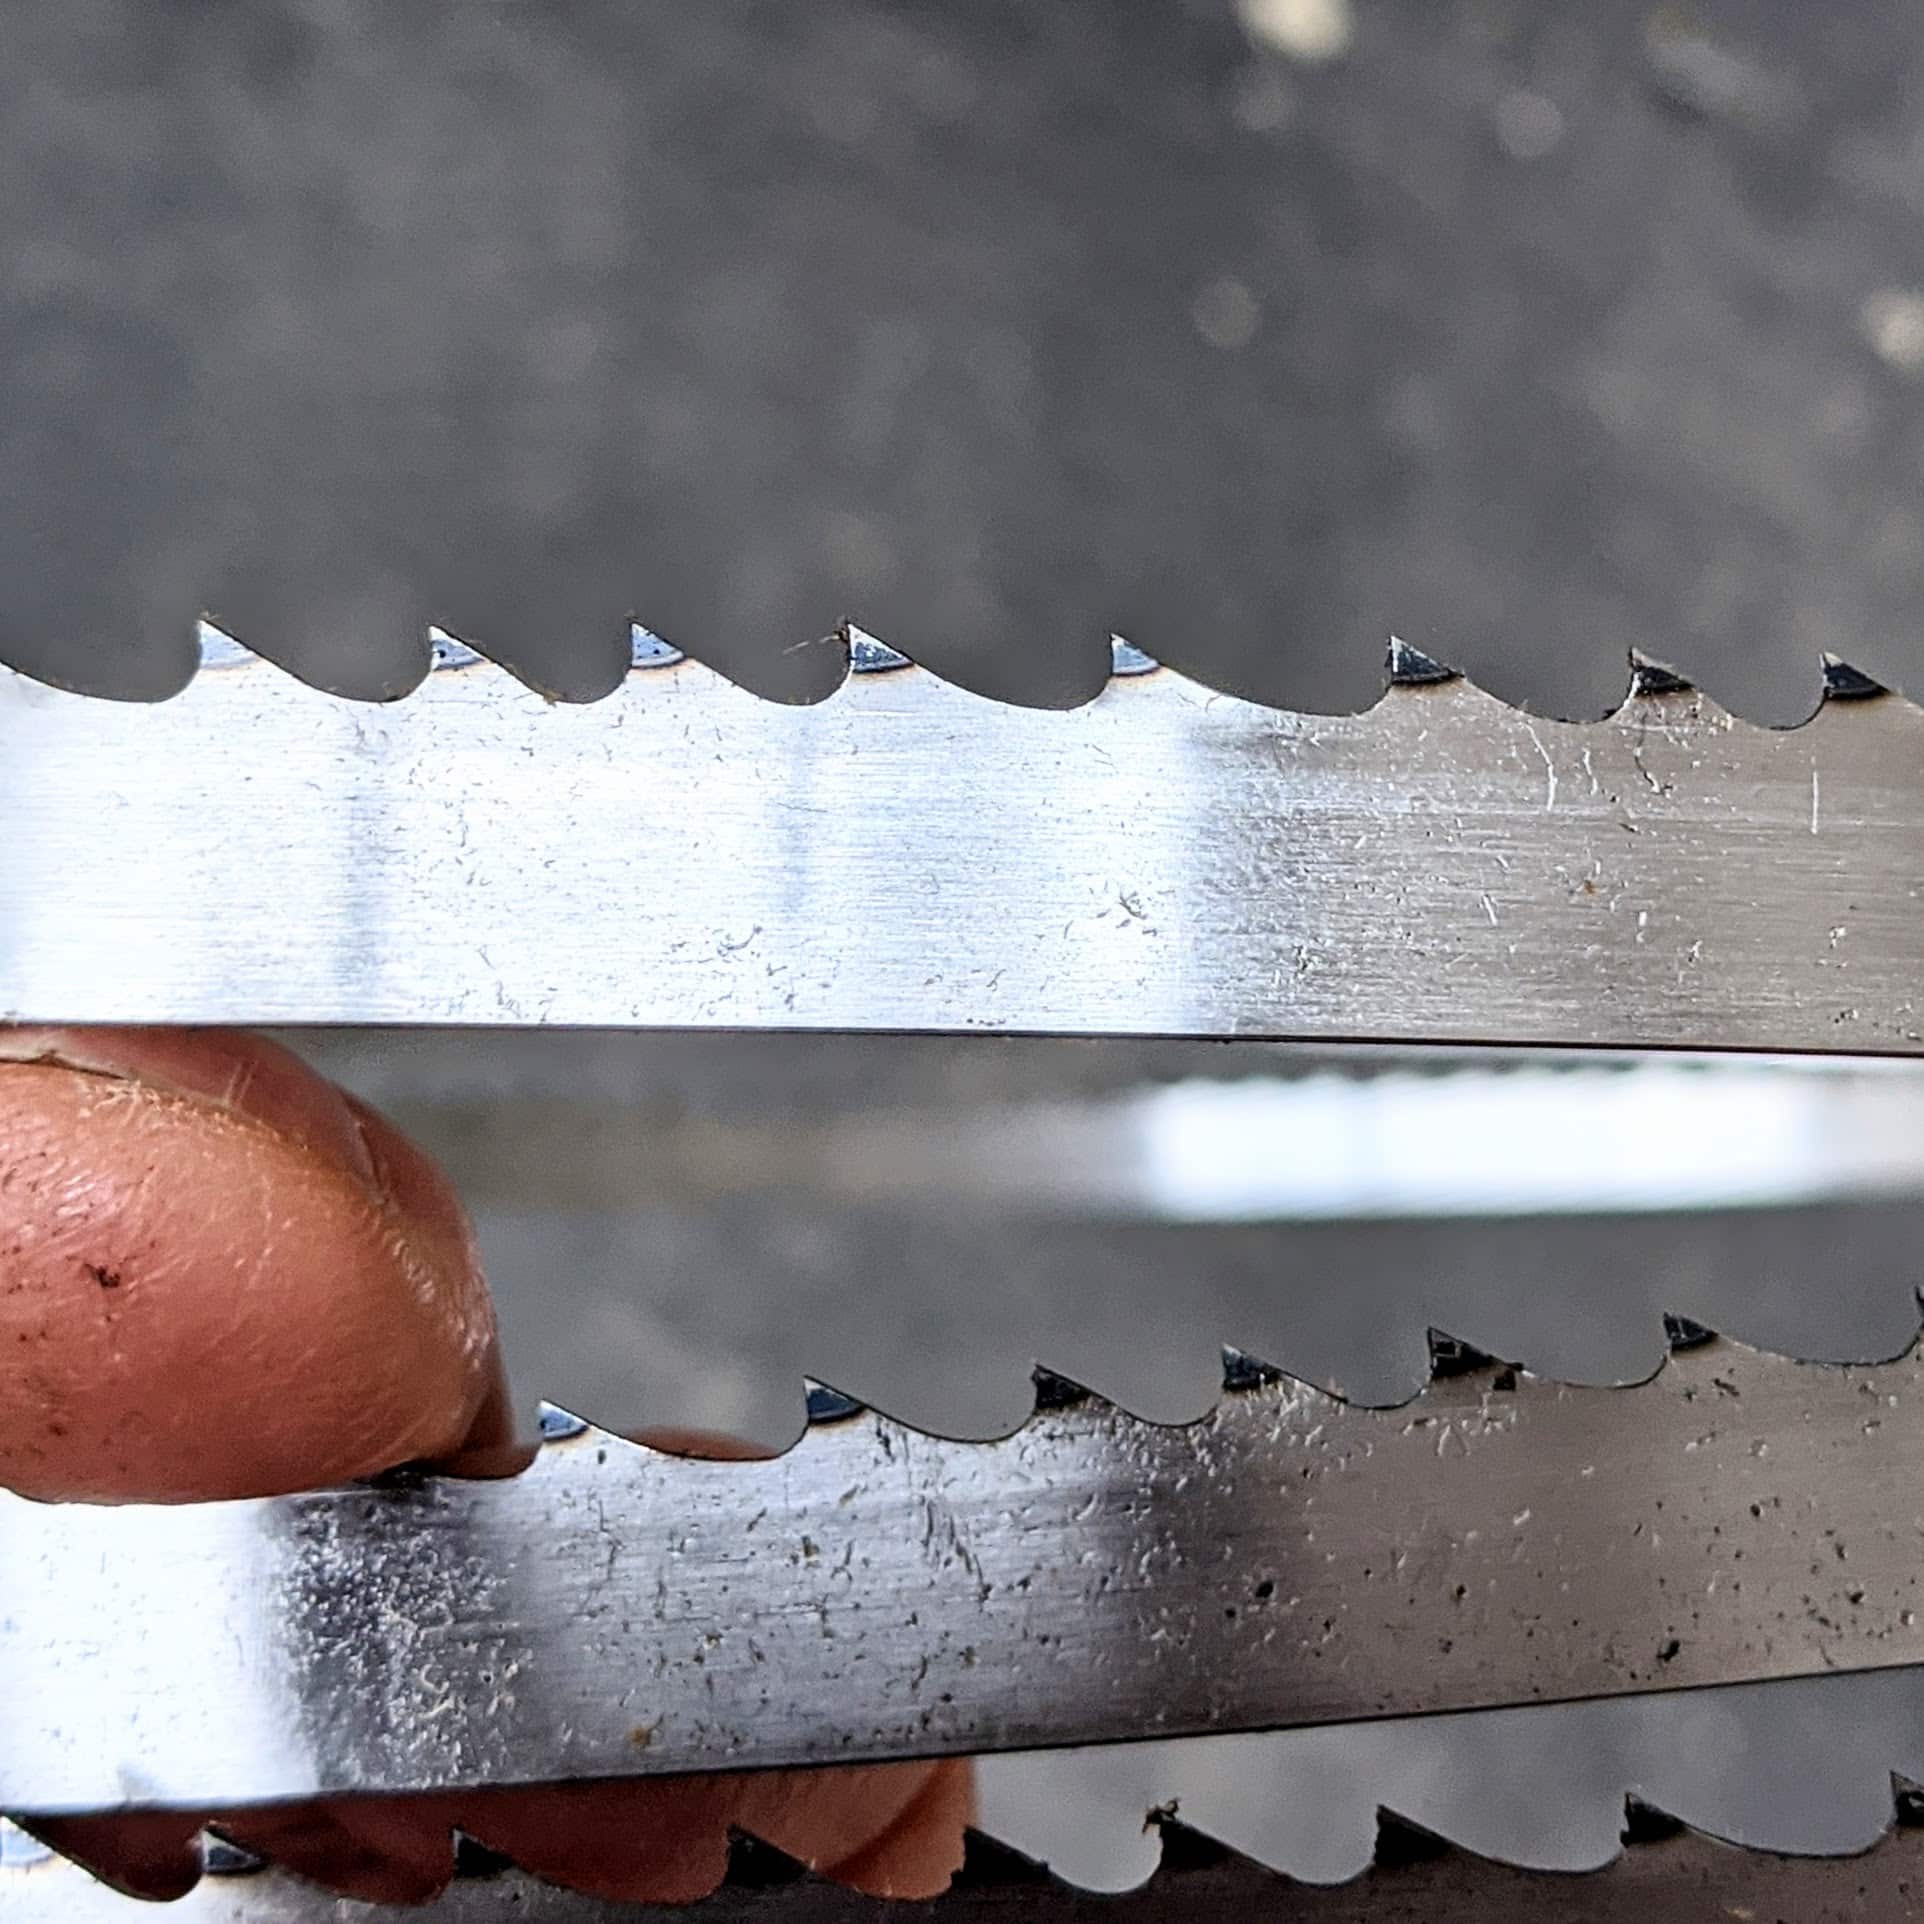
As the tooth points are all aligned to the tooth line and the teeth are different sizes, the gullets dip and dive to different depths. You might think that this variability would cause irregularity in the smoothness of the cut and then to a noticeable difference in the feed as you push the wood into the blade but that’s not the case at all. This variation gives a smooth and even cut, minimises any vibration and results in uniformity. Any variability in needed pressure by the user will be directly because of variations in the grain and there are many complexities to this. Also, variabilities occur through the mechanics of the machine itself caused by blade guides, tensions to the blade, pullied drives and belts used, tyres to the bandsaw wheels and more. It sounds complicated but you will get used to your particular bandsaw and earn what makes a difference as you make standard adjustments. As an example, a pattern for me is to run a new blade for 20 minutes of use and then go back in and check the blade tension, bearing alignments and such like that. I should point out here that using a deeper beam (more than my suggested 1/2″) does not necessarily mean a better cut or indeed the ability for applying greater tension. It can be exactly the opposite and this will depend on your bandsaw. Some bandsaws do not have the capacity to apply the greater tension demanded by wider blades and can indeed compromise the bearings, guide components and the bandsaw frame itself. Applying too much tension will indeed relate to the bandsaw frame type and engineering quality and, as most bandsaws are now steel box construction rather than the cast iron older versions, some box construction types can be more prone to flex according to the applied tensions and other pressures in use. Remember vibration can result in harmonics throughout the box construction which can cause unwanted undulation in the passage of the blade into and through the cut. It takes sensitivity not to over-tension or alternatively under-tension a frame which causes temporary distortion between the wheels top and bottom. The variation of outcome between different tensions can be most remarkable and too much to talk about tensioning here.
My blades cost me around £13 a pop for my 16″ bandsaw. This seems to mean that with a general lifespan of a blade, as a full-time maker, being about six weeks is about 9 blades a year so a yearly expense of £113 per year or a mere £2 a week. Hard to beat.
Hi Paul
Thank you, a very useful article.
I decided to get a bandsaw instead of a table saw a few years ago, partly on safety grounds. I don’t use it much for curved cuts a a jigsaw is more convenient unless precision is needed. The only problem I find with long rips is that the table is small and rather high so I need to set up rollers or a high worktop on trestles each side to control the ‘droop’. I have re-sawn quite a few old joists and although an odd nail I could pull out has been a problem band saw blades are cheaper than tct circular ones! Occasional chips on my spiral cutter were also a problem but it’s a lot quicker to rotate one of these than resharpen a chipped plane iron!
About tooth spacing:
“The 3-4 means the number of teeth can vary between 3 and 4 to the inch run of saw blade.”
“This variation gives a smooth and even cut, minimises any vibration and results in uniformity.”
“Remember vibration can result in harmonics throughout the box construction which can cause unwanted undulation in the passage of the blade into and through the cut.”
Indeed the variable tooth spacing means a variable frequency . That would minimise exciting any saw natural frequency.
About weld:
I understand cutting and welding perpendicular to the length is probably easier (cheaper?). Wouldn’t a slanted cut and welding (scarf joint) be better?
(That was done when assembling tape-record tapes.)
As the manufacturer does this by machine, it wouldn’t necessarily be more expensive.
It would make a difference to have an angled cut I think but TBH I have only had one blade pop on me and I have been using Tuffsaw bandsaw blades for over ten years and they are wonderful people to deal with too.
Paul,
As usual you demystify something that a lot of people make very complex, thank you! You take care to stress the most important points in the setup and make the rest as simple as possible.
You stress the importance of blade tension. But the hardest part of your method to understand and duplicate is where you set/verify this value. I guess you are just verifying because you have determined you need to over-tension the blade relative to the manufacturers gauge on the machine.
How high is the block you use relative to the space between bearings on your saw, and how hard do you press the blade? Is the block shift exactly a quarter inch or 5/16″ or something else?
There are a lot of bandsaw blade tension meters out there that start around $350 and go up from there. I found a device that uses magnets to set the tension which costs about $40 (the EZTension Bandsaw gauge). It seems hokey but it also improved the cut on my bandsaw right after I used it the first time. I just started using on one blade, so I haven’t given it a full trial yet.
The gauges on the machine really don’t work but can be used to show a level of tautness. I have never ever found a guide to be anywhere near accurate and so havenever worked for me and for a couple of reasons including blade length variation and then too the stretchability of the steel used too. It might be simpler to say with a six inch distance between the roller guides and the table top the blade should flex left or right of verticality no more than 2mm either way so a total combined of 4mm. If you cannot move it then the tension is too tight.
How does the over tensioning of the blade affect the tires on your saw?
Compression of the material used in the tyres and applying excess pressures to any and all components not the least is the bearings themselves is bound to increase wear and throw the wheels out one way or another.
I believe that only works on carbon steel blades.
I wonder what other bandsaw blades people like. Based on some online discussion group comments, I am using the Wood Slicer from Highland park. It calls itself as a resaw blade. It works well on my not particularly great bandsaw for resaing and ripping — I have never tried cross cutting with it.
However, it is pricy and I cannot yet speak to it longevity.
I also use the Highland wood slicer. 1/2″, 3-4 variable. The size I use runs about $40. Certainly more expensive than the Tuffs Paul gets in the UK, but I have no complaints.
I use them most for re-sawing into thicknesses suitable for musical instruments, but also cut curves and crosscut. Like Paul’s, they are capable of a smooth cut.
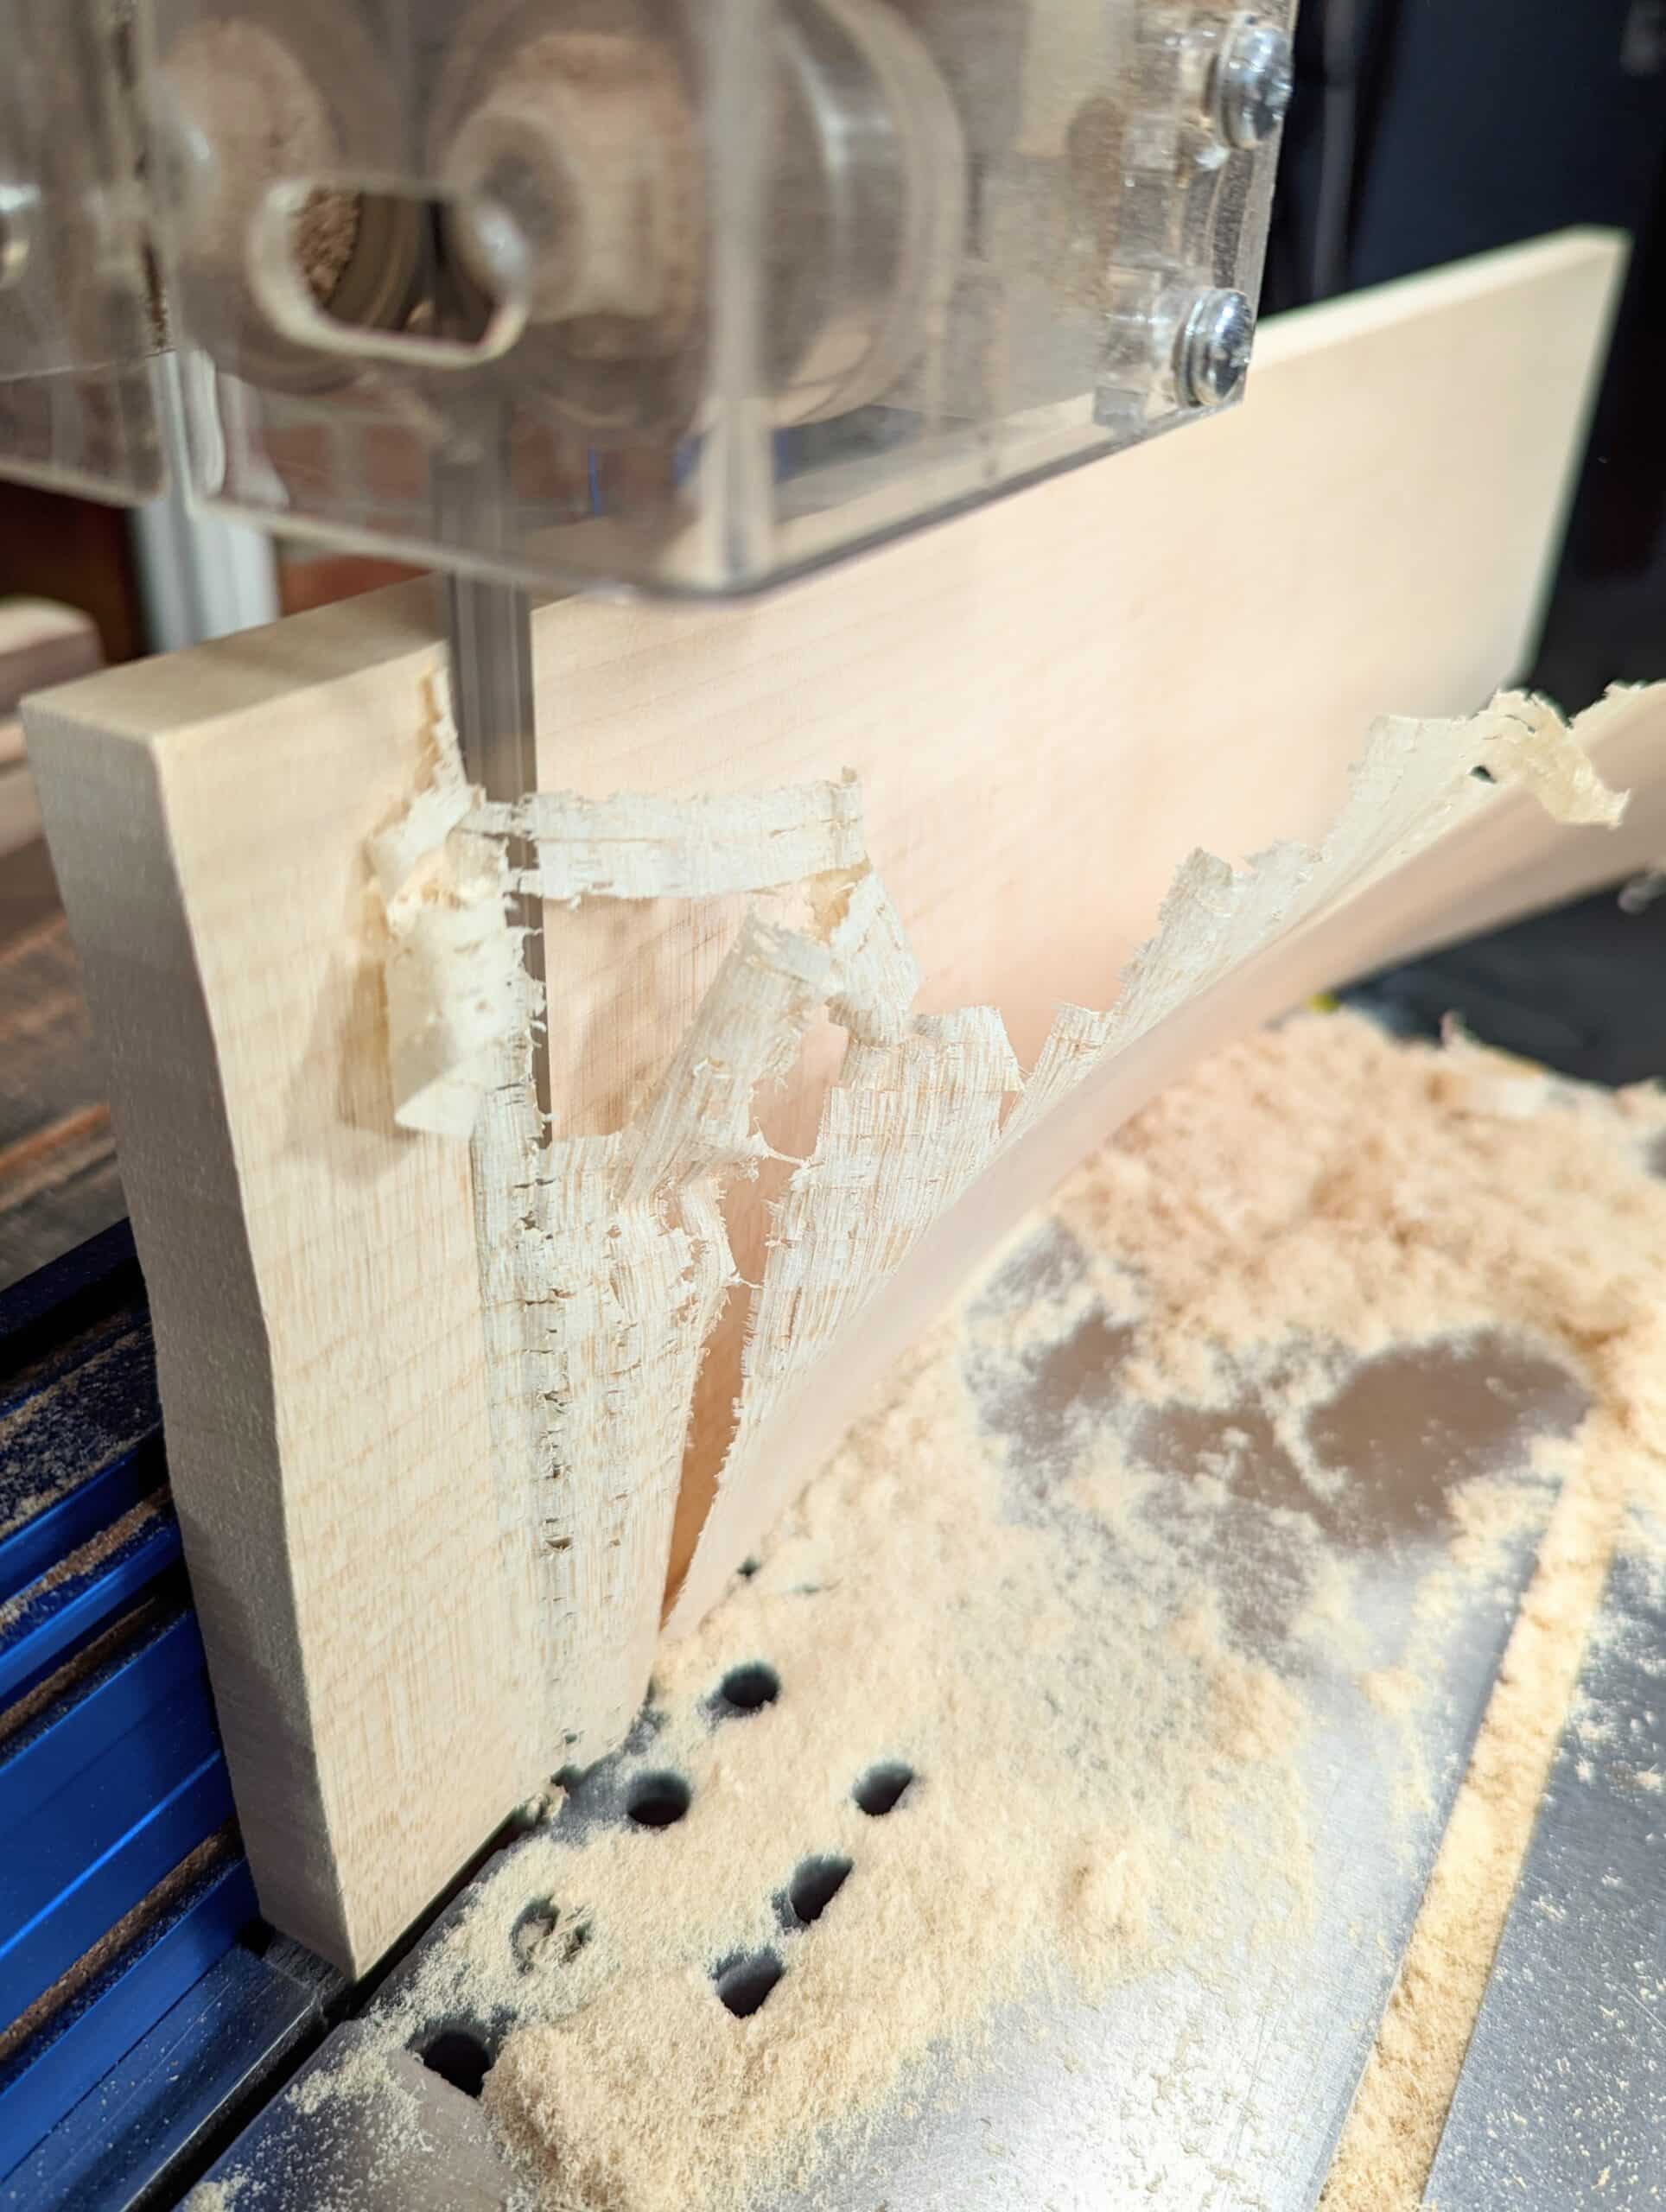
Paul, Thank you for the timely blog post. I was making a skimming cut (like your 3rd picture in the blog), and my blade was being pushed to the outside of the board as if the board was altering the course of the blade.
It sounds like I need more tension.
Do you have a bandsaw blade that you could recommend for your US readers based on your time in the US? A lot of folks have recommended the woodslicer blades from highland woodworking but they seem pricey.
I ran a boat shop for a dozen years- the best blades that I could find were from my local tool shop, made to my specific request. Lennox stock, which has various specific types depending on your needs. Tried different mail order, best were a phone call away, and prices were reasonable. Call around and see what is local to you.
Thanks for the tip Randy!
Thanks Paul, I’ve been looking at bandsaws, but I’m really not sure which to go for, and the required dust extraction is putting me off too.
I’d love it if a foot powered bandsaw was available! I did see a drawing of one online from a book called “Manuel Du Tourneur” by Bergeron, which was essentially a frame saw on a stand. Pushing the pedal down pulled the saw down the way, with a bow/spring setup providing opposing force. I guess there is nothing equivalent today, and no need for there to be!
Hi Rico,
The dust extraction put me off for years as well. There are several youtube videos that show how individuals have been able to get good dust extraction via a shop vac. You just have to pick-up the dust right below the table. I was able to use a product called loc line to do this.
I have a ridgid shop vac with the upgraded “Hepa like” filters and a bag. My particulate count is very low in my shop when I measured it with a particulate counter.
Hi Paul, I bought a used 12″ bandsaw a couple of years back. I don’t use it much as, for me, it seem more trouble than it’s worth. Putting new blade on solved my early problems 🙂 . But ripping straight was a problem, even after watching youtube videos, etc. Ditto a screw-on fence guide gadget 🙁 Then I bought a couple of deep, low tpi ripping blades, much as you suggest. From one cut, it seems a significant improvement 🙂
But then my drive belt broke! It was worn by previous owner and I had anticipated it, by having already bought 3 spare drive belts! Problem now is that I cannot fit it! 🙁
I’ve taken the circlip off but the bottom wheel won’t budge, even with a hub-puller! Even removing the big axle-nut at the back of saw 🙁
Any suggestions appreciated. [It’s a Perform ccbb2 from Axminster. The instructions are useless.]
On the plus side, I recently sharpened the 28″ 3TPI rip handsaw I bought on eBay a while back and it works, although my sharp vintage 16″ Elsworth (maybe 7 or 8 you?) seems to work just as well or better! 😀
The link belts are the best, don’t take a set from sitting. Adjustable in (if I remember correctly) around 1/2” increments, last forever. Can’t remember what the exact name is, but all of the larger suppliers will have them. Good luck!
Thanks Randy, that’s a good idea, which I considered before I bought 3 replacement drive belts (3? I forget why 3; presumably surprised and pleased to find drive belts intended for my specific bandsaw! 🙁 ).
But perhaps time to reconsider. I wasn’t sure what size and type of link belt would be appropriate – but I suppose I can at least measure my spare belts now! :D.
It’s a pity they didn’t make the drive belts a little longer, so it’d just fit over and past the lower wheel, so it didn’t need to be removed!
My mistake, my now favourite, slim, Elsworth saw is actually 22″ not 16″ (and I probably meant 7 or 8 TPI).
I do have another saw which is 16″, which I used today, handy. The federal Eagle medallion suggests it is a Disston. I’m thinking American. One of Paul Sellers favourites I believe after researching it a bit today 🙂
(I have other Disston saws, USA and Canadian, more by luck than judgement, both types seem okay to me).
Hi Paul
Just a suggestion. Many of us are spending too much time on our devices getting screen time into our eyes, which is not good for our eyes largely, because our blink rate goes down.
I like to print off your blog postings and read them before I go to sleep at night in bed. I stop looking at devices about an hour before bedtime because they find it makes it more difficult to go to sleep. So here’s the suggestion,publish your blog in such a way that you can easily print it off in a PDF format. What I find often happens if I try to print from your blog is the end up with a lot of really large blank spaces, because the images don’t size to fit the page anyways, just an idea give it some thought OK take care .
Thank you Paul! This is exactly what I wanted to know.
Jon
I don’t know if this is good practice or where I learned it, but I’d be happy to hear if anyone else does this (or if it is a bad idea). I set the blade tension by vibration. I mount the blade, clear the guides out of the way, and use the scale on the saw and “by feel” to set the tension on the low side. Having already centered the blade by hand, I’ll pulse the power to make sure the blade will run true and then start the saw. On my saw, as I come up from low tension, the vibration will get larger (resonance) and then will die out again. If I went up higher, it might resonate again. Anyway, I set the tension just above that resonance, where I see the vibration is minimized. I can’t do this blindly…if my first guess is too high, I might start above the resonance and have to come down, for example, and I suspect there are multiple resonances. So some experience is needed to choose where to start and to choose which direction to go. Overall, on my saw, the tension scale from the manufacturer tends to be a good guide and I’m really just refining the tension. My saw can handle 1/8″ up to 3/4″ and I usually have a 3/4″ Woodslicer blade on.
My first bandsaw many years ago was a Delta 14in. For years I was not using it so I sold it. Then I ran into a sale for a Rikon 14in and it has a cut height twice that of the Delta. Also a 1-1/2hp dual voltage motor. I keep a 5/8in 3 tooth skip in it most of the time and use it almost exclusively for ripping but it is by far the safest and fastest way to cut thin strips too. Even though it is of Chinese manufacture it is well built and far less expensive than the Laguna I was looking at. For ripping the widest blade your saw will take and the coursest tooth count the better. I used to work for an industrial supply that had our own blade welder and have found that Lenox blades are about the best there are and use them whenever I am able to make them.
Thanks for confirming that a wide, coarse blade is the way to go for ripping 😉
Pail- as usual wonderful and helpful insights.
Keep it up.
Best
Martin
My 40+ year old 16″ Grizzly bandsaw has a cast iron frame, and cast aluminum wheels. It did not come with a tensioning gauge, so I strum the blade until it sounds right, and that has worked for me.
Hi Paul, what horsepower is the bandsaw motor you use? I set my saw up as best I could following the guides on this site and it did improve the quality of cut and the way the sawcuts. the bandsaw still bogs down quite a bit when resawing though; it would stop conpletely if I really pressed it. I do go very slowly too and lighten the pressure when feeding the wood. I have old salvaged Douglas fir I would love to resaw into multiple boards and I’m wondering if I would need a motor greater in horsepower than the 1hp motor that came stock
Teeth number and feed rates vary, depth of cut major component. I have ripped thousands of feet of cherry with a 3/8” 3 hook with no issues up to 8-10” depth. This was an old delta with a riser and a 1*1/2 hp baldor if I remember correctly.
I had the same problem, and wondered if I was under powered. I have 1/2 HP. I bought a new 1/2 inch Timber Wolf blade all my problems disappeared.
Thanks Paul. Some helpful info for sure. Very close to getting my bandsaw operational. Ironically, I needed to add more power to my garage so that I can bandsaw and collect the dust. Felt funny being a hand tool woodworker and needing electricians.
Are carbide teeth blades worth purchasing for bandsaws? I’ve heard they last longer and can be sharpened a few times. I don’t mind the initial outlay of cash if they indeed have a long term value proposition. However, it could be the risk of a pebble, dirt, or metal destroying a blade makes it not worth doing.
On another note, I needed to cross cut about 10 boards that were 12″ wide by 1″ thick. I was curious how long it would take to crosscut by hand so I timed myself going at a medium pace. Took all of two minutes to cut by hand for each board (just the sawing time; not the time to put on bench etc – that didn’t take long either). Fast enough where I’ve never felt the need to own a chop saw or table saw for this operation.
The best investment I made for my bandsaw was one of those metal detecting wands used by doormen at nightclubs etc , (I use reclaimed timber ) Mine (ebay) was cheaper than a new blade, and will detect metal I can’t see, even with my glasses, but I’ll know where to search carefully!
My Bandsaw has a 1 1/2HP motor. I have never had a need for tungsten tipped blades and have only really seen them on commercial machines used in industry.
Hi Paul and team,
I have a record sabre 350 bandsaw, it’s new for me and i found à lot of problem. Very difficult for ripcut, I use Axminster blade 3/4’ in 3 tpi and 1/2’ in 6 tpi. My wood does not advance and smells burnt.
I ´ m in trouble. Do you have any advice ?
Cheers, Ludovic
Yes, you don’t saw what machine you are suing but I suggest you forget 3/4″ blades, lots of friction there and questionable tensioning on wide blades hence greater resistance. I also question your using a 6TPI blade. Rarely does anyone need more than 4 TPI. 3 to 4 TPI gives much deeper gullet which removes the sawdust more rapidly. You will get much less resistance.
Thanks Paul, do you think this machine is not a good one ? I live in France and we dont have a lot of possibilities.
Resharpable blade are good or it’s better to continuing with hard teeth blade ?
FYI I think my 2 new ripping blades are 5/8″ deep/wide (less than 3/4″ but max. for my Perform saw – perhaps too deep still?). They are 3 TPI. (And packaging Label says Starret, Scotland.)
Hello Ludovic, I have the same bandsaw and I had a very similar problem, on the black plastic table insert there are two tiny grub screws to lift the insert to be completely flush with the table. this stops any splinters catching if there is a slight step. This solved my problem, I hope this works for you
that explains my sloppy bandsaw cuts. having served in the Navy, i can say with experience my bandsaw cuts like a drunken sailor…using a bandsaw. Tension is too low. Really helpful!
It’s sad that Tuffsaws don’t ship outside UK. I live in Europe and never found another supplier of a 1/2″ 3-4 VTPI 🙁
Hi Paul! I grew up in the States watching woodworking shows with my father on PBS. Most of those shows back then were machine based and I grew up thinking that if you want to get into woodworking today, you had to use machines. Well I am a very novice hobbyist who is trying to migrate from machines, to mainly hand tools, but I still want to keep the machines for repetitive work or carpentry/ home improvement projects. Anyways, I have been saving up to purchase a new table saw with the safety system but I am starting to reconsider and I am thinking I may purchase a nice band saw instead.
I also want to take a moment to thank you for your YouTube content. Your explanations and tutorials gave me confidence to try sharpening and using my hand tools. I now have my great-grandfather’s Stanley no. 4-1/2, my chisels, and my hand saws sharpened and being used on my first big project. I have chopped mortises (still need practice), planed boards flat, and edge jointed boards by hand. Once I finish my project, I hope to build a new work bench, and make the Paul Sellers router plane. Thank you again and I look forward to more content!
Nick
A question I have about blades is whether they are brand specific? The supplier of my band saw in Australia sells only their own brand of blades, and they don’t have any vari-tooth options. Are their generic blades available? It seems to me I would need to find one close to the length of the branded option for it to be compatible with the saw.
I’m sorry. I can’t answer that. Starrett is a key player with good blades and a variable tooth pattern so you might start there as they supply bandsaw blade makers wholesale where the bands material comes on a long roll and are welded to specific sizes.