Drying Down or Drying Up
There really is no one measure-fits-all all wood types when it comes to its moisture content. Green wood in the tree at the point of severance from its root can vary between around 30 to 300 per cent depending on the wood or tree type, the location of moisture in the stem and the season of the year. We woodworkers don’t need to know too much about this unless we are logging our own wood. When we do concern ourselves with moisture or water in the wood when we start to consider using this and that piece for an upcoming intention to make something from it. Dense-grained wood in our temperate regions will be somewhere between 6––25% with an average of around 12––15%. It’s the local conditions of air temperature and relative humidity that dictate the final moisture levels in our wood. Controlling the environment we work in will impact our wood. This is not always easy for us.
My wood goes into a special dry-time period set aside as my period of acclimation. Is acclimation the same as acclimatisation (use a ‘z’ instead of ‘s’ in the US)? No. One is a result and the other a process. Acclimation is a result of being accustomed to a new climate or condition. My woods change in different environments. My workshop is relatively dry compared to the house we are making furniture for. My tighter tolerances for inset doors and drawers have resulted in my needing to take remedial action later in the day when the furniture has been placed. The drawer sides expanded sufficiently to make them unopenable. One of the side cabinets in the dining room expanded so much that I needed to use considerable leverage to remove one of the drawers. It’s one thing drying my wood down further in my climate-controlled low-humidity garage space and another taking into a home where the daily life of a family showering, cooking, breathing, wet clothes from rainy seasons and such influence to moisture levels of the atmosphere so markedly. But still, it is a good thing to work with dry wood and be prepared to either design accordingly or go in later and ease whatever needs a shaving off somewhere. Because we only work in solid wood we must be aware that wood will indeed swell and contract in our homes. rarely can we truly control the atmospheric moisture content without permanently using a dehumidifier. I take two gallons of water out of the house in a given day at this time of year. Even the MDF doors installed by the builders swell and stick if I don’t take the steps to remove some of the atmospheric moisture (AMC). We don’t have winters cold enough to eliminate AMC in the surrounding world around our homes; from here on, until summer 2024, we will indeed be wet even if it’s sunshine every day.


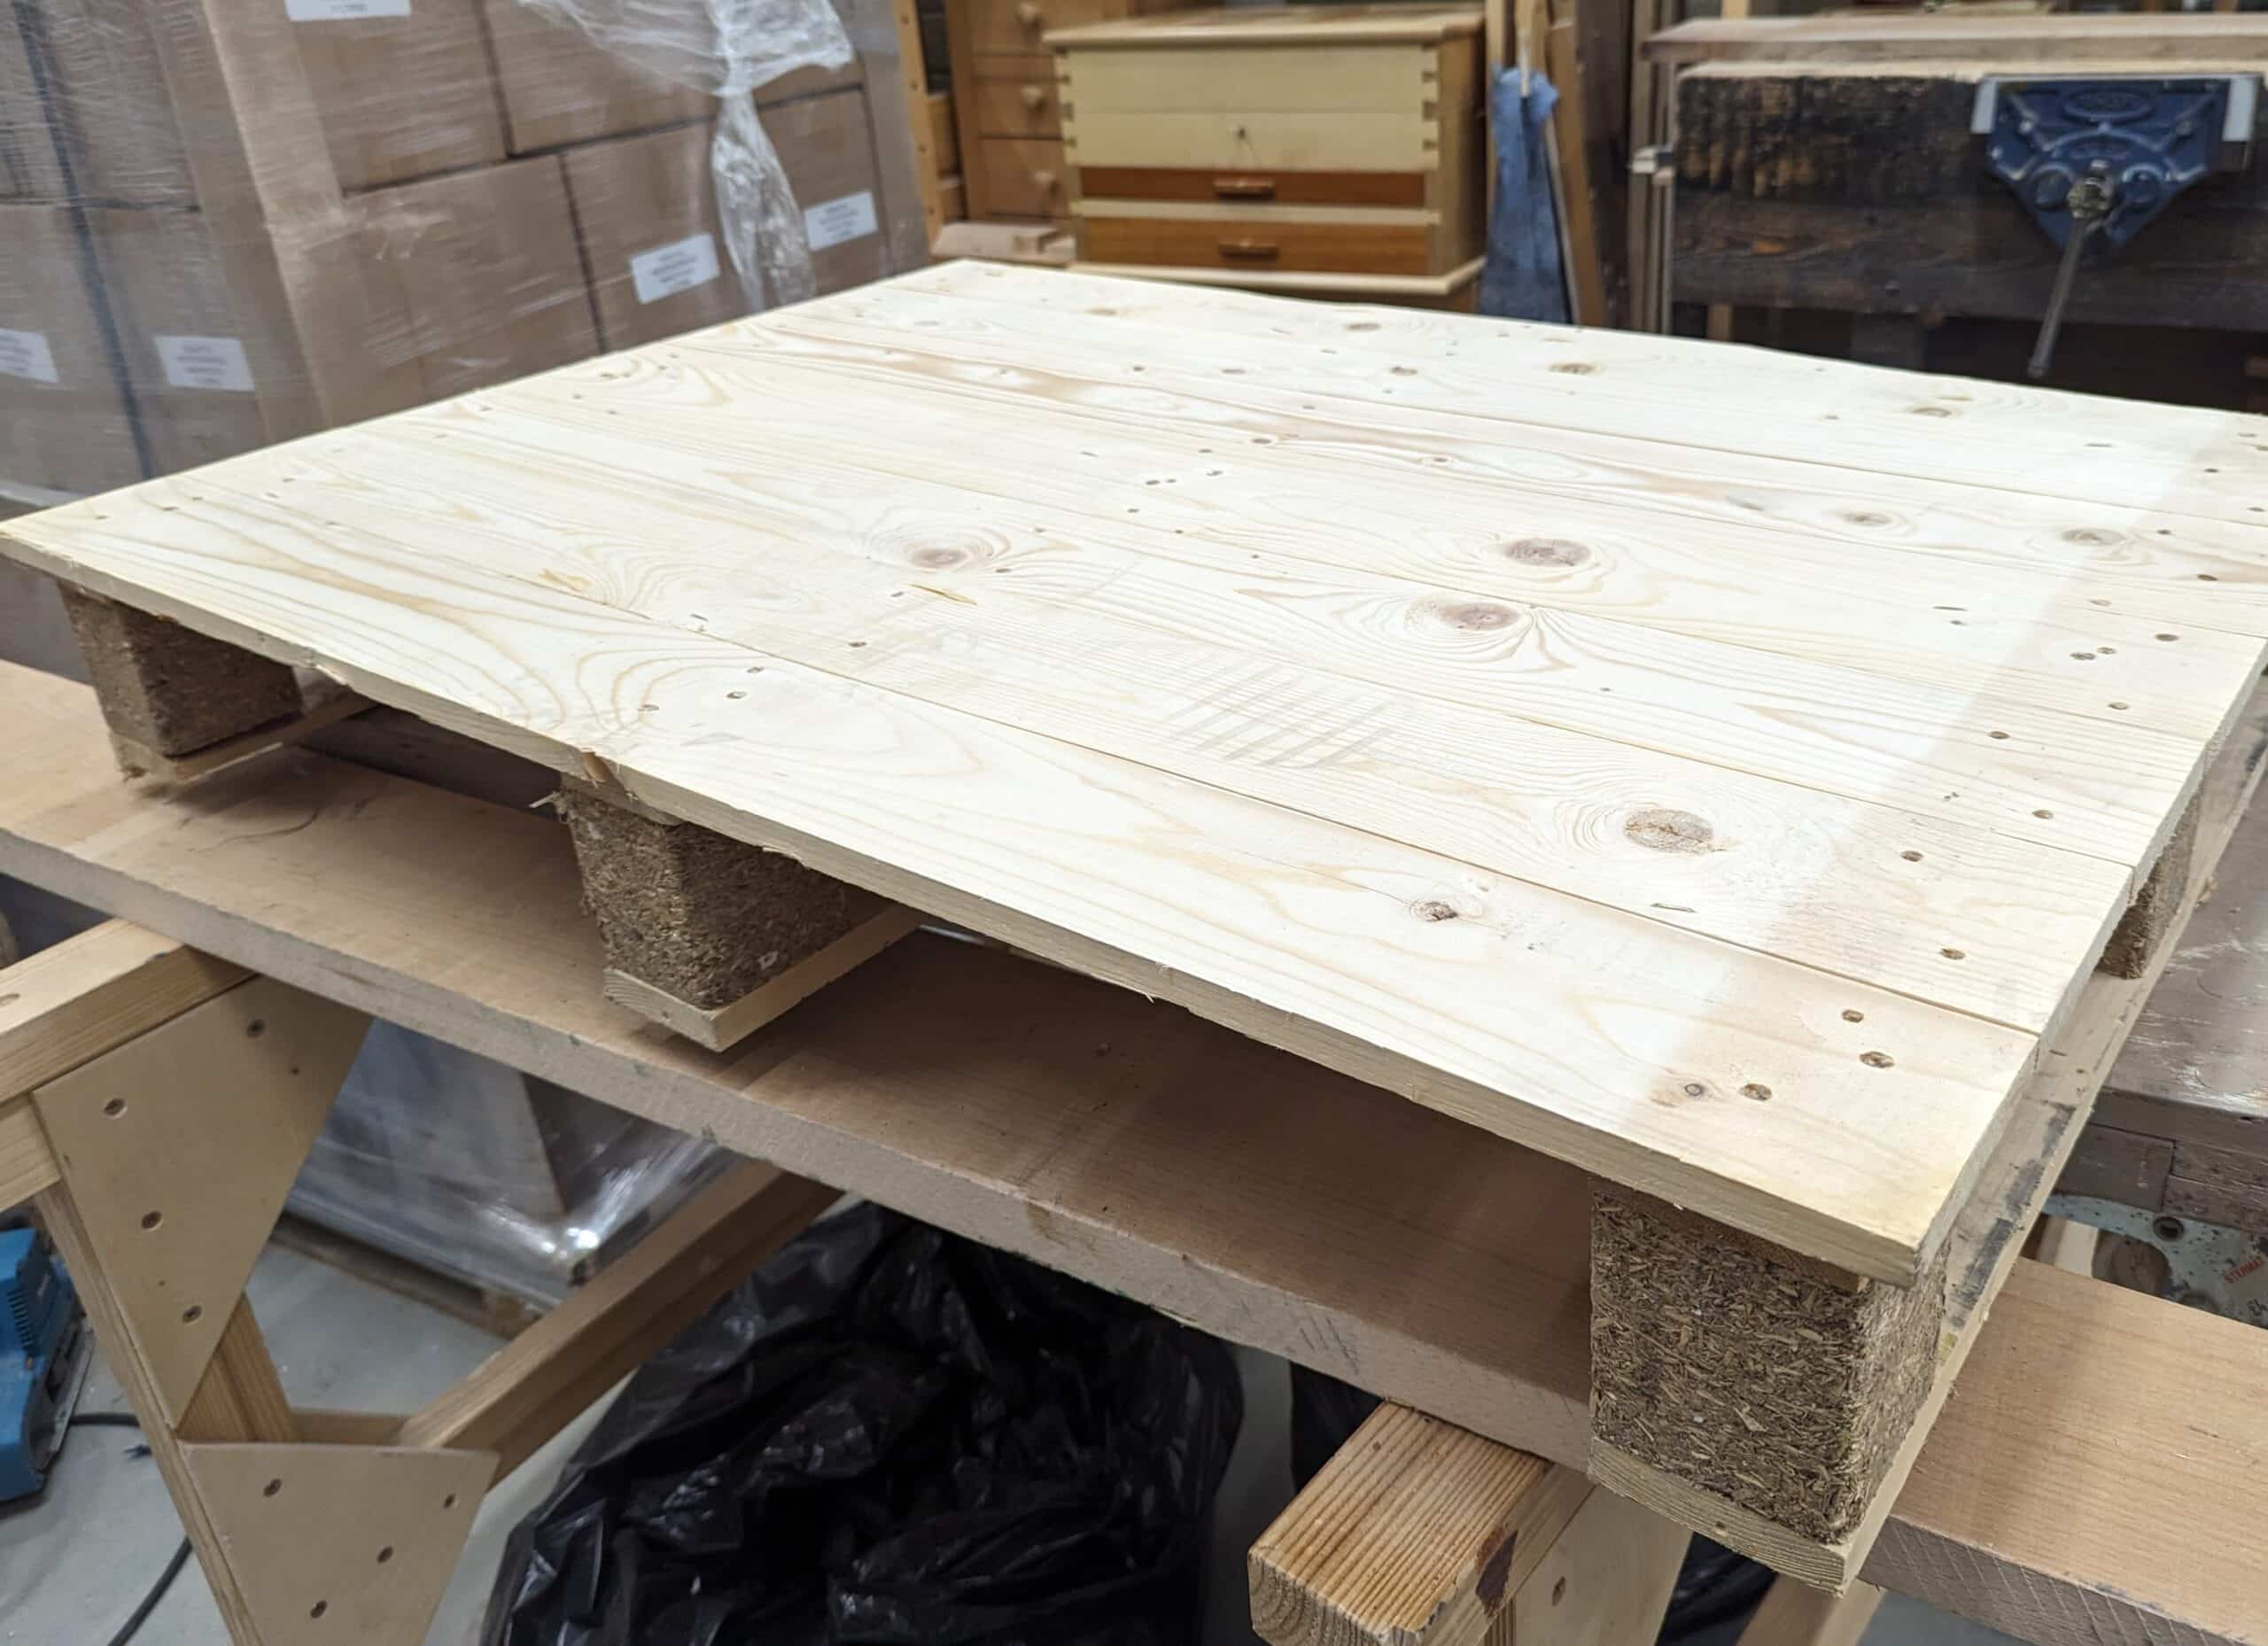
I am making some boxes from pallet wood. This pallet came under a recent intake for stocking my book Essential Woodworking Hand Tools. I often use a jigsaw to remove the riser blocks which go as firewood to friends with wood-burning stoves. Drying this wood down, even more, ensures the wood can be trued and made ready for joinery with minimal likelihood of further distortion as I work the wood.

The bandsaw is my thicknesser (thicknesser planer machine) of sorts; unifying the thickness means just a few shavings for cleaning up saw kerf.
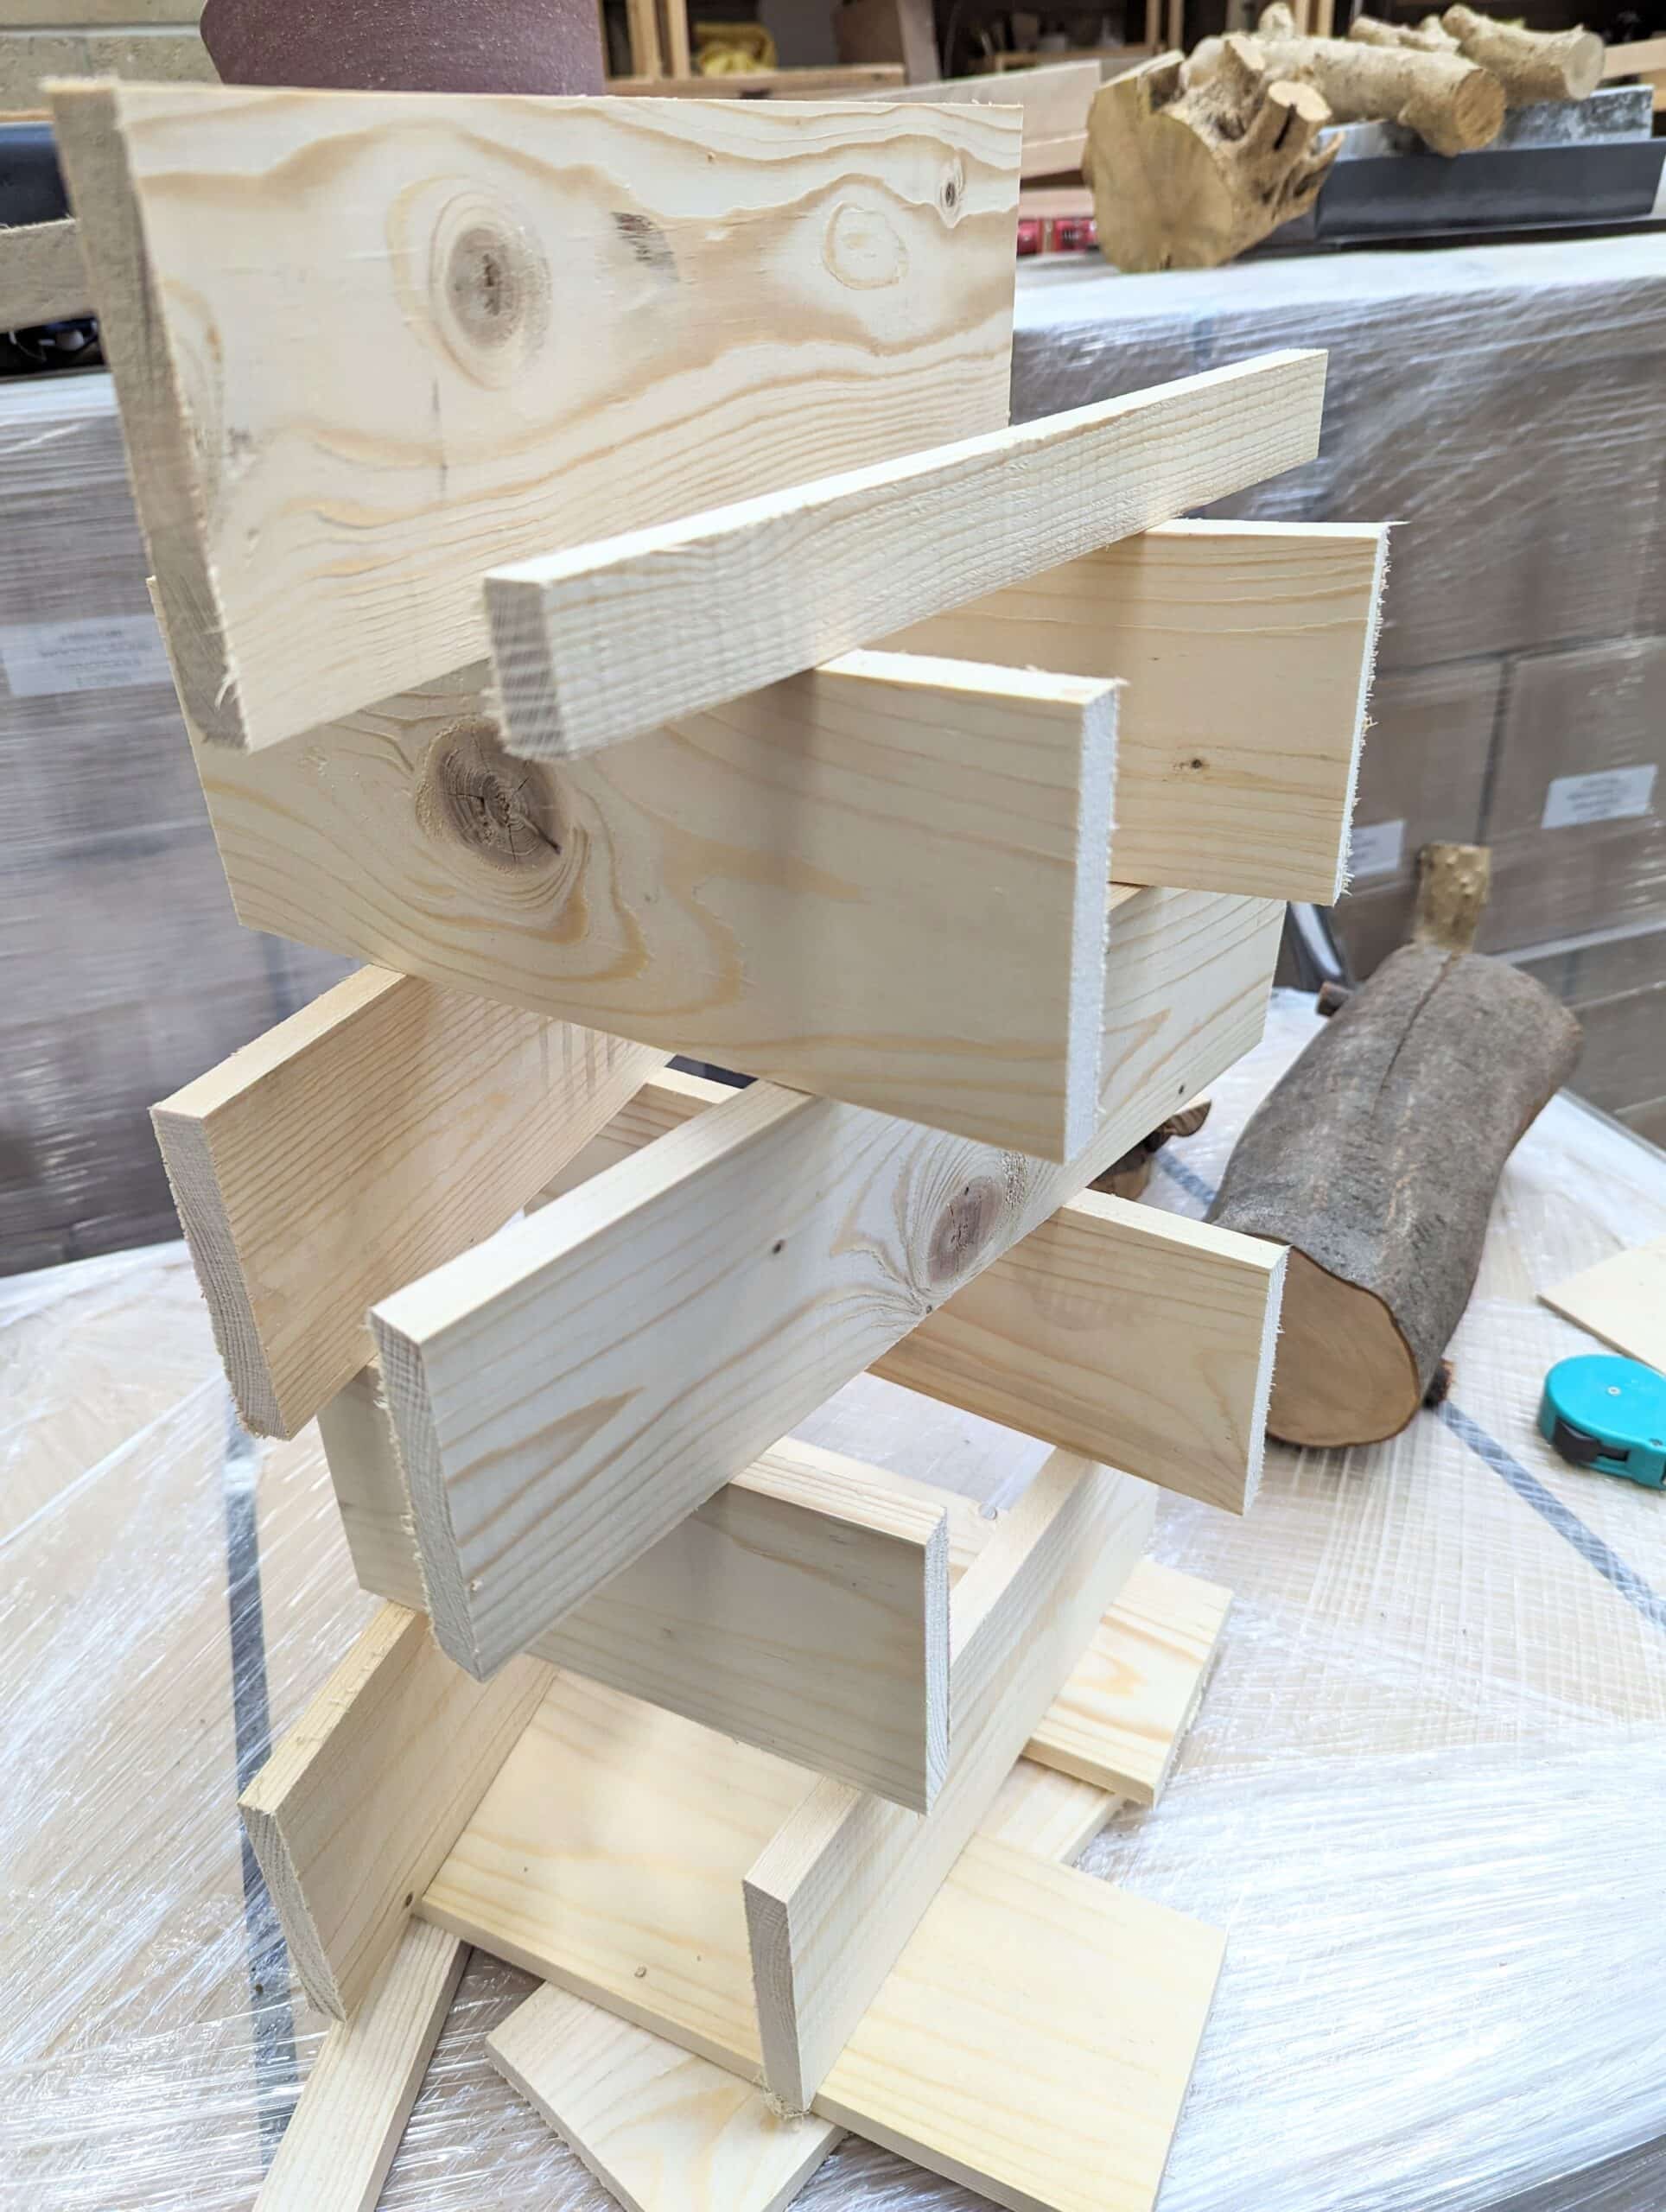
This randomised stacking is less randomised than it looks. I built it up for free airflow in and around the box pieces to bring down any moisture levels though it might well increase too if the weather is against me. I measure the height of the tallest point at the beginning and then check it at the same points every other day to see if the height increases or decreases. Usually, any difference will show on the second or third day and then on through the period of exposure in the controlled environment.
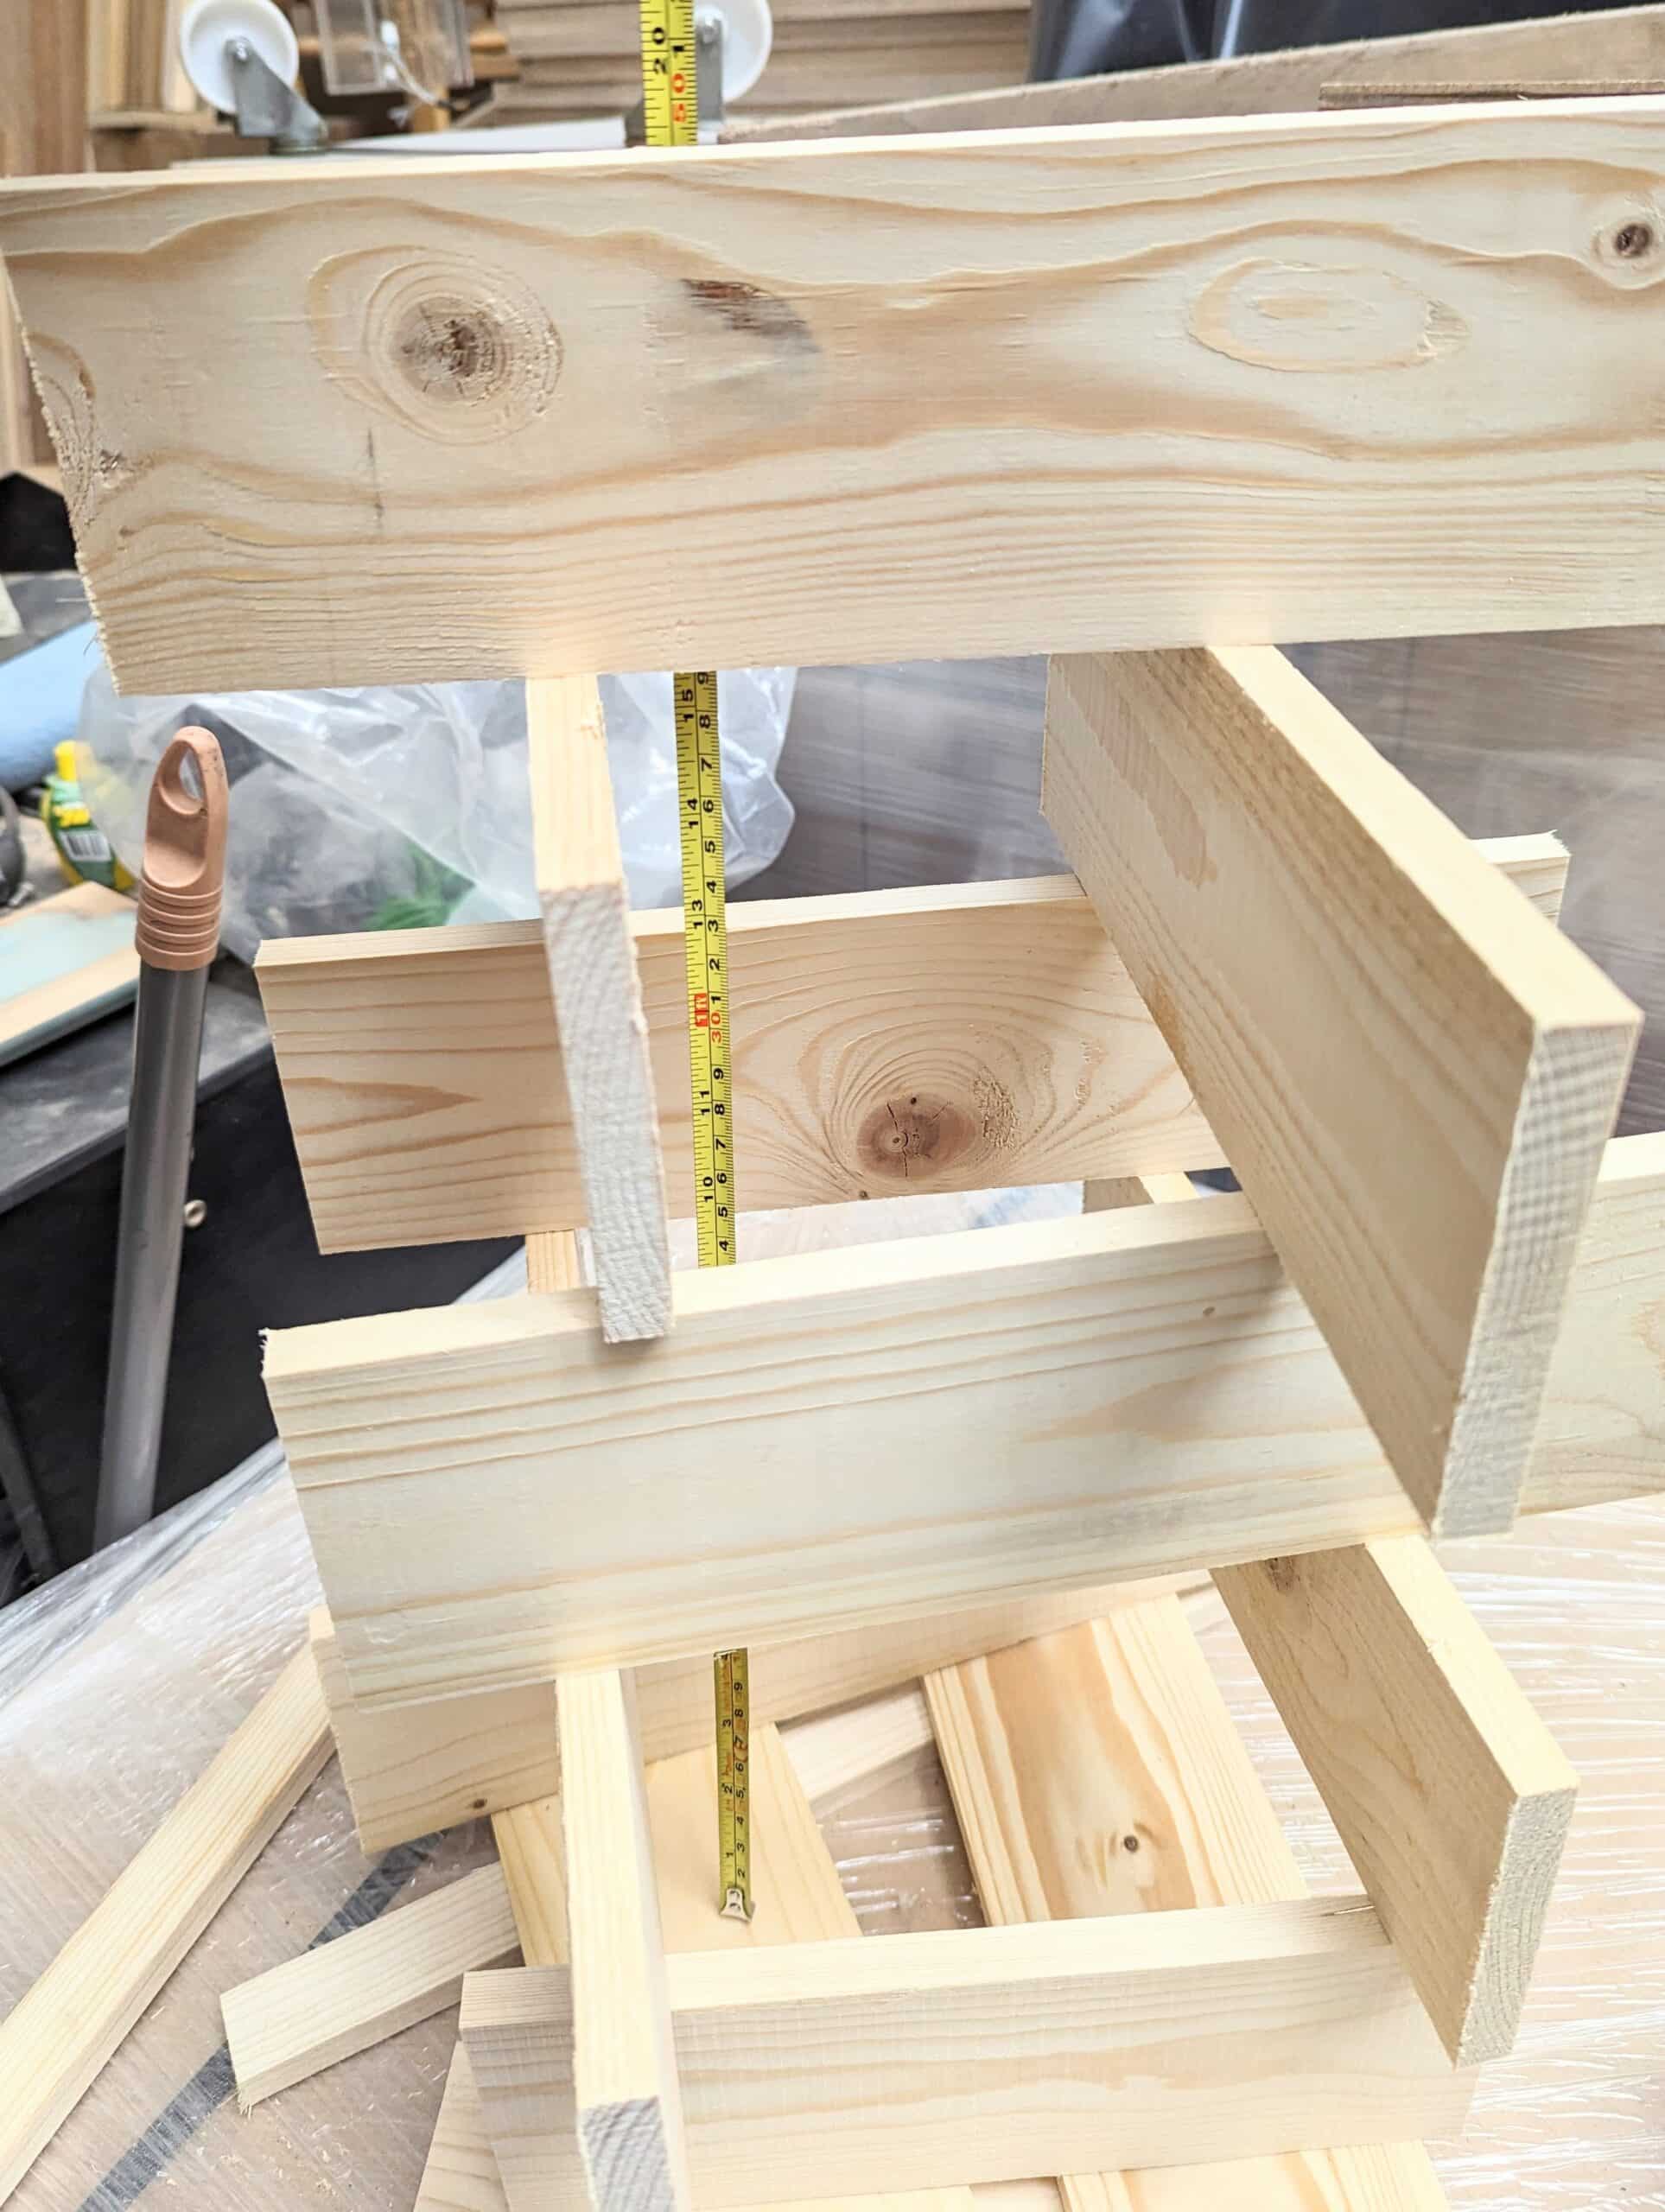
Within two weeks the wood pile lessened in height by half an inch over the 20″ distance and then remained the same for three days. My wood was ready.

Stacking the wood this way magnified the expansion so by dividing it by the number of pieces I could see that each 3″ wide board expanded 1/8″ through taking up atmospheric moisture in its previously uncontrolled conditions. This amount will indeed affect the joinery as of course, the thickness will become apparent when any shrinkage (or future expansion) will show around the dovetail lines of interlocked engagement.

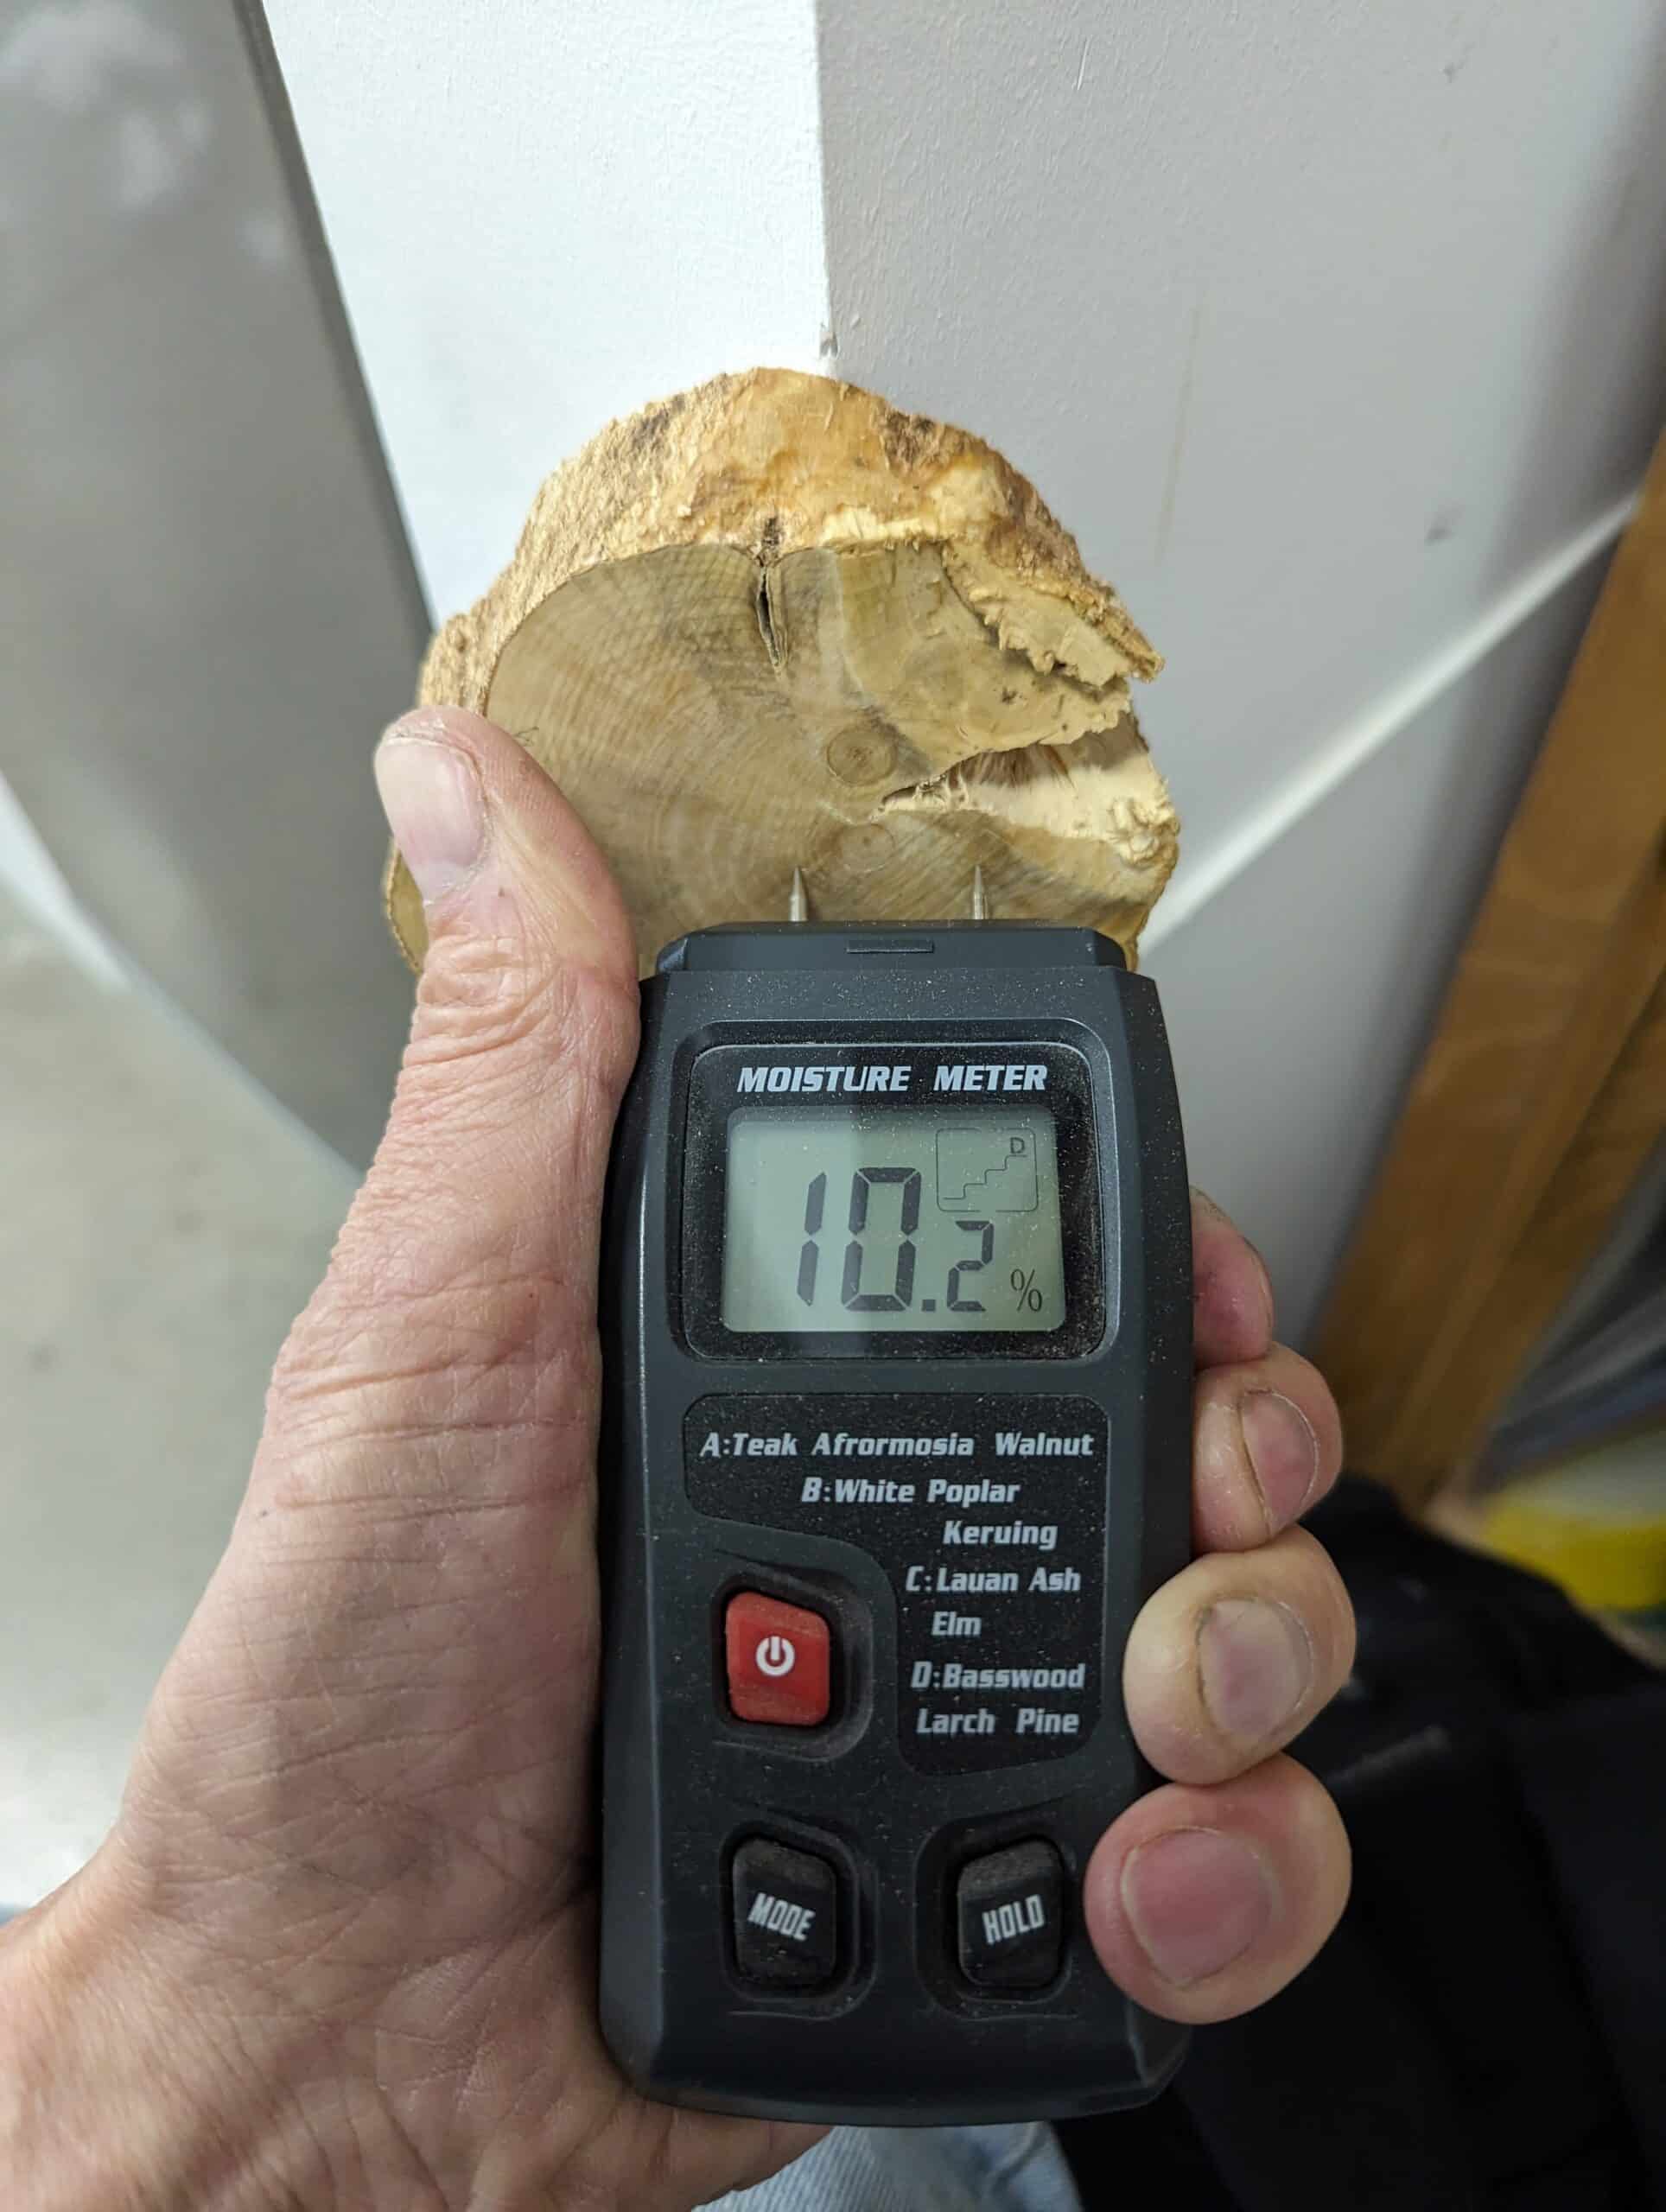
Another method I use is to weigh my wood if indeed it is for smaller sections. Kitchen scales do well for this though I have also used bathroom scales for planks stood on end too. In this case, I want to be sure my wood engraving block was dried down to its maximum. I was patient and it proved right to be. Weighing wood is not an uncommon practice for me as well as for others as it works so well and so accurately.

I do have a moisture meter for steering me when I go to buy. It’s an immediate reading even though not a true result of what you actually get throughout a board or a batch of wood. In this case, I used it to simply confirm my weighing on the kitchen scales. Things were moving the right direction for a few days until there was no more reduction. my wood was ready for engraving. What I was trying to avoid and did so successfully was the wood block cracking after preparing it for engraving which can take many weeks of work.

I almost always take my wood into my climate-controlled garage to acclimate. You will usually see it hovering against the back wall for a week and more before I start a new build. It’s worked well for my working. It may be a luxury to have a controlled environment but whereas a tablesaw is an essential machine for a machinist woodworker I consider good air control beats that need hands down here in the UK. Let’s not talk about Houston!
If you want to, the best acclimatisation will ultimately be in the room where the piece will finally come to rest be that the bedroom, dining kitchen or wherever if indeed it is going into a house. Airconditioning generally keeps things at a constant as will using other means of climate control but of course, rarely does the shop in which the work will take place remain at a comparable level and especially is this so when the work takes weeks or even months and years. The US is a nightmare for makers whereas surprisingly the UK is not. Make a piece in Houston and send it to West Texas and you’ve got some major issues with severe shrinkage and vice versa send it the other way and within a day not a single drawer will open if it is indeed recessed. hence the development of overlaid doors and drawer fronts developed in and for the USA.
I might be being a bit thick, but how can the moisture content be 300% – wouldn’t 100% be pure water?
It is weight of the water in the wood compared to the weight of the wood without any water in it. Thus, 100% moisture content is equal parts wood and moisture.
It’s easy to tell Paul uses hand tools…there are clearly five fingers visible holding the meter. A complete set of 5 is rare in garages full of machines.
I have been using machines as well as hand tools for more than 70 years and still have all my fingers. My father, unfortunately, lost his left index finger to a table saw at a relatively early age. That impressed me enough to be careful for my entire life.
When mu uncle holds up his hand to order 5 beers at the pub, he only get’s 3…
KiethW, you have a good question. There two formula commonly used for moisture content.
1. Percent Moisture Content = 100 x (Wet Weight – Dry Weight) / Dry Weight
2. Percent Moisture Content = 100 x [(Wet Weight / Dry Weight ) – 1]
Both these formula give the same result.
If the wet weight is 4 ounces, and the dry weight is 1 ounce, then the moisture content will be calculated as 300%
Thanks Paul. I had something happen recently that I don’t understand and was wondering if you might be able to explain it. 18 months ago I bought a but of supposed eight quarter thick quarter sawn white oak for a project that was supposedly kiln dried. When I got it home I used my pinless moisture meter and discovered most of the wood had mid to low 30s for moisture content. Rather than take it back, I cut it to rough lengths and let it sit to further dry and every 6 months measure a bunch of pieces and wrote down the values. Almost all are now down in the low teen moisture content which is what I normally see for the wood in my shop. However, a few pieces that were rough cut to length are still in the high 30 percent range after 18 months and haven’t moved at all downwards. Given all the other pieces have dried, something else must be going on with this wood. Any ideas? I didn’t weight it and I’m guessing there must be something inside those specific pieces that is registering as water. Many thanks. By the way, I now always bring my moisture meter to the lumber yard just to make sure there are no surprises with supposed kiln dried wood.
Hi Joe, I’m not a pro or anything, but have seen on other channels and YT videos that work with thick slabs that sometimes kiln drying can actually trap moisture in a piece. Something about the initial dry time happening too quickly, which “seals” the wood and doesn’t allow the inner moisture to escape.
It’s happened a few times to Blacktail Studio – and he did a video talking to his supplier about the issue:
https://www.youtube.com/watch?v=BchjJwBKaI8&t=0s
I bought a dehumidifier with an automatic pump to empty the tank based on your earlier blog posts. It really has made a difference. I’m in a garage in Alabama and the humidity swings are quite large between the summer and winter.
Humidity swings in my Connecticut residence are from 17% in the winter to 65% in the warmer months. What compounds the swings is my house is heated with wood pellets in the colder months. I have learned to leave a gap about the thickness of a nickel so doors will open and close all year round. There is no way to effectively control the humidity in my house except by expensive to run humidity controls. Either way I don’t make “piston fit” drawers! Instead I use metal drawer glides and lipped drawer fronts to cover the gaps.
Paul,
Stacking your wood to magnify the shrinkage measurements is a great trick. But your mention of your end grain engraving endeavors piqued my interest. Are you using the engravings to print woodcuts on paper? Thanks, Richard
Paul,
Sorry, I missed your previous blog on engraving which answered my question. But I find that subject interesting as well and thanks for sharing that.
Richard E
Any experience with rescued long-submerged logs from the southern USA?
When I had a large (3000 sq. ft.) shop in West Virginia I also had a WoodMizer sawmill and did my own logging using a large Belgian mare to snake logs out of the woods. I only sawed furniture wood and some small amount of specialty millwork, buying cabinet and millwork wood from a wholesaler. I built an extremely accurate steam driven dry kiln with which I could control temperature within 1/2 degree Fahrenheit (when ambient temperature was below 90 degrees)..
I dried ring porous woods ((oak, etc.) to 6% moisture content and diffuse-porous woods like poplar to 7% MC. This is because wood cells collapse when drying and have somewhat of a memory of that collapsed driest state. Then I acclimated the wood to the ambient temperature for 3 to 5 weeks before building furniture with it. Using air-dried wood is usually fine if the furniture remains under the conditions of the shop atmosphere, but wood subjected to modern climate controlled homes will swell and shrink considerably under higher or lower humidity (hence stuck doors and drawers). Drying to an initial 6% to 7% MC will lower (at least slightly) the range of movement later. Air drying rarely will yield wood below 10%
I always checked the moisture content before starting to work (and before finishing, if using lacquer or varnish). The only problem with moisture that I ever had was with some purchased poplar used for paneling in a restaurant. The wood was right (8% when making the paneling but it swelled and fell off the wall several months after they nailed it to green furring strips.
Environnment including workshop.
For our health, relative humidity of air should be kept around 50% (between 40 and 60%).
Relative humidity is just that … relative. The moisture content in air doubles with each 10 degrees. So there is twice as much water in the air at 80 degrees than at 70 degrees. The moisture content in wood is measured relative to the wood’s driest state so keeping the humidity at the same relativity still allows wood movement if you don’t also control the temperature.
Off topic: I’ve avoided pallet wood because I never know what might have been spilled on it during its lifetime. The FDA found bacterial pathogens in 10% of pallets. In 2009, pharmaceuticals were recalled because they were believed to be contaminated with 2,4,6-tribromoanisole (TBA) that was used to treat the shipping pallets. I’m not an expert and am just cutting and pasting a few examples from a quick search. If someone wants to use pallet wood, I suggest they research the matter and decide for themselves. It is my belief that pallets are often treated during their lifetime between uses, e.g., with fungicides.
Good shout, Ed. Thank you. I’m not sure if we will have the same issues as the US as I recall trying to create shipping crates I planned to make myself for sending my things back to the UK and every shipper denied me to the privilege because they would not transport anything that was not commercially treated. It seemed at least to me that they were talking about commercially chemical treating things. Now that was back in 2009 so things might have changed. There is a lot of information out there now and it seems easy to track a pallet here in the EU and the UK. My pallets came new with the books i had just taken in and they are heat treated (HT on the pallets along with place of manufacture and sustainable stamps on too) only and have the EU logo to that end.
Hi Paul, I have tried the same thing you have just described in your recent post using pallet wood. One issue I ran into was, that even though I resharpened just beforehand, I couldn’t quite tackle tear out. By trying to smooth plane the boards I progressively made it worse as the grain seemed to switch from one side to the other in the areas that did contain a knot and the tear out was very significant. Is my plane not sharp enough or was the timber (fir) too fast grown?
In the hands of a master, It is never mundane to see beautiful stuff made out of a pallet !!!
A very useful article, I store wood in my shed workshop and have an old plastic shed which has a load of wood in unfortunately I have a lot of pallets to break down which are outside and will need to dry out before I can use them. I have not thrown out my table saw hardly used it as it is noisy. I can cut the wood quicker than using the table saw as it took time to set it up. I wish I had found Paul Sellers when I first started out, hand tools give you more control.