This Wooden Plane . . .
. . . .cuts grooves fast and accurately. But it does a lot more if you want it to.

I think we might have undervalued the wooden plane but even more so the men that used them for centuries before we abandoned them almost altogether. It’s the lightness of them that we really lost but then too we lost the reality of how well they worked in the hands of those who fully understood and knew them through using them for decades.
I worked with some men who used them and then with those working alongside them who smirked behind their hands because they did. What I did notice was that the old men never fell behind, could adjust their bench planes perfectly with a quick hammer tap or bench knock and achieved the highest standards in plane work.
My fascination for the long-term use of British hand planes and then other tools too grew gradually as I gained more and more experience. The working knowledge got less and less as the older woodworkers died off but then one or two books came out that filled in the gaps. Another sphere of knowledge came through well-known auction houses and catalogues listed by very knowledgeable auctioneers working with collectors and dealers. At those day-long auctions out in the sticks, you met up with third-generation tool makers with a family-famed past. What interested me most though was that Joinery workshops had lived through three centuries owning and using its vast range of wooden planes. to cover the equally vast range of tasks needed to work wood. Although I personally would most likely never use mouldings in any of my work anymore, I still find it amazing that millions upon millions of linear feet of moulding in all woods came from hand-made beechwood moulding planes every year. These mouldings used in, out and around any building you care to name are still there and the indoor versions will in many cases be 300 years old.

The privileged had woodworkers unknown from the masses to anonymously build what would become thousands of historic mansions as monuments to their superior dominance, wealth and privilege and then millions of more ordinary properties as homes, offices, schools, hospitals and workplaces the millions in Britain would occupy through the next millennia. For people like me, these buildings translate the lives of working people and work as a walking history tour in every door and window I look at, through and into as I pass through any town, city, village or farming hamlet. I look for simple side beads on back doors to old terraced houses and the classic moulds more extravagantly struck in hundreds of thousands of linear feet of stately homes. Of course, these days complex moulds are on everything everywhere from dado rails to skirting boards(base trim USA), architraves (door trim USA) and so on. But looking beyond the ubiquity and finding the ancients becomes the passage of discovery; like looking beyond the stain to find the real even if it is just pine.

The architects will usually be acknowledged somewhere; remembered and even revered, but never the man who once stood all day at the workbench for decades running moulding planes day in and day out making mouldings in oak with a beech moulding plane. I see that stopped chamfer to the chair rails and frames, roundovers and quirk beads that are a part of my tool history lesson, but then too a great lesson survives in the lives of the different classes we Brits are famed for in pretensions of the different eras and the people living in them. I thank the USA for helping me shrug off expectations of class. It’s still here, after my 23 years living there in Texas, but it’s different. Who can explain the massive and distinct change I don’t know. I doubt anyone can.
Over the years I’ve watched as woodworkers I’ve known amassed their trophy router bit sets to their arsenal to mould everything they make. It’s as if they can’t resist adopting an orphaned profile for every corner edge of whatever wood they work and all the moreso today in some if not most Western cultures. Somehow makers seem wont to shun more simple looks to their pieces. Doesn’t it make you wonder why? Well, not really if you think about it. Buy a £400 power router and you have to do something with it –– I mean, use it for something other than recessing dadoes and making grooves and rebates. The advantage of a power router is that it makes little difference going across the grain as with it. You can also whizz round internal corners to frames for doors and other cabinet parts, even if it does leave the telltale signs where the junction ends up router-round with the additional burn marks now and then. The elimination of copes speeds up the process and dispatches the need for skill once more too. Of course, moulding wood does have its place and we use it all the time. It’s used as much to close off gaps at meeting points and then too to conceal shrinkage in several places. It also makes cleaning and wiping down easier in internal corners and such so mouldings do have their place to soften life for us. Oh, and you can also dovetail with it too.
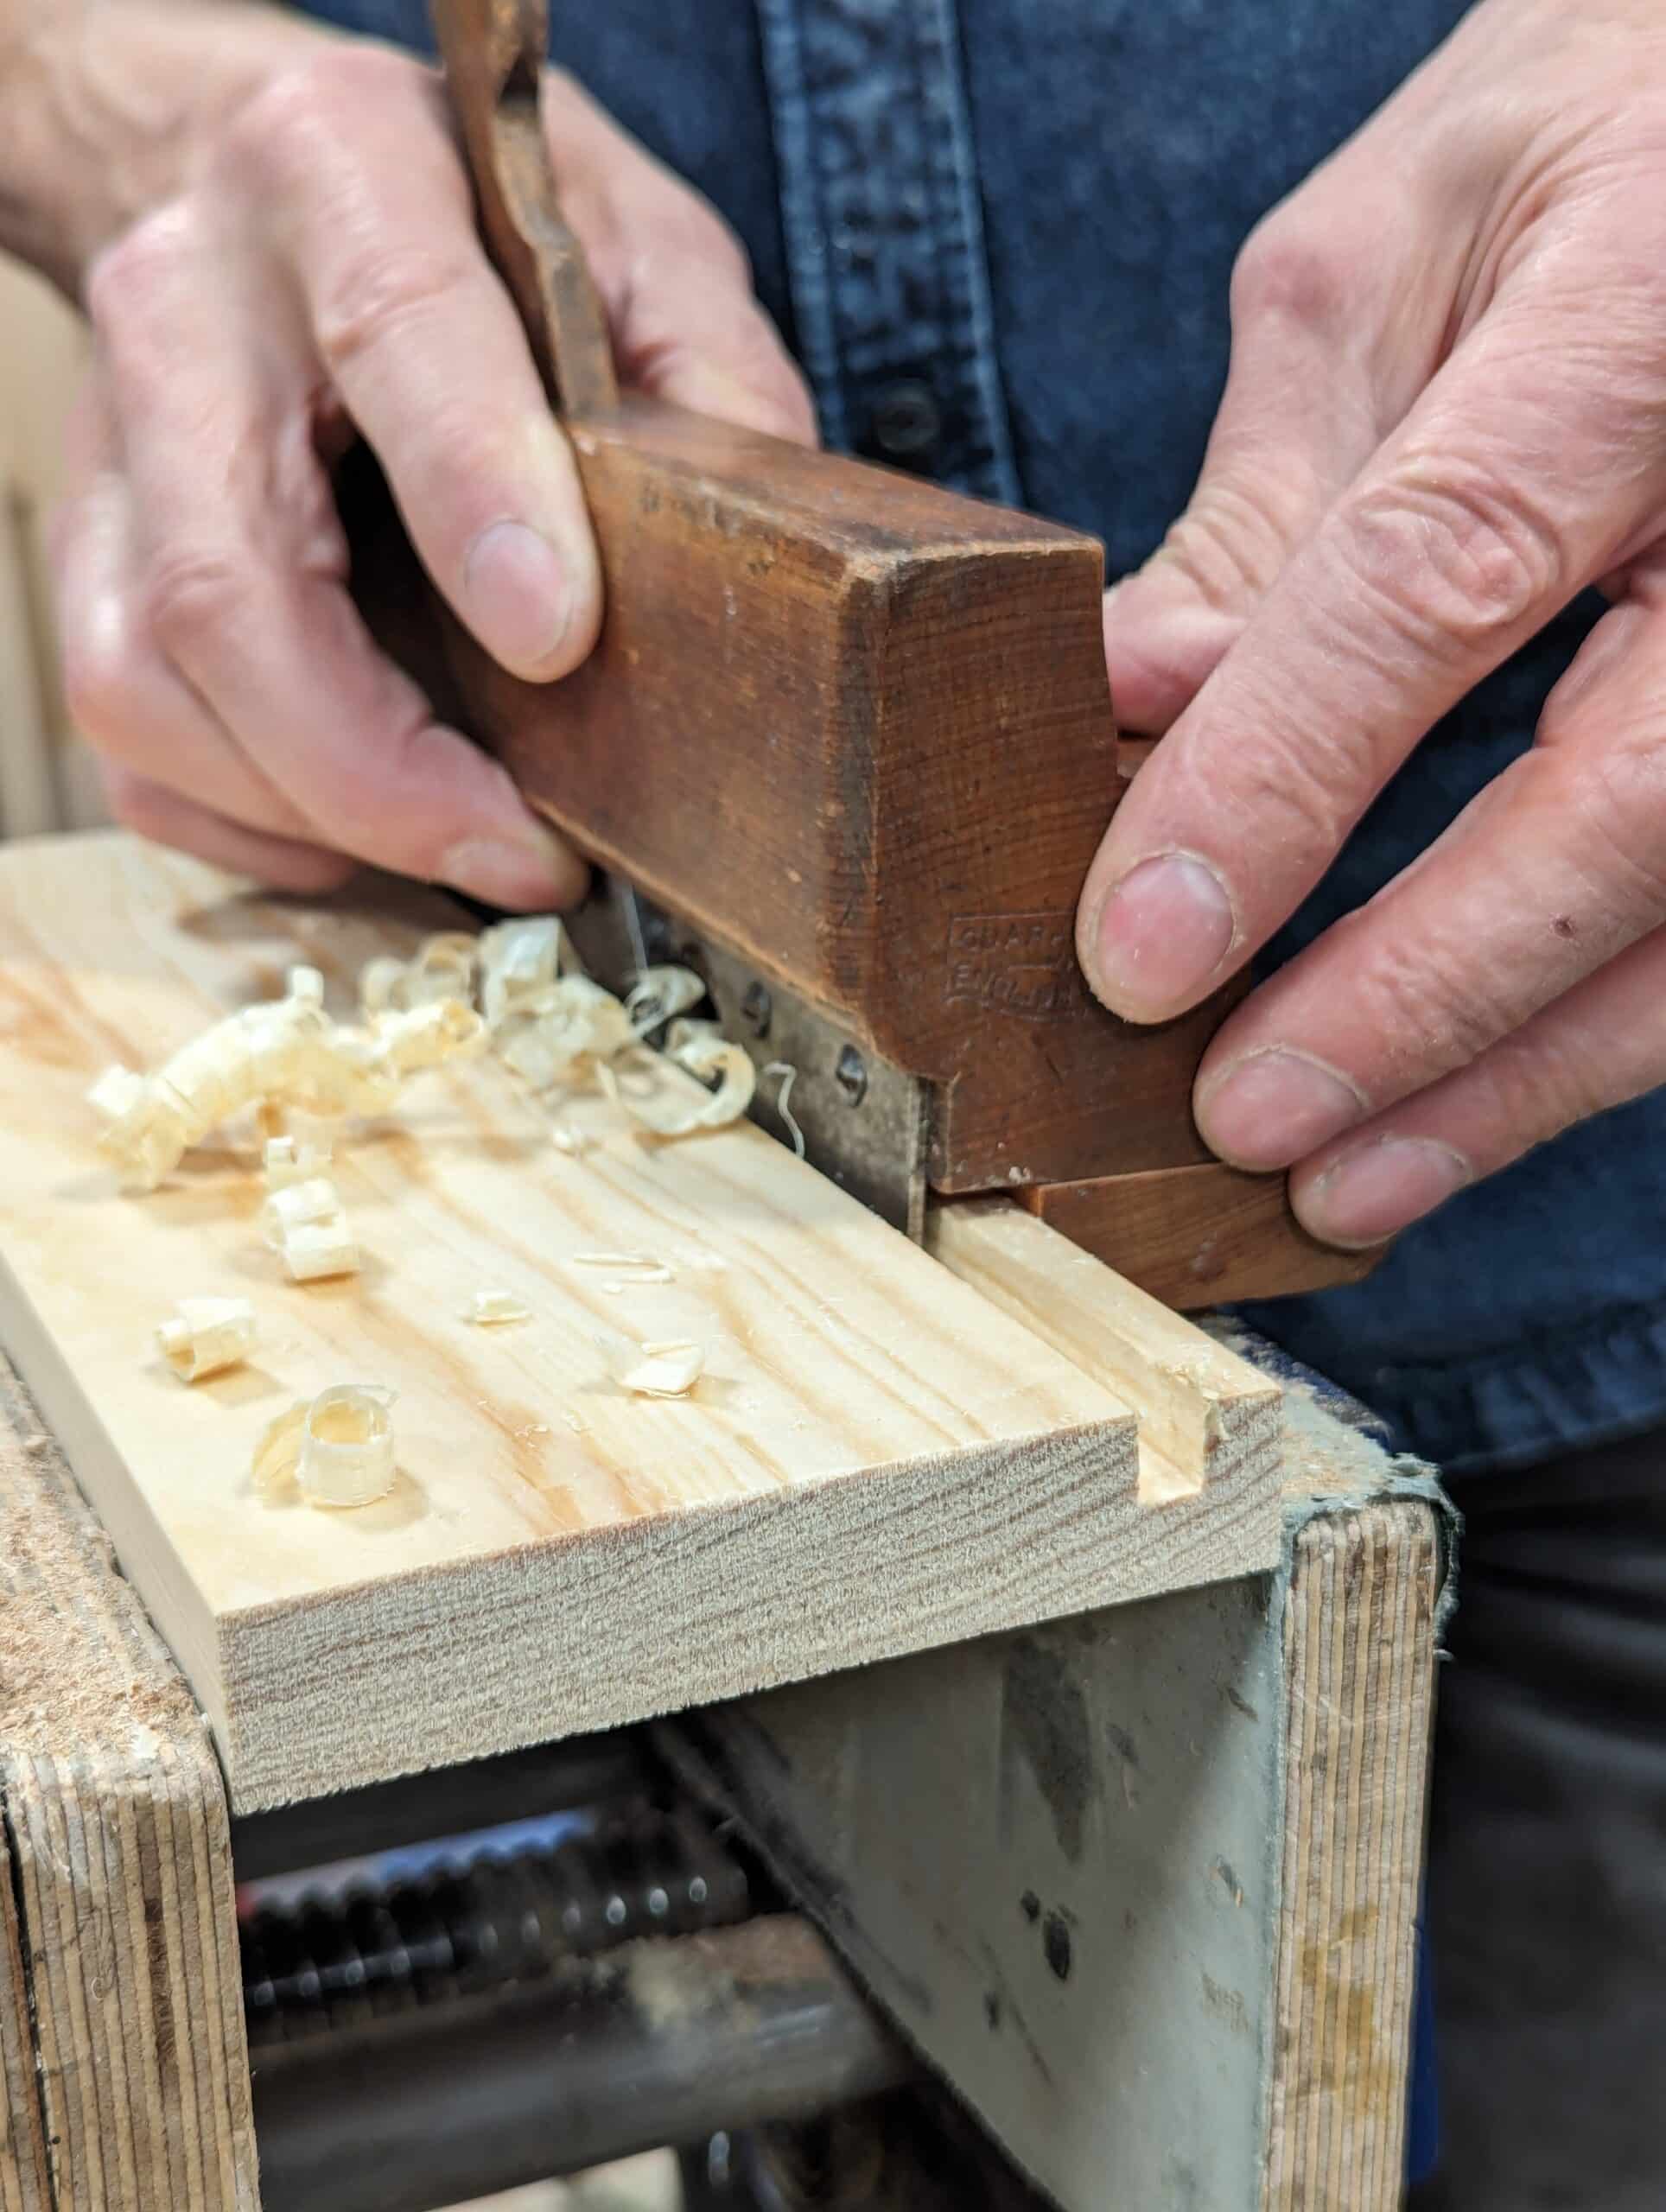
Whereas we can indeed reduce the overuse of mouldings, grooves and rebates are usually an essential to much of our work. Whereas plough planes offer wider options with the addition of stems to the body of the plane that then hold our fence guides further out, handles, etc, the more compact grooving plane will often do 90% of our work. The vintage wooden versions are still available for under £30. For grooving the inside, bottom rims of drawers to receive drawer bottoms and then too the inside edges of frames for panels, they work very well indeed. These planes are different from plough planes in that they often have no adjustable depth stop but rely on a stop point within the sole. This works well for repeat grooving as in drawers where we usually stop at 1/4″ on everything. Crafting artisans often added temporary external stops to
butt up to either by screwing or nailing stops onto the plane body. Most of the craftsmen I ever worked with as a boy could gauge almost any depth they needed by eye as well.

The grooving plane feels a little more clunky than the cast metal plough versions at first but you soon get used to that. You can either find different cutting irons to fit the plane or pursue finding dedicated plane versions as in 1/4″, 5/16`’ and 3/8″. Cutting irons from other planes can sometimes be used or adapted to a plane body you have and individual irons are sold without plane bodies all the time on eBay. This will depend on the wedge because the tapered irons may have a different taper to them. But you can tweak things and even easily make a separate wedge to make this work for you. Wood or metal, plough and grooving planes all cut deep and fast and the wooden versions absorb more vibration than metal ones do.
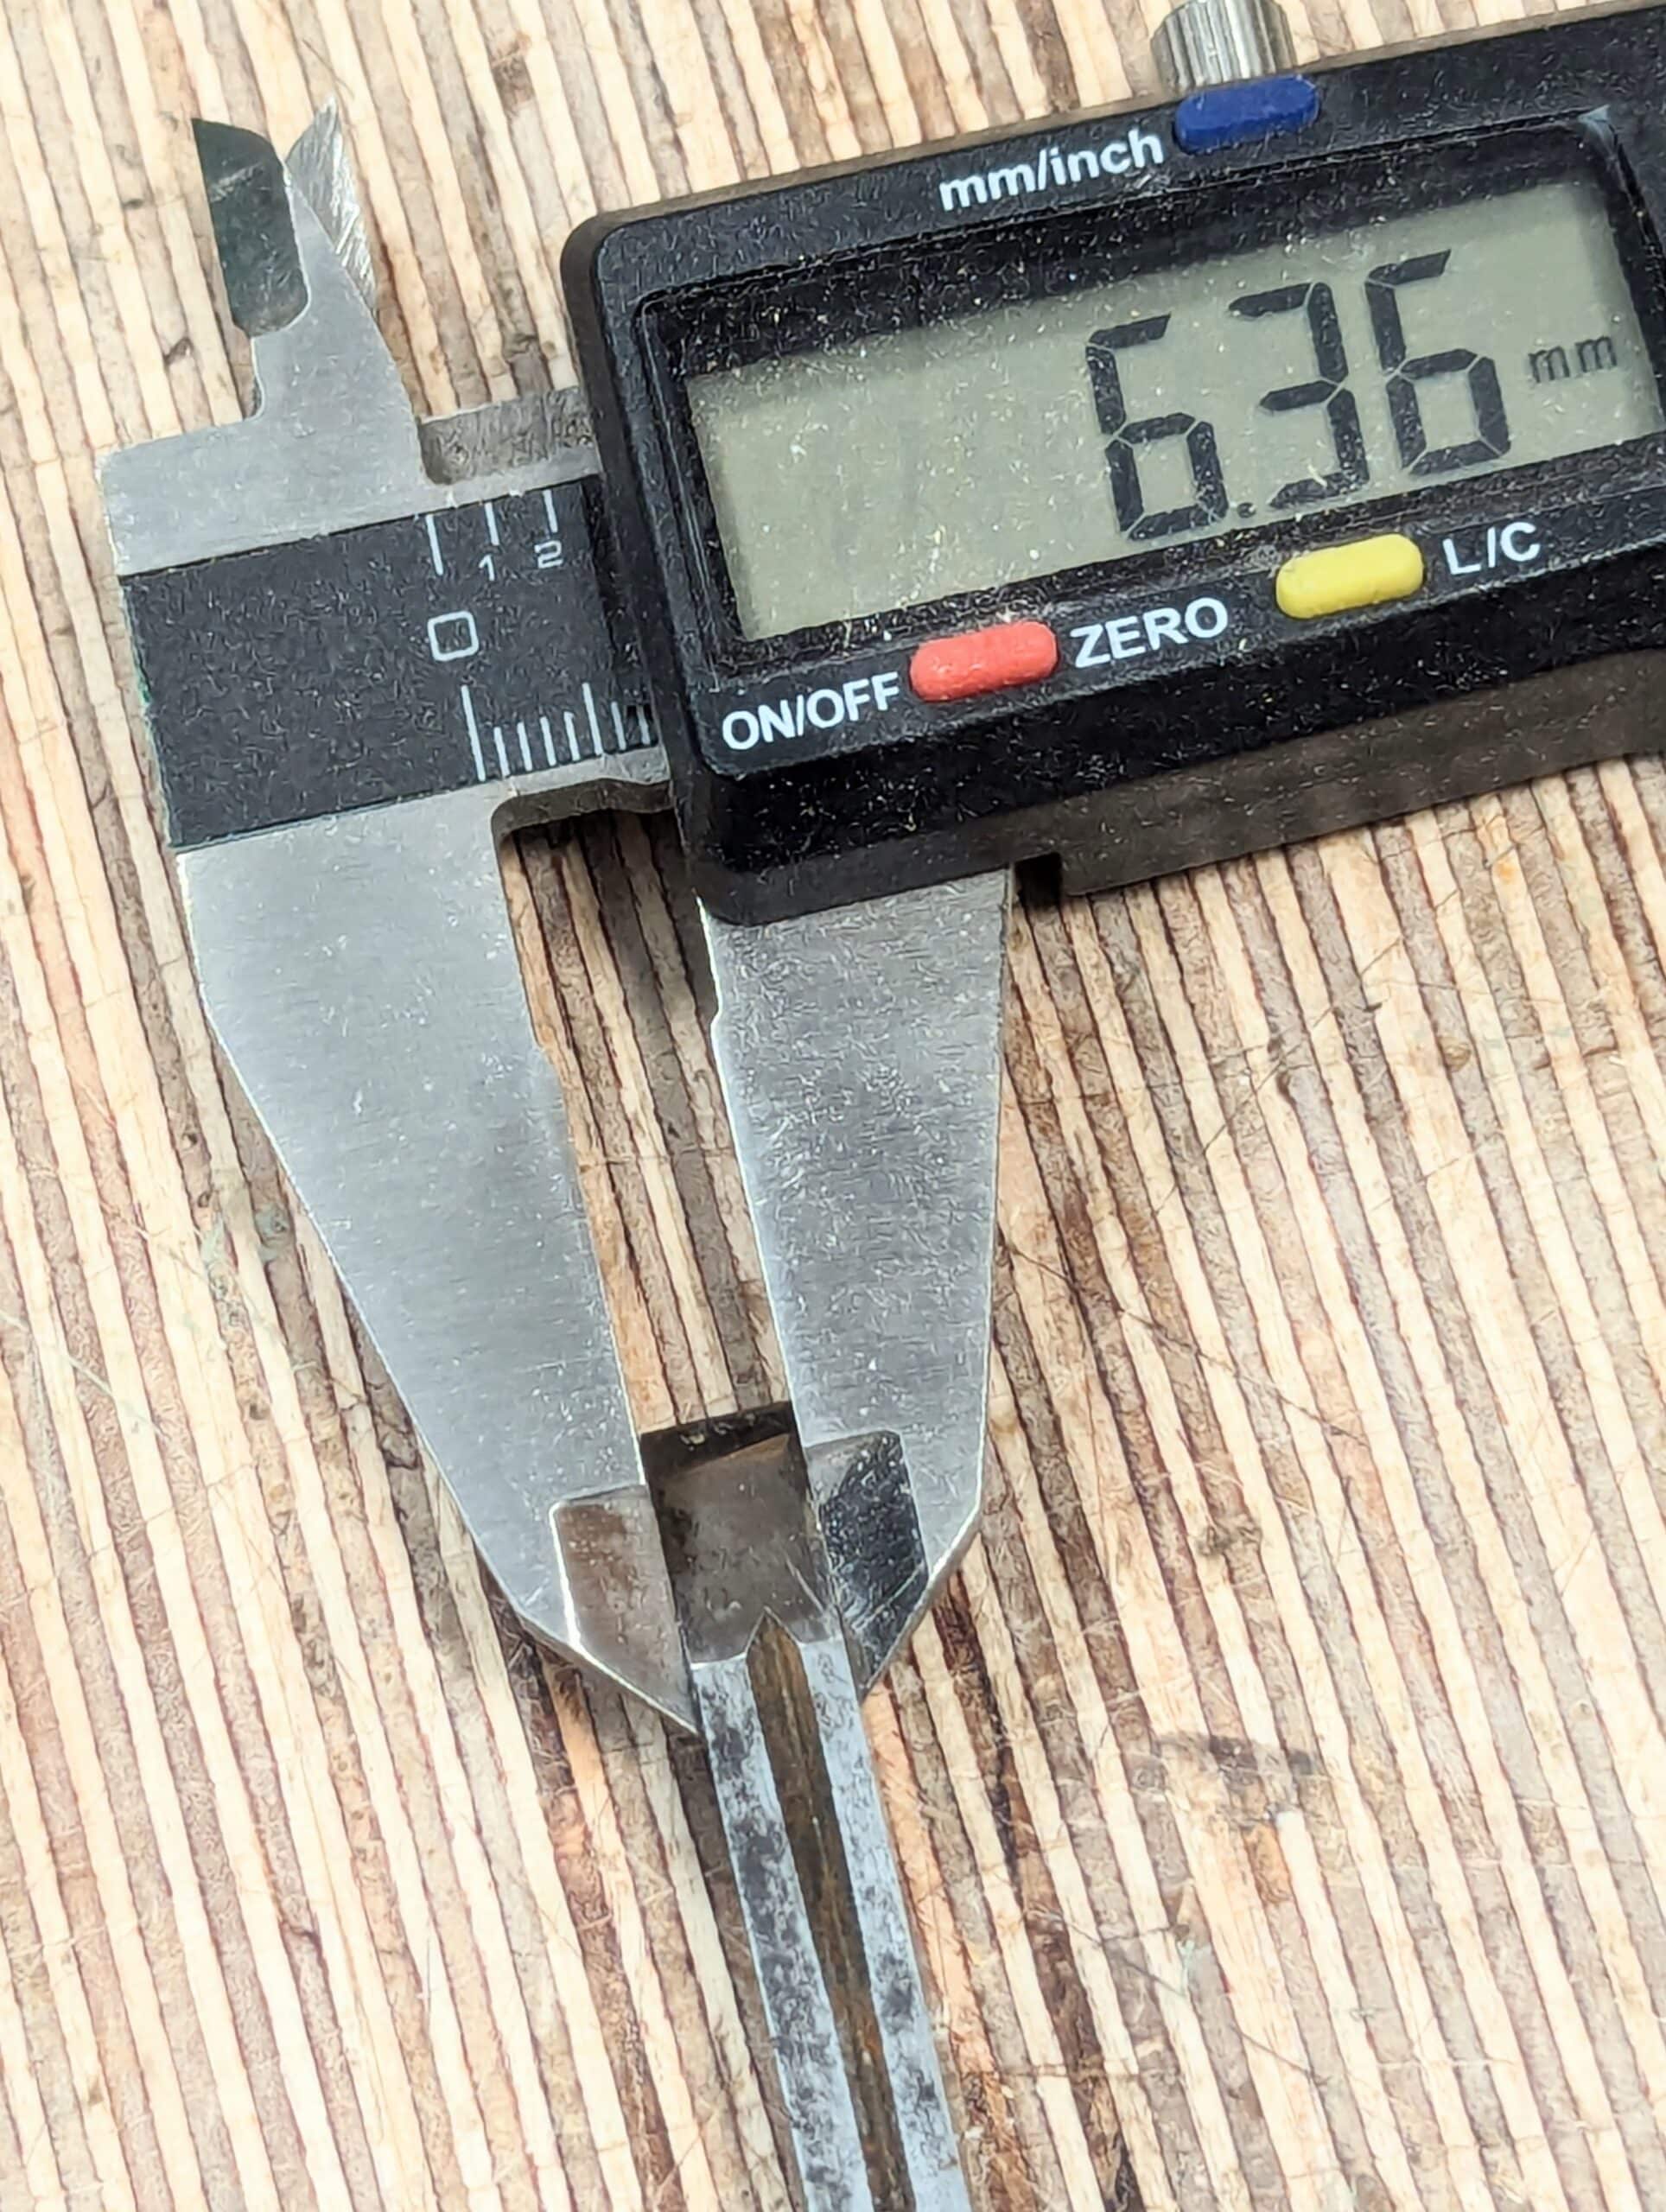
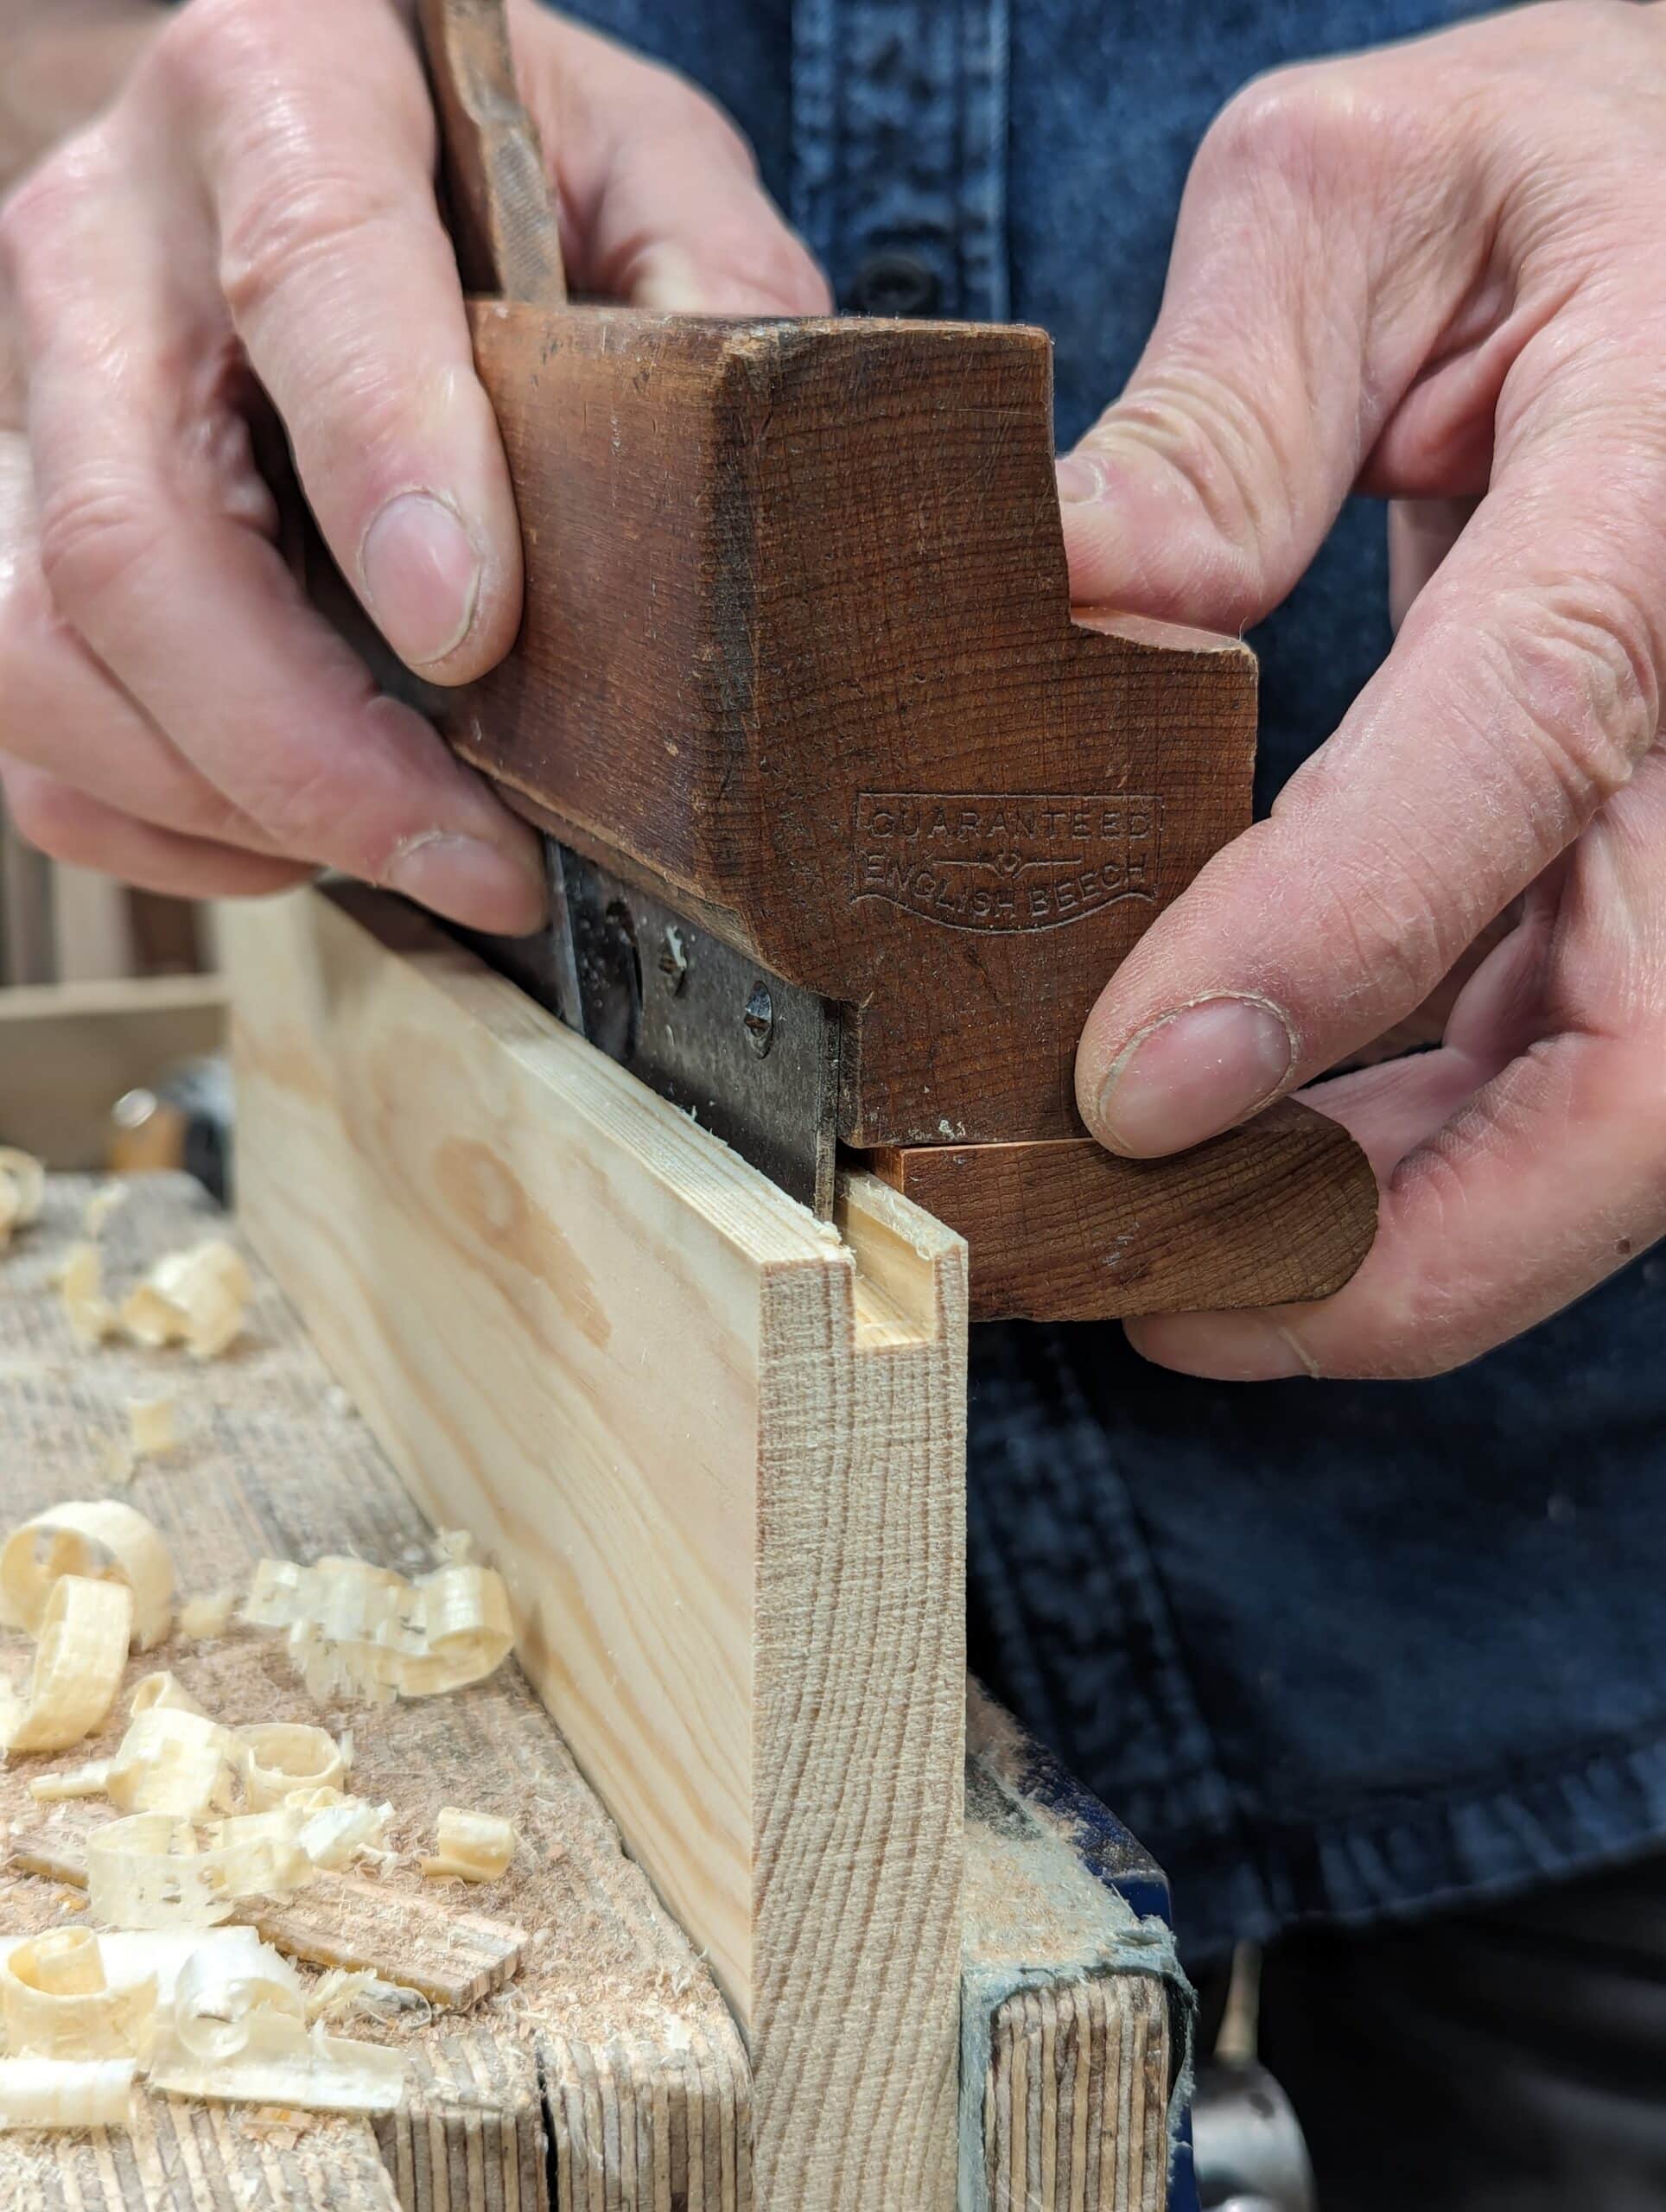
The features of a well-crafted, hammer-forged cutting iron in plough and grooving planes of this now more vintage kind lie in the trapezoidal shape making the back or underside of the cutting iron slightly narrower than the opposite, upper or flat face. If yours is not, then you can go in and abrade the shape not create the correct shape. I doubt that you will find one that isn’t but perhaps you will. if that is the case then the blade will drag in the cut like a swim in molasses. This ‘relief’ to the sides radically improves performance and especially so with such thickly tapered irons.

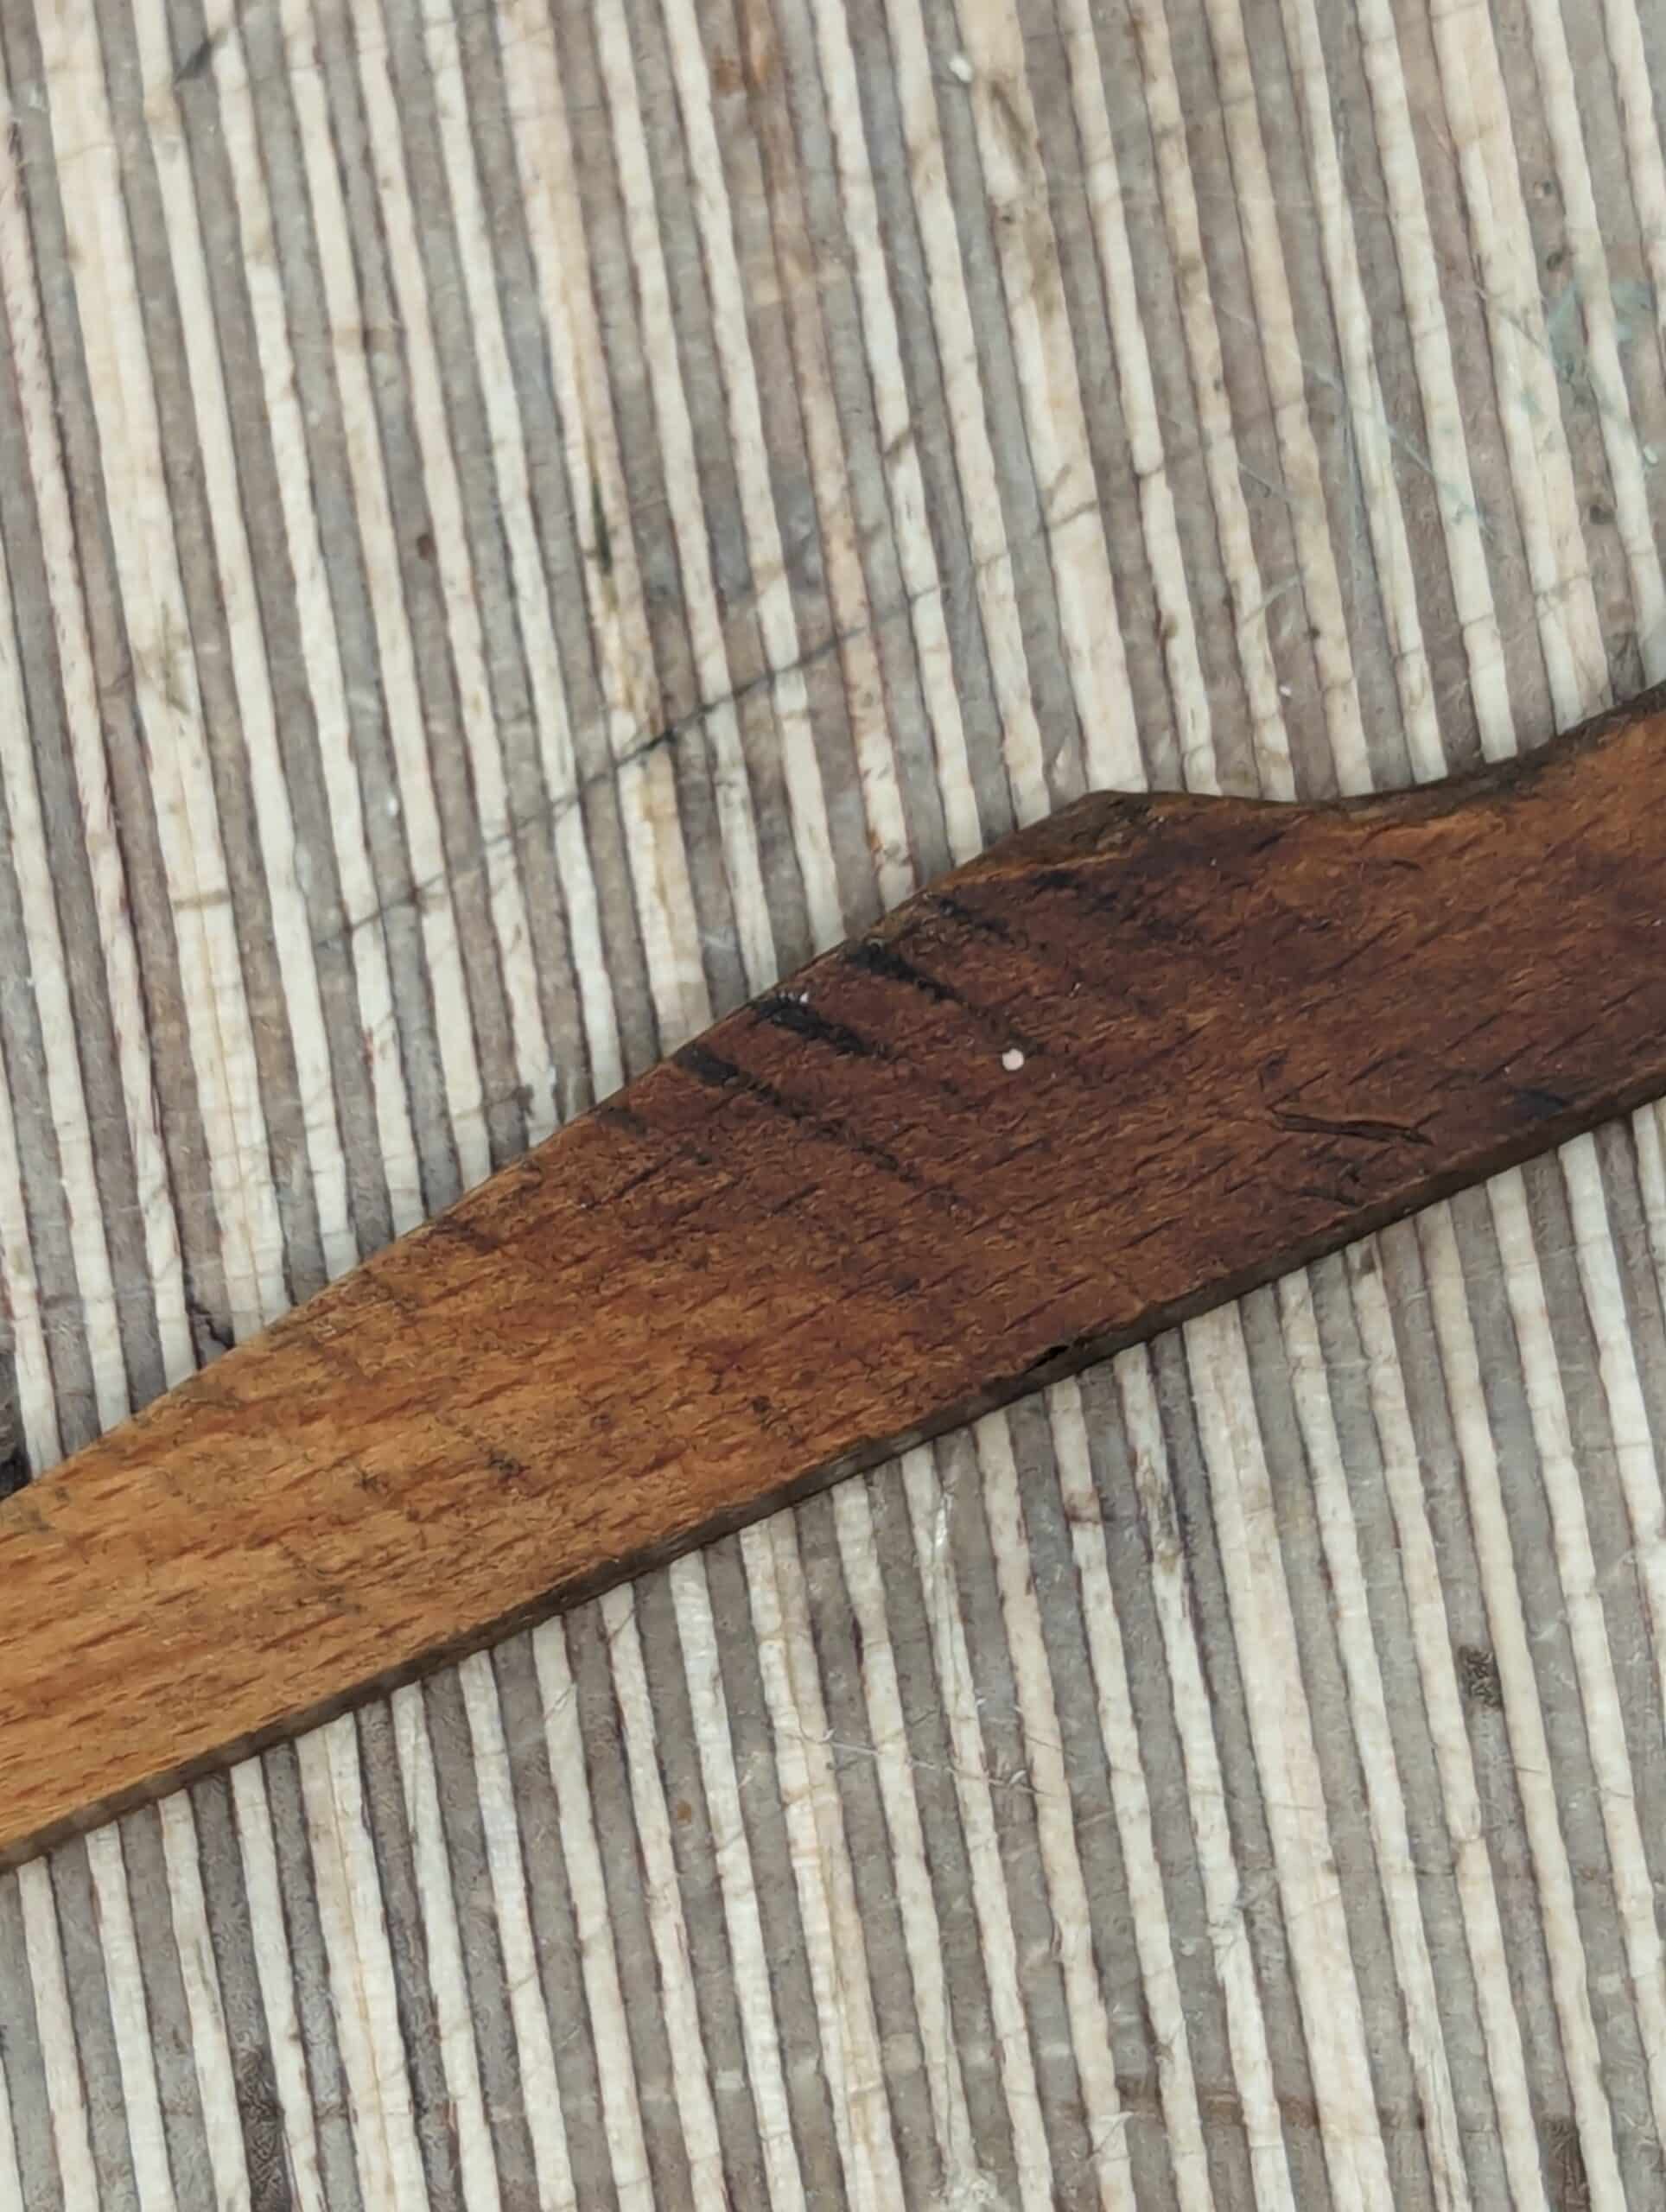
It was interesting to see on this more recently made plane just how much things like the wedge came directly from a fine circular saw. Three faces clearly show circular saw kerf in both the wide facets, and one underside edge; some coarse and some fine.

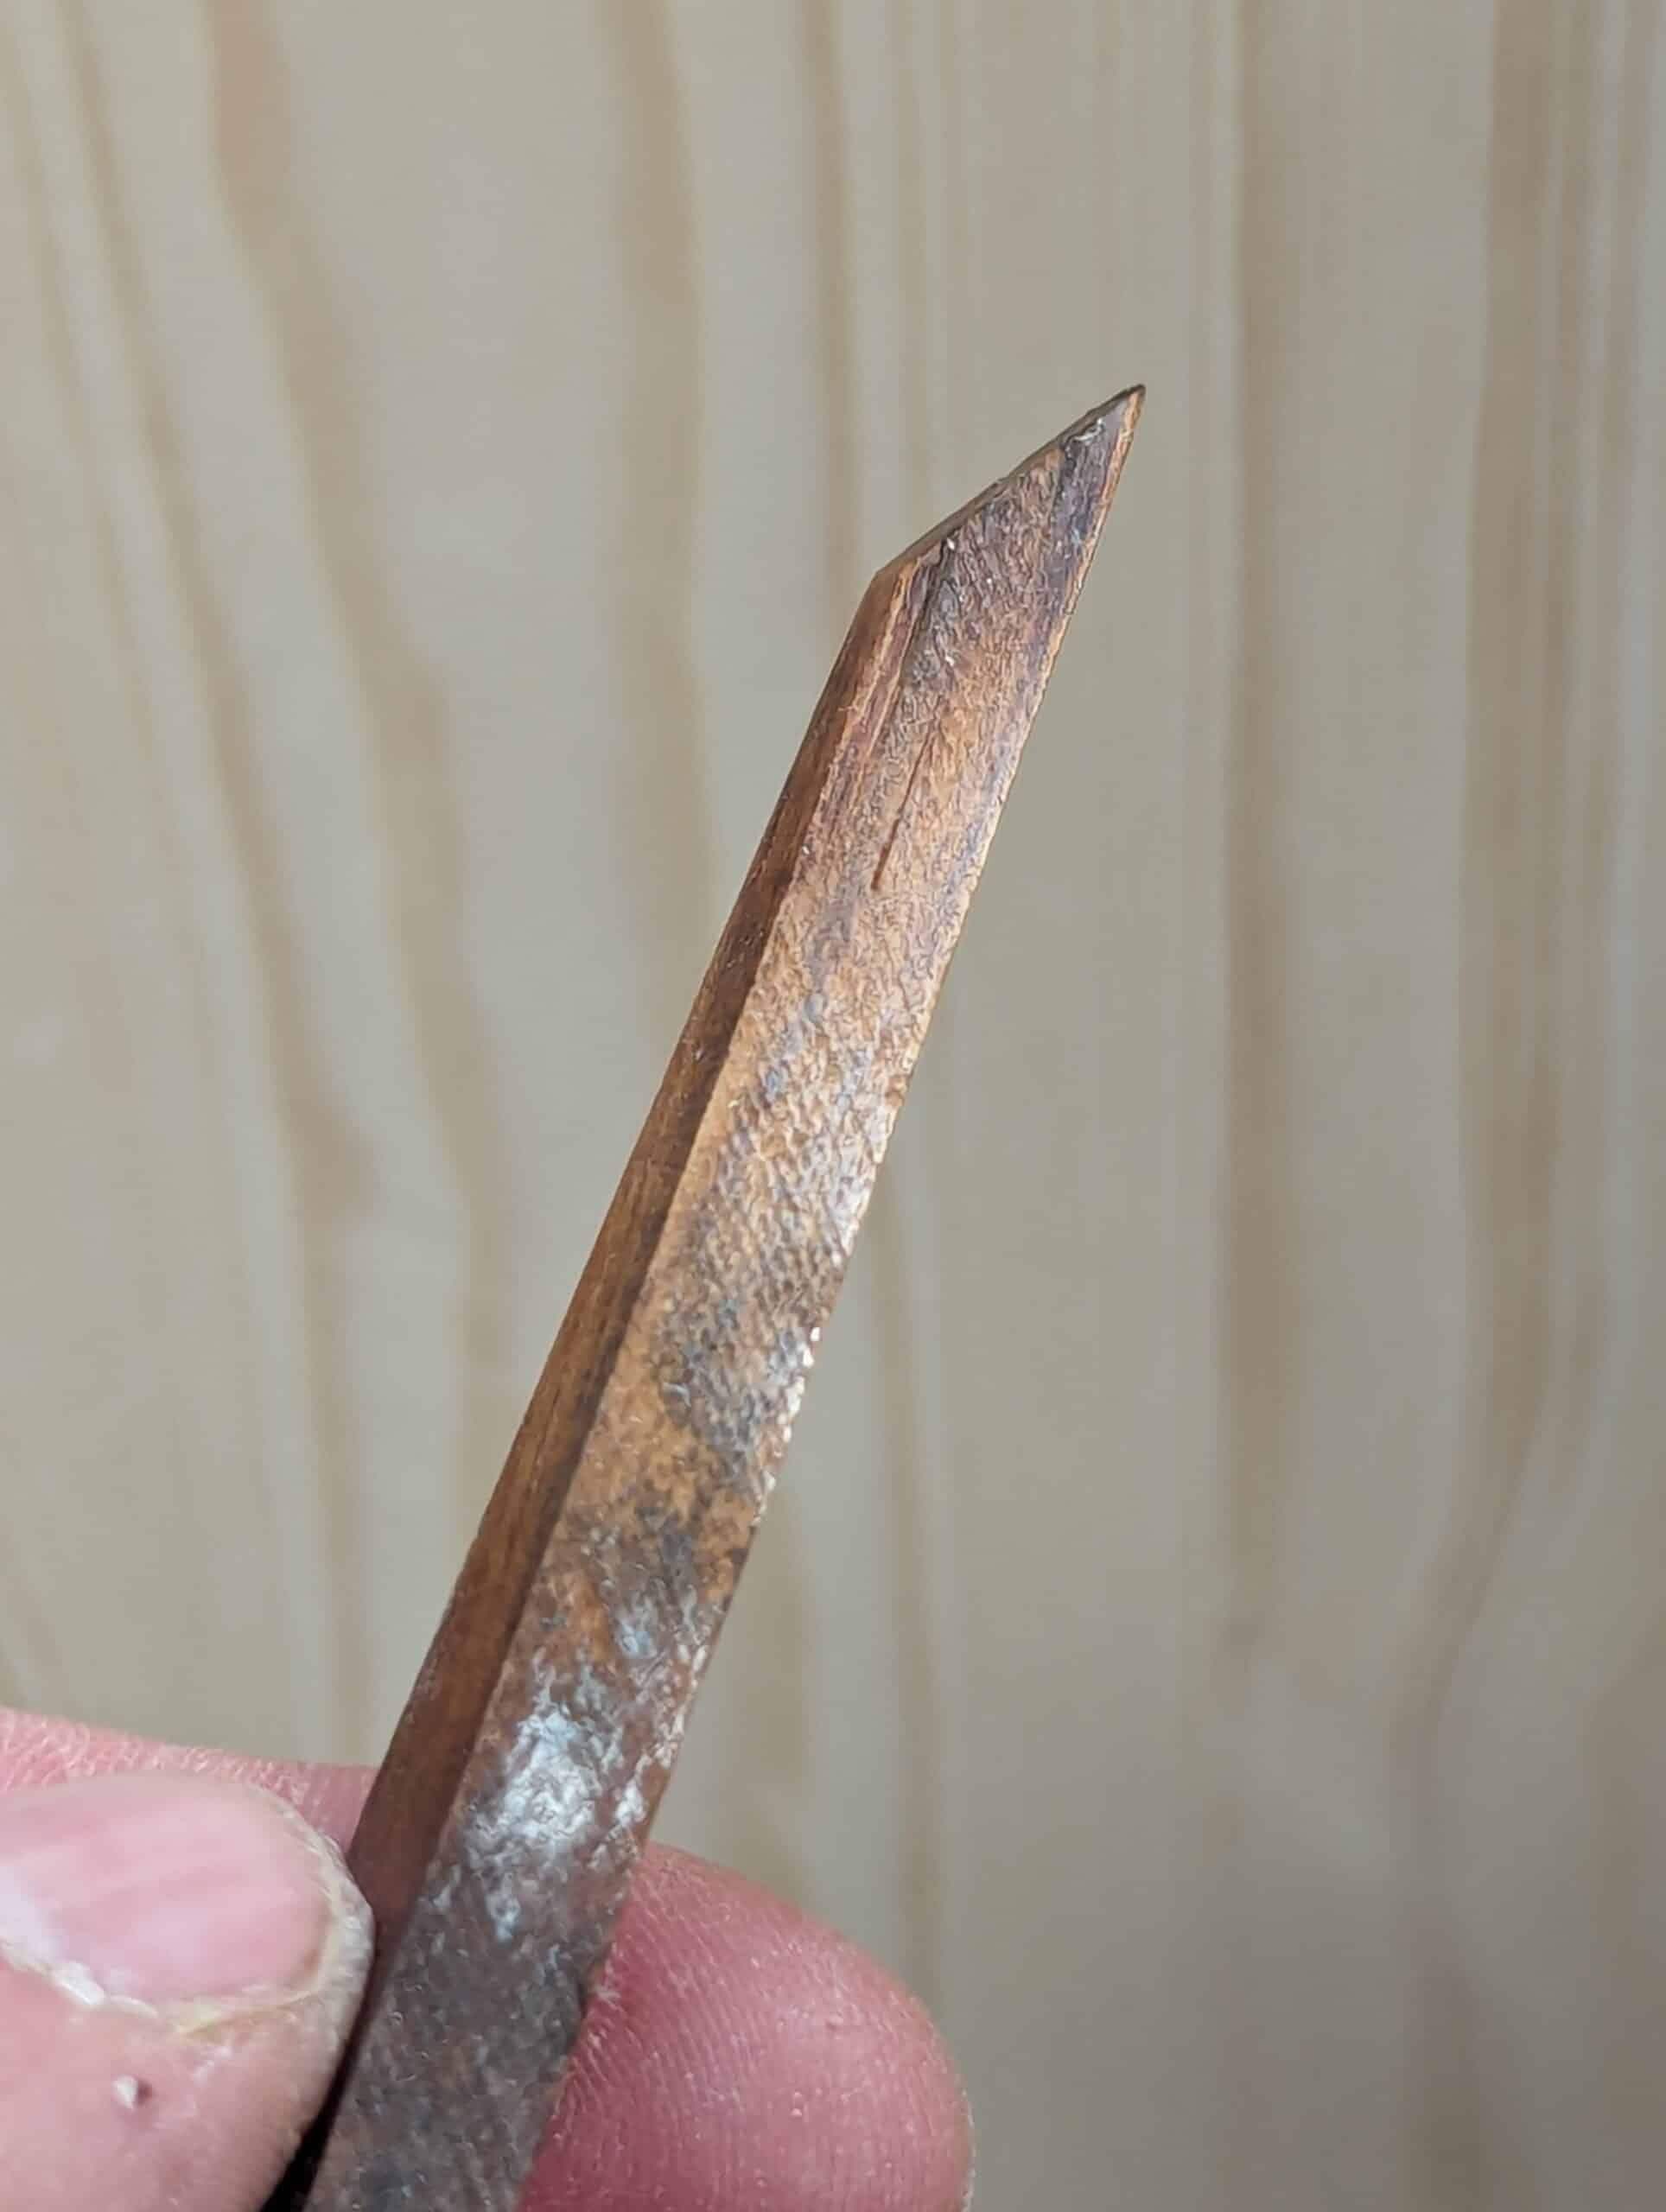

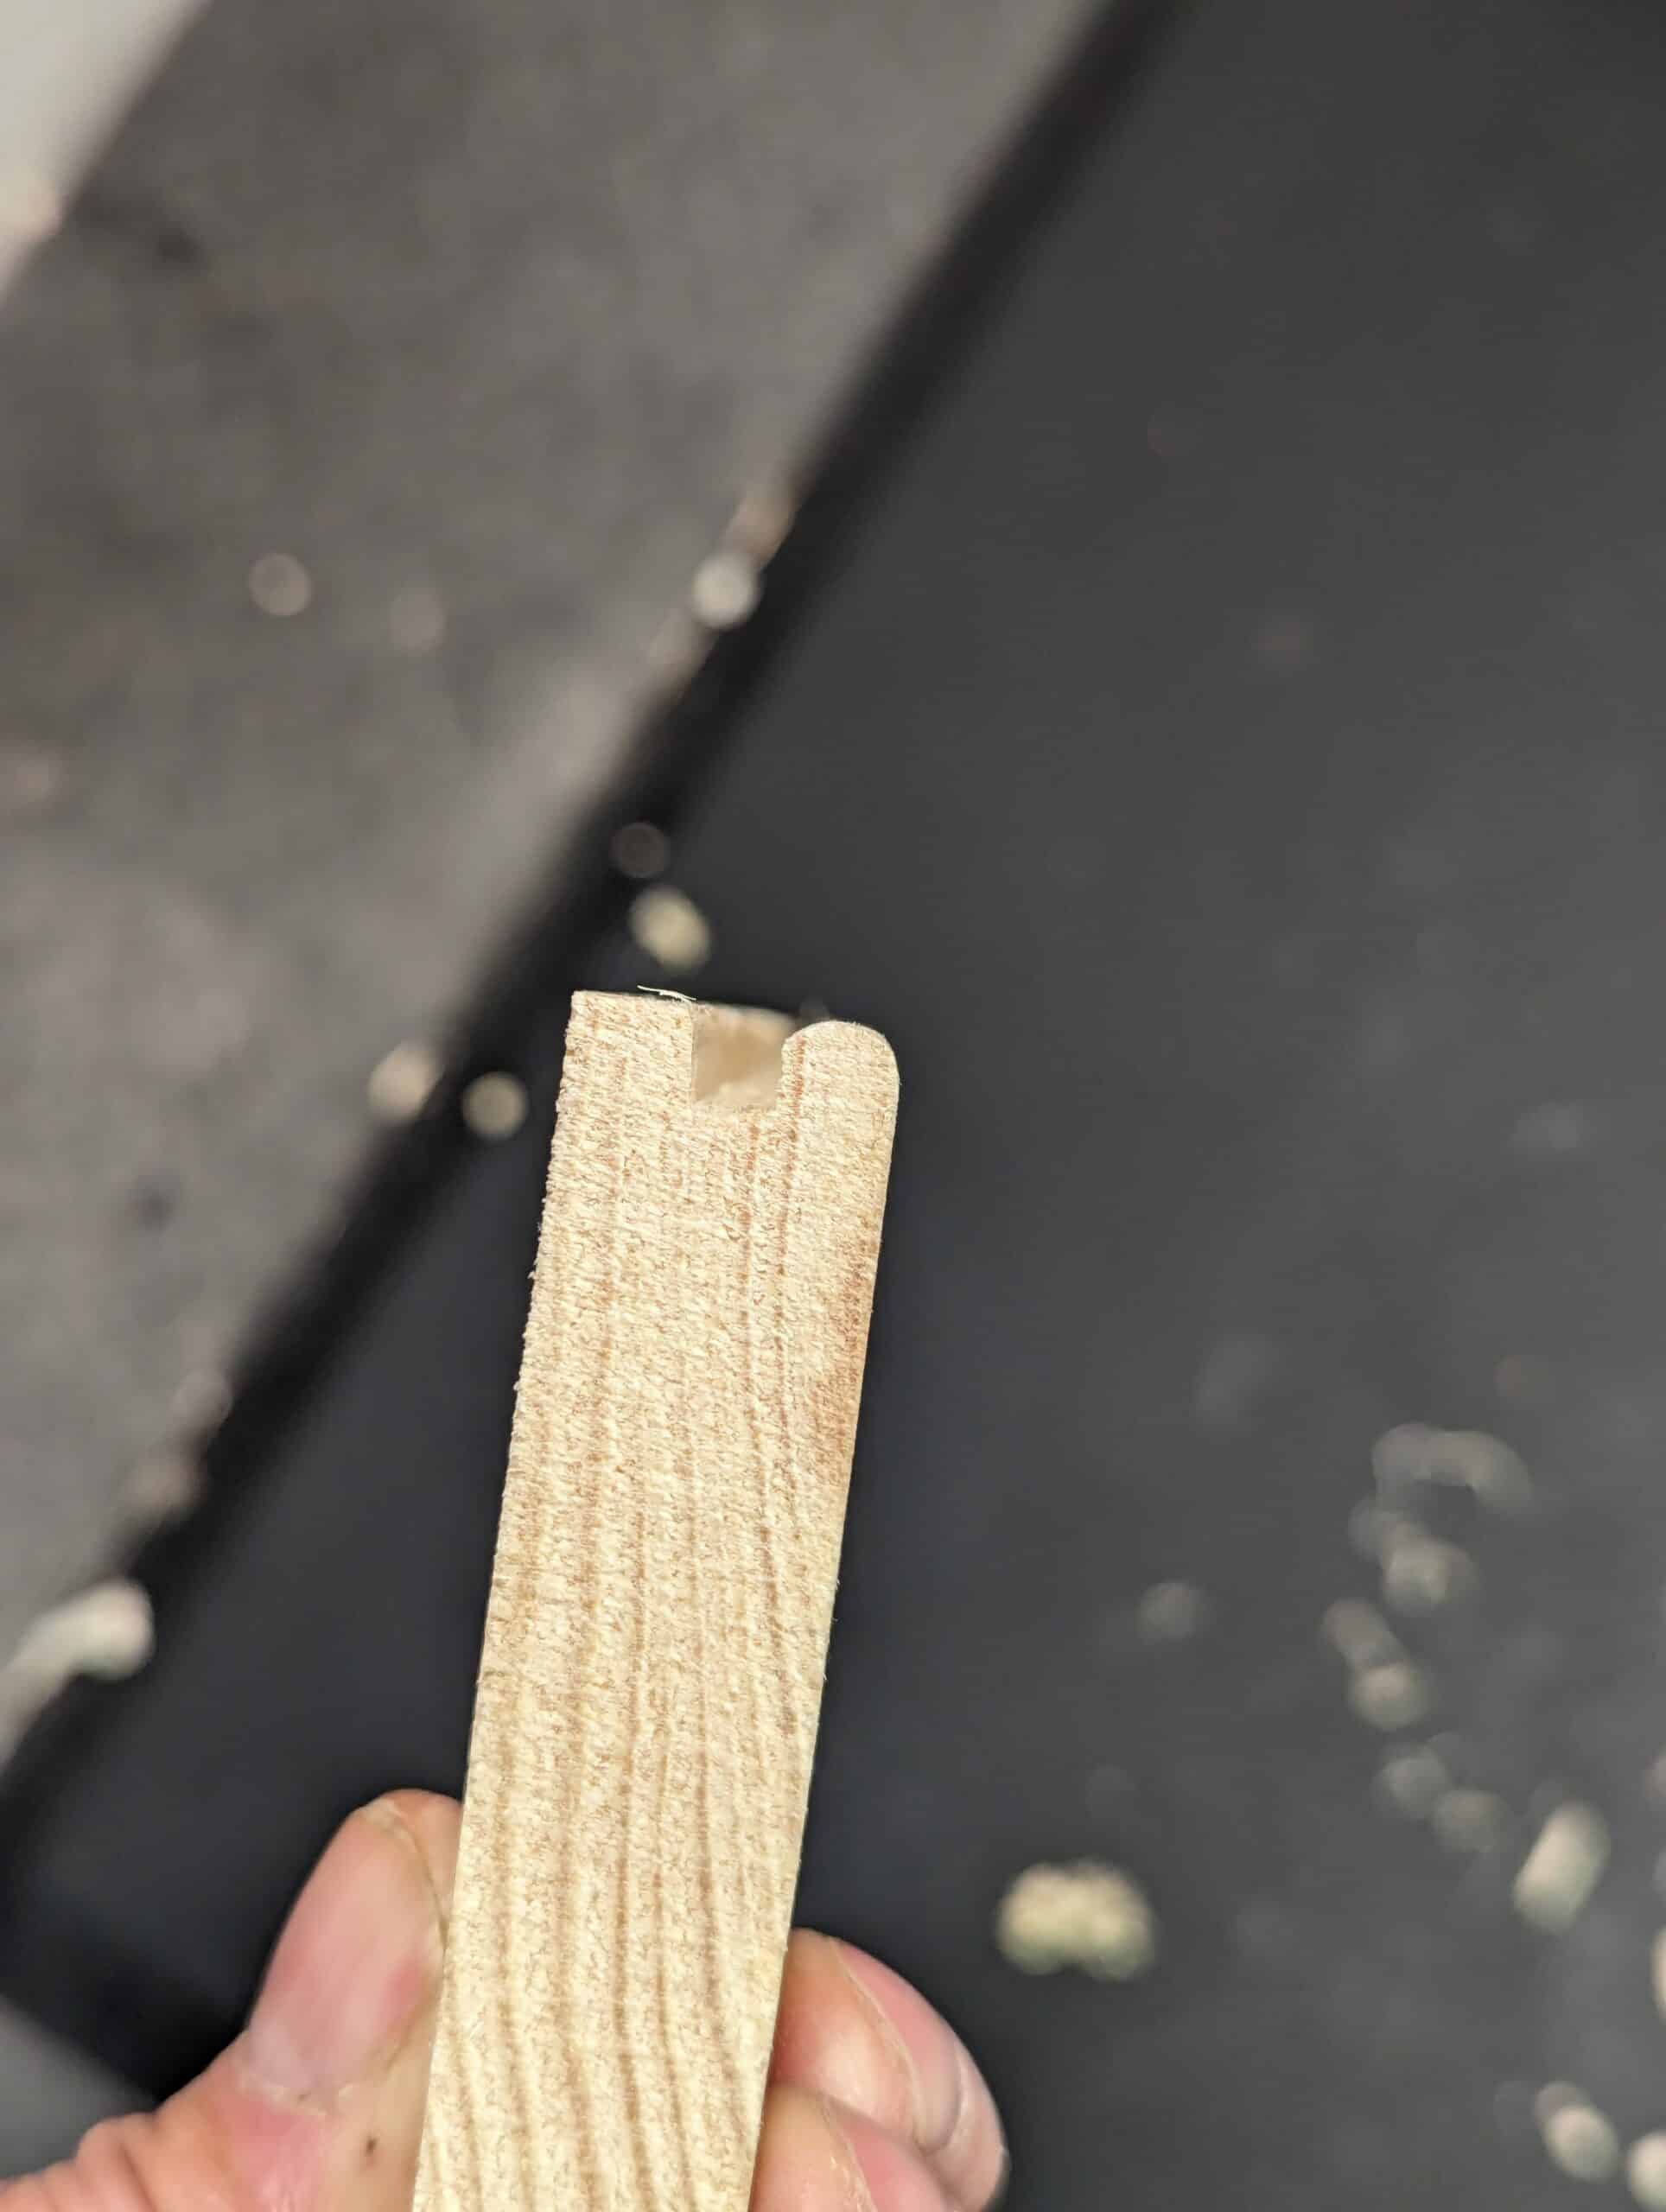
Here you can see the vee in the back of the cutting iron registering on the fore-edge of the rear part of the skate that rides the wood and sets the depth of cut in relation to the skate which is the actual sole of the plane.

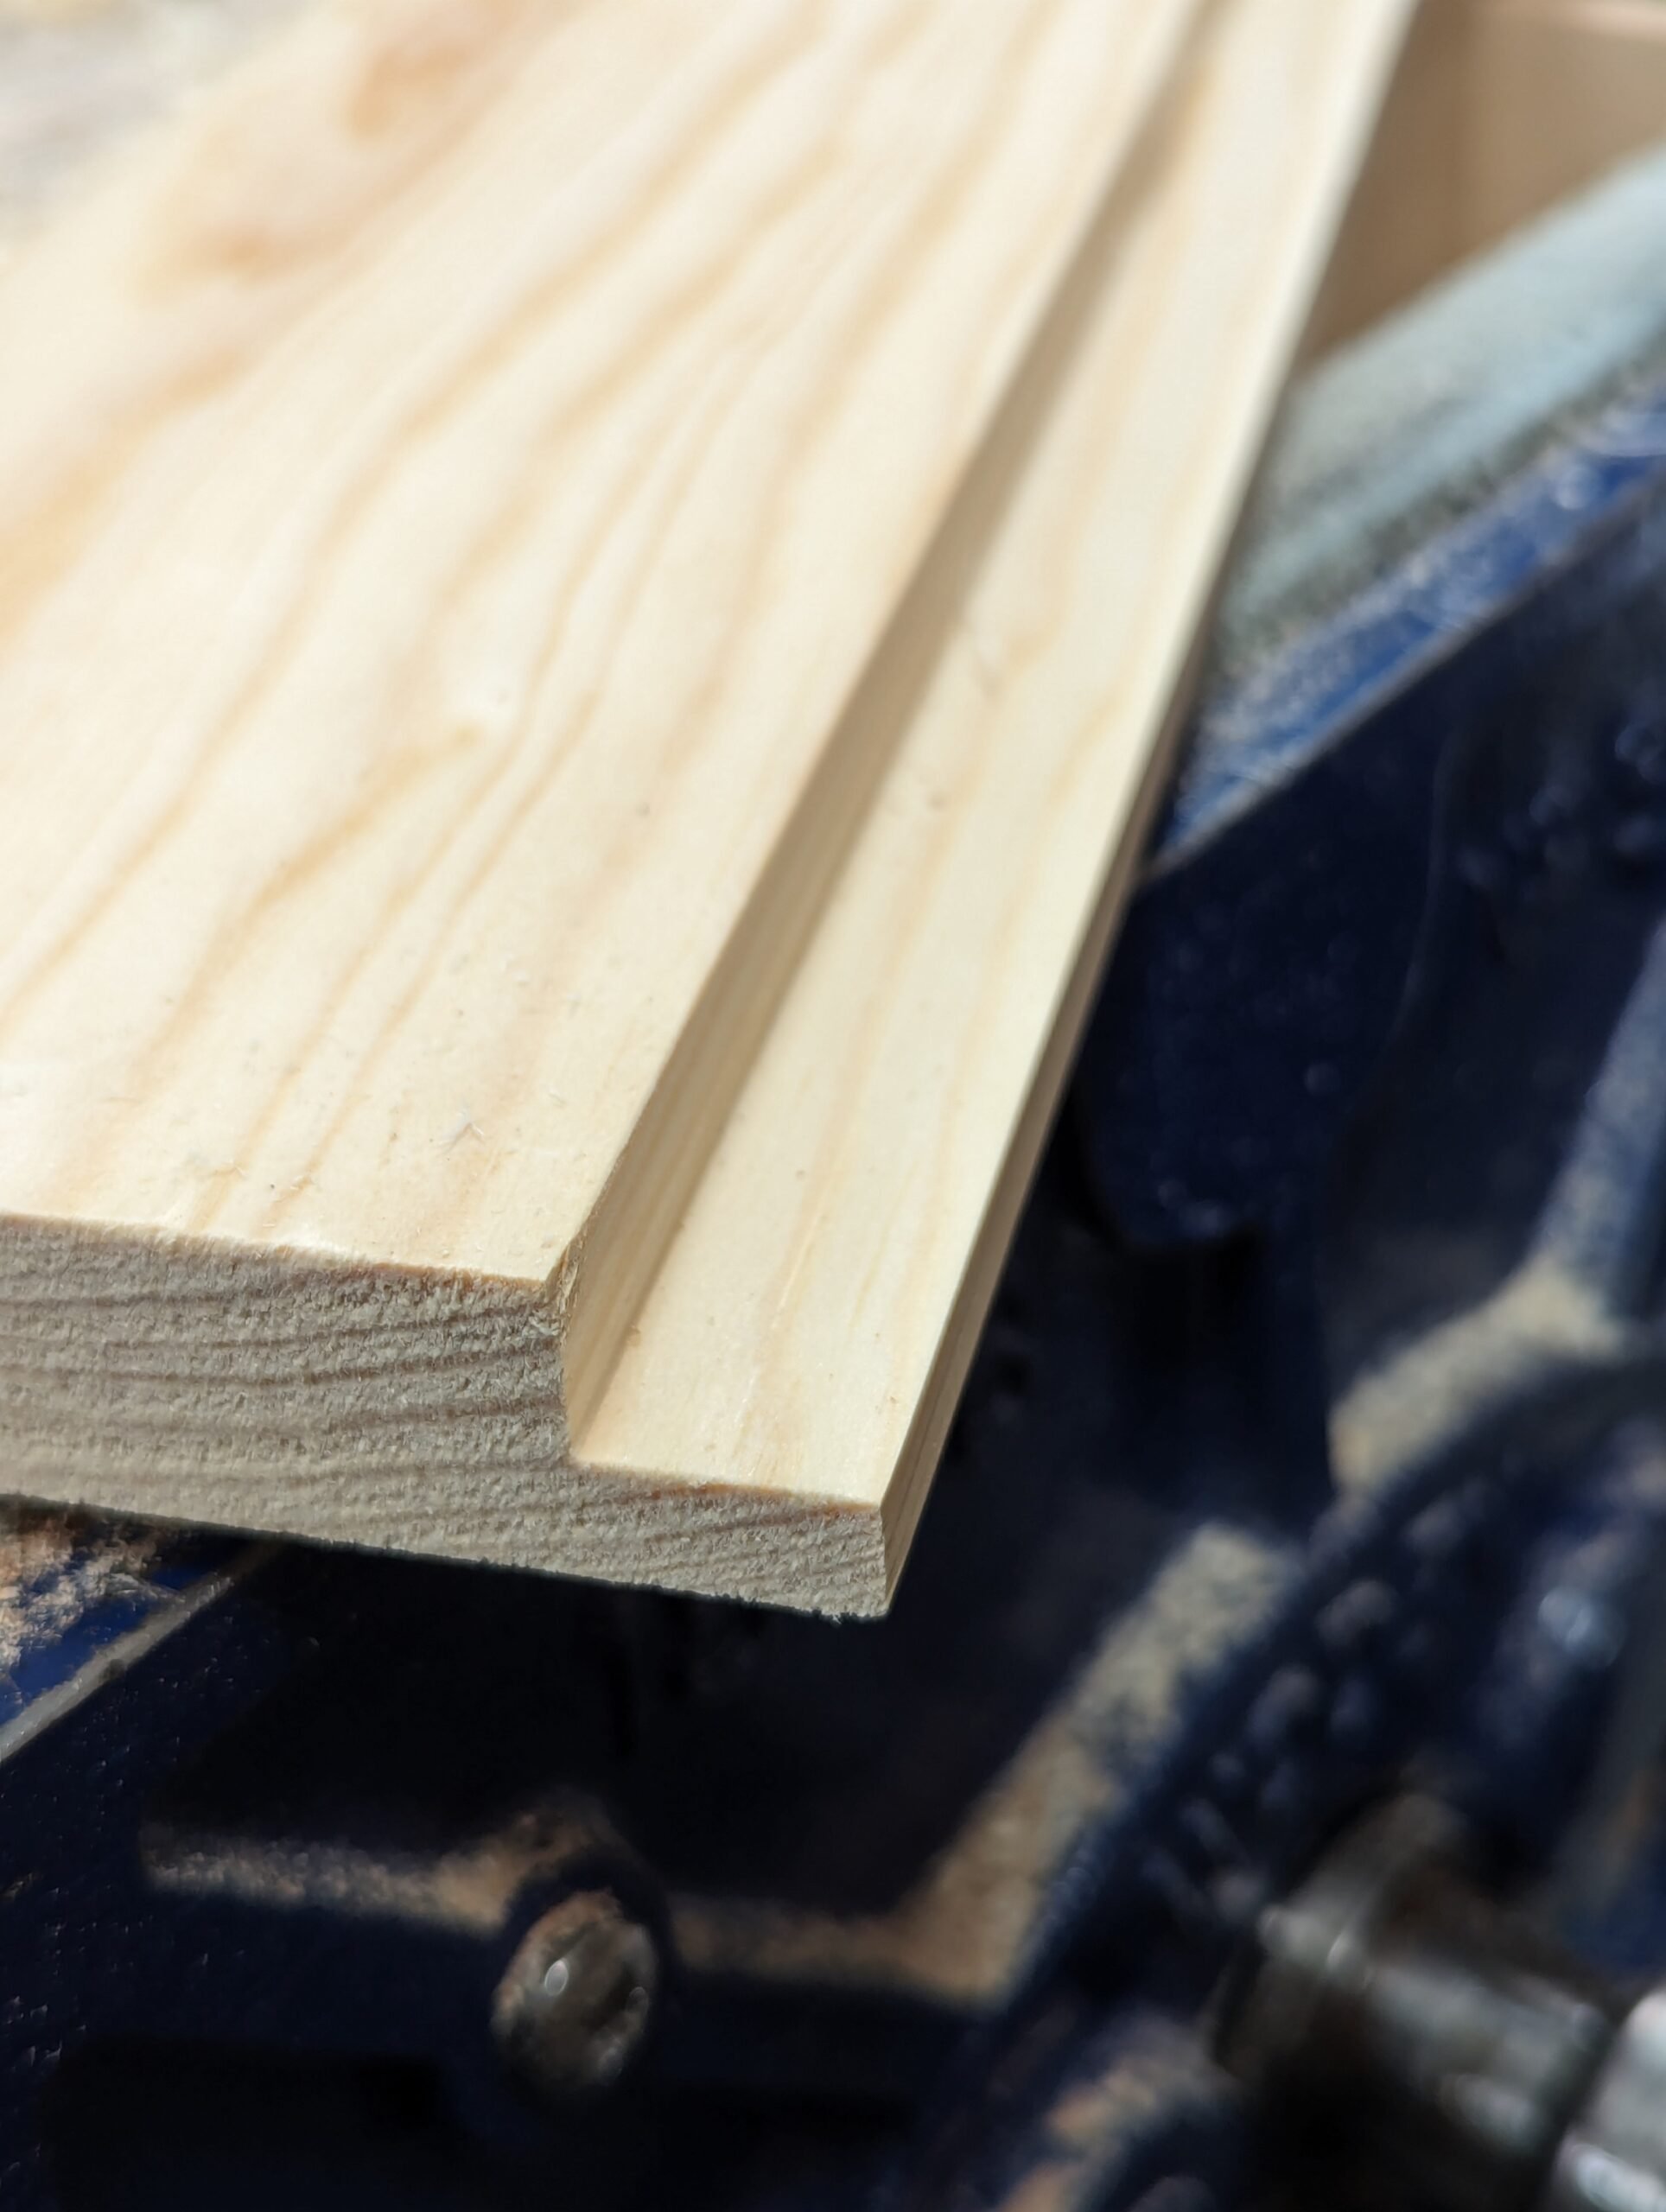
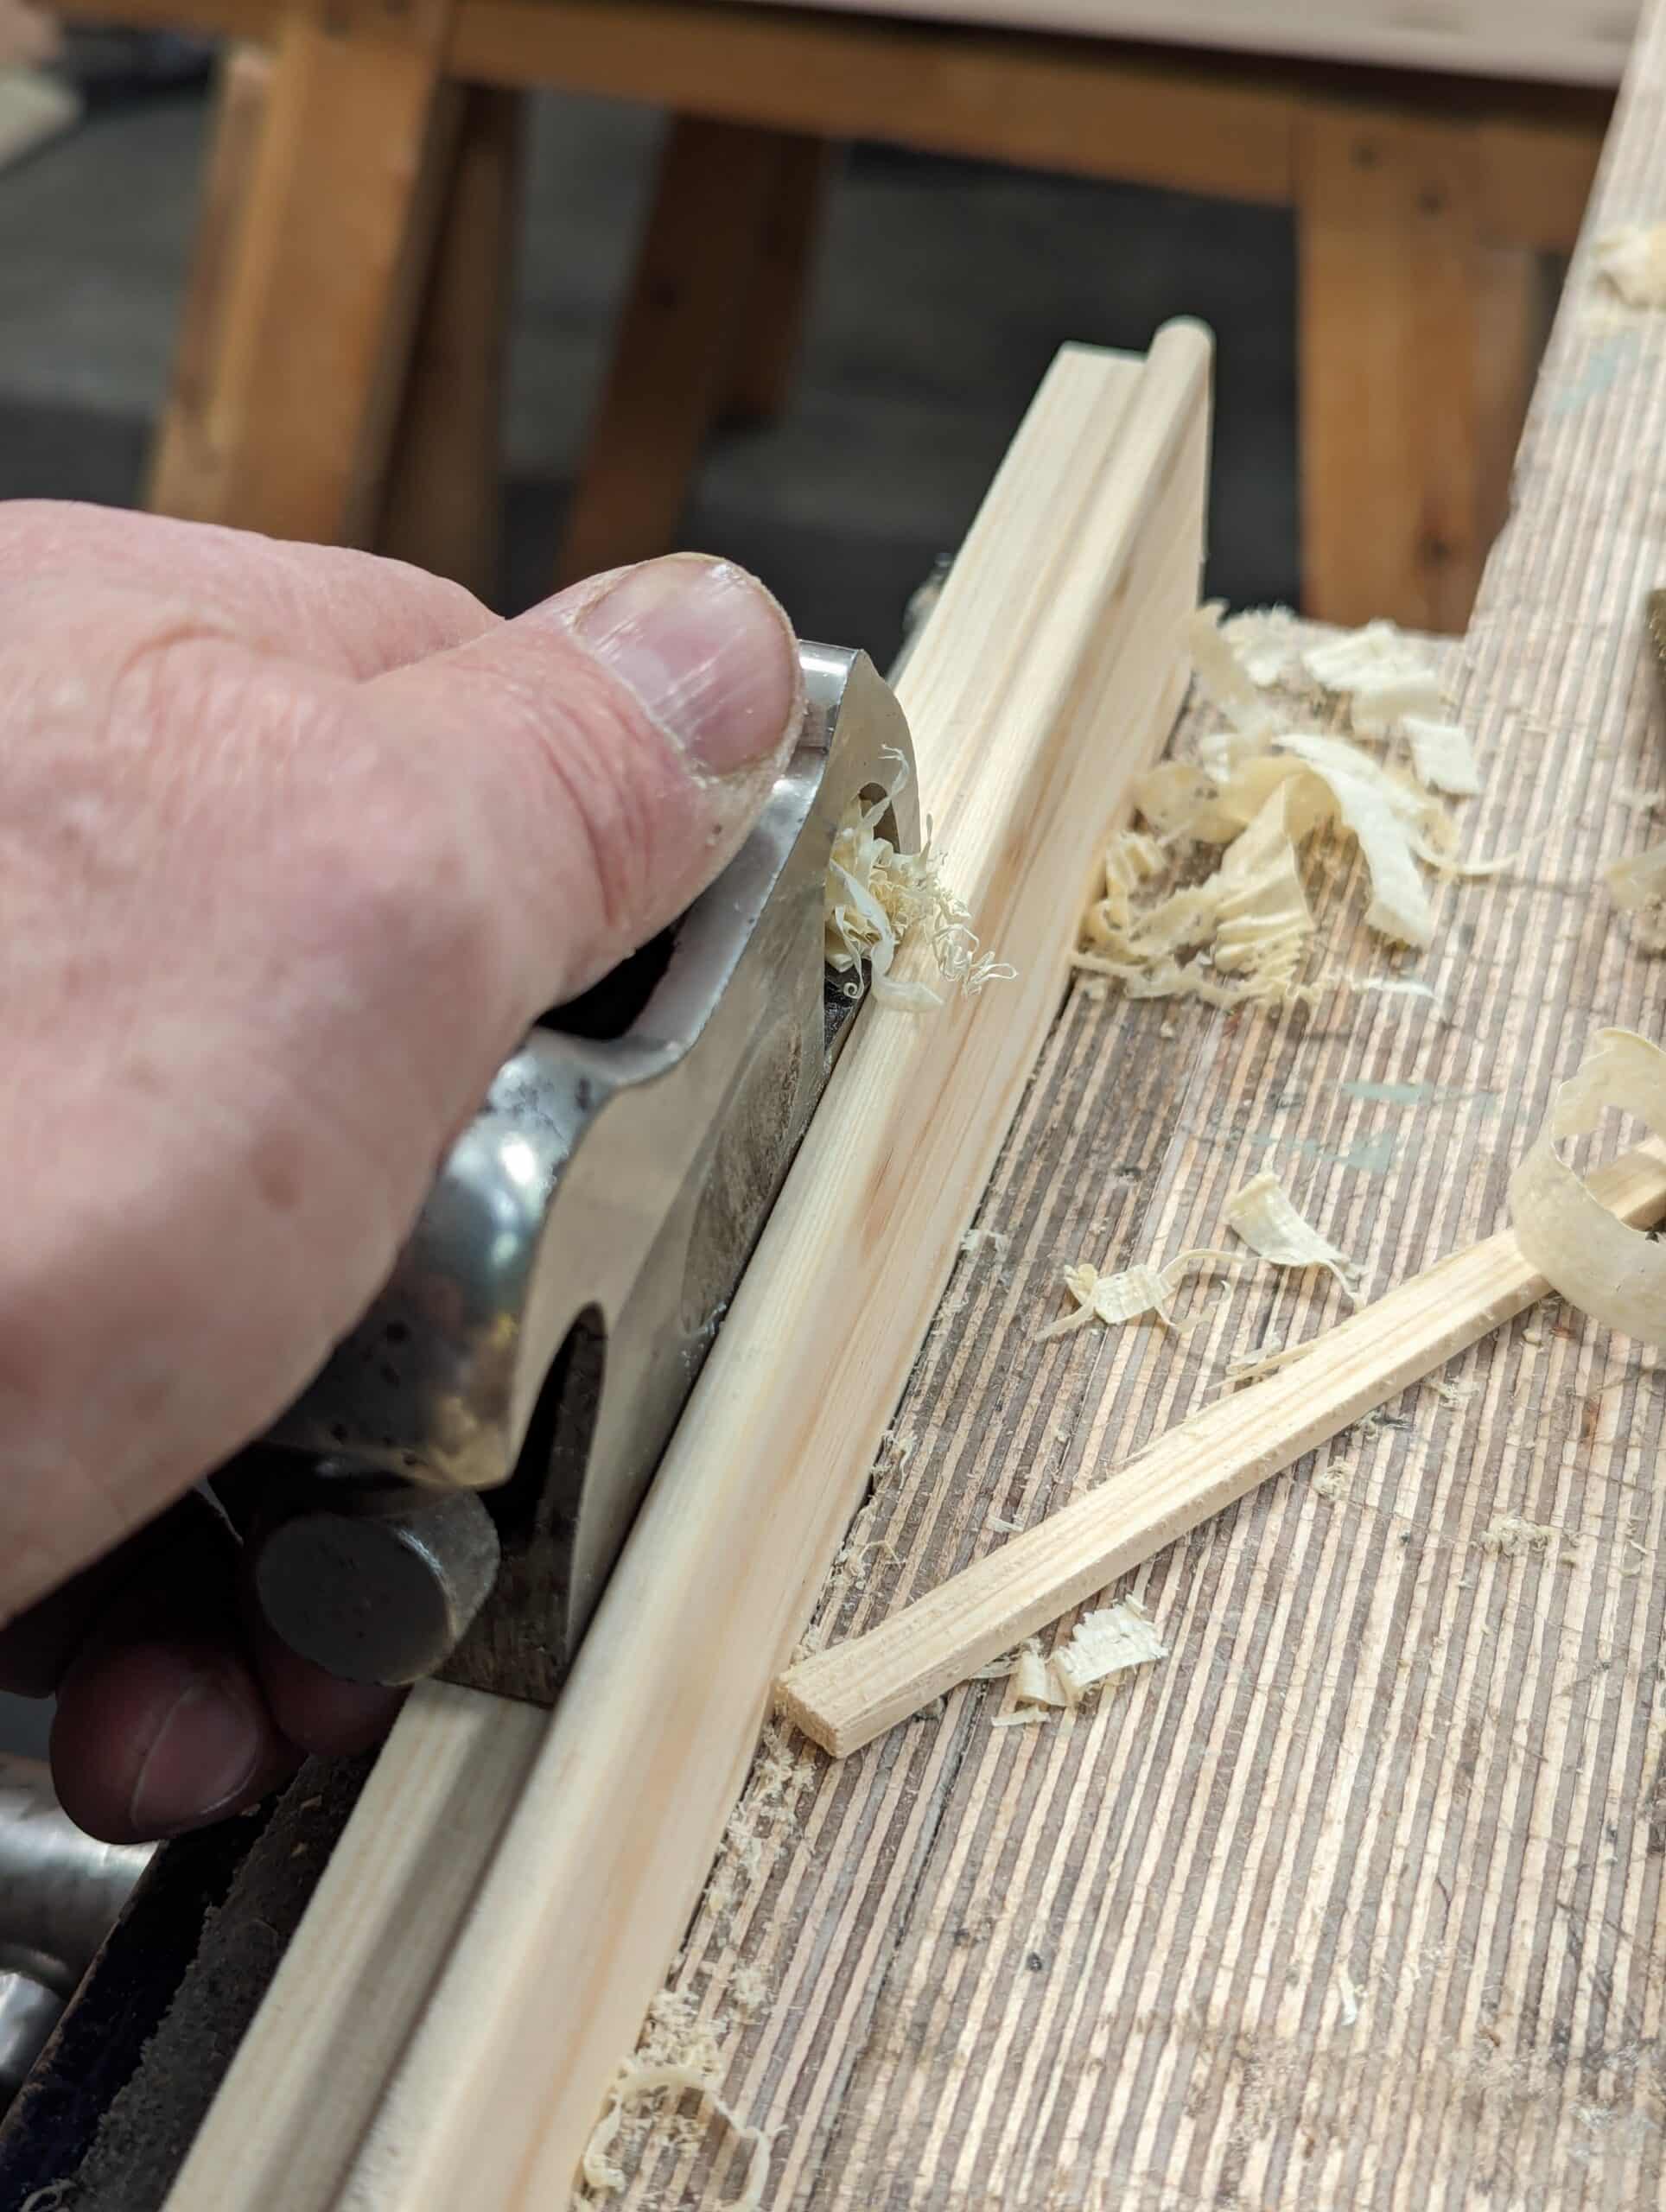
A 1/4″ groove this deep on a one or two-foot length of pine, oak or any other temperate hard or softwood takes under a minute to develop; all woods will take about the same time except the ragged-grained versions like say yew and such, not many, and usually none is as easy as any other. using this plane is probably faster than setting up a power router to perform the same work but with no cleanup apart from two or three clustered strands self-clinging in balls on the workbench or shop floor.
The bottom inside faces of drawer parts groove quickly with a grooving plane like this one; twenty swipes in twenty seconds and you are done. Four times is a little over a minute’s working and the exercise is really good for me. Do these in stints two dozen times throughout any given day and you will be surprised at the value and the volume of the workout.
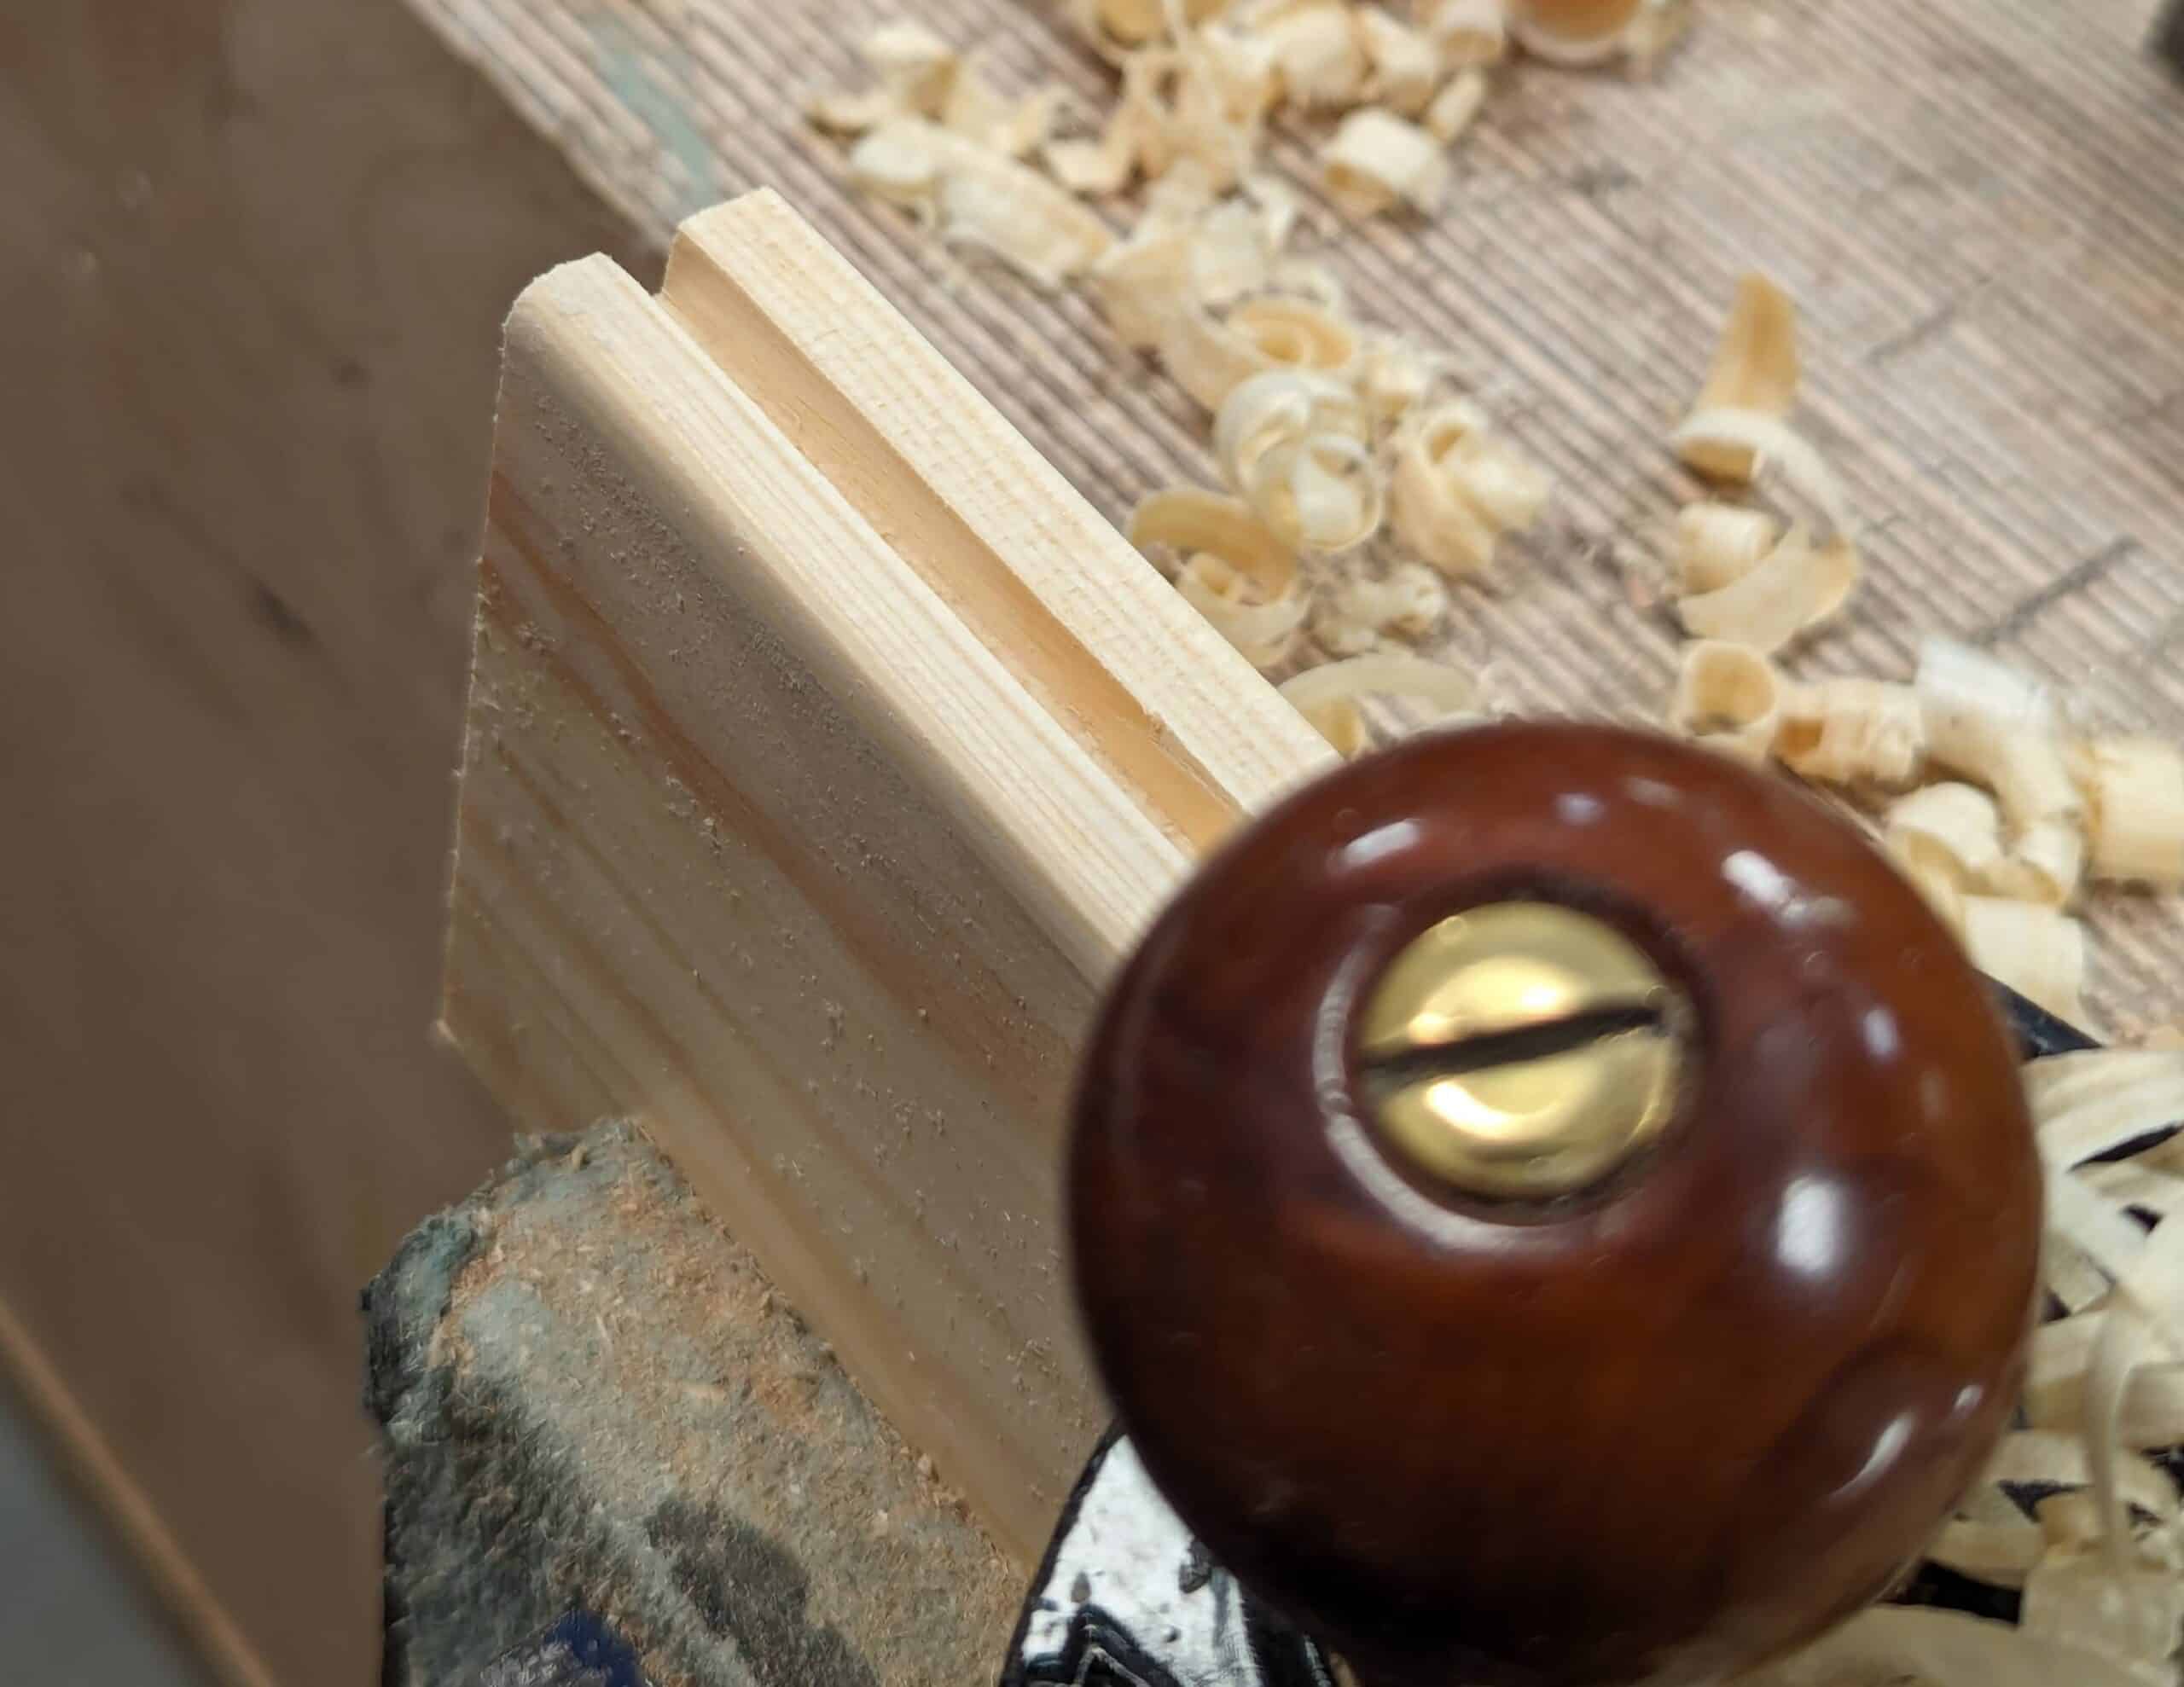
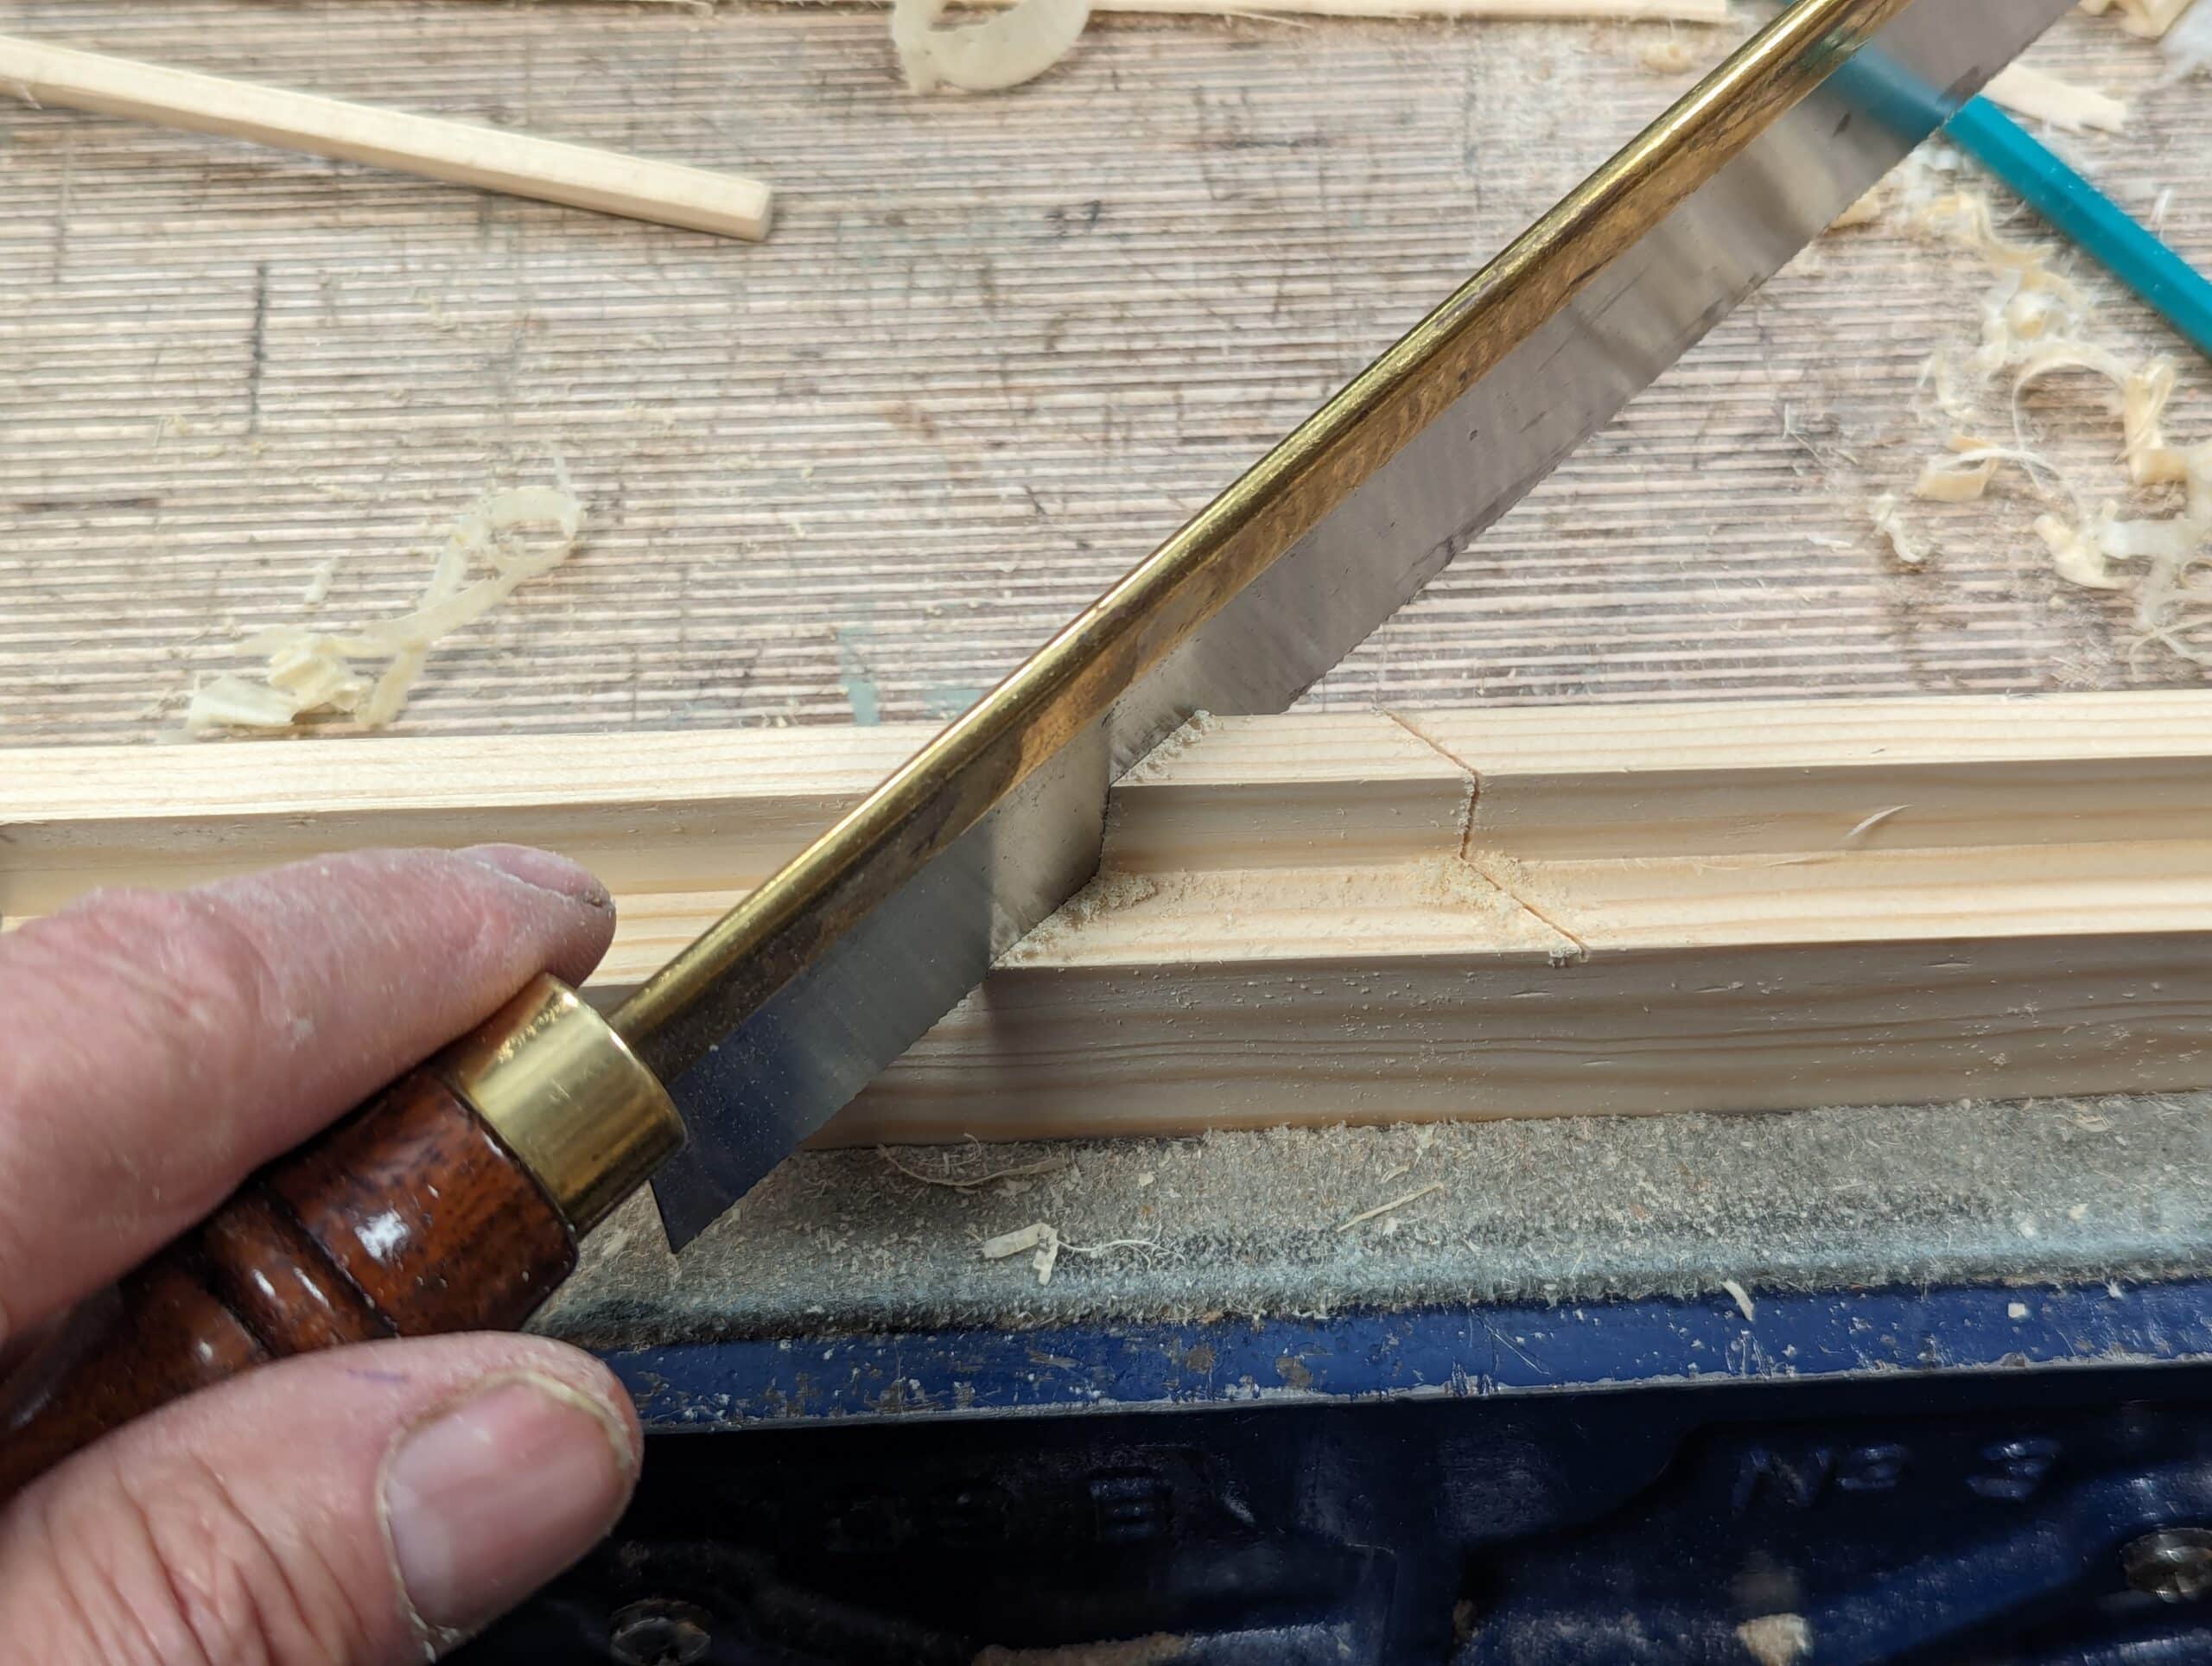
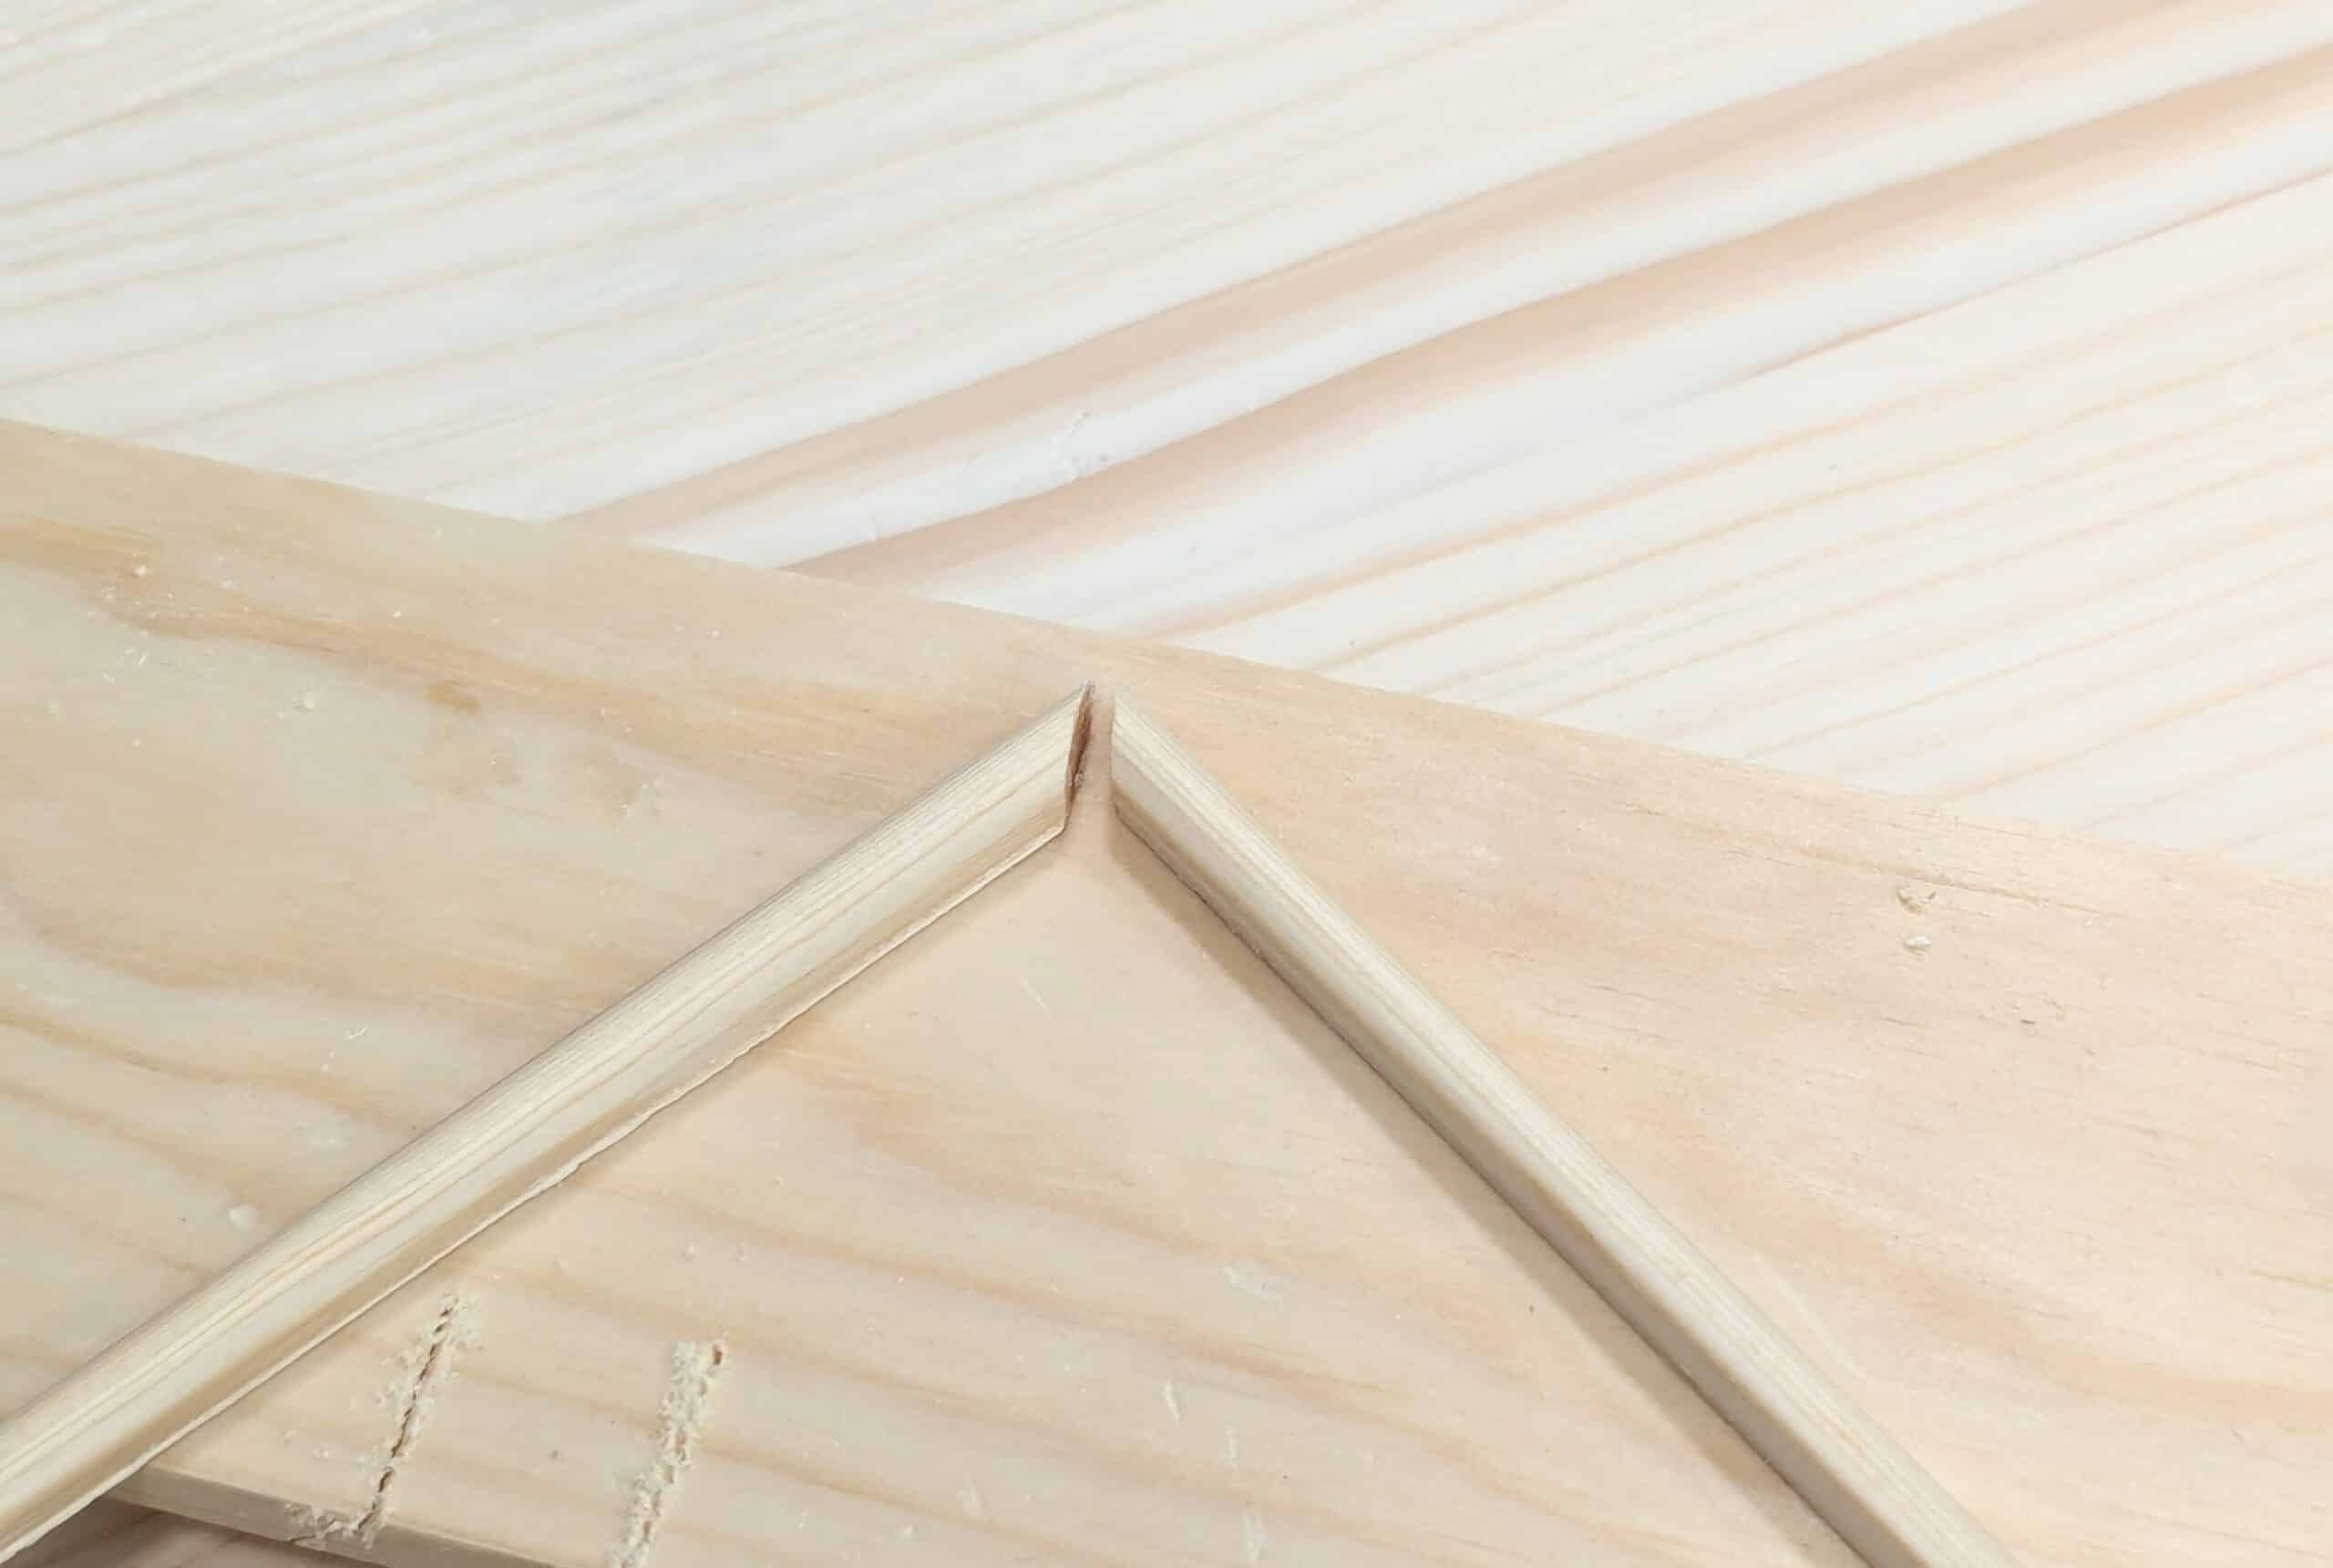
The insides of frames are equally speedy ways to create grooves for your panelling too. You can offset the groove as I have done here or centre it according to need. Think on this too though: you can run grooves onto to adjacent faces to create rebates (rabbets) by leaving a tiny amount of wood in place and then slicing through what remains. Alternatively, you can run the plane from a non-adjacent corner.

This is just a question of adopting and adapting planes to take on other tasks. Oh, and what bout inlaying strips for decorative features or for something like inserted beading, separators and such? The list is endless when you have imagination.


Add to all of this the fact that you can feature other planes like bullnose planes and block planes to create side beads and such.

I have created small beads by ploughing out a groove and rounding the two corners with a bullnose and a number four and then slicing off the strip with a tenon saw. very neat!

You can even make a small mitre box from the rebate you created in a heartbeat.
Then you can take that little round-over and mitre the cockbead you just made from a scrap of wood.

All of this is to say explore your possibilities. Adopt new ideas and experiment with the planes. Want a tray holder within a box? plough out a groove either side so that the grooves are run in the dovetail piece and the groove butts up against a pin and you have a neat solution to the tray seating inside. The options are huge and all for the sake of a small purchase on a lifetime tool.
I have purchased a few moulding planes for as little as £2 50p. I like using the few I have, when appropriate.
Some years ago I purchased a power router when B & Q were selling them cheap as an end of line. But have rarely used it. It took far too long to clean up my workshop afterwards. At the time I thought that I needed one. I had to buy, use and regret the purchase to realise that I really didn’t need or want to use one.
Hi Paul. Thanks for bringing this subject up. I live in mainland Europe and its next to impossible to get a metal plane at a reasonable price. I have two in the stable a stanley plough with the brown plastic handles and a faithfull No. 4. Apart from that I rely on my German wooden planes.
For rebates I have a wooden plane (about 1″ thick) with no fence or depth stop. This is easy enough to fix – first mark your depth with a marking gauge and then you can freehand it or nail a wooden fence onto the piece which needs working.
Many of the German planes, ECE, Ulmia, Johann Weiss etc. (Pinie should also be good, made in Czech Republic I think) can be either either left or right handed. It depends on the nob at the front of the plane – one point to look out for when buying. Woodworm can also be an issue on some of the older plane bodies. I just put some woodworm treatment into the affected parts and that seems to work ok – although if anyone has a better tip, please add in the comments. Special mention has to go to the Schrupphobel (a sort of roughing out plane). Its got a curved bevel and removes any bumps or lumps on a surface.
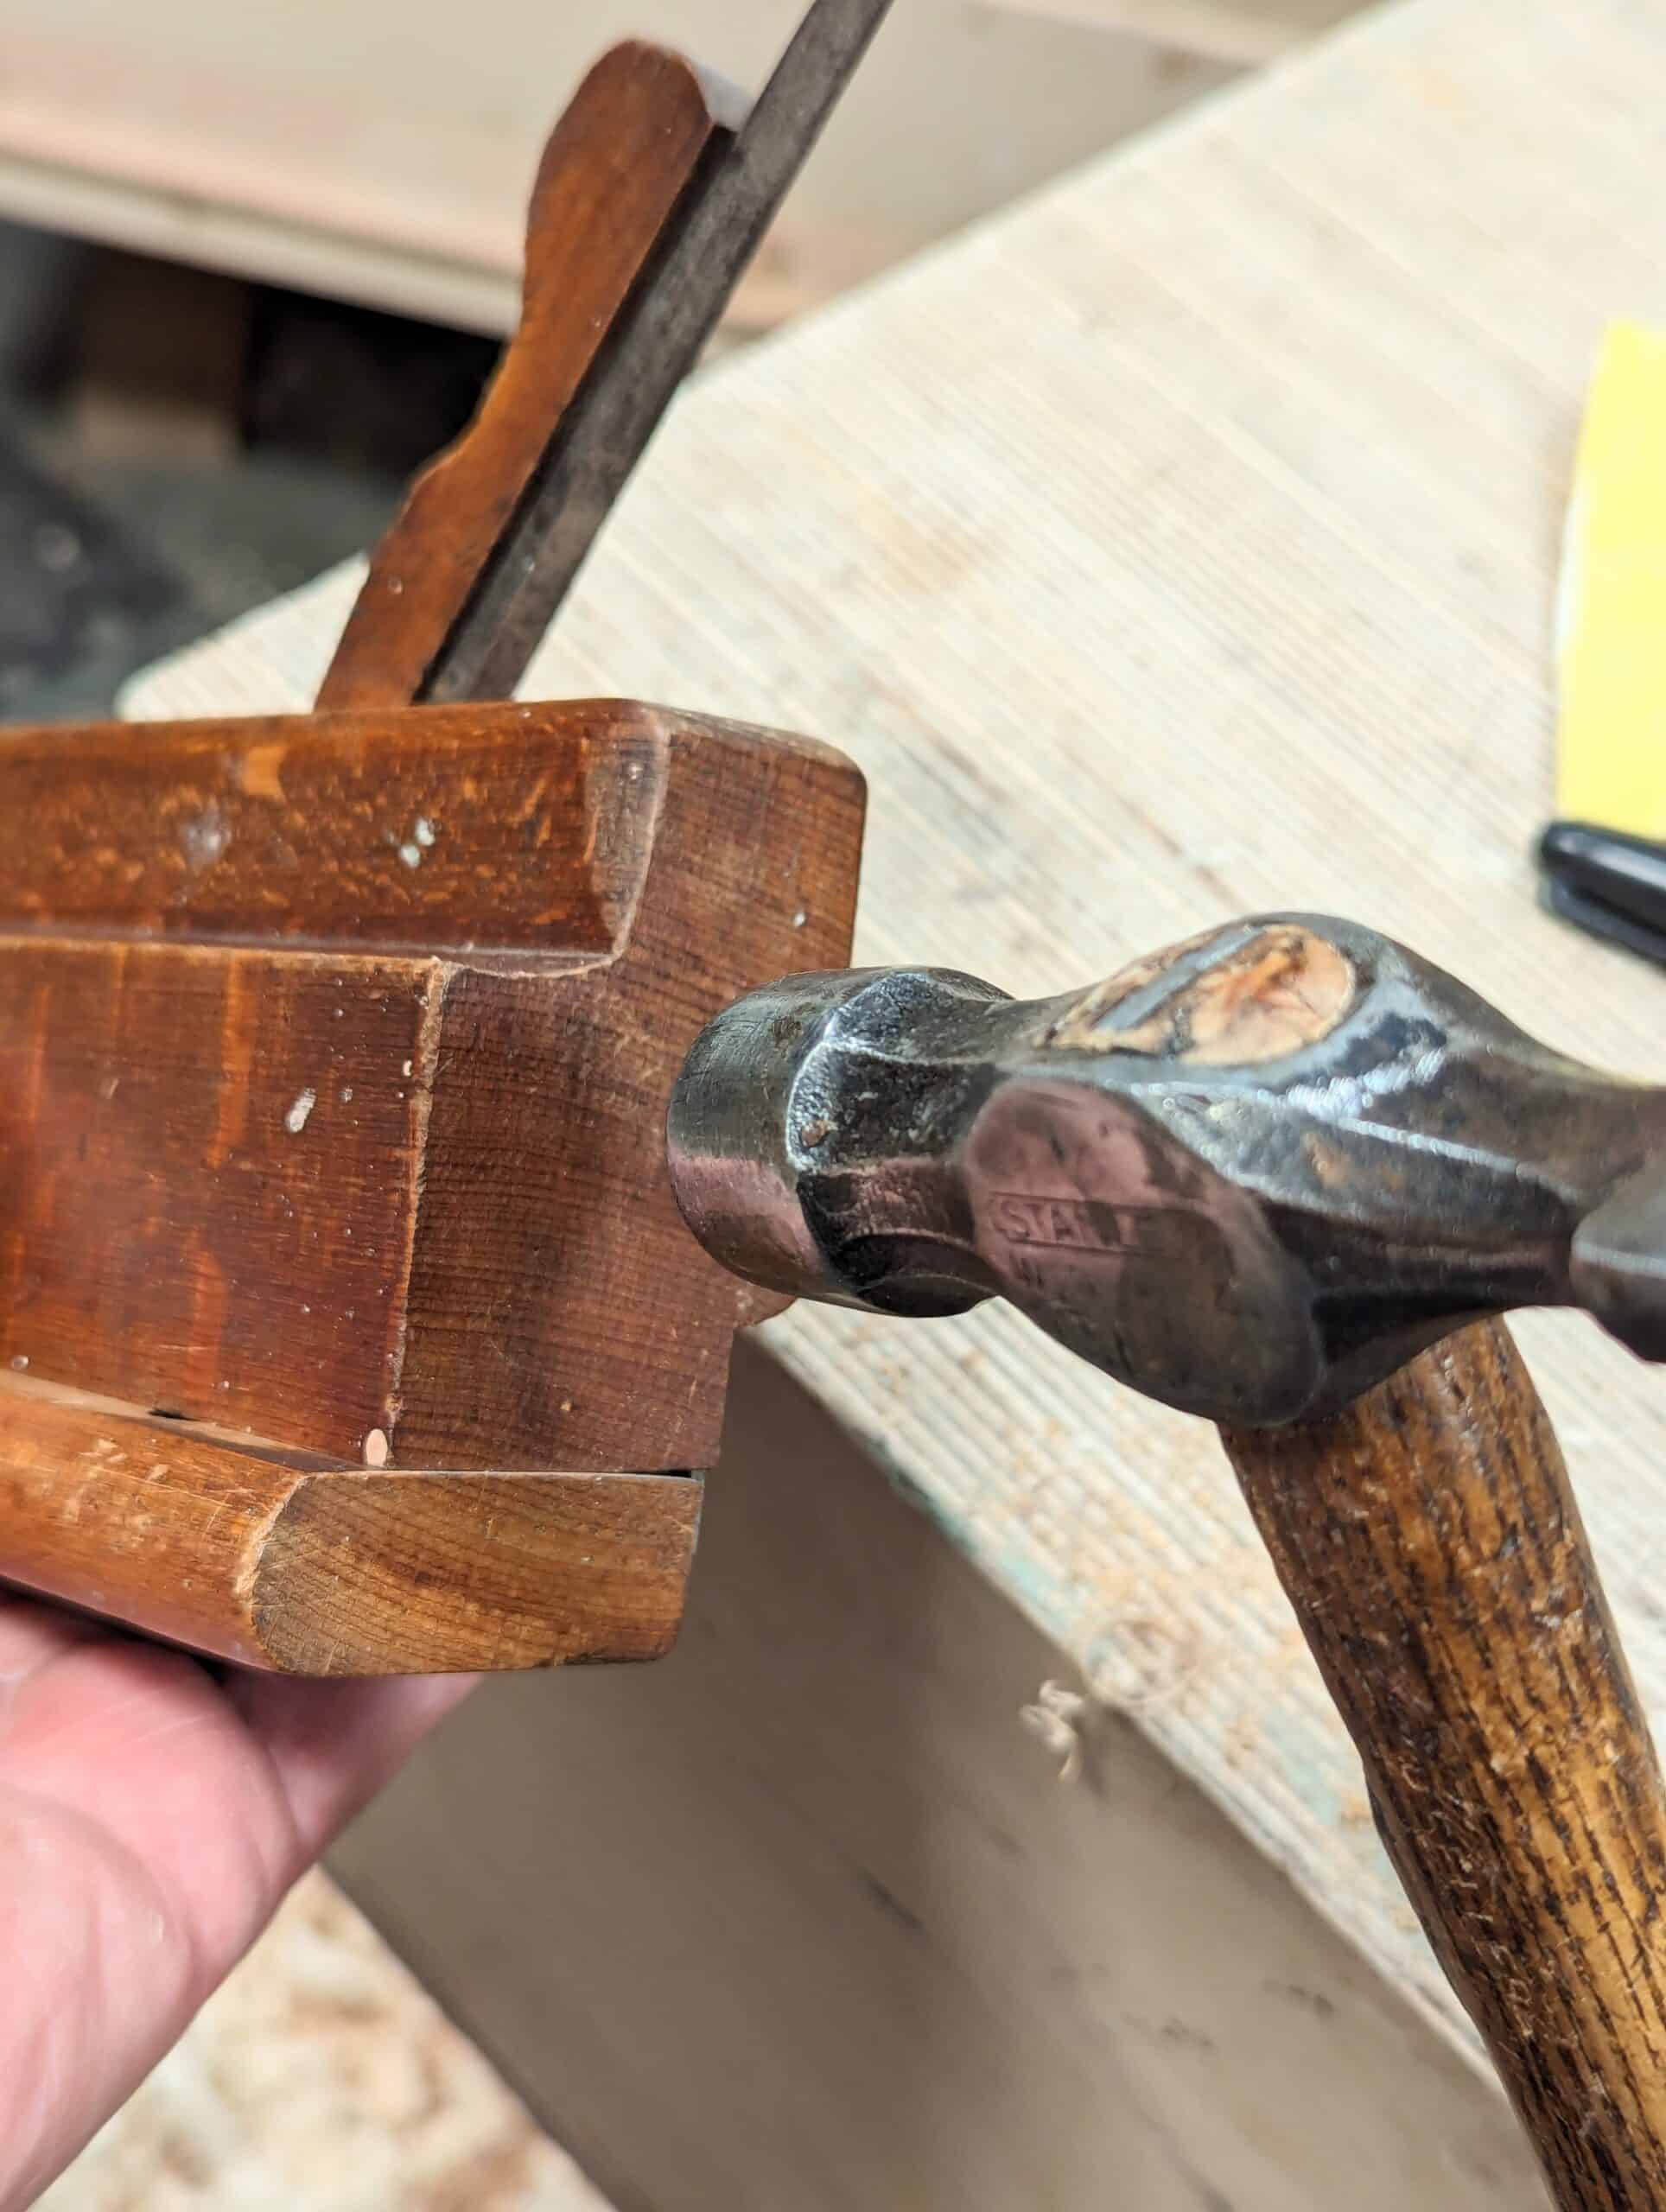
I see Paul has used a metal hammer to adjust the plane above. I sort of shy away from that and use my Thorex hammer instead for the body. It can be benficial to have a few different sized (metal) hammers for adjusting the iron, though. I’ve been toying with the idea of putting a metal button onto the body of the wooden planes for adjustment, but just never got around to it.
All the best and happy hunting guys.
Paul – I do enjoy your blog – many thanks. I have slowly got rid of all my machinery except a big band saw. During a cold winter and in a less than well heated workshop the benefits of a wooden plane are clear – less cold hands. I use wooden bench planes all the time and regularly recourse to a small collection of moulding planes and panel raisers. I agree, a thorax hammer works v well.
Not as accurate as a router bit – but much more satisfying and I am slowly getting better at using them. But then I am a dedicated amateur.
Best
When I was in 8th grade I made a cutting board that needed a blood groove made around the perimeter. I was not familiar with a power router and had the instructor do that part for me.
He hesitated on one of the corners and burned the wood plus there was a mismatch when the groove met. I didn’t like the end result and I scrapped the project. Over the years when I used the power router I found it limiting, worse the least slip would scrap or ruin what I had spent a lot of time on.
I bought some antique molding planes but after a lot of failures I discovered they were warped or had flaws that made them unusable or unsuitable without a lot of work that I didn’t know how to do.
I had purchased a great book by Matt Bickford on how to use molding planes and decided to buy new planes. This eliminated the tool problem but then revealed my lack of knowledge and technique! Right now I use them to finish up a profile after I have “roughed” them out with my shaper. They get rid of the machine marks and pretty much eliminate the need for sanding. They are also good to remove the tear out that machines sometimes force you to produce.
For me it’s a big long learning curve, I just don’t have the time on every project I undertake to use hand methods nor do I enjoy failing and wasting good wood.
Someday I hope to rid myself of the crutch (and noise) of using machines.
Wow, every day is a school day! This article has cleared up a mystery for me. I made a grooving plane entirely from scrap – an offcut from a spruce fence stob for the body and wedge and the iron made from an offcut of square steel keybar. (Handy, being a mechanical engineer! )
It’s a bit crude. It works, but I wondered why it was such hard work. Now I have twigged it’s because the iron is dead square in section. It’s dragging. I need to relieve the sides to that trapezoid shape.
Bench grinder, draw-filing and a polish on the diamond stone. That’ll sort it out.
Thanks as always Paul.
I’m a retired mechanical engineer, too, and after years of grinding cutting tools for metal lathes, it makes sense to me that the iron would work better with proper rake and relief. I’ll have to keep that in mind when I make one for myself!
Hi Paul, very interesting article. Is there a reason why you don’t use mouldings on your pieces any more.
Many regards
Paul.
This should answer your question:
https://paulsellers.com/2022/10/why-no-complexity/
Why No Complexity
I think often that the only reason we see so many mouldings on current work is it continues more as a pretention of skilled work rather than it being skilled at all. I see too that it can appear quite magical in the same way a film or a video gives the impression we are actually seeing an action when the event is wholly past. Look to the fore edge before the router bit hits the square corner and then behind the power router and see a fully profiled mould is indeed like magic being effortlessly carried out in a single, instant pass of a machine. It’s different with a moulding plane where each stroke removes a thing shaving a fraction of an inch thick in long strands.
Looking back into the history of woodworking and seeing who commissioned the mouldings tells its story. The wealthy and the privileged commissioned outstanding work to express their power. Would we working people then and now have gold-leaf frames hand carved with massive relief work have sucvh things hanging on the walls of our 3 metre square living room walls or dining rooms. Really, most of those wealthy and privileged people were little more than our rich and privileged today. They were and are just show offs. But I will use a mould if I want to. I find them of value in protecting corners as in cockbeading, roundovers, coves and such all serve to soften otherwise hard and weak corners, make cleaning easier and so on. Then too, rounding over the lid of my boxes causes the grain to ‘wrap’ around with some grains. I find stains and moulds to be more pretentious I suppose.
Outstanding information. I like and appreciate my molding planes, other wooden planes, and metal planes. They all have a place in my workshop. Thanks, Paul.
I have quite a number of wooden molding planes as well as metal planes , Record and Stanley. I mostly use the metal planes , but enjoy using the wooden planes . I am by no means proficient but for me this is a hobby. I do occasionally use a powered router on a table for production when I want multiple casings. I enjoy the quiet of hand planes and safety in use. I appreciate your comments and knowledge , thank you.
I have two routers and I haven’t taken them out of their cases in years. The noise, the dust, the work in setting up, the work of cleaning up the whole place, the potential for instant, catastrophic damage, the need for special cutters, all of that just inspires me to do the job by hand. No doubt the router can produce great results, but I’m doing this for the satisfaction of developing my skills using a few good hand tools. Paul is a great help in that regard.
Dear Paul, hope you’re well. I’ve been following you’re old videos for making wood 4 square. (Just got a scrub plane/ 78).
Q1: When using a scrub plane on the board face, do you ever bevel the far corner to stop blow out of the far edge? I notice you didn’t do this on the video, but others do, and your thoughts on doing this?
Q2: Also, I planed at maybe 60 degrees across a maple board (with the grain), and got a reasonable amount of tear out. I couldn’t work out how to reduce the tear out. As a first step, would you reduce the scrub plane blade depth, change the angle of the plane more in line with the grain or what as the first step if getting tear out with the scrub?
Thankyou!
It all depends on the wood type and then too that specific piece of wood. This is reading the grain beyond textbooks and magazine articles where the outcome can be guaranteed in text but not necessarily in real life. I do bevel all around very often but not always. And less so for “blow out” and more for giving me a highly visible line as a goal to scrub off bulk to before going to a more refining level and the ultimate goal. 2: Some woods are more notorious for grain tearout and a yes, a lesser setting will help as will reducing radius to the cambered iron, ie across the plain iron width. The more wood you plane the greater the knowledge and the awareness as soon as the plane iron touches the surface of the wood.
many thx paul. i definitely have a long way to go to get experience with the scrub – very early days yet!
ps- i was astonished how quickly the scrub plane works compared to a normal plane for dimensioning – saves hours and a lot of sweat!! 🙂 cheers
Hi Paul,
The contrast between the plywood bench with a metal vise and the wooden body planes makes a powerful statement. Whenever I hear someone say (IKEA), I want to weep.
John Parker, from across the pond
Thanks for this article Paul, I was having some problems using my plough planes (1x metal Rapier 44-style and 1 cheap old wooden one with separately bought set of irons) on some salvaged 60s/70s floorboards. I’d tried the Rapier plane some time ago and had been pleased and impressed with it. But, although I eventually cut a few grooves ( to make a file holder for “jointing” saws and card scrapers), with both planes, I was rather disappointed by how long it took and the messiness of the resultant grooves :(.
I tried a few ideas from your wonderful book, which improved my understanding but didn’t fix the problem. Although I did not fully follow the section on tweaking plough plane irons; I have traditional trapezoidal section irons (per this article), so perhaps that is good enough??
Making sure the irons were sharpened to 30 degrees or less was surprisingly important and helpful! 🙂
I am now wondering if the problem was the wood: 3 or 4 pieces of old floor boards?
[Perhaps my irons for the wooden plane were the wrong ones? But they look ok and both planes struggled?]
Thanks again for this article. It gave me several new things to think of. (Any further tips/ideas always appreciated 😀 ).
Hi Paul!
One silly or maybe crazy question.
Can u show us how to make any wooden plane, for example the this post?
I manage to make your router planer is I like the wooden plane more than the metal one.
paul has a video series on making a wooden round both ways plane. It is a free project on his other site.
https://woodworkingmasterclasses.com/videos/making-wooden-planes-info/
Paul, I hope this musing was as much fun for you to write as it was a sheer pleasure to read. Thanks!
This is incredible. I wandered into a plane like this without the adjustable fence at an antique shop on the side of the road for $8. I honestly didn’t know what it was when I saw it. I brought it home and cleaned it up. There was a little piece of rotten leather tacked to it that looked like the craftsman used to protect the wood from the fence or have it glide better? I could immediately tell how to hold it from where the craftsman’s hands had smoothed the wood over, I imagine, years of use.
It’s good at 1 job, but I can be done with a drawer bottom with it before I could set up a table saw to start. And it’s perfect every time. I pull it out a few times a year when I’m doing work like that.
But now you have me thinking of how to use it more creatively. Was that piece of leather there to adjust the fence? Some other way to get more use out of a specialty tool?
I can’t spend a lot of money just collecting these, but when I see something like that, I do want to restore it. I guess it borders on spiritual or something, but I like taking a forgotten and neglected tool and bringing it back to doing its job. It was once very important to someone, and it deserves better than to sit on a shelf as a nicknack.
Actually doing the same for 2 1960s budget guitars right now. They were forgotten and neglected and soon someone will be loving them and using them to make music again.
The talk of mouldings reminds me of another skilled craft – that of plaster mouldings. Mostly used for crown moulding in rooms. At The Myrtles, there are pierced crown mouldings. It is said craftsmen from France were hired to work in Louisiana to make them.
I do like wooden molding on furniture. I just don’t like to to go overboard with them as happened with the advent of the Industrial Revolution. Some of that stuff got rather gaudy!
I do love wooden planes. It is sad to remember stories about barrels of them being sold for next to nothing to use as firewood.
Recently at a cost of £2 each I picked up 2 moulding planes, a tool roll with 18 brace bits and a brass backed Taylor Brothers tenon saw from my local antique / house clearance centre. The planes are still on my to do list. I tried the bits all apart from 2 cut cleanly but some need a sharpen. The tool roll has seen better days but I may “restore” it. The saw was rusty, but cleaned up well, it was only very light surface rust. i sanded and shellaced the handle which was looking tatty and polished the brass. The teeth looked neglected with a few broken, but having sharpened it it cuts well and now gleams. It now hangs from a wooden block shaped to fit inside the handle with a brass turn button to keep it in place.
Whilst I was working on this I remembered a Sandvik resharpenable 14″ saw with a damaged plastic handle I bought a while ago for the same place. So I made it a new handle, I have made one before being inspired by Pauls plane handle video. So for £10 and a little time I gained 2 saws, 2 moulding planes and 16 bits. Keeping your eyes open does get you some cheap tools that just need a bit of attention. Thanks to Paul for the inspiration.