My Thicknessing Guide
A friend nudged me for this post. Reminding me of making my tool chest back in 2013 or so, that was in upstate New York, he spoke of my card scraper setup for thicknessing cockbeading, inlay and such. I thought it would help others so here it is:
You might want to make the inlay piece first so that it is drying while you then make the guide
Having cut the size of inlay wood to the size you want you can add as much or as little or no contrasting wood as you want or don’t want. My main wood is 4mm by 10mm oak with the secondary wood of walnut ending up being 2mm square but rough cut to 3mm sq.
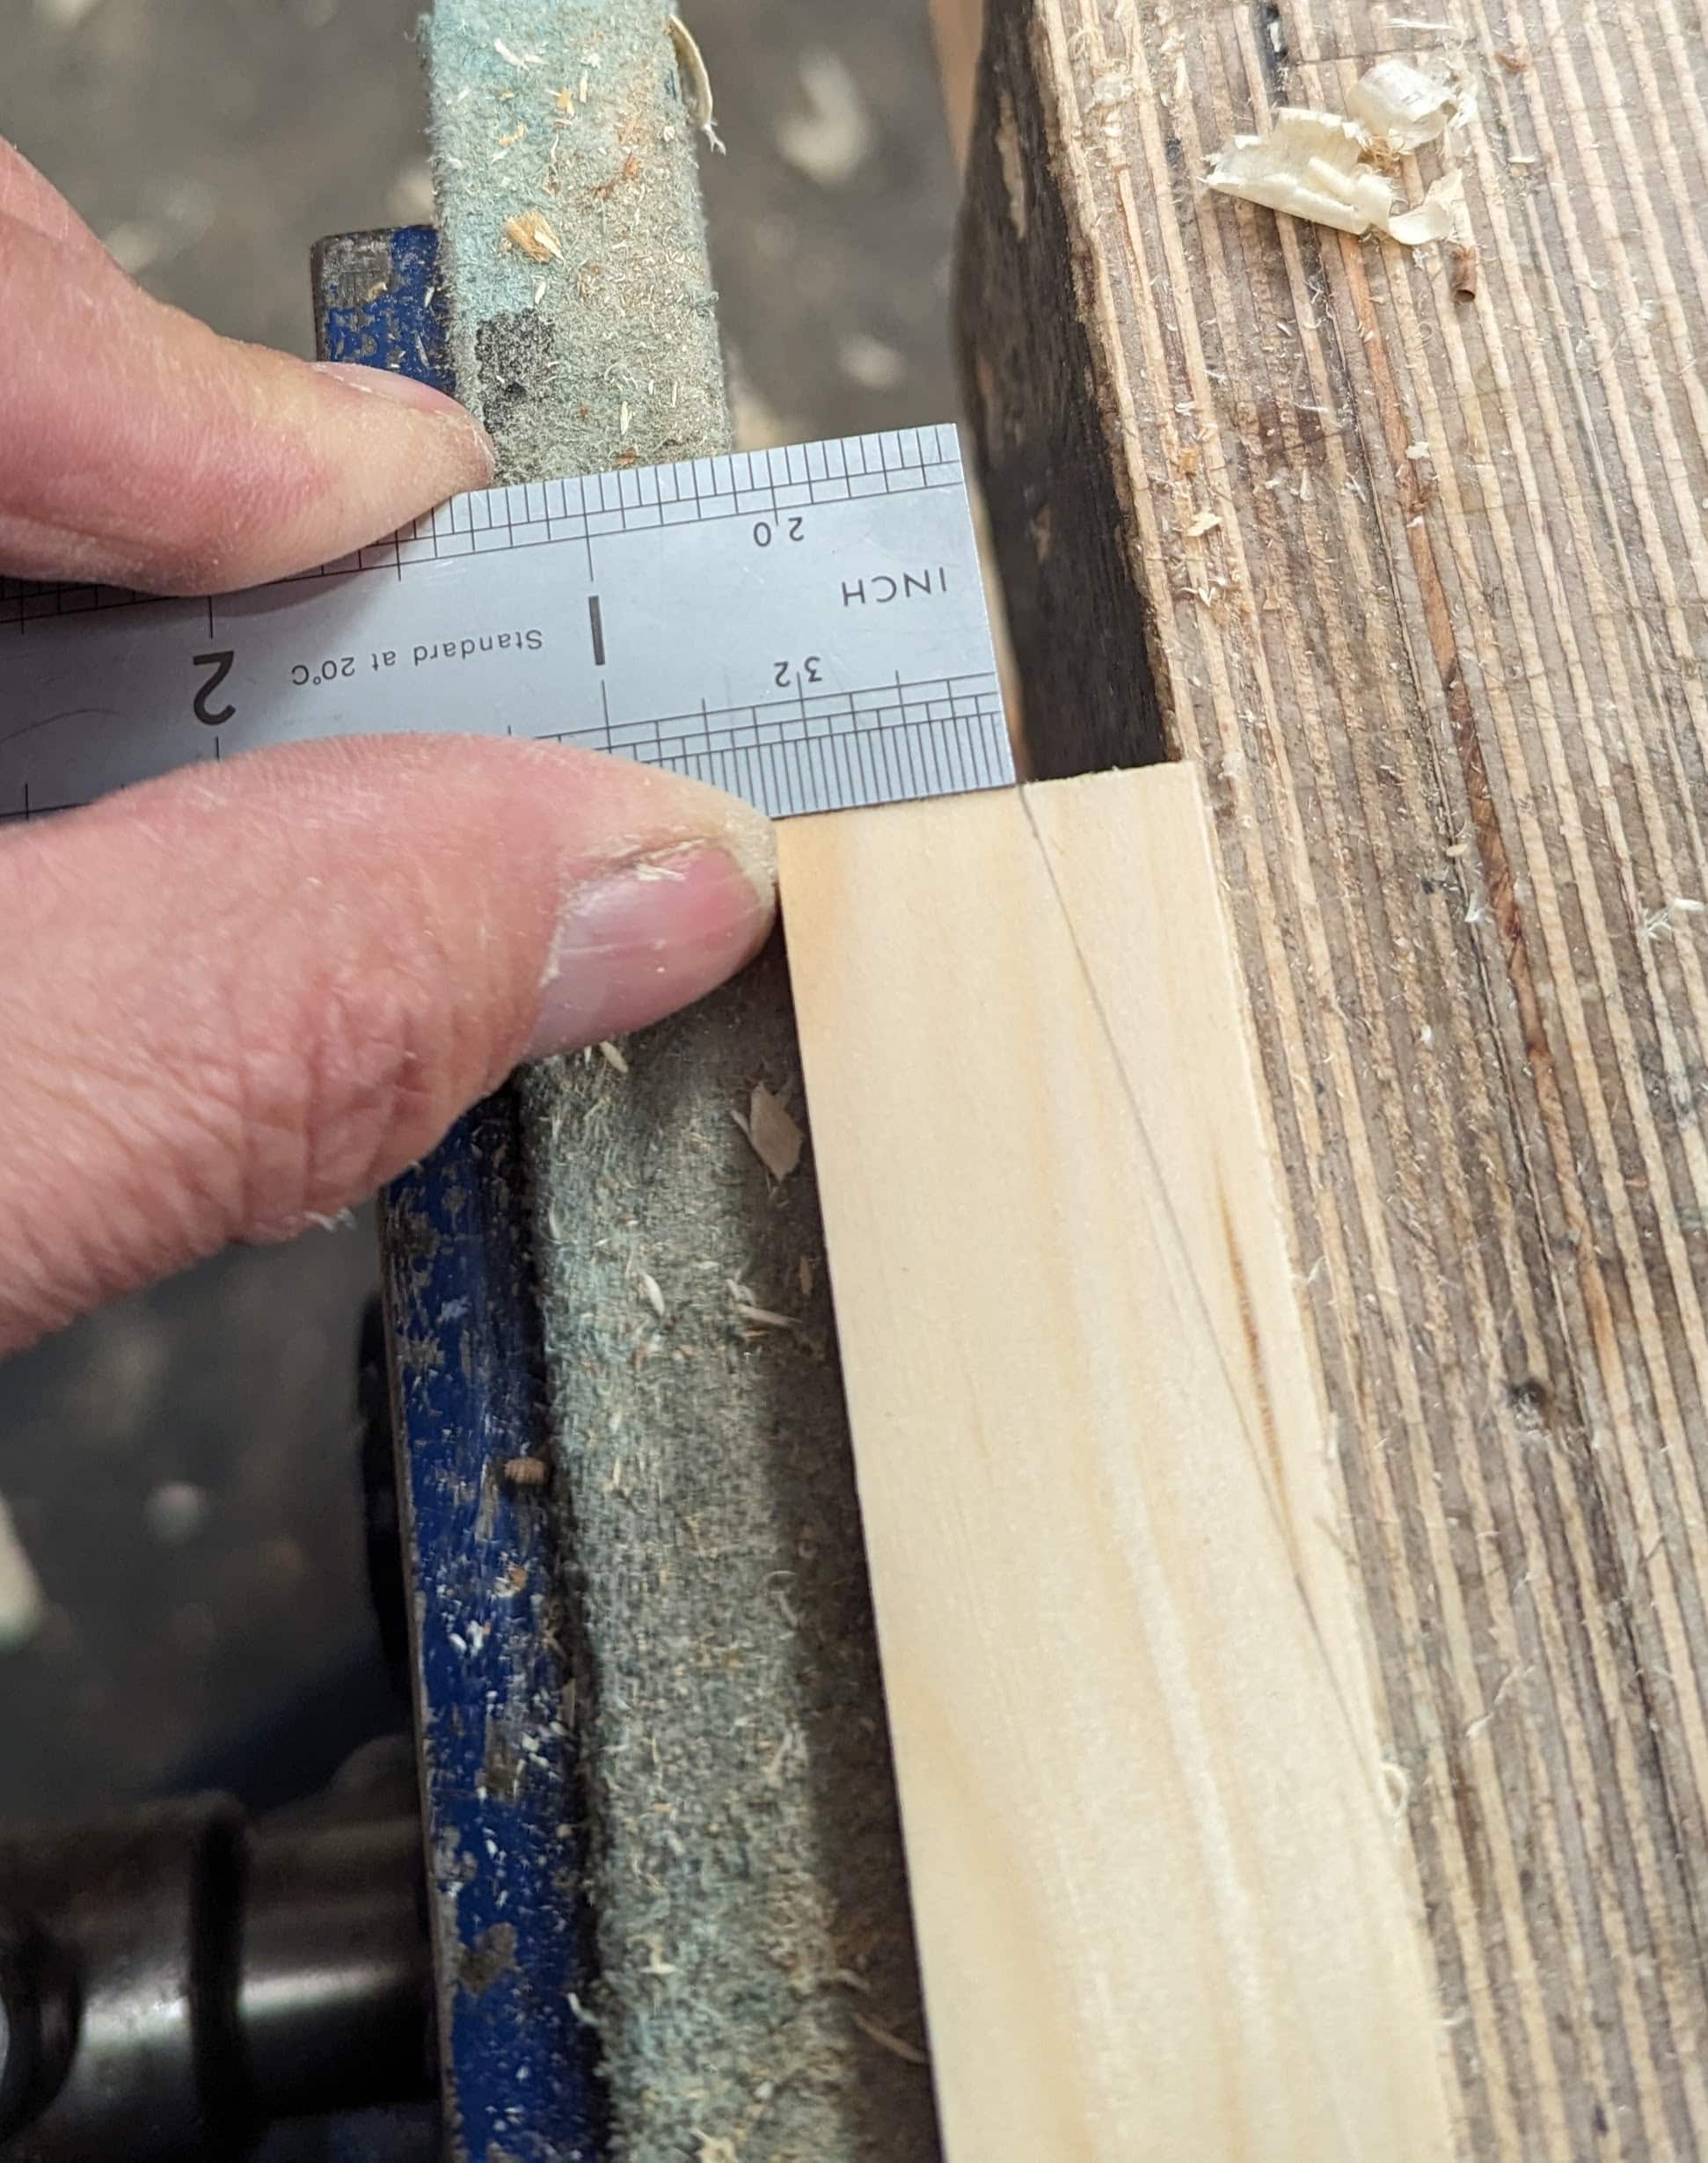
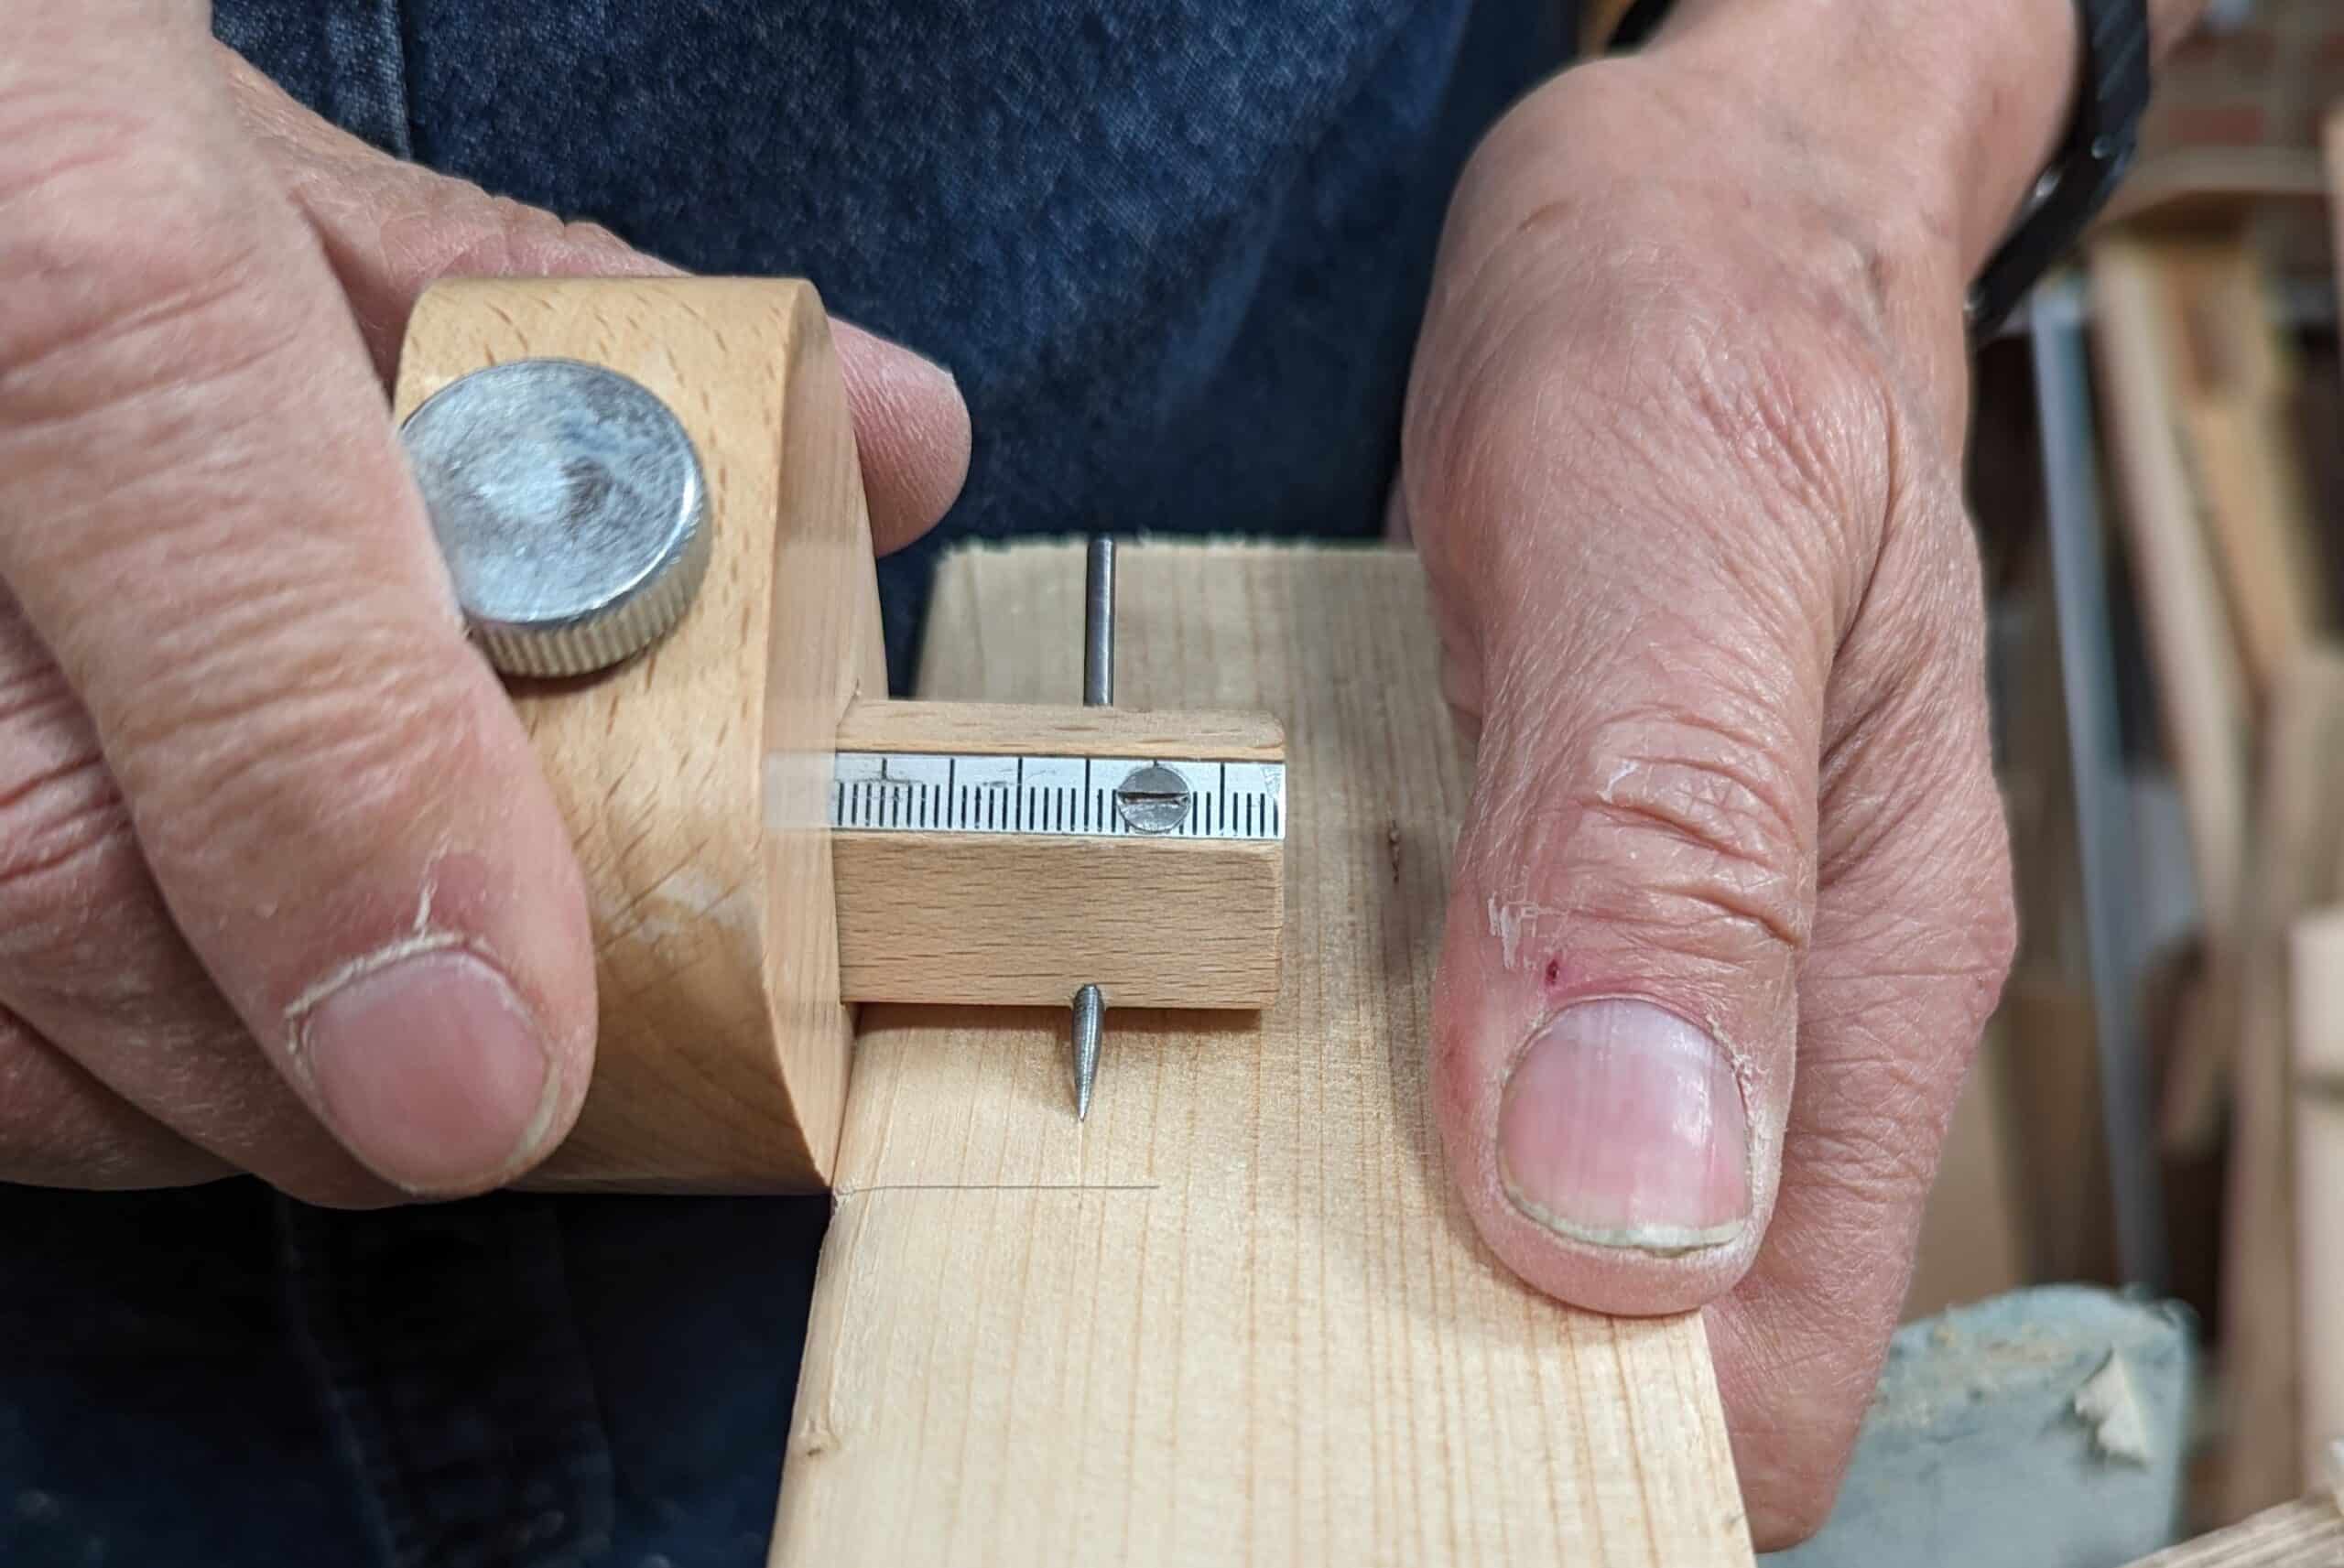
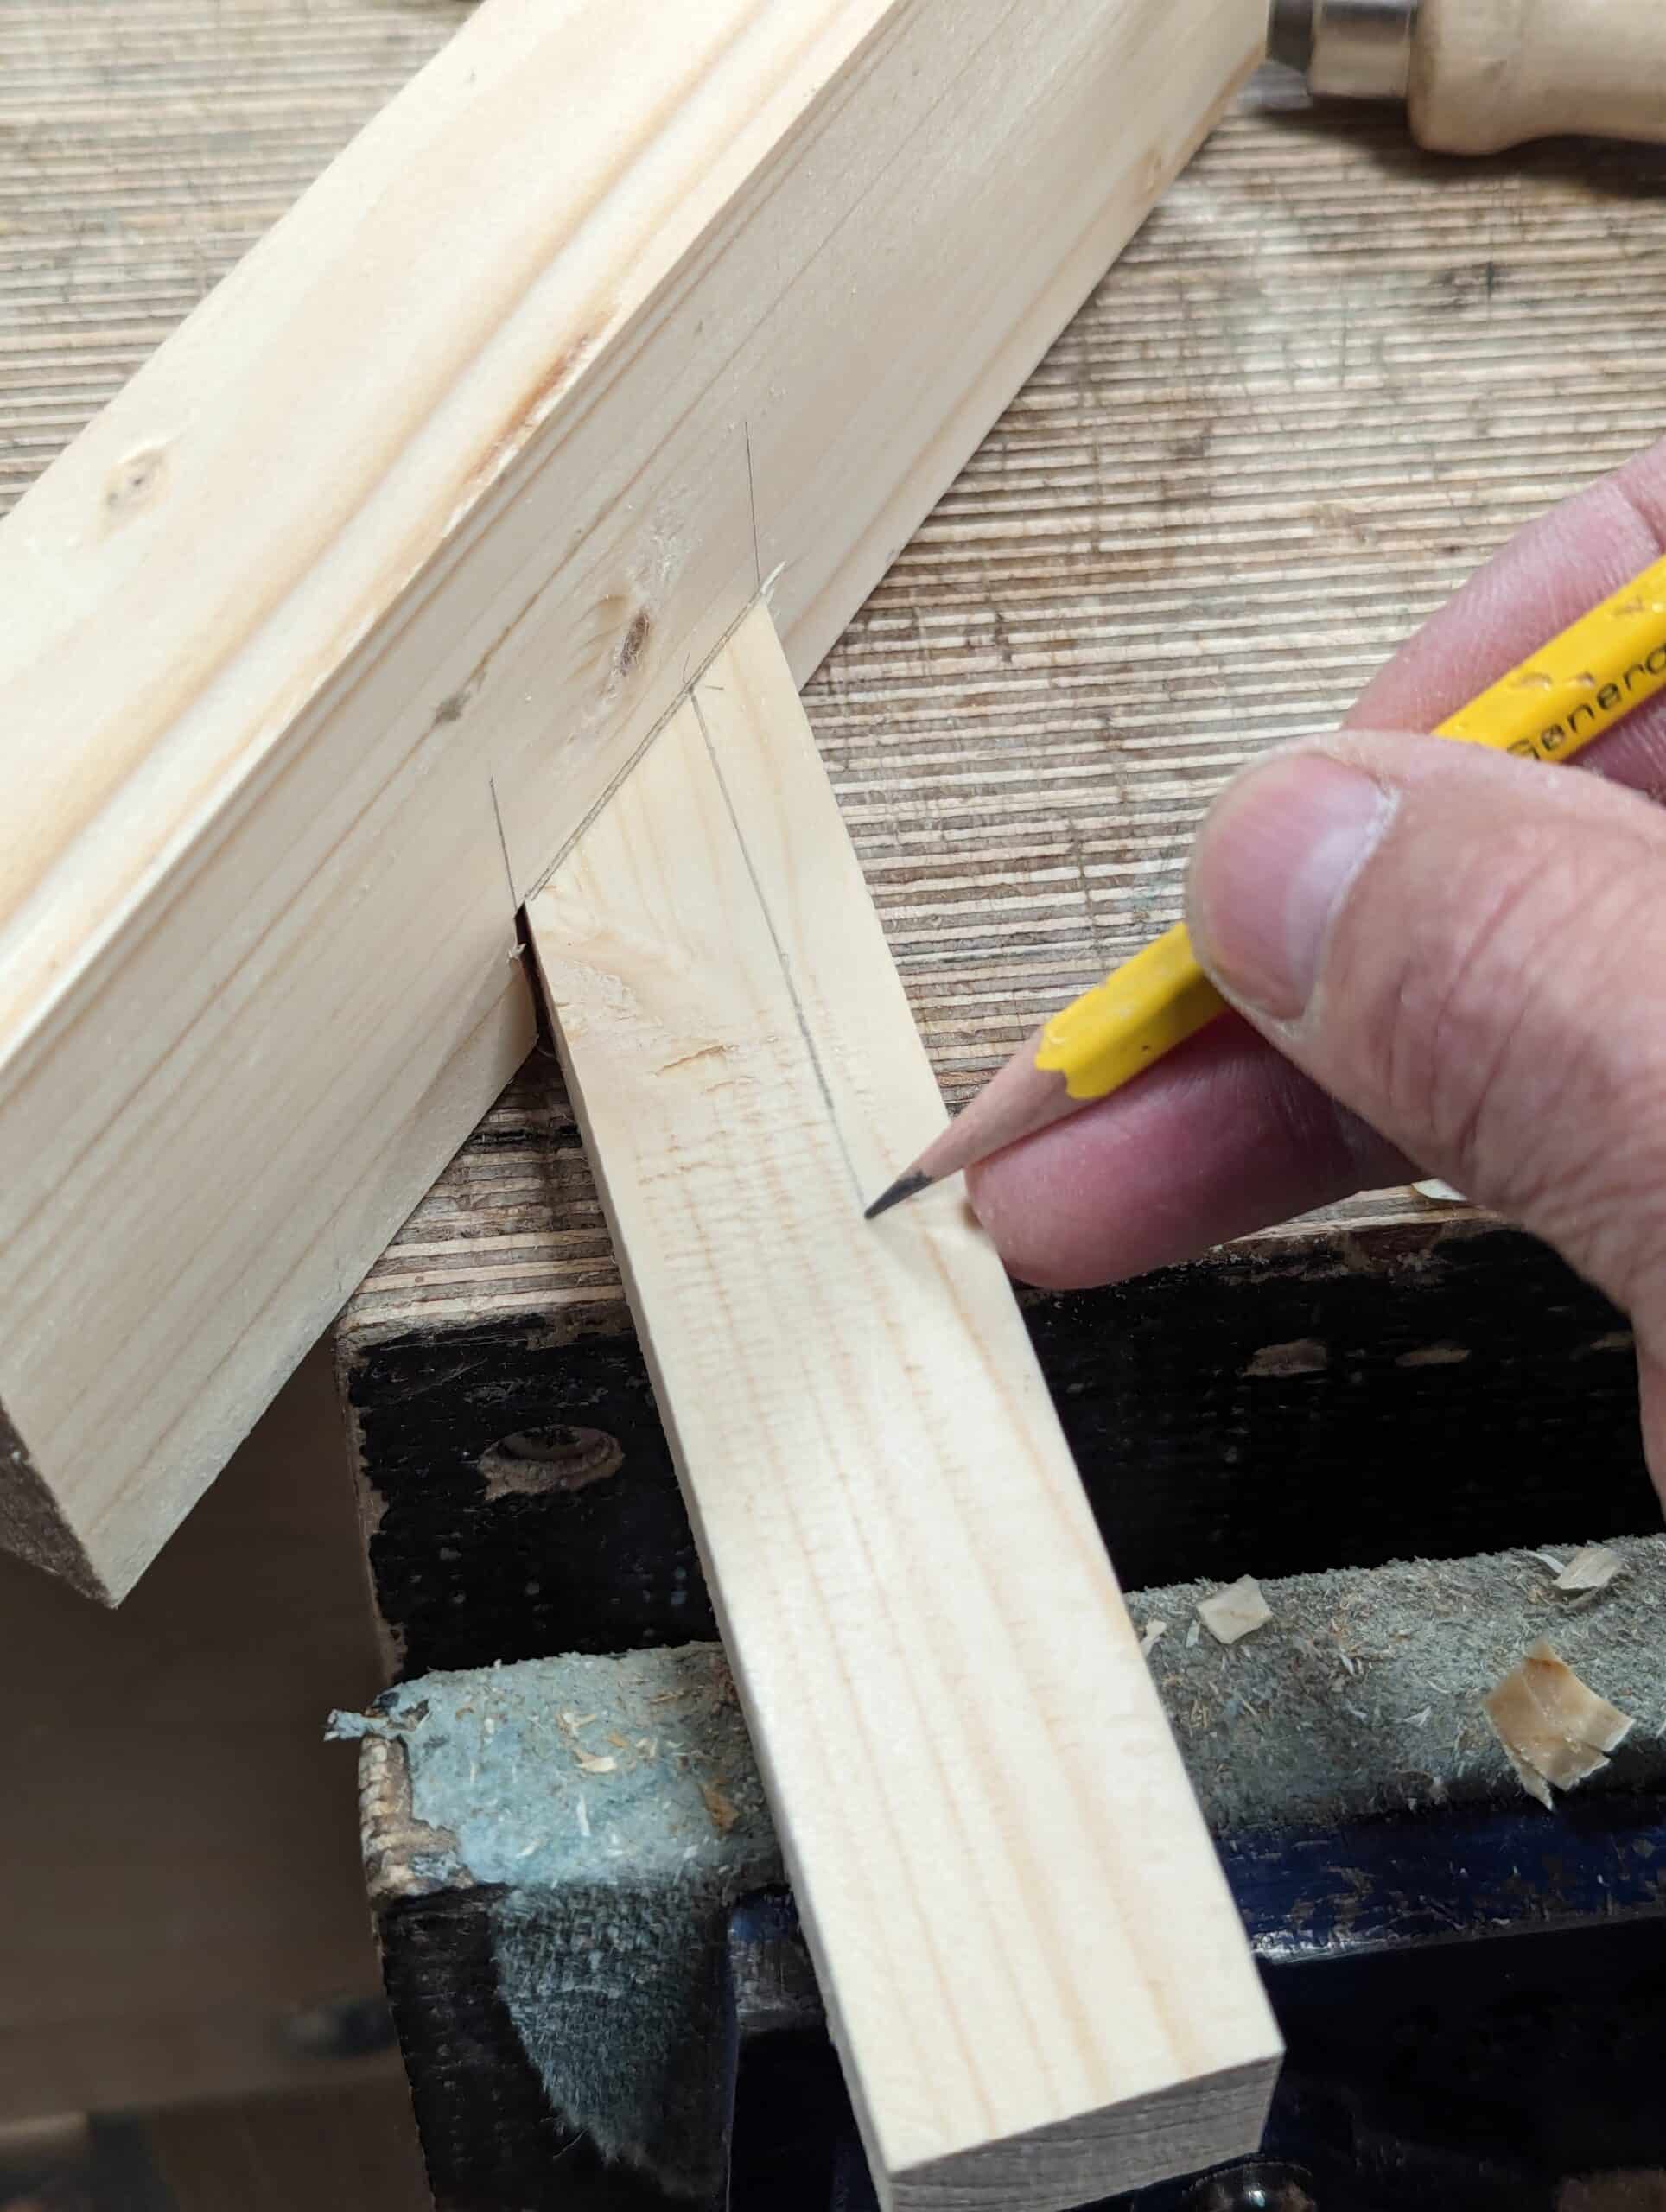
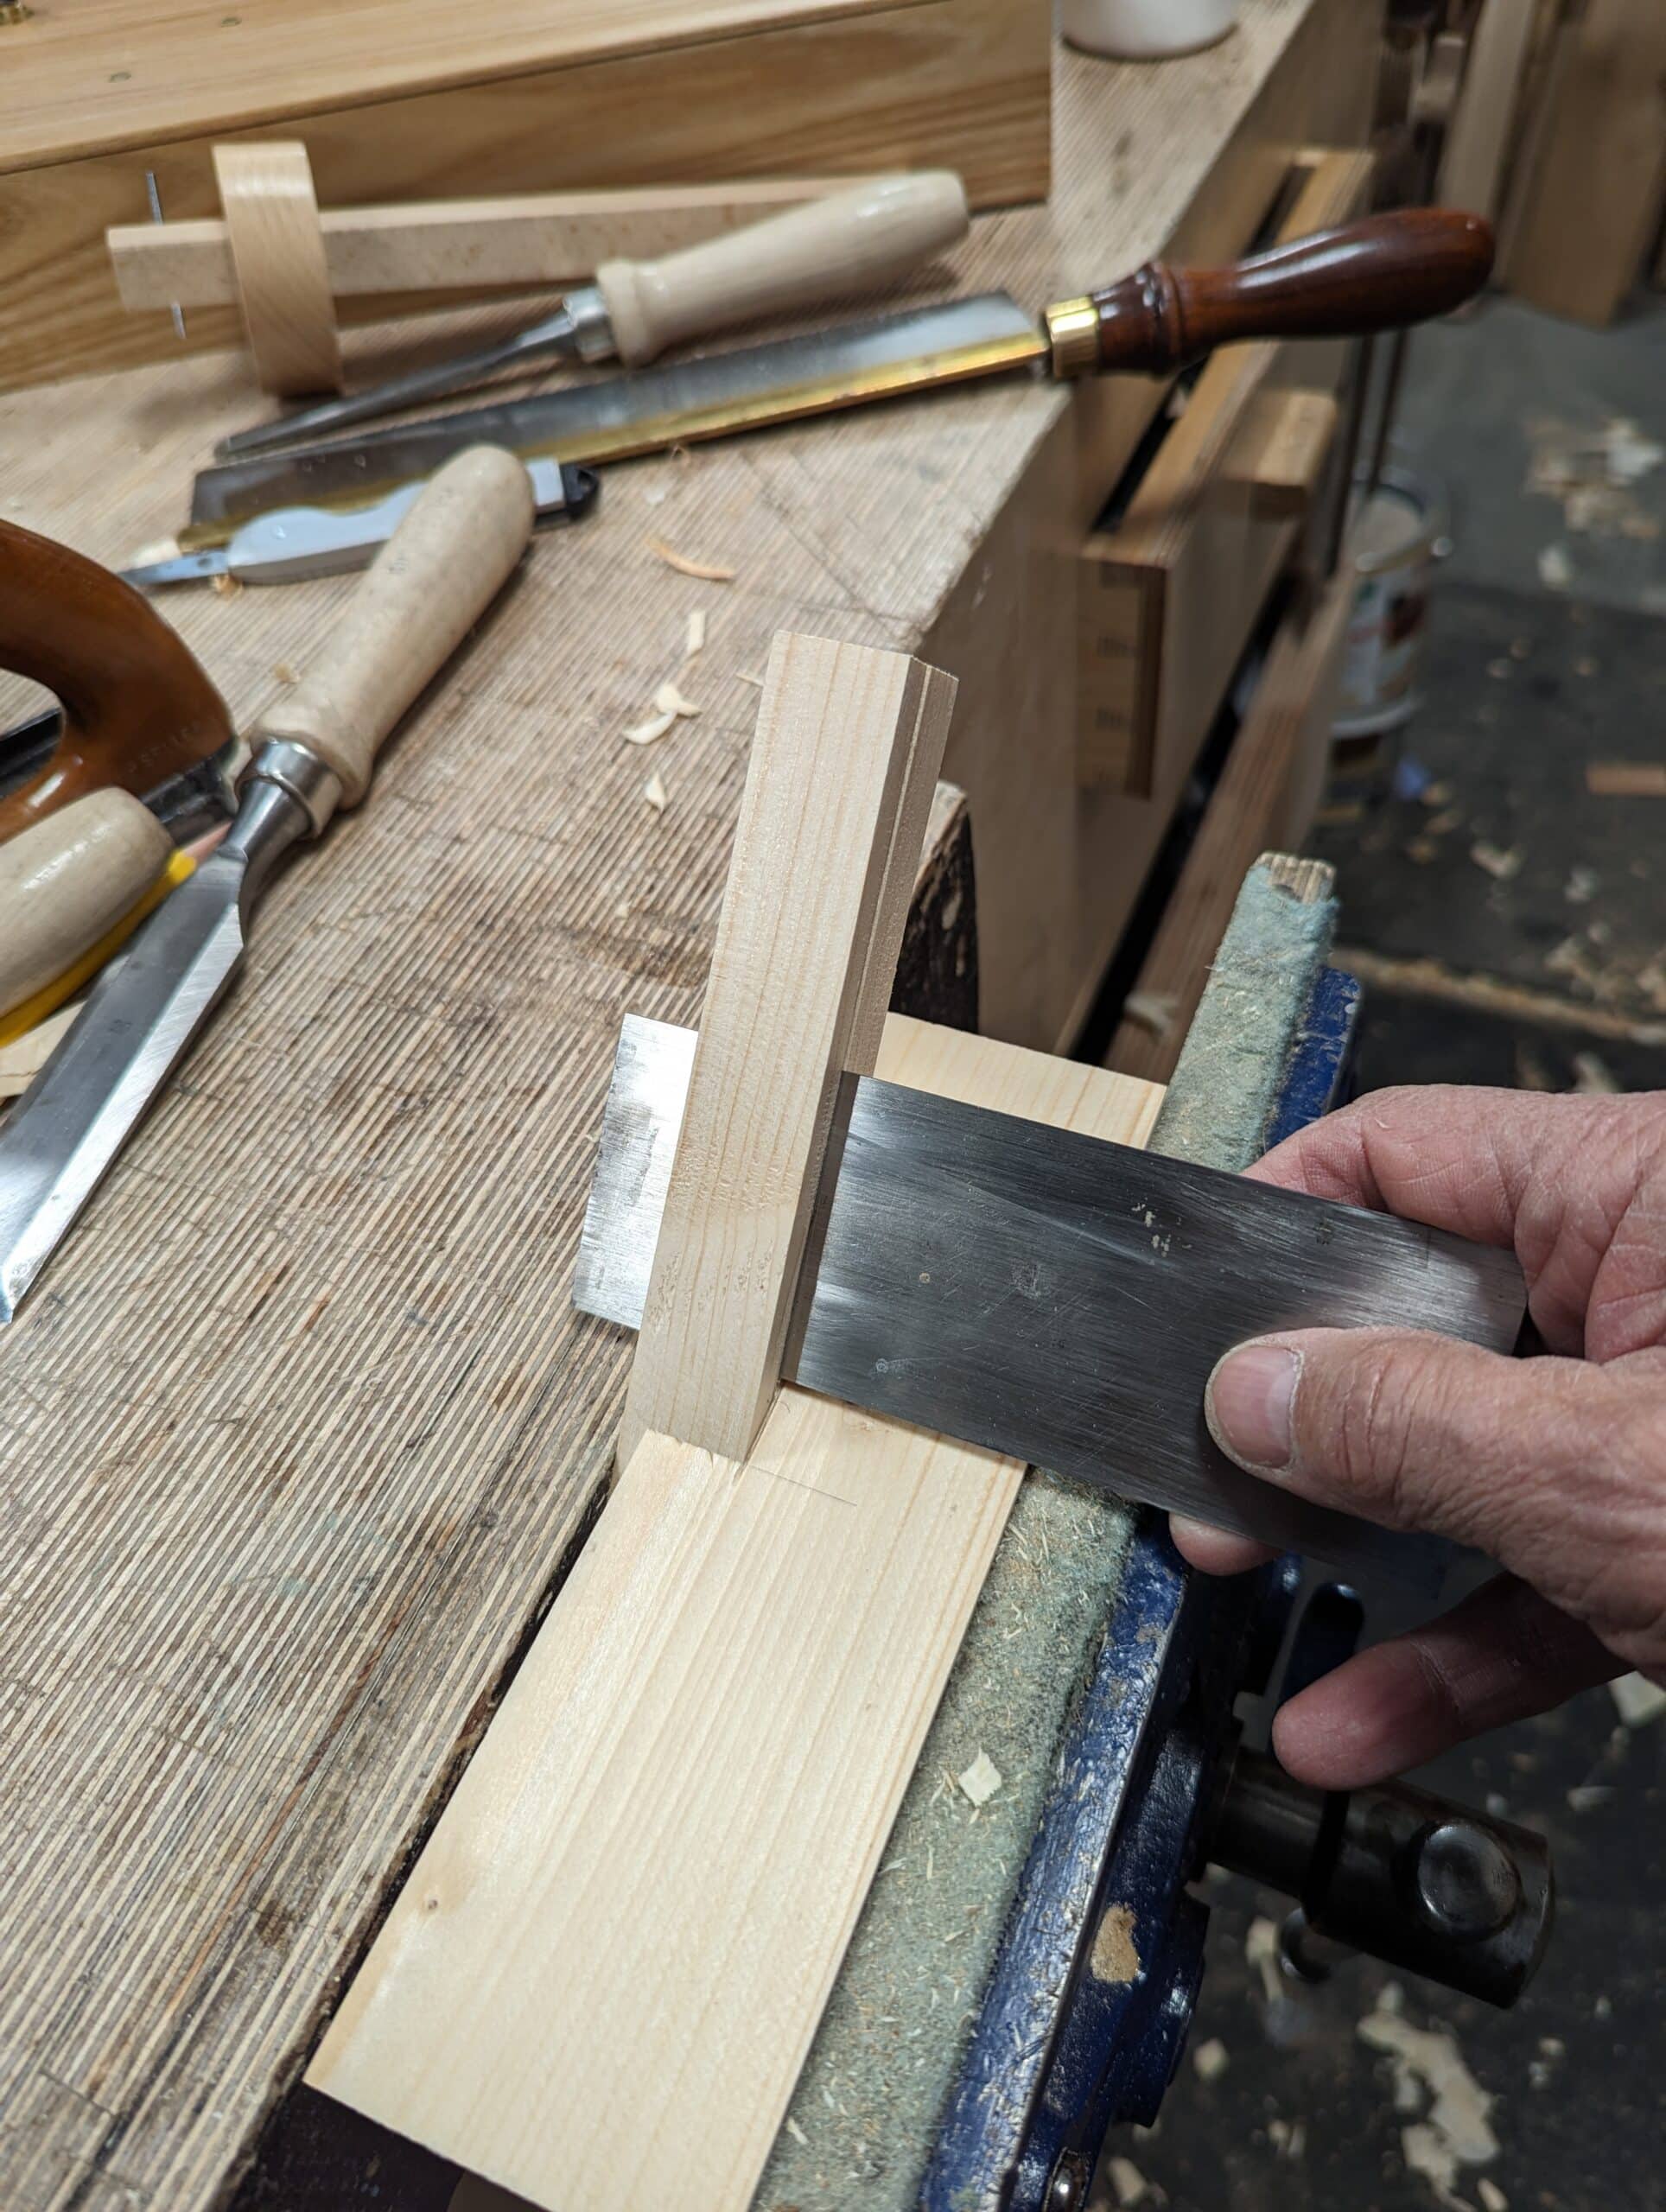
Notice my technique for using the gauge by clamping the stem in the vise and pulling the wood to the gauge point and against the stock of the gauge.
Use any marking gauge you have to indent the shallow line in the surface slightly less a distance than the thickness of your inset piece is. My lines are 2mm from the corner on the flat and edge faces.
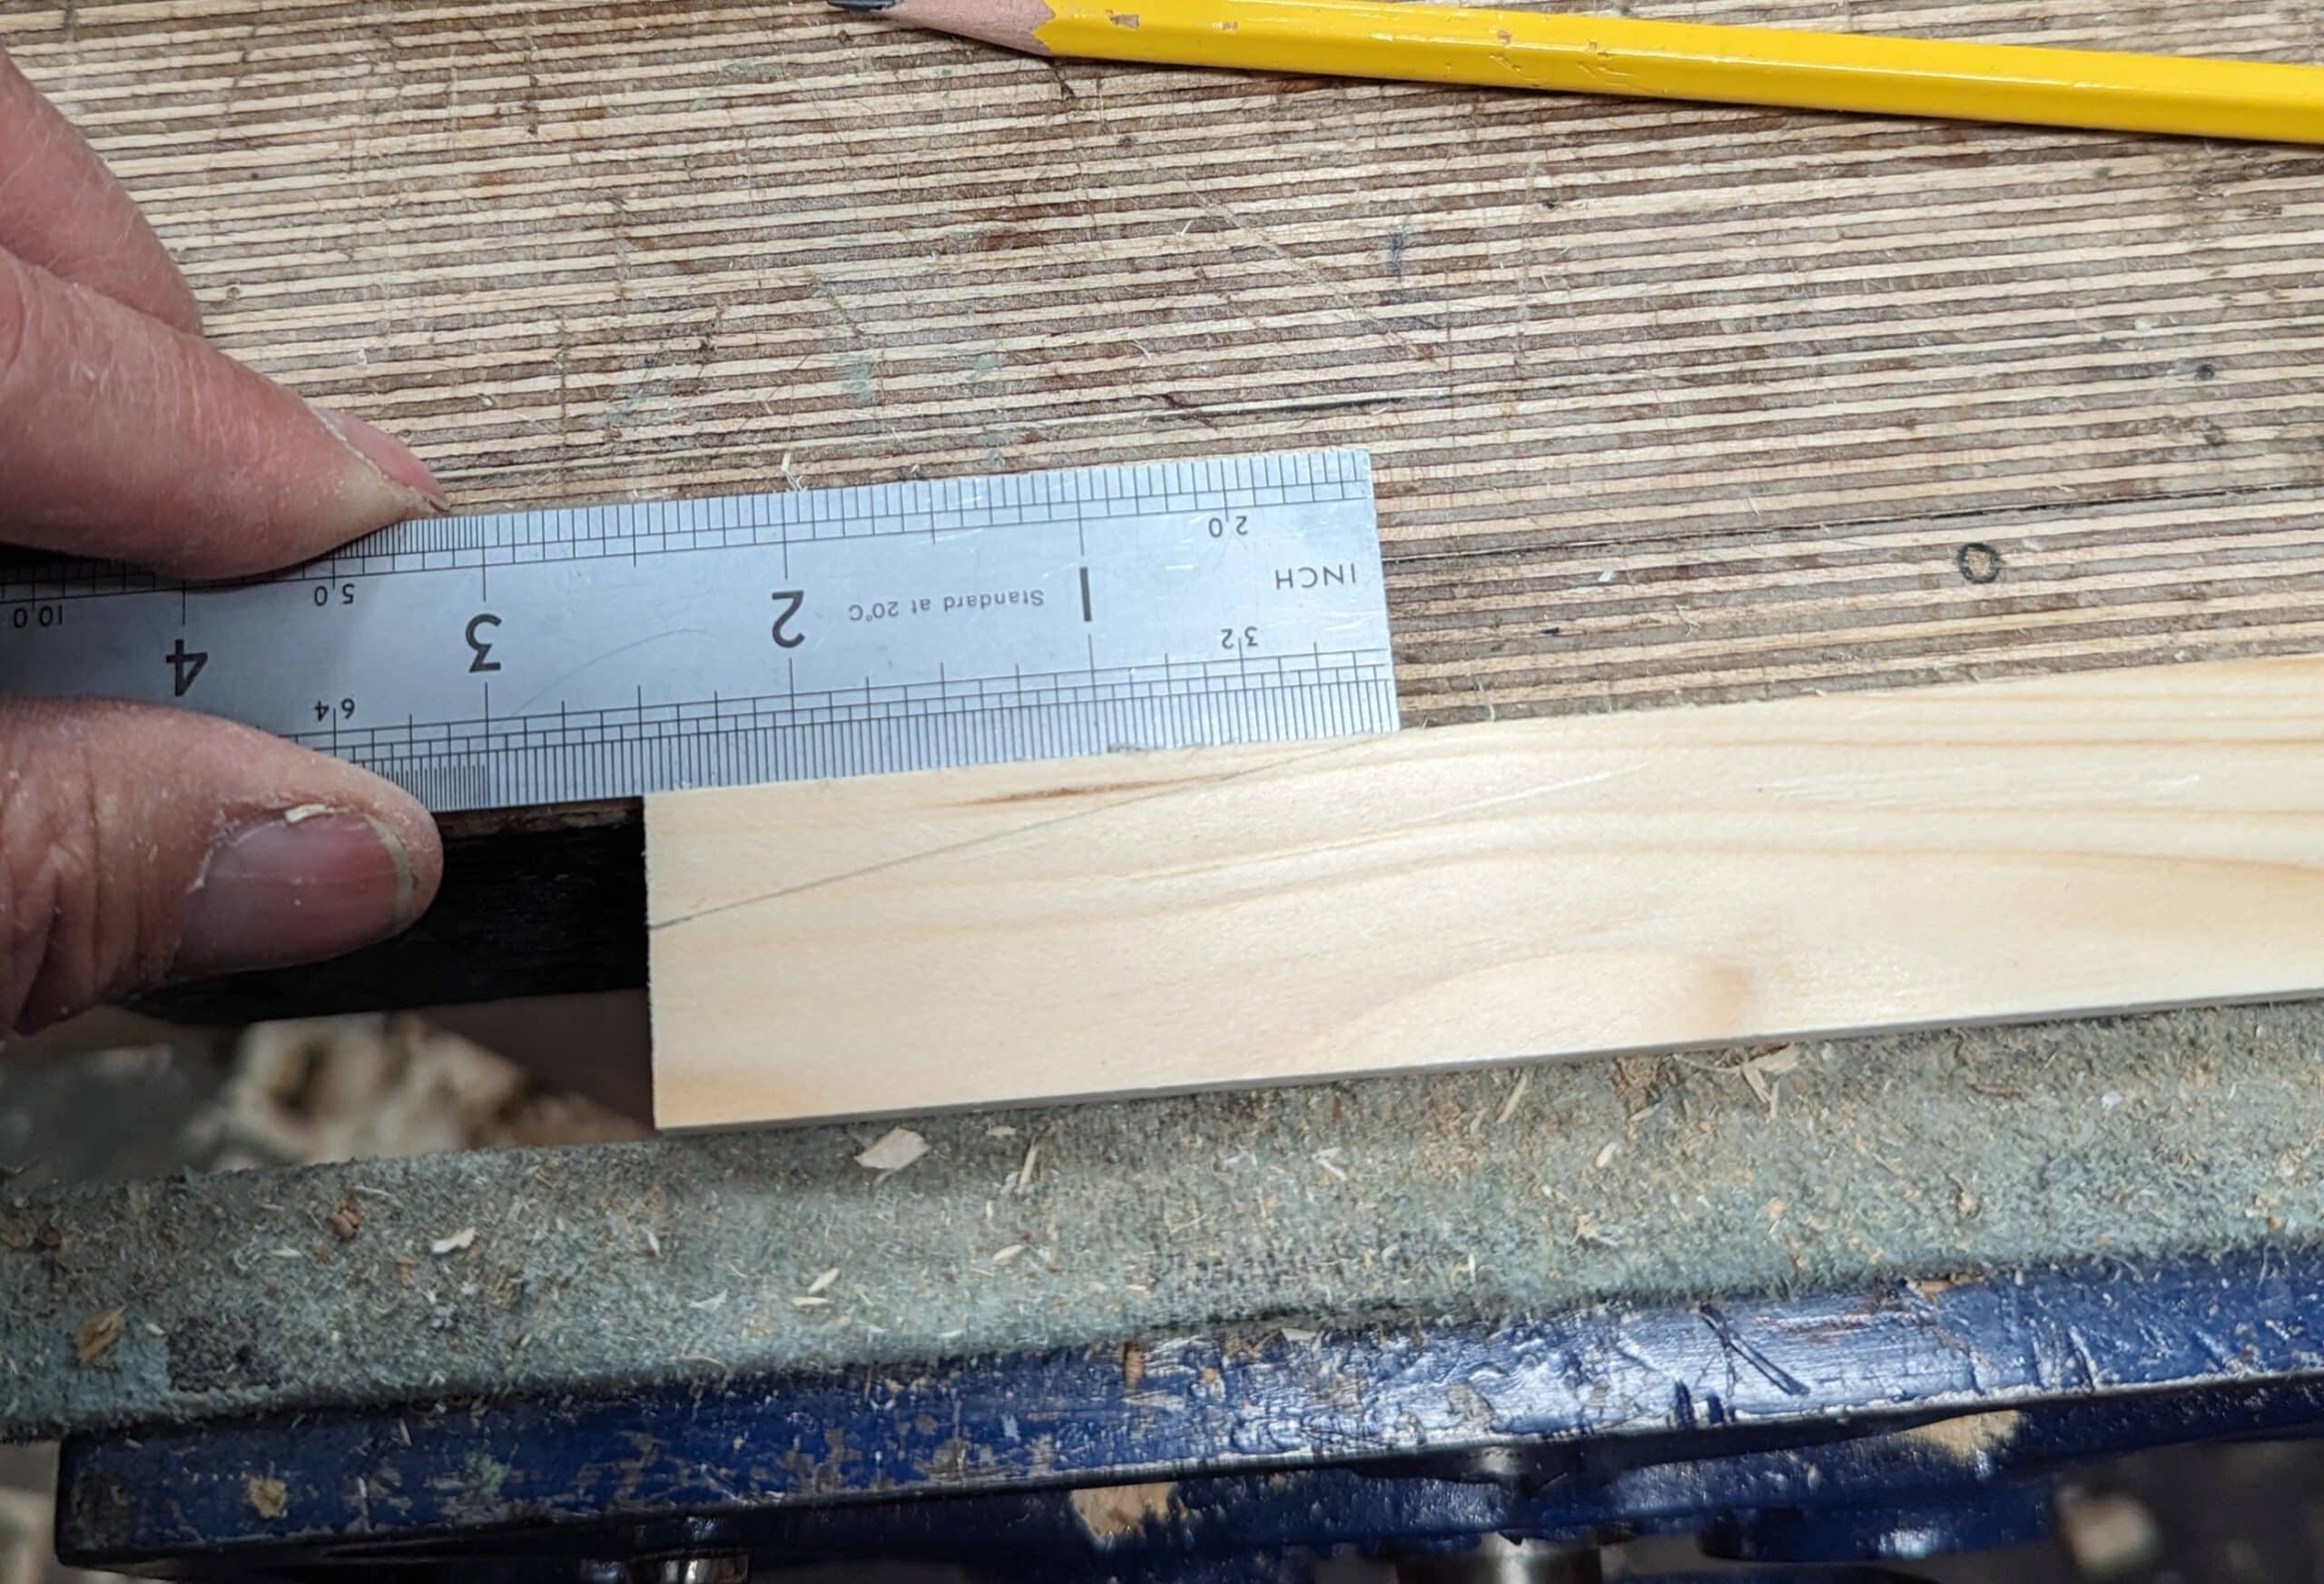
Do the same on the adjacent face.

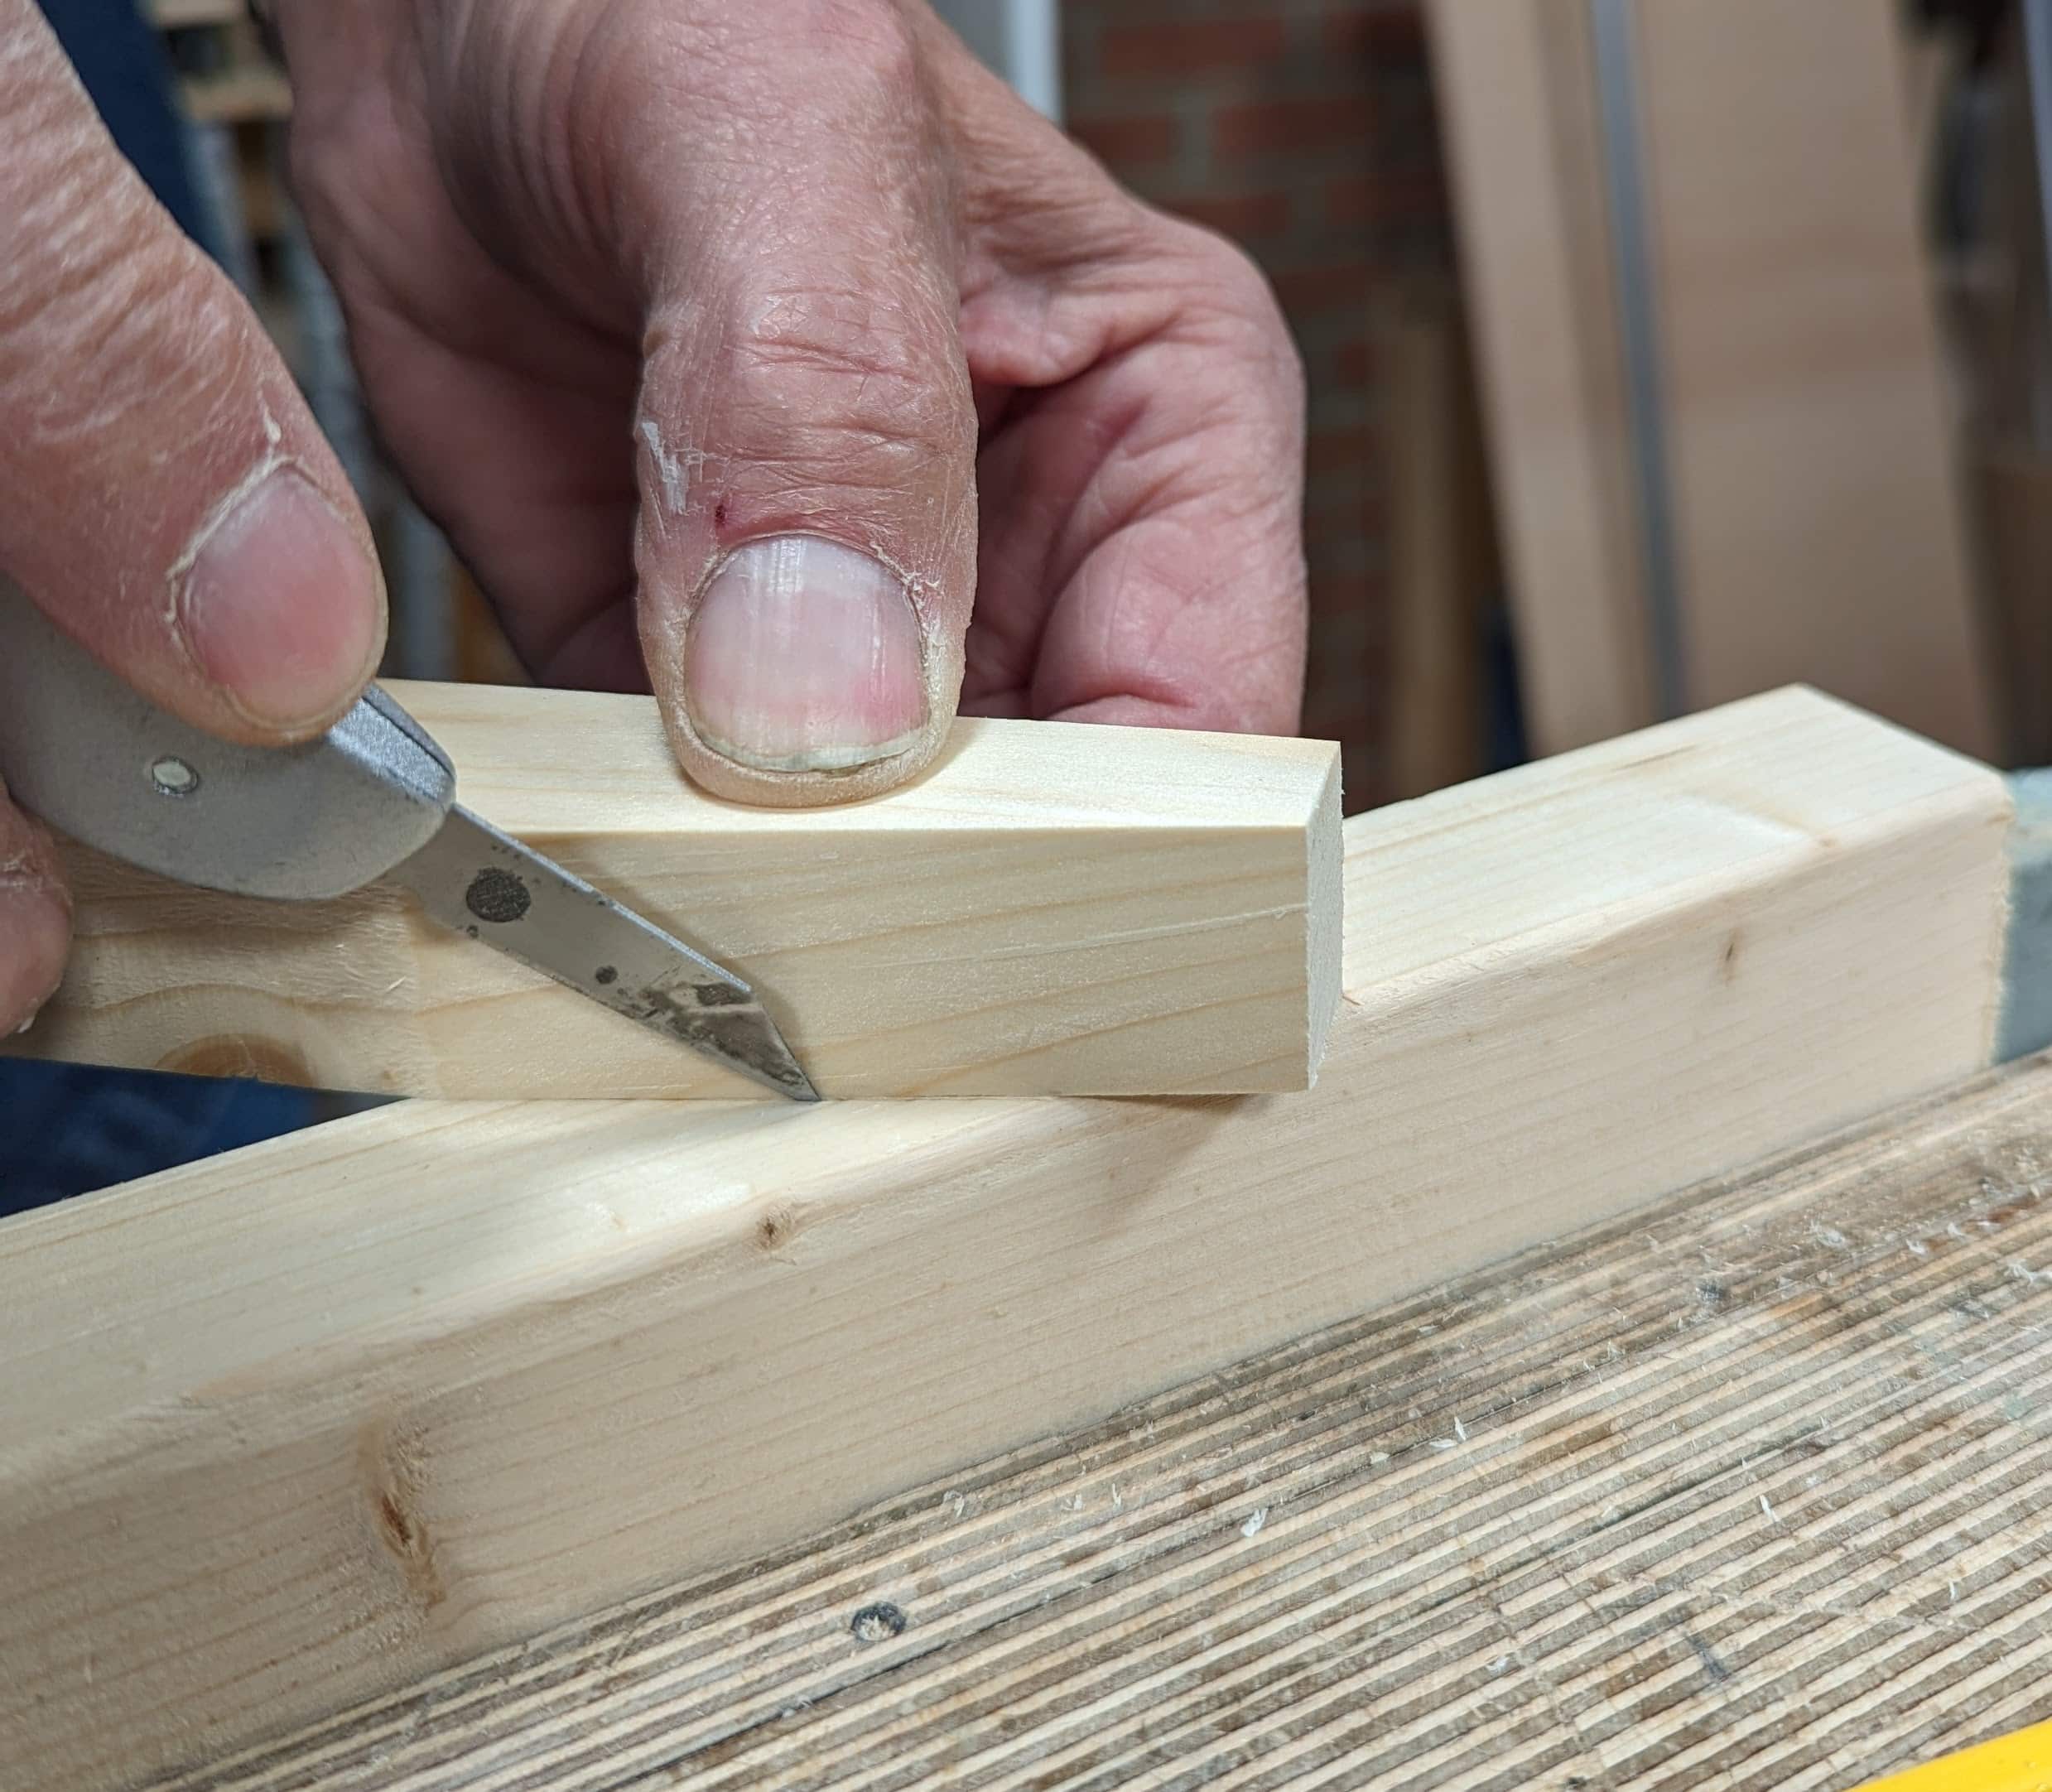
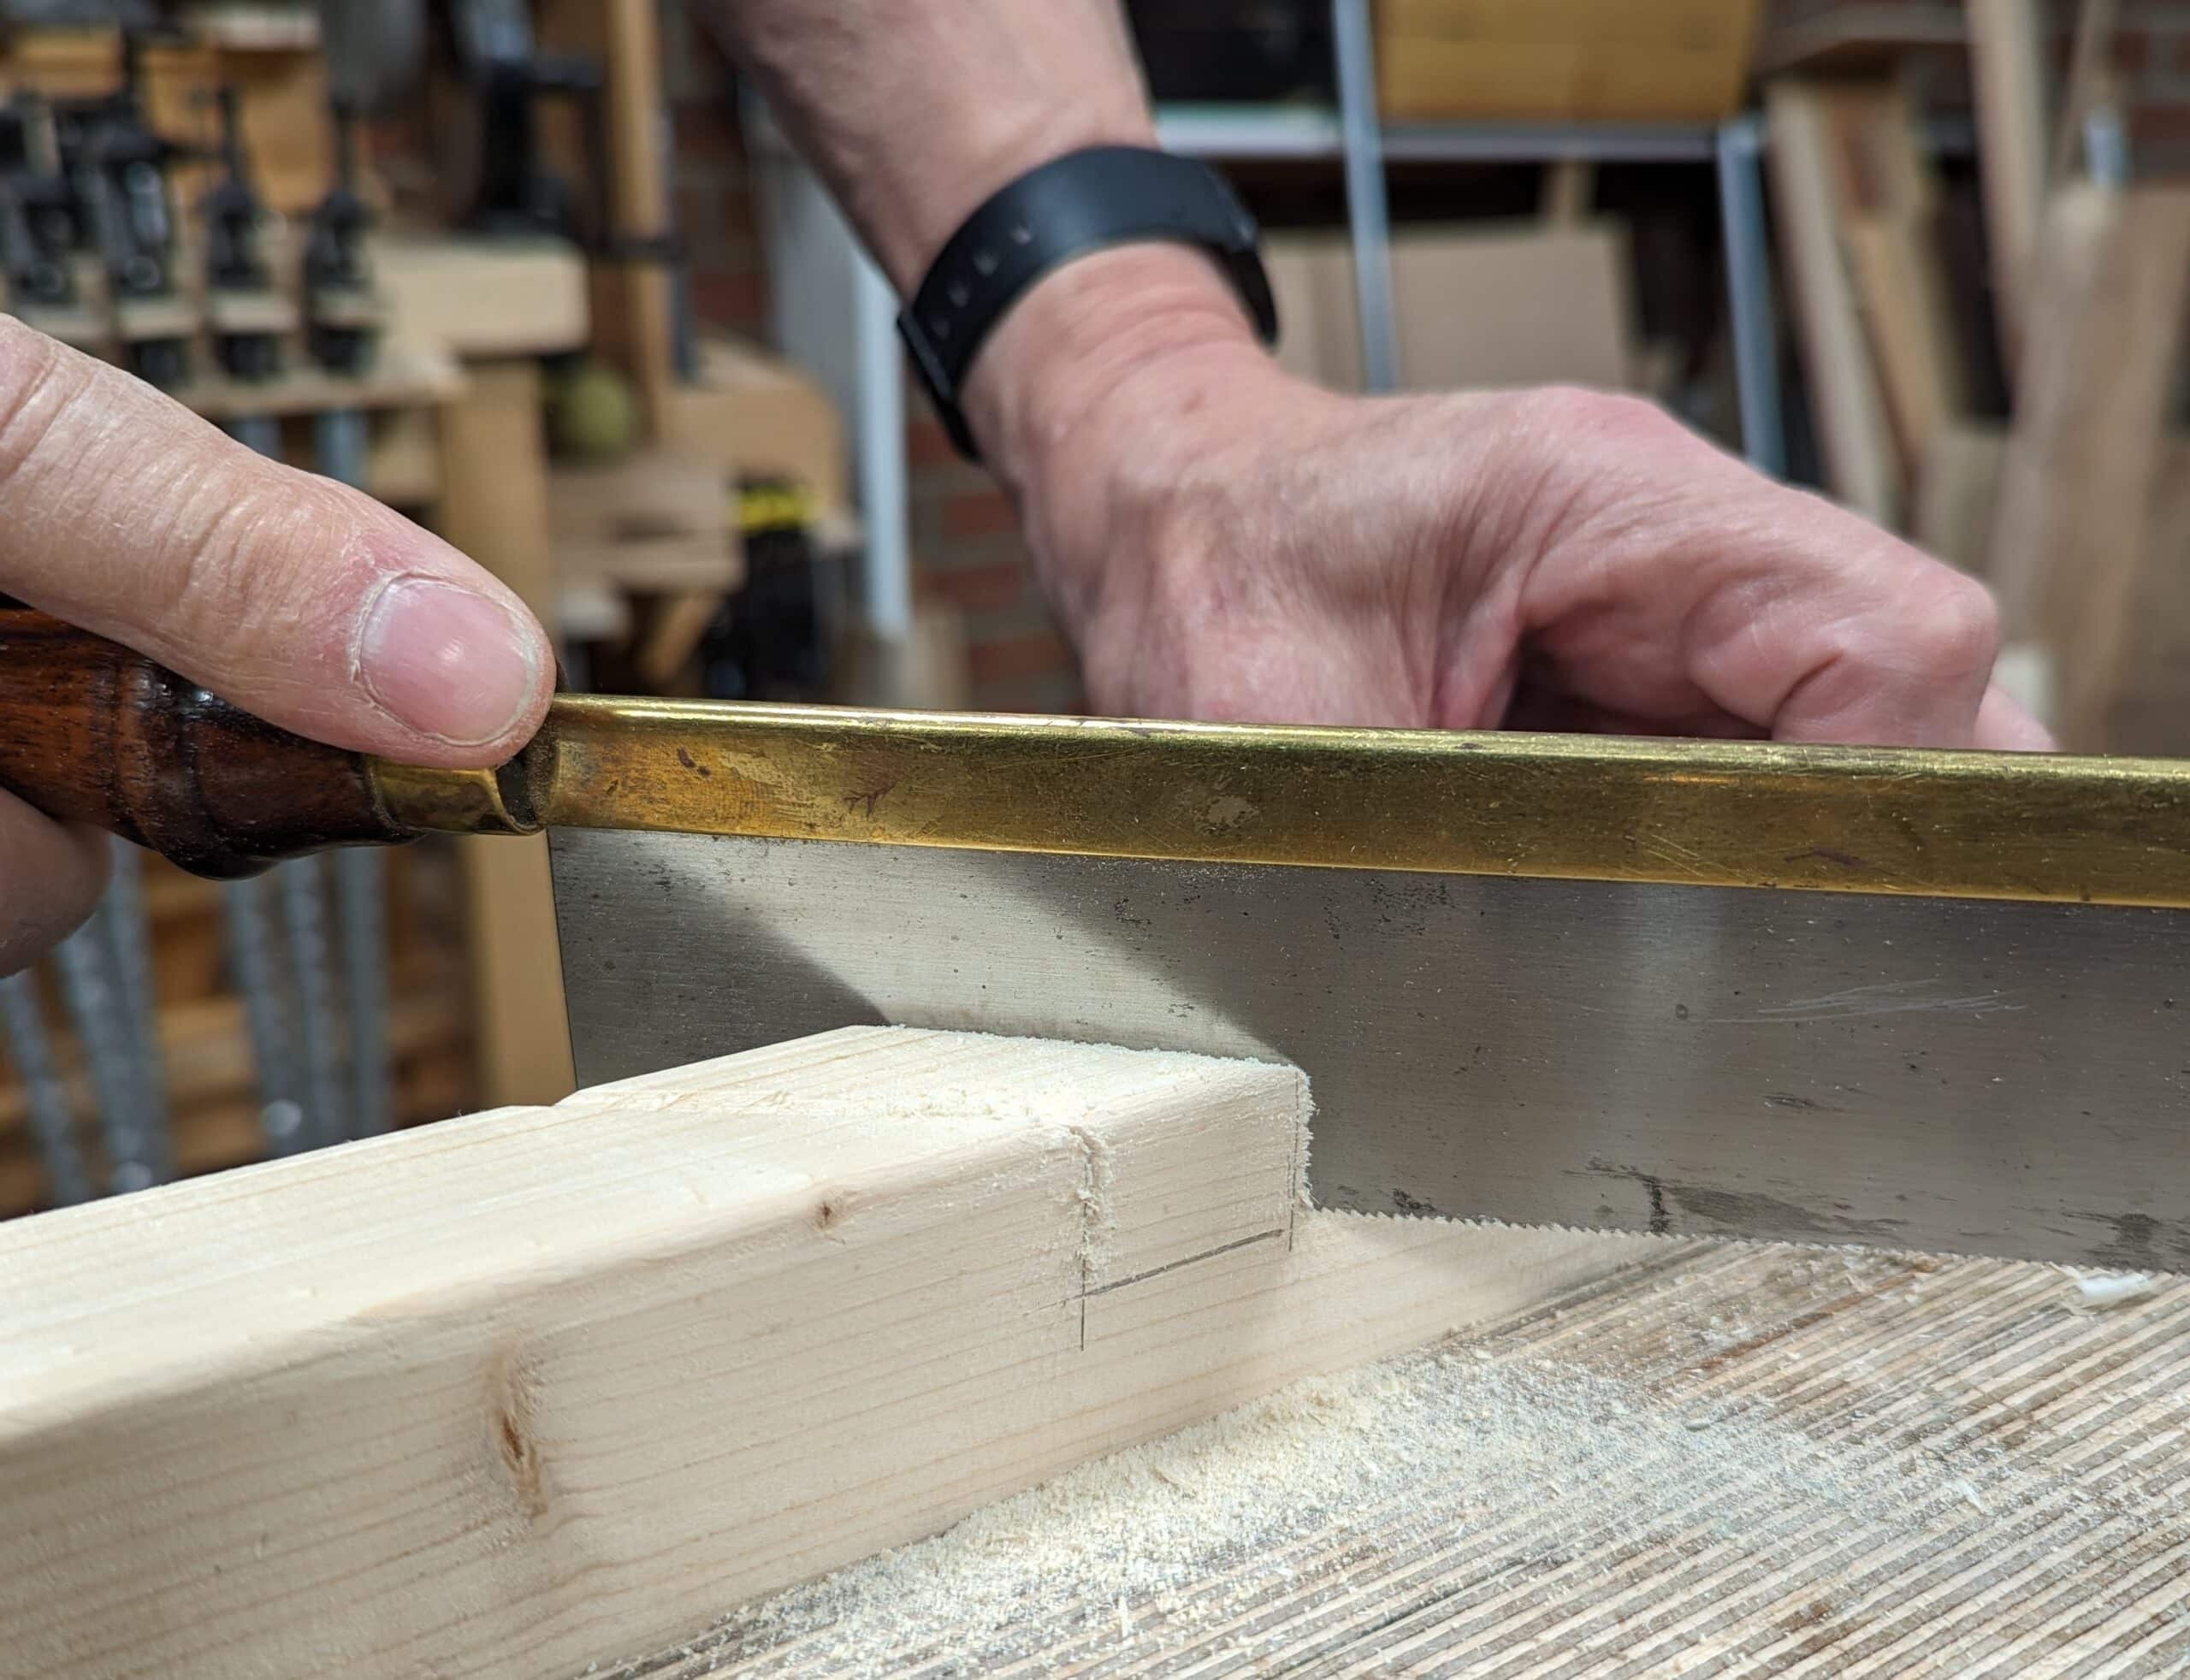
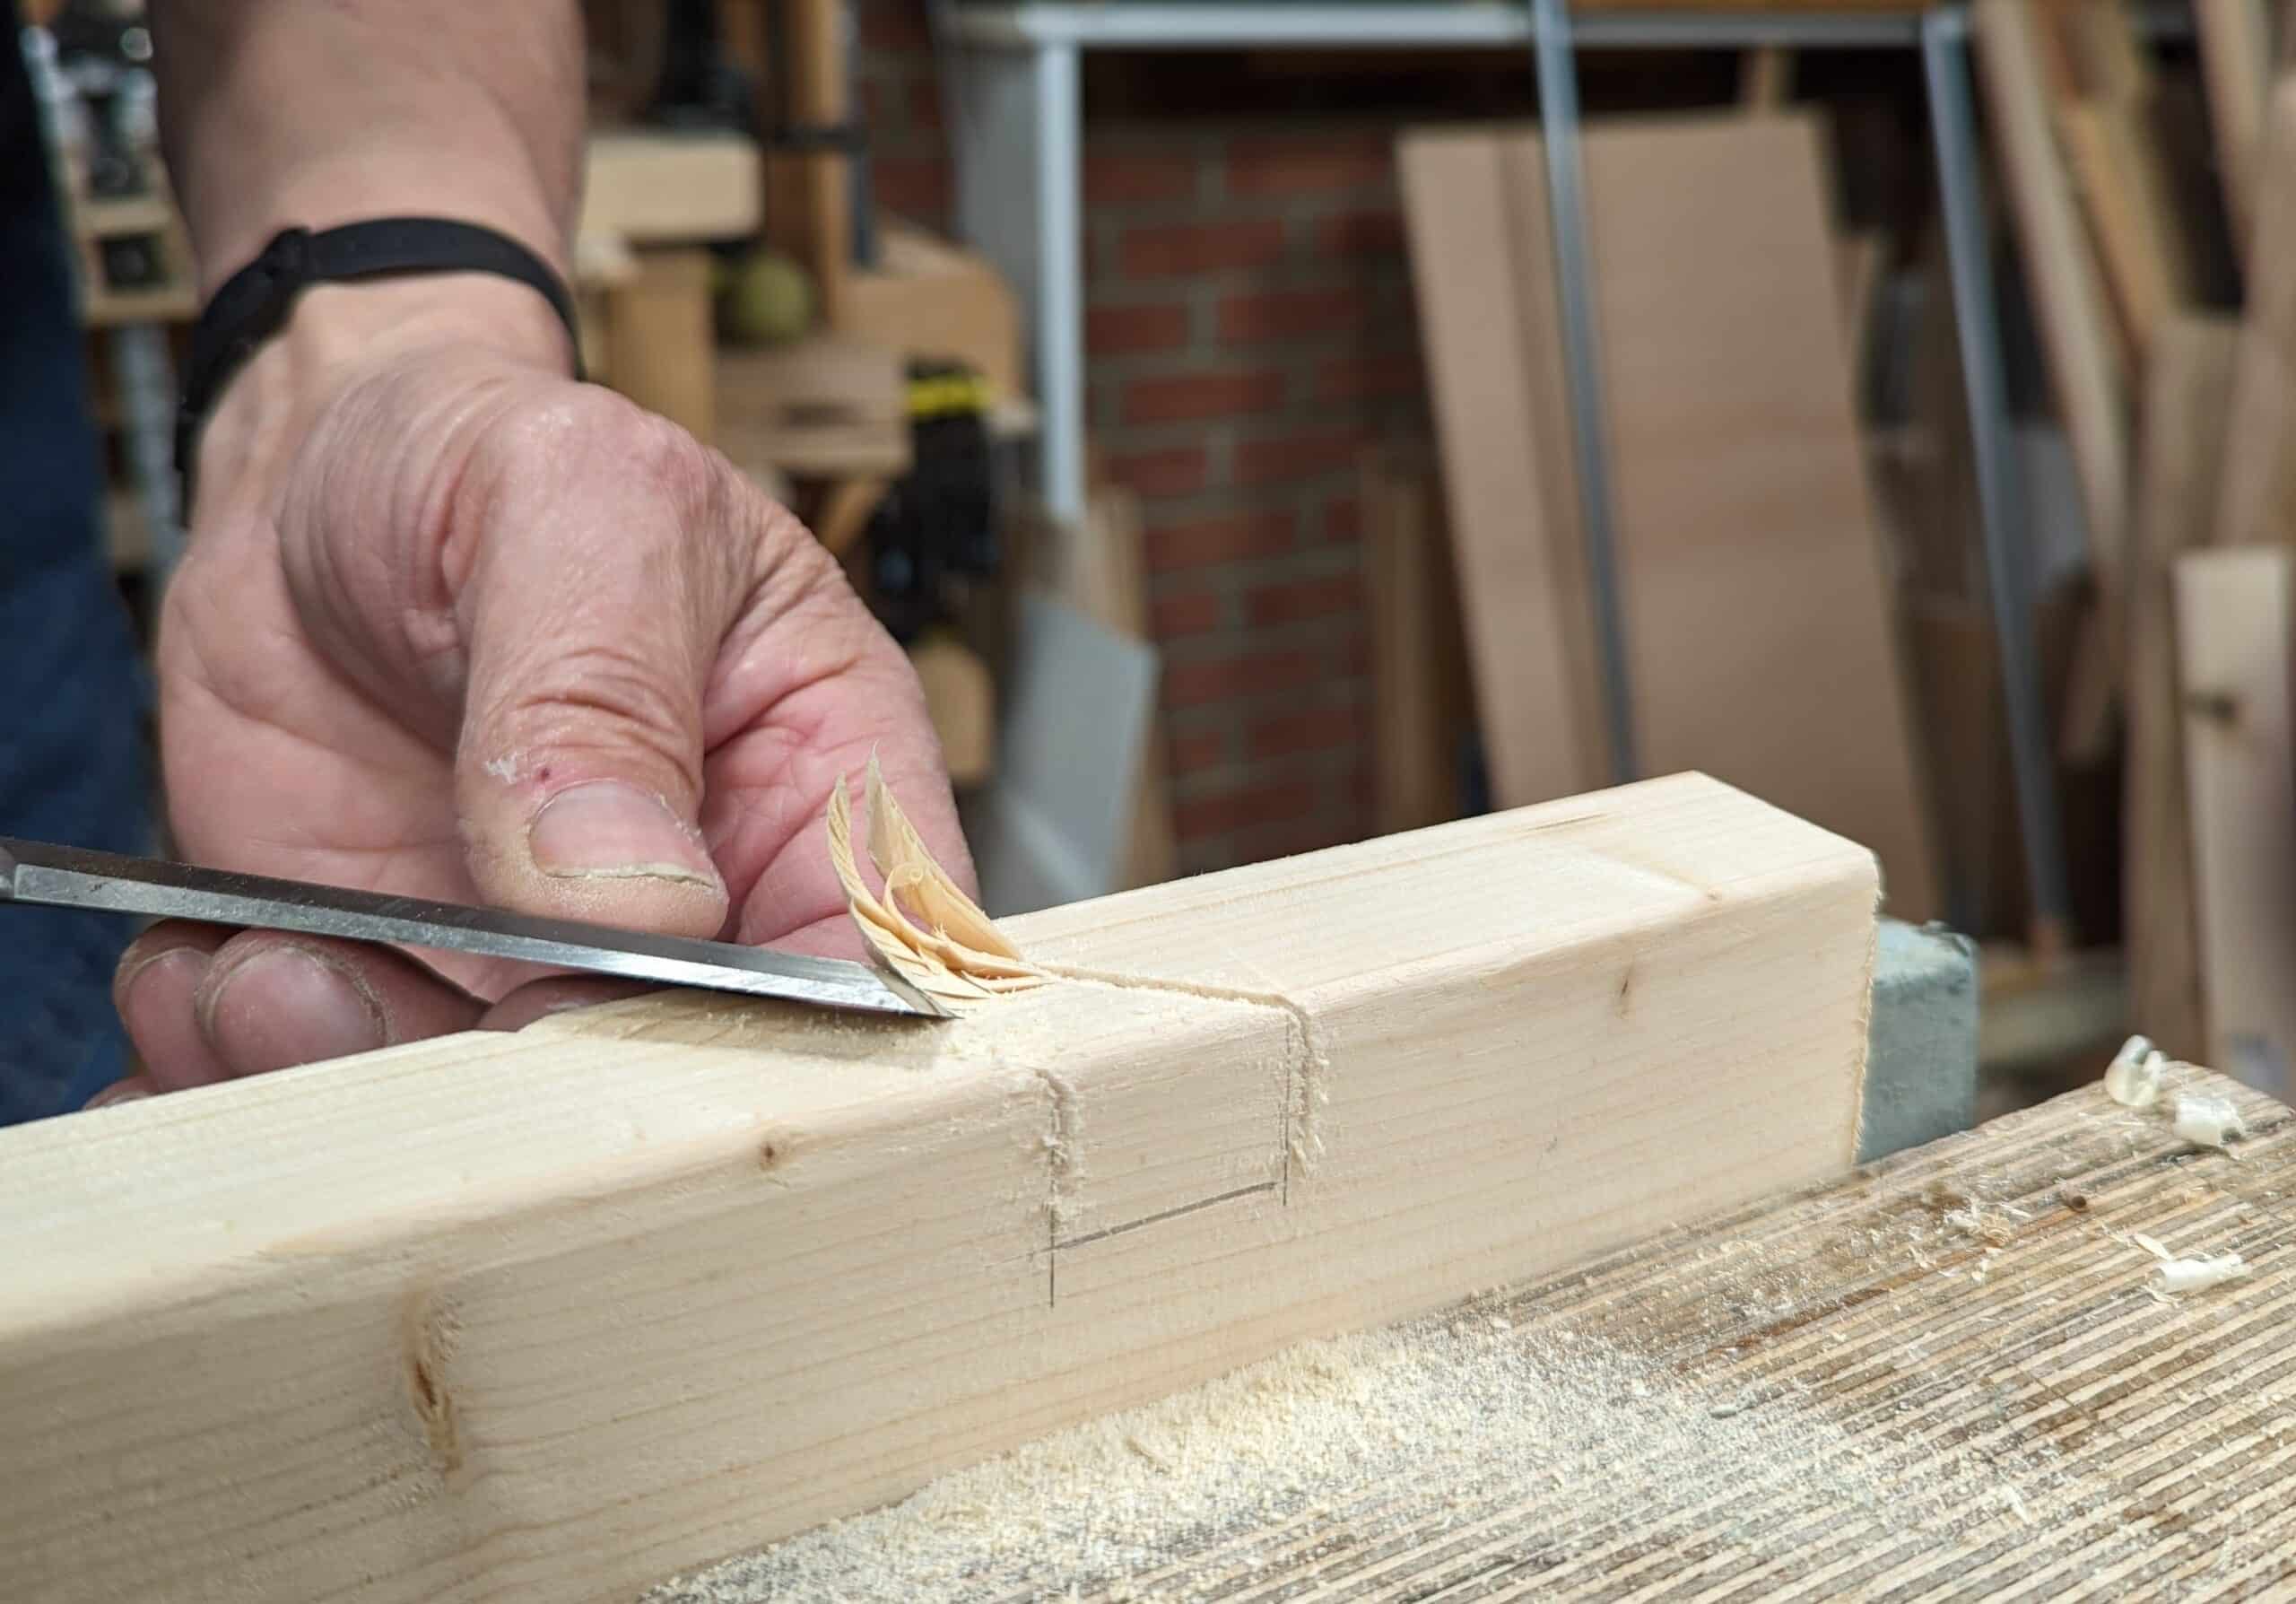
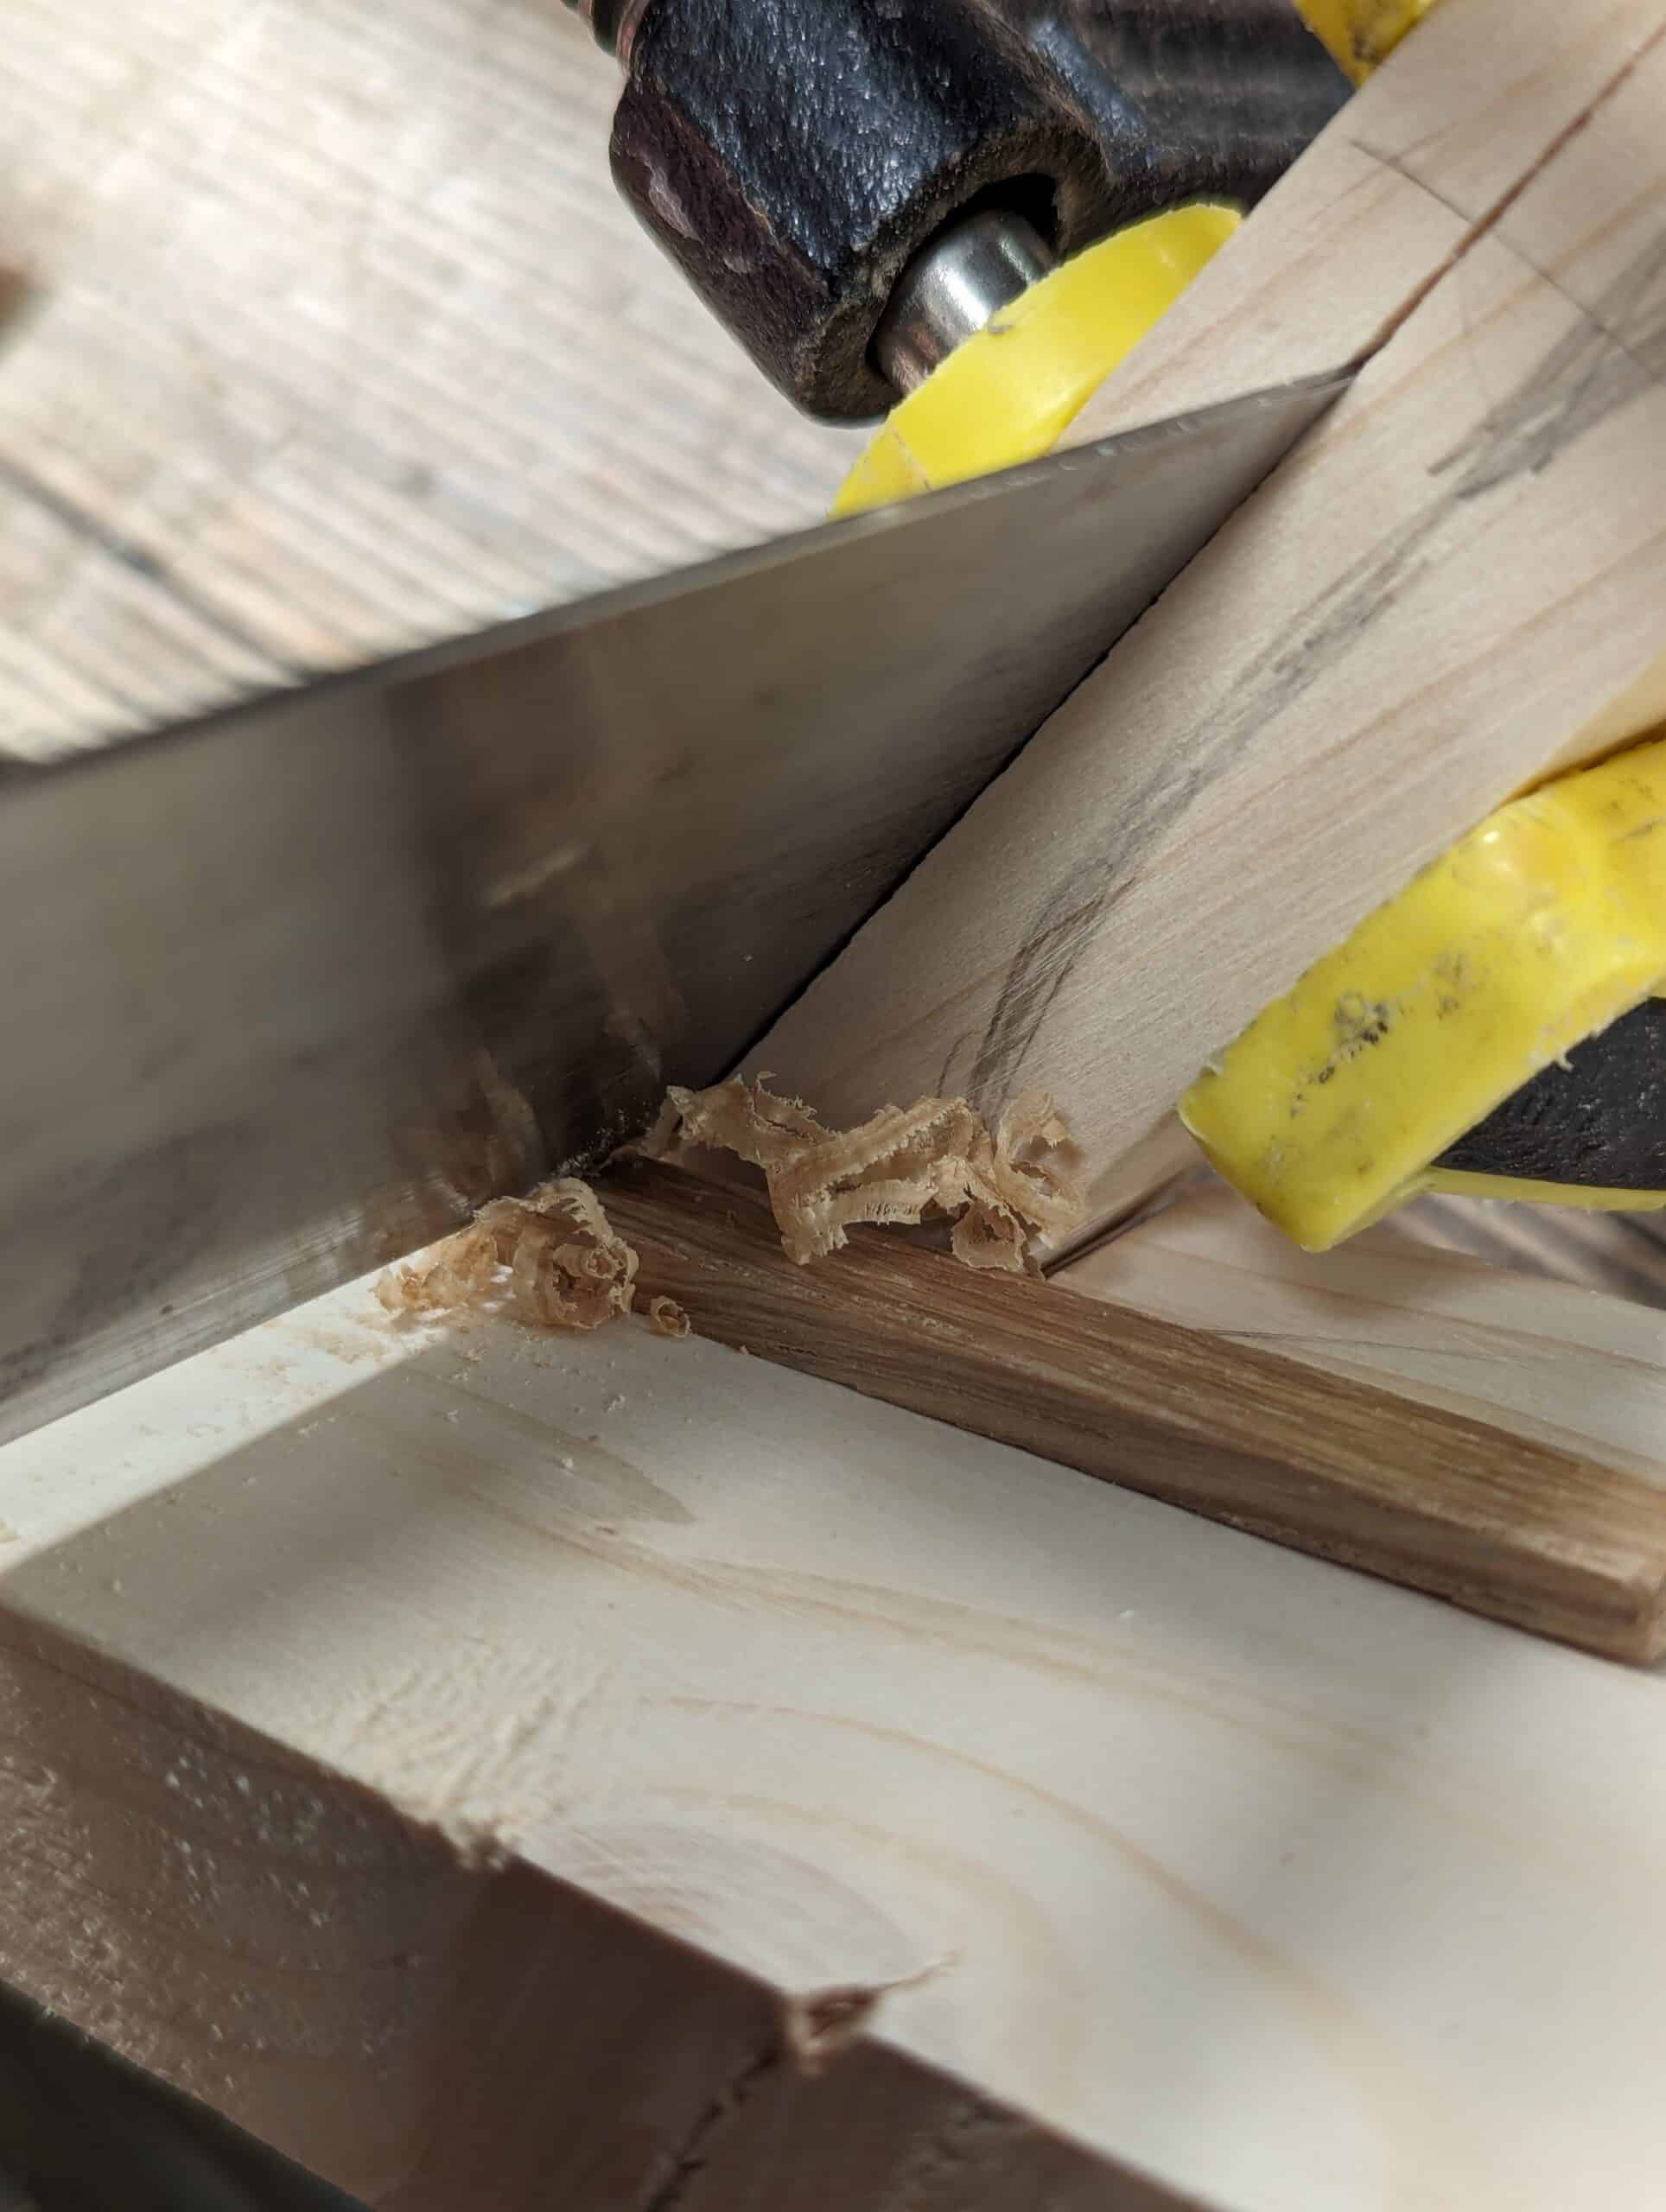
Use a sharp knife to part the fibres down into the gauge lines but not too deep in the first pass as this is likely to split the main body of wood.
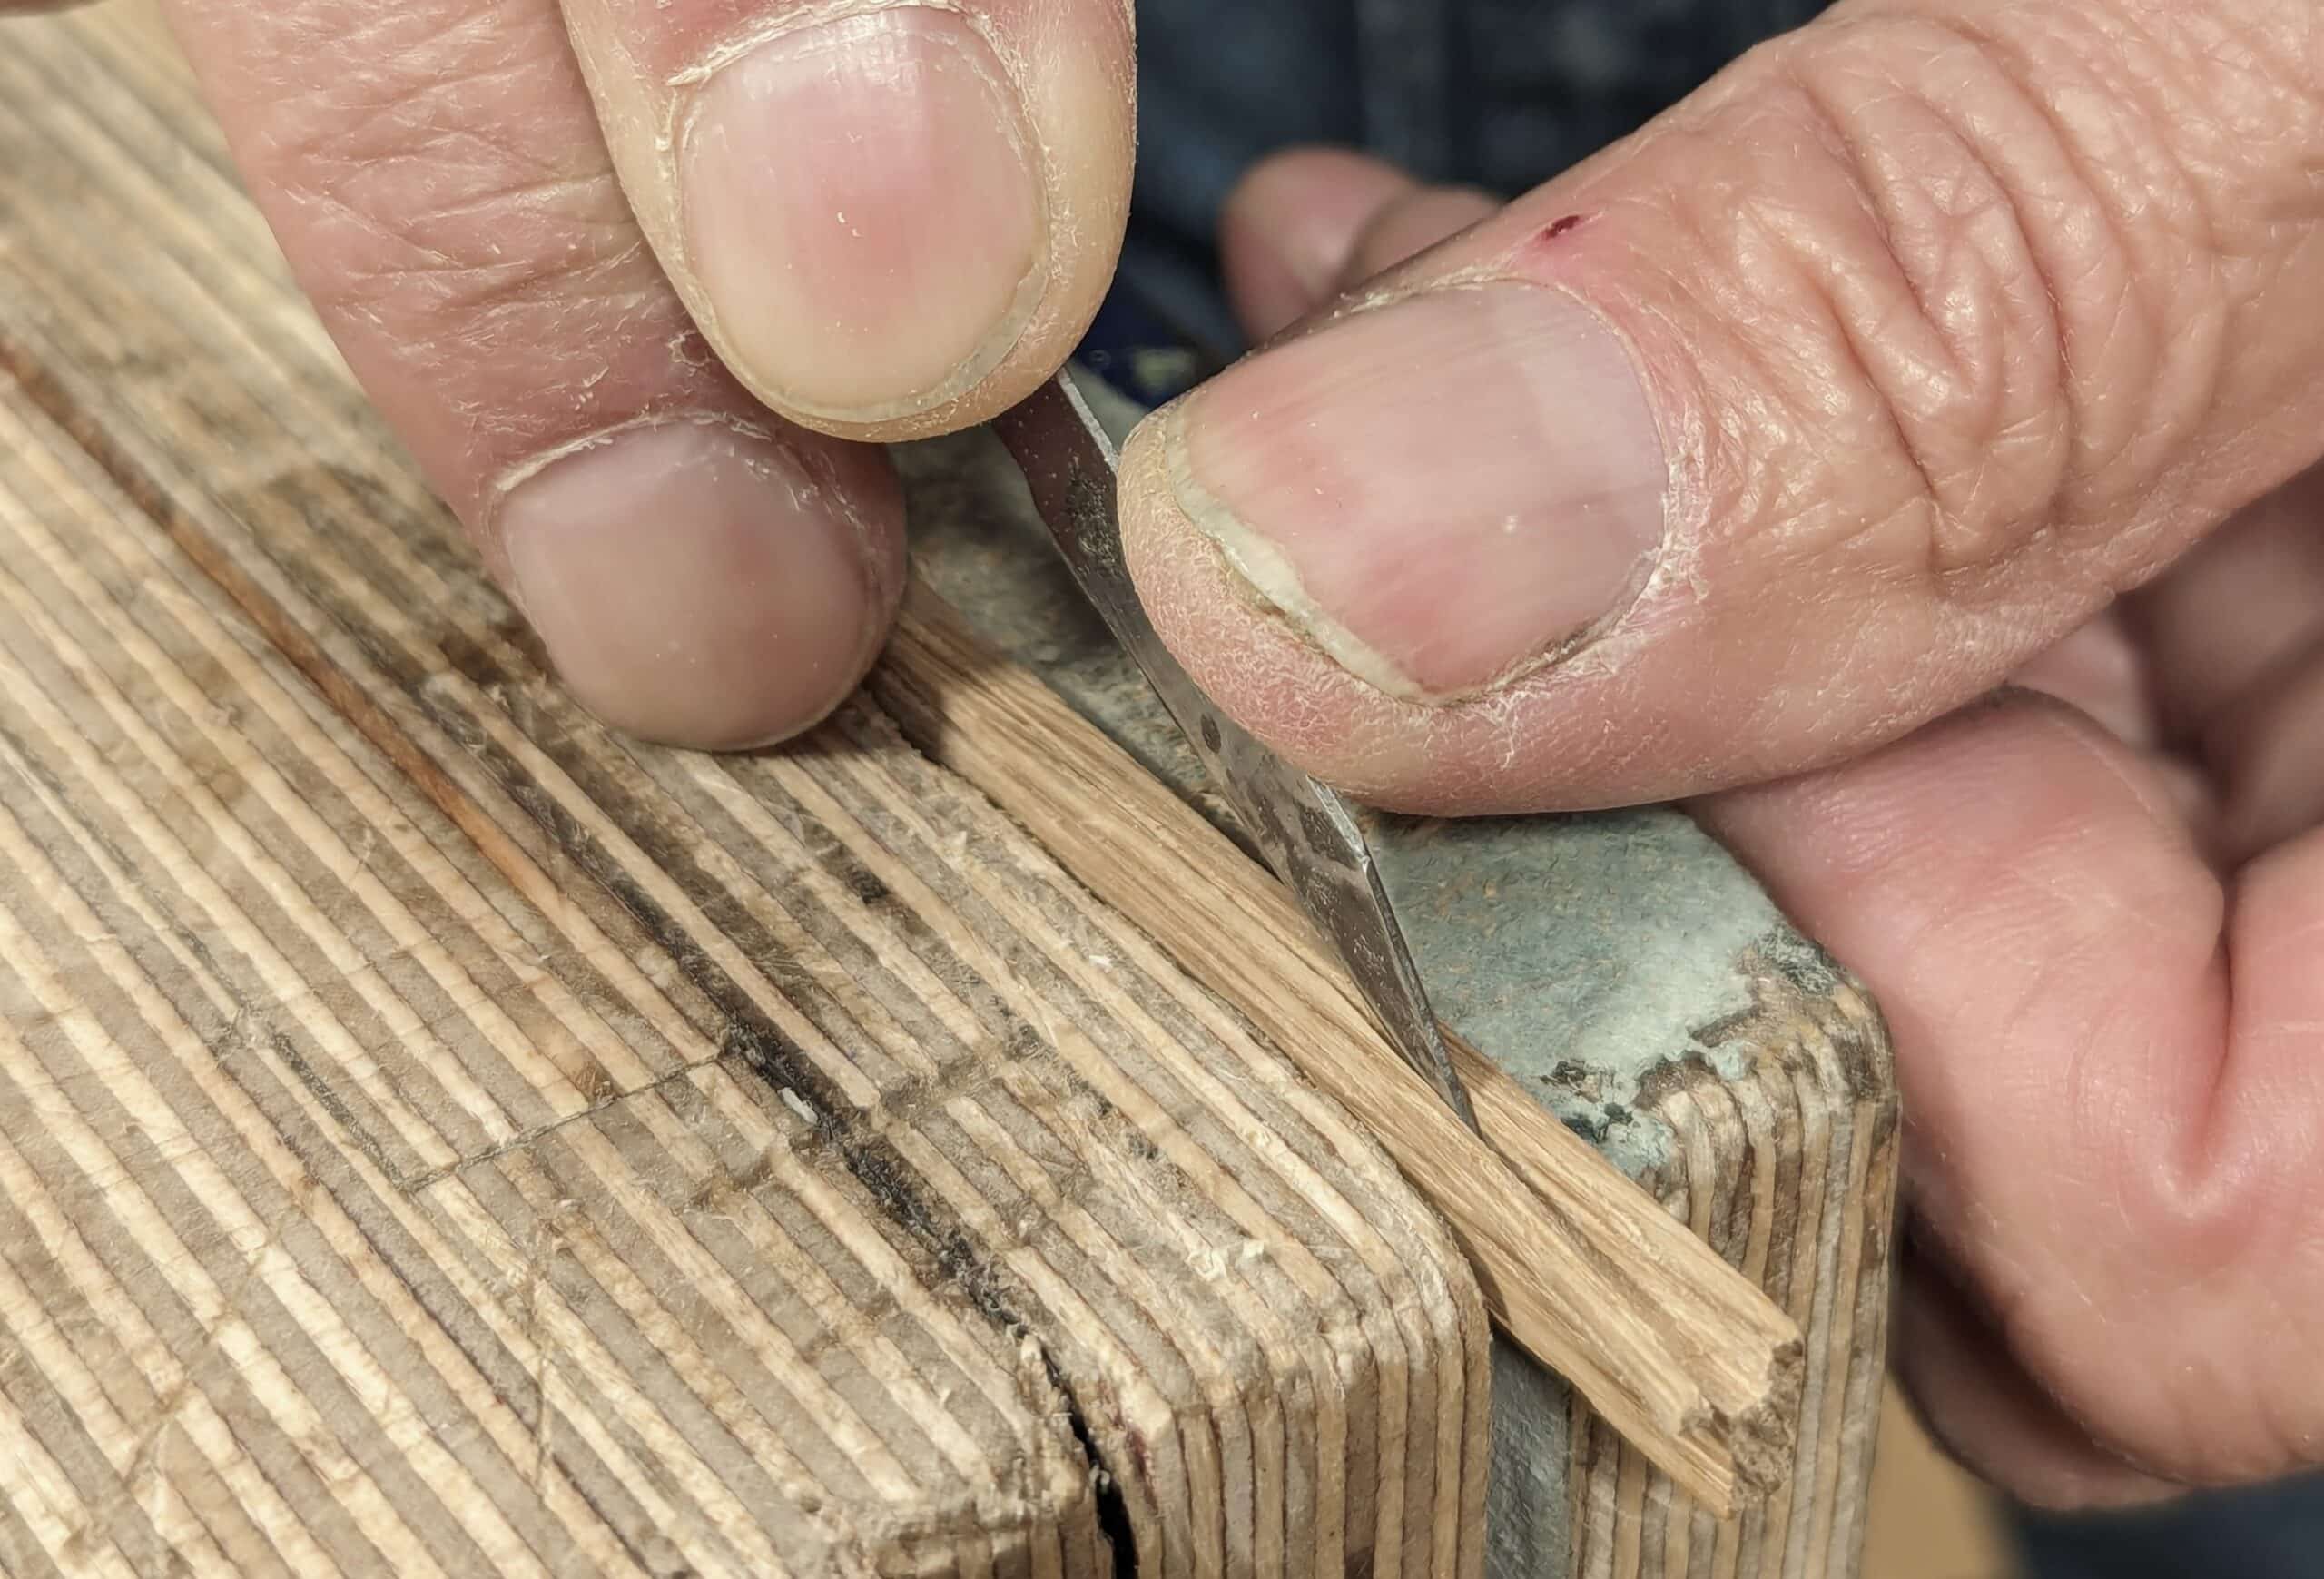
Do the same to the adjacent gauge mark on the edge face.
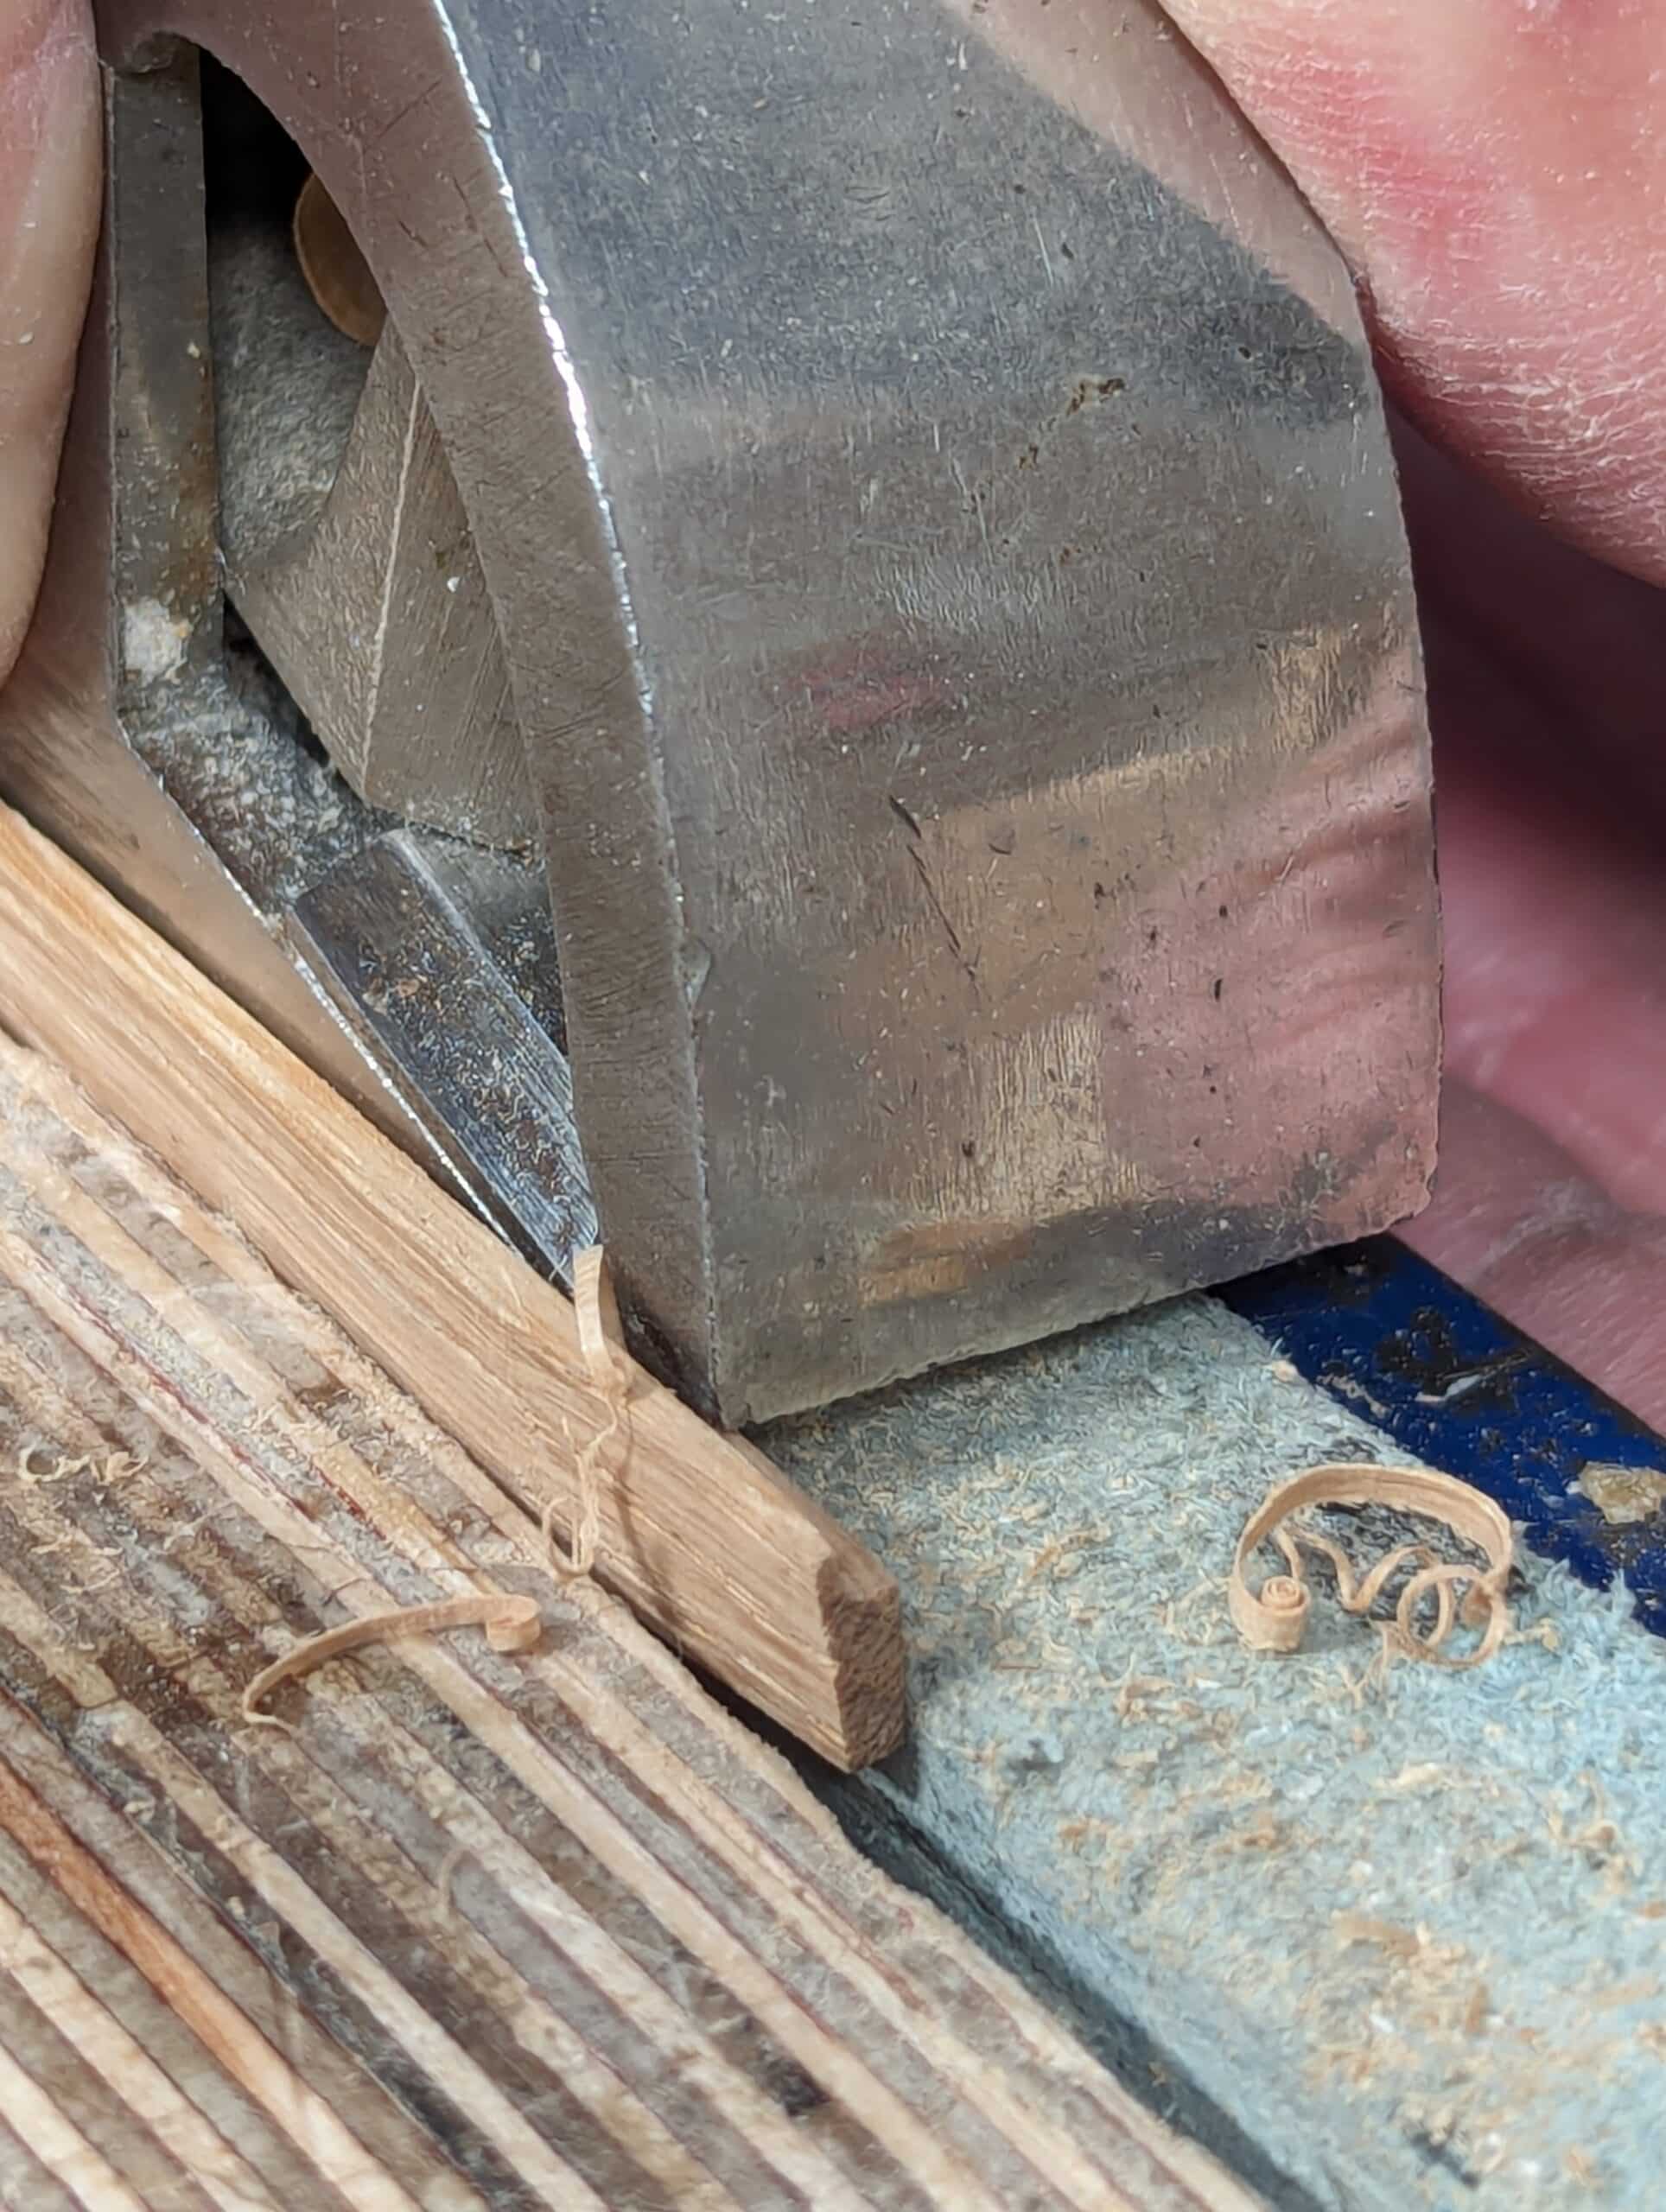
Clean up the cuts with a bullnose plane. . .
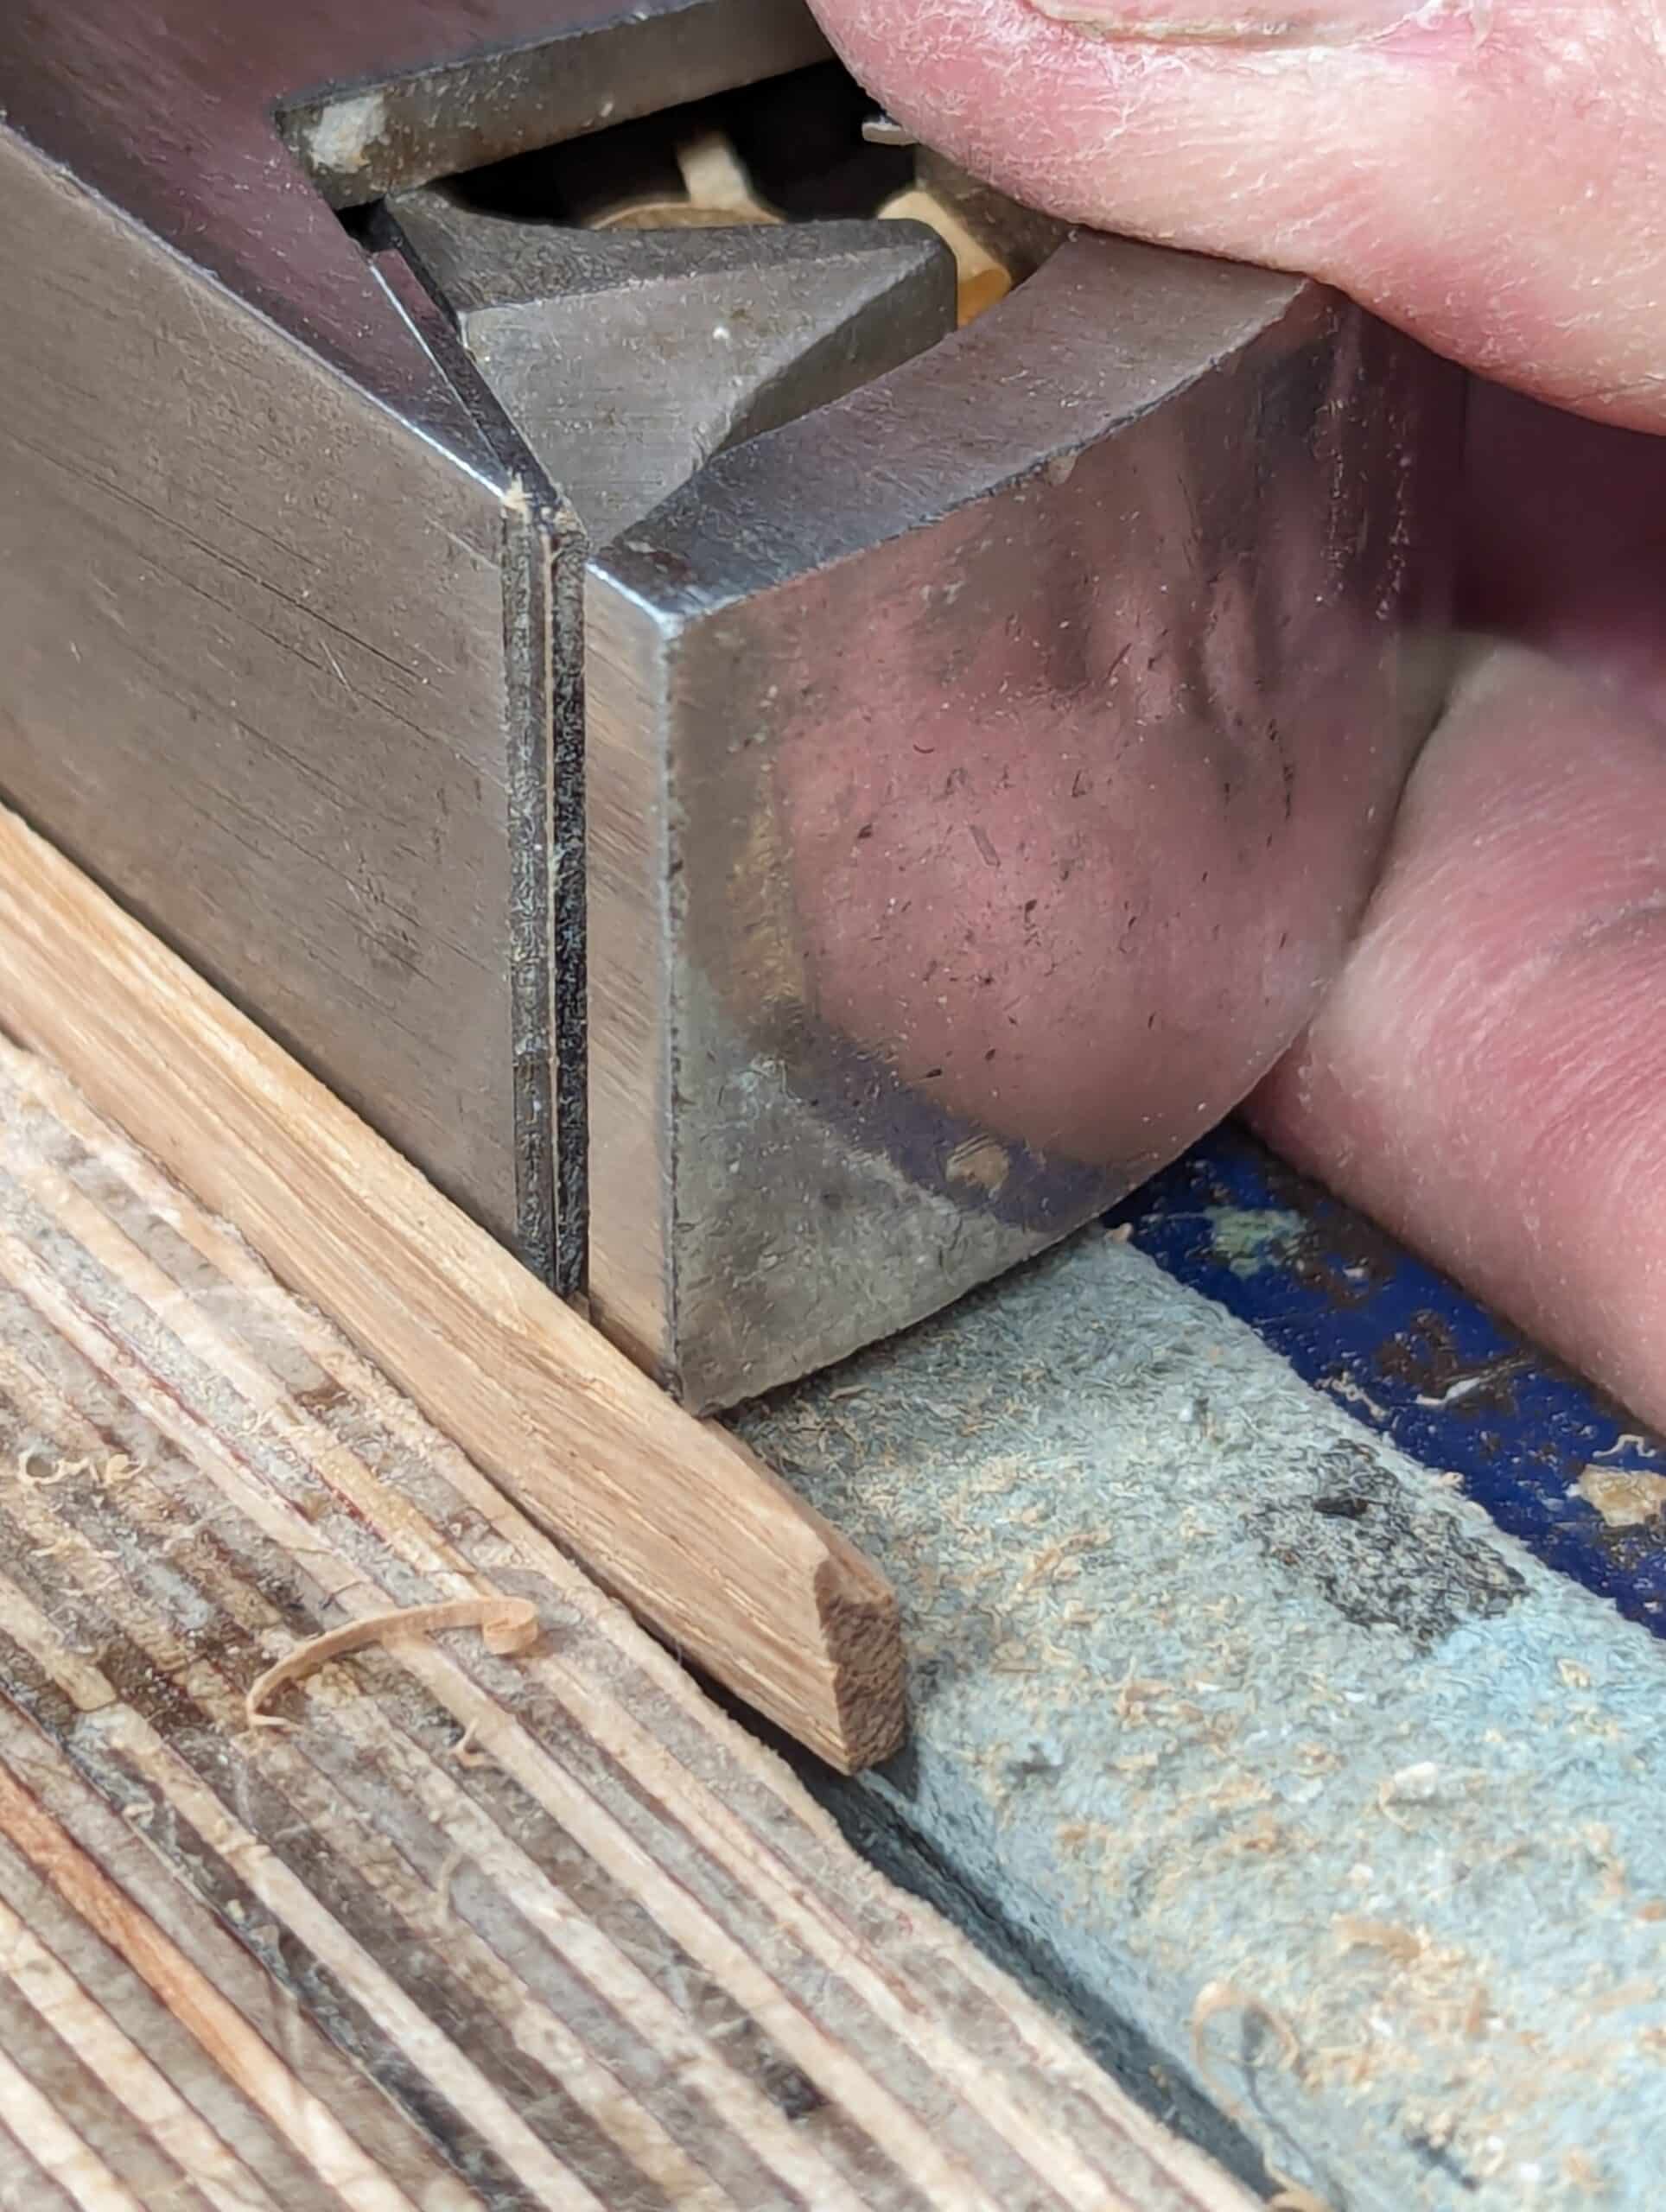
. . . lay the bullnose on its side for the narrow edge as it might be hard to clamp in the vise.
Rip a 3mm by 3mm contrasting wood if indeed this is what you want.
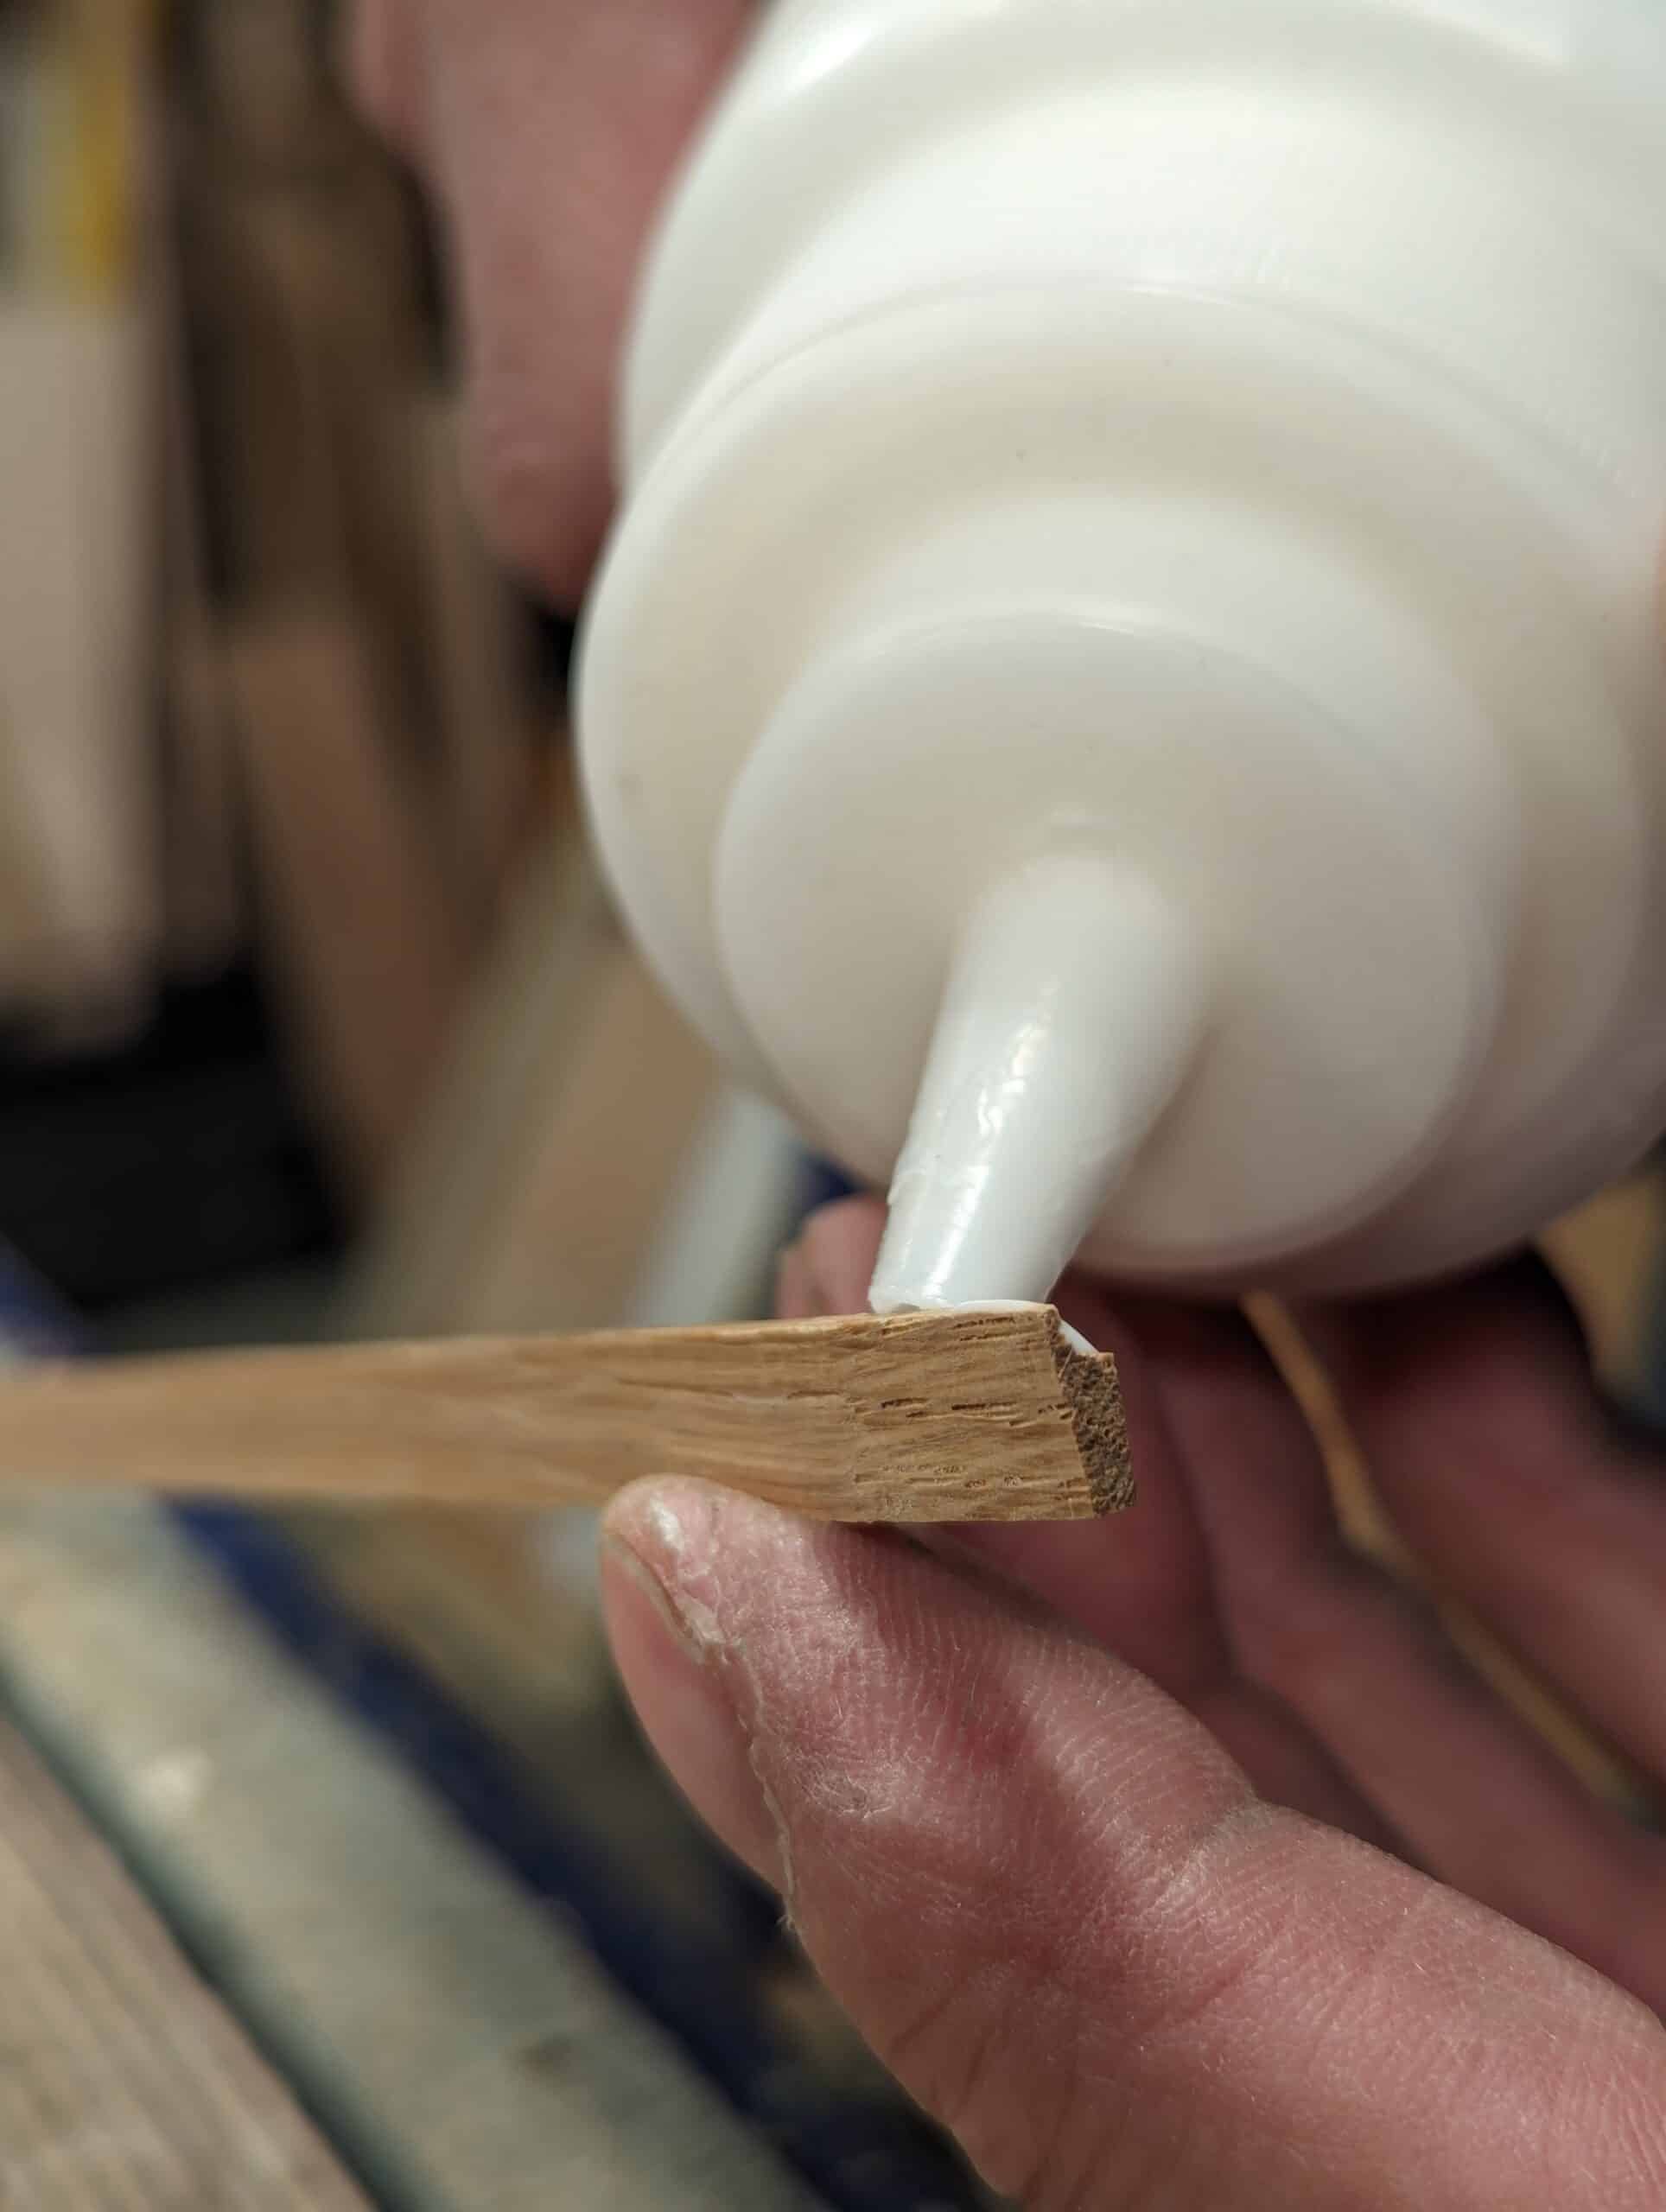
Apply a bead of glue along the internal corner and . . .
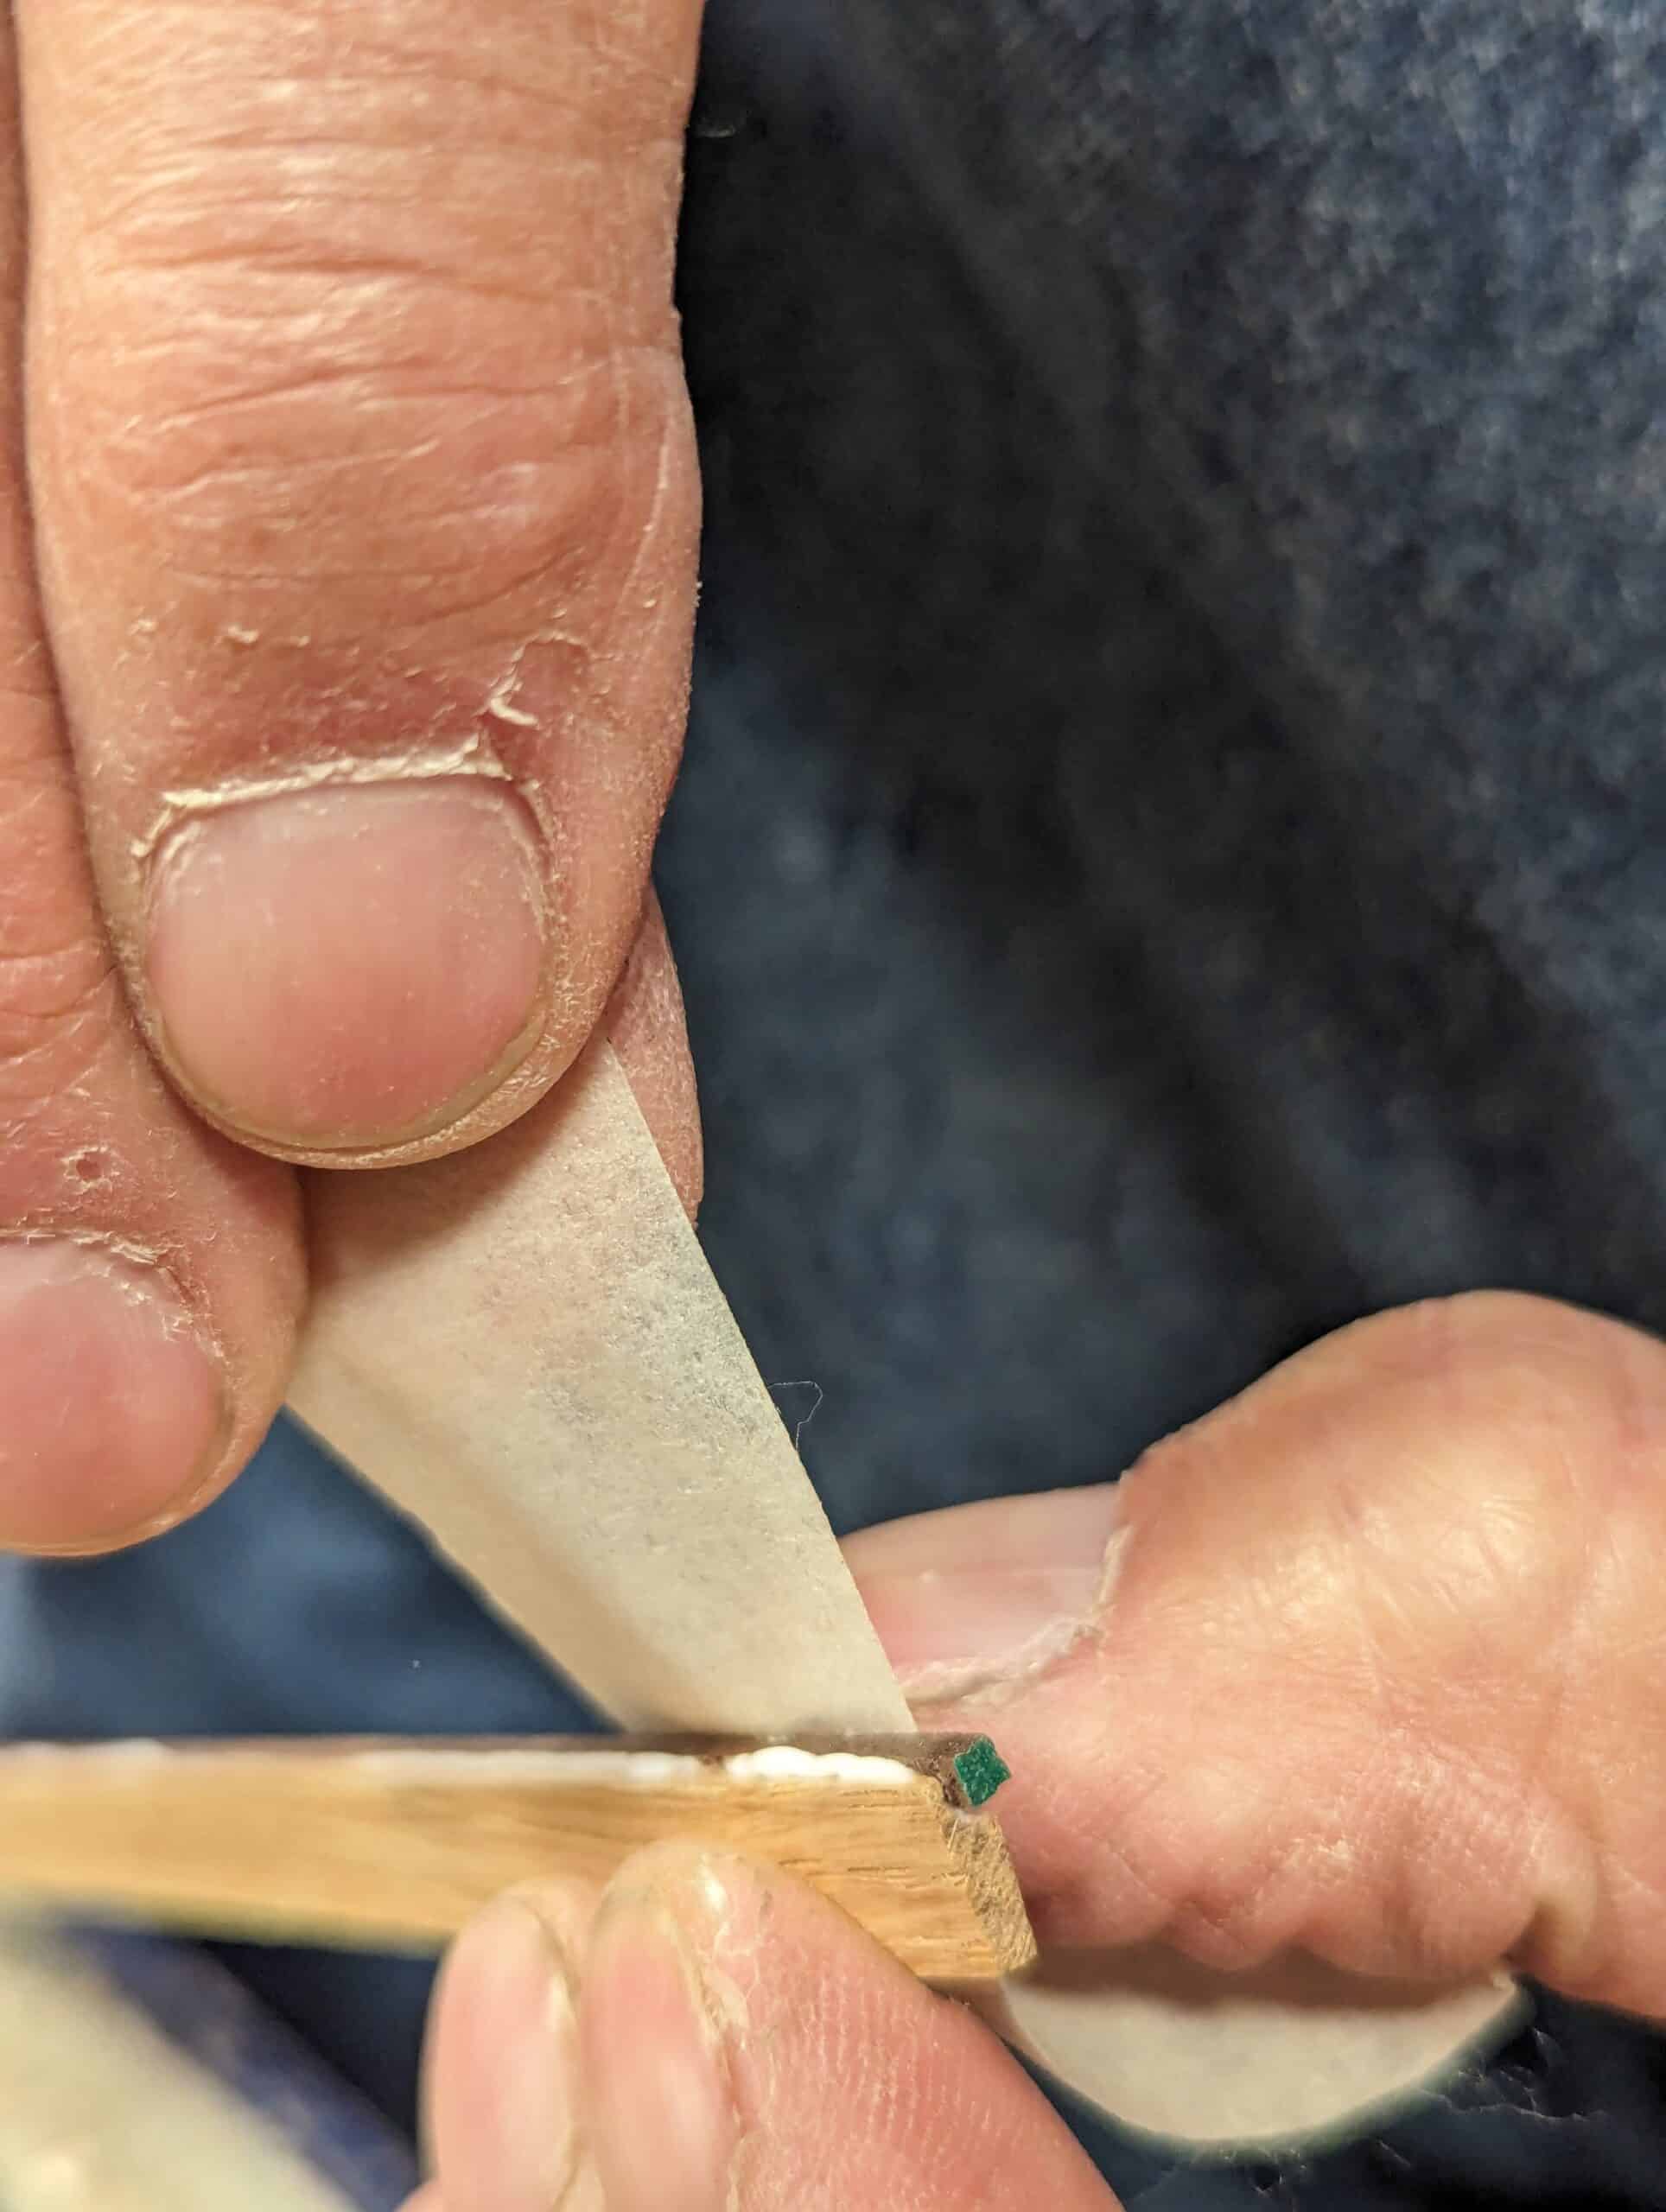
. . . use masking tape stretched to apply pressure to the inlay corner piece. Leave it to dry for at least an hour or so.
This is how your inlay piece will look when set within the thicknessing jig.
It’s best to plane any discrepancy out first.
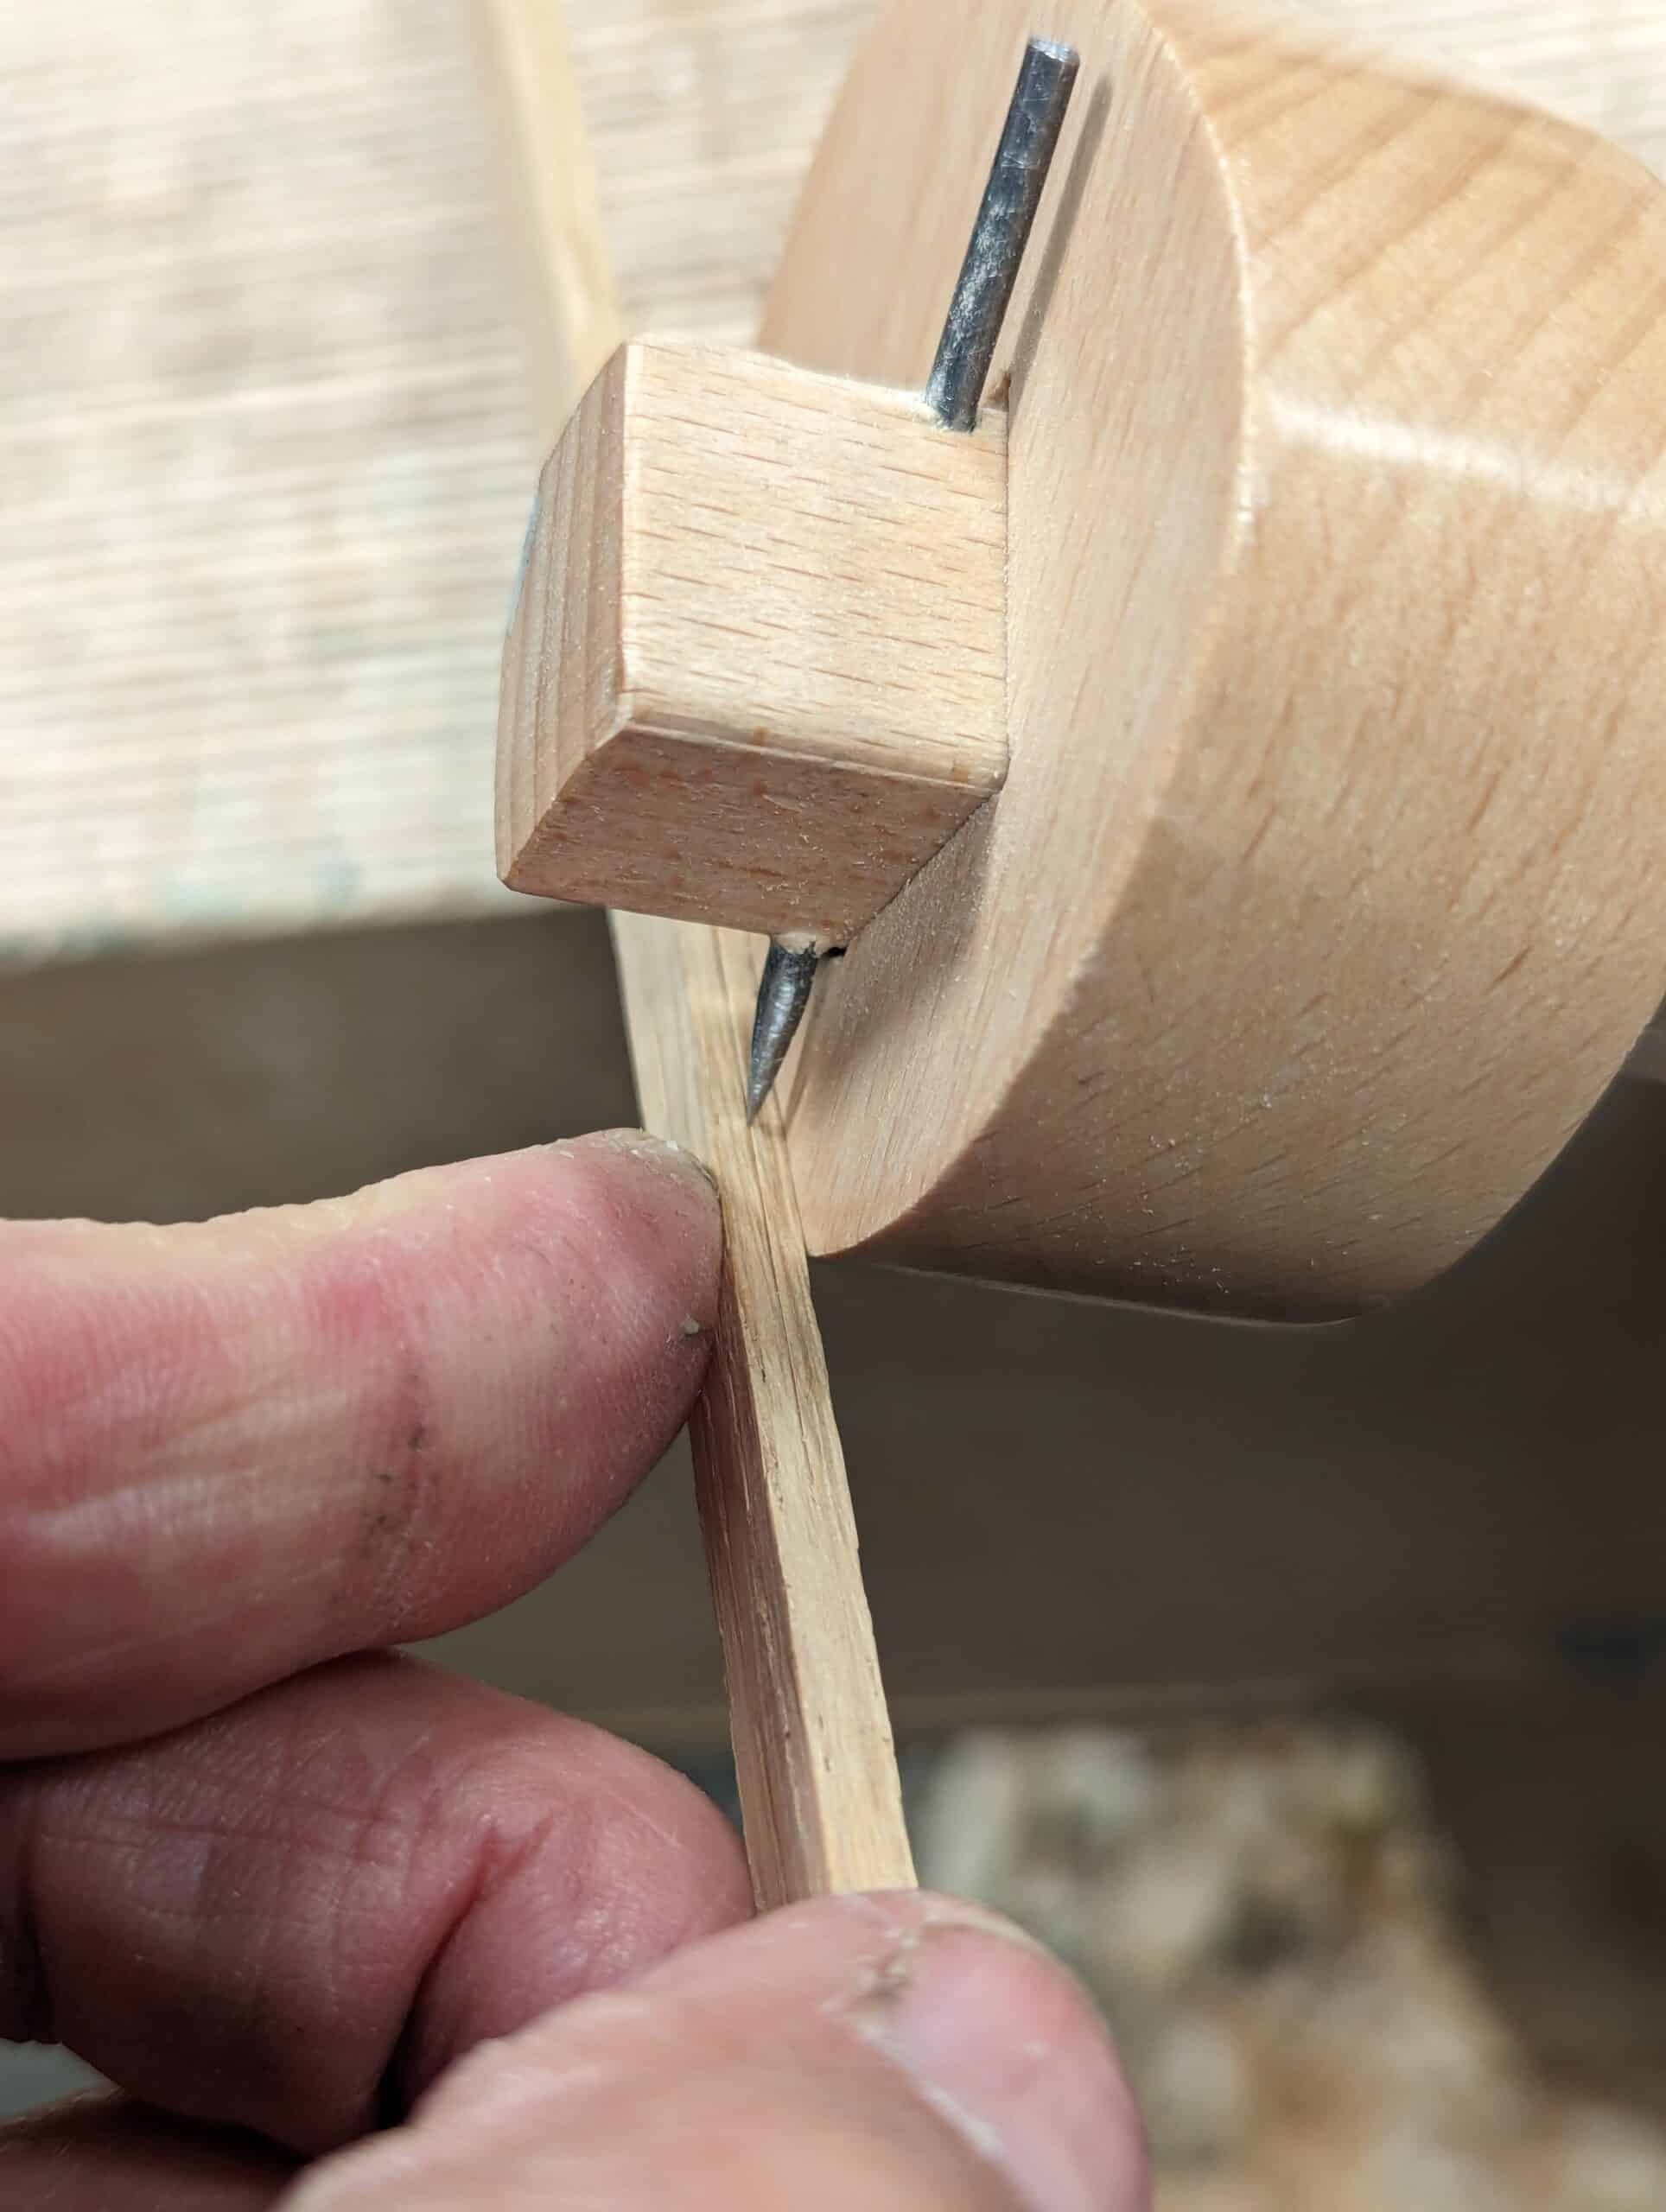
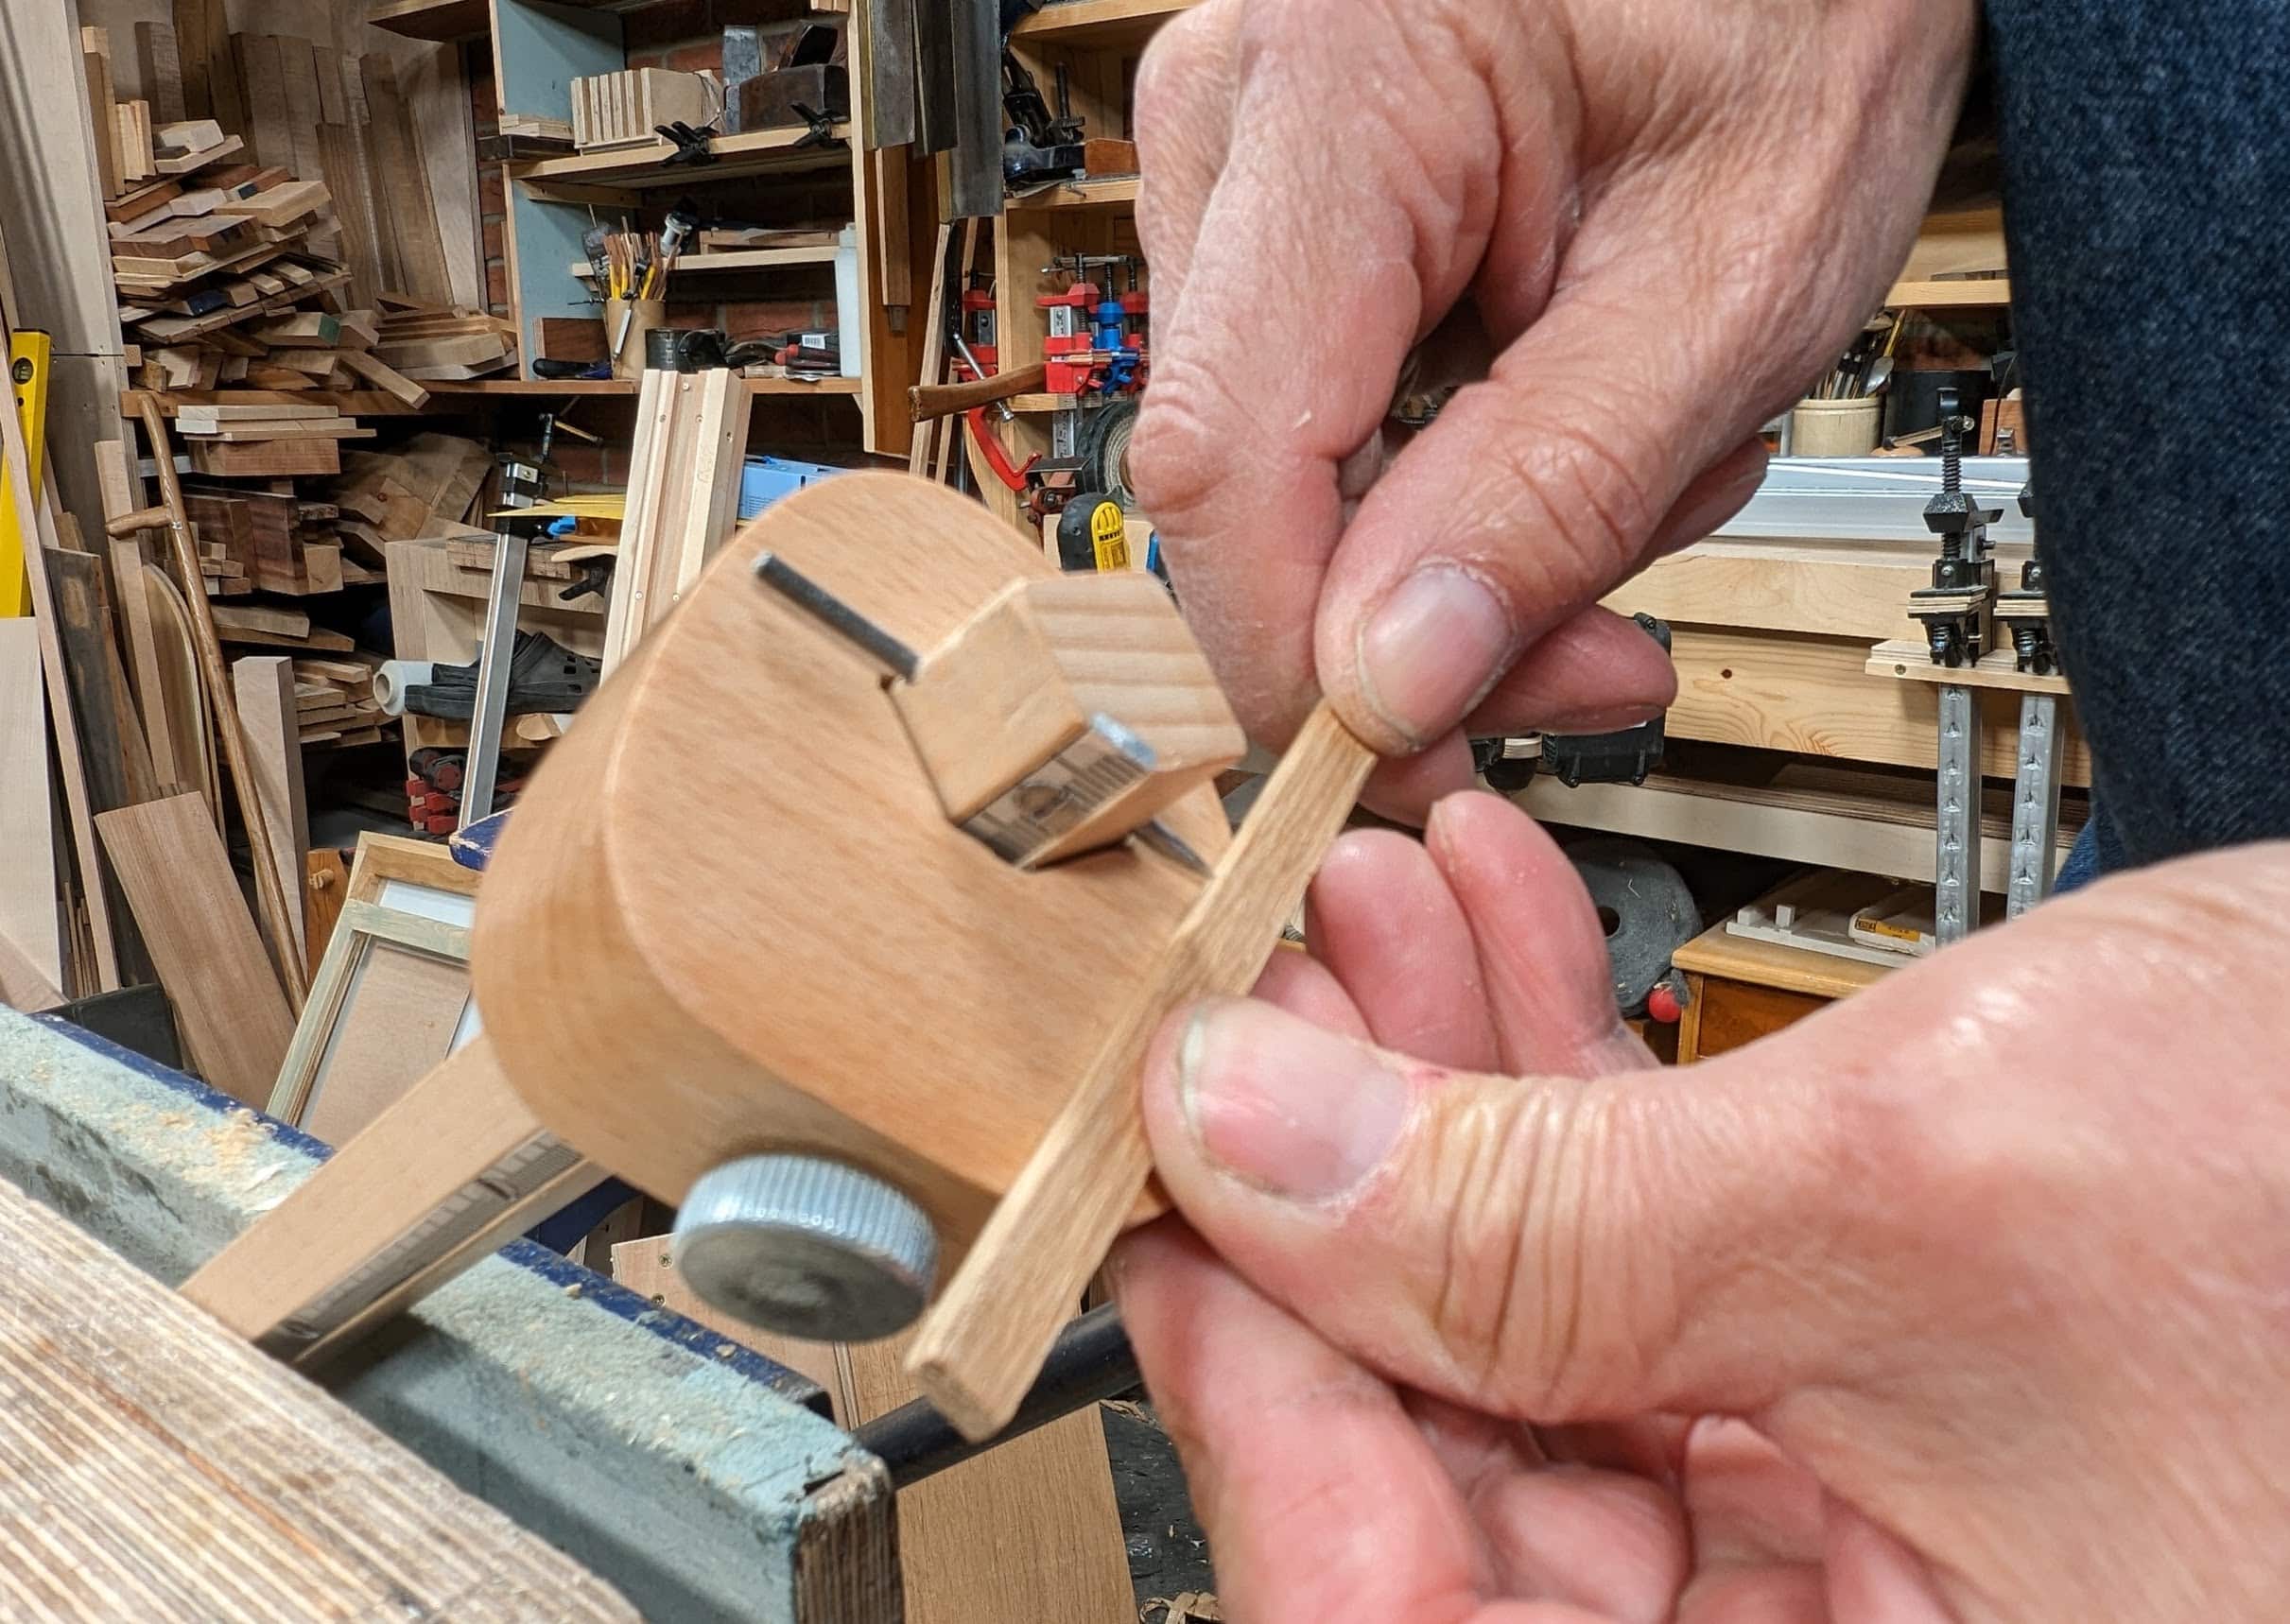
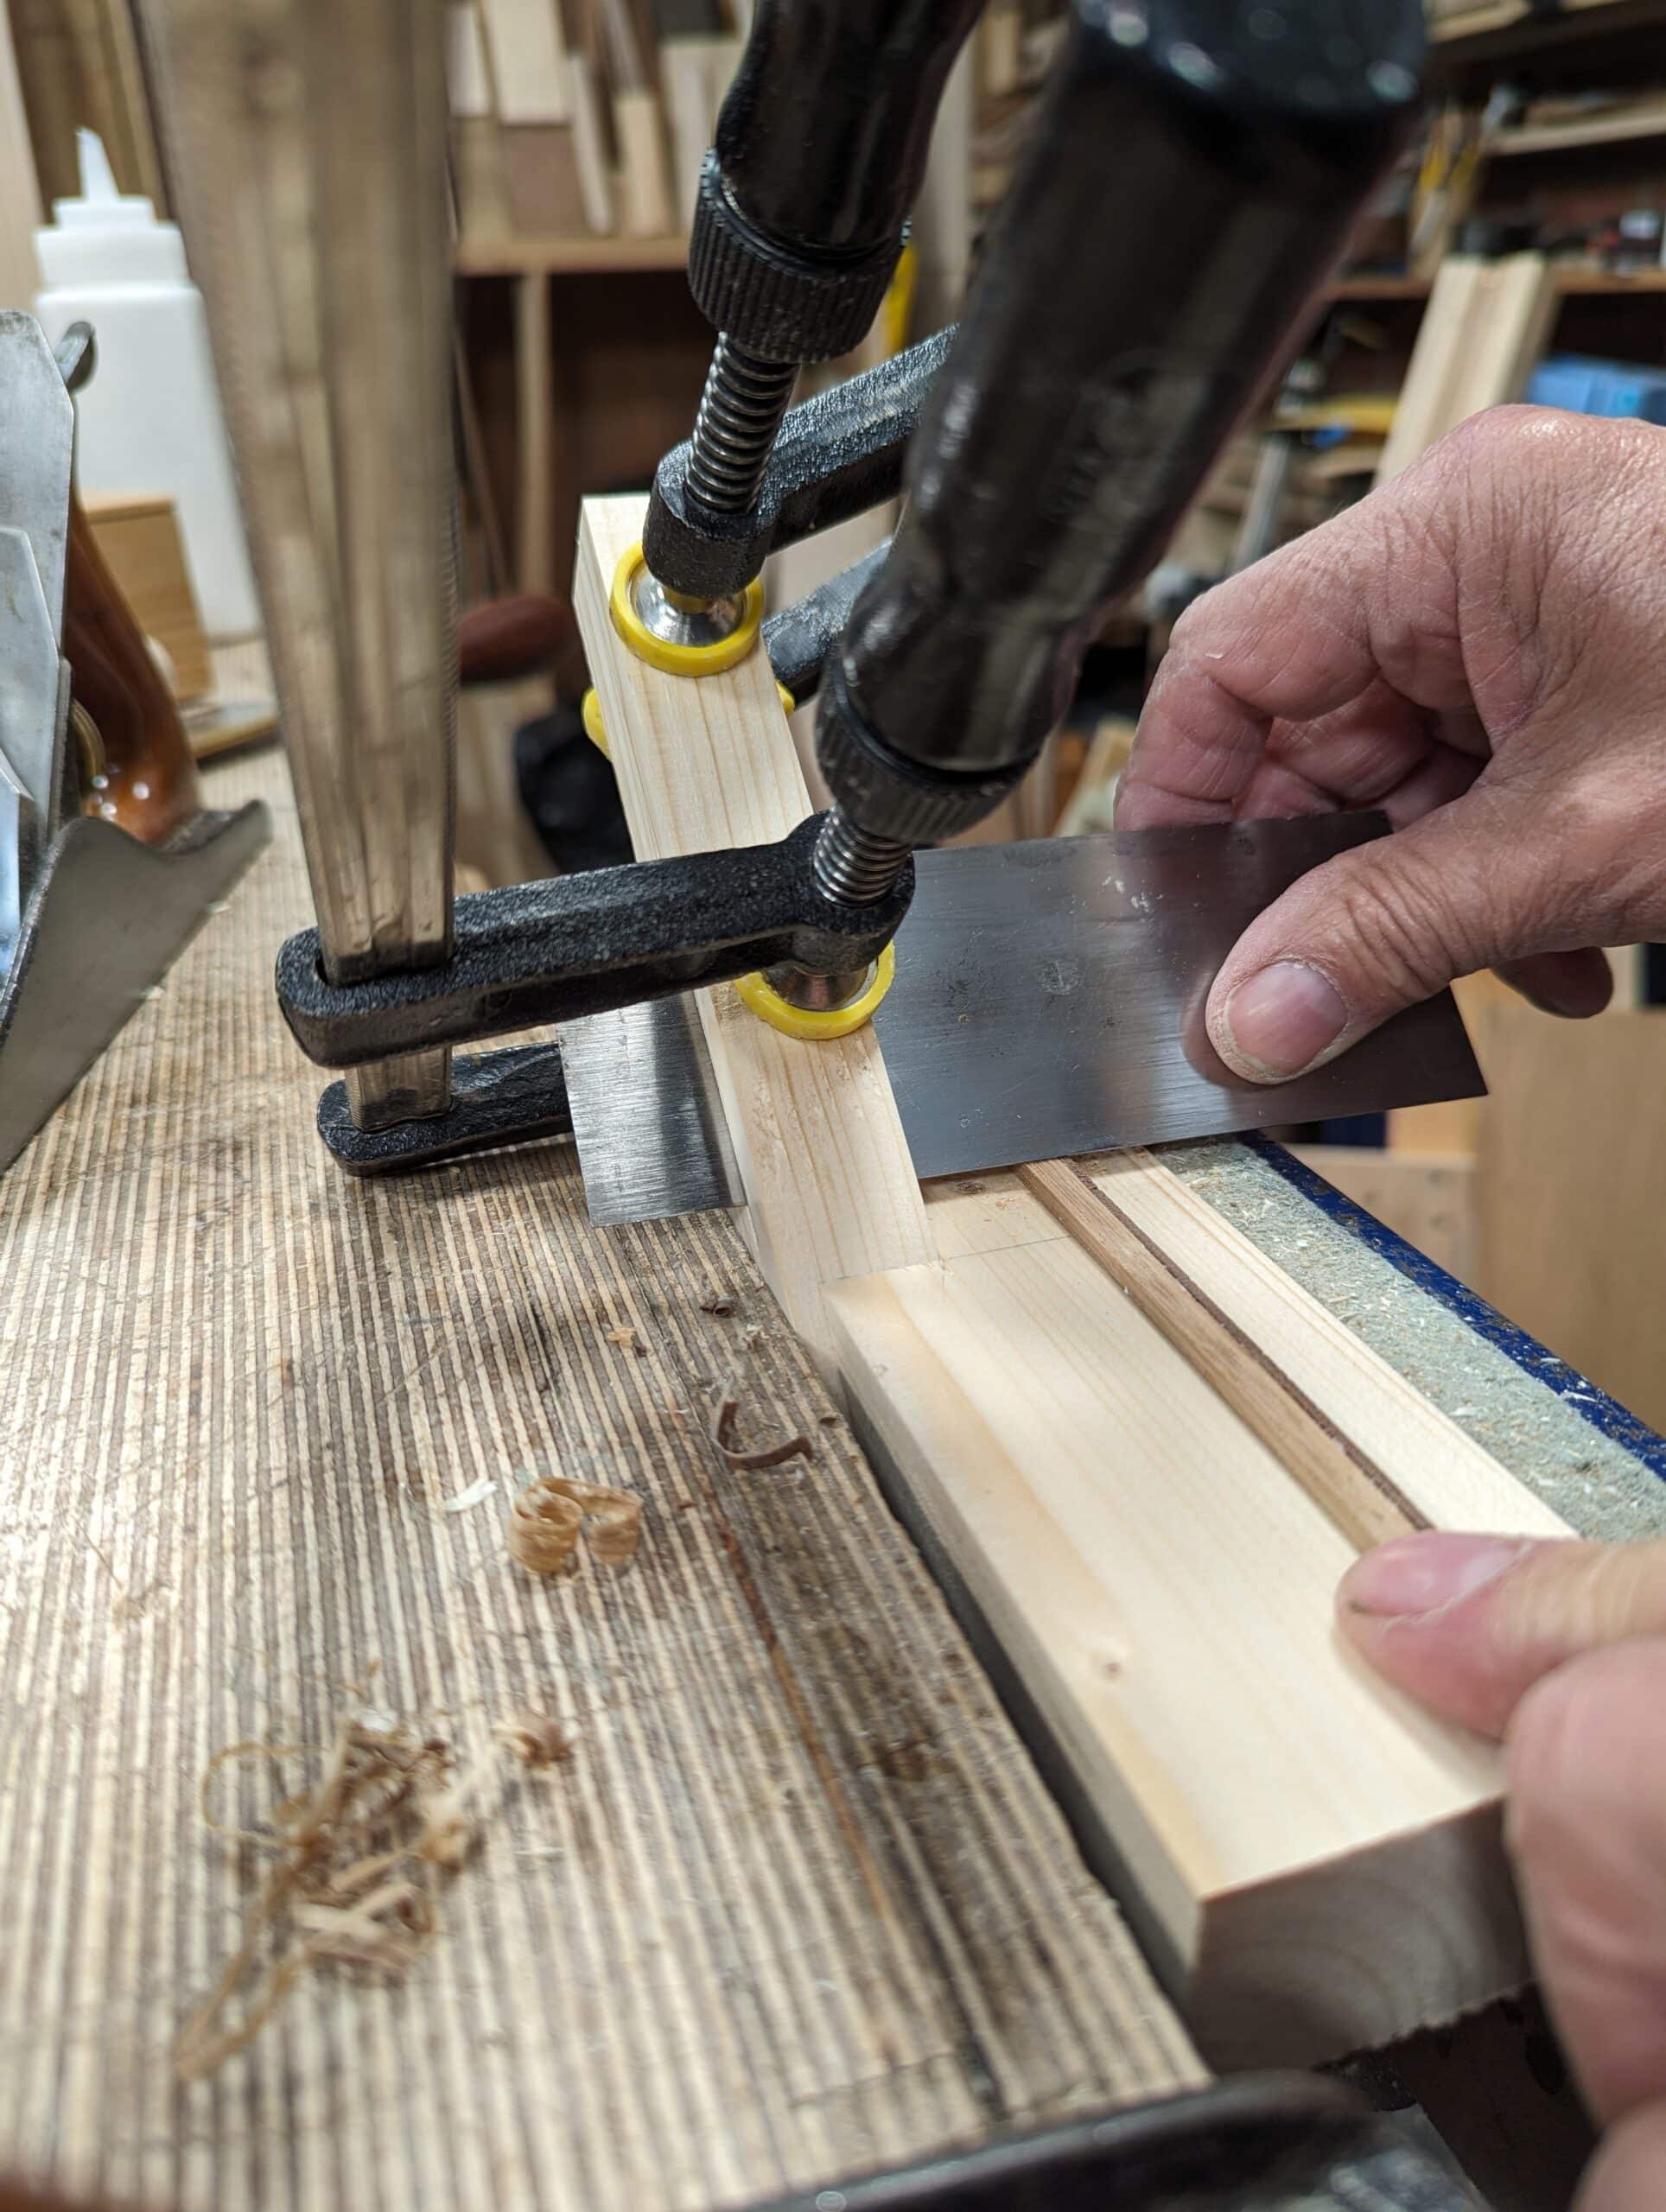
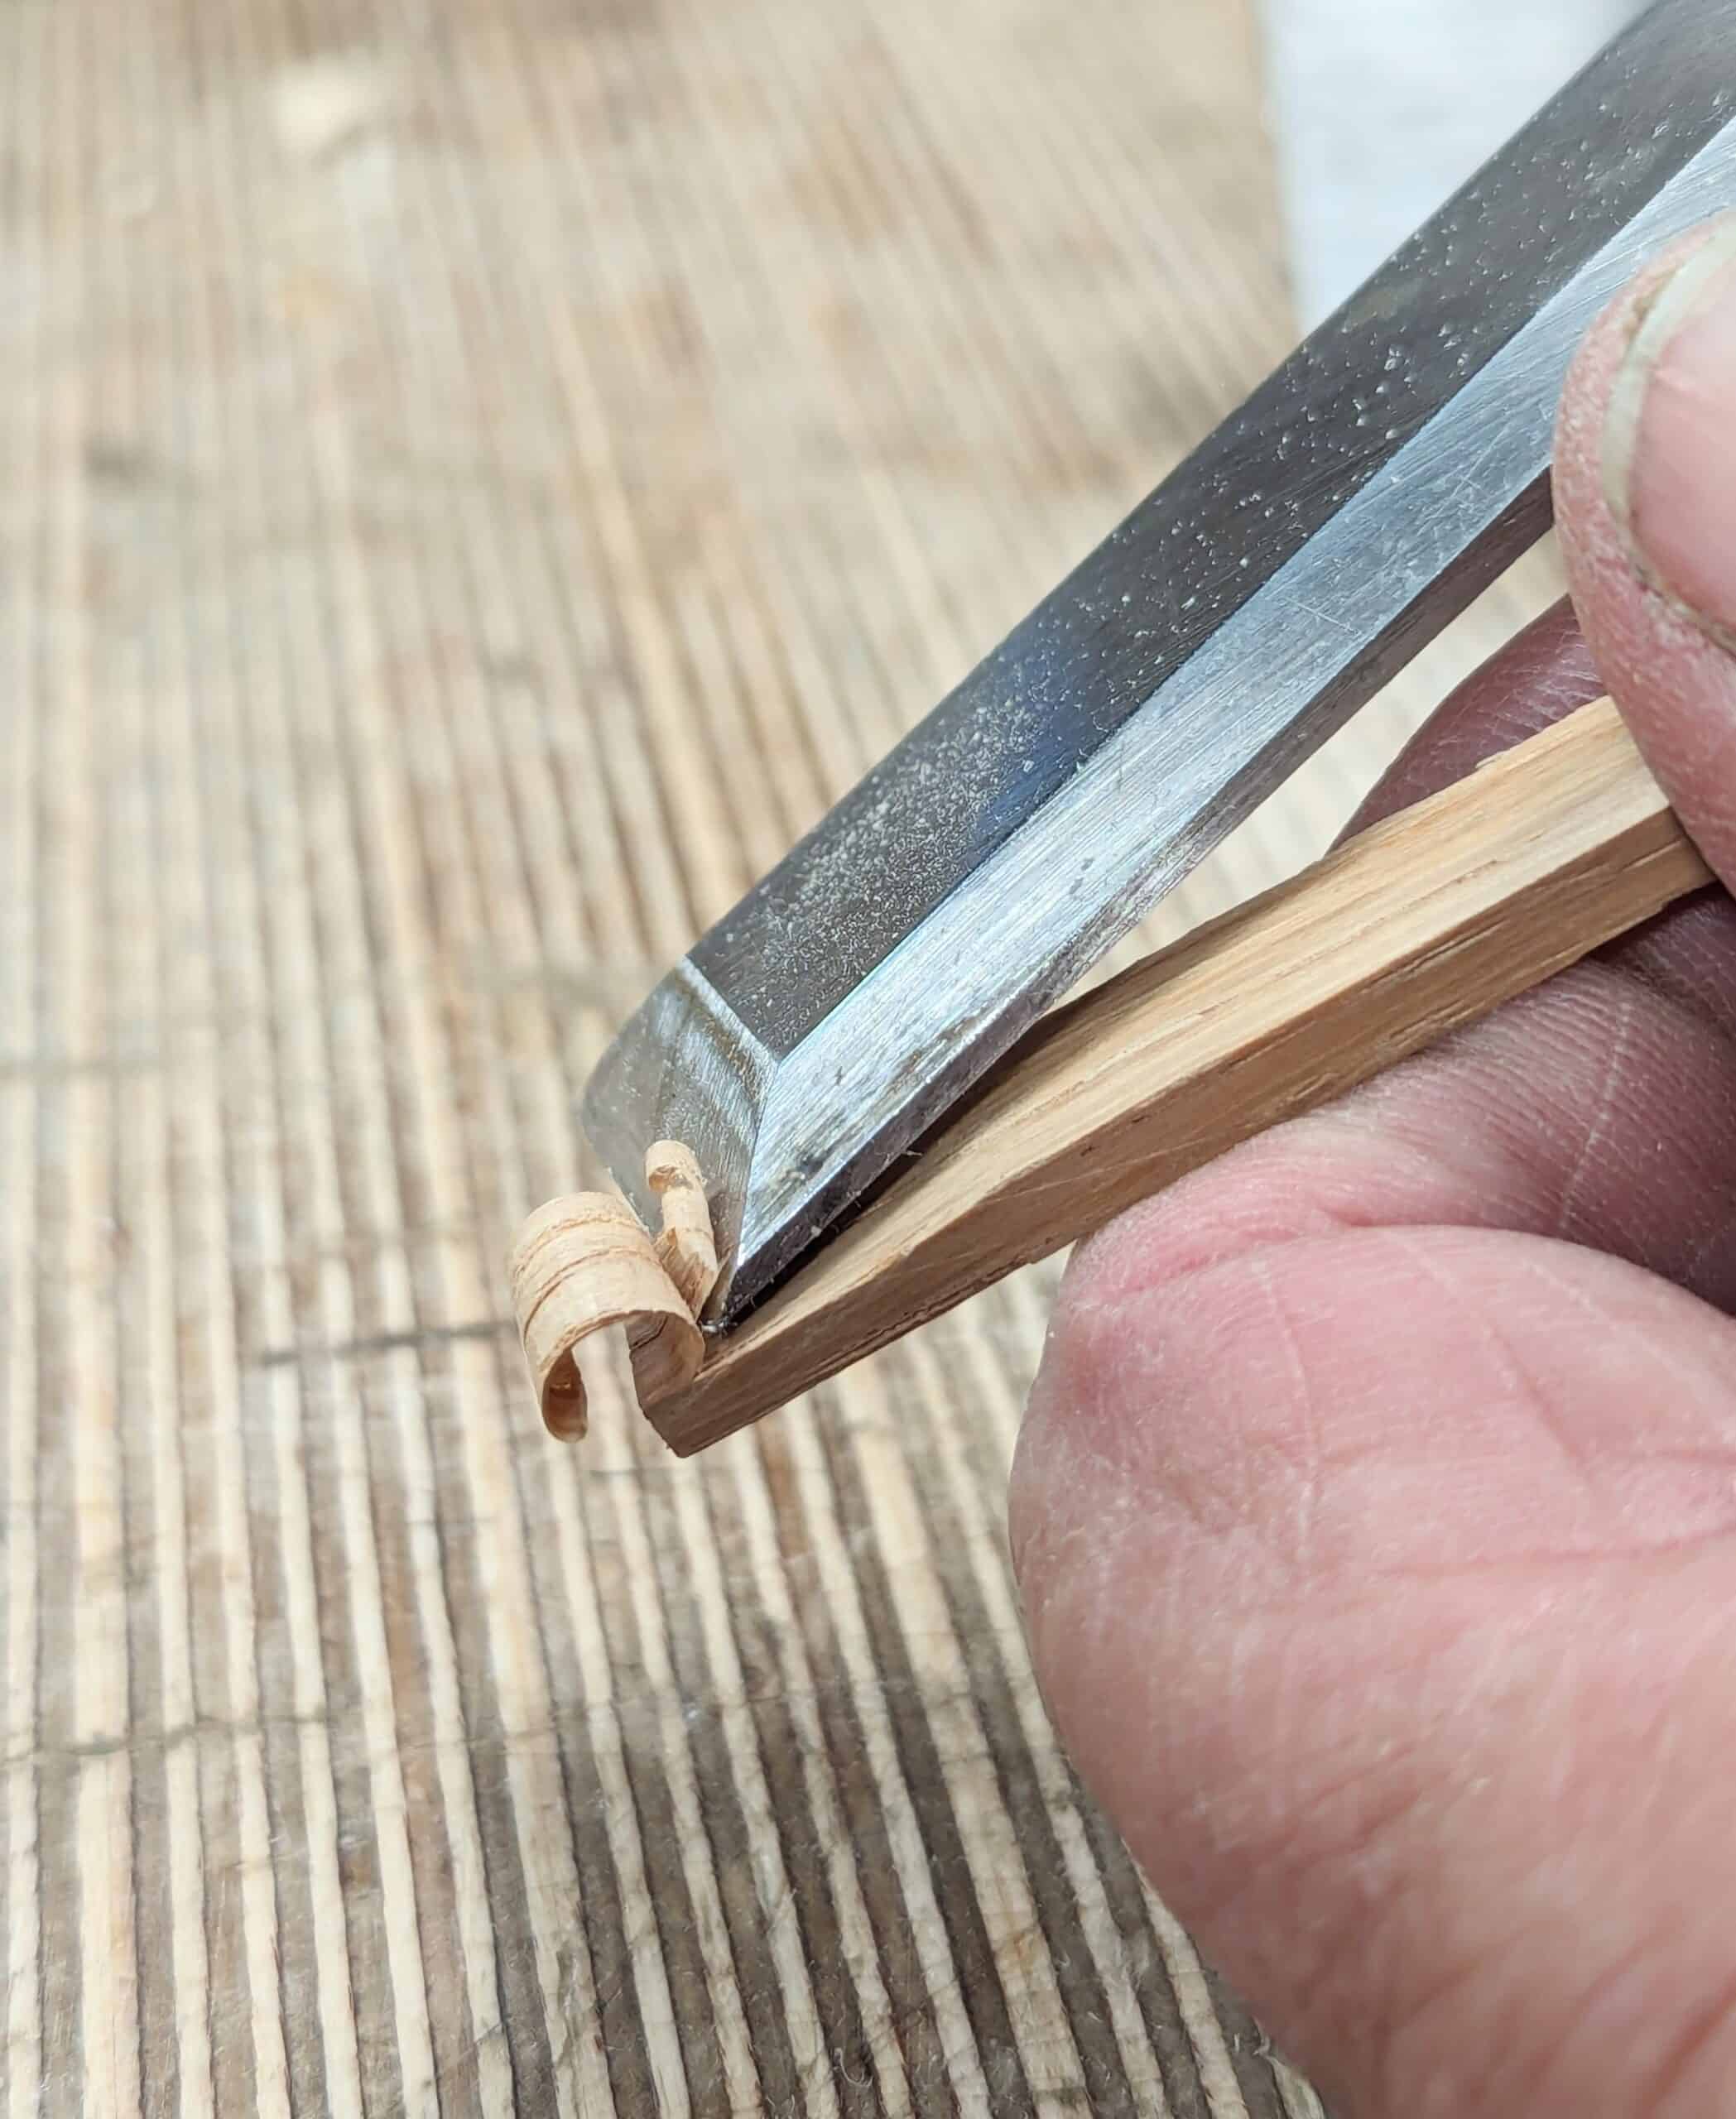
We pull the strip under the cutting corner of the scraper. Here I am pulling with my left hand and supporting the plate with the thumb and fingers of my right. By working the strip towards the outer edge first and where the plate flexes more I can take several successive passes and with each one it will remove shavings.
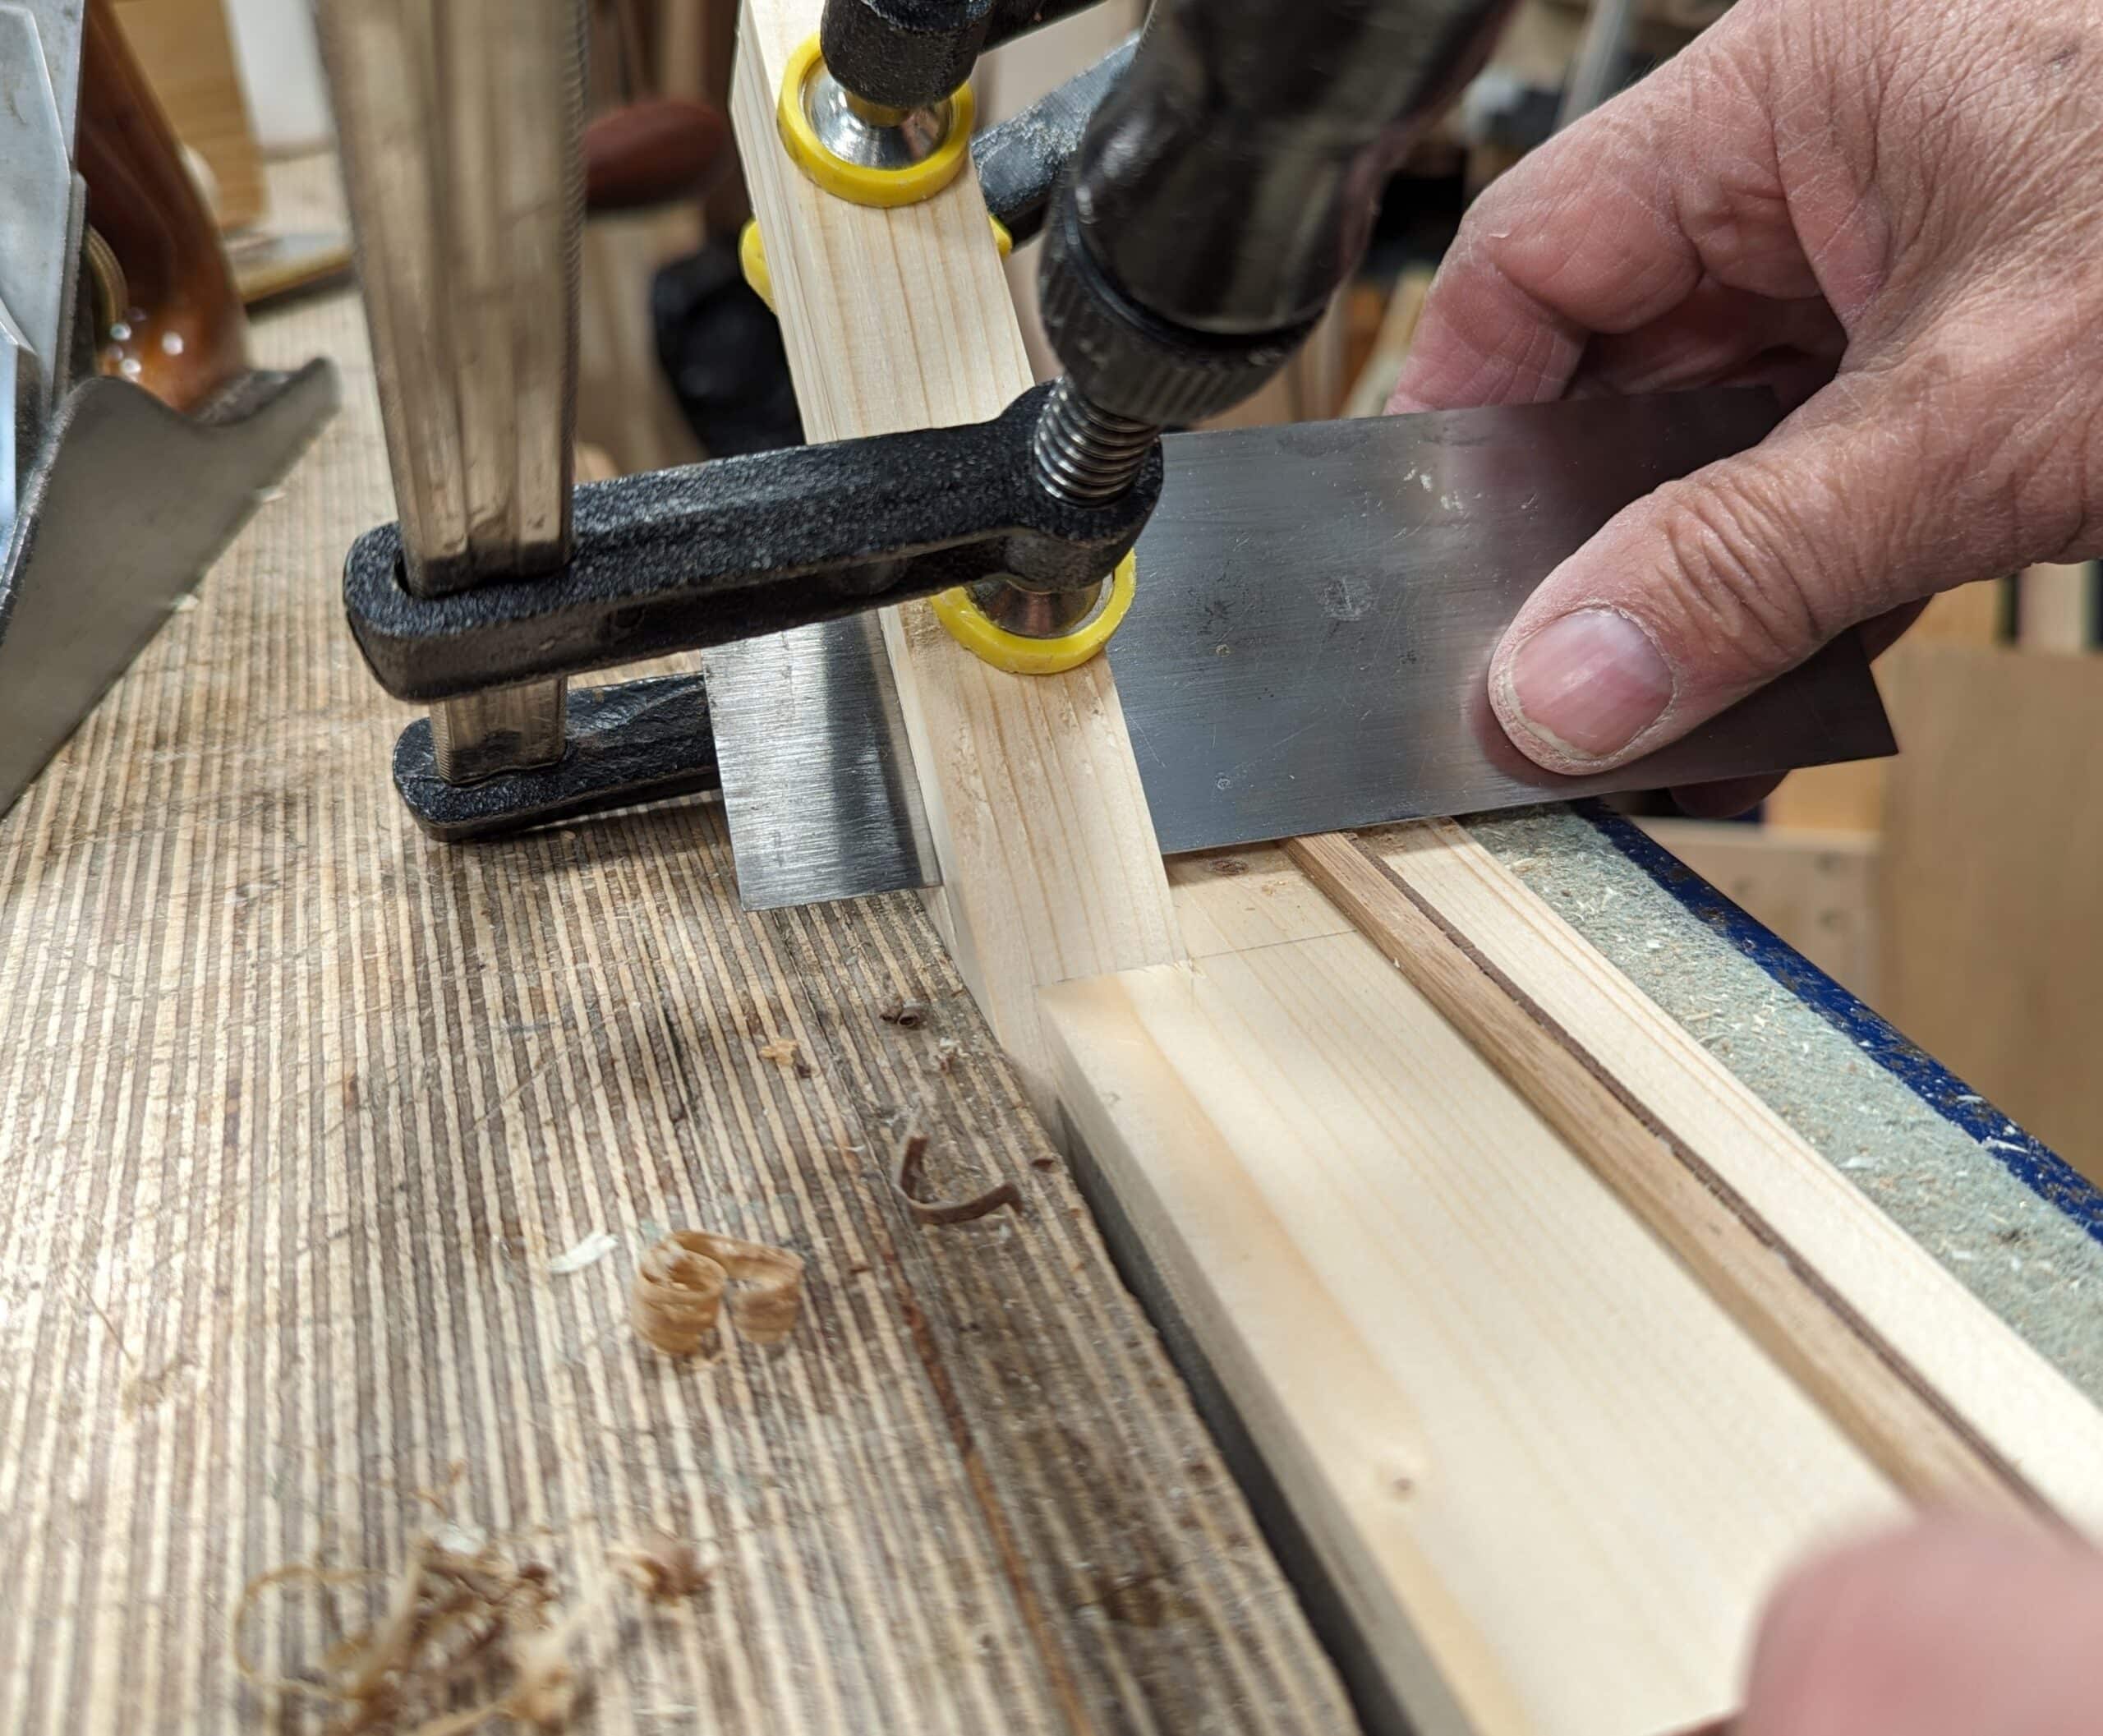
Then I pass the inlay piece into the opening directly adjacent to the wedge where there is zero flex. Previous pulls through the gap were less rigid and the scraper bent just a little under the pulls. Pulling the inlay piece through but tight to the wedge will be the last pull and this will give you a perfectly thicknessed size.
Now for the jig.
I just cobbled this quick one together from a section of spruce stud and it works just fine. If you want a long term version then use something like beech or maple but any hardwood will do. That said, the stud woiod will do it perfectly well too.
The wedge best used for retention is a 1:7 ratio but it can be any angle you like because retention is not reliant on the wedging action but the vise you install the assembled unit into. The wedge shape is more used as a stop-and-secure element to help as you install the unit in the vise rather than a friction fit hold. Also. the parallel saw kerf to house the card scraper in can go past the support surface. That way you can adjust to anythinness you want and you can incrementally change the settings simply by loosening the clamps. That said, once the scraper is installed, and when you have used it to thickness your strip, you can either tap the end of the wedge for an extra shaving or two or you can move the strip you are thicknessing to the outer edge and press the scraper plate lightly with your fingers and pull the strip at the same time. Press the plate more or less or repeatedely for thinning further.
My base platform is around 28mm (1 1/8″) thick, 20cm (8″) long and 64 (2 1/2″) wide. The wedge is 17cm (7″) long . The start width is 25mm (1″) and thickness is 22mm (7/8″).
First make the wedge according to the pictures. It takes two minutes and no more.
`This face is 25mm (1″) wide.
Saw and then plane true aftewards.
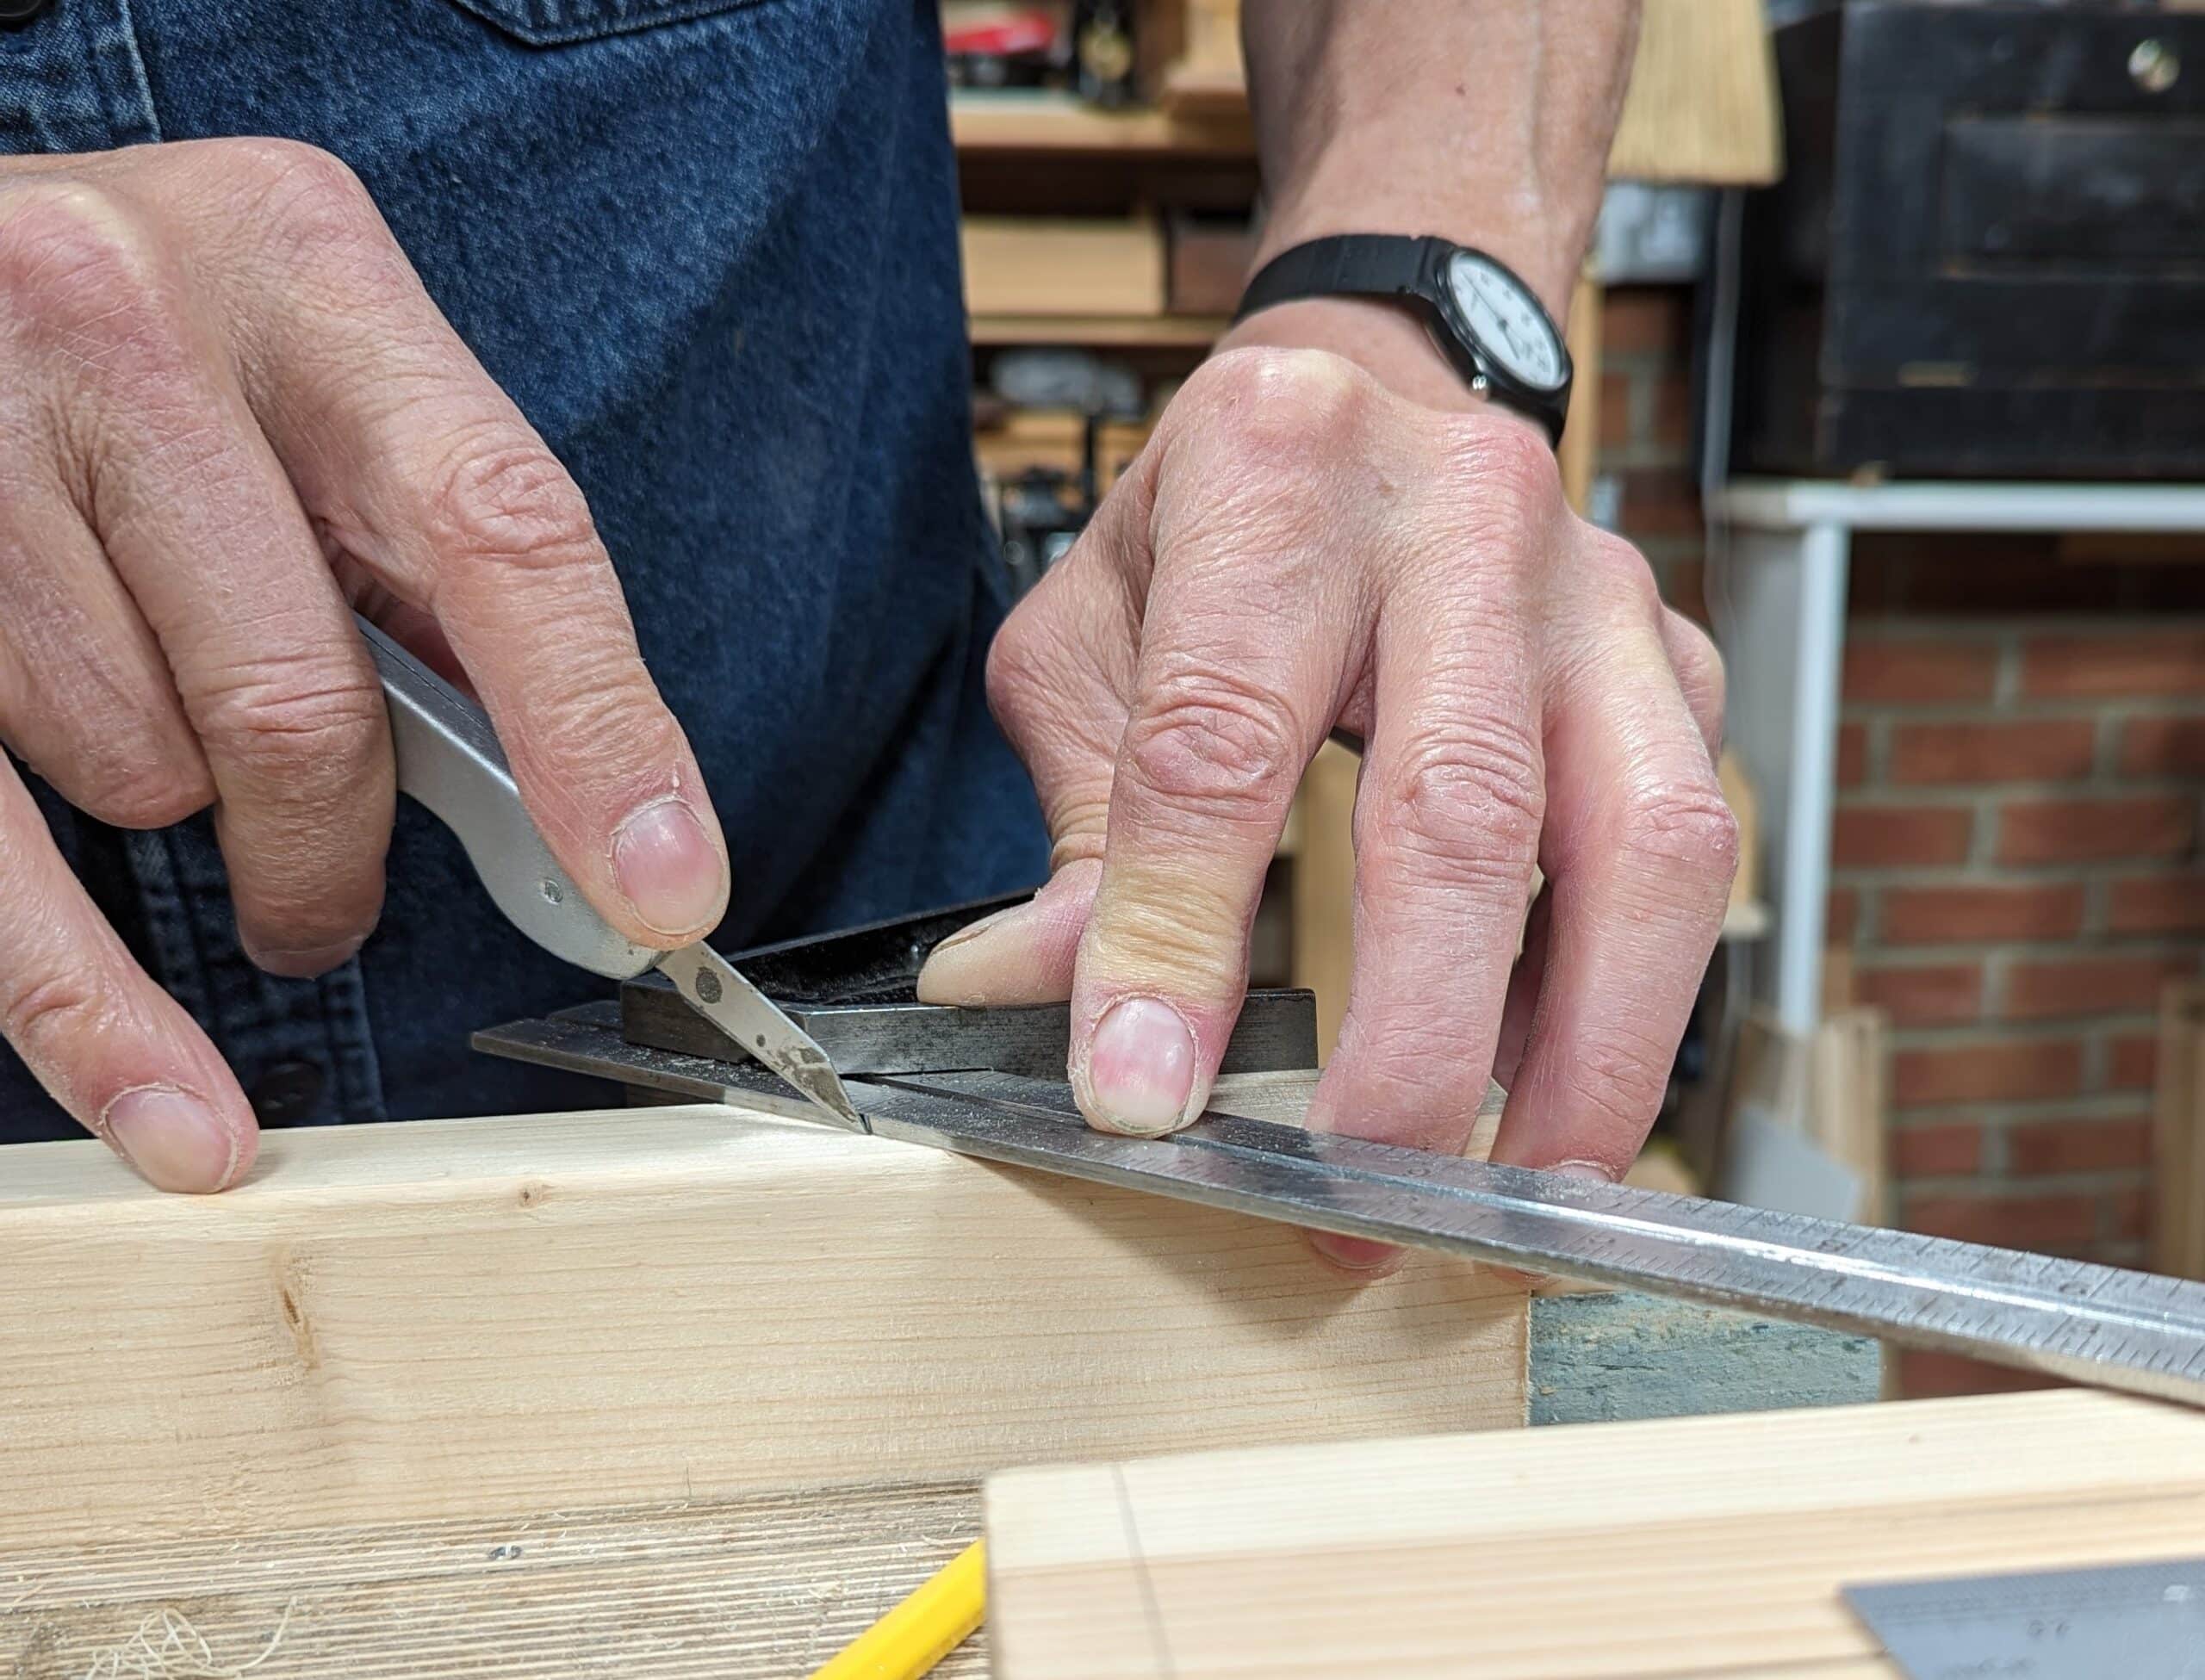
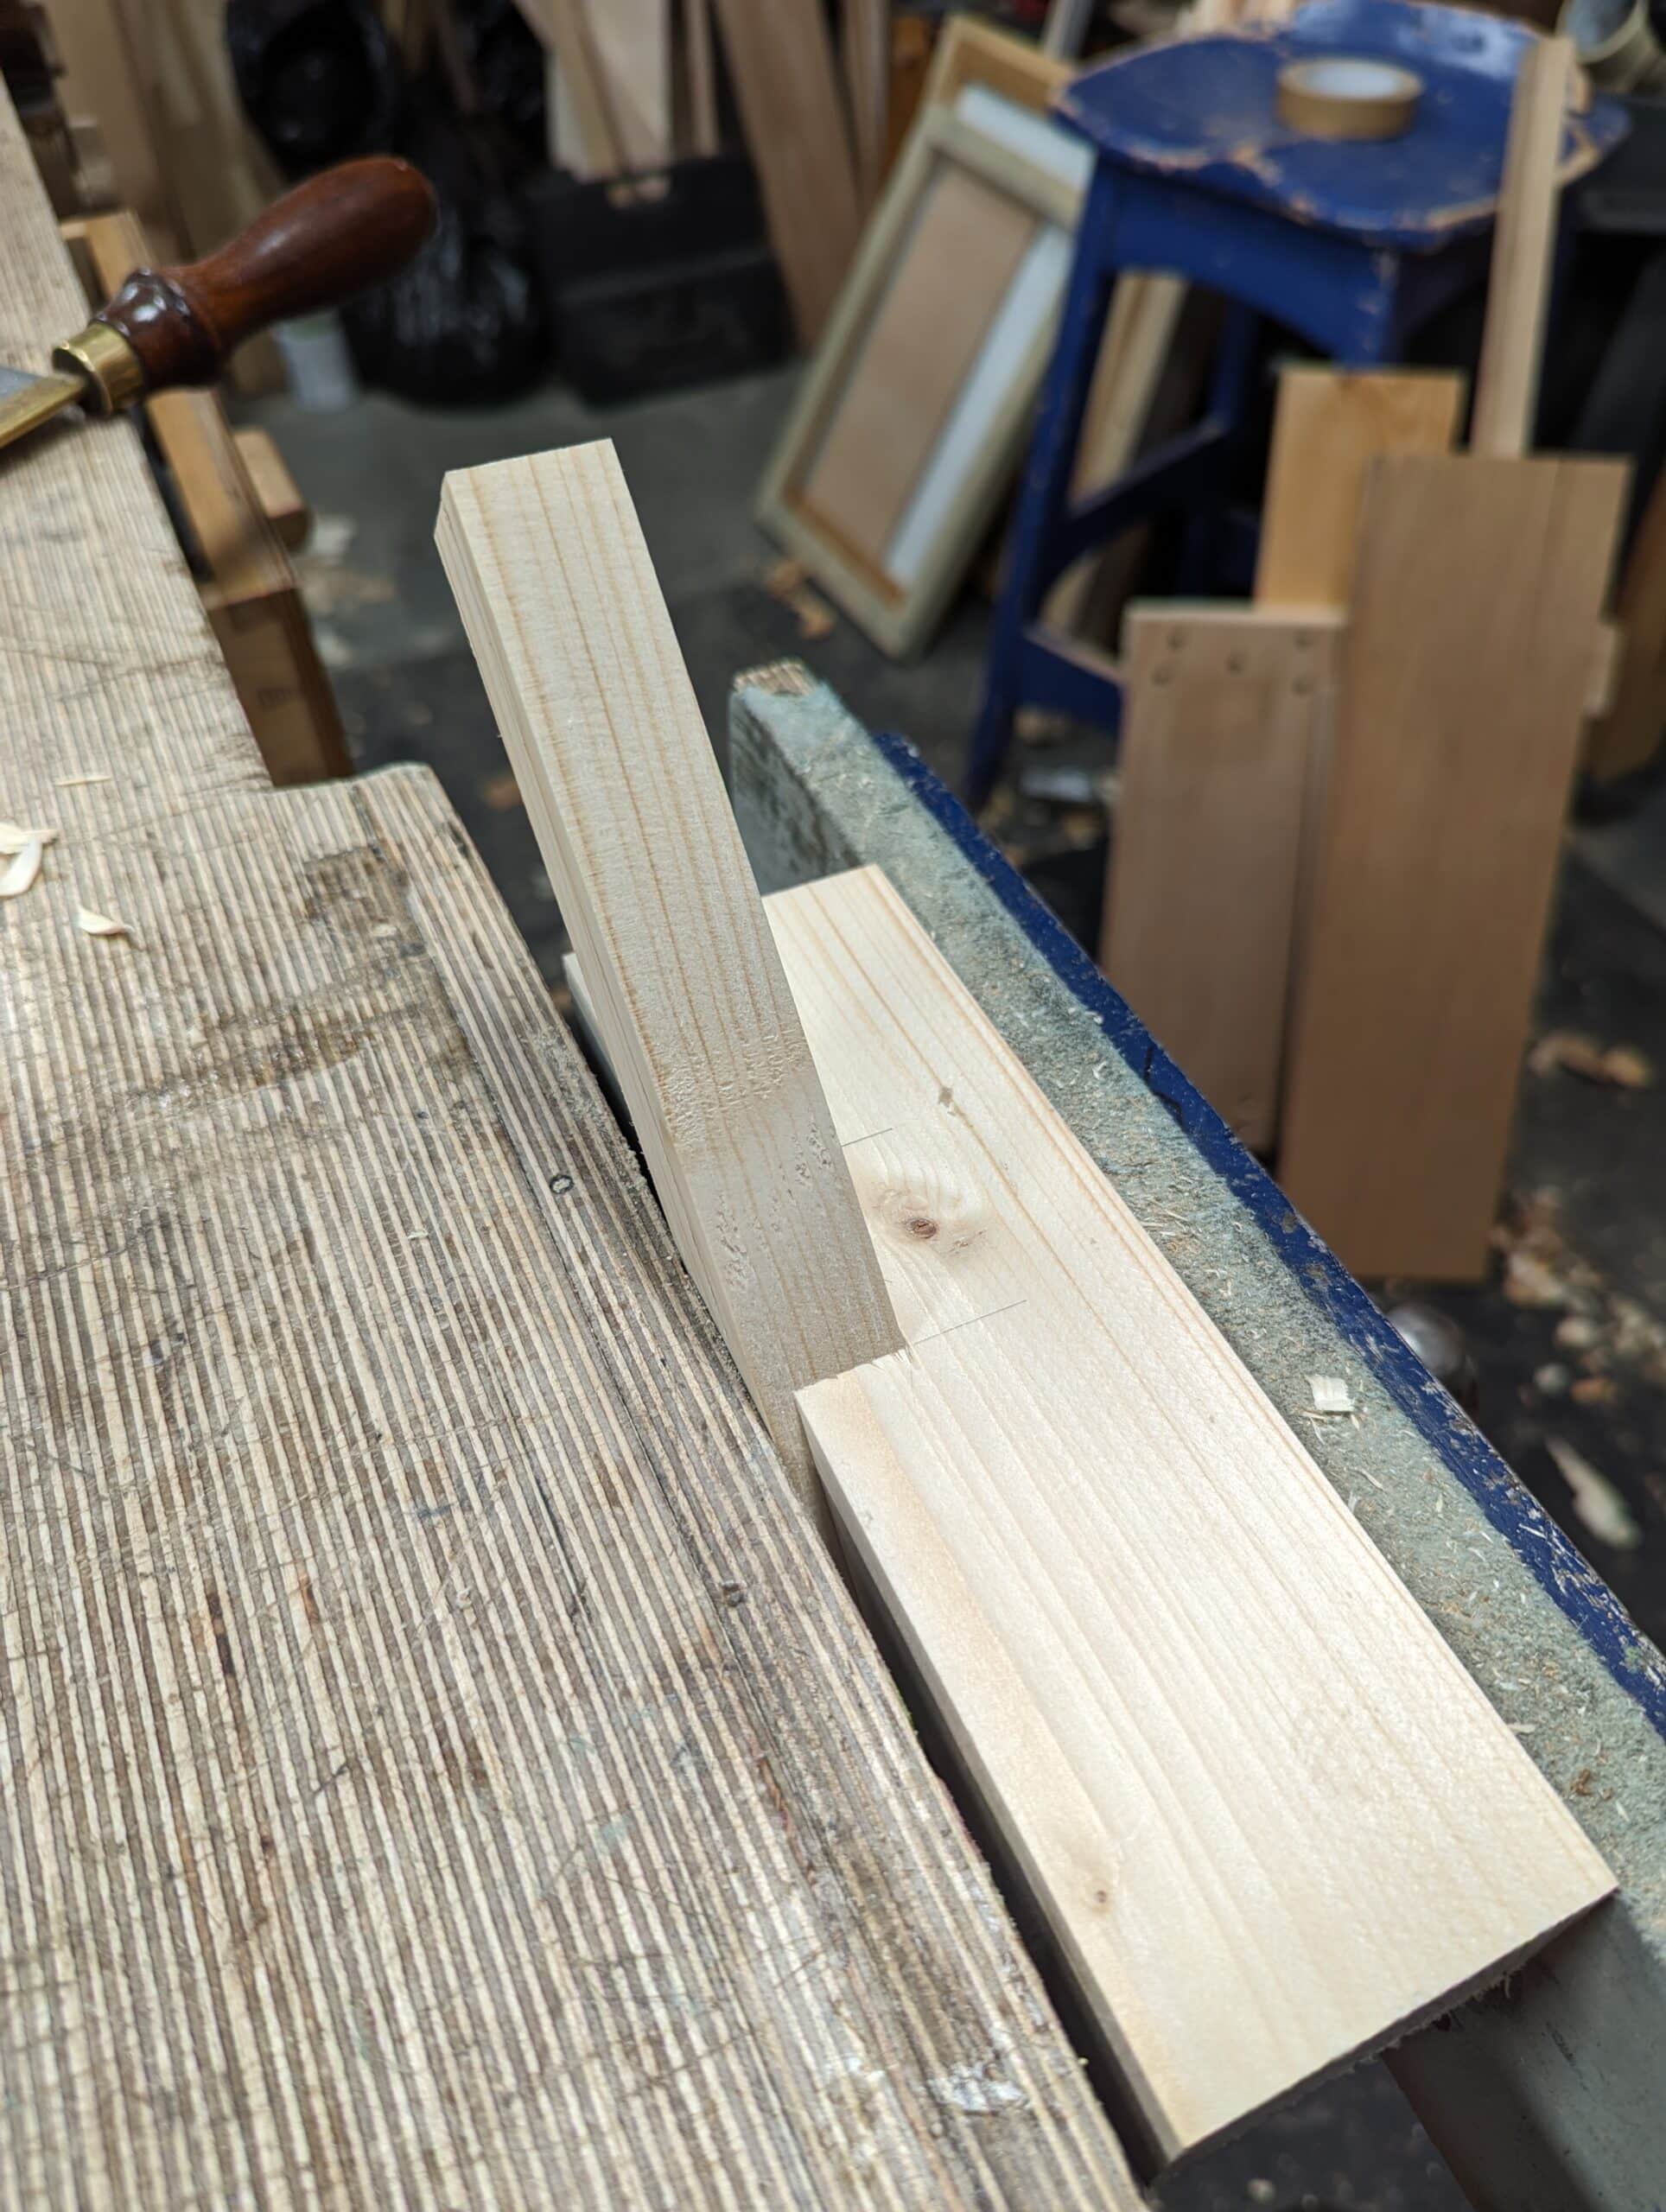
Make a knifewall at 45º in the side edge of the base platform piece somewhere near the middle.
Place the wedge against the knifewall and mark the second, angled line onto the edge of the base platform piece.
Square a guideline to saw to on either side of the edge onto both the large flat faces, top and underside.
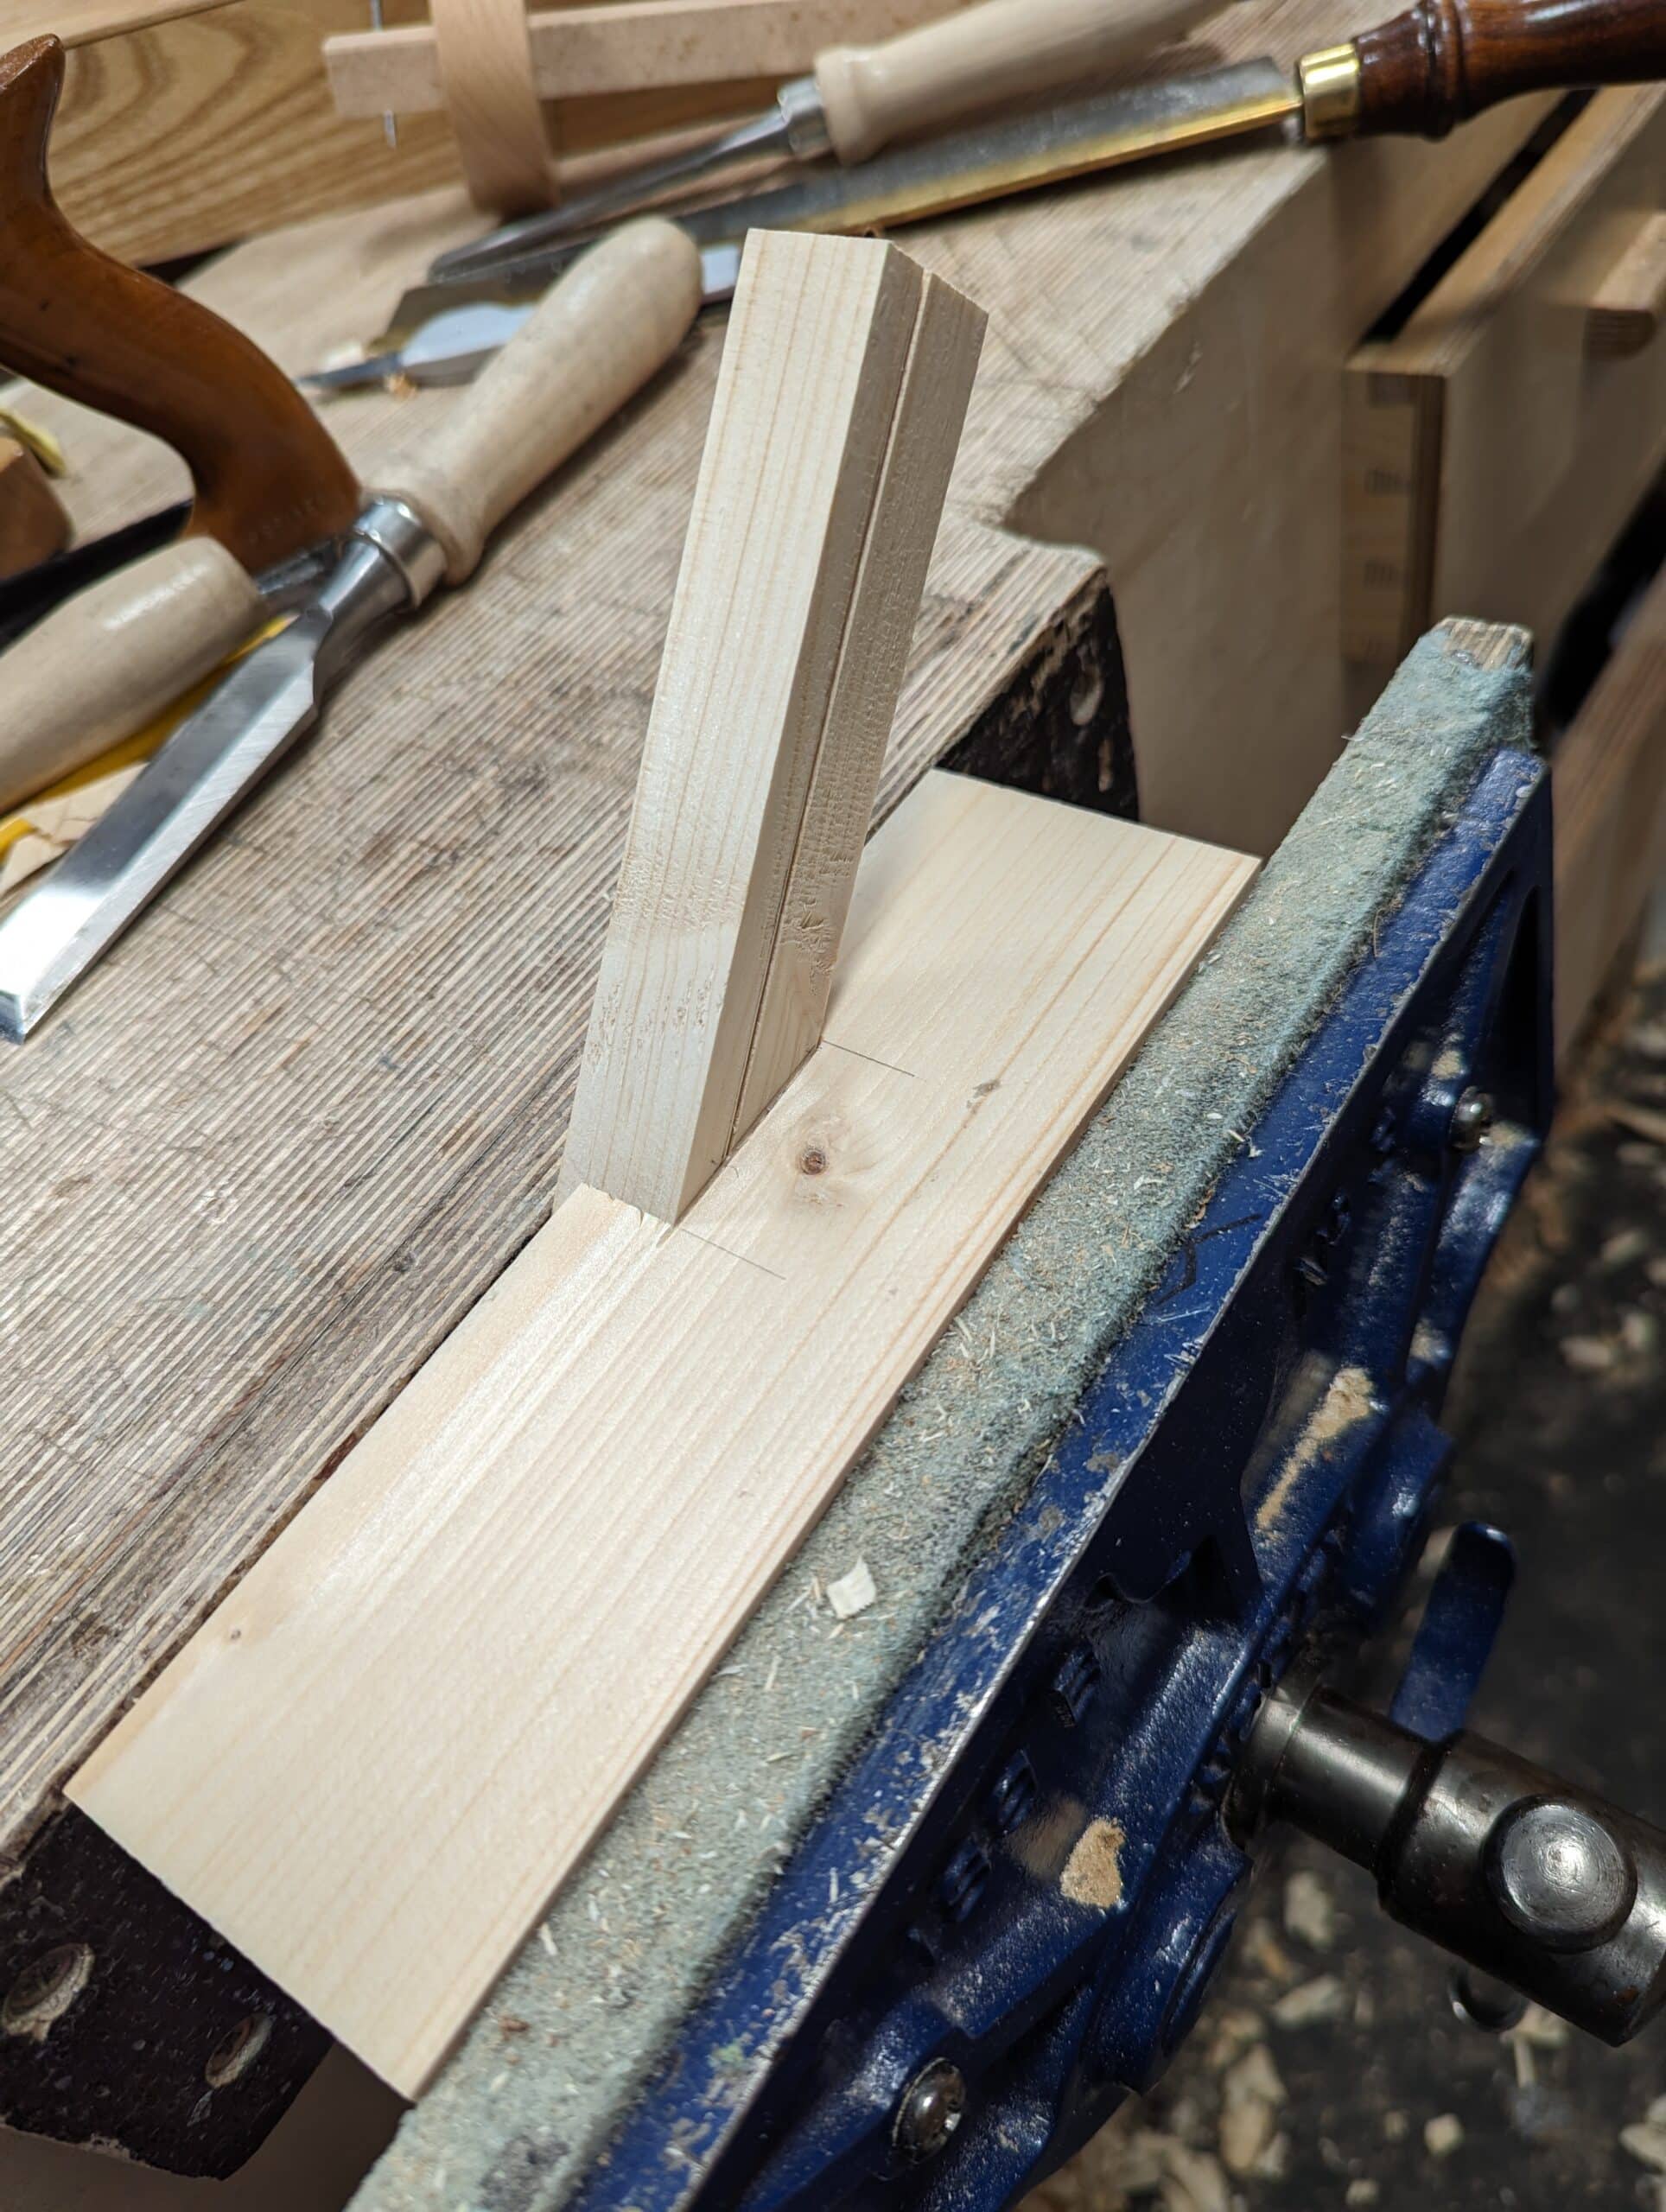
Set a gauge or a combination square to a depth of 22mm (7/8″) and mark both wide faces for depth of cut
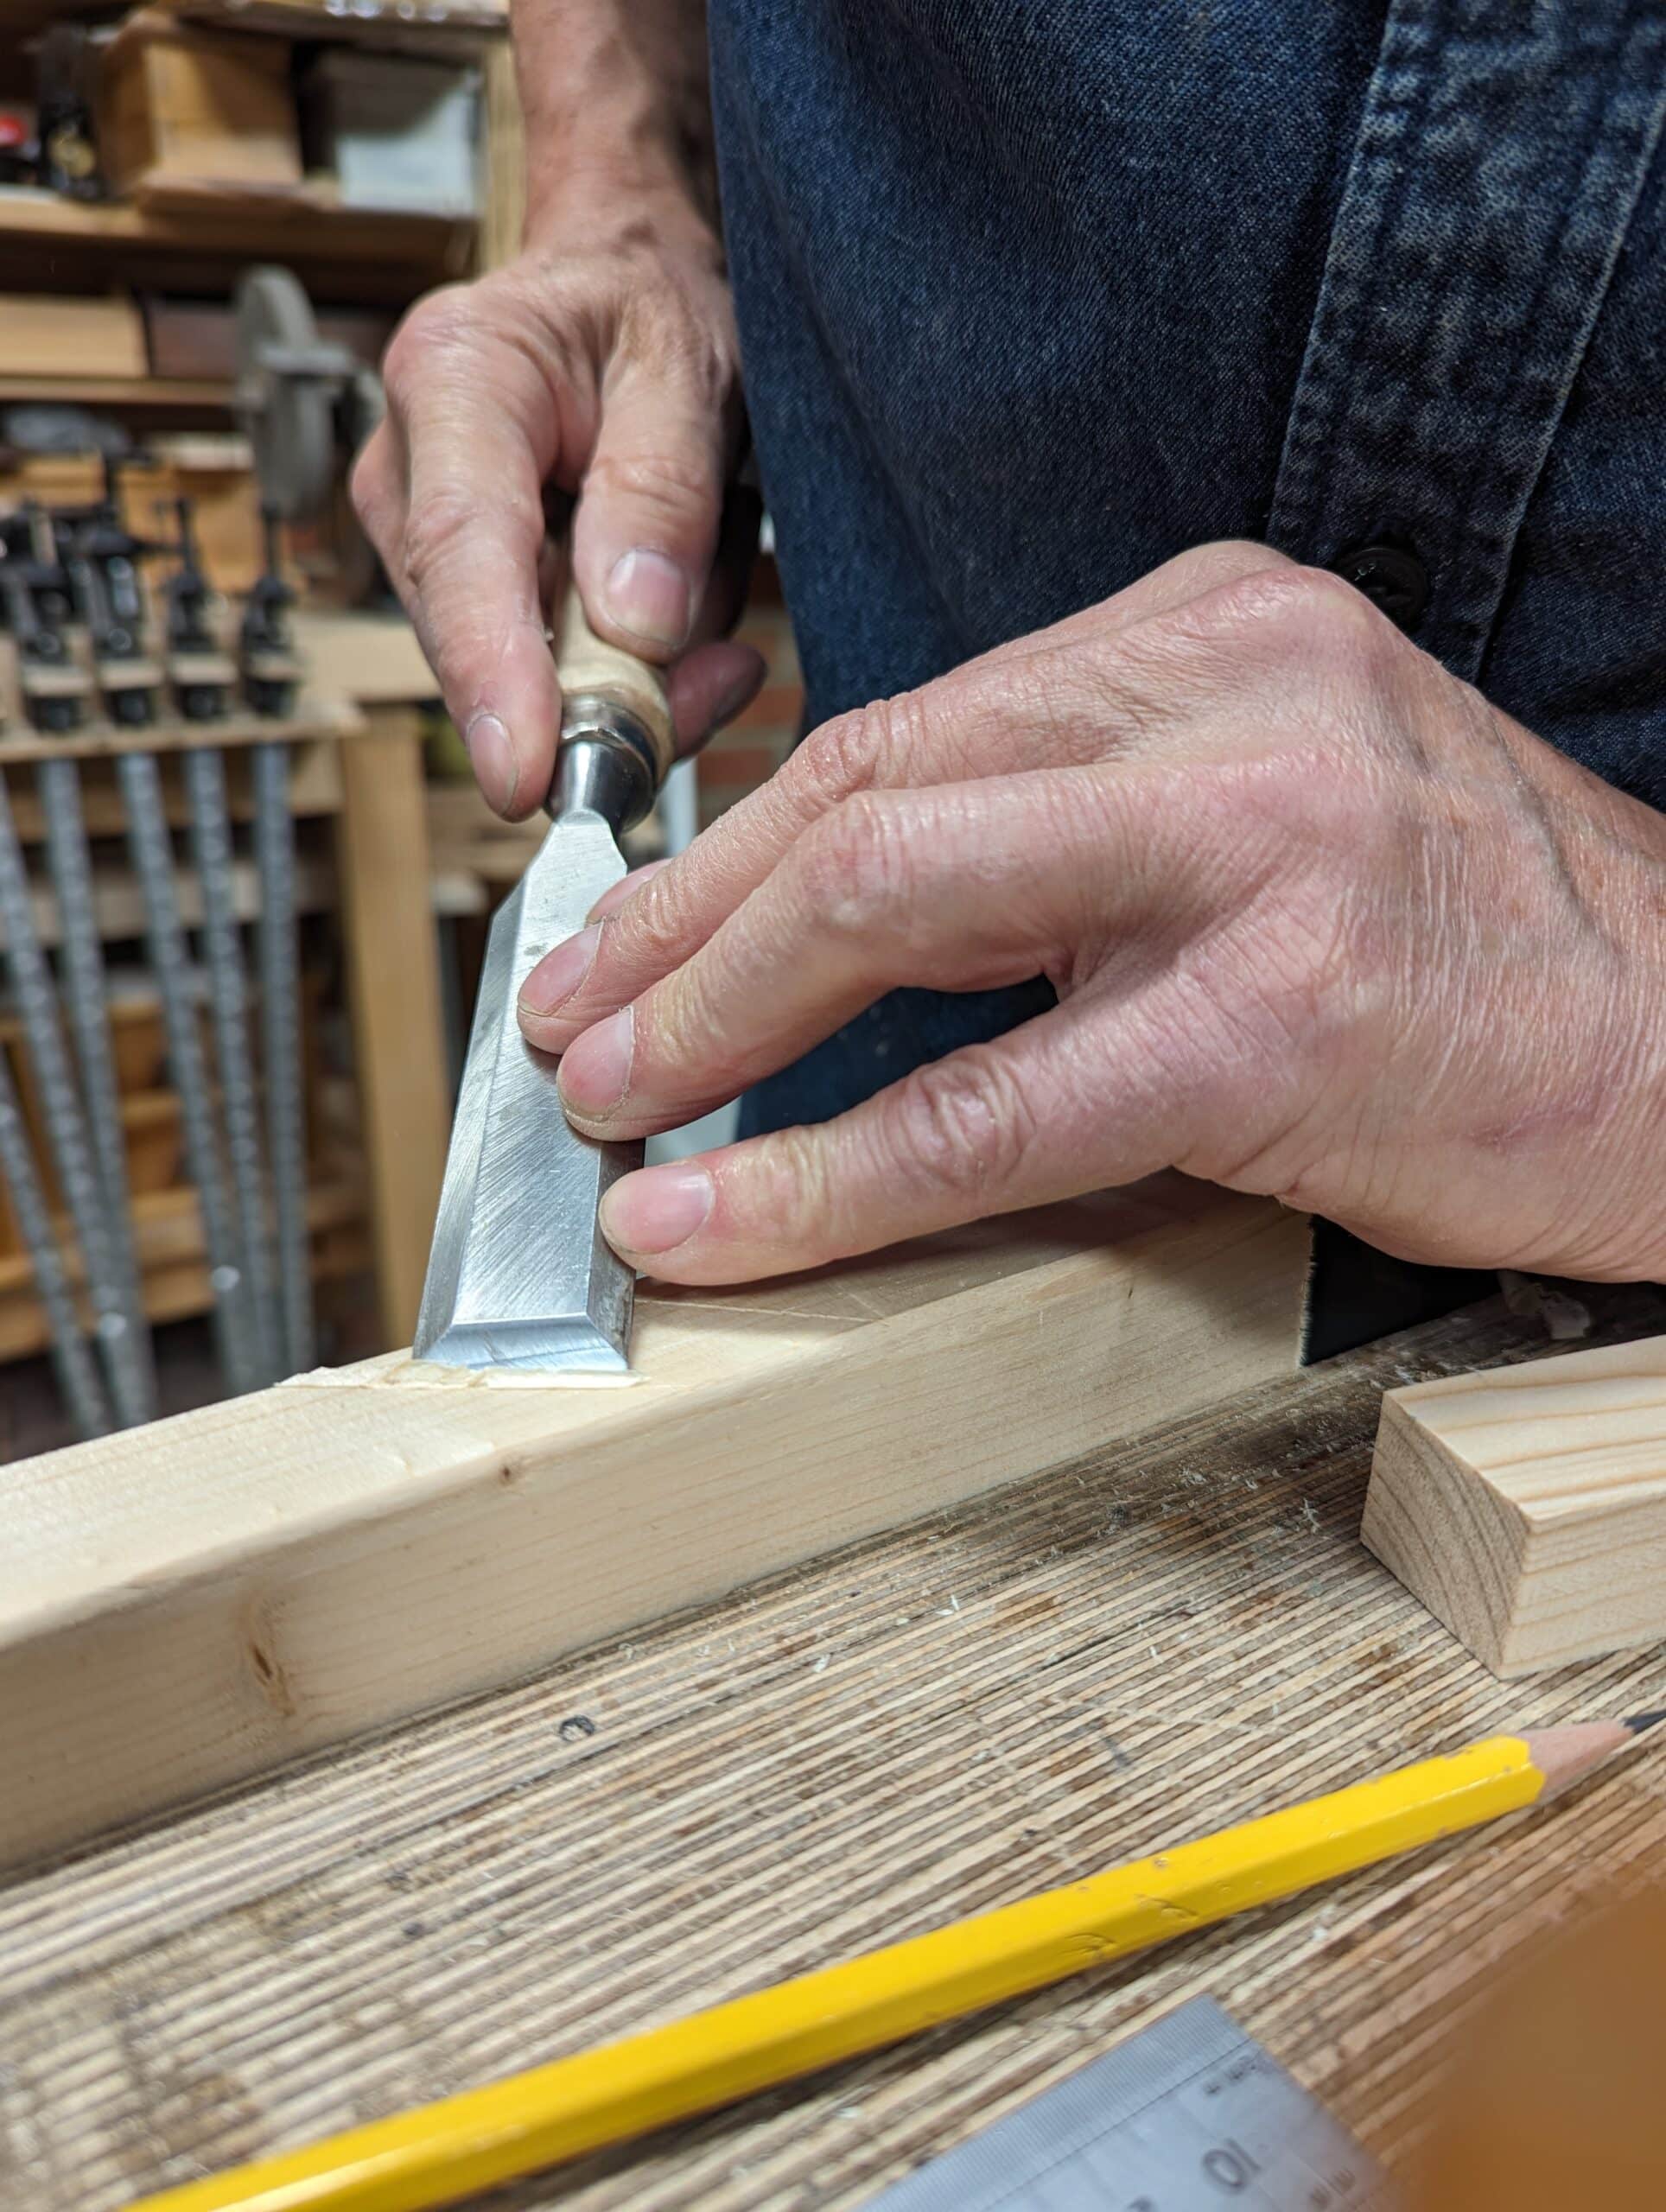
Deepen the knifewalls with a wide chisel to set the saw down into.
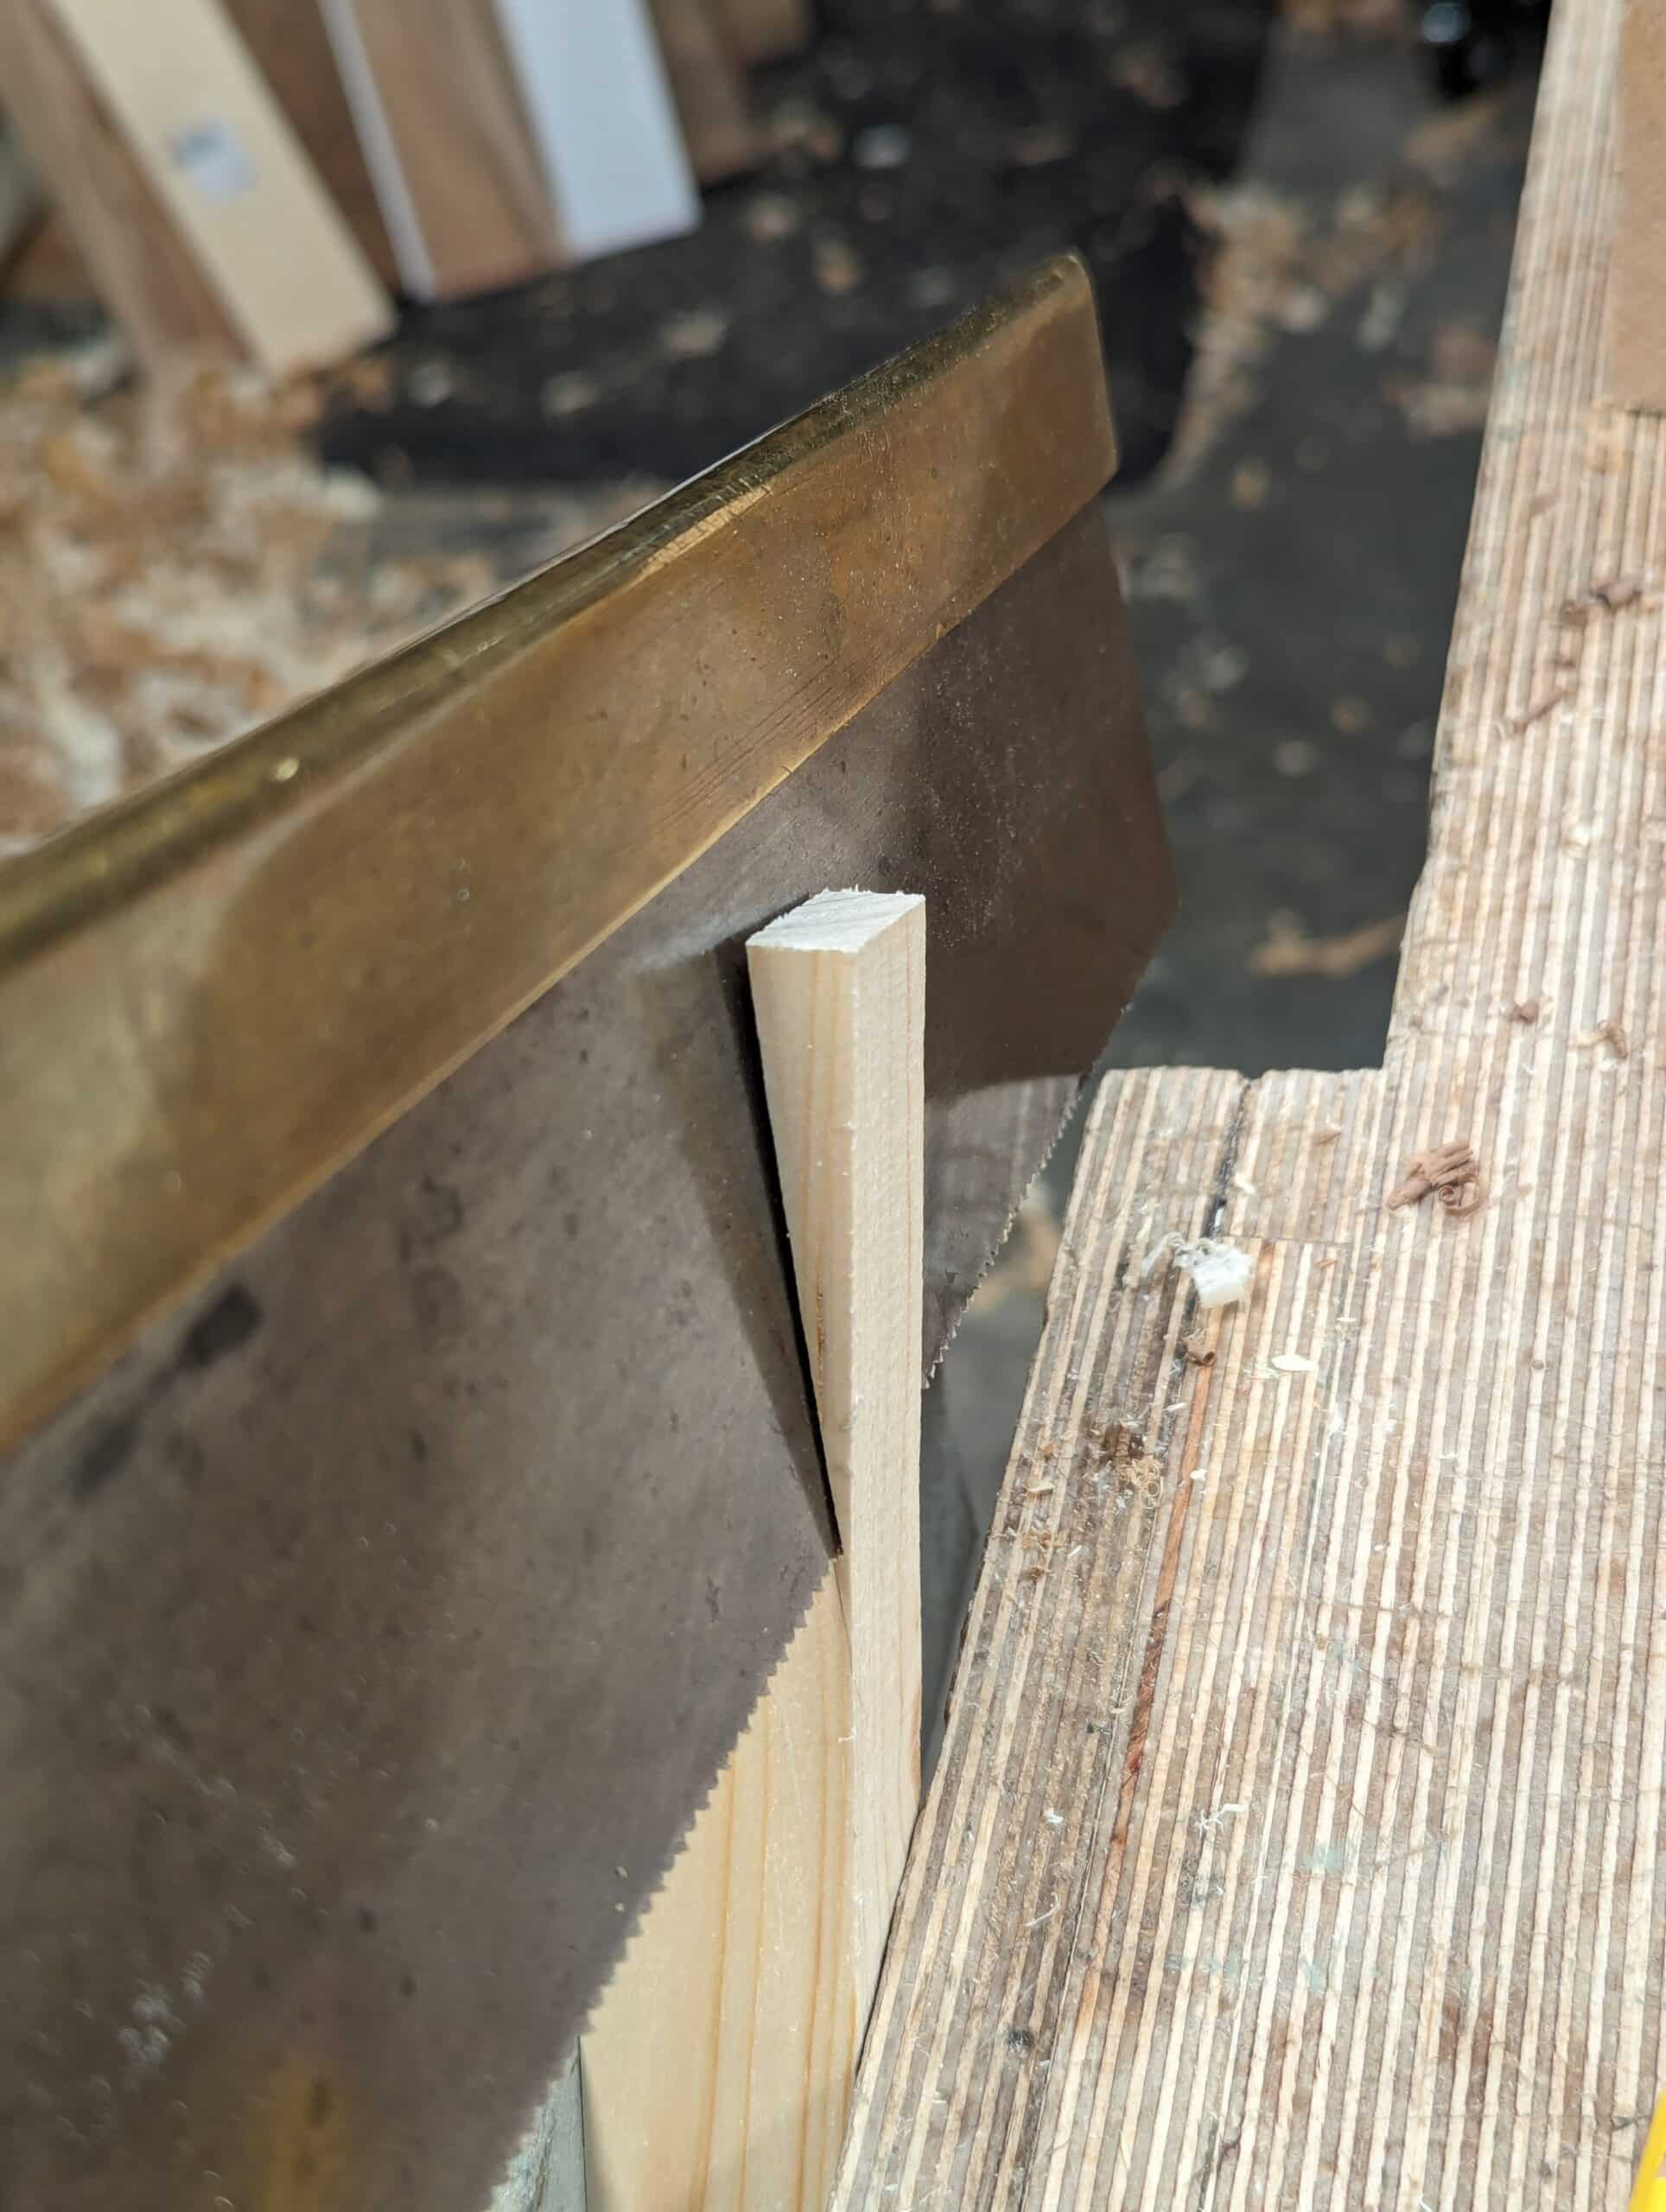
Saw down the knifewall to the depth line.

Remove the waste in between with a chisel and route out the final fibres level with a hand router plane or work to the two gauge lines from both sides with a chisel.

Drive the wedge into the recess and mark the position of the platform onto the wedge (as below) . . .
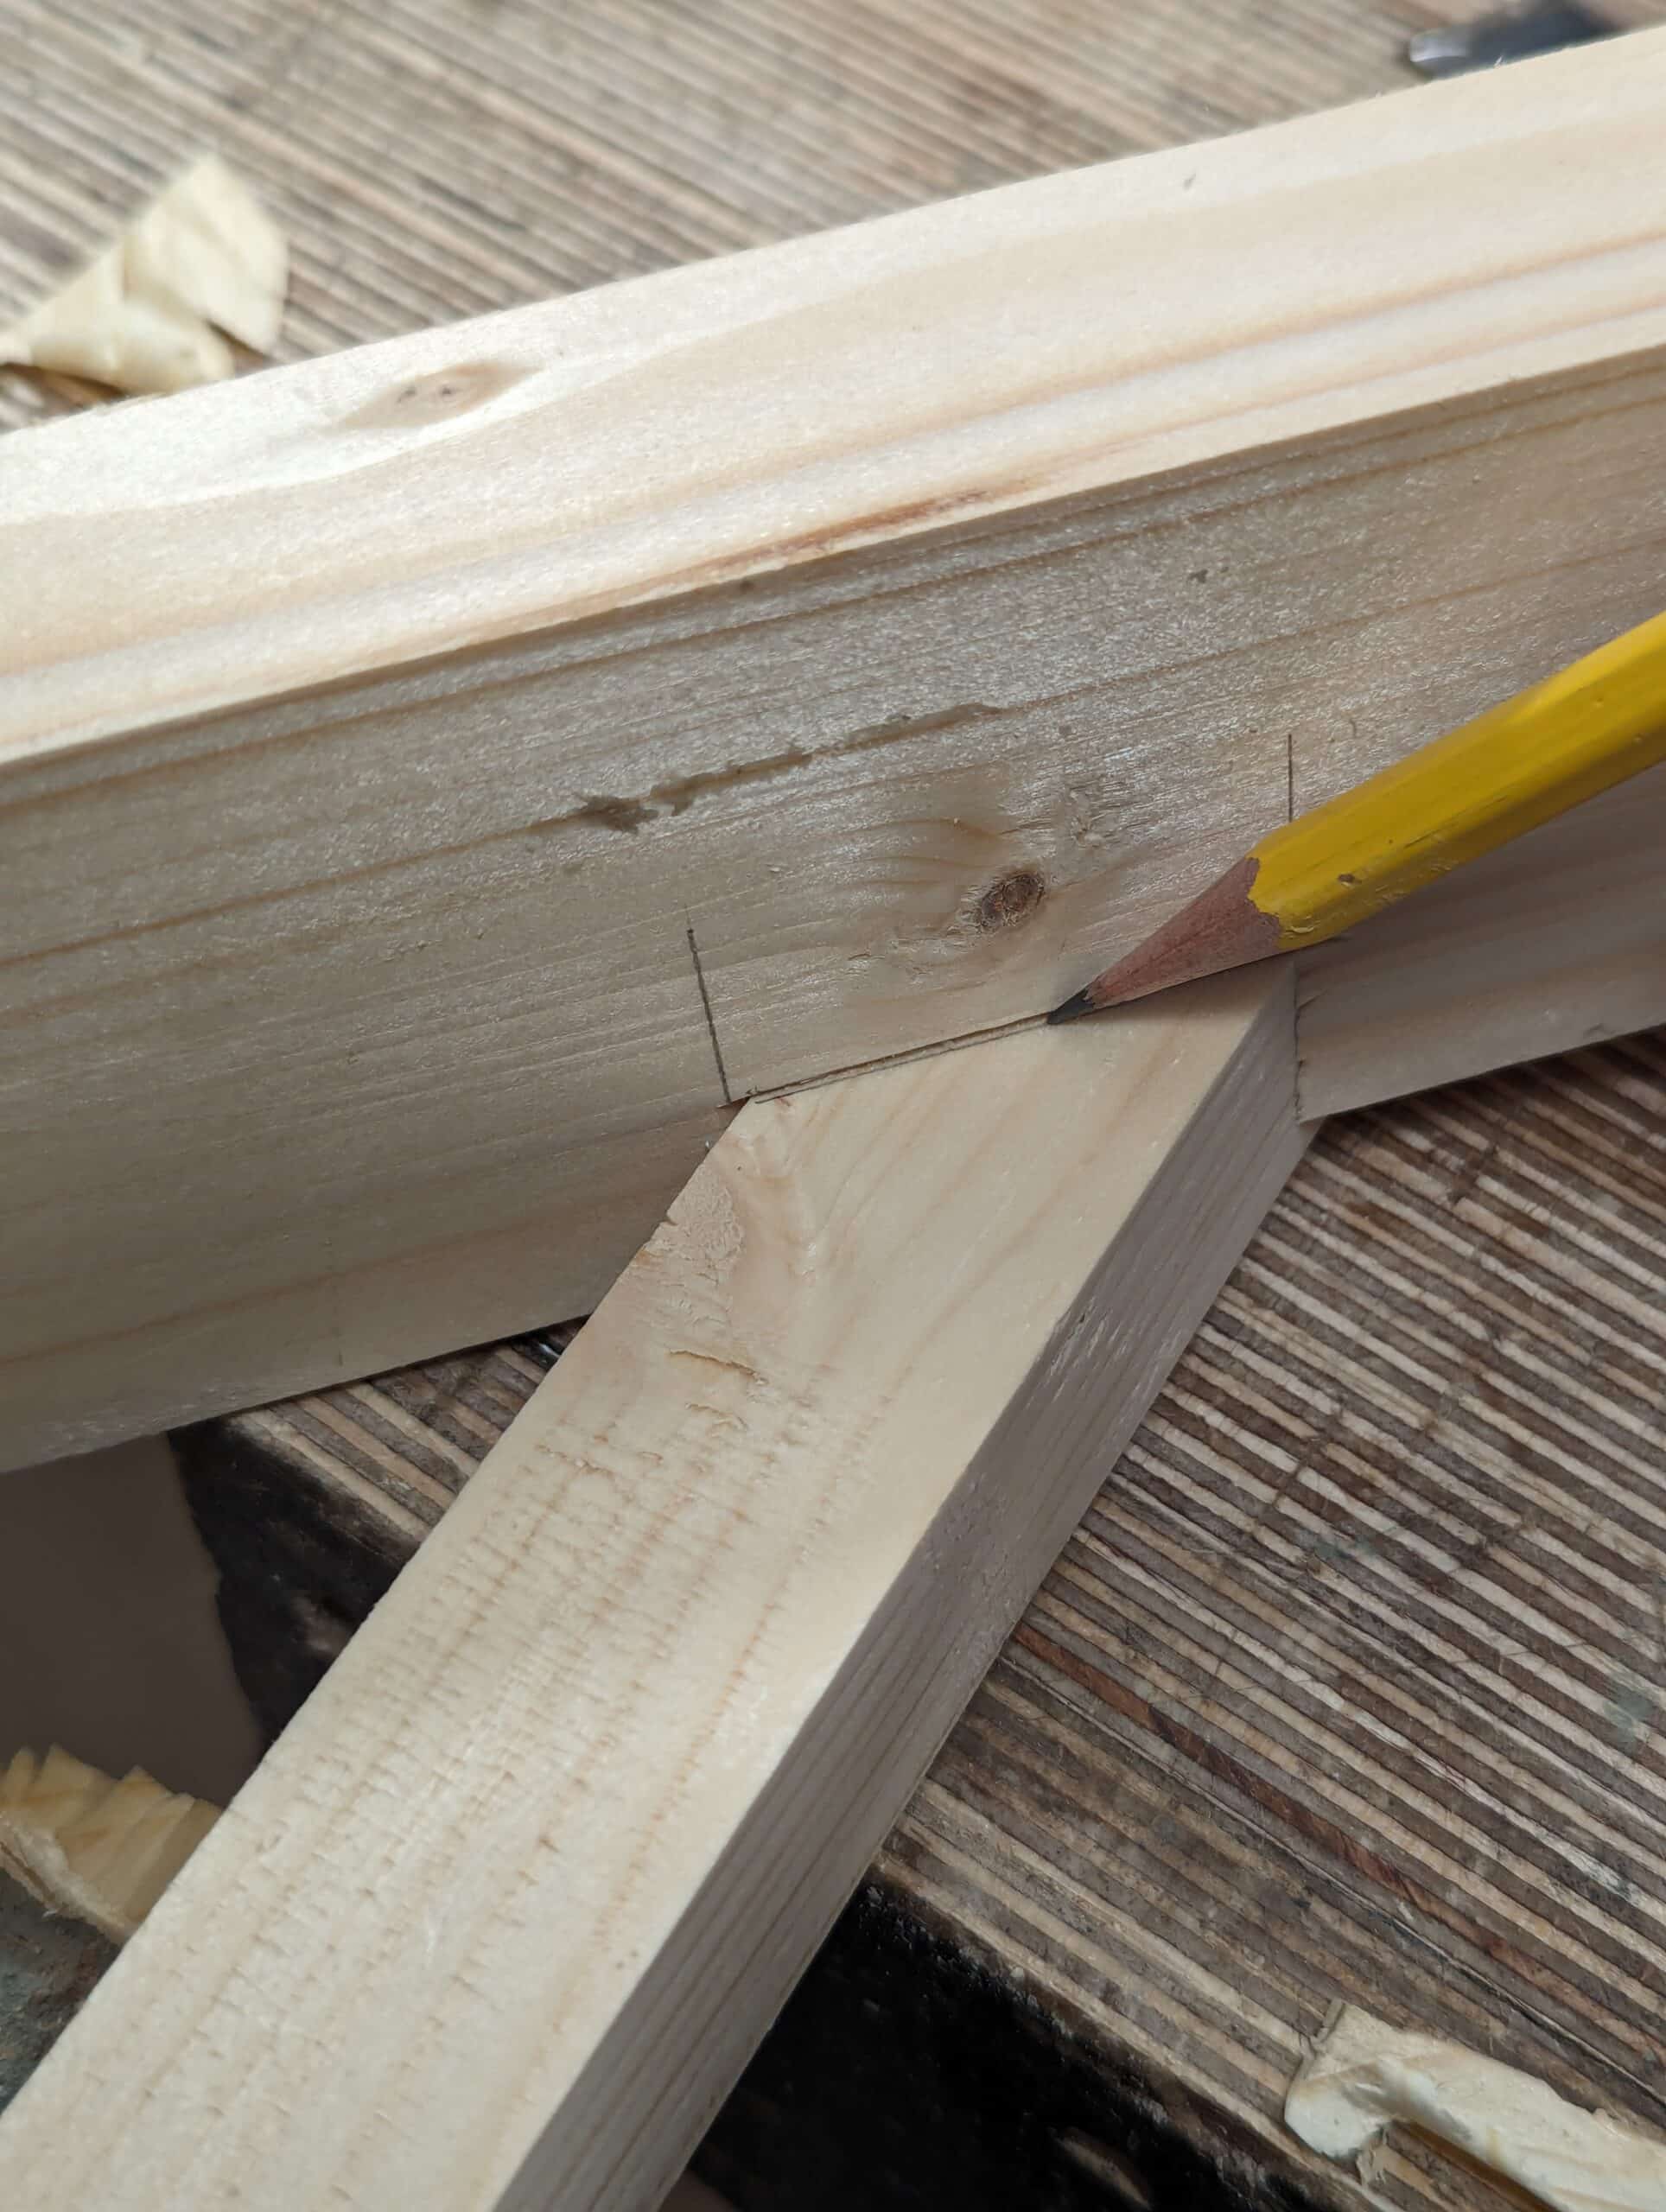
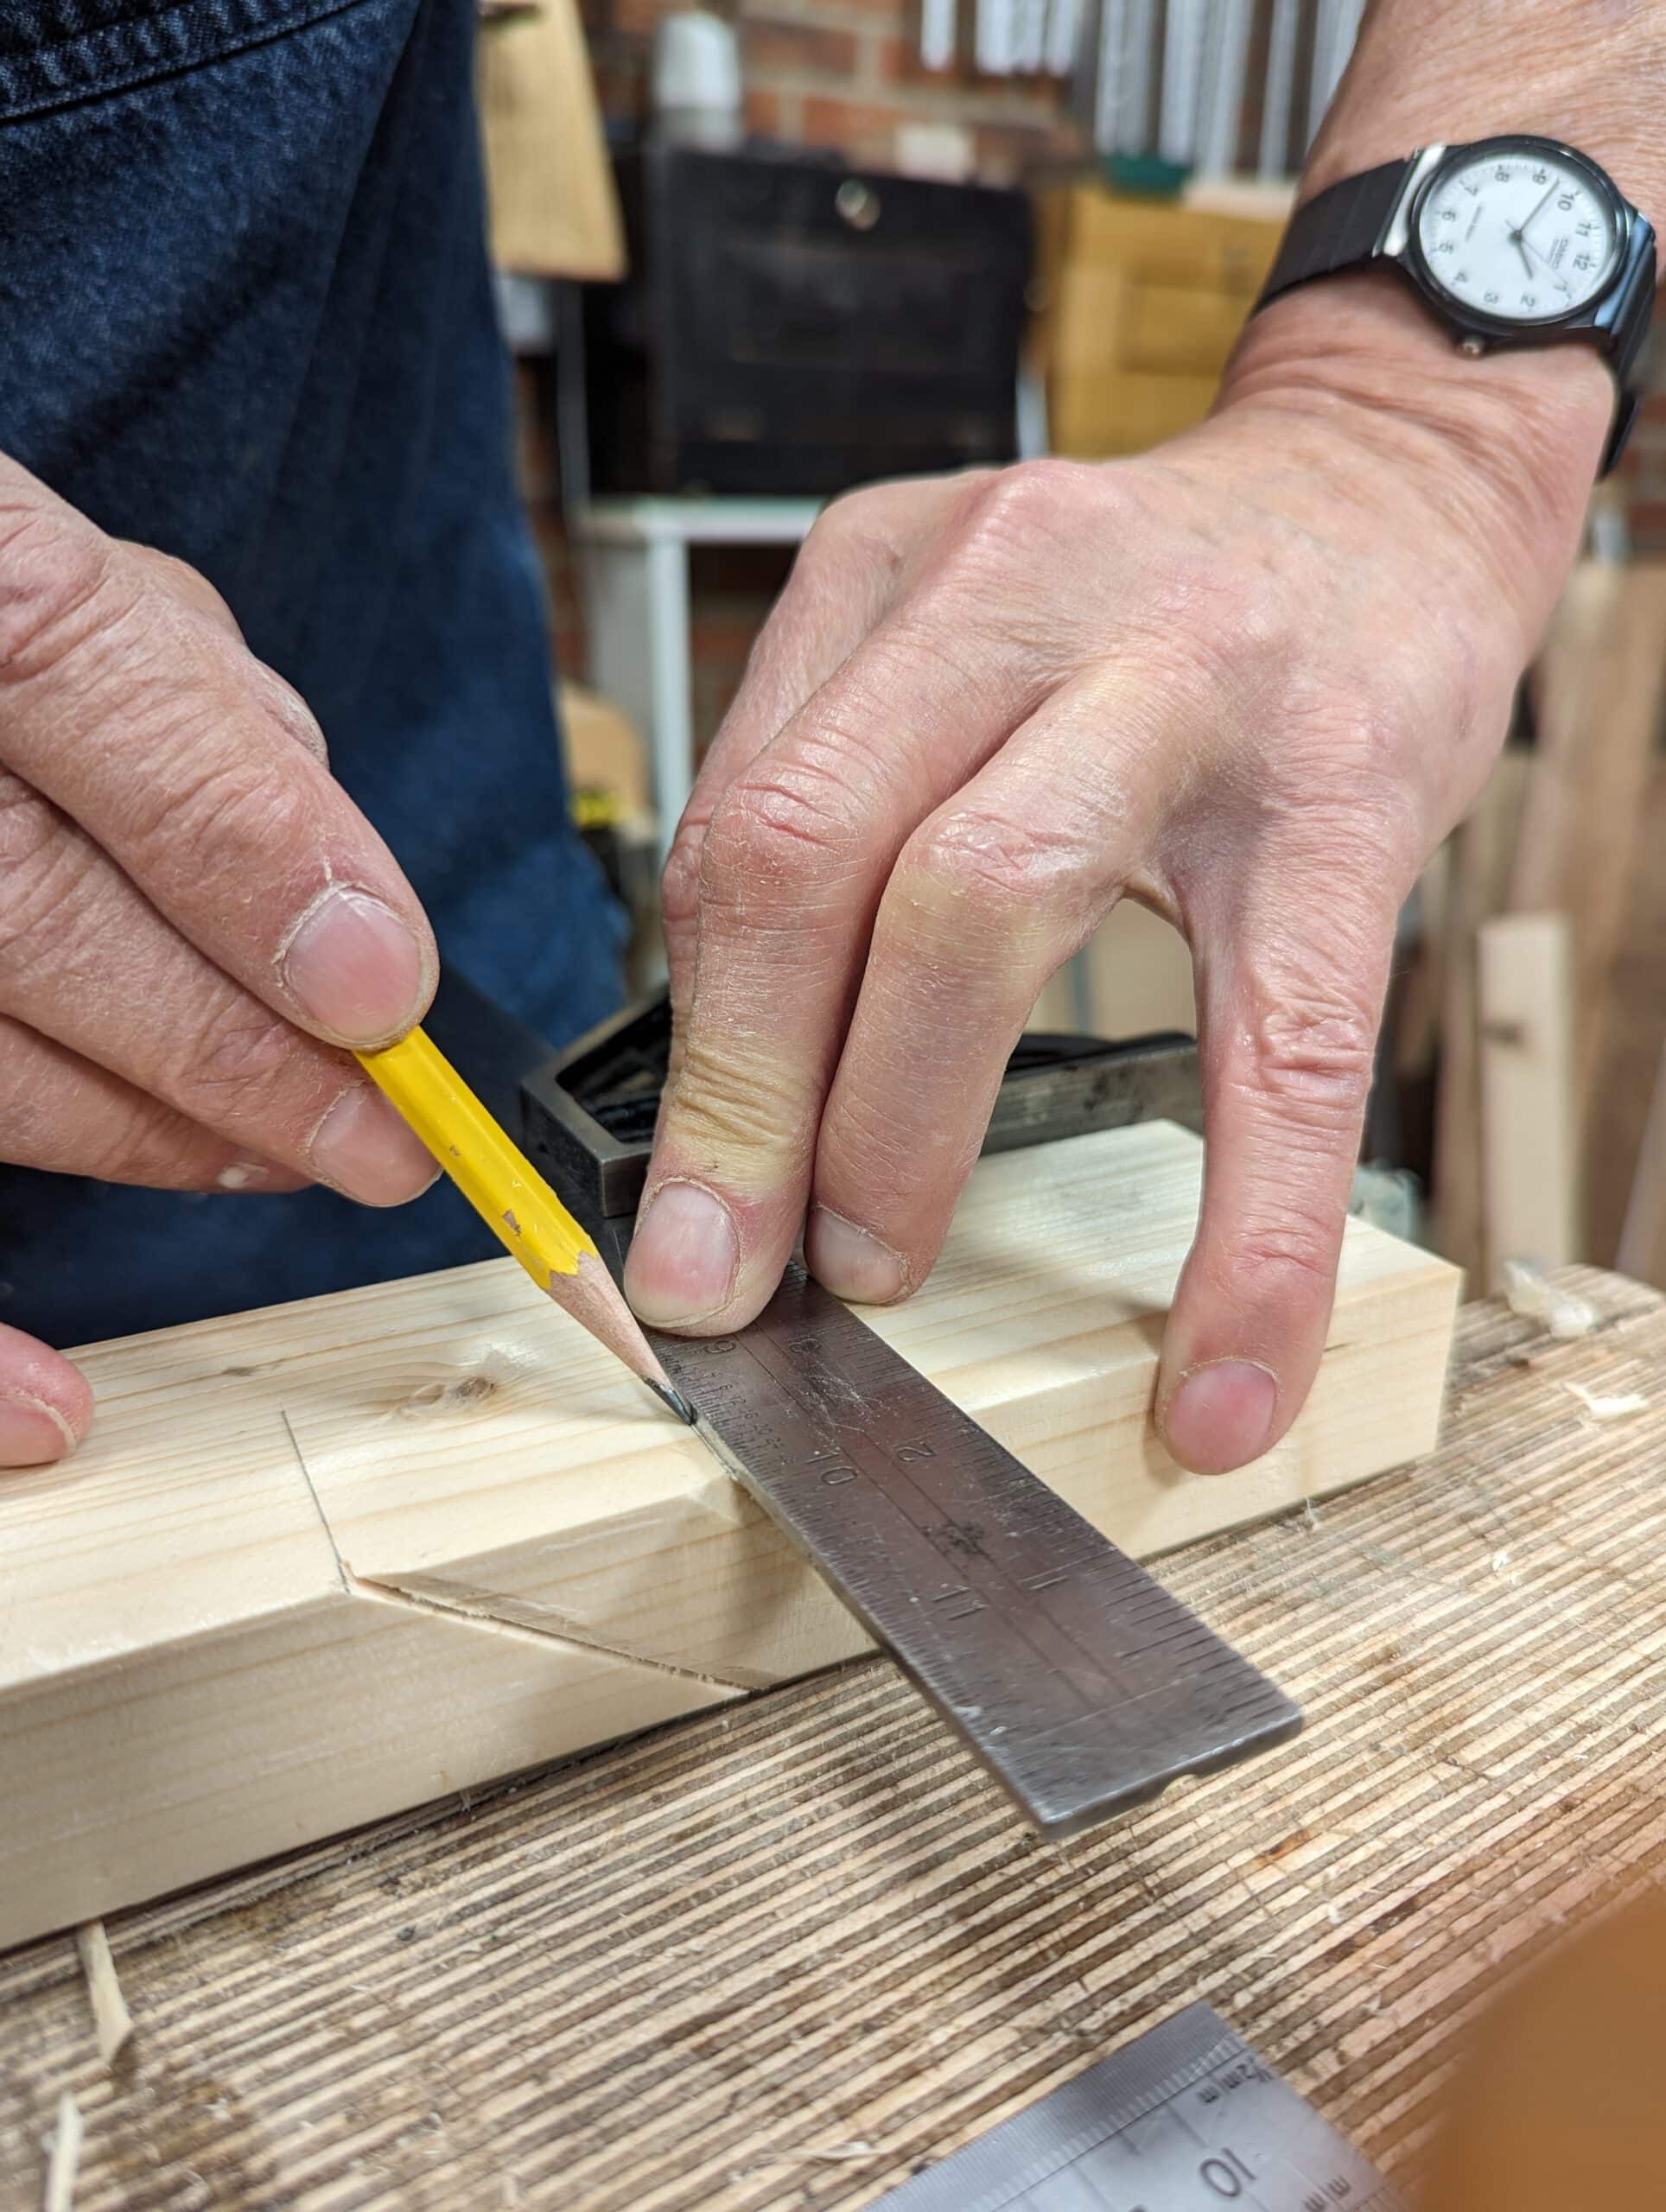
. . . and run a pencil line along the primary edge, the long, main straight one, about 10mm (3/8″) in from the edge.

Saw along the line to the angle line.
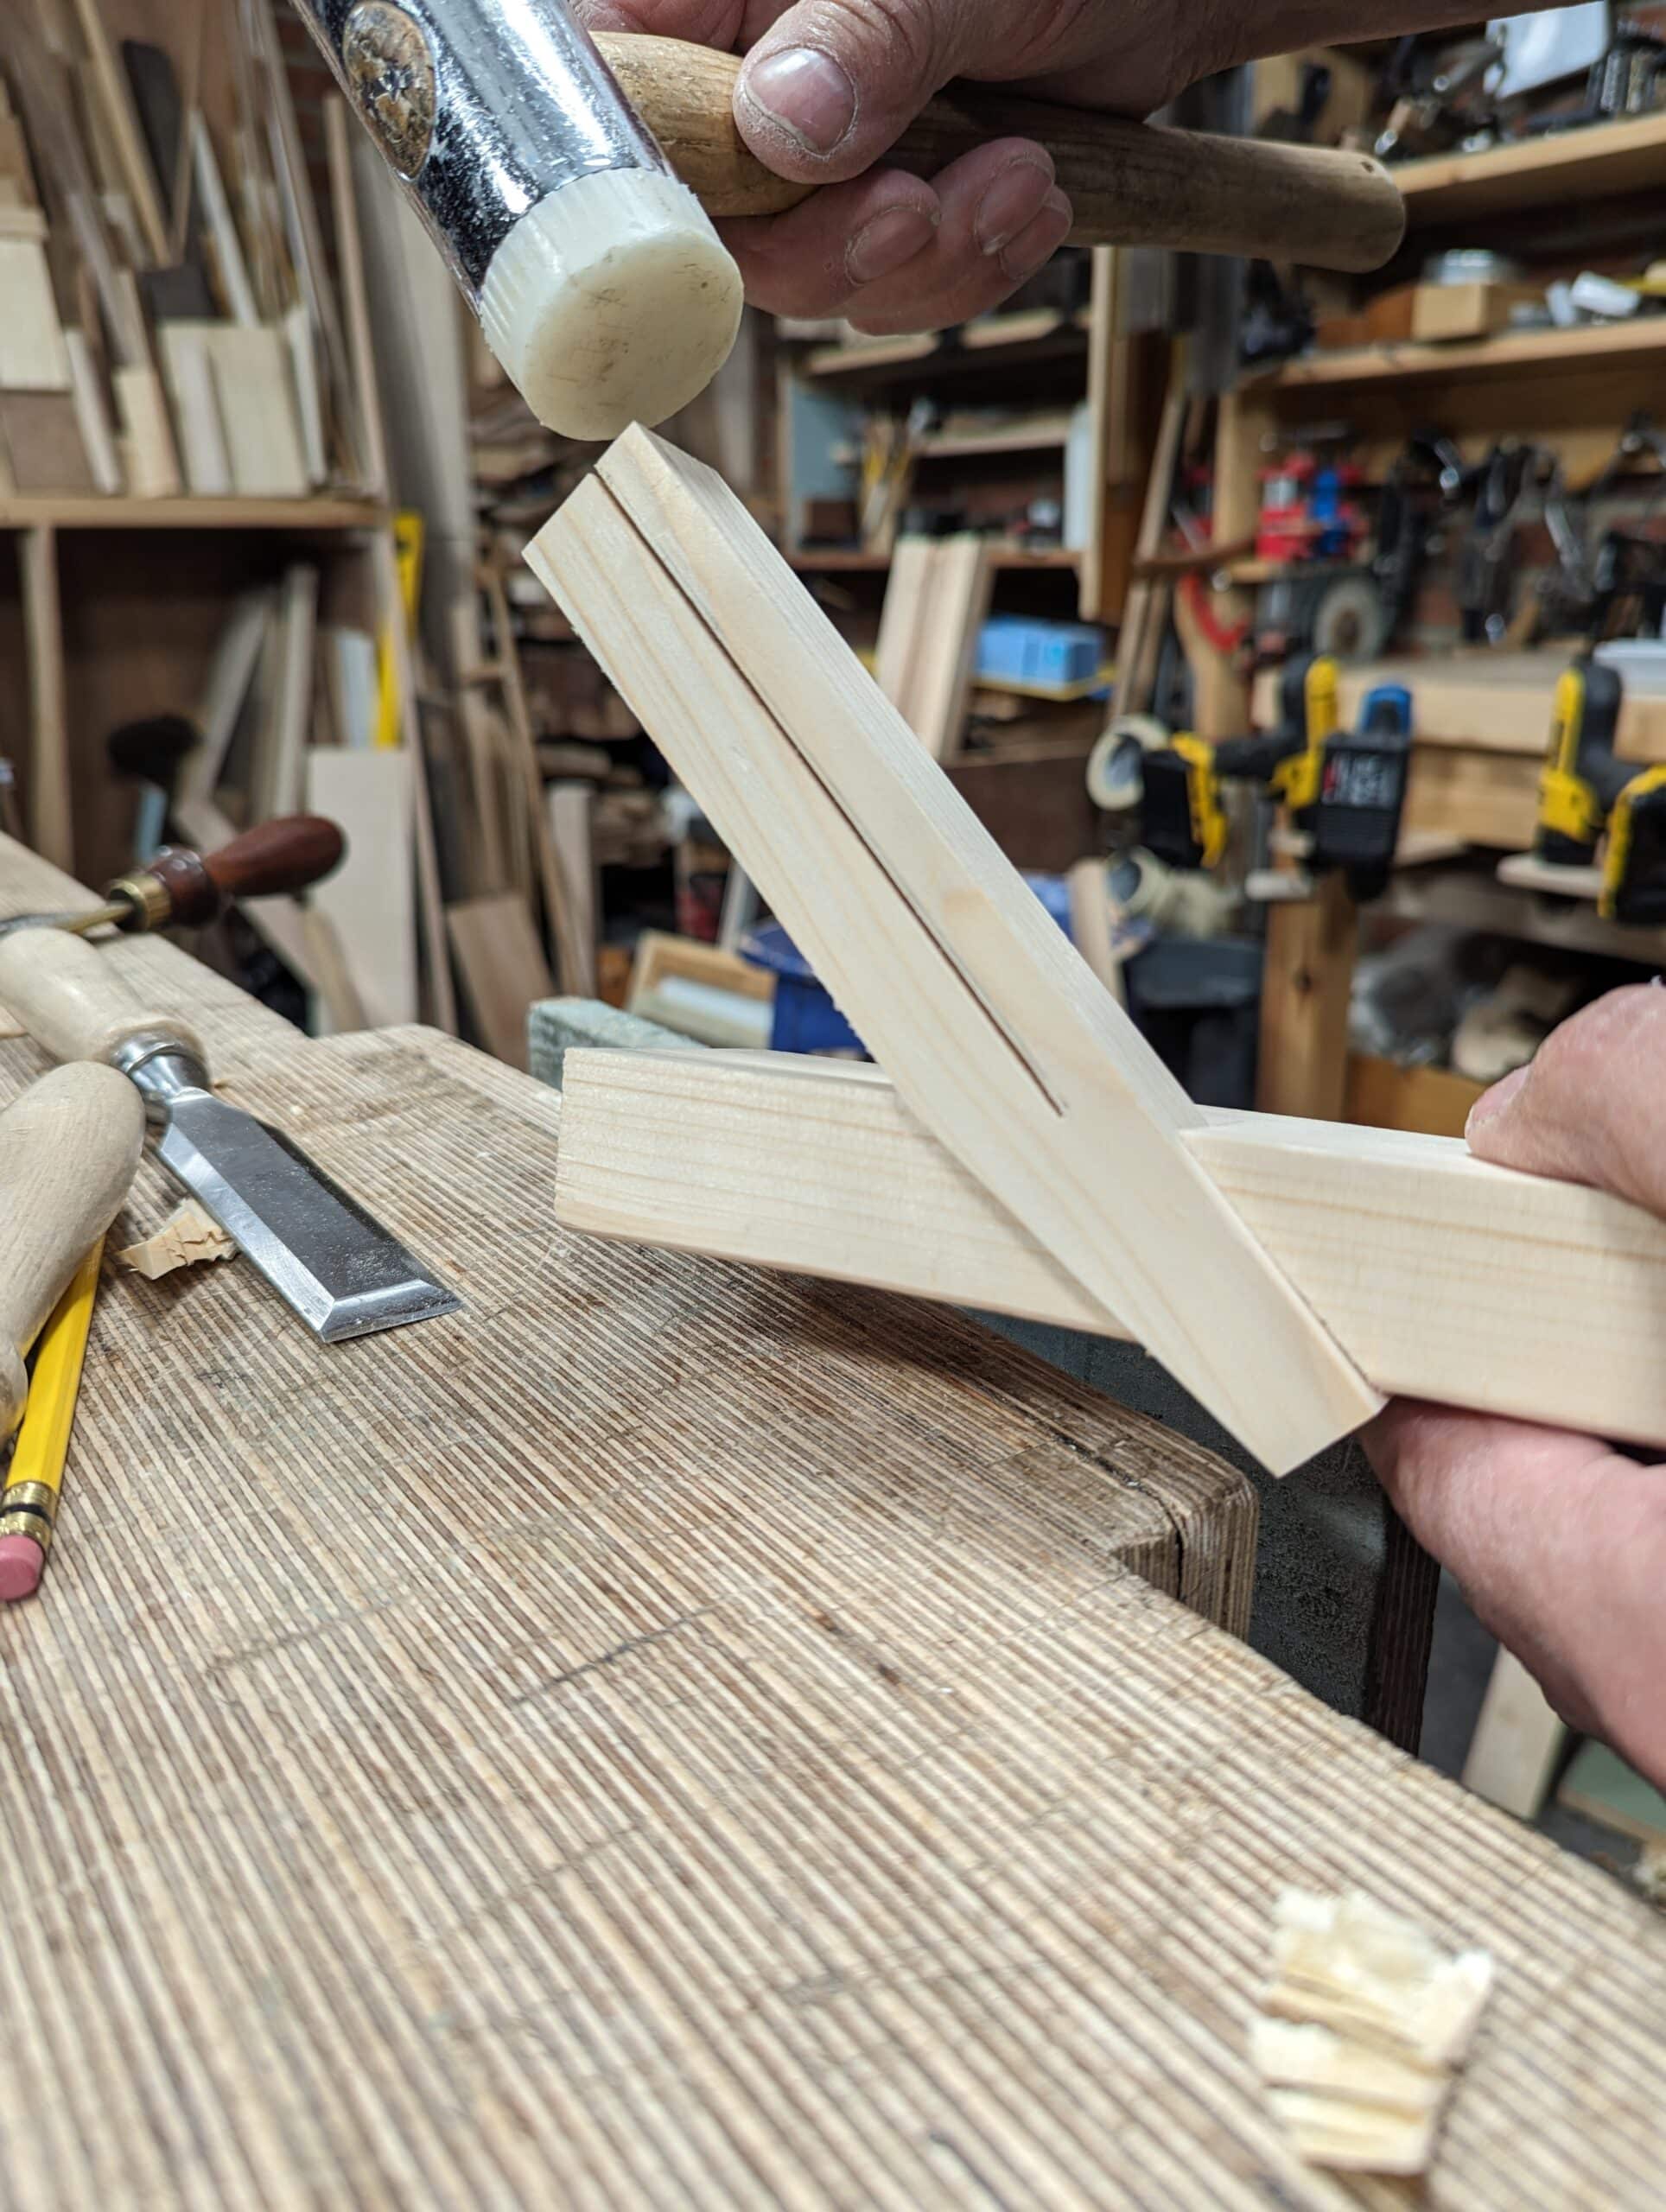
Drive the wedge into the channel but not too tightly––just one extra tap’s worth.
Clamp in the vise securely. Here you can see how the vise will compress the wedge sideways into the channel and lock it immoveably in situ.
To Set Up and Use
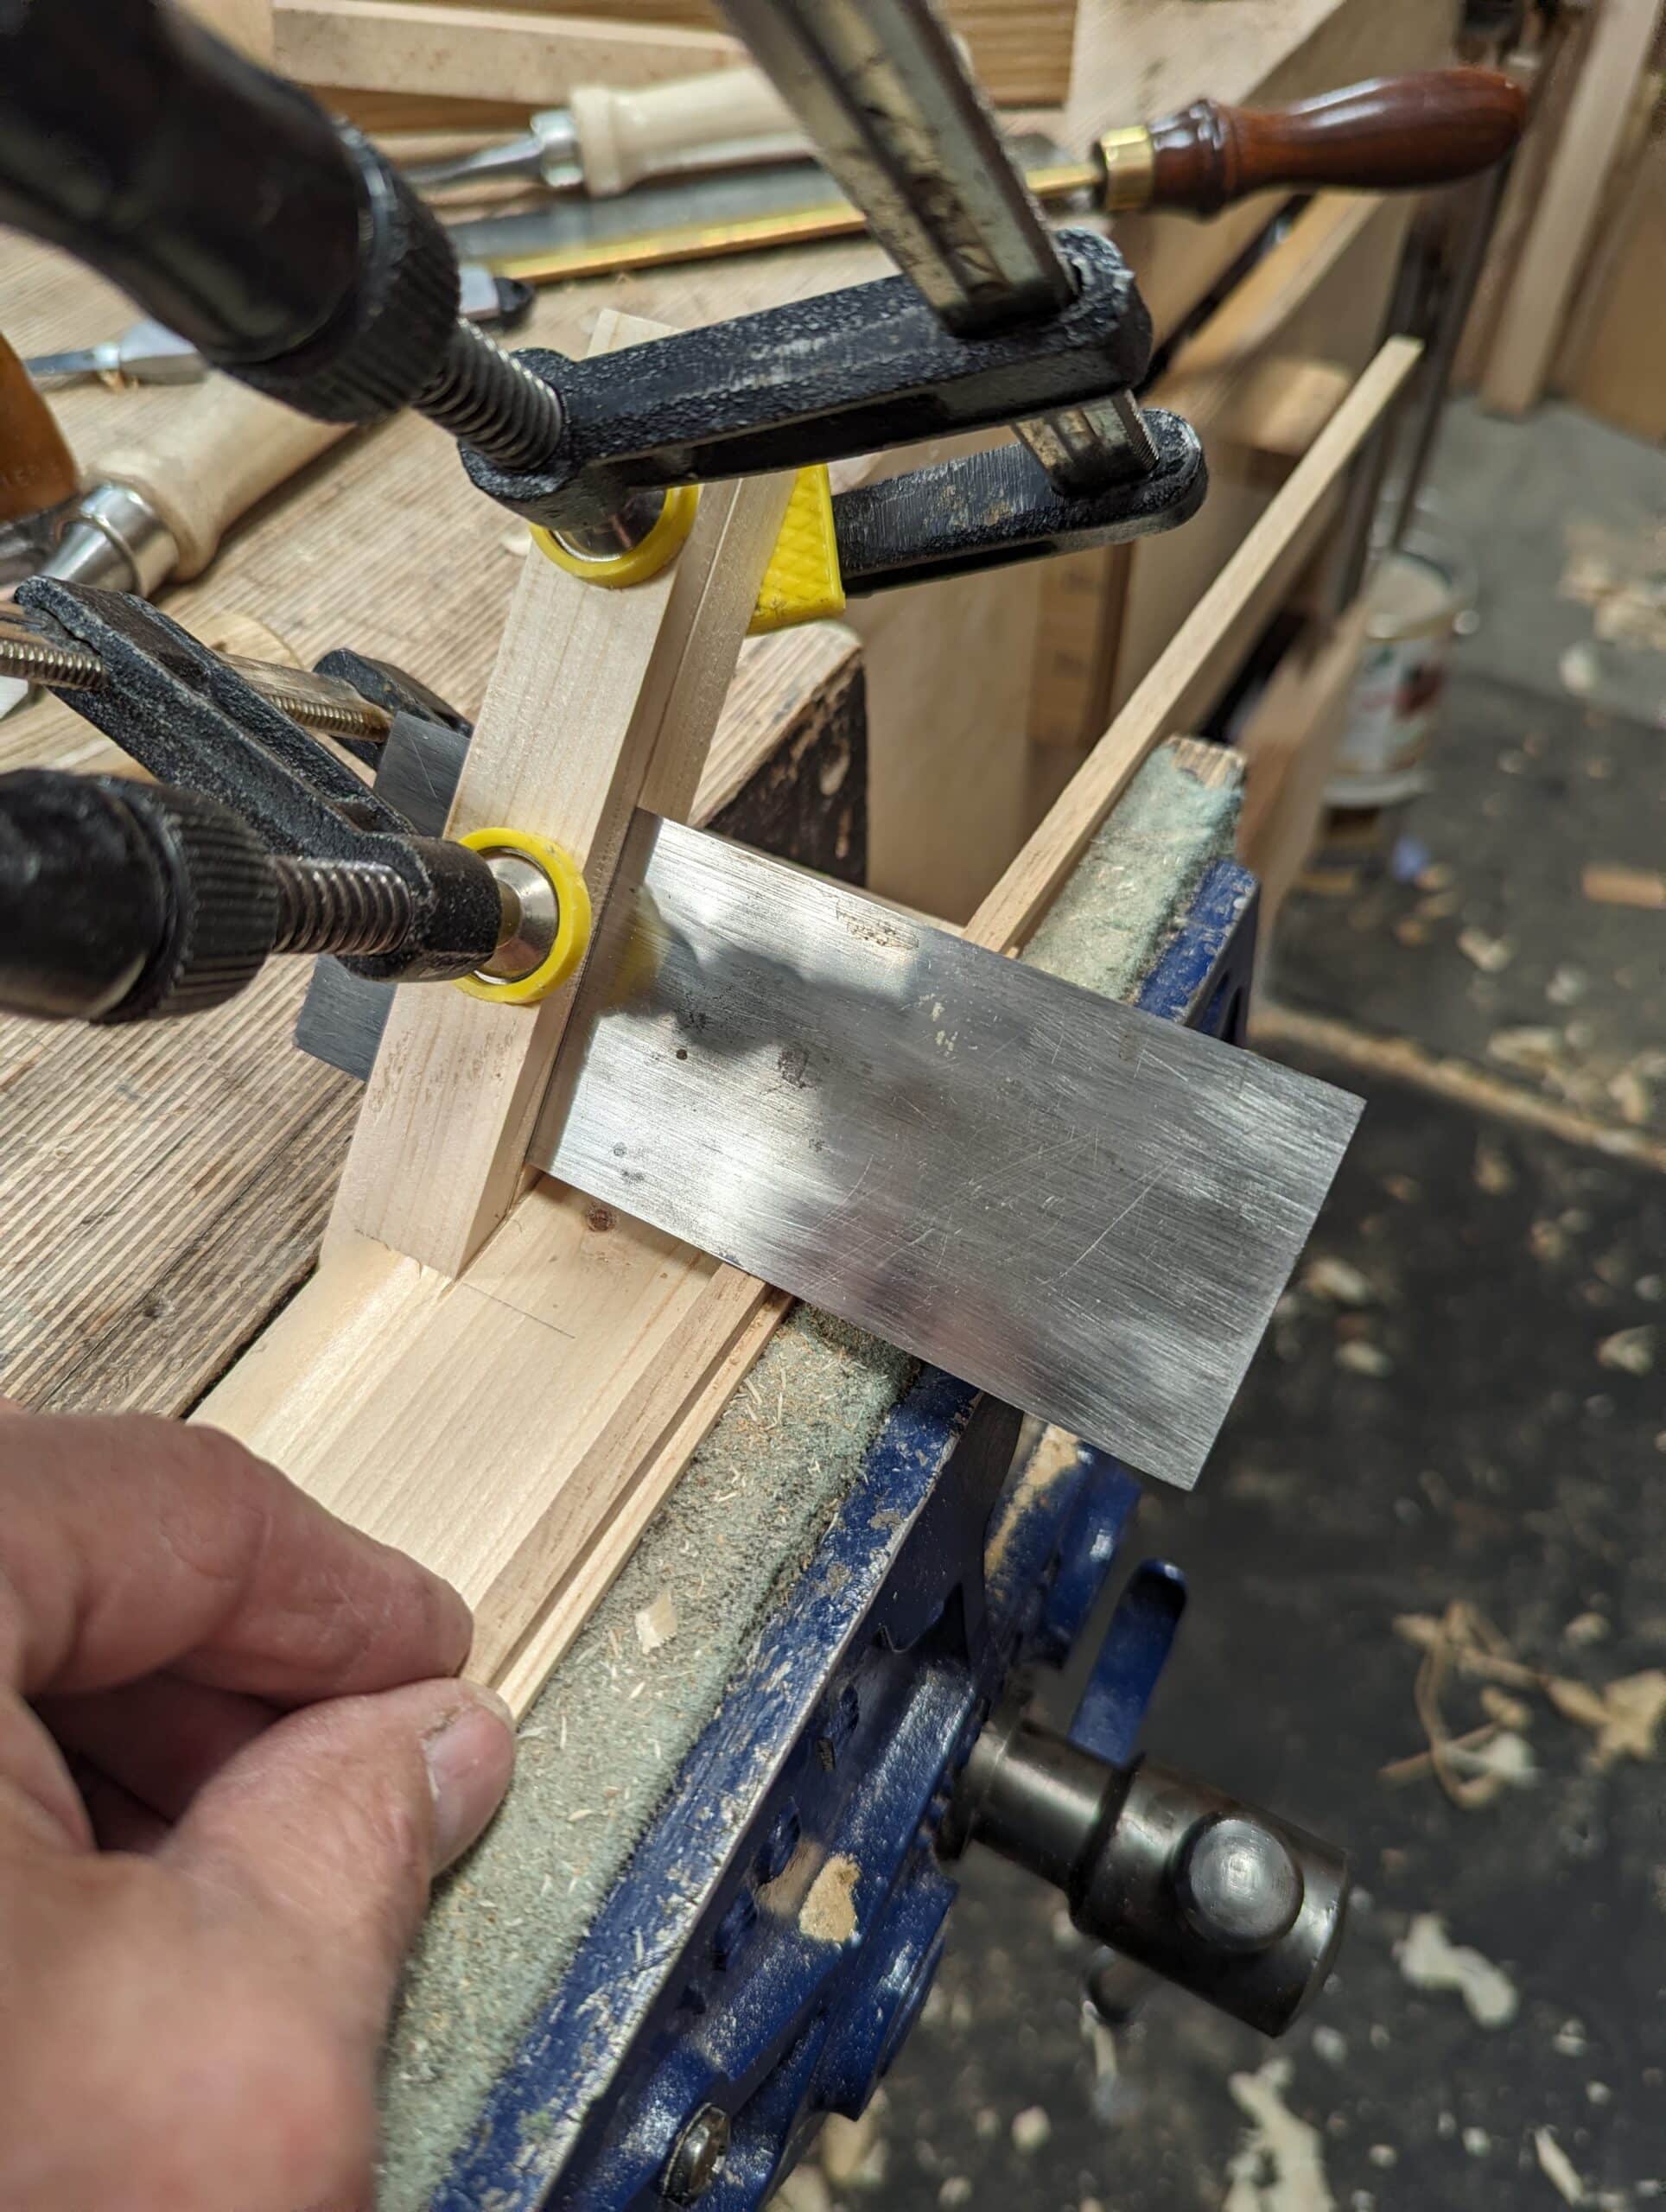
Having driven the wedge into the recess enough to seat it, clamp it in the vise so that the wedge is held and compressed into the recess.
Insert a newly sharpened card scraper to the near height you want for thicknessing.
Create a leading edge to the start of the piece for ease of start.
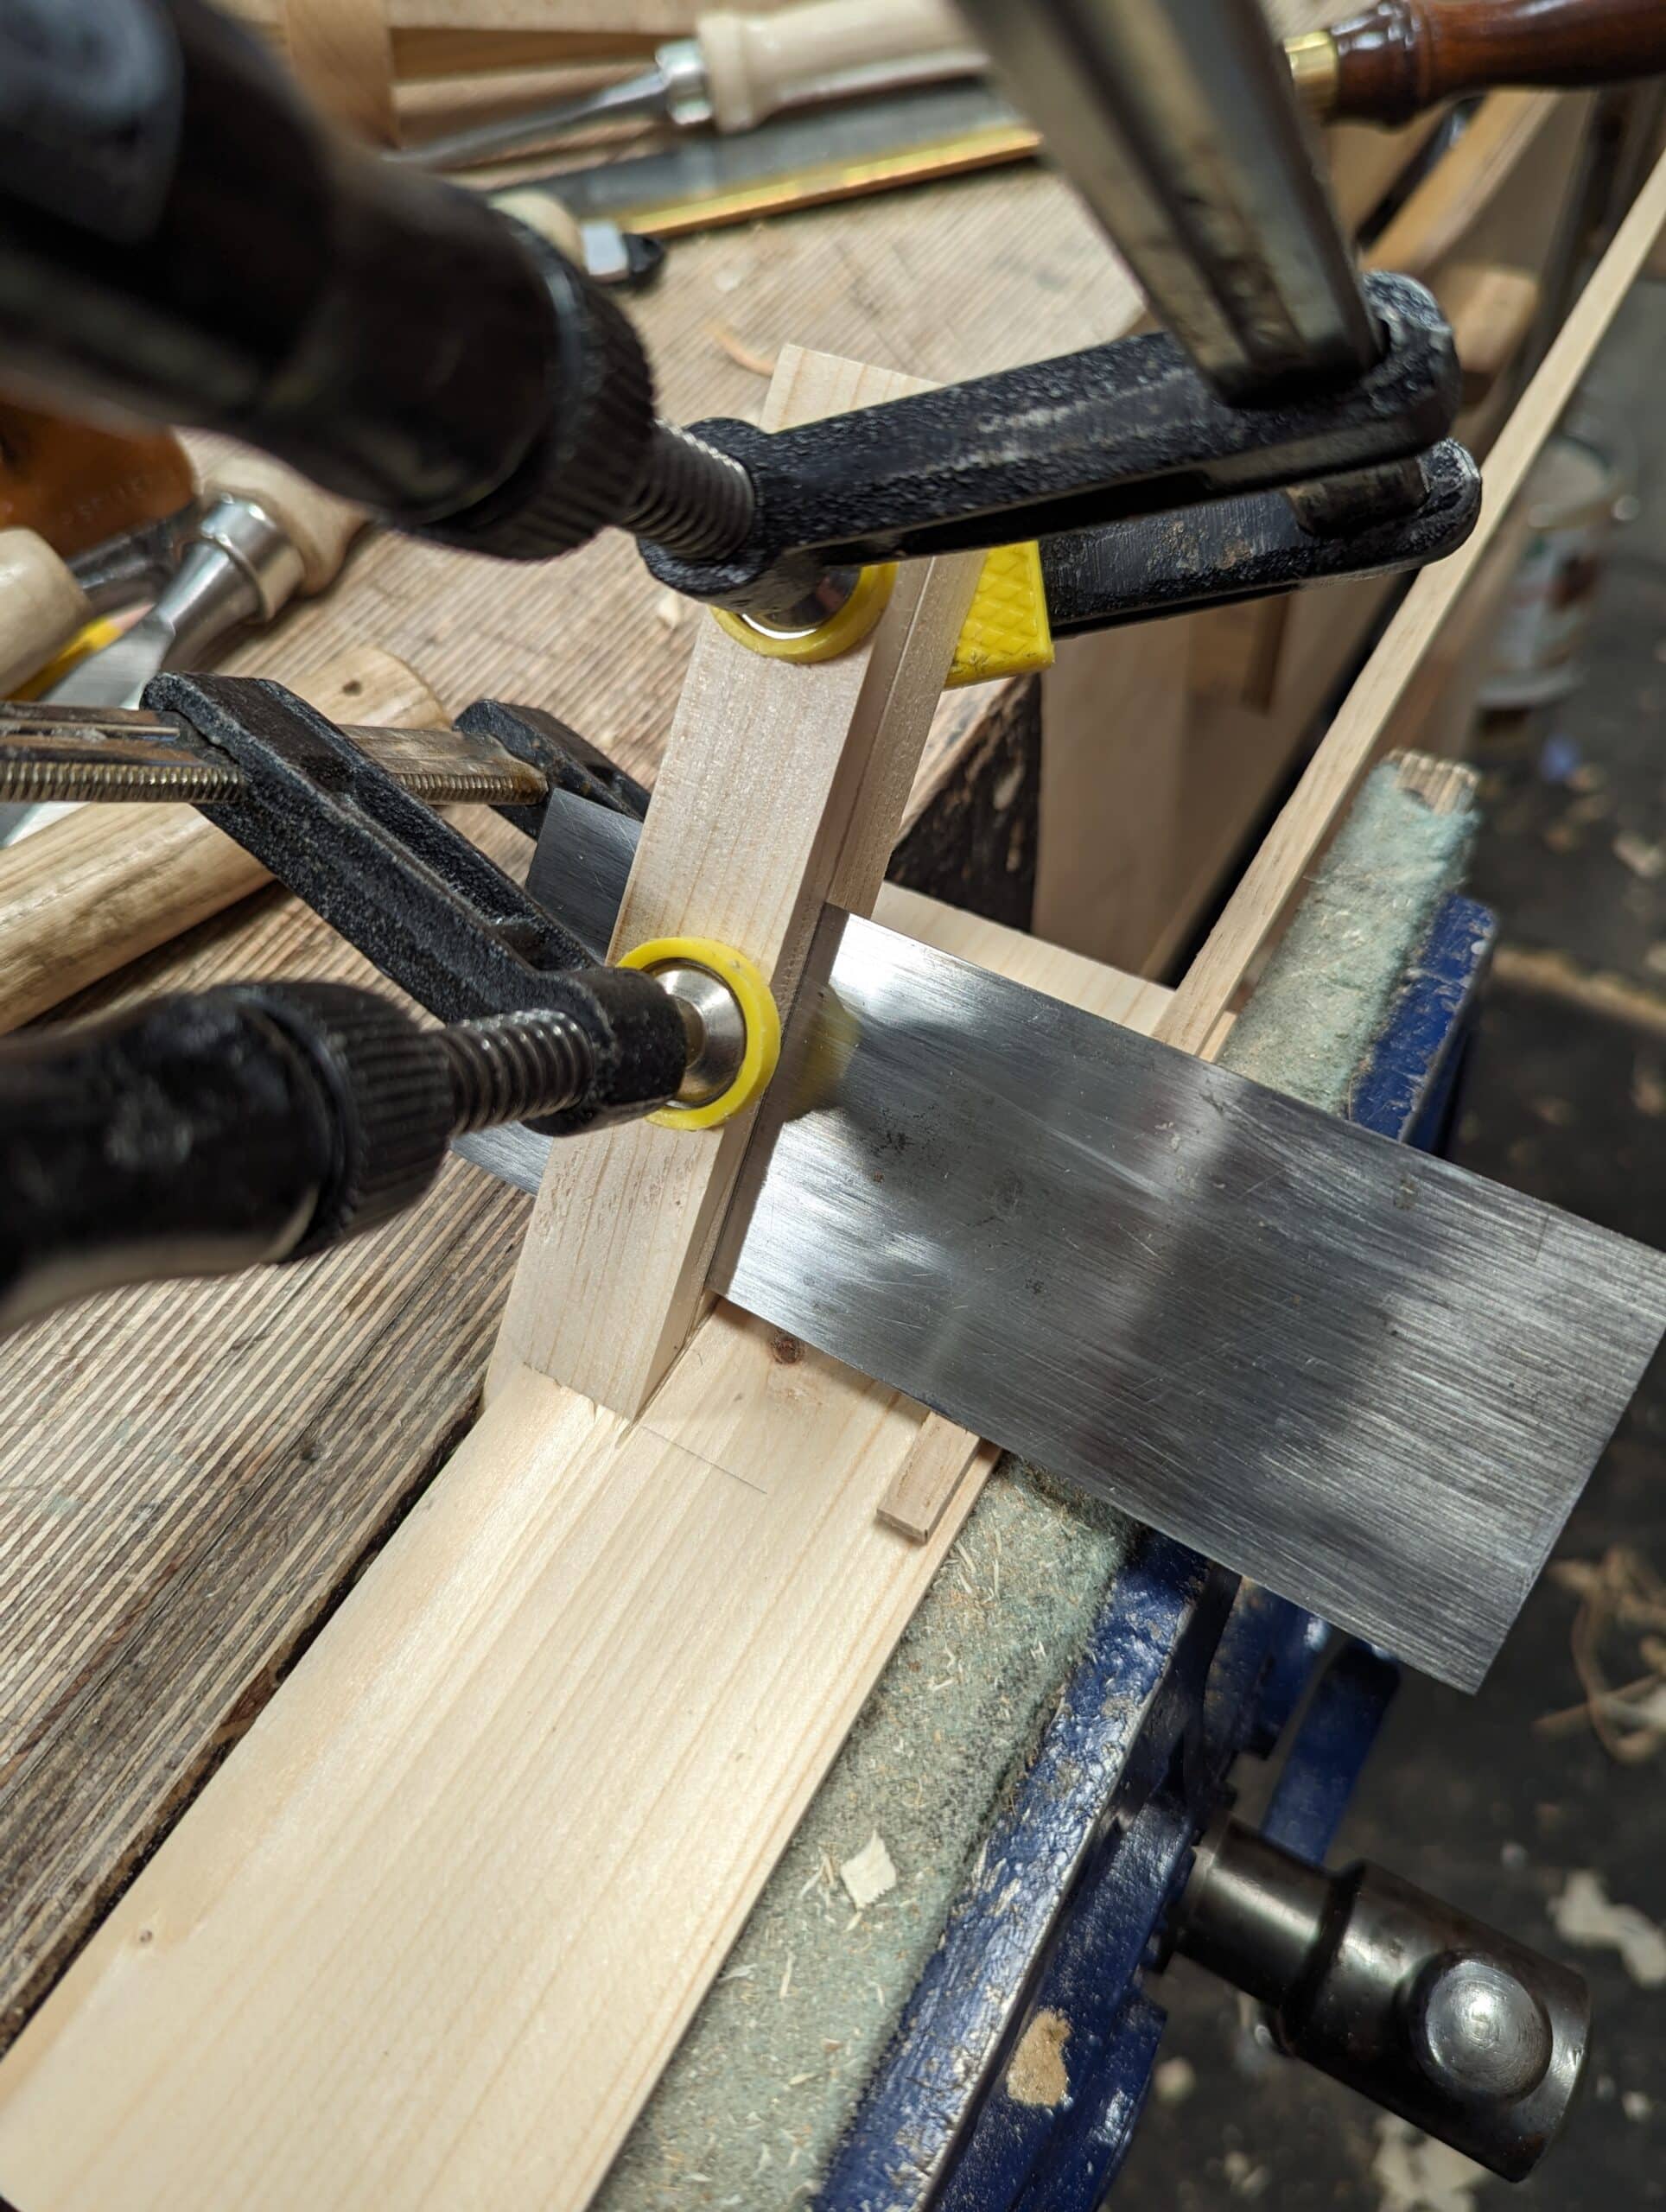
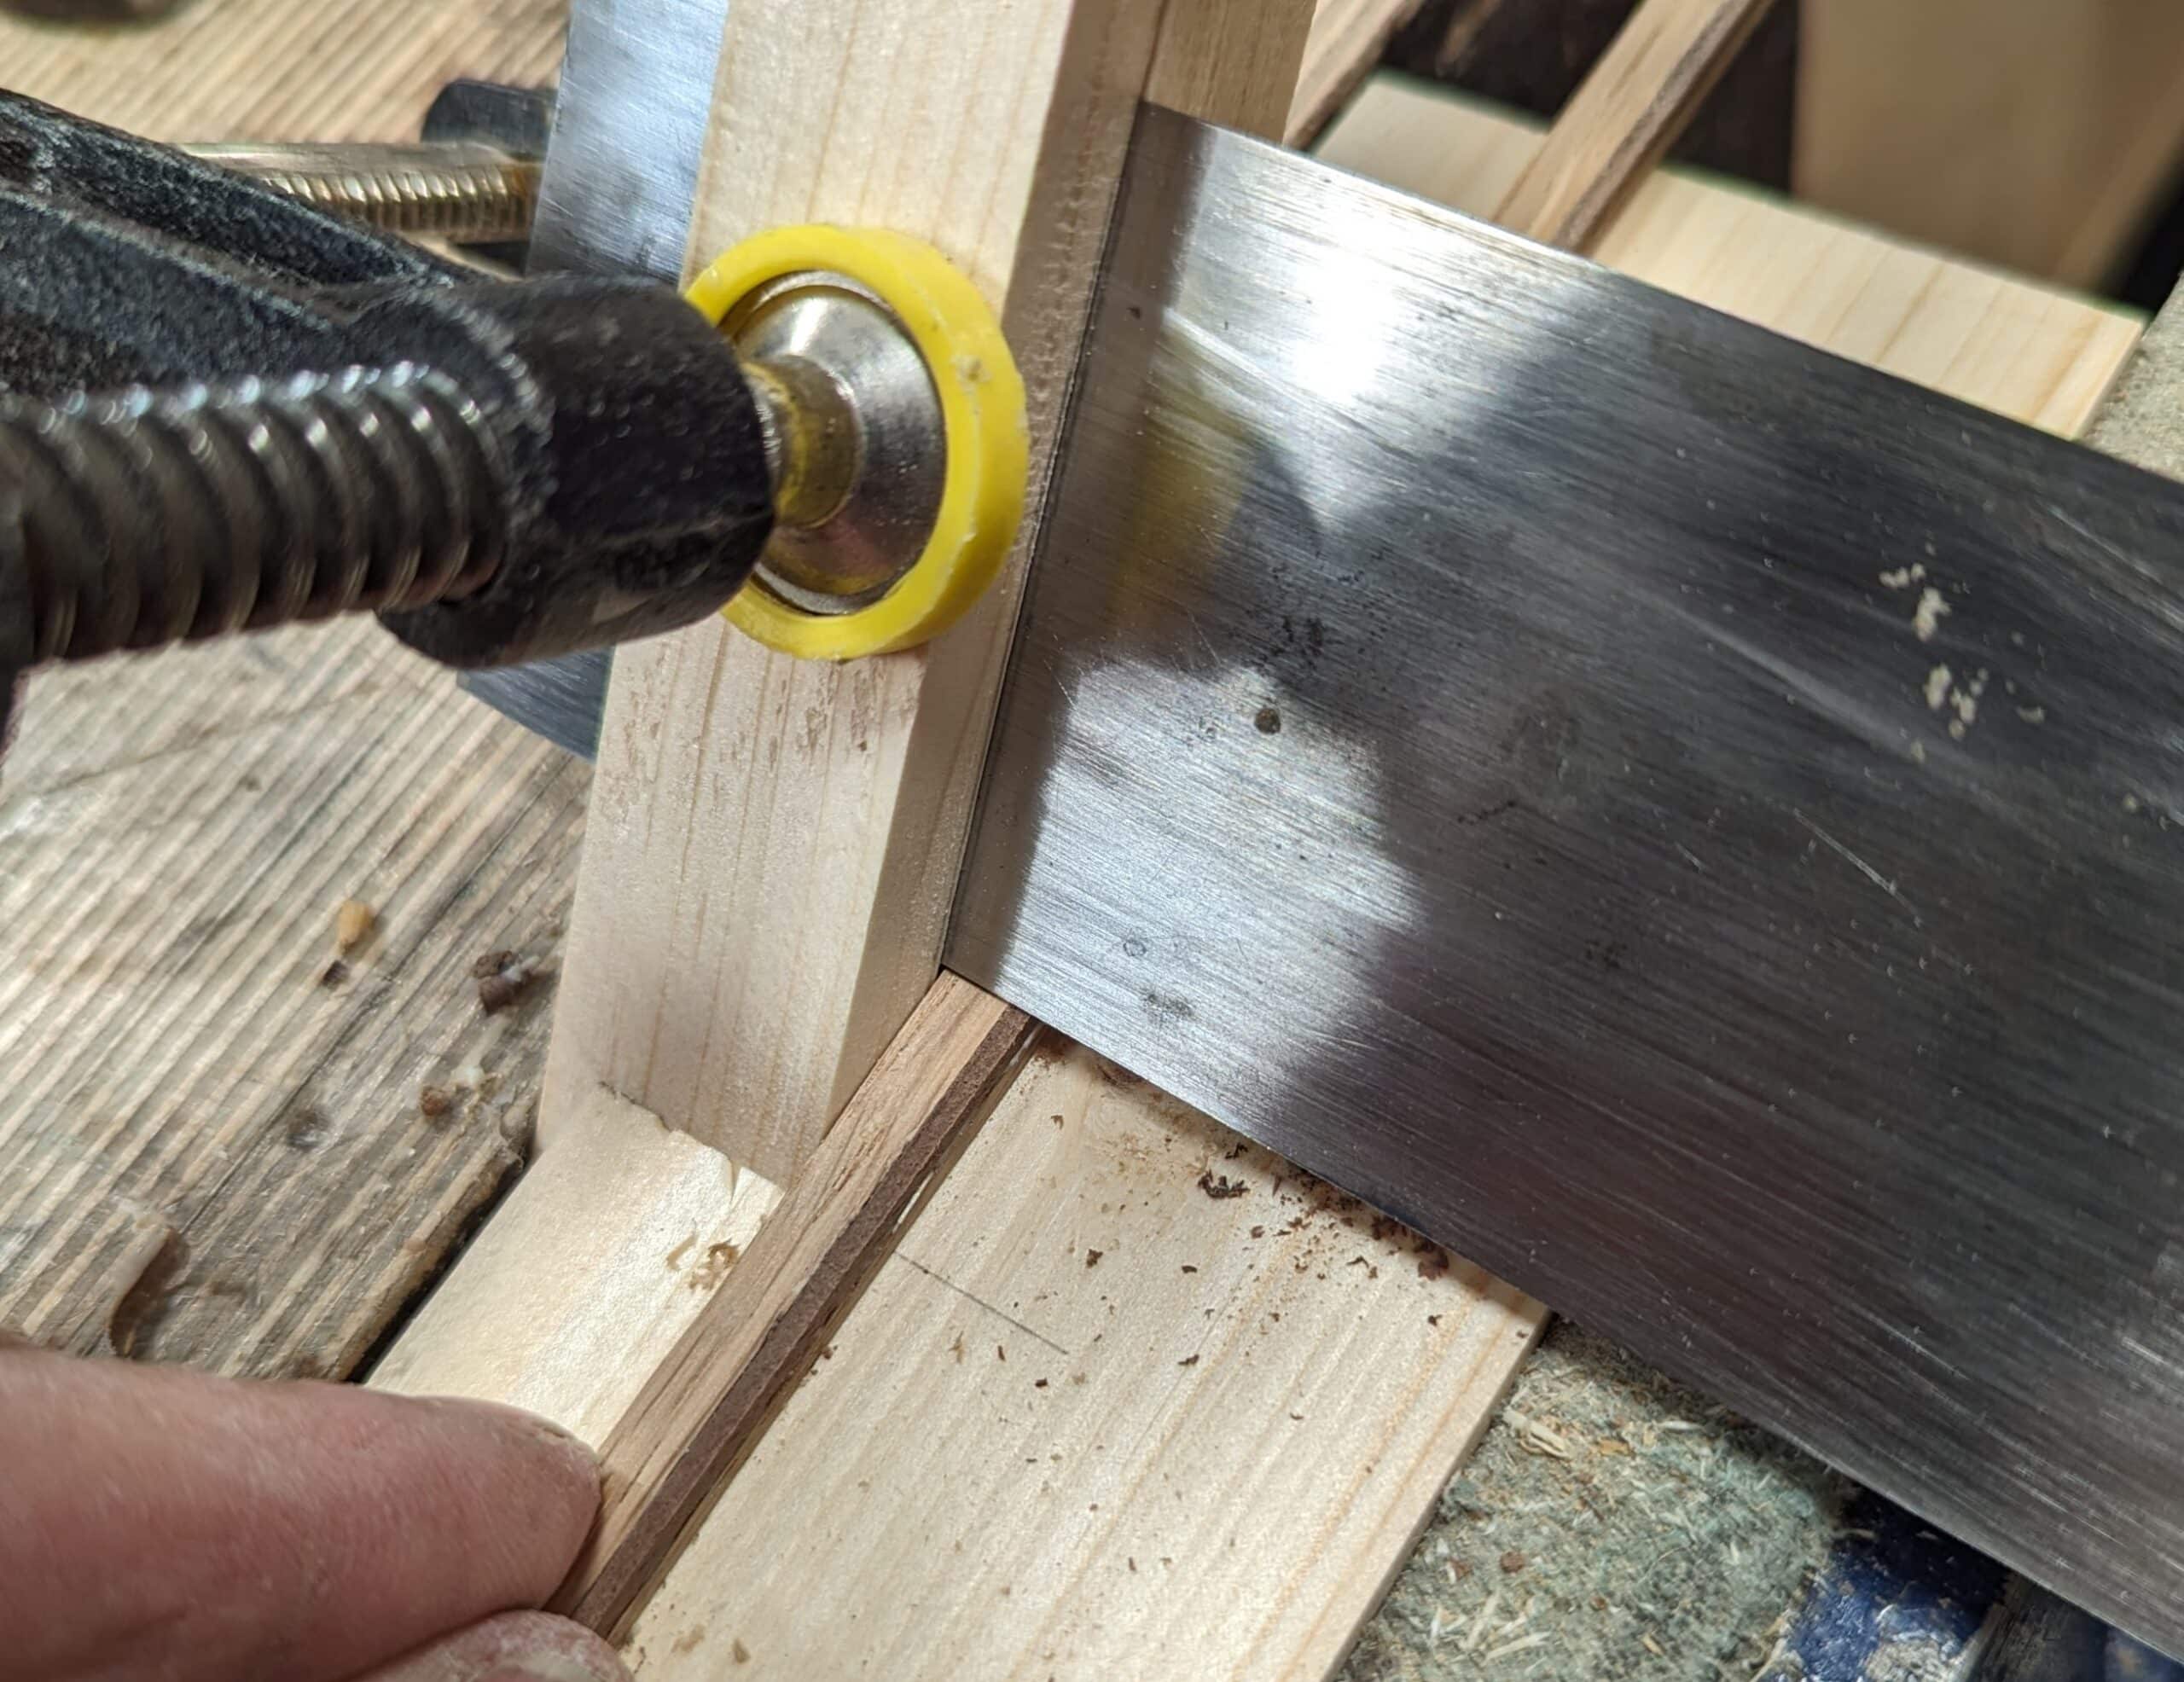
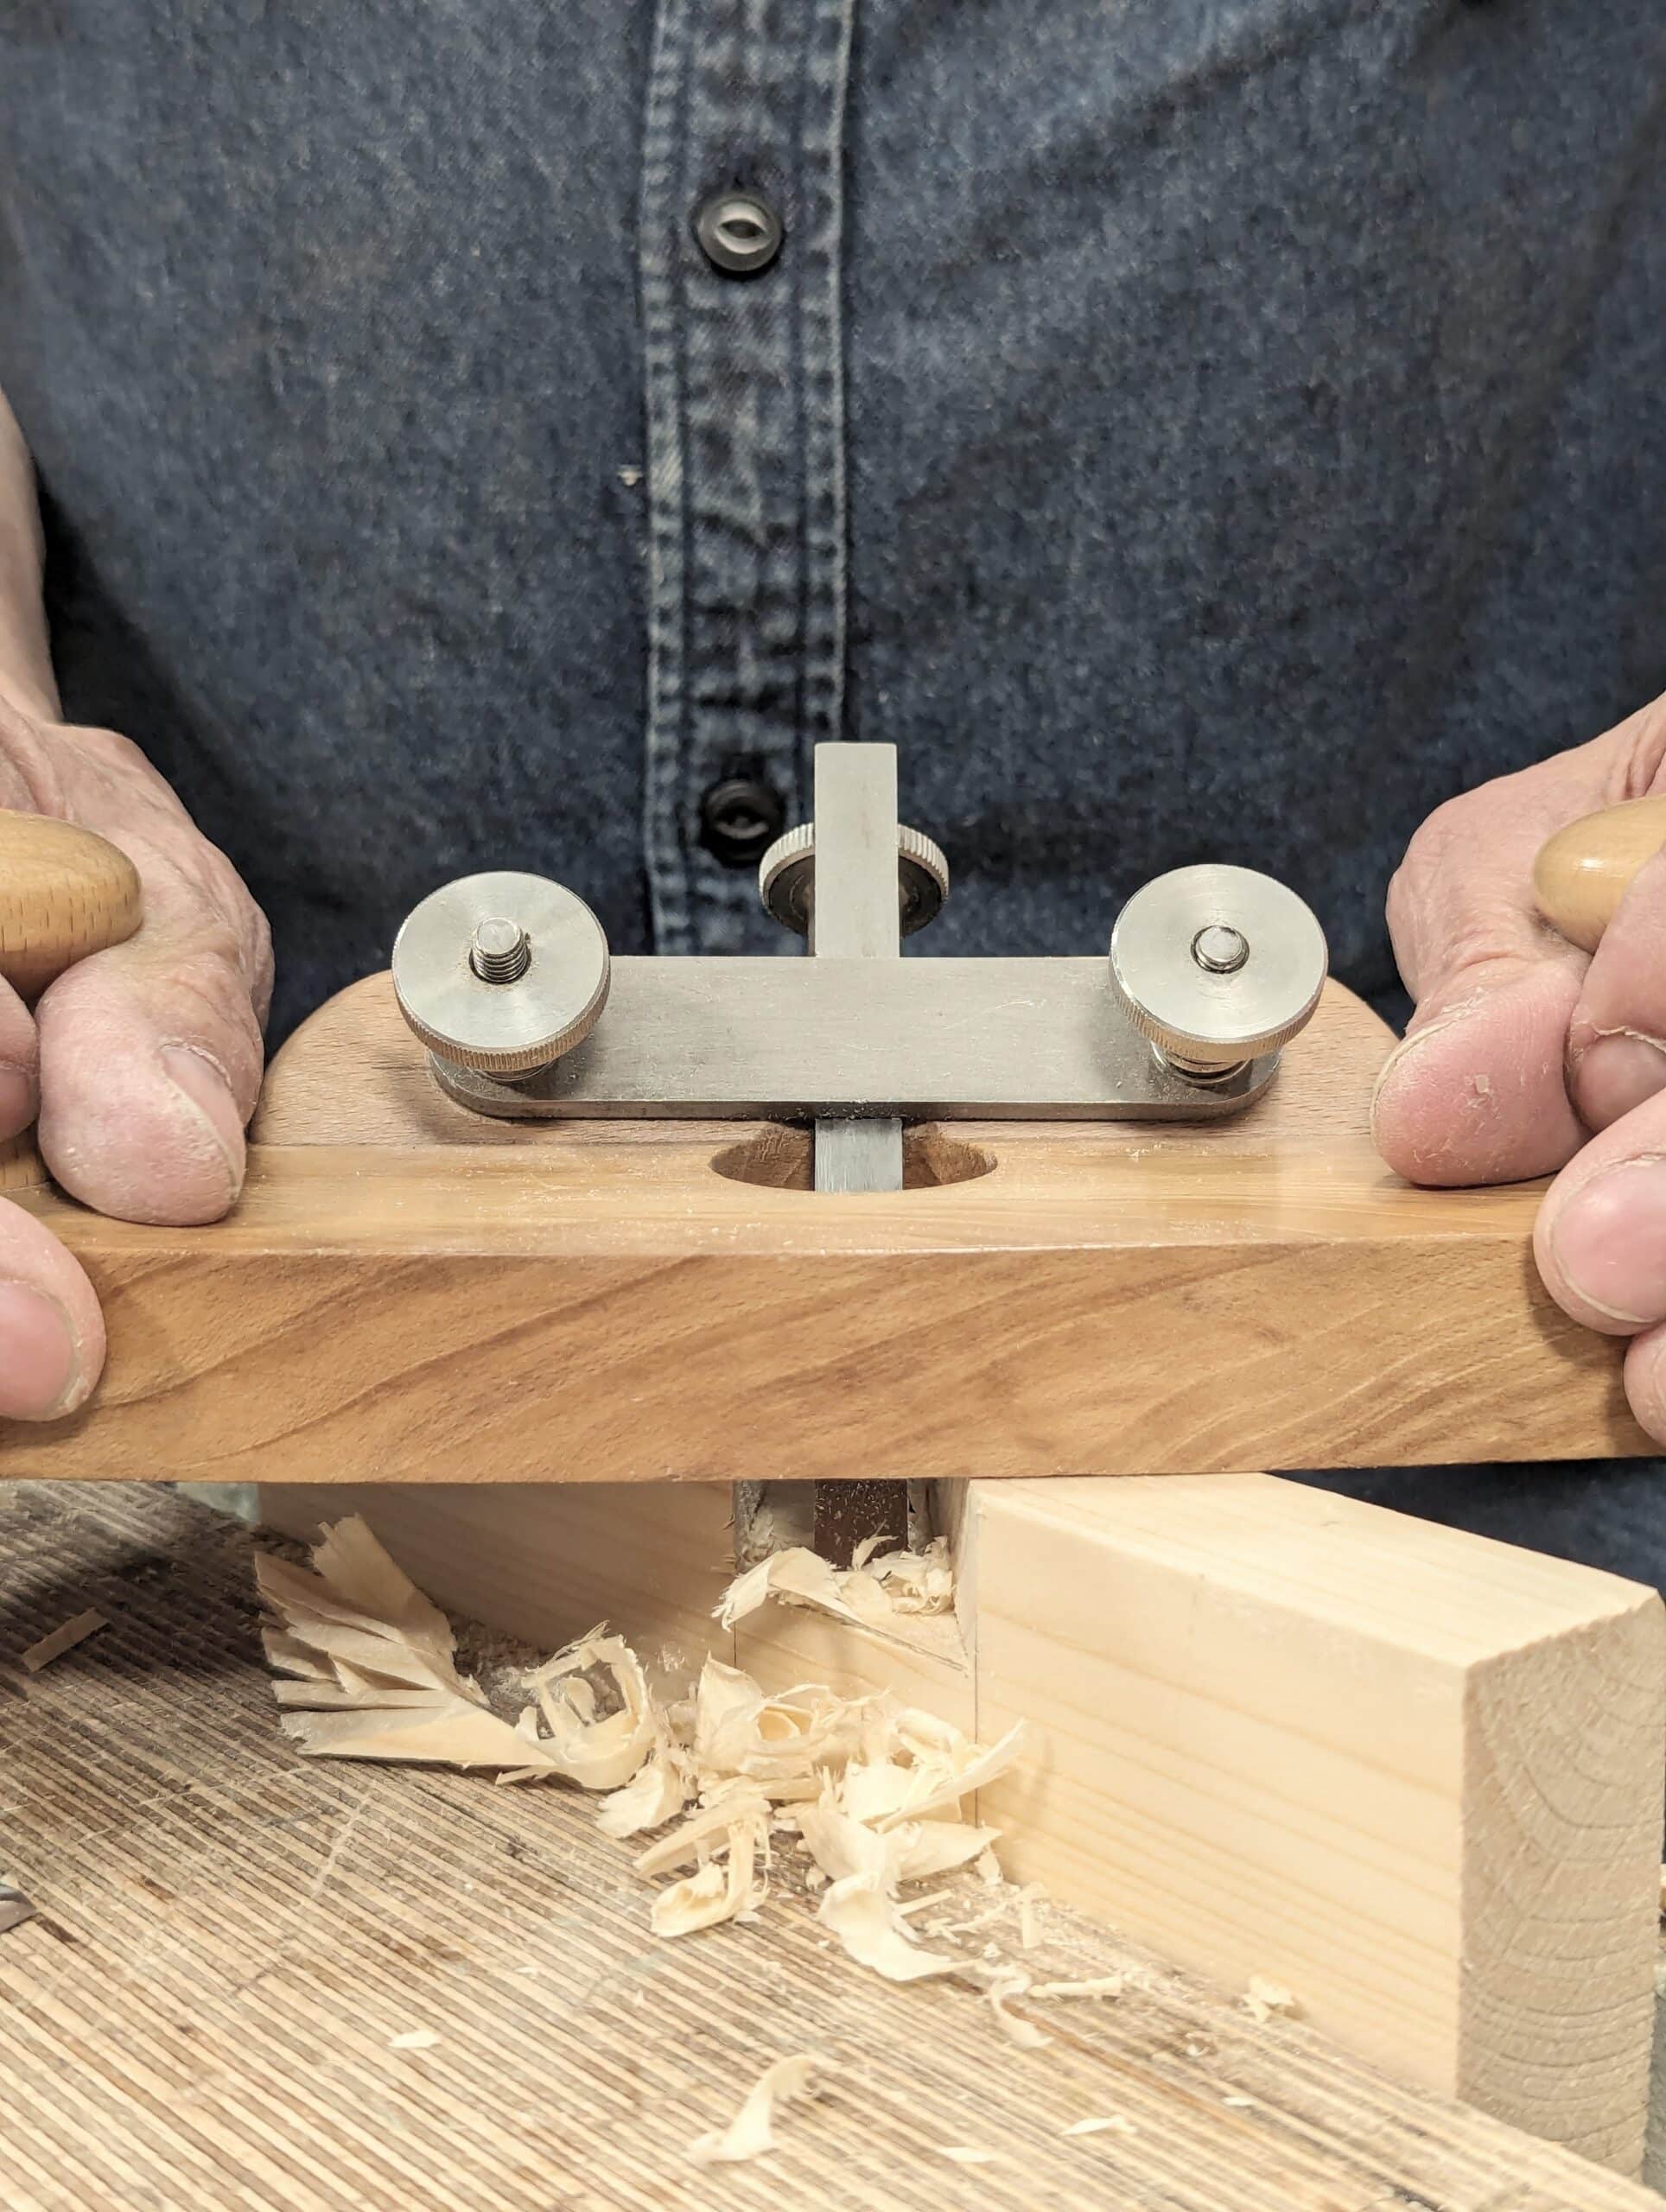
Now apply the two clamps as shown. Notice the piece of wood to be thicknessed inserted there as a guide.
Adjust the depth of cut according the thickness of the stock before you cinch the clamps tight. This will be set according a piece of wood you have thicknessed just for setting the scraper plate. You will set the edge of the plate as parallel as you can to the base platform.
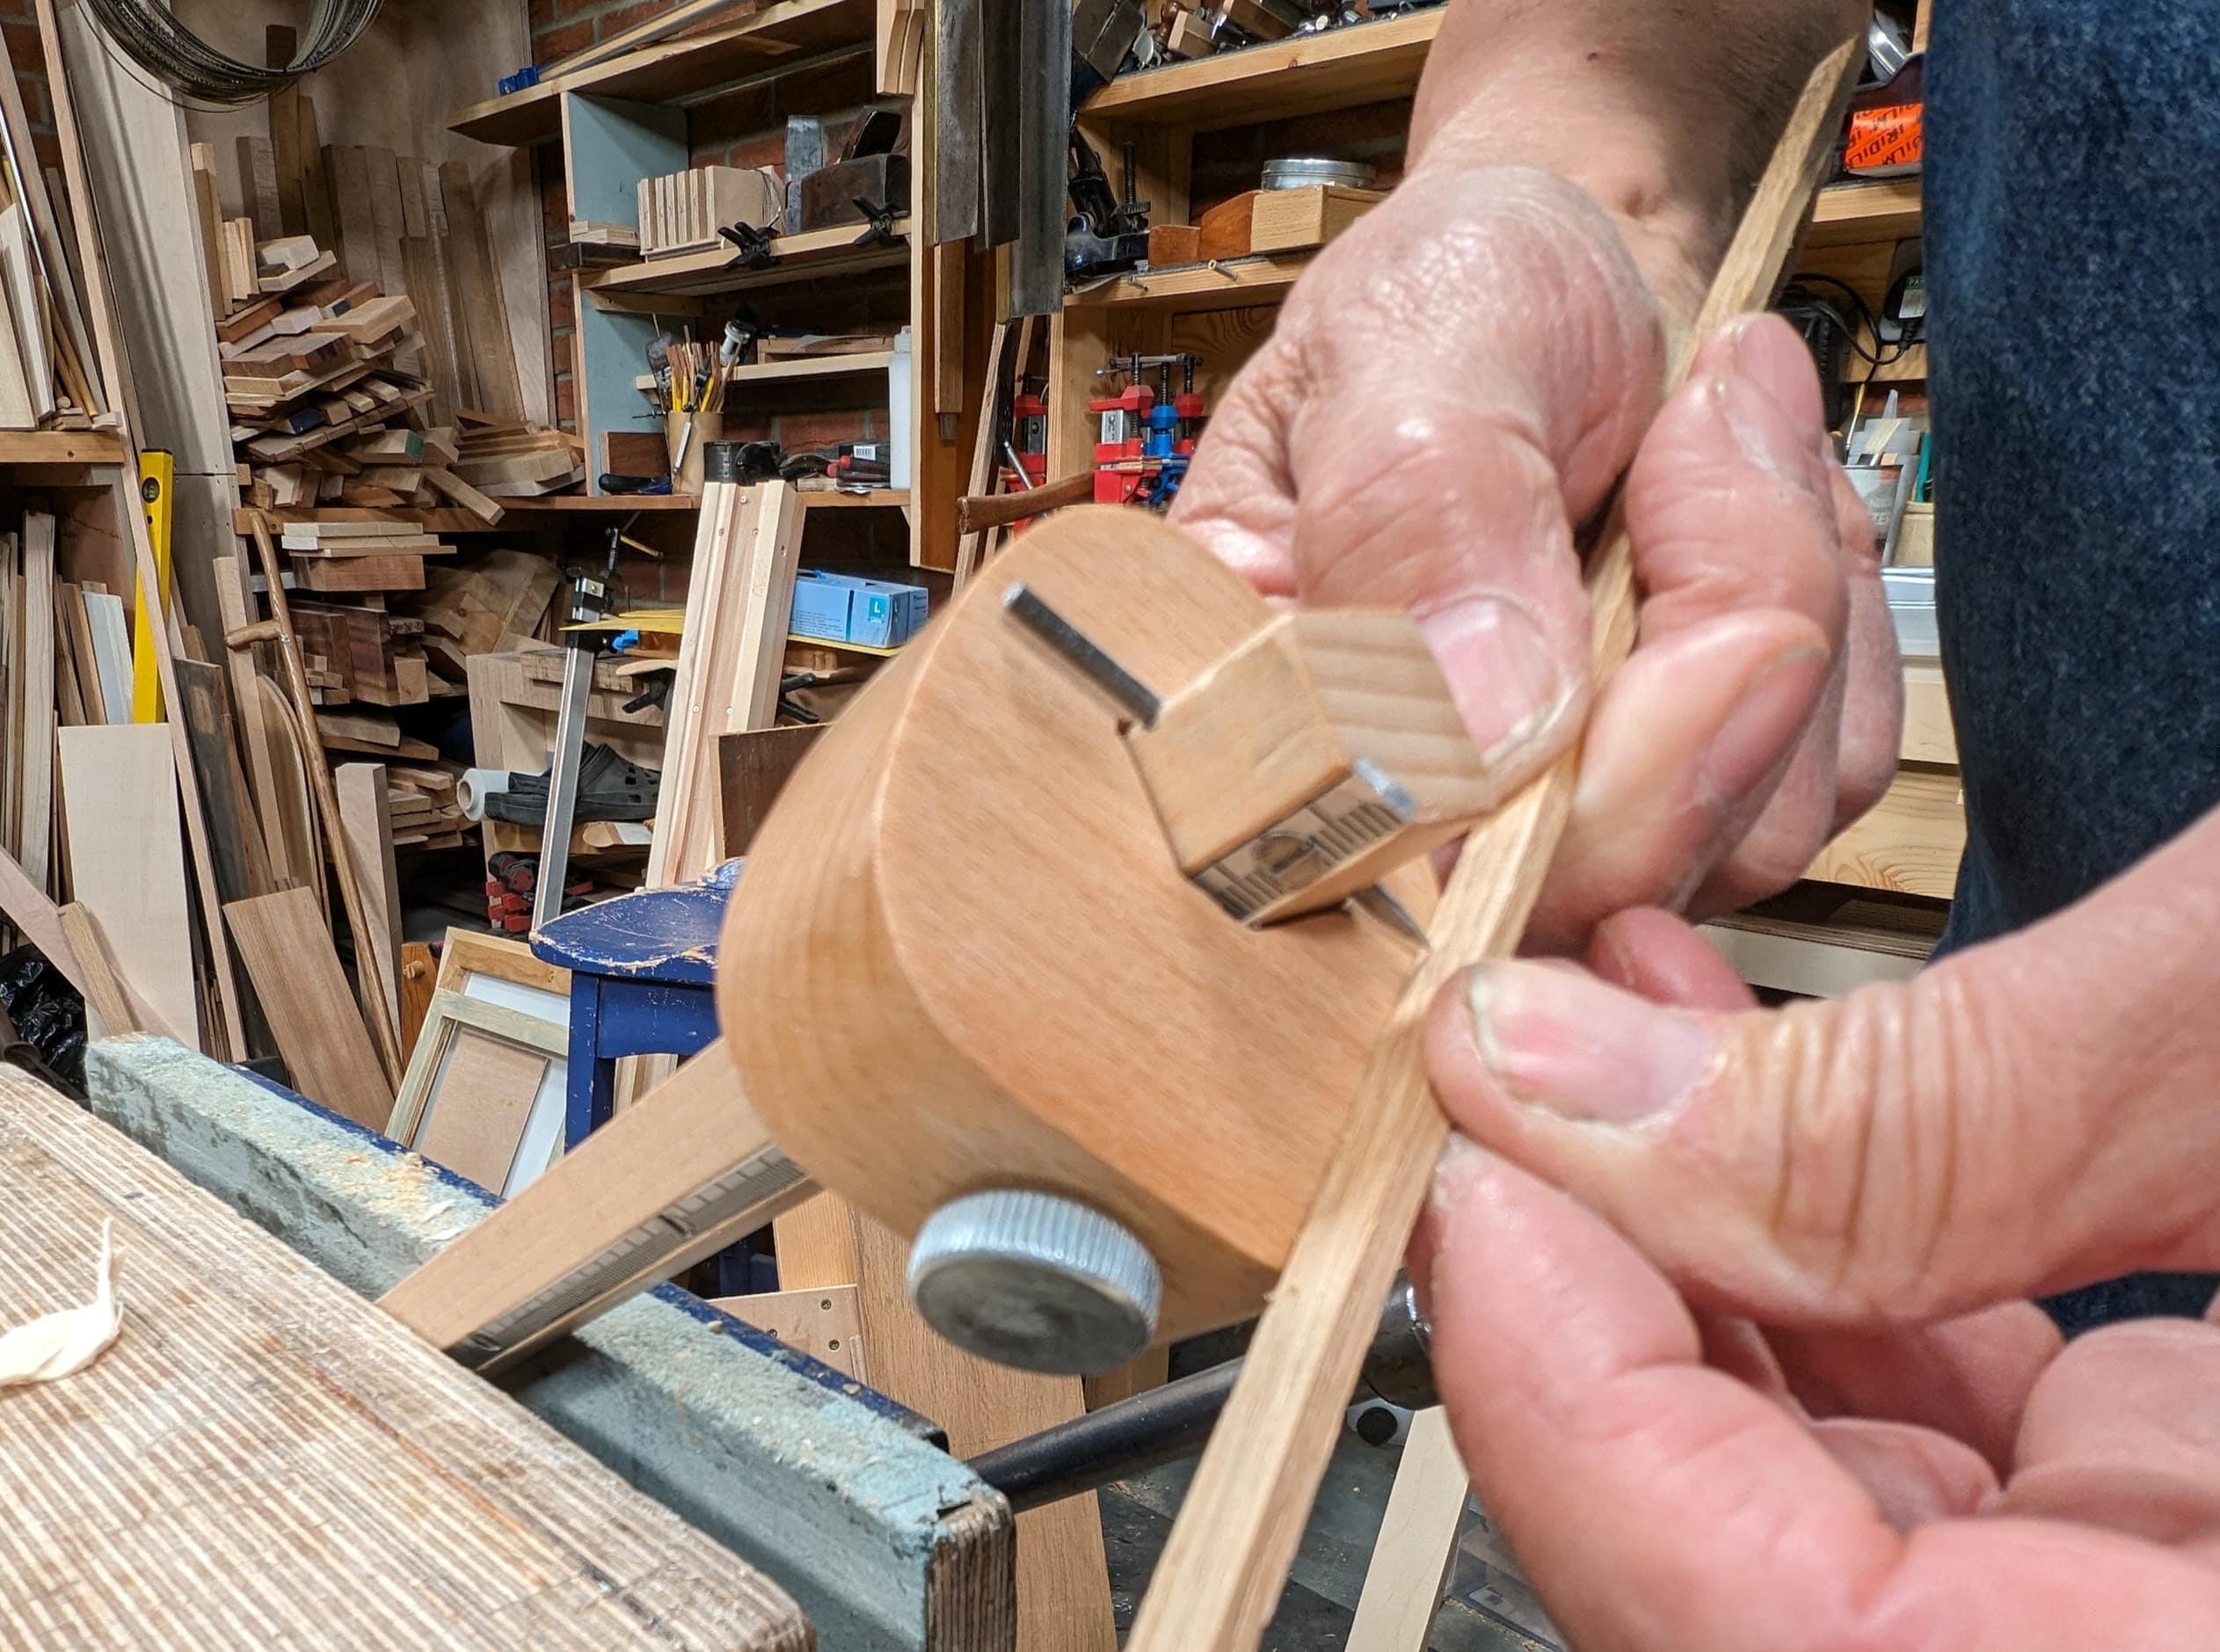
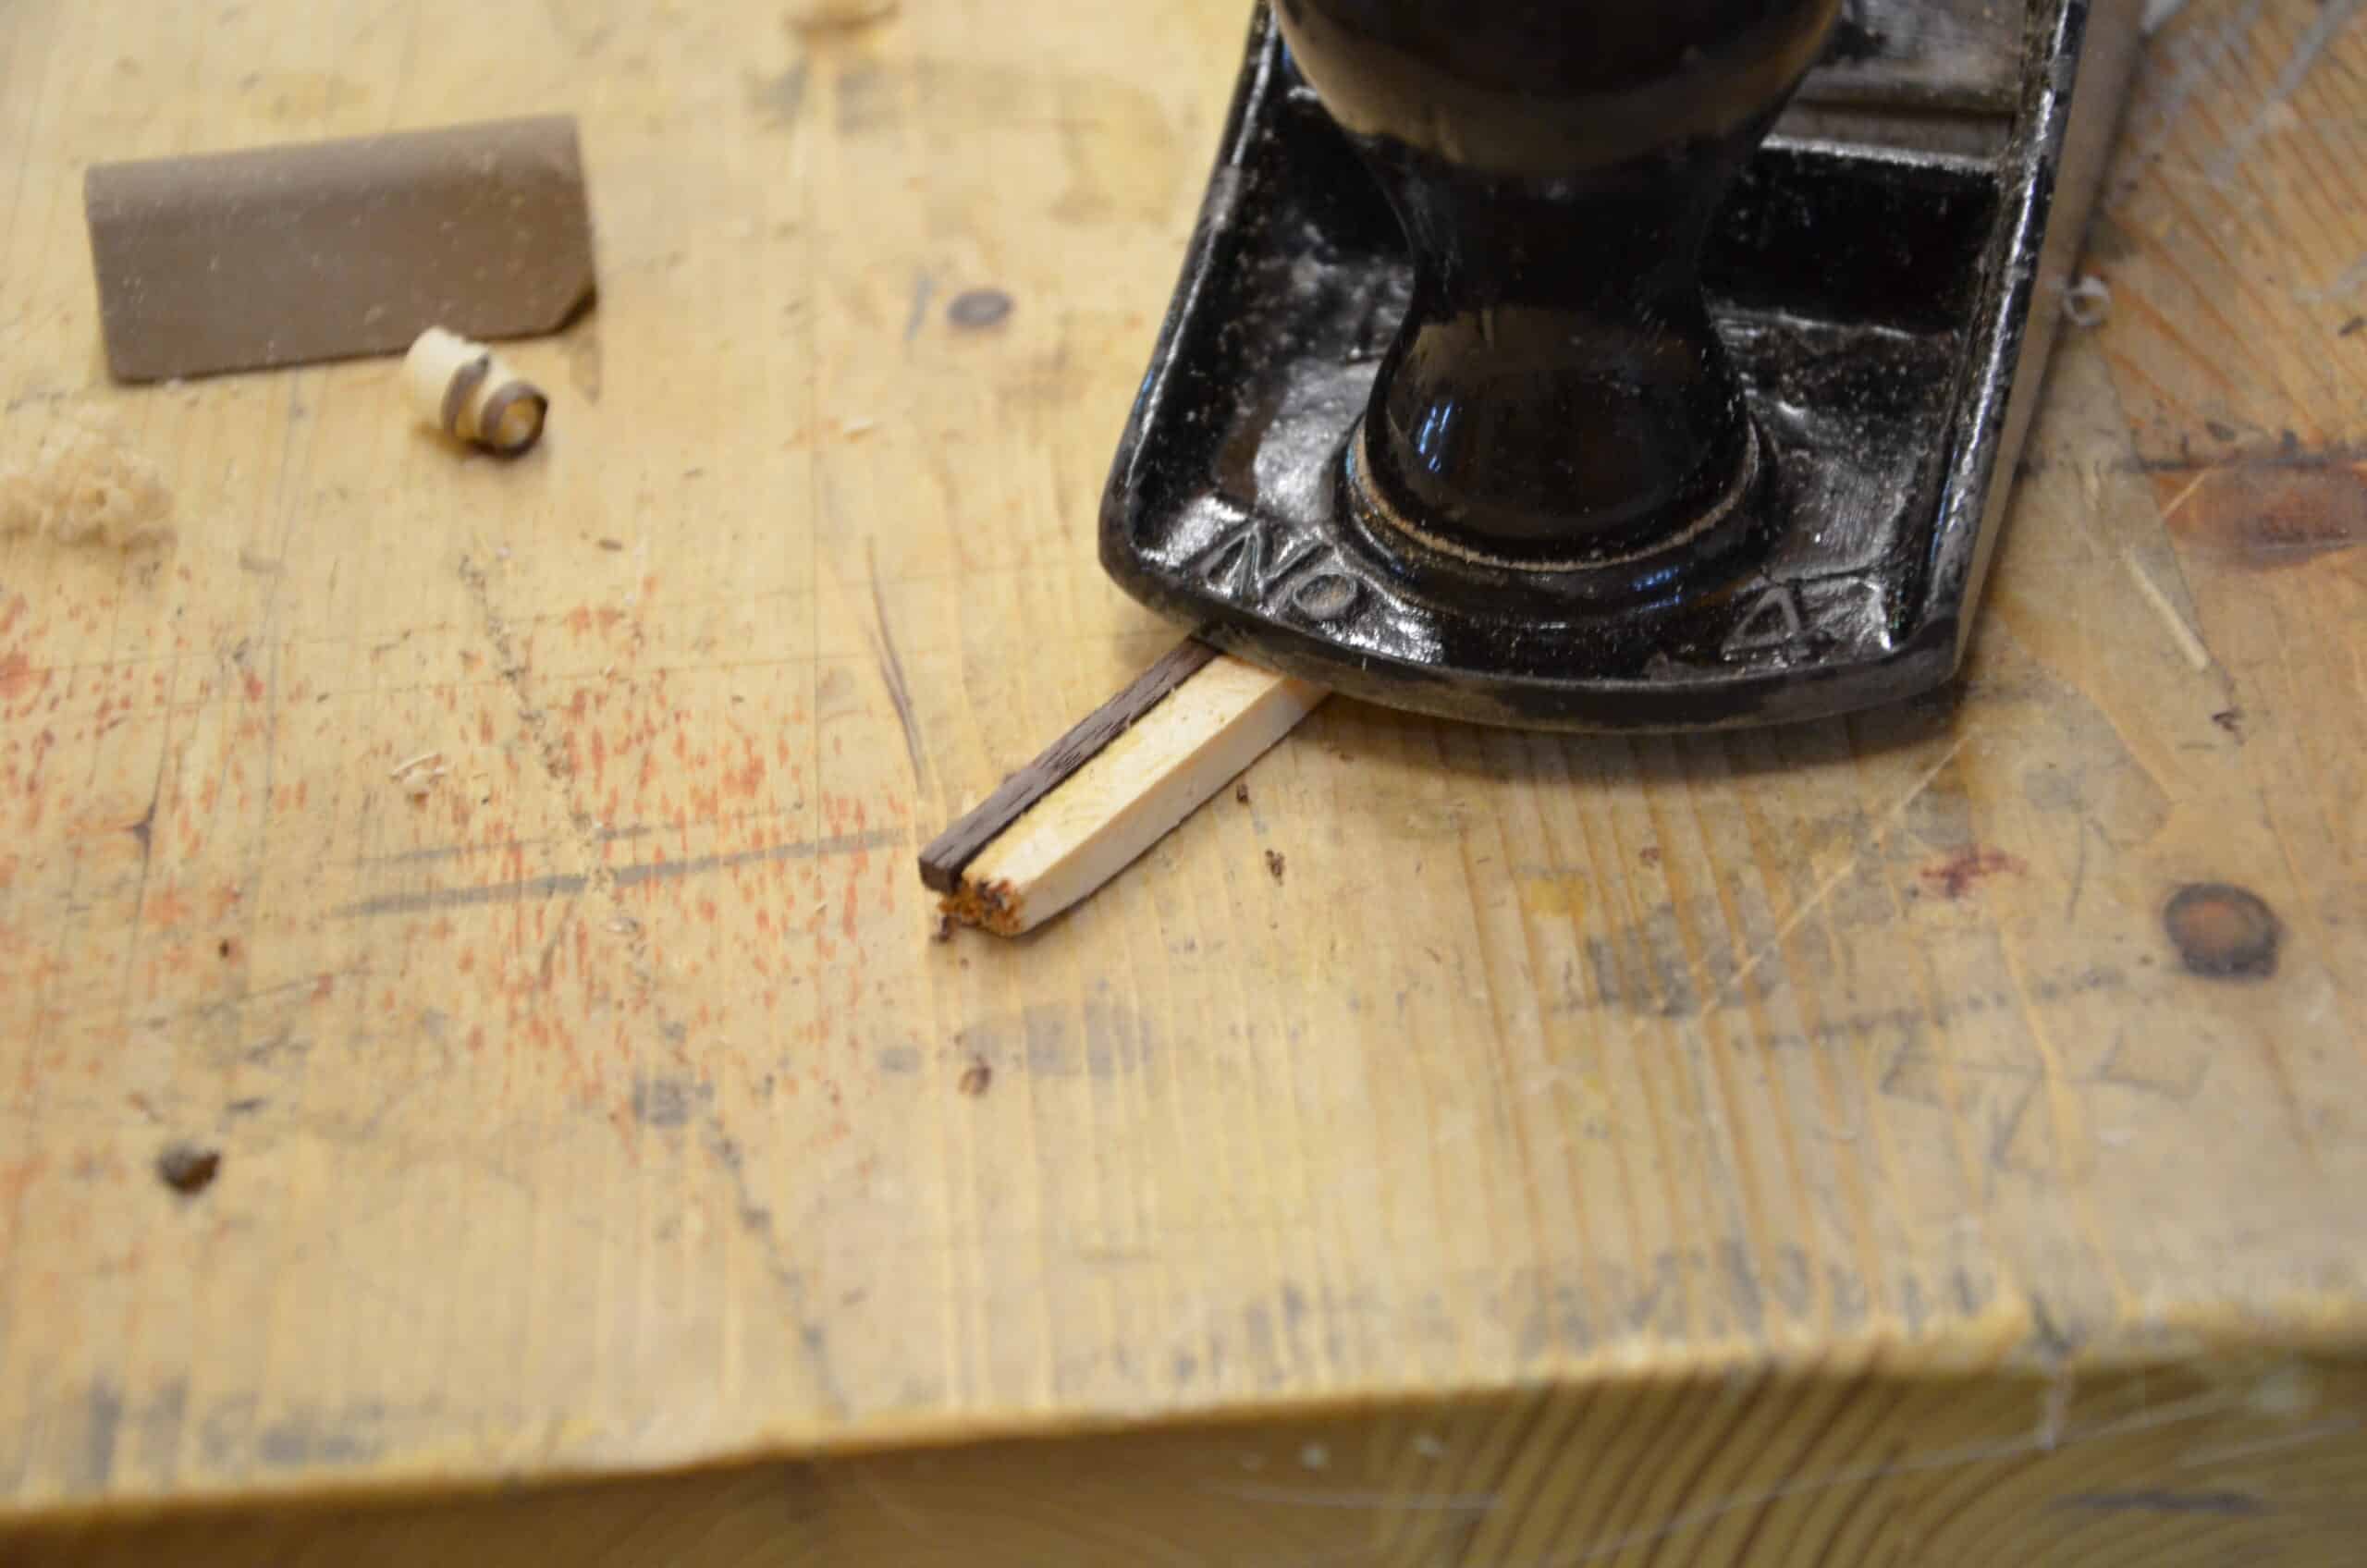
Here you see the shavings peeling off that finalise when the last pulls takes no shavings.
Follow the above first part instructions for making the two-tone inlay piece.
Thank you, Paul, for the photos and description! I thought the angle for the wedge housing would be important, but apparently not. I suppose scrapers cut over a relatively large range of angles, even if it does feel like there is a sweet spot when working with one in the hands and I suppose, also, the flex you mentioned and the stabilizing hand can help. Thanks again!
I will be making this one. Thank you.
I went ahead and made one. Works well! There is a little chatter, which shows in the final surface, but two seconds by hand with a scraper cleaned it up. Is that typical? Probably some practice with the stabilizing hand will help avoid this.
I skimped and used whatever scrap I had at hand, which was a little narrower and thinner than you suggested. Next time, I’ll make the bed wider (per your dimensions). With my bed being narrower, it seemed to make it harder to get the first passes because I couldn’t be further away from the wedge (and thereby get a lighter cut). I also made my wedge too long, which just means I couldn’t cut the kerf with my tenon saw. Not a big deal (use a panel saw), but it was needlessly long. Next time, I’ll shape and house the wedge, then mark up a bit more than the card scraper width, cross cut, and then rip the kerf. My tenon saw can definitely rip that depth.
Thanks again!
Btw, there is something weird about your blog software. Once I post a comment, I cannot see any comments that come after it. I have to go to a private window or a different browser or otherwise get rid of the browser state. This is in Chrome and I think I’ve seen it with Safari. At some random time, new comments (after mine) will show up for me although sometimes I’m not sure that they ever show up. I just wanted to let you know…there’s nothing for you to do, necessarily. Chasing that down is unlikely to be a good use of your time! Oh, this has happened for a very long time…more than a year, probably even longer.
This is good because I once tried to make the one that is suggested in the Roubo book but that was a disaster. I’ll be happy to try this one and see if it is better. Thanks, Paul.
This is so much simpler and easier to do than the one in the Roubo book.
very cool! thank you for sharing. 👍
muchas gracias Paul , una genialiadad.
Saludos
Oscar
Very interesting jig Paul. I don’t do a lot of inlay work, but I have a lot more scraps these days, so likely will. A couple of questions about the jig. The scraper is clamped only at the wedge side, with the opposing hand used to stabilise at the outer edge. I’m assuming that you just trust your own senses in order to maintain the scraper’s parallelity with the platform? Or is the clamping force on the scraper sufficient to maintain parallelity with just an initial setting? Secondly, you mention planing discrepancies prior to using in the jig. Have you discussed how to hold such small pieces for planing before on your blogs? That’s one bit I often struggle with. I resorted to making a planing sled for small pieces, and I use plastic spacers to raise the piece up to the desired depth. It works okay, but a bit of a faff!
Thanks again,
Rico
The easiest thing to do is to just make one. It only takes ten minutes from scraps and the experience will tell a hundred times more than I have time to create words for. There is no risk and no loss in doing this compared to the hours it took me to pull the article together. And please don’t take this as any kind of rebuff, Rico. I always enjoy your considerable support, encouragement and contributions here. That is not my purpose here at all and I know replies can often be taken the wrong way even when well intended. Passing a piece thicker through the trimmer does take off successive shaving with or without added finger pressure provided the scraper is sharp. You can add small finger pressure to absorb vibration or prevent flexing and you can also apply pressure for a thicker or heavier stock removal. This guide or thicknesser works amazingly and especially with very thin material including veneers. You can familiarise yourself with different physics elements to expand your knowledge and understanding as you try it out. I have shown my methods for planing thin stock and where and how to clamp such materials in my videos. I thought that this was worth showing for those who might need one.
No rebuffing felt, Paul! I totally understand, trying it is always the best way. I usually comment on your blogs whilst at my desk, with my brain going into overdrive trying to conceptualise something in theory rather than practice. I should just wait a couple of days until I have the time to try for myself and then return with questions! I will re-familiarise myself with your thin planing stock videos in the meantime.
best wishes,
Rico
Hello Rico.
If you want to be sure for parallellity, you can draw one or more lines on the platform top making sure they are square to the platform’s edge.
Then, looking over the scraper’s top edge, you can eye ball it parallel to the drawn line. Simple and easy.
Love it, so simple and effective! Thanks for the post.
Another excellent piece of practical advice to produce something simple and potentially extremely useful thank you.
Kumiko woodworking is highly dependent on having accurately sized small identically thicknessed pieces, and it has immediately occurred to me that this would be a very simple way to achieve that outcome.
Your willingness to share your knowledge and skills has undoubtedly benefited thousands of people including myself.
As I see it, the flexing of the scraper is here an advantage as it allows to achieve the desired thickness in multiple passes without changing the setting.
One start away from the wedge when the piece is still too tick and finishes near the wedge where the flexing is minimal.
With other jigs, one has to start with a piece very near the desired thickness or has to incrementally change the setting after each pass.
Brilliant.