Make your own 5061-style gauge #1
For more information on gauges, see our beginner site Common Woodworking.
As a follow up on scarce finds on eBay I thought it might be useful to convert and existing gauge to approximate a similar but home made retro-make design that will work equally well.
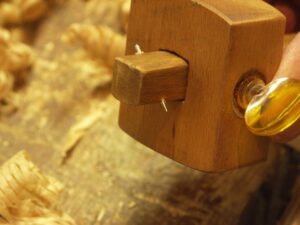
The critical advantage of the Stanley 5061 gauge is the ease with which the trailing edge marks combined with maximum visibility of the point itself.
Here is a simple way of altering the orientation of the point.
Pull the point from the gauge with pliers or make a fresh one from a heavier piece of piano wire ground to a point using a grinding wheel or a flat file.
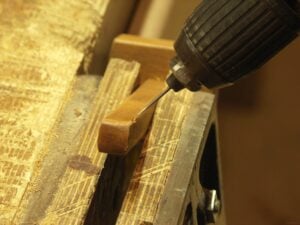
Install the point into the drill and use the point as a drill bit, applying firm and even pressure until the point passes through to an acceptable distance. Drill from corner to corner as shown.
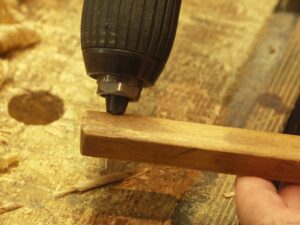
Release the point from the drill and the bit will be firmly anchored in a friction hold in the stem of the gauge.
More following…
I performed this pin modification on my gauge today as per your instructions. What a HUGE difference it makes. It made my Harbor Freight combination gauge run lines like a champ! Marking in the opposite direction can be a bit awkward, but not so much really. The bottom line is that I finally get a perfect line! Thanks for this information Mr. Sellers.
Dear Paul,
I have always your blogs interesting, but now, wow, you have exceeded yourself, blog after bolog of interesting projects to try. Hold on a bit man, I need the time to ry all this. I have always found marking giages difficult to use, the point digs into the grain etc. This is going to be great.
I made a crude but effective marking gauge – a prototype I suppose – by sharpening a washer to act as the rotary cutting edge (youtube tip: put it in a drill press to sharpen it). For the beam I made a dowel using a large washer to act as a dowel plate (I used a piece of elder riven from a block of firewood – perhaps not the best choice of wood for either use!). The body is just an offcut of construction timber with a hole drilled thro’ it. I was going to use a metal thumbscrew to hold it in place but at the moment the fit of the dowel is tight enough that no extra holding is required. I just tap the dowel on the benchtop to adjust it.