Questions Answered – Router Bevels Reversed
I thought that this was an interesting question and would help everyone better understand some added complexities for all edge tools actually. It’s a well thought through question and Ed is a friend of mine.
Letter from Ed
Question:
Paul,
I was going to post this on your blog, but was afraid it might confuse someone and lead to disaster, so I’ll just put it in an email:
I’ve always wondered why a router plane bladed couldn’t be sharpened “upside down.” That means, have the top of the blade flat (no bevel) and put the bevel on the bottom, which one sharpens by mounting the blade in the router flush with the base and moving the router over a stone as if trying to rout the stone. Yes, this would give zero relief angle, but since the router is really acting like a paring chisel, why wouldn’t this work? You’d always come out parallel to the sole, which would be good for accuracy.
-Ed
Answer:
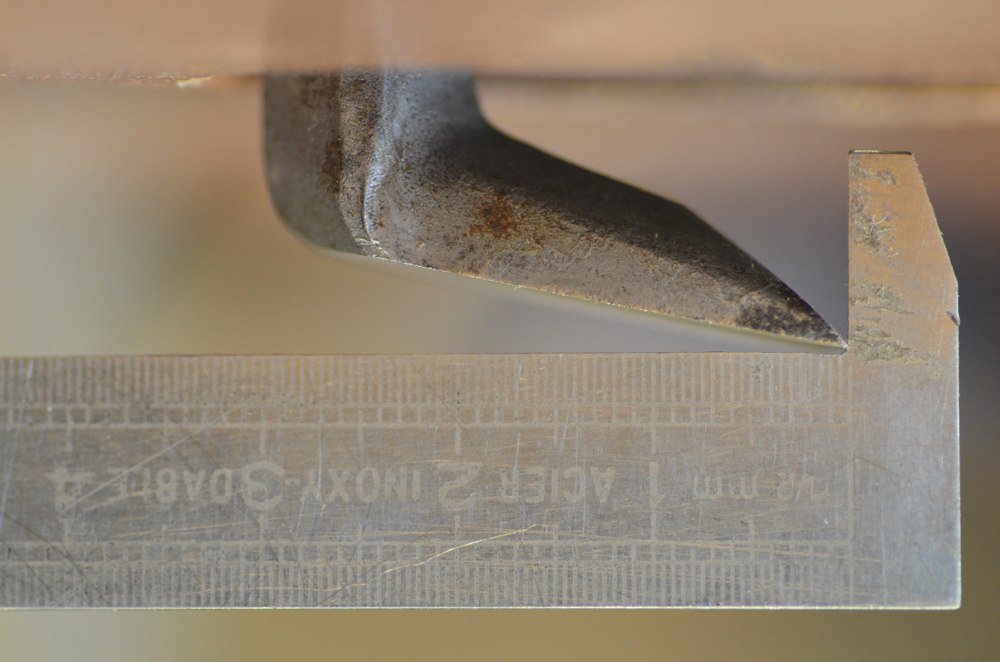
It’s a mega amount of work for little change. It’s really not a problem to hone the bevel of a regular router but you need to set it up first and so I wrote this blog to address the issue. Firstly, you are right, putting the bevel on the underside would work fine but not really without relief. One key problem I see is that most often out intent is to put say a 30-degree bevel on a cutting edge but often add a few degrees unintentionally when and if we strop. That’s enough to put the heel before the toe and so negate the cutting edge from actually reaching the wood and causing the bevel to more ride the wood rather than cut. This is a very common problem with 151-type spokeshaves too, by the way.
With regards to relief. With the best intentions in the world a paring cut just will not happen. When you sharpen any edge tool, the immediate response of the tool edge to the wood is a minute, most often indiscernible fracture right along the fragile edge. This thin line of broken edge happens almost without pressure, but, regardless, the edge does edge fracture. At this stage the edge fracture is very long and narrow and the edge is still sharp enough to cut wood. Subsequent edge fracture continues throughout further and subsequent use and eventually you must sharpen up again.
We tend to see the edge as being worn away like water washes over rocks but that’s not only what happens. The edge does indeed fracture into ever increasing sized craters and this is what the dulled edge really becomes. That being so, the two faces forming the cutting edge are now jaggedly cratered rather than the crisp arête. This then is the reason we inevitably elevate a chisel to compensate for edge fracture on the flat surface edge after only a few minutes of use depending on the wood being worked and the way the chisel itself is worked in the wood also.
Routers are really worked hard in much of the work and the more you can get in prep work from the chisel the easier it will be on your router, it’s cutting iron and of course the less sharpening you will need to do to the router cutter too. Now, that said, there is no reason a steeper top flat cannot replace the bevel and a relief of say a few degrees put to the underside. The Preston and Veritas routers both have a shallower presentation to the underside of the cutter so that would be just fine. Just as an aside and another note of interest that somewhat proves my theory is that if you take one light pass, even the lightest pass, along and on the tips of saw teeth as if slightly topping or jointing the teeth with a flat file, the saw just will not cut at all. Even though the meeting edges are indeed sharp, without the relief of a back bevel they don’t cut.
Paul, this is exactly the method I was taught to sharpen the blade of a router plane. I does indeed leave a clearance angle when done correctly, and what is more, it leaves the edge lying in a plane parallel to the base of the plane. Kind of the point of a router plane is it not? To create a plane parallel to the base?
The gentleman who taught me this had “suffered” his apprenticeship in England, so your disparaging remarks hit home with me.
Mike
Mike- Could you say a few more words describing “done correctly,” as you were taught? What achieves the relief angle? Do you tilt the base a bit?
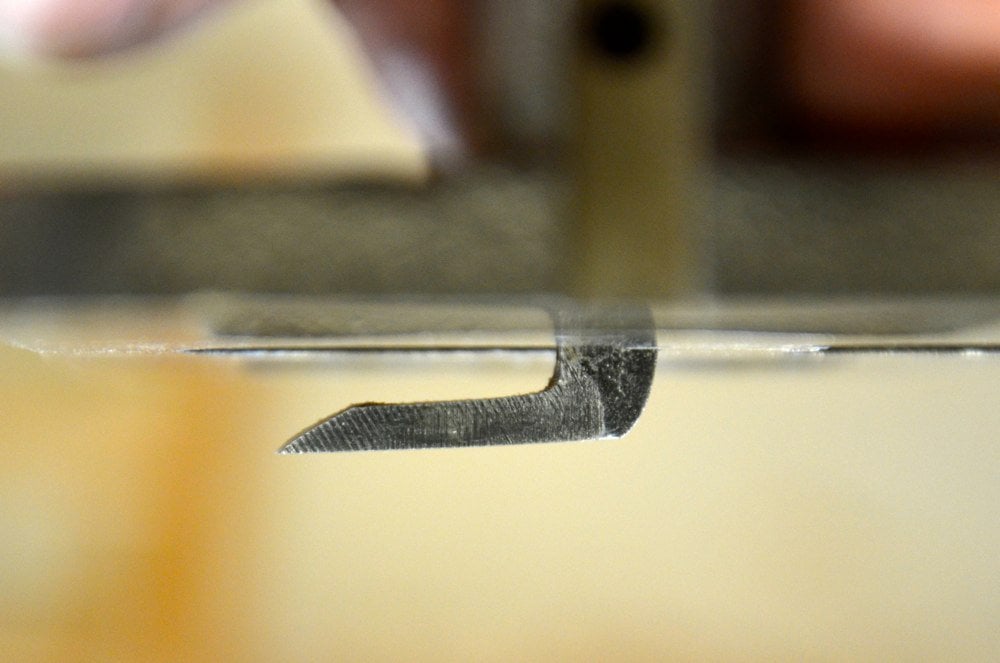
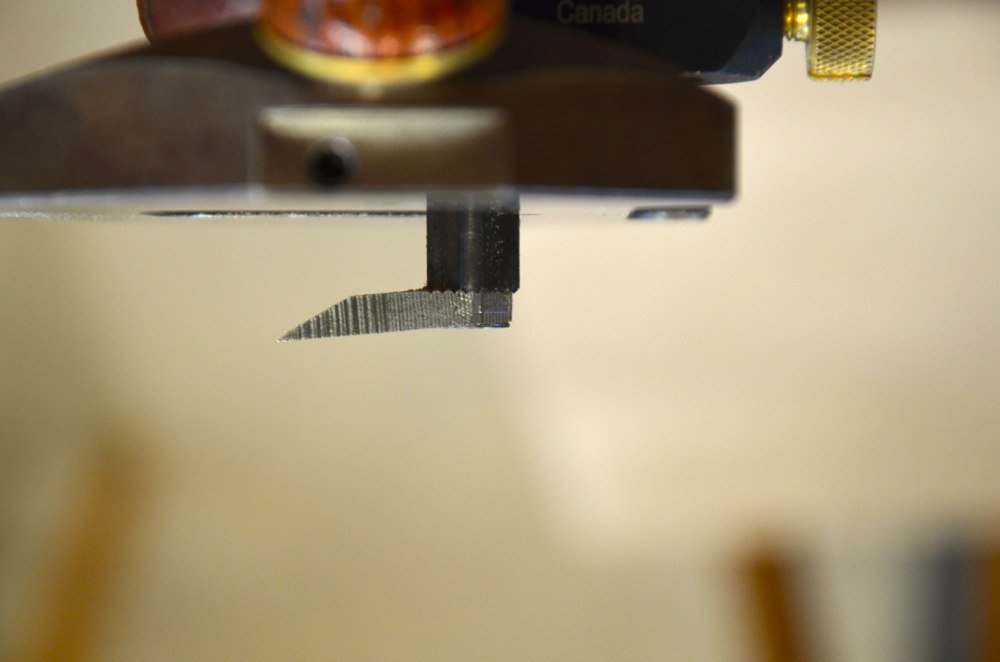
If you look at most router planes, there is a straight edge to the base behind the cutter, in the plan view of the stanley 71 there are two “ears” that form this line. The tool is rotated around this line so that the blade extends below the base, yet touches only the edge of the blade. The angle between the base and edge will be the clearance angle for the blade. All this assumes that your abrasive and the line on the base are reasonably planar, I use sandpaper as the abrasive on a granite plate.
More difficult to describe than do.
So, is there a tripod formed by the blade as one point and plus two points on the sole of the router? You actually extend the iron a bit below the surface, and let the base rock back to form that tripod? Is that what you’re doing? If so, this is really clever….there’s no need to regrind anything. None of the angles change. It’s just that the “top” is the back of the iron, which you polish once, and the bottom is what you hone to sharpen.
Sounds like a bevel-down router cutter.
That is correct!