Unpacking the #71 Router – Last Post Part III
Today I worked to give better examples of the tool in use, to show a little more of its substantial merit in the trade for nigh on 130 years. Running the two makers, Stanley and Record (of old), side by side you quickly see that these tools are essentially the same and even some of the parts are interchangeable between the makers. Not all the threads on the set and thumbscrews are the same so watch for that if you are buying to add to an opposite maker.
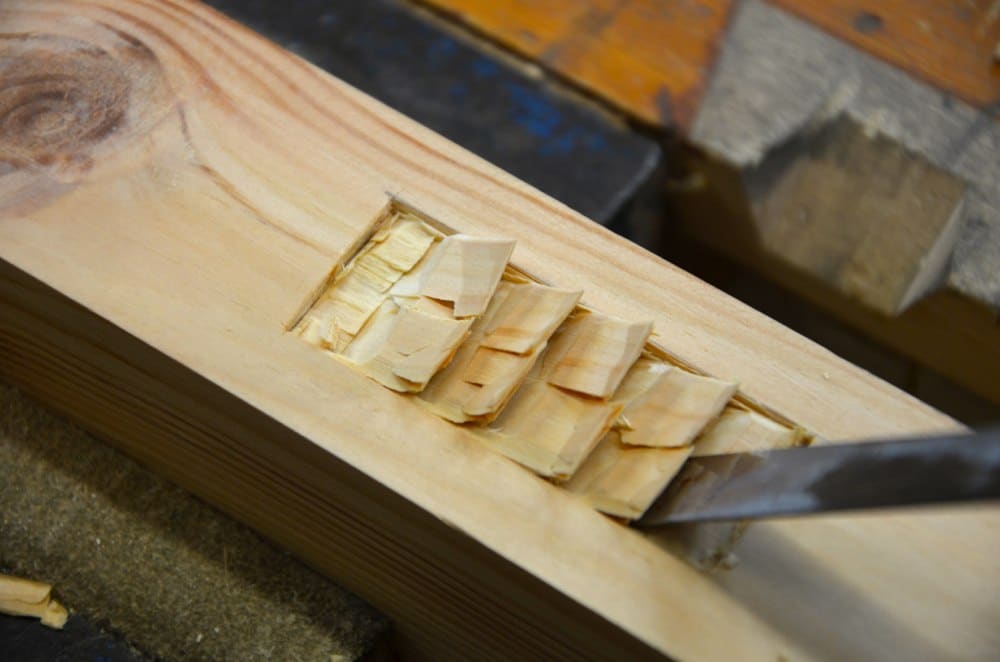
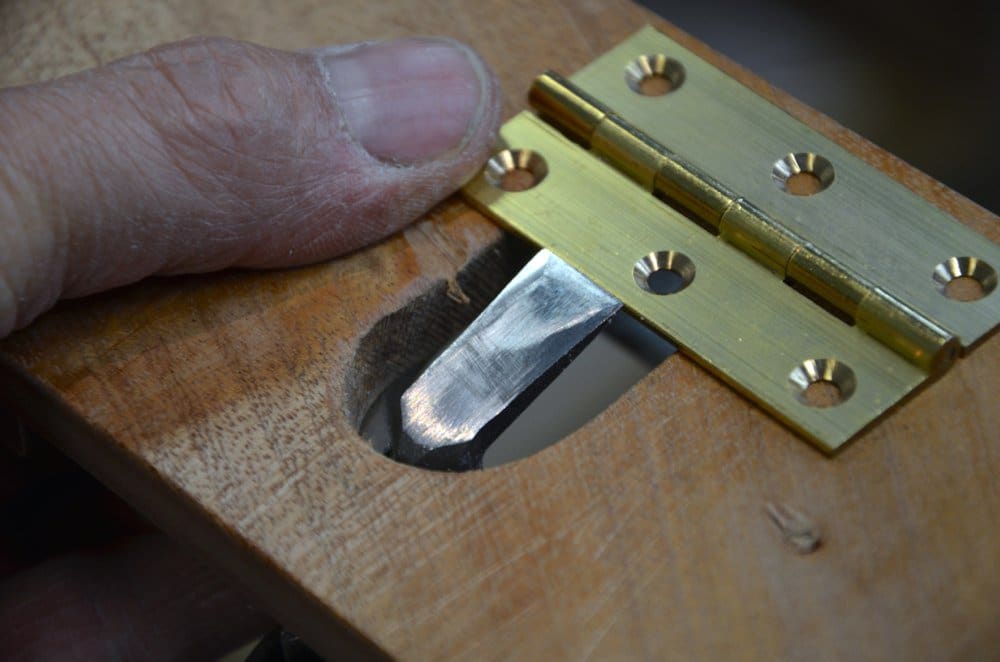
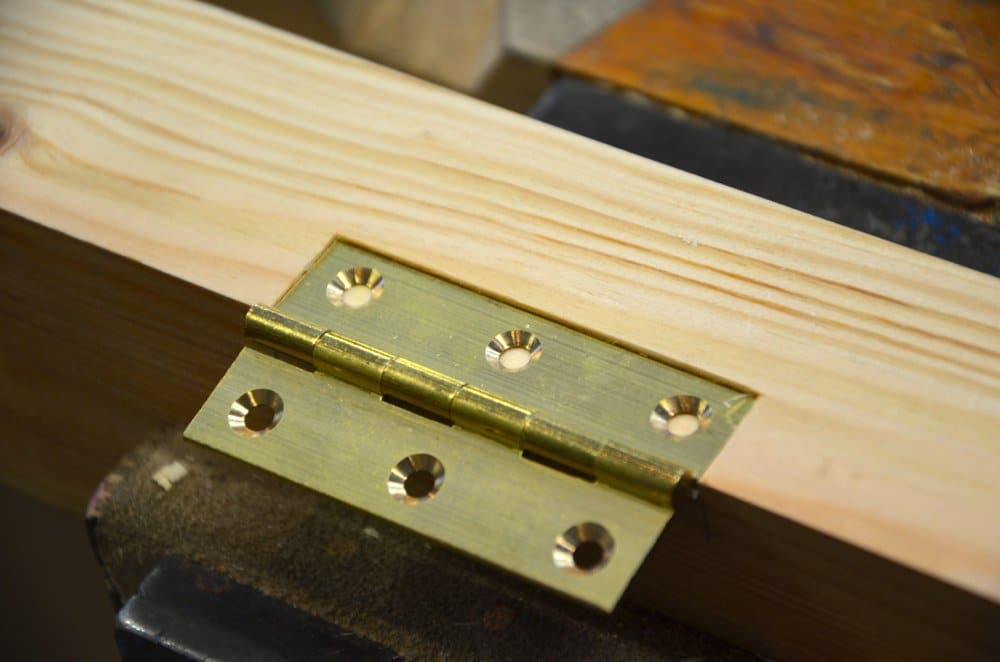
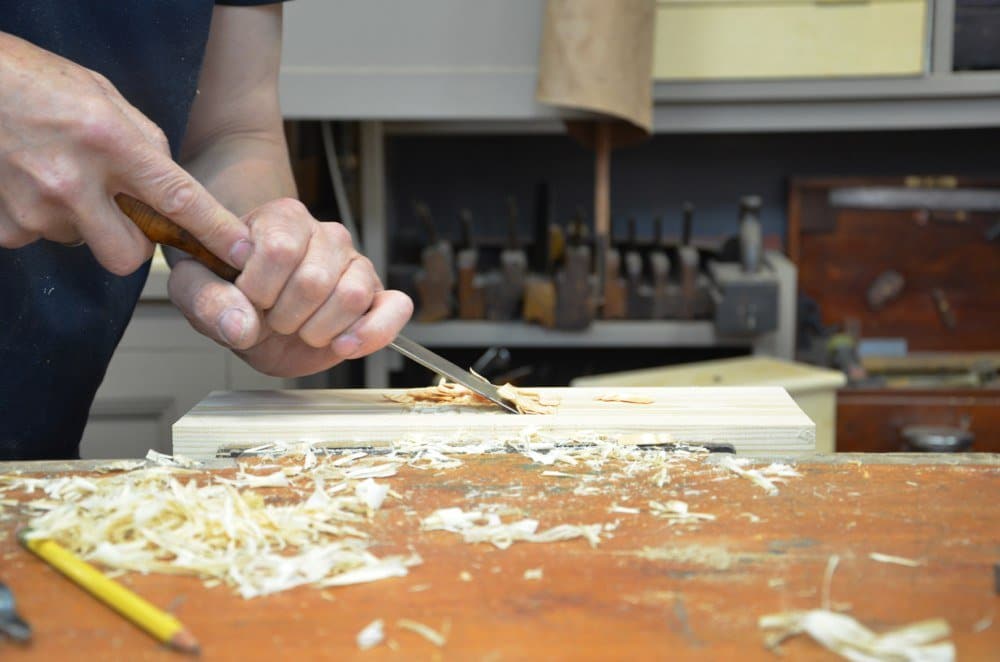
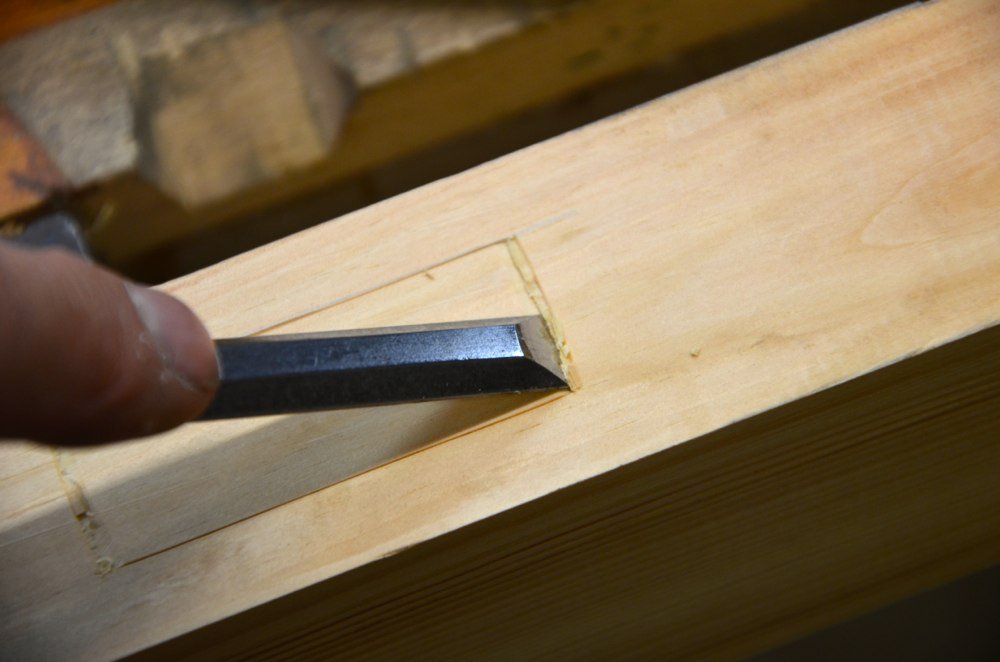
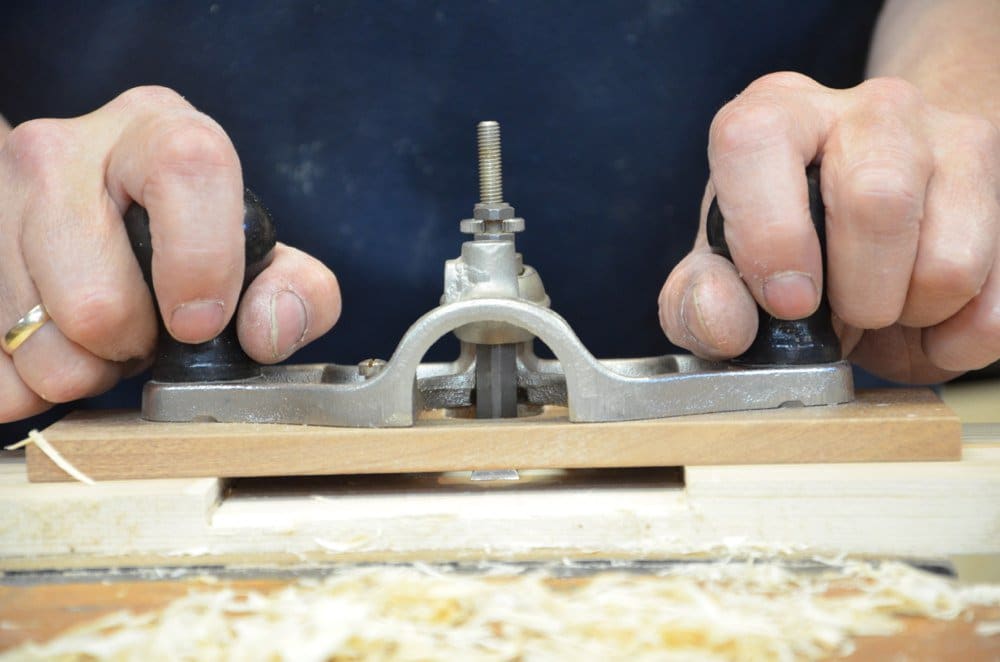
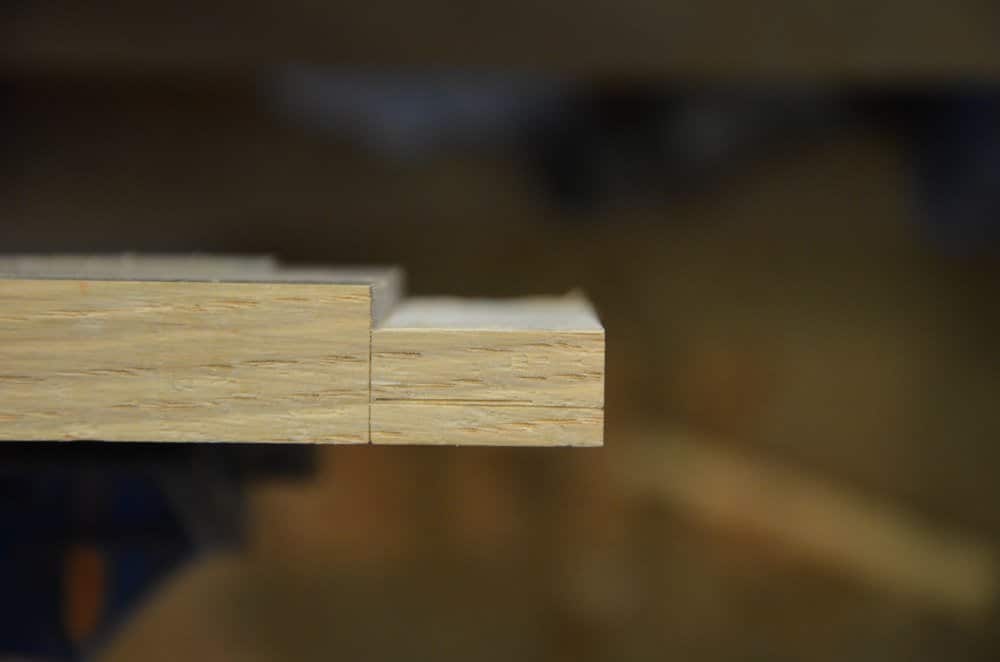
In this situation I use the router on the wooden base board to to delineate the depth for a hinge recess.
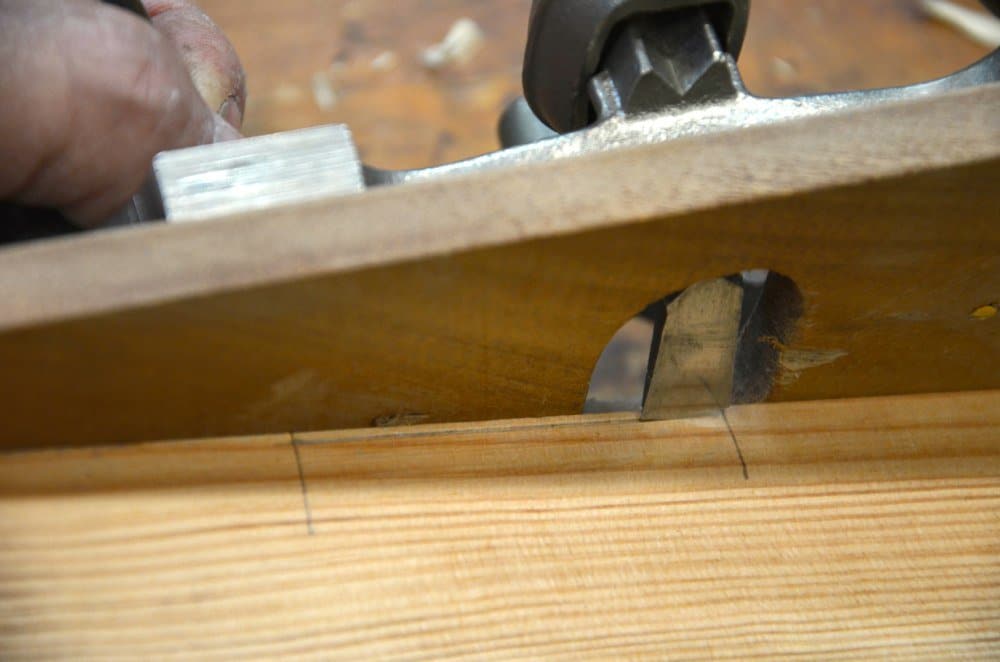
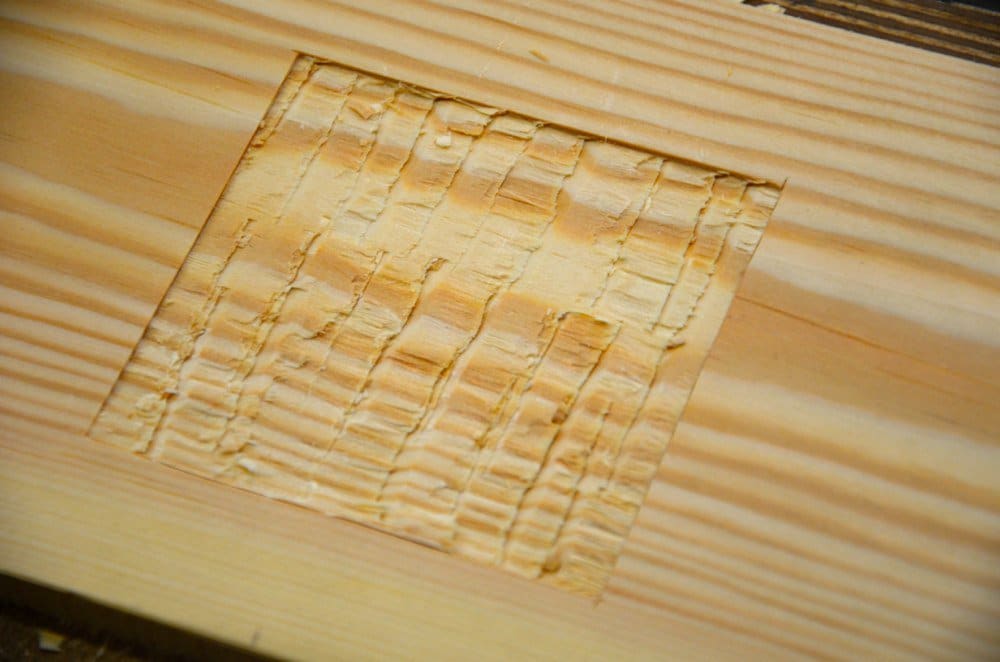
After that I chisel the knife wall at the hinge width to deepen the walls and then adjust the depth of cut in the router to remove the waste in incremental depths of about 1mm (almost but not quite 1/32”).

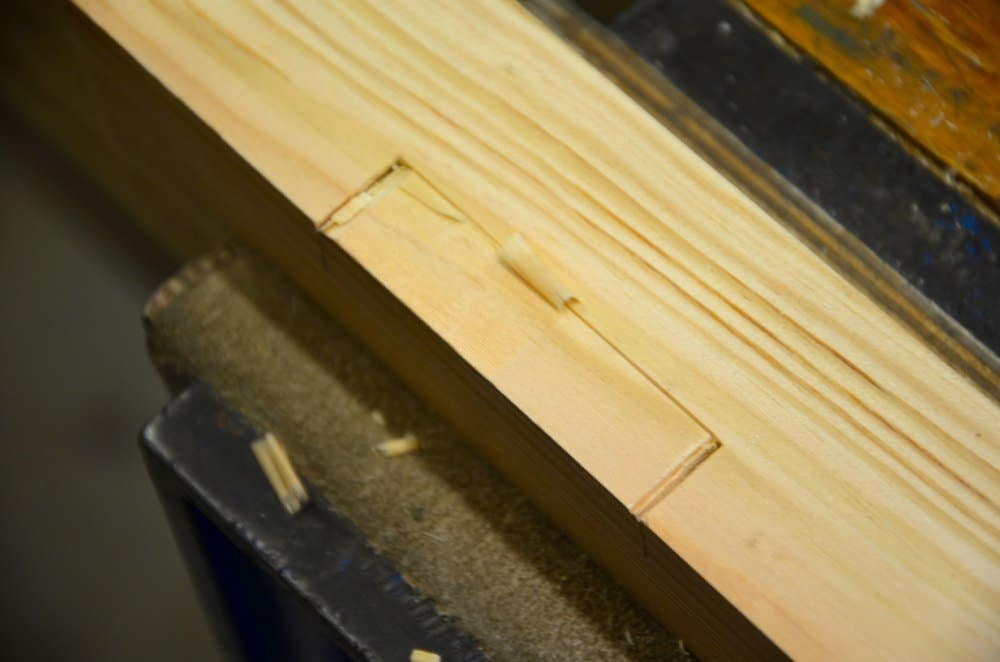
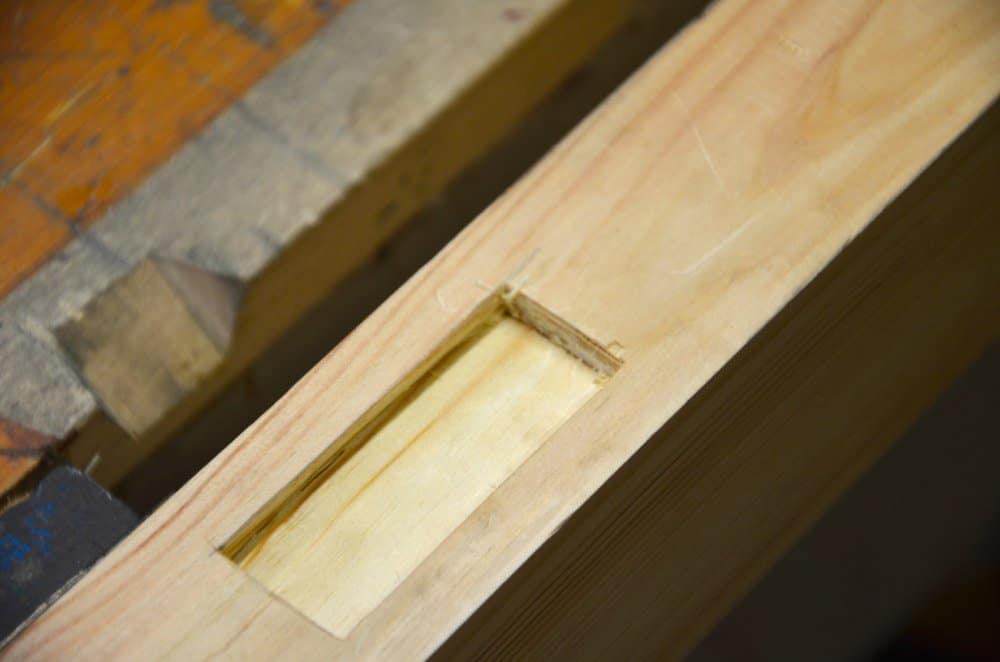
The recess is ultra smooth and within one thou of an exact overall depth. Translate this into inlay recesses and you start to understand the real value (and safety) in using the hand router and with the wooden sole attached it feels the same advantage all wooden planes have over all metal ones but with the added micro adjustment that makes the work dead-on accurate. Above you can see the steps in hinge recessing with the router.
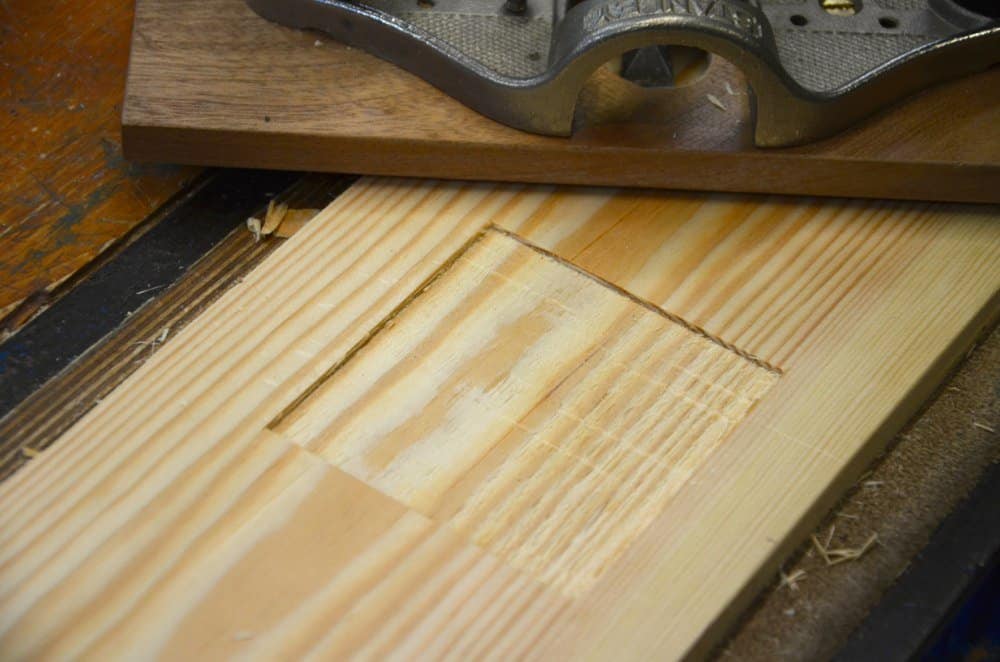
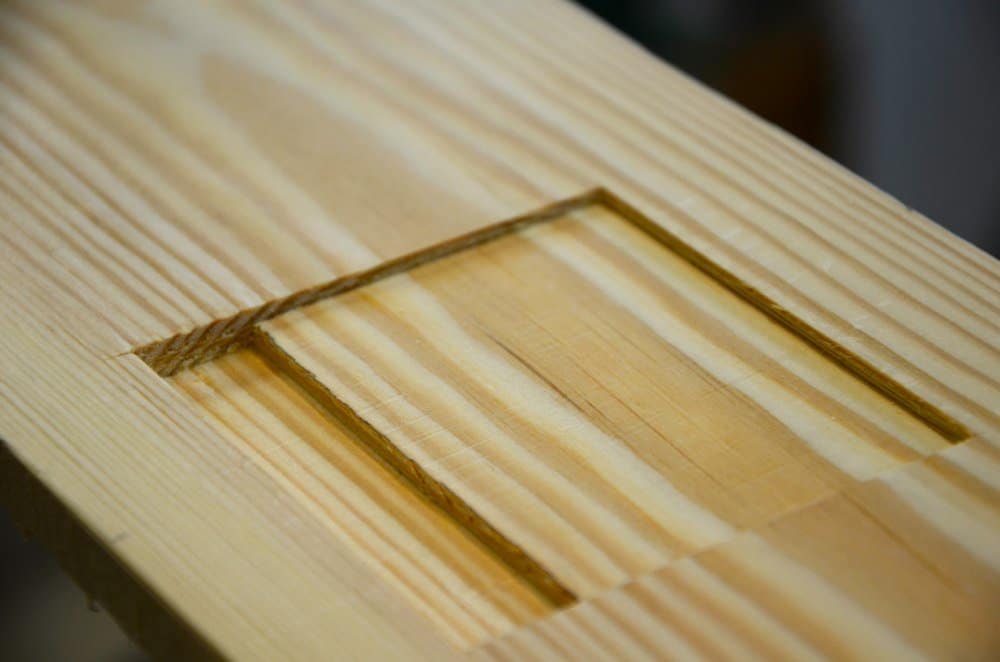
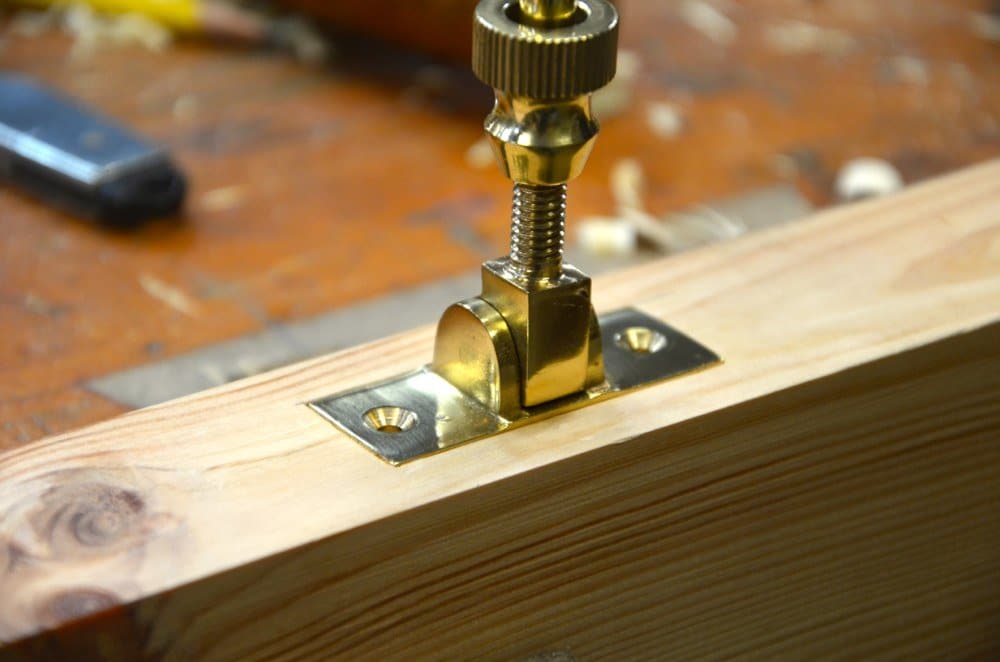
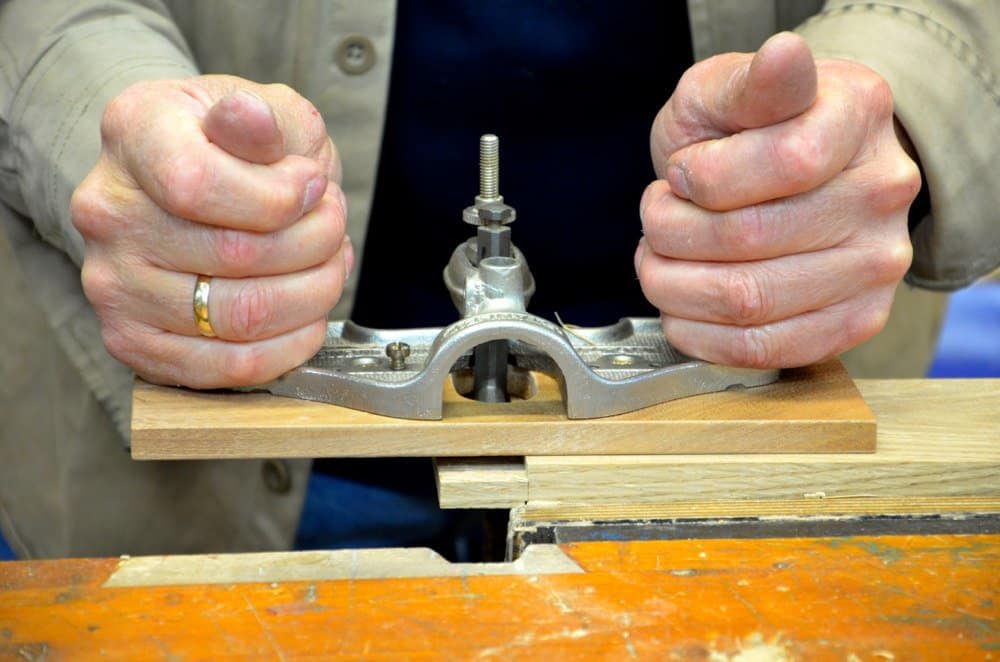
I created a double-depth recess on this one within four knife walls and then a hardware recess of the type you might use for extra support for strength.
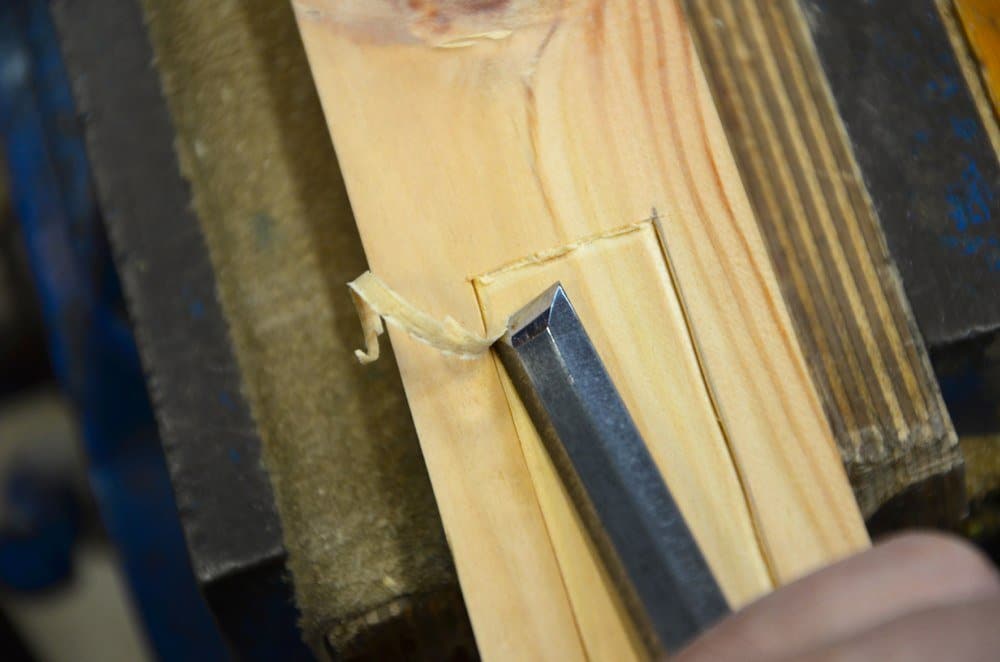
Chiseling the bulk of the waste saves too much setting and resetting and gets you to final depth very quickly.
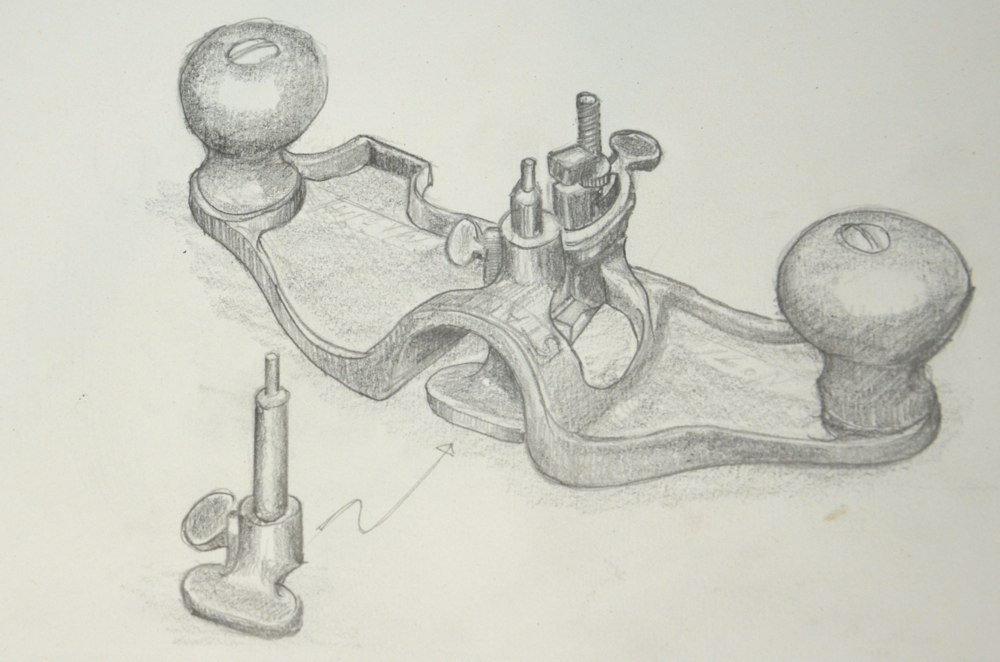
The original Stanley Tool pamphlet that came in the box with the tool is given lastly below, but I added ital and colour for clarity between my work and Stanley. You can work out the parts by the visual look at the pictures. In the pamphlet Stanley have coded the text with Capped letters.
In my last blog on this I talked of the spanning of areas wider than half the plane worth to rout out wider indentations that would otherwise be more difficult. If the cutting iron is well prepped the surface recessed will be as smooth as a planed surface.
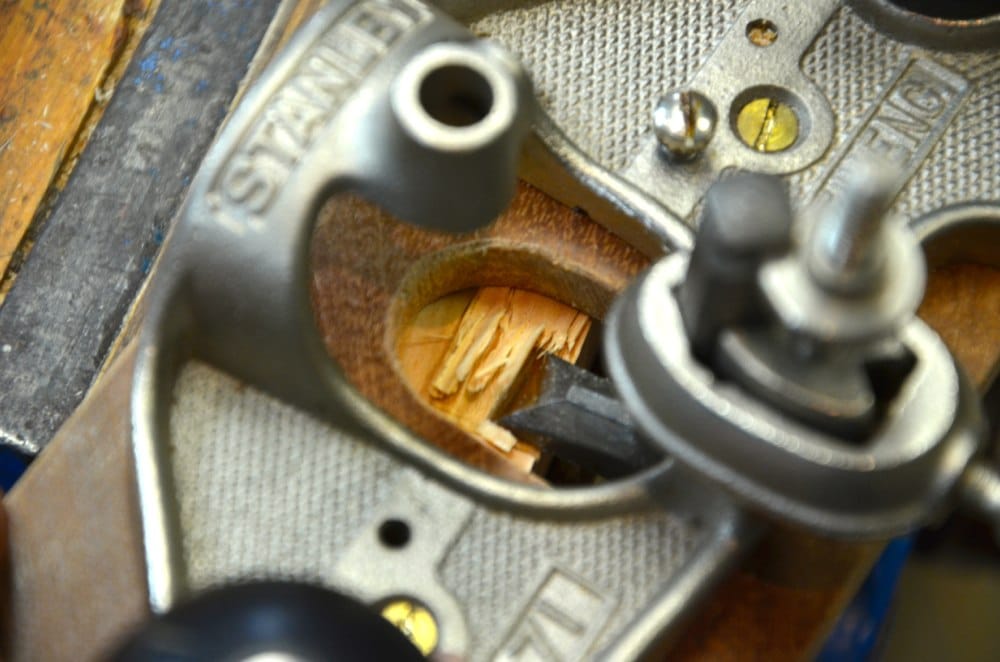
For tenons the hand router beats even the shoulder plane for accuracy and smoothness.

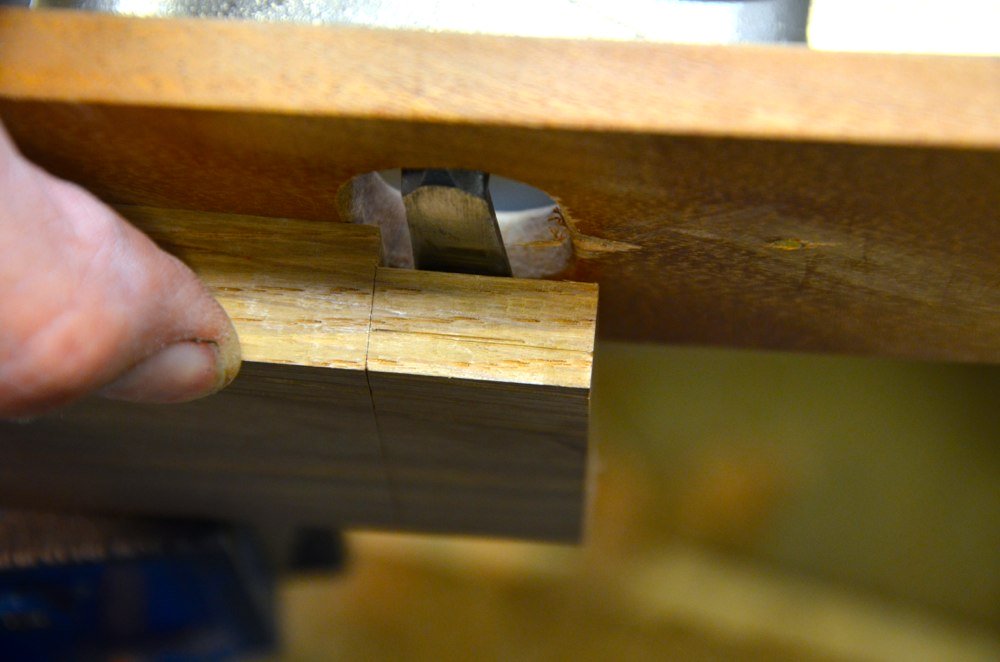
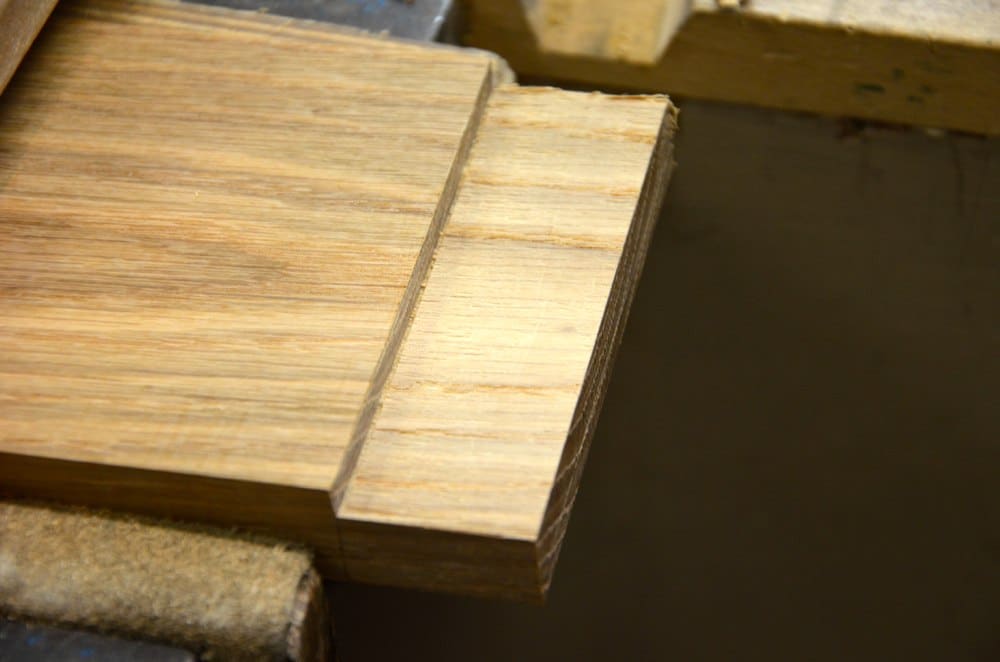
Here you can see the exactness of the surfaces and the alignment with the gauge lines. I have been making a table alongside the class today and all of my tenons look like the one shown and all are interchangeable with the same tightness of fit.

Here is a feature not to obvious at first. Using the back our outboard face of the blade mount gives more access into otherwise inaccessible areas bullnose fashion as in this recess were it up against another board.
Wording from the original Stanley pamphlet accompanying the #71 router plane:
Stanley Router Plane No 71
For surfacing the bottom of grooves or other depressions parallel to the surface of the work. There are many applications in pattern making, cabinet work and in fact almost all kinds if woodworking that call for these tools.They are particularly practical for routing dadoes for shelves, stair stringers or where pieces of hardware are to be recessed into the surface or edge of a board, such as large hinges or lock strikes, etc. It is not possible to show all these, but the user will discover places where the tools will prove their value.
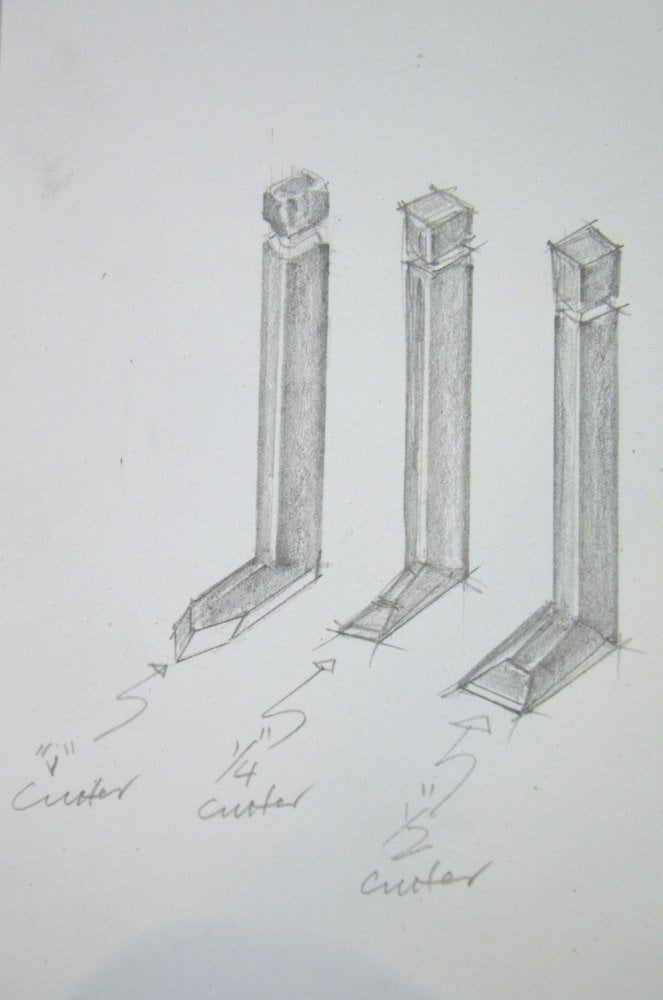
CUTTERS-Cutters are made of high grade quality steel and are hardened and tempered. The shanks of the cutters are graduated in 1/16ths for 1″ which makes it possible to reverser for duplicate work and for approximate depth adjustments. Three cutters (N) are furnished, 1/4″ and 1/2″ router cutters and a (3 piece) “V” or smoothing cutter. Cutters are adjustable and depending on type of work can be held on front and back of cutter post (D) by means of clamp (H) and clamp thumbscrew (G).
VERTICAL ADJUSTMENT OF CUTTERS-To adjust cutter to desired depth, loosen thumbscrew (G), turn adjusting screw nut (B) up or down on adjusting screw (C), and tighten thumbscrew.
SHOE-A shoe (F) for closing the throat is provided for use on narrow work if a closed throat is practical and is fastened to depth gauge rod (A) by means of the shoe thumbscrew (E).
DEPTH GAUGE ROD-This rod (A), fastened by means of thumbscrew (O), may be used to control the depth of each cut, preventing the cutter from taking an excessive cut which would be inconvenient. For example, a cut 1/16″ deep can be cut repeatedly while still allowing the cutter to be set for the final depth of cut. One end of the rod is of small diameter for following in a small groove.
FENCE-An adjustable fence (L) is provided for use where the cutter is to run parallel to an edge. One side of the fence is designed for straight work while the other side is for curved work. Fence may be fastened to either left or right side of working face of plane bottom (K) by means of fence fastening screw and washer (M).
KNOB-The two hardwood knobs (J) are fastened to plane bottom by means of knob bolt and nut (I).
Drawing of schematic of plane here.
Drawing of plane on wide housing here.
The illustration shows how to rout openings wider than the plane bottom (should read wider than half the plane bottom). The attachment of a flat board to the plane bottom is the simplest way to span large openings. The plane bottom is provided with screw holes for attaching such boards as necessary.
Drawing of options for use, plane and plane parts and assembled plane here.
Here is shown a common job in home construction where this plane can be used – routing the stringer for the step and riser of a staircase. The other piece shows a stopped dado and a routed shape for an inset.
I’ve only just begun hand tools, but I can tell you and I are going to get along fine. Your skill is excellent.
Keep up the good work.
As I mentioned I have an earlier model, how ever there is a person selling a really nice one with all the attachments for $95US which I feel is a little steep, but is a fine example and would love to have it.
Steve
Are the fences for the Record 071 and Stanley 71 typically interchangeable? I need a fence, and have secured a source for the Stanley version, but am reluctant to purchase unless I can be certain it will fit my Record.