Making My Box Part II
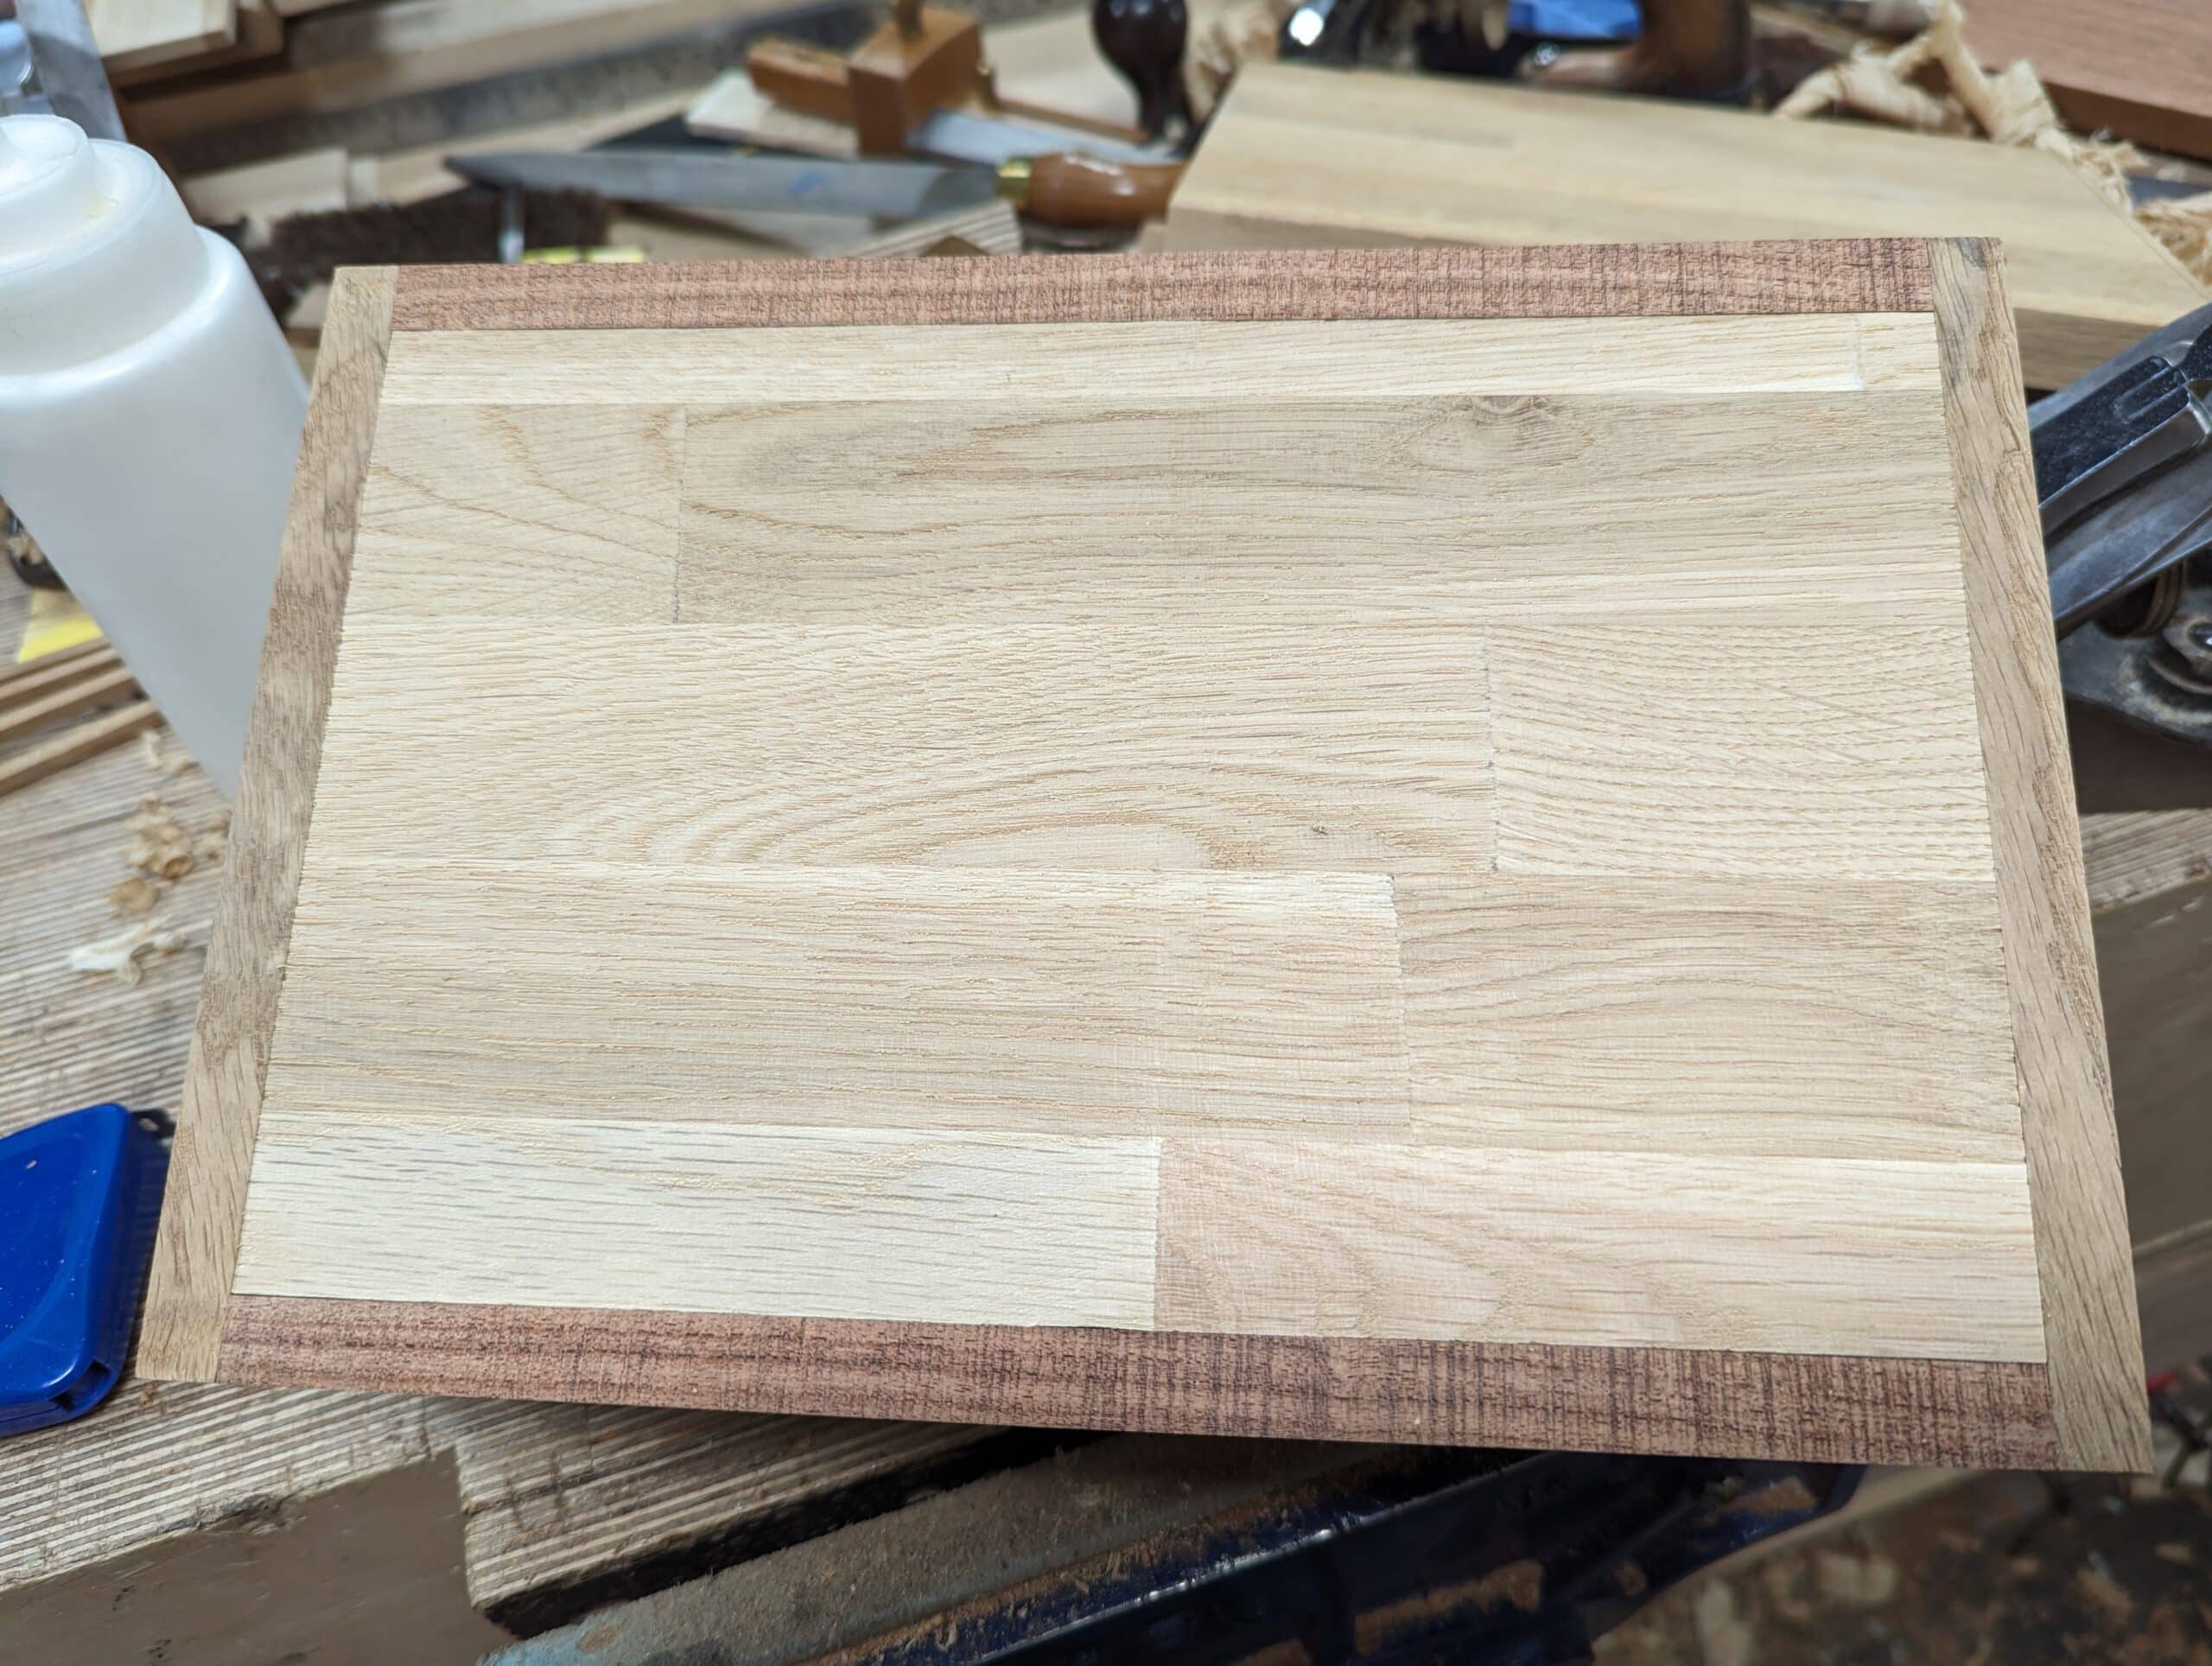
Having leveled the edges top and bottom and then too the outside we can focus on fitting the bottom and the lift-up lid. Fitting the bottom first allows us to take care of minor discrepancies in squareness before fitting the lid. Making the first corner square and then working parallel will push the box into dead squareness if you have a tight fit. In the four boxes I made I fit the thin panel and left the bottom in place without actually installing it permanently. it’s easier to handle the box for various reasons including popping the bottom out to relieve a stuck lid.
Fit the lid to the opening in the same way as the bottom with no gaps all around. We will plane the lid down by 2mm, 1 mm each side, but this we will do after we drill for the hinge screws.

This is the trickier part but by keeping the lid tight all around and drilling the pilot holes and subsequent step-drilling we can guarantee perfect alignment all around after the lid is fitted and locked in place permanently with the screws. I used 1″ number #6 round-head, slotted brass screws. Take a close look at these screws and you will see the bottom of the slot retains a full circle of brass between the underside of the screwhead and the bottom of the slot. It’s not much but more than enough for retention quality and to leave the look of a round brass dowel after you have filed off the bulk of the head including the slot yet in reality you have retained part of the head and the mechanical retention property of the screw thread.

You will need to size your drilling to the size of the screw you use. In my case, the overall diameter of the head is 6mm. I used three drill sizes to install the screws. Start with the larger 6mm spur bit first as these bits drill a clean peripheral hole with a sharp rim around the hole edge. Drill down one or two millimetres, enough so that the bottom of the slot sits just above the surface of the surrounding wood by a paper thickness but all the way across. That way, when you file off the dome head, the slot is completely removed and the finished level looks more like a neat brass dowel. Of course, none of this is done until the lid is fully fitted and sized first.
Ideally, you will have the lid wedge-fitted within the rim of the box and level with the rim.
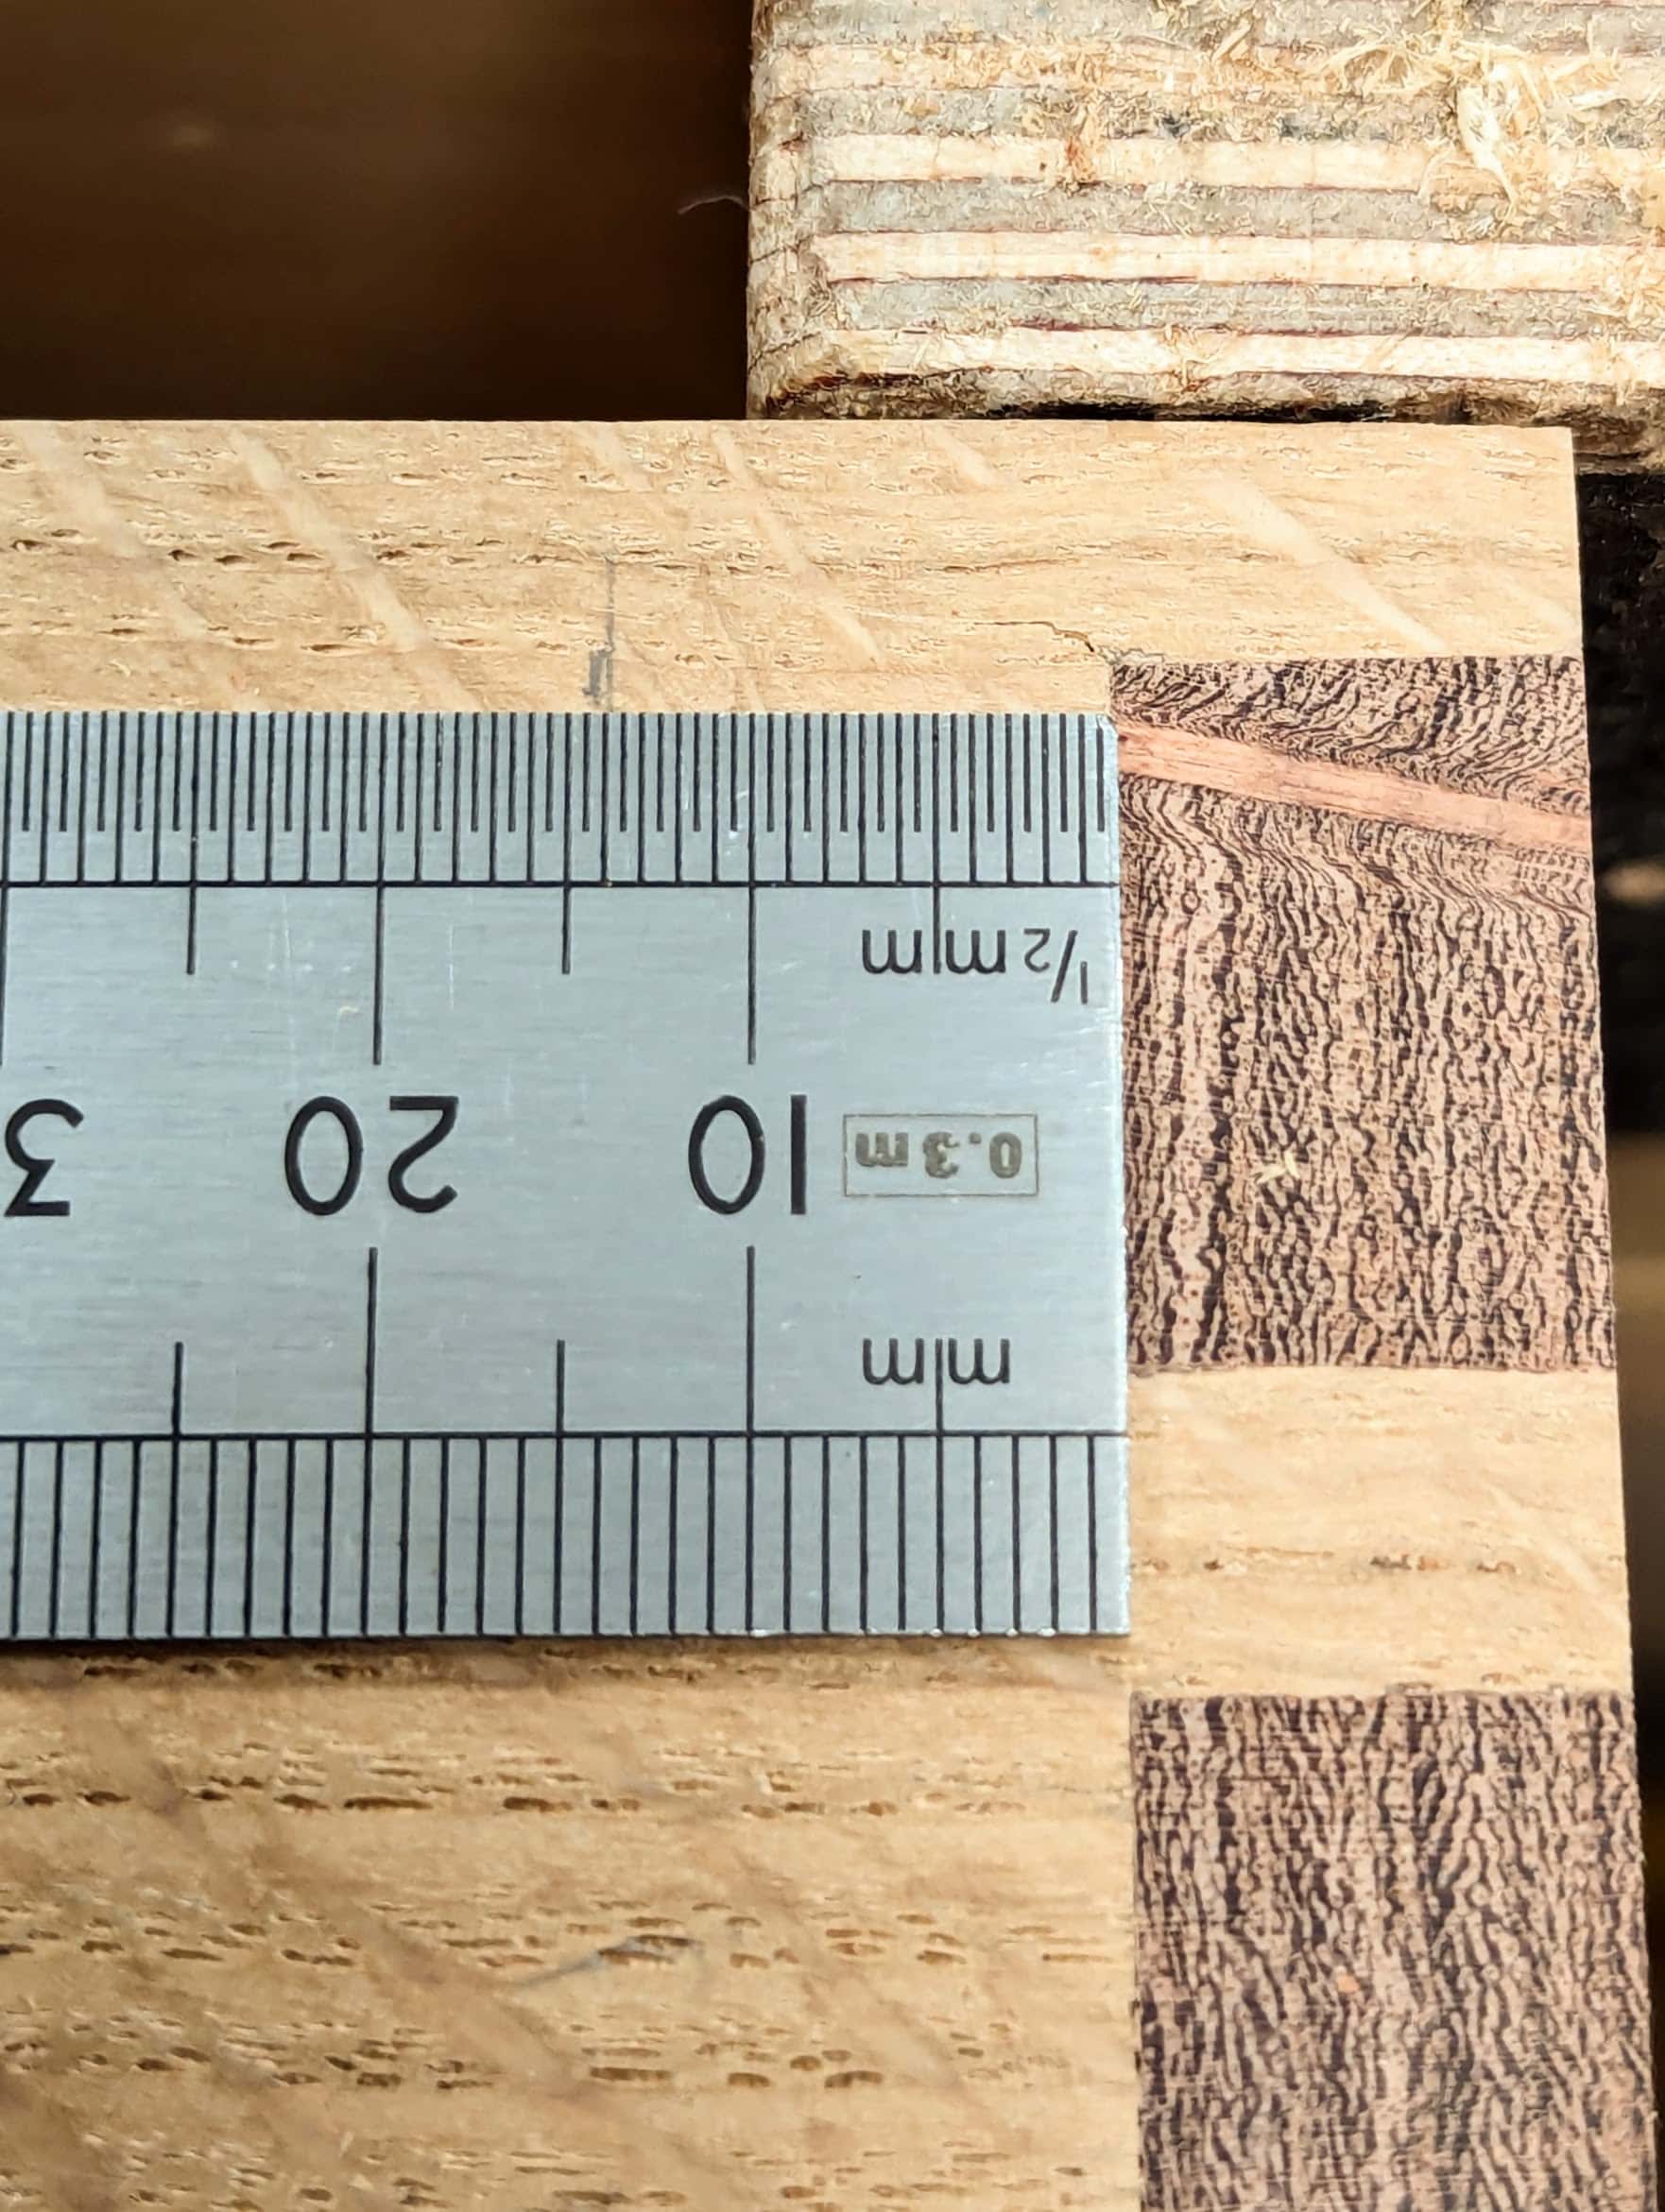
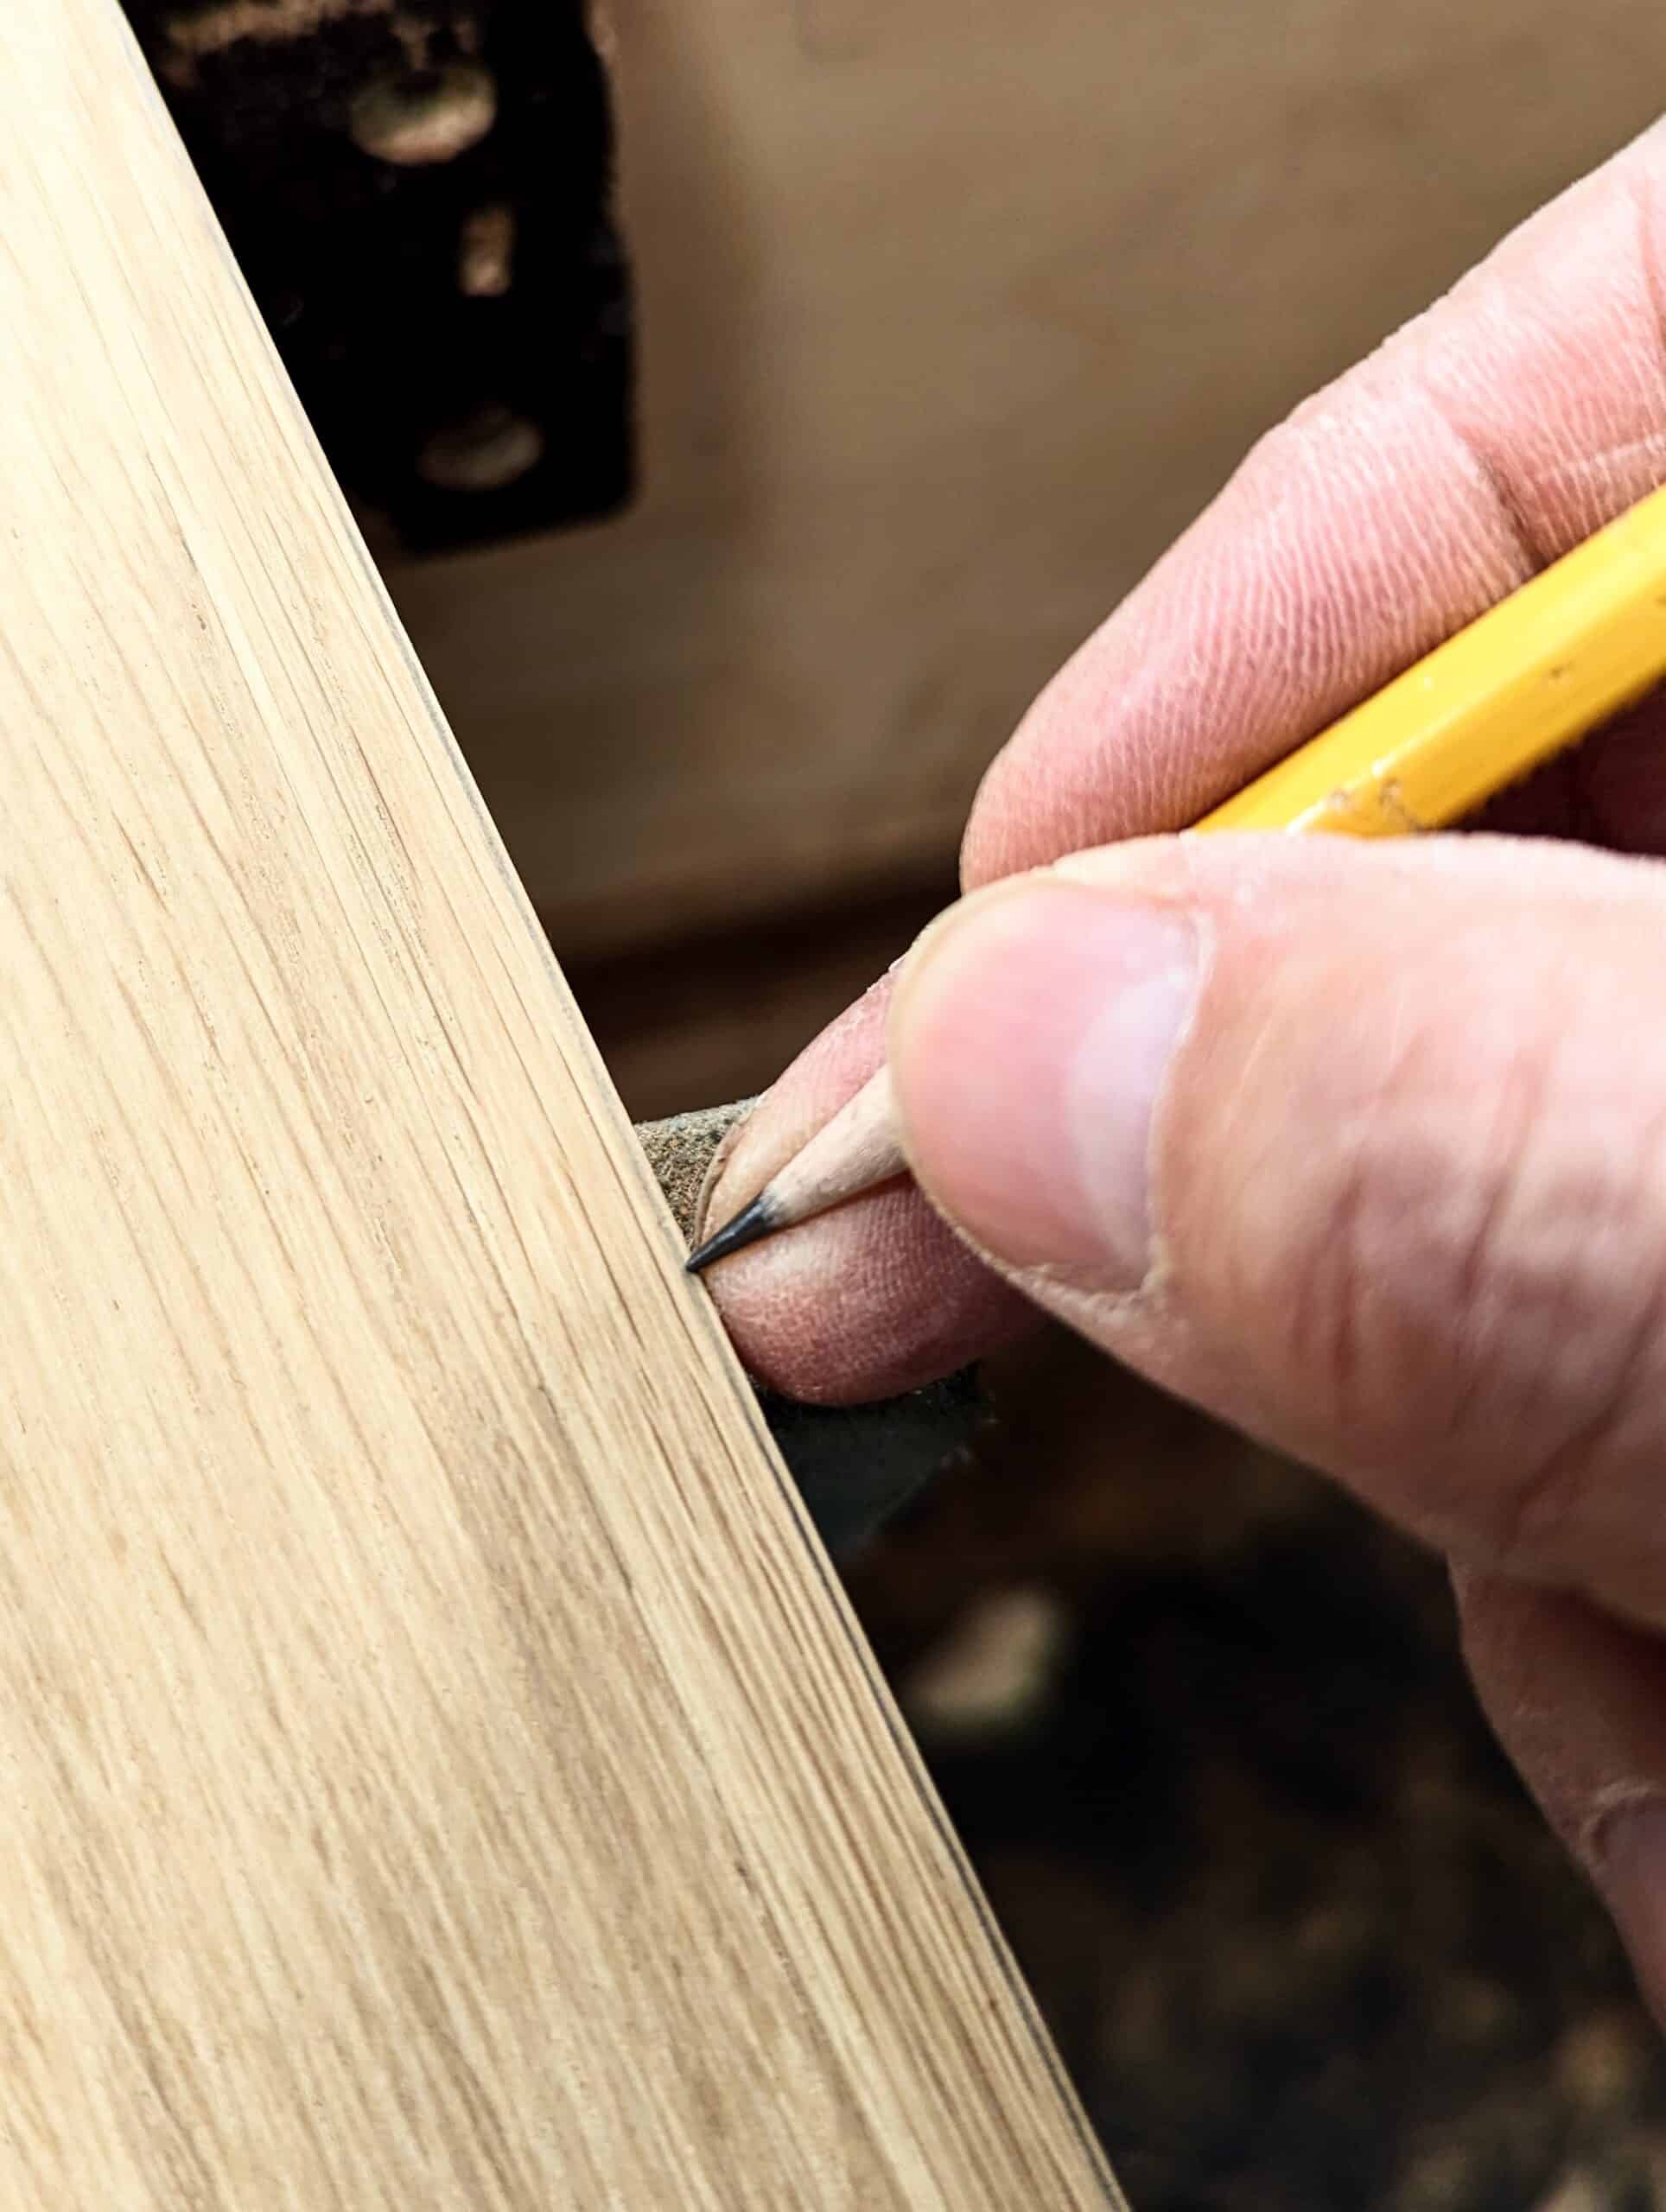
Measure in from the inside face of the dovetail at the top, back corner of the box 14mm . . .
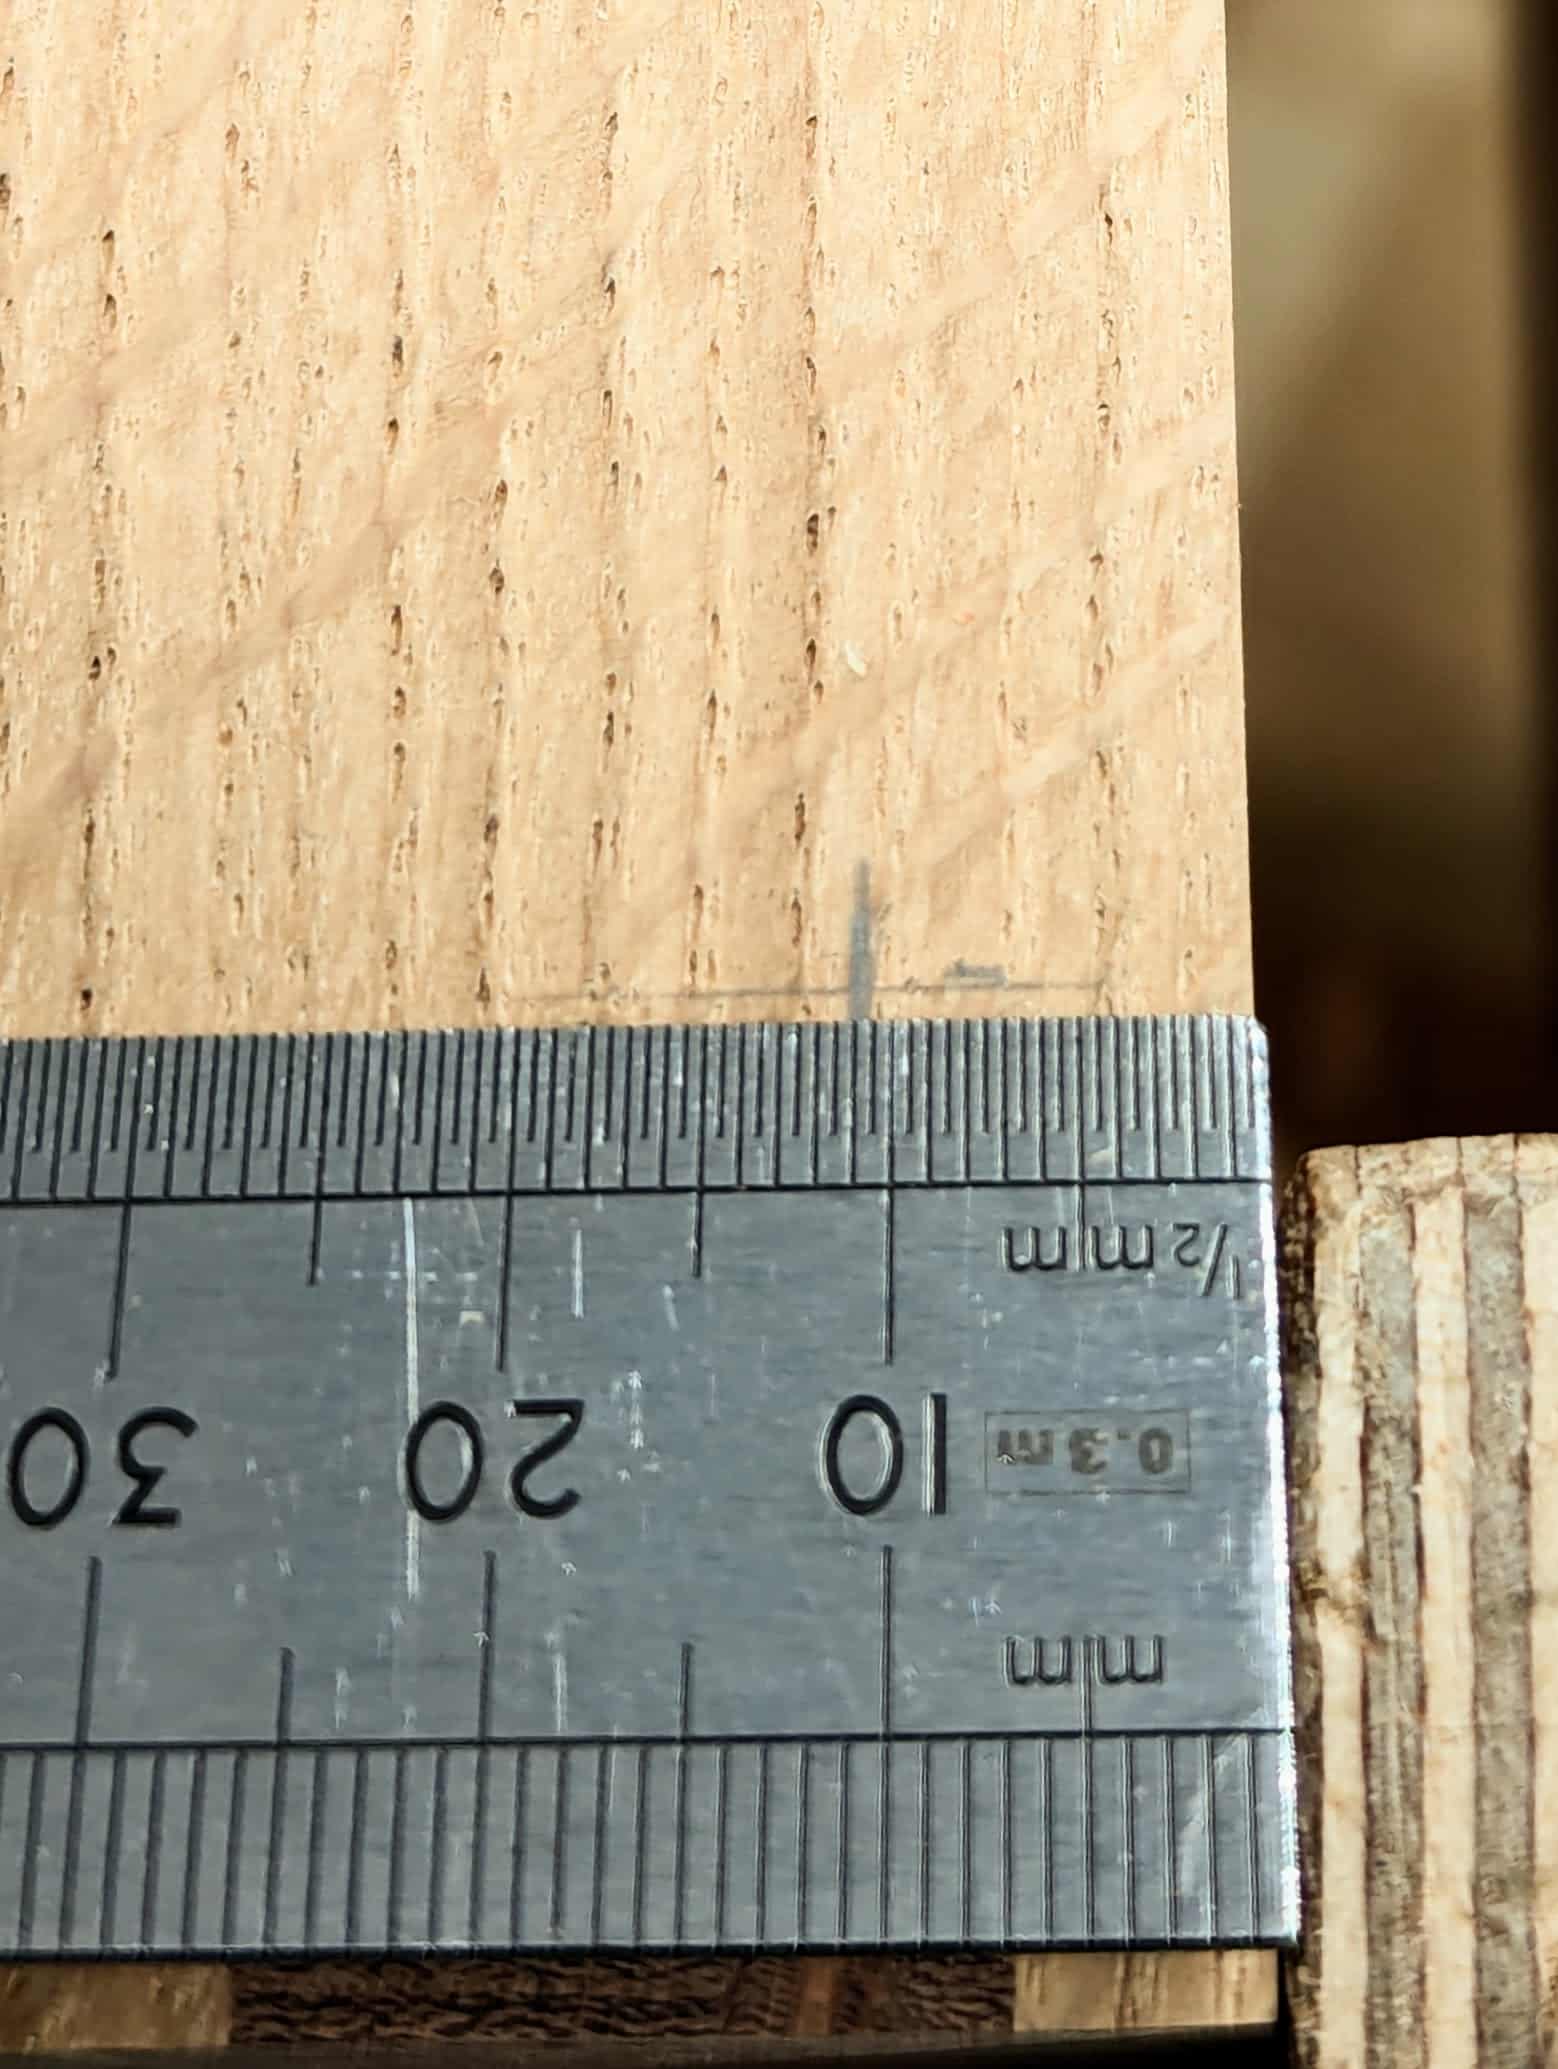
. . . and down from the top edge of the box 11mm. These crosshairs will be the centre of the screw and then to the subsequent holes you will bore next.

Use an awl to centre and start the screw hole.

It’s best to drill the first hole sized to the screwhead. In my case, it is 6mm. I went down 2mm but you can go deeper as the underside of the screwhead does not have to hit the bottom of the hole. That said, tighter tolerance will be better.

Now drill the pilot hole sized to just under the diameter of the screwthreads so that the threads of the screw will bite into the wall of the hole in the lid part itself.

The next hole is for the box only. This hole will clear the shank of the screw close to size so that the screw rotates freely in the box part. I say close to, but dead-sized will mean there is no slop in the lid movement. But if it is too tight there will be the possibility of friction binding on the screw and the screw gradually undoing the threading into the wood.
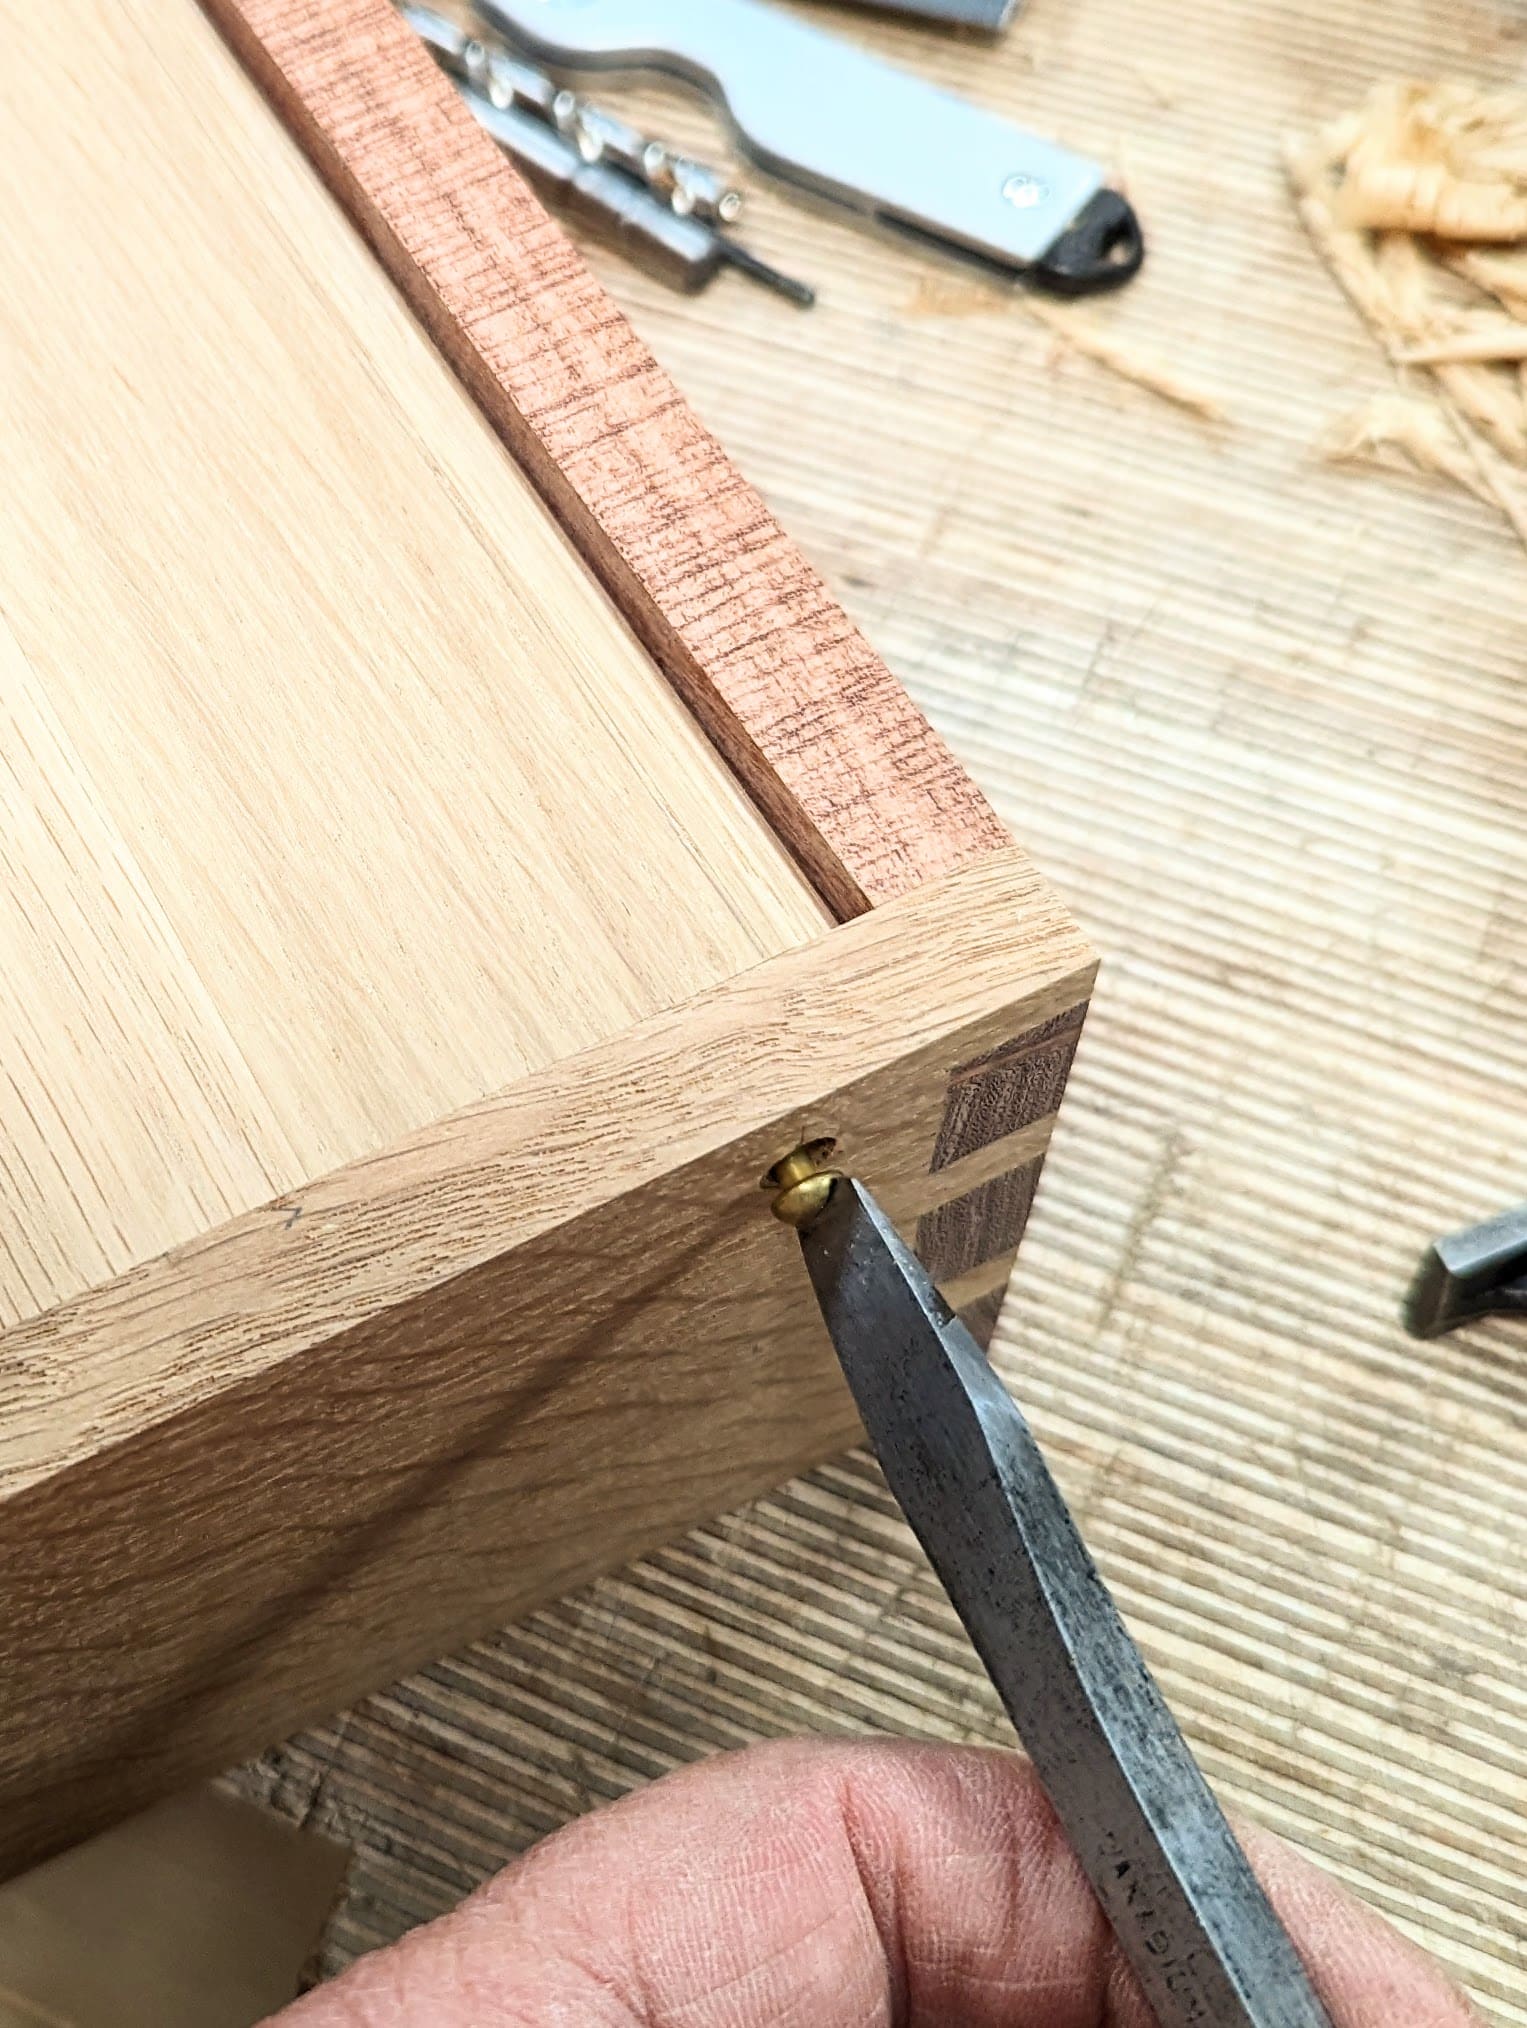
We are now able to drive the screw to test drive the fit, etc. Stop turning just after the slot of the screw is a paper thickness above the surface of the box side. It’s a great idea to use some paste wax on the threads as this will reduce stress on the screws and the wood. Do not file the head down yet. `We still have much work to do.

It is unlikely that the lid will actually open well, if at all, just yet. The tolerances will disallow it. We must take a millimetre of each end of the lid perfectly parallel to the existing ones and off both the long edges too. Do this next. Take care to plane accurately and to a knifewall line. When I say a millimetre, I do mean a millimetre.
The back, top corner (see pic above) will be planed to a quadrant with the bench plane following the reductions just made. By now the lid will fall in at the opening free side but it is good to try it at this stage so you can micro-adjust any discrepancy. Don’t take too much off. Better to keep reinstalling and seeing how it falls back when fully open. I aim for it to be self-held when open but not much more than 10º or so from perpendicular.

Plane, scrape and sand the lid free from being installed in the box. We can now make and fit the handle.

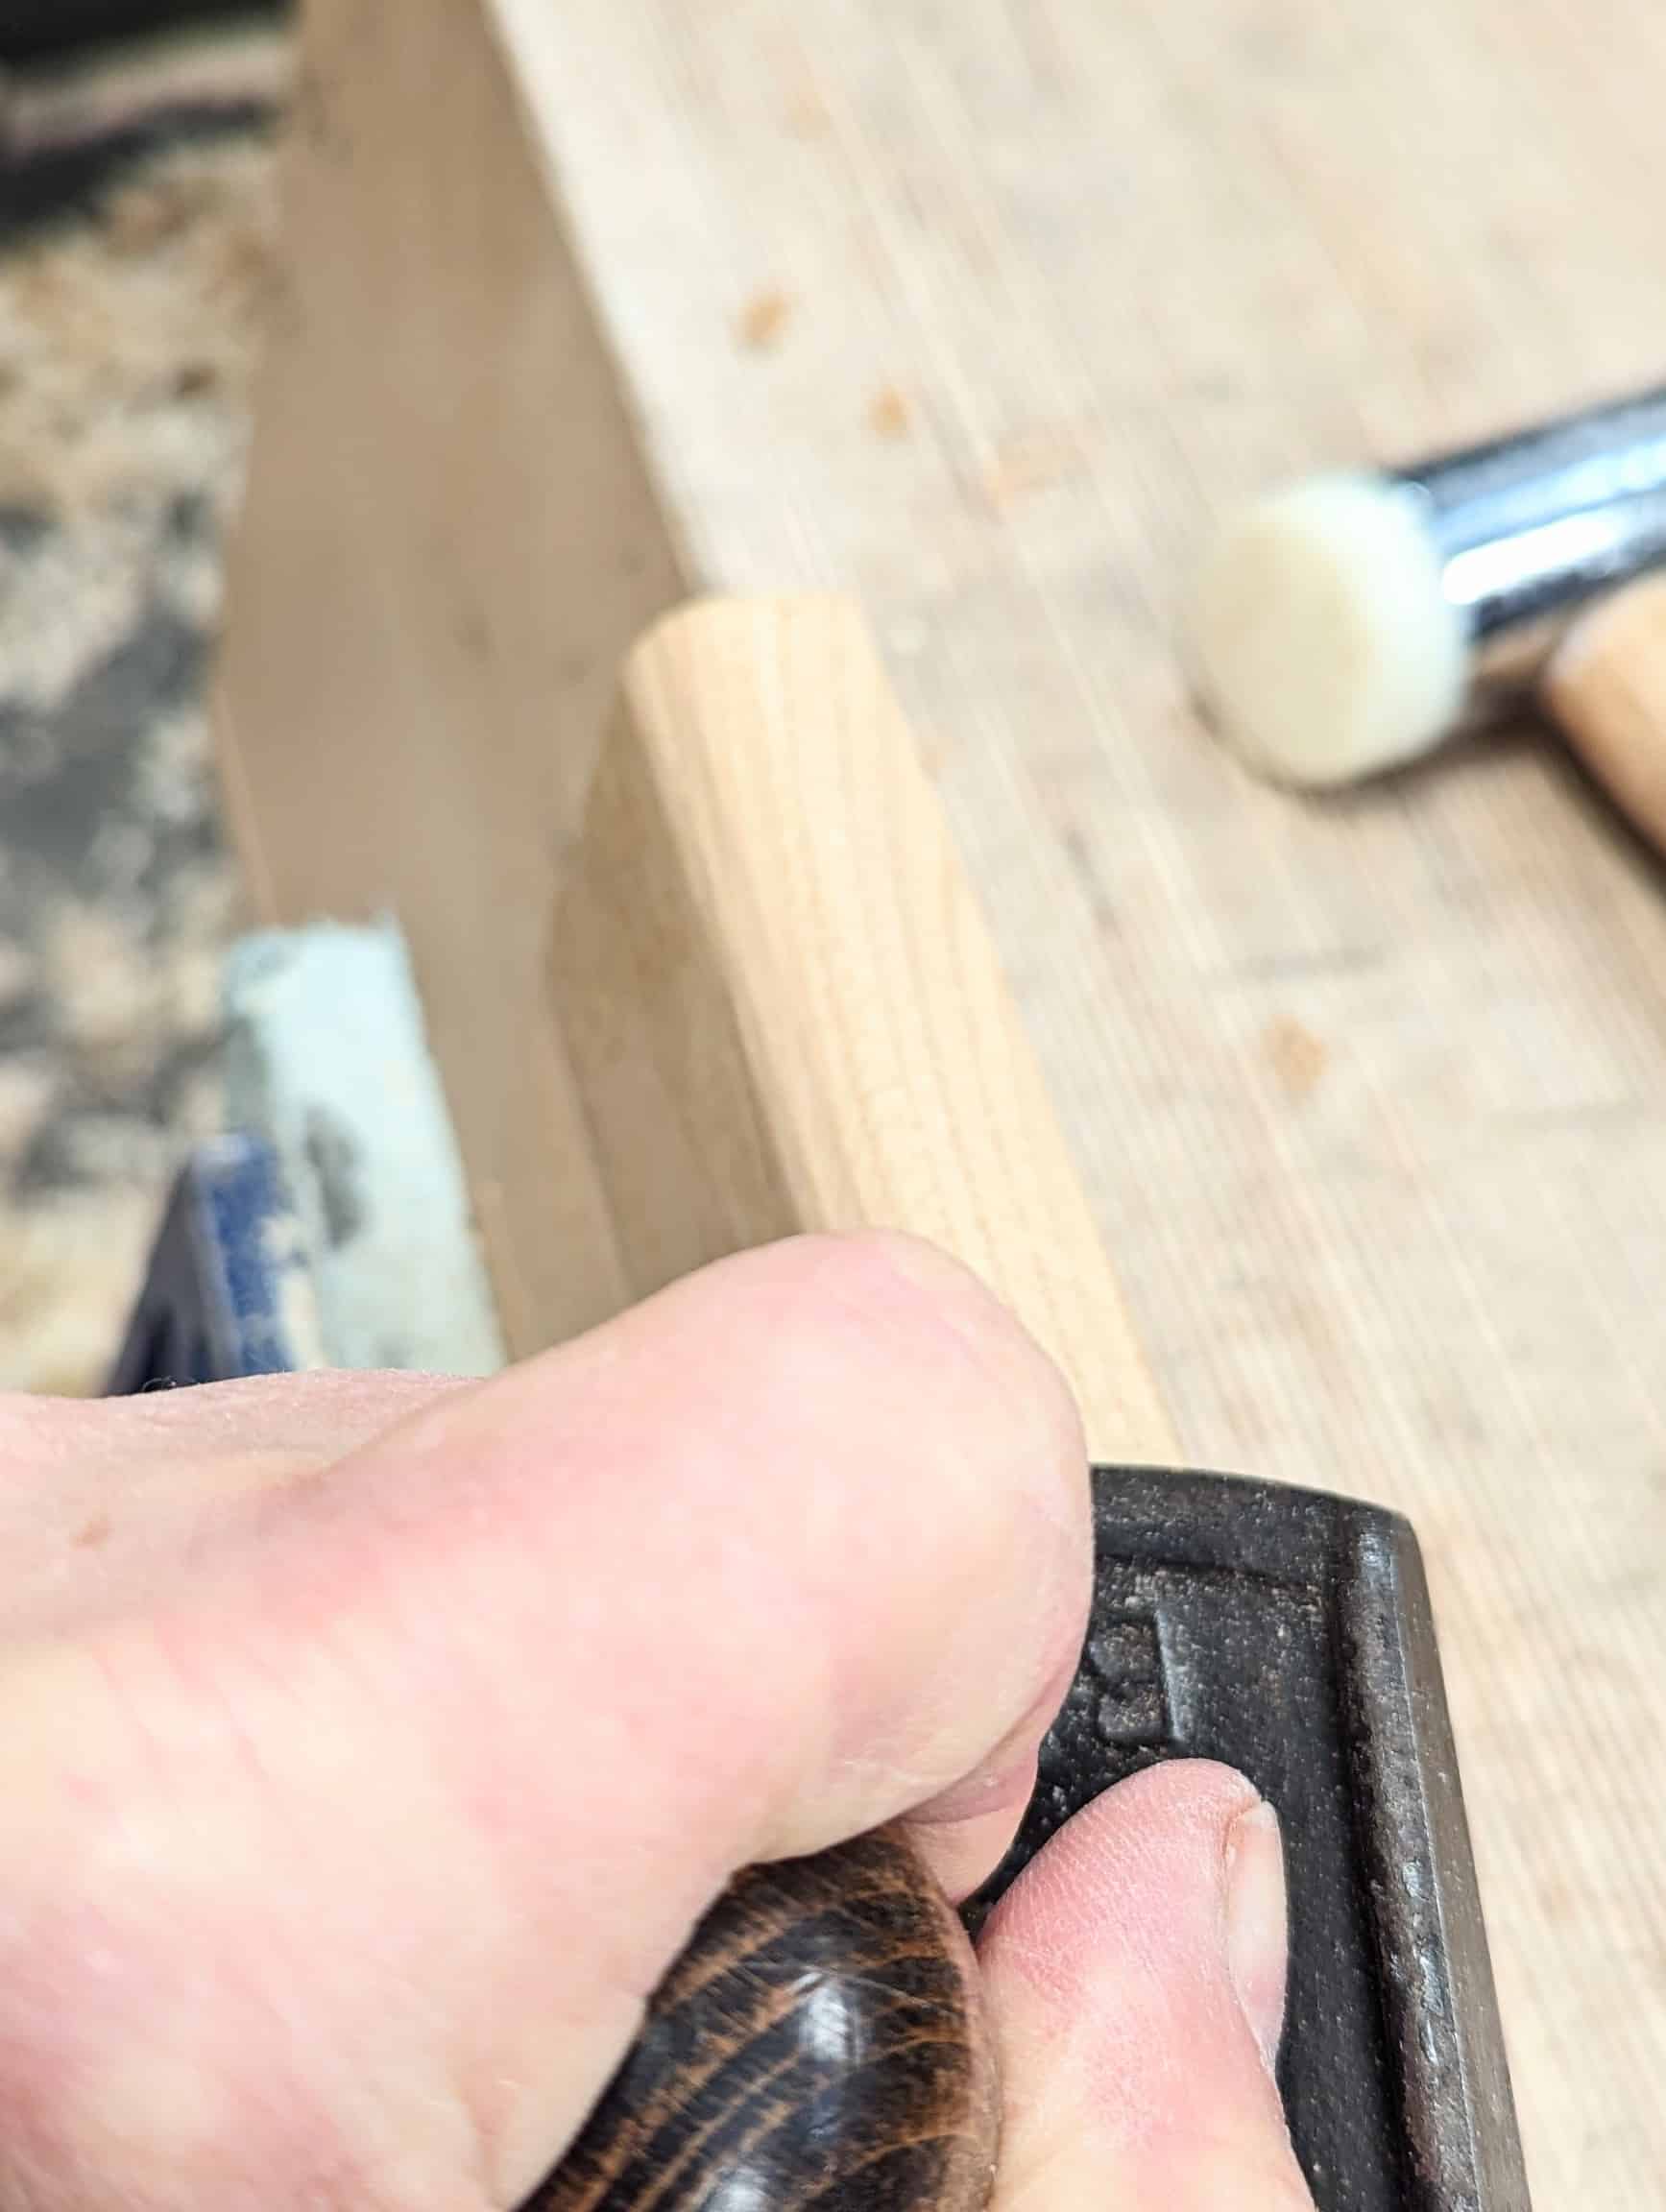
The handle is centred along the front edge of the lid and mortised into the edge with a quarter-inch thick mortise to receive the same sized tenon. Not much to it. 3/4″ deep.
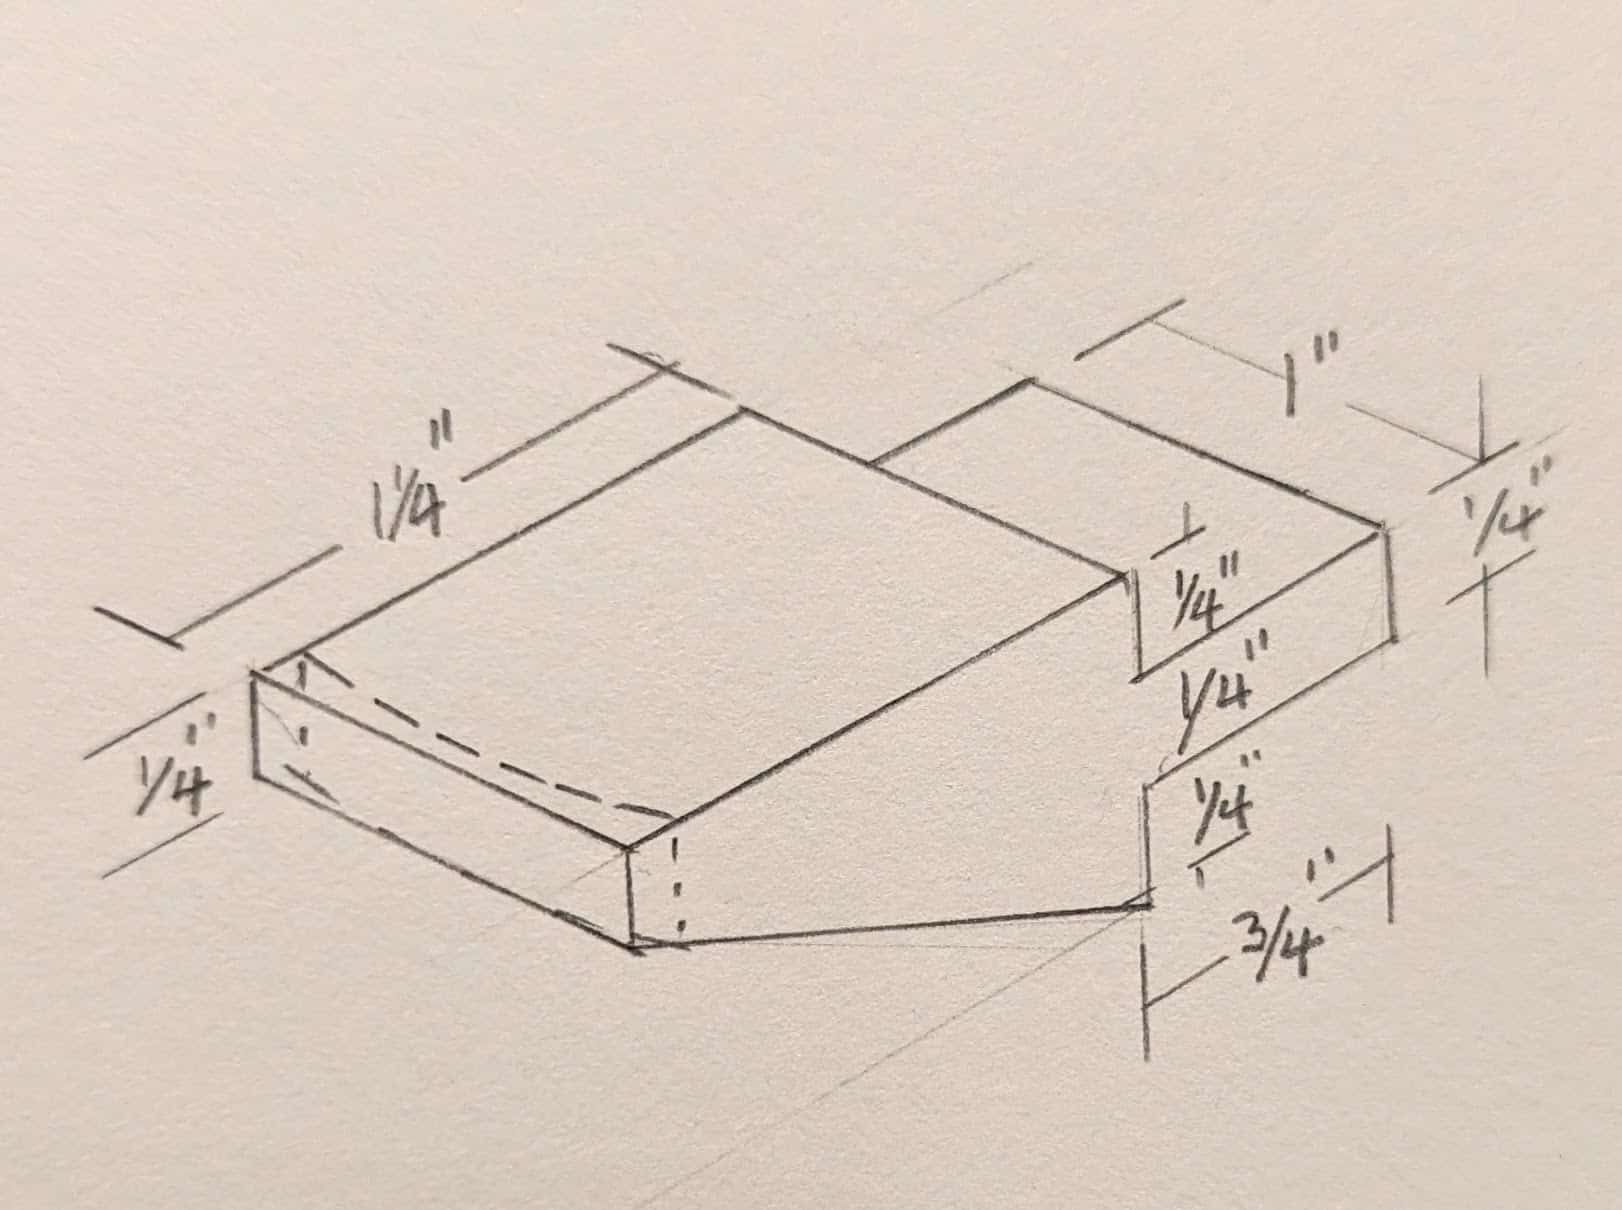
The drawing gives the handle details. Shape the handle after the joint is fitted and seats well.
Shape the handle as per drawing using standard tenon-making procedures. The slope to the underside is best sawn with a dovetail saw and then trued up and refined with a Shinto saw rasp (or a plane if confidence levels are good) followed by a flat file. The radius I used for the fore-edge is 2 1/2″.
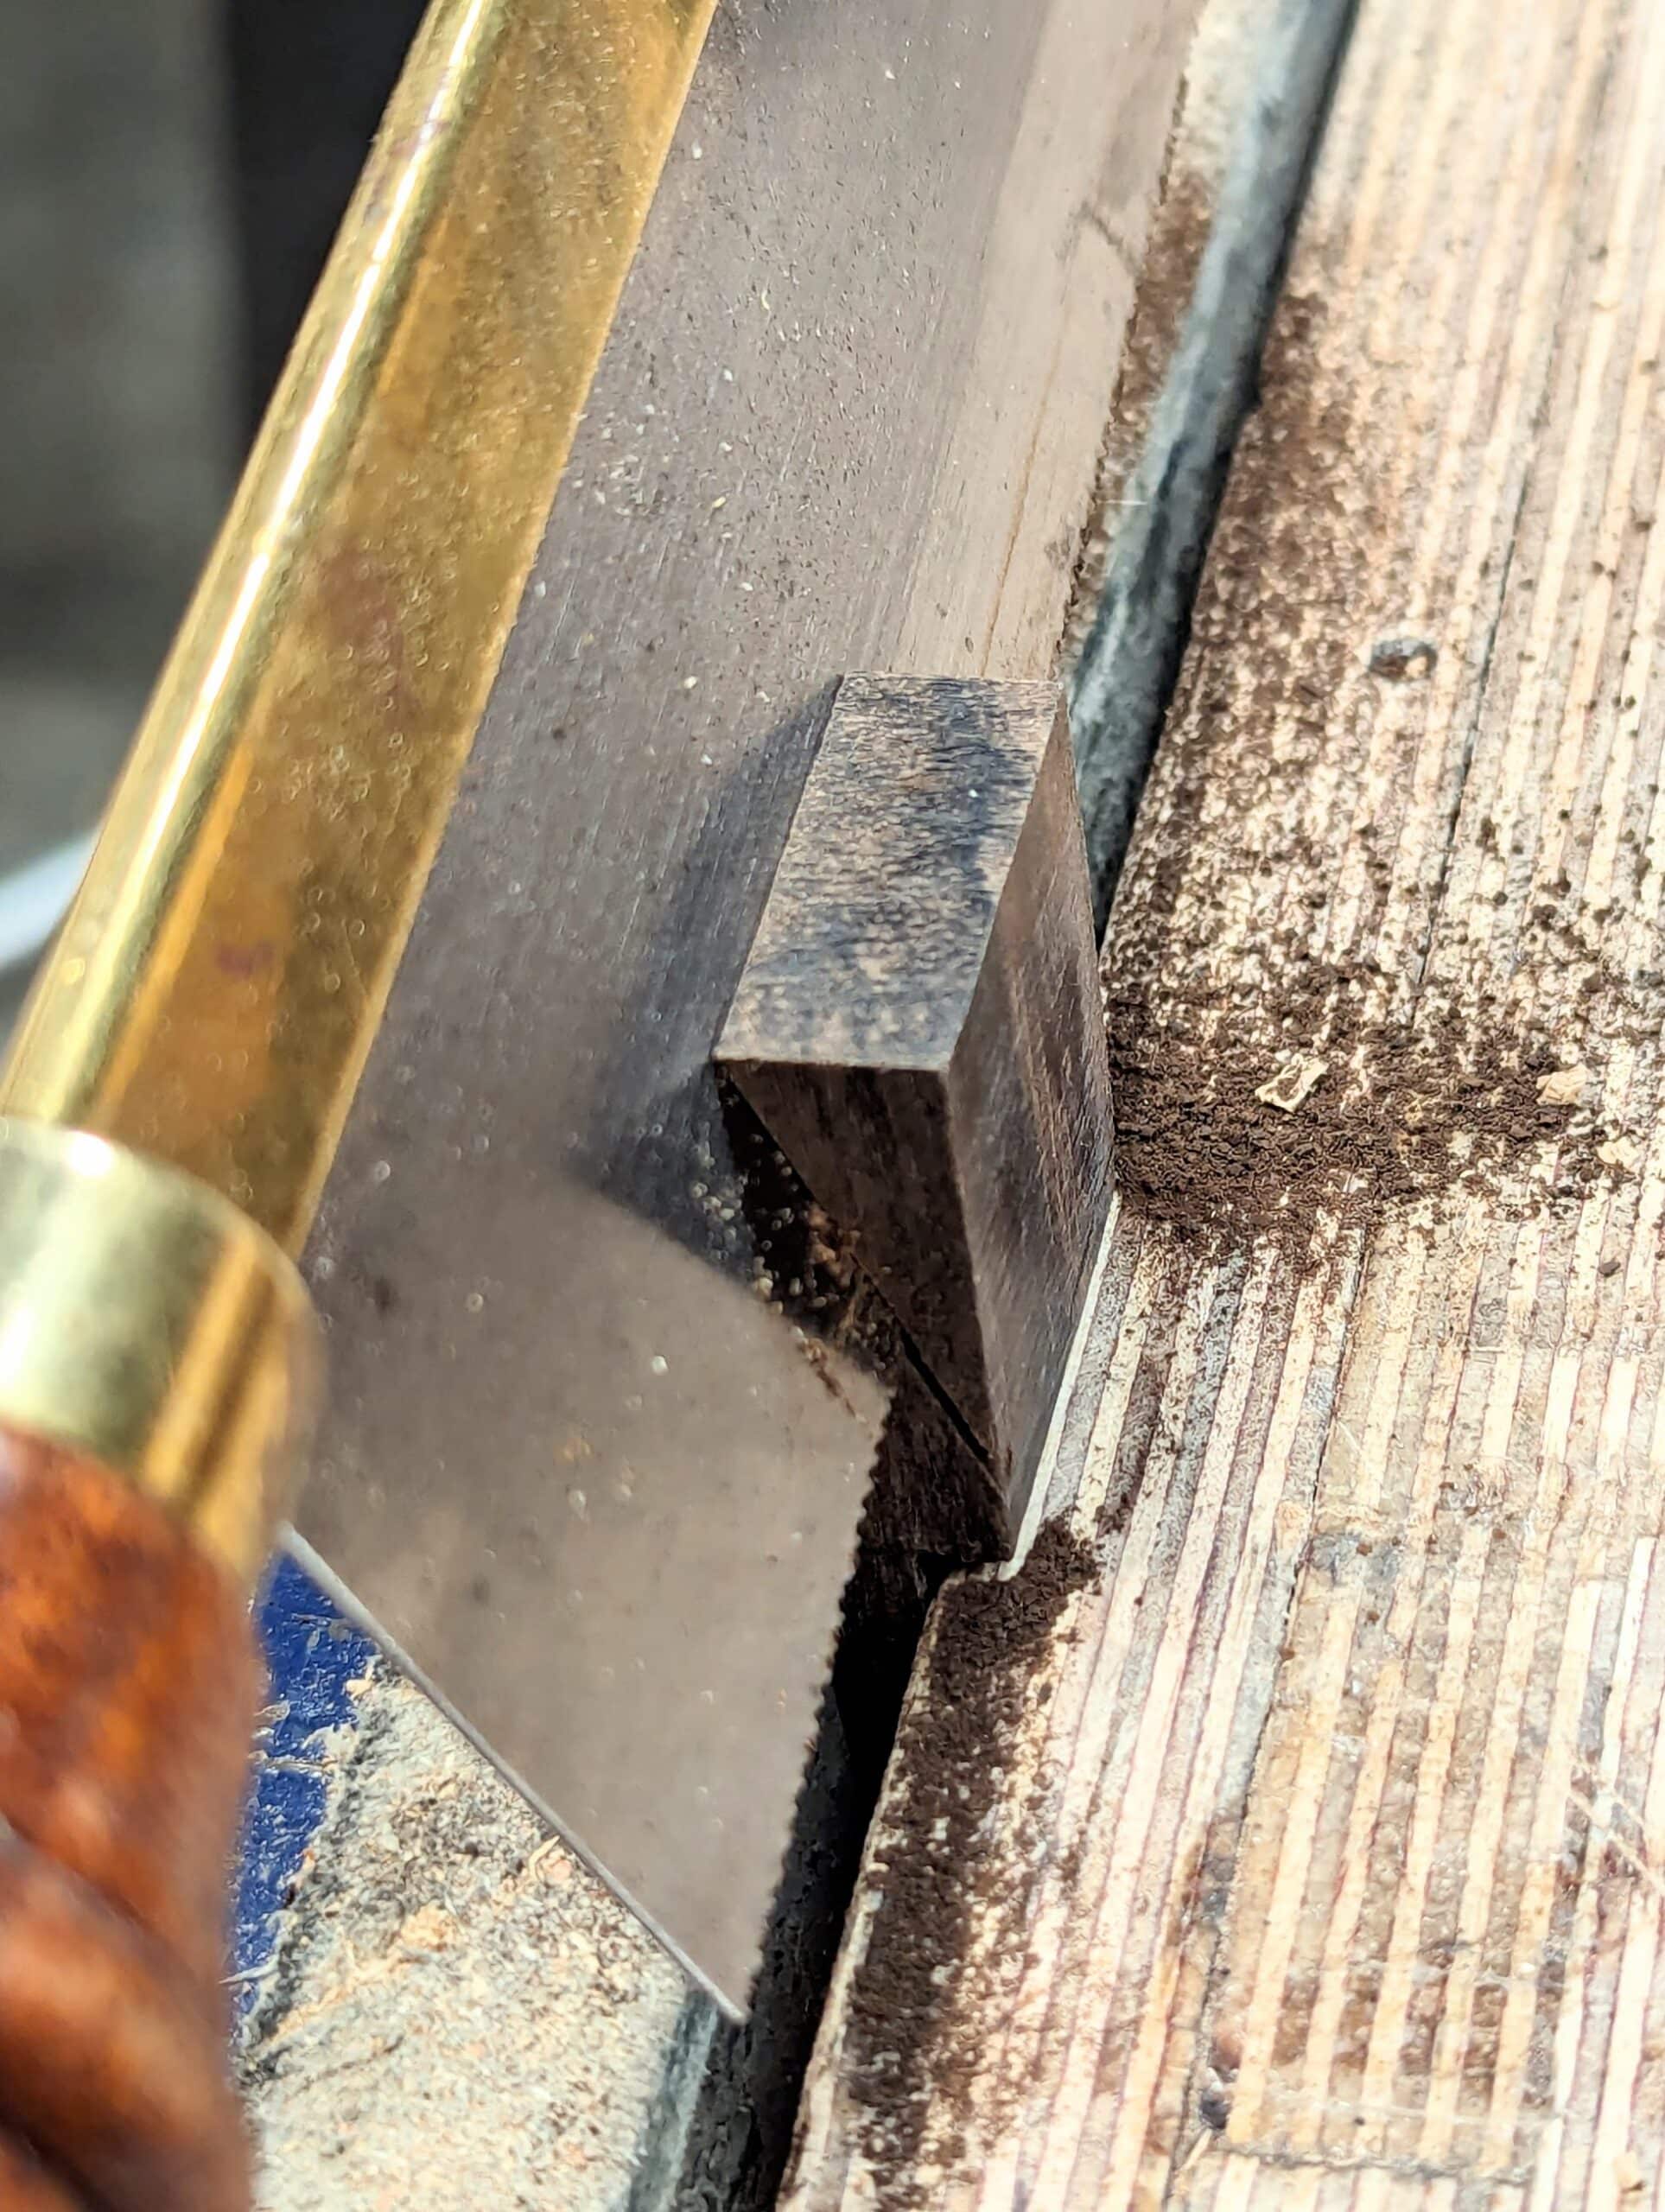
Lower the lid onto the handle to establish the position of the recessed cut you will make next. Use a 1mm shim of plastic (a card scraper is usually around 1mm too) to mark each side of the handle with a sharp knife. You will saw to this knifewall next.
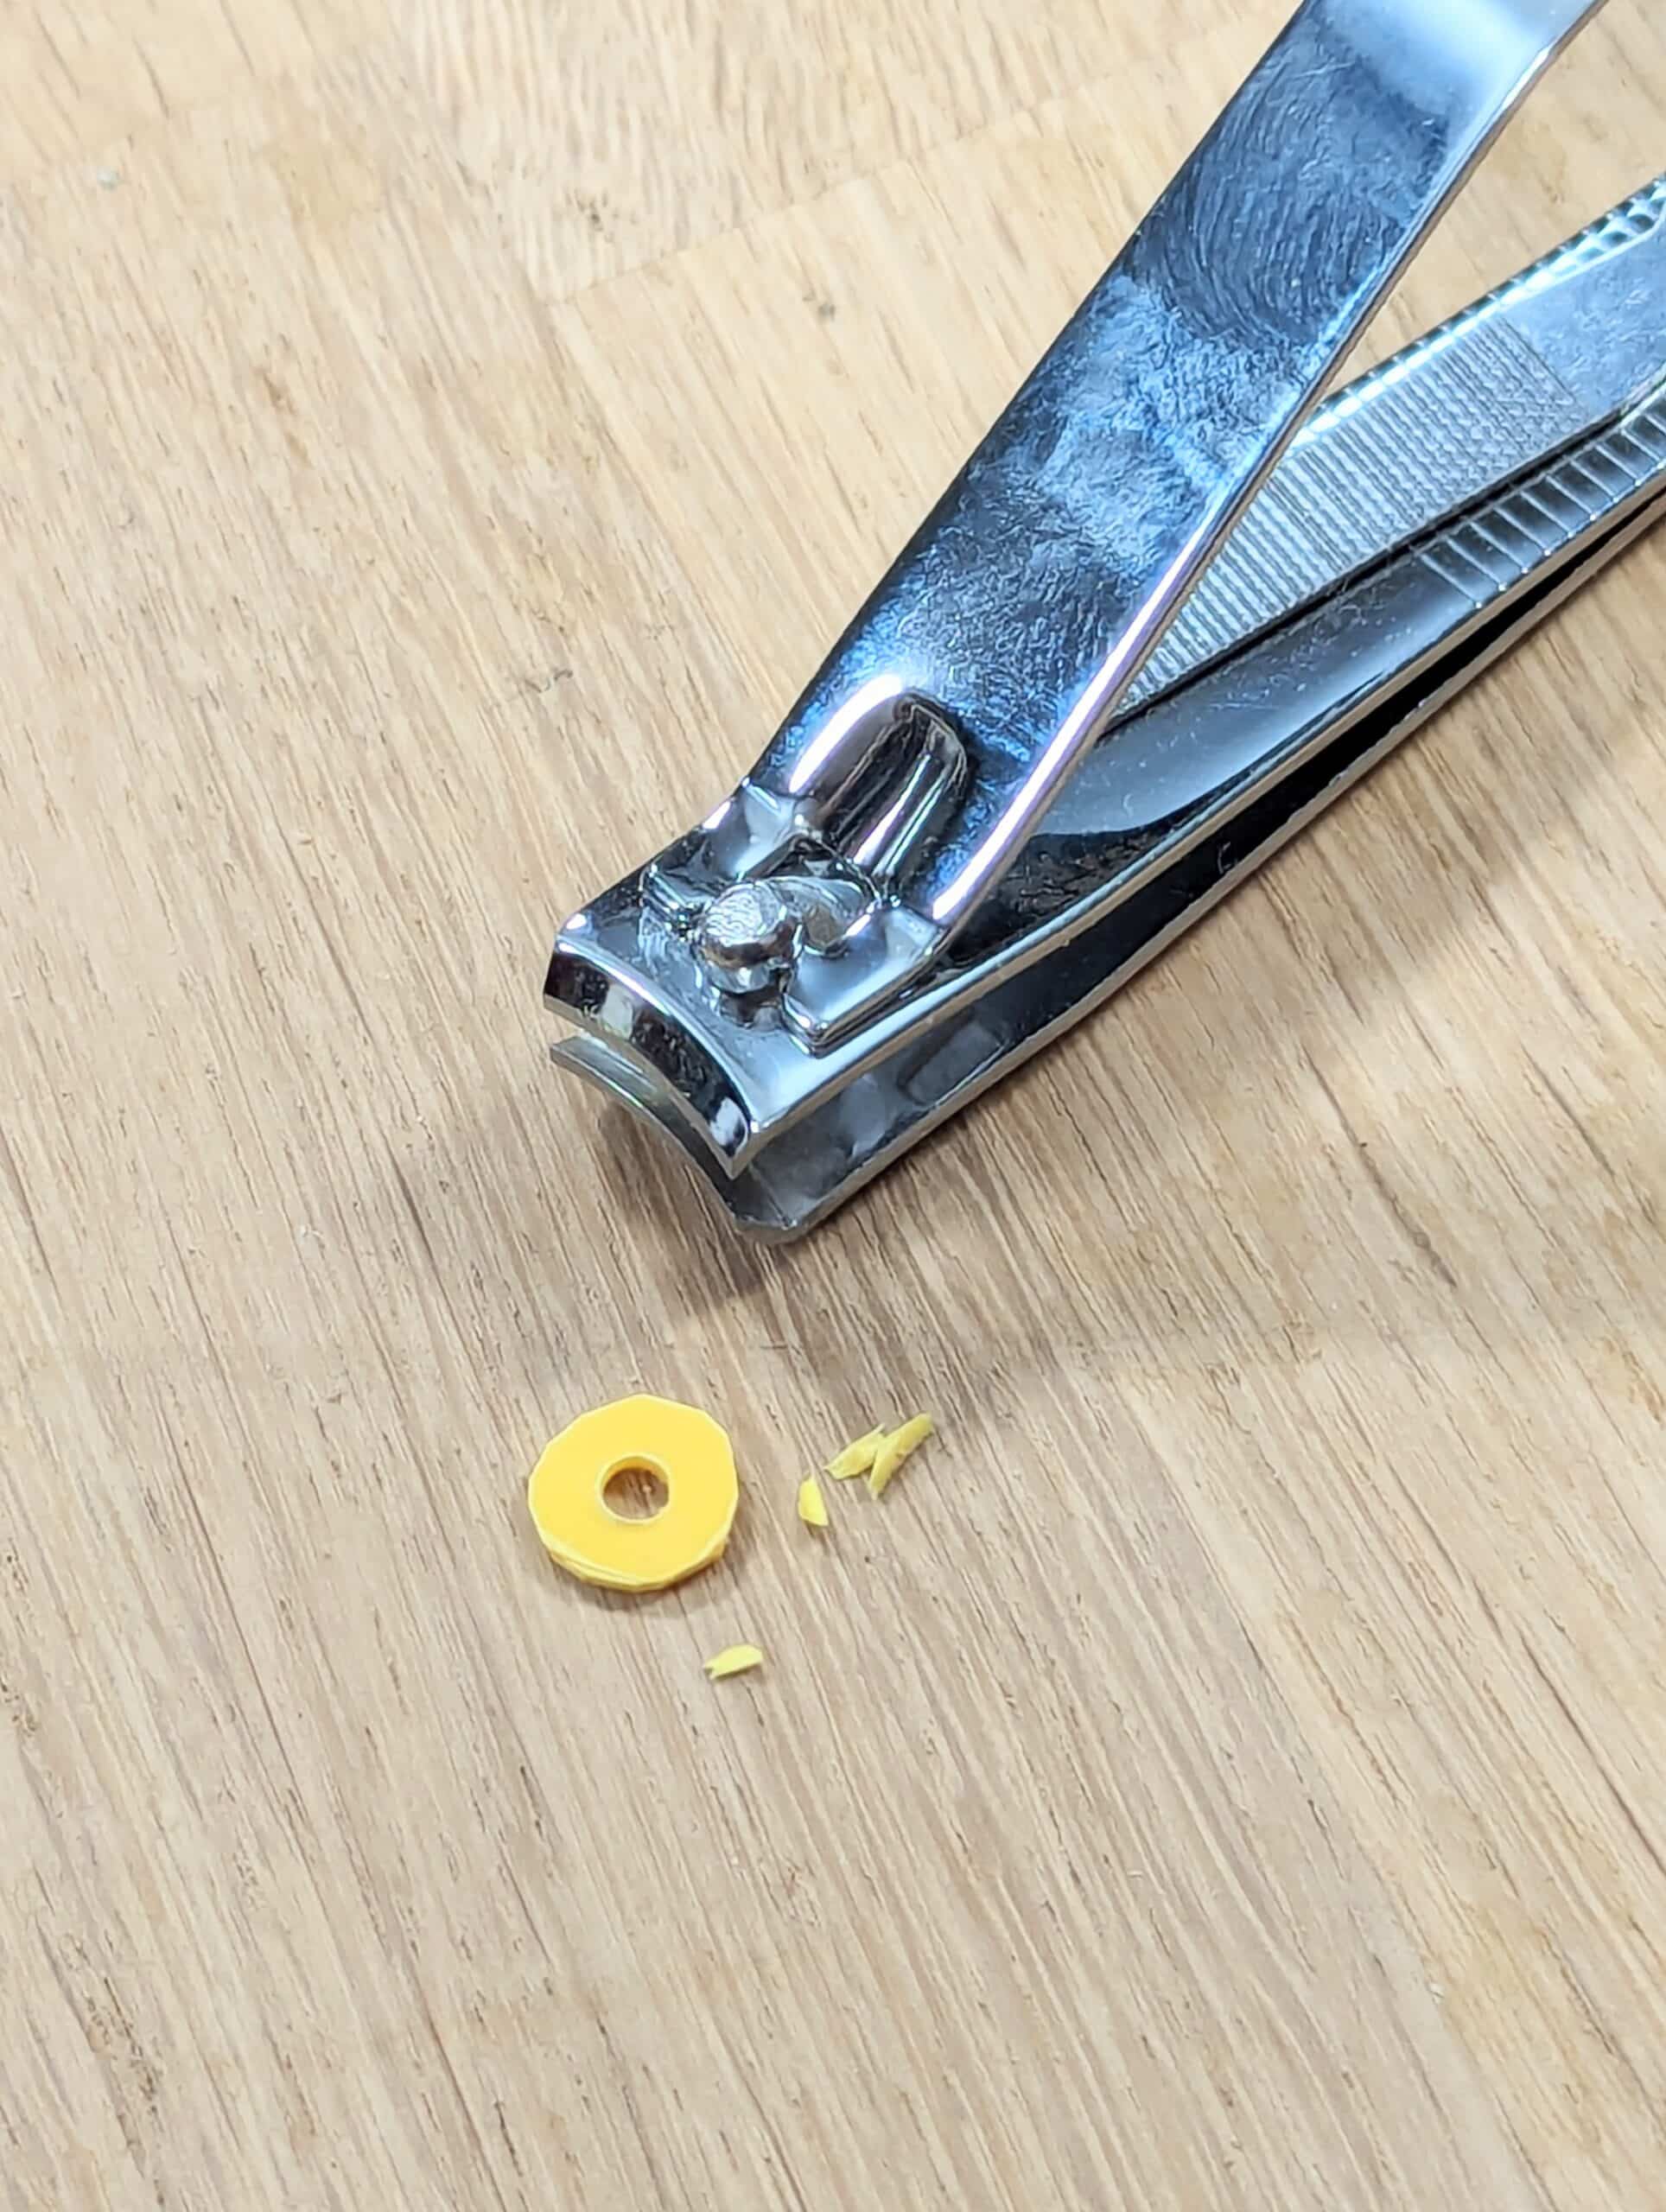
I made two plastic washers from 1mm plastic to slide between the box lid ends and the walls of the box. This maintains the equidistance in use. Shape the handle as per drawing using standard tenon-making procedures. The slope to the underside is best sawn with a dovetail saw and then trued up with a Shinto saw rasp followed by a flat file. The radius I used was 2 1/2″.

Now cut the sloping recess to match the slope of the handle as near as possible. By gradual paring, you will hopefully finish paring when the lid lies flush with the sides of the box.
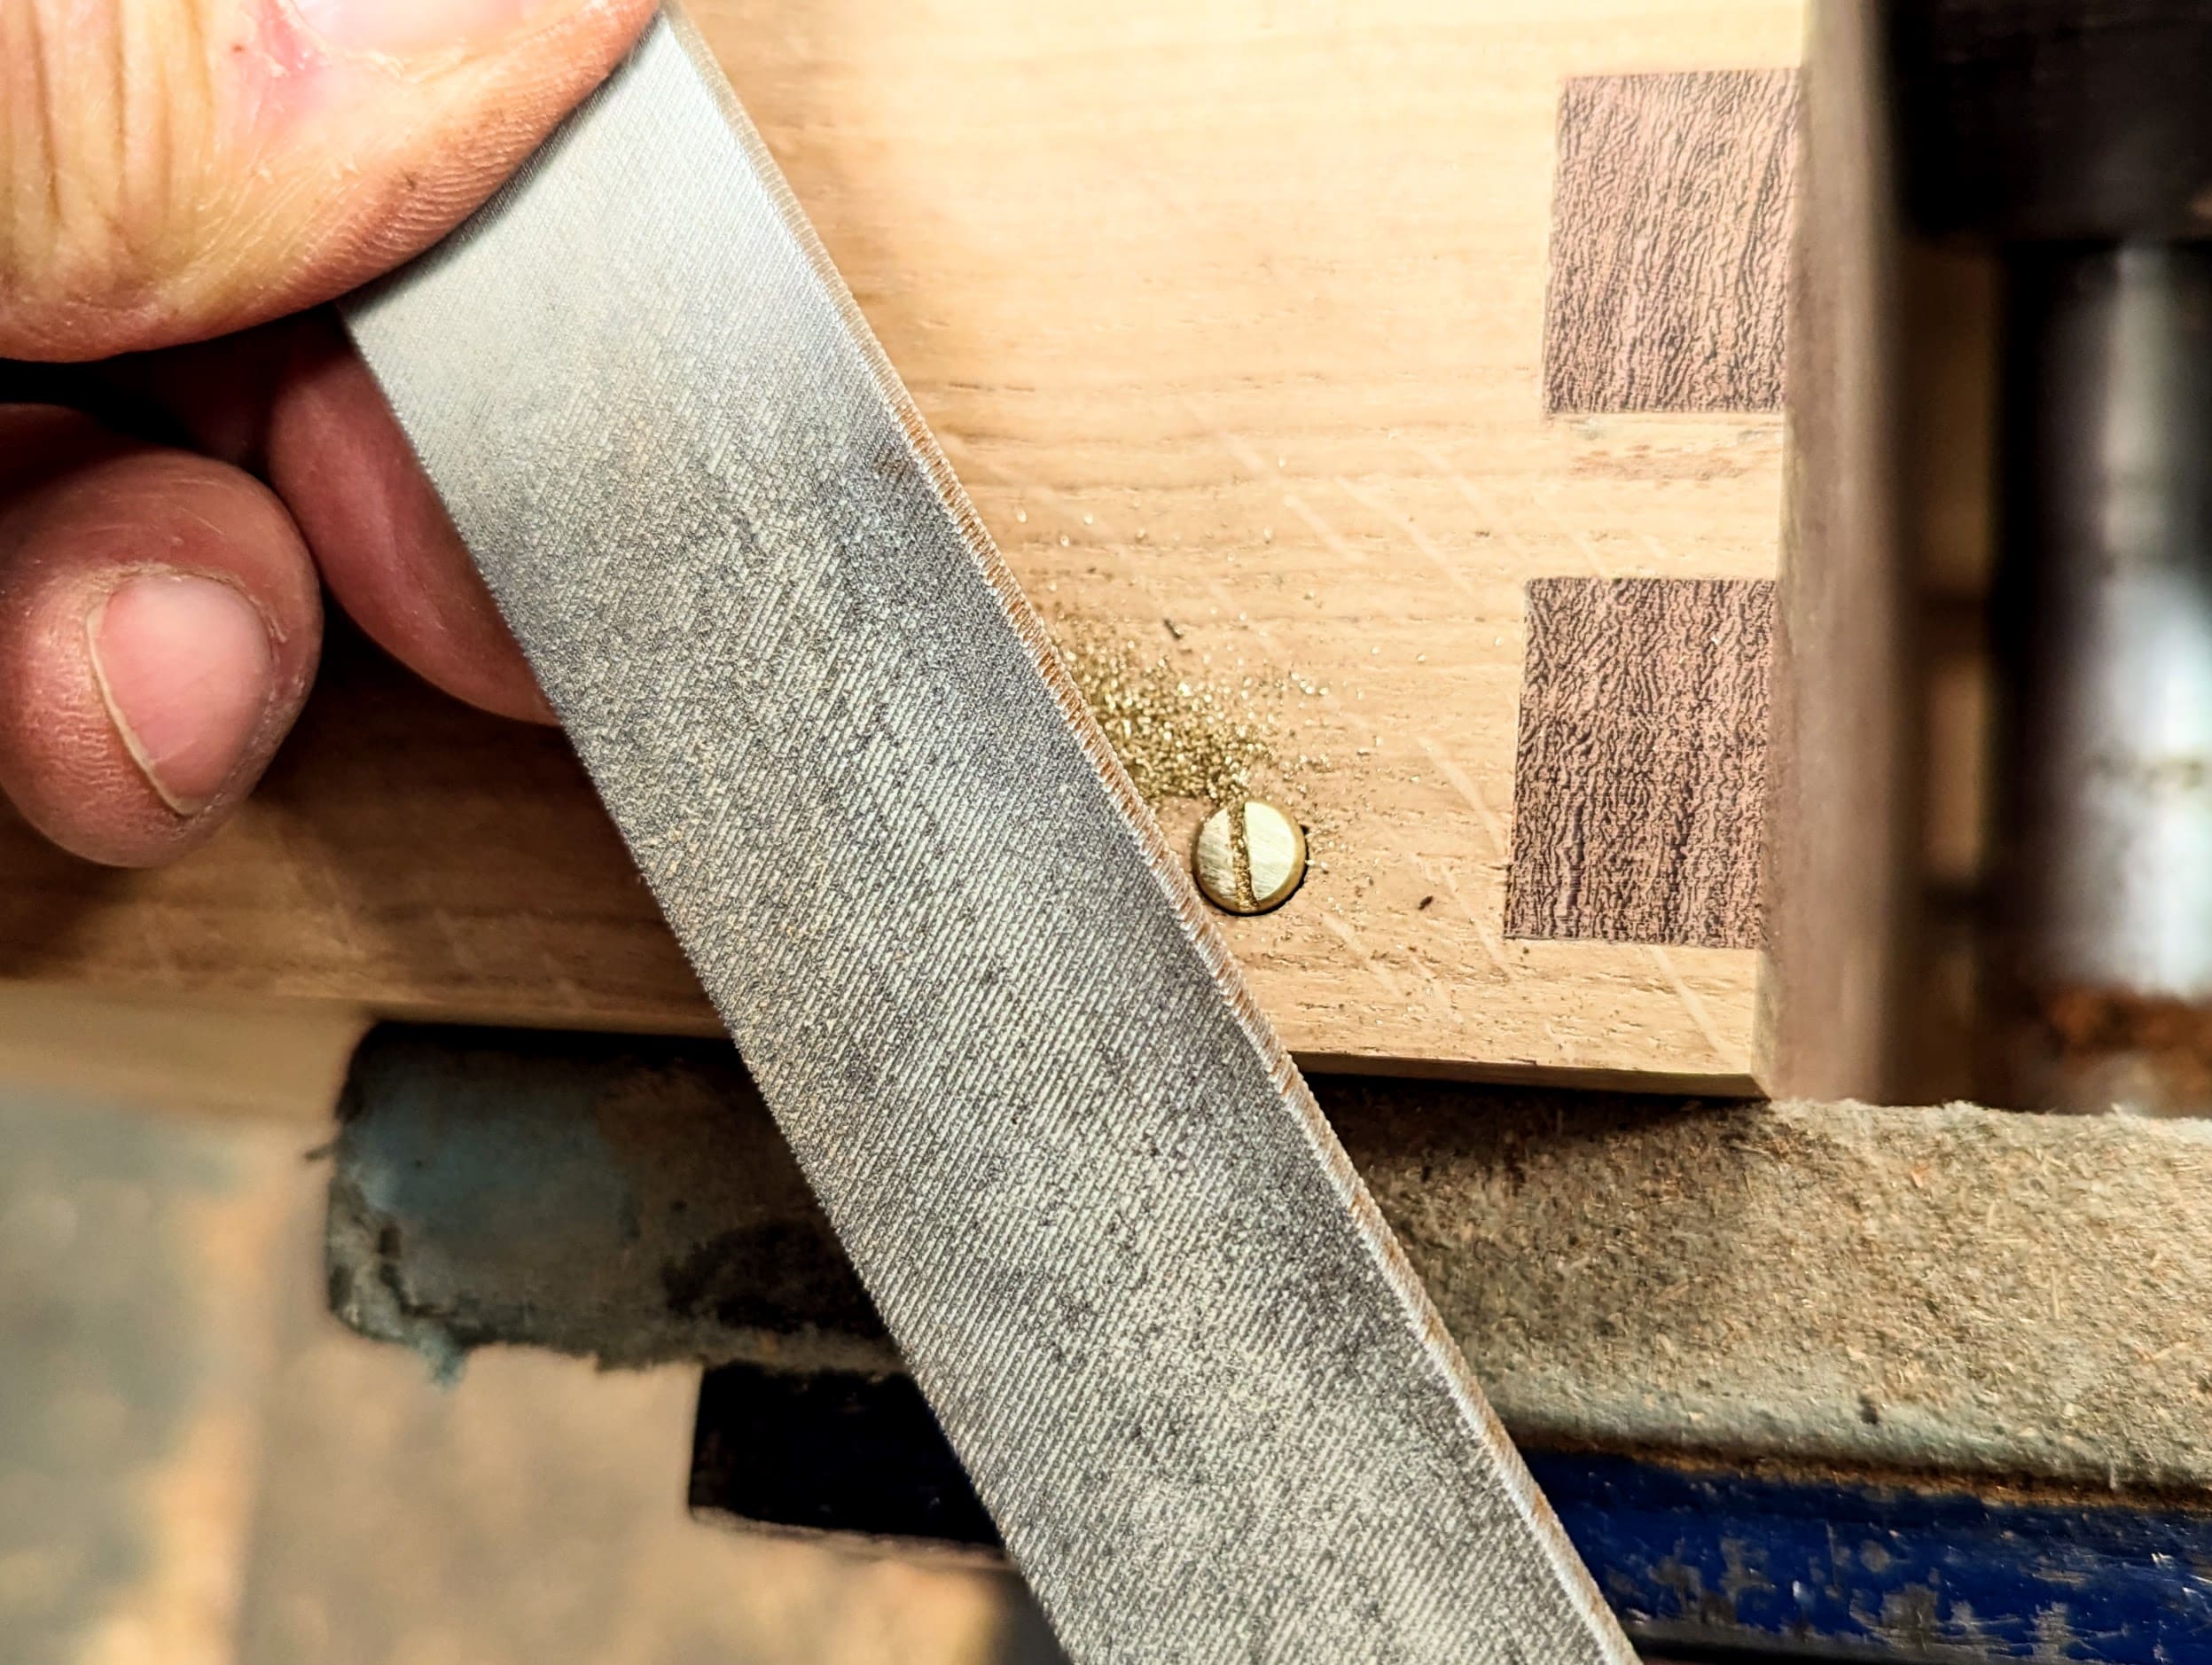
When you are happy with the fit and all of the parts seem to be functioning to your satisfaction, the last thing with the lid is to file the domes off. This is one of those point-of-no-return jobs. You still have to install the box bottom . . .
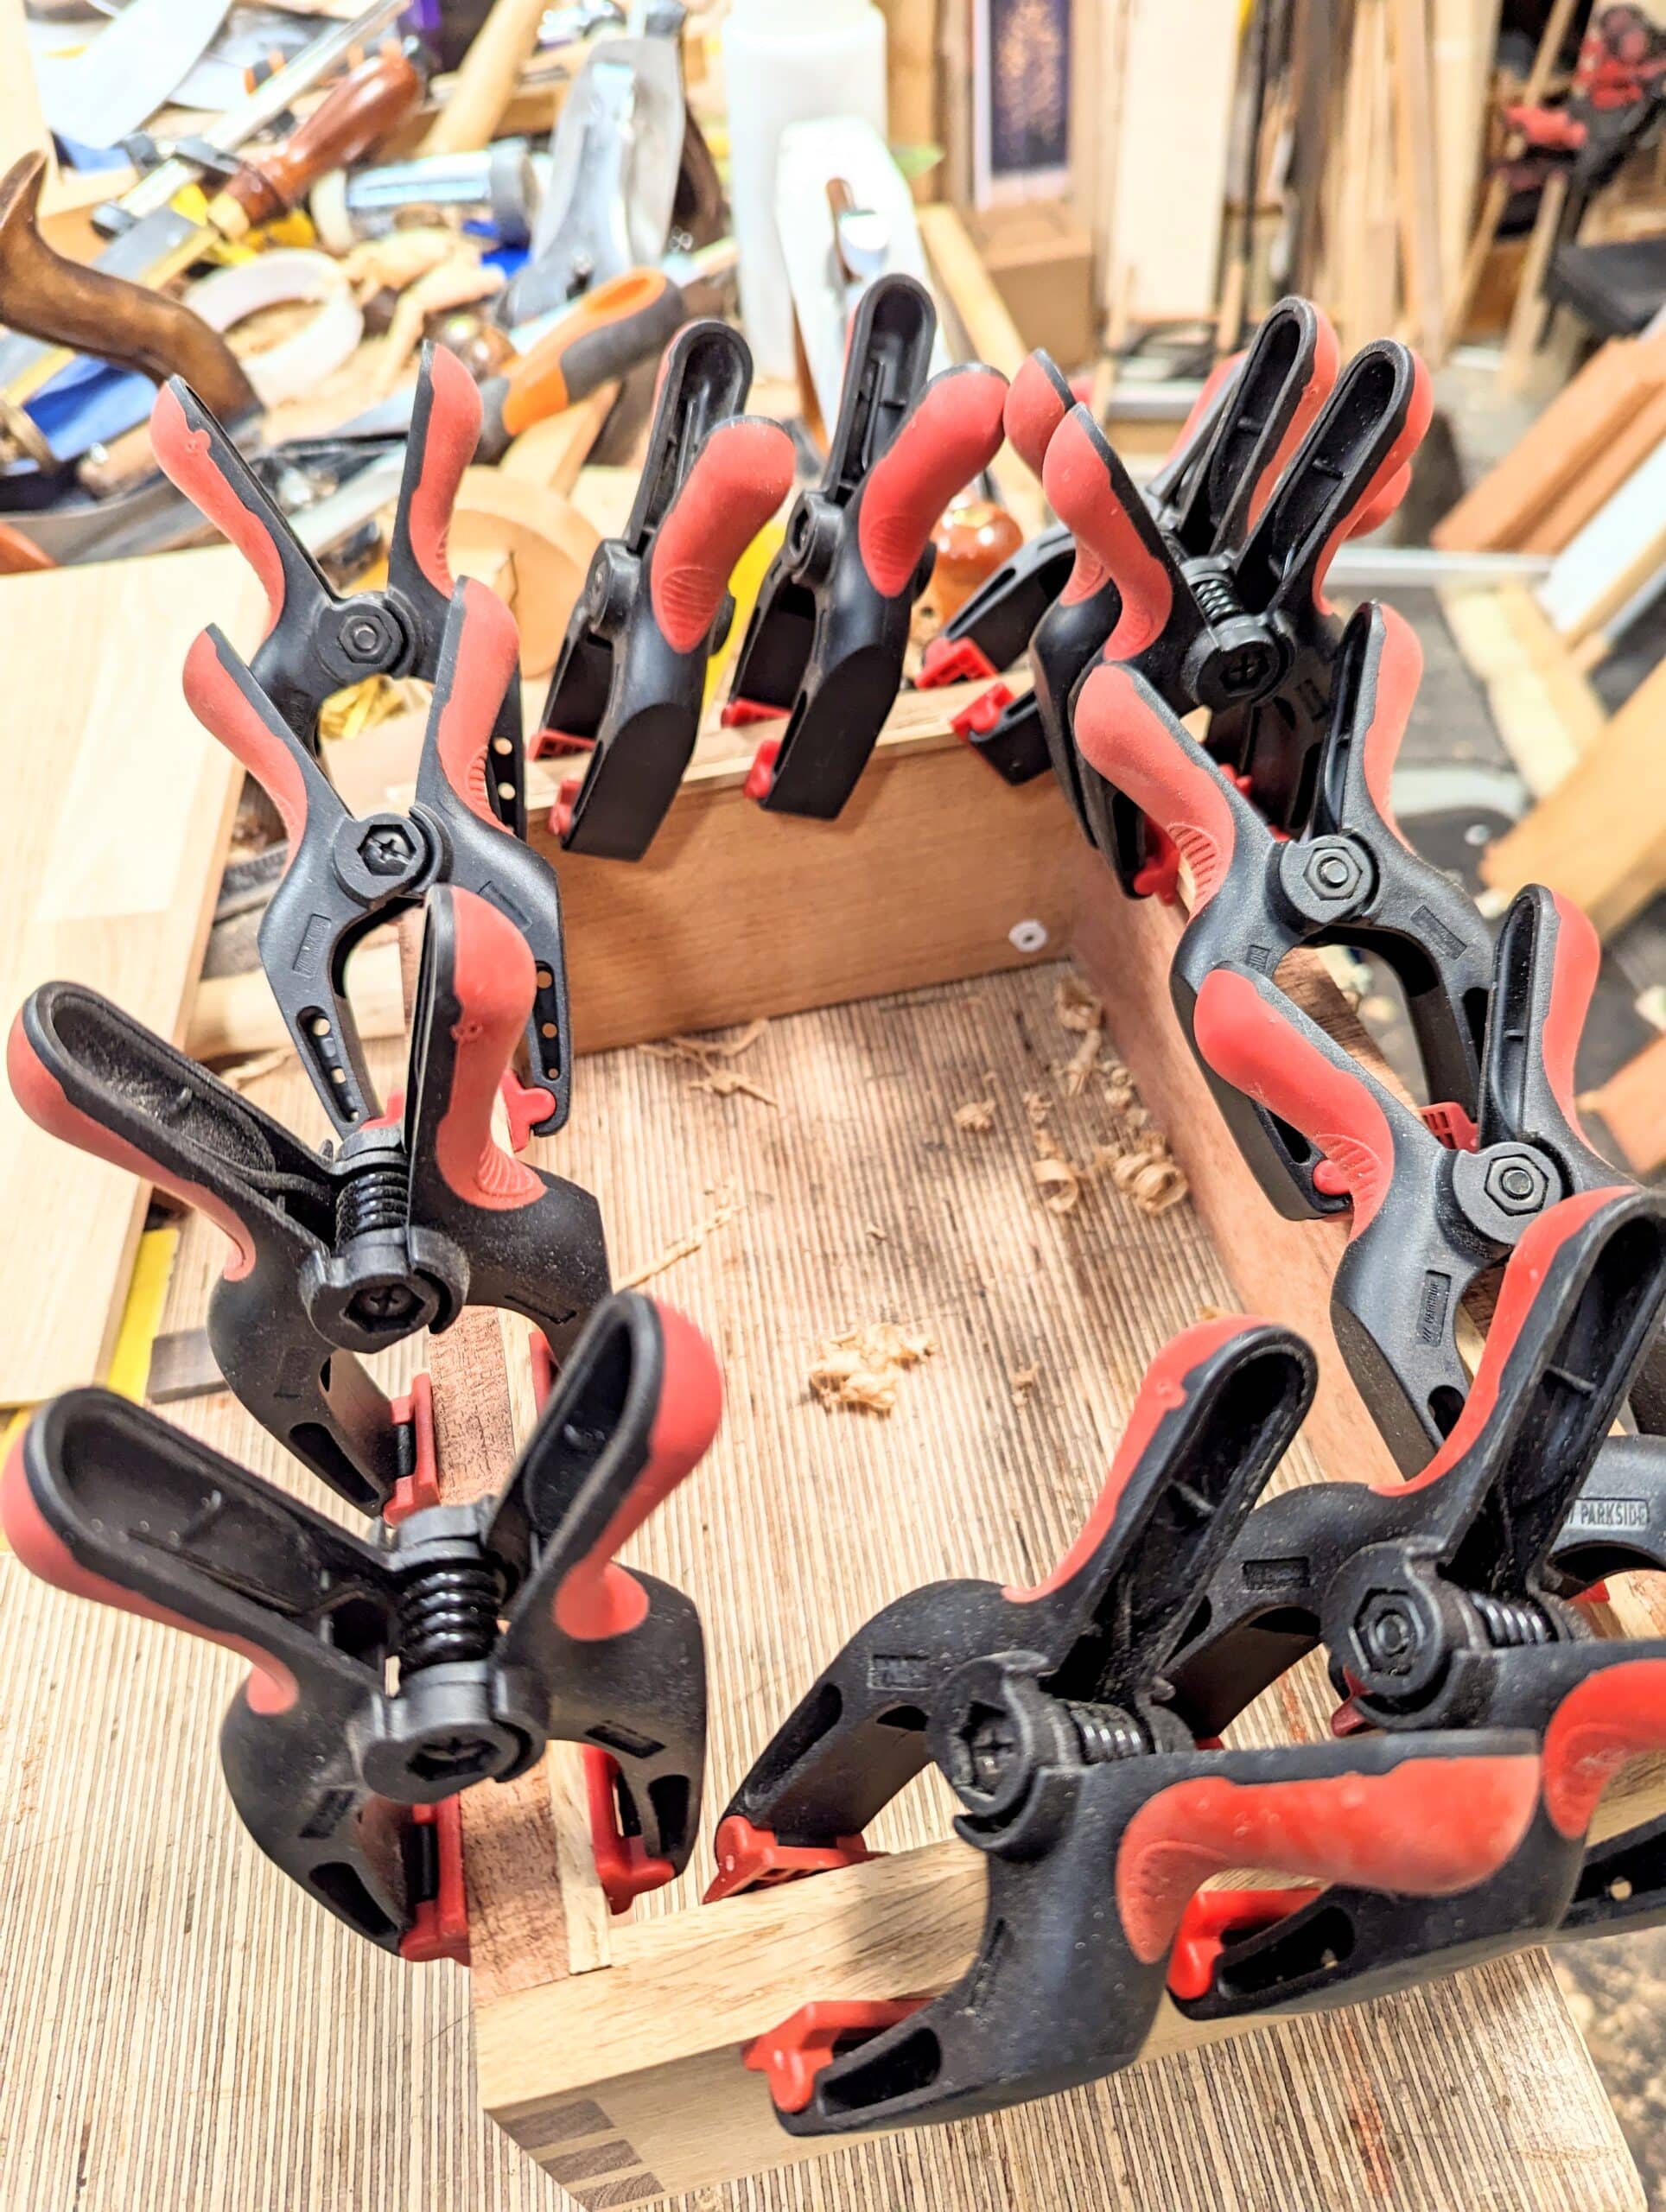
. . . and it’s already fitted. We glue 3/16″ by 1/4″ strips to the bottom rim of the box first. Use spring clamps (above) for this. Best to leave them for a couple of hours for the glue to dry.

Slide the box bottom into place and cut the retaining strips to length. A dry fit will be good at this stage, just to be sure. When fitted, you can glue the strips in place. I cut sticks that will bend but give pressure to use as stems to press the glued strips on opposite sides to the walls of the box. Use regular clamps as I did if you have them for the adjacent faces then you will be dry all at the same time, otherwise, the sticks get in the way of each other. Do not add glue to the box bottom. We must allow the bottom to expand and contract for the rest of its life otherwise it may split through shrinkage.
Apply the finish of your choice. There are many good rag-applied finishes finishing to a pleasing satin finish these days. I think I would avoid a water-based as they are usually thicker and more opaque. Shellac is good if you want a high glass but buffing out with 0000 steel wool and a soft paste furniture wax softens it. I used Osmo Polyx-Oil High Solid 3232 Rapid Clear Satin this time. Two to three coats wiped on and then almost scrubbed all off straightaway with five hours between coats works well making it impervious to water, staining and alcohol. You do not need their special applicators or removal rags. I just use microfibre household and car cleaning cloths cut into 5″ squares for application and clean-off. Warning: As with many oil finishes, even the ones that seem natural, this finish is capable of spontaneous combustion so dispose of it sensibly. I keep a can of water for this but an airtight container works too. Oh, and clean up can just be with white spirits so no special solvents as suggested on the can.

I do hope that you enjoy practising your dovetailing on this box. I have always found it best to practice on real pieces as `I did as an apprentice. Often, George would just throw me in at the deep end as we made in the day-to-day. I cannot recall ever practising dovetails until I got it. From day one, every joint I ever made was on the project in progress as we engaged in its making.
My, my, my! Mr Sellers you have my mind going this cold morning. After a bit of quiet time it will be good to bundle up and get going on the project. But first I have a request from our daughter for some serving spoons. Times a wasting.
Blessings to you Sir.
Well done, Paul, as usual. The box is not only easy on the eye but you have packed it full of teachable moments as well.
I wasn’t sure from the instructions; was the back of the lid essentially a round-over?
A quarter of a turn centered on the pivot axis; otherwise it wouldn’t be possible to lift the lid open.
I had to read a few times to understand that the bottom is inserted from inside (“Slide the box bottom into place”) after the operation: “We glue 3/16″ by 1/4″ strips to the bottom rim of the box first. ”
and the bottom is then kept in place by the other strips glued inside and above the bottom.
Same as for the drawer of the “desktop organiser”.
I guess one make a staggered board out of battens and then cut thinner pannels with the band saw for the top and bottom.
Any trick to make the butt joints perfect? (passing a fine saw between the two ends?)
Ah! The only reason that that the stepped pieces are in the design is because I upcycled the waste from a kitchen sink cut out that had been discarded. So a solid piece of quartersawn wood would work or a laminated section, Sylvain.
This is a question I have been wondering for a long time. What type of material did you wrap the wooden jaw of your vise in? I have tried a few things that have been unsatisfactory. The leather I have used became smooth and it slips and is also too thick to wrap over the top as you have done. Thanks again as always.
Mine is upholstery hide. It stretches moderately and when stretched into place it gives around a couple of years if six-day-a-week use before i need to replace it. I do the one jaw only, it’s 2mm thick max, and if there is any slip of wood between the jaws it is because I didn’t cinch the jaw up tightly enough. In other words, nothing slips.
I kept a look out for old leather furniture being thrown out , asked if I could have, then cut off what I could, put the unused remains down the local recycling depot.
I feel so many people would have enjoyed the apprentice method of learning, as Paul eloquently describes the good and sometime challenging persons involved. I recall many trade elders like his true friend George, You were shown, you had a brief practice and then trade tested, Off you went with another skill under the belt to perfect. So many of my later engineering colleagues who had been pressured to go do a “real education” were a bit less enthusiastic about design and innovation. As opposed to my German colleagues who often did apprenticeships as the forerunner to their later degrees, many becoming the ultimate business leaders, as they intimately understood the workings of the disciplines from bottom to top. Only 45 years since my Year 12 then Adult apprenticeship with RAEME in Australian Defence, where in the beginning we all sort of grumbled about not getting to use “the machines” and were sternly advised
“you won’t be plugging into any trees if you’re out in the forest gentlemen, hand tool skills work 24/7 light or dark, master them and you will revel in those skills all your life”.
Like Paul i’ve managed to create pretty perfect spherical shapes by hand because you have an attitude that it can done. We were given so much cross-trade training over my original 8 years of training and I still look to learn and try to master new techniques and appreciate the can-do that Paul personifies in perfecting trade/craft knowledge.
Paul gets respect, he’s earned it
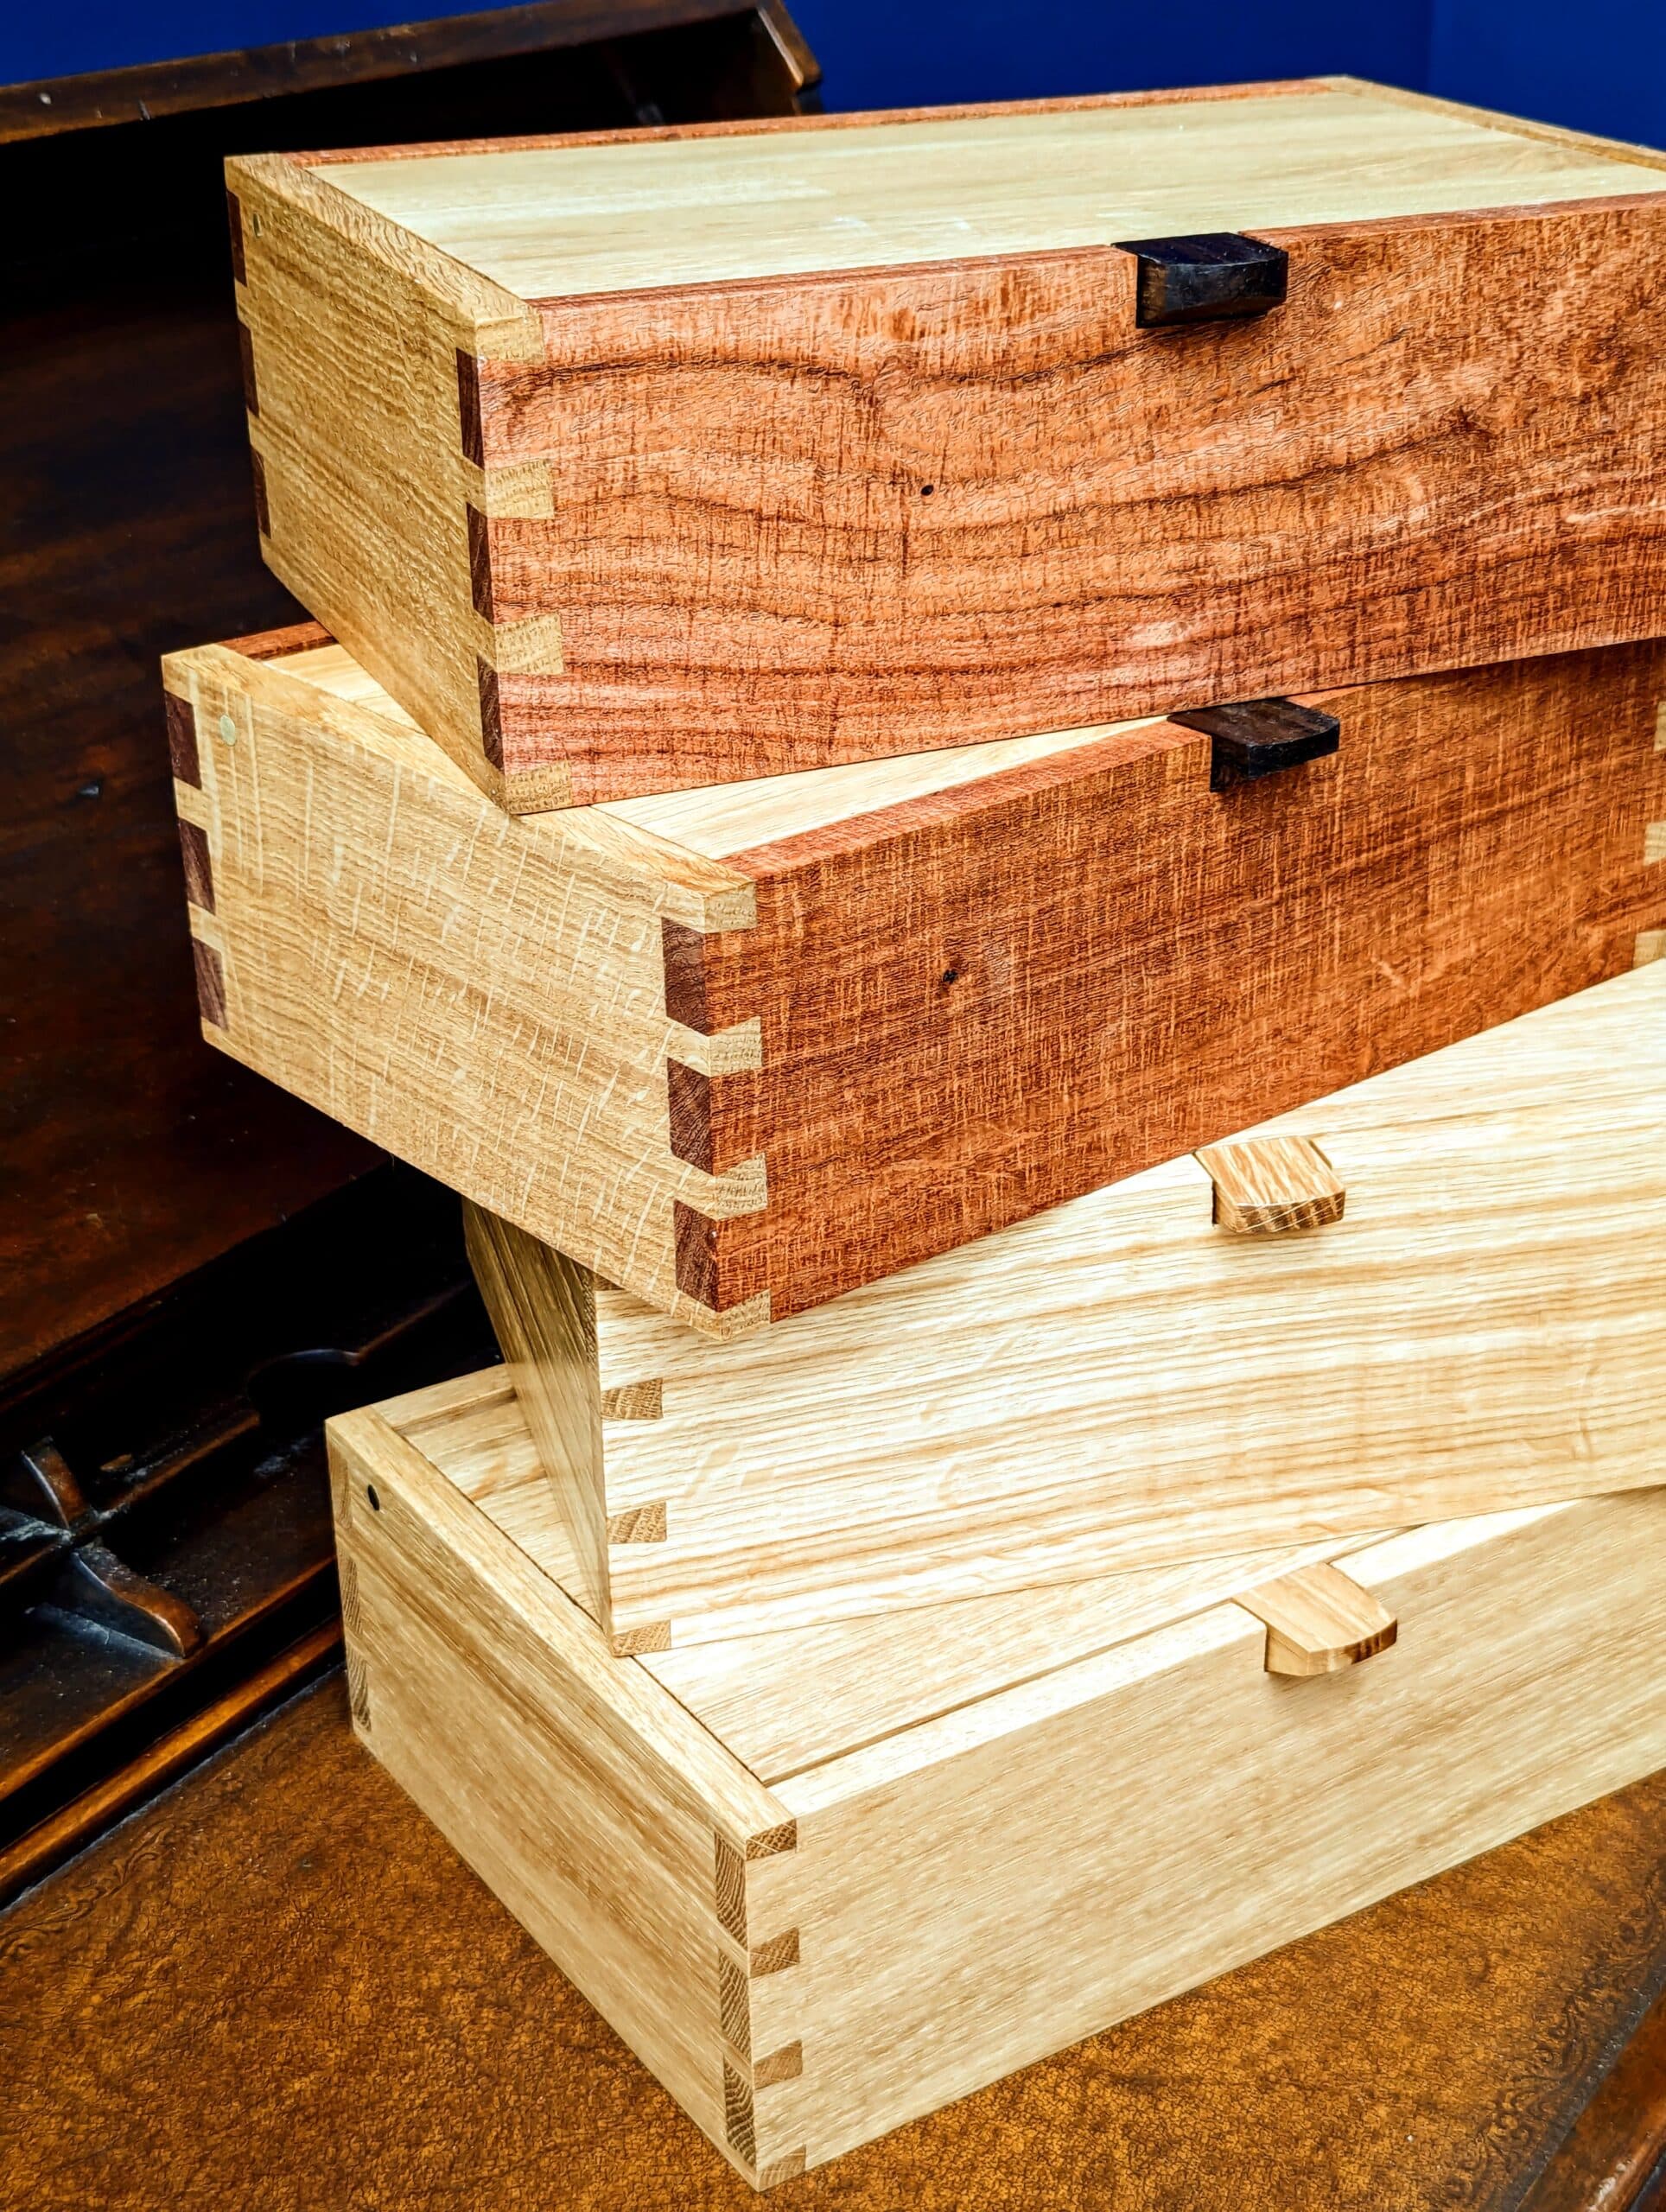
Thank you for a great design and insightful execution, I love the look of the quarter sawn wood with the contrasting dovetails, and the recessed top with tight reveals.
Also the hinge mechanism, simple but functional. Well Done Sir.
Beautiful little boxes, and so many expert teaching moments. Thank you.
Greetings, Paul!
Just a clarification on the brass hinge screws. Are they (what we call in the US) an Oval head wood screw?
(As opposed to a standard round head wood screw)
I ask because I made my son a humidor and used Oval head brass screws installed down each corner, front and back, which locked the mitres in place.
They also became a decretive element as I was able to set them slightly proud of the surrounding wood and filed them flush to give the look of brass pins.
The Oval head, after filing flush, left a goodly amount of material underneath to help hold the humidor together for the next 100 years or so!
Always enjoy your work!
Thank you!
Don B
The oval head screws here have slots that cut just below the ridge line around the edge so no, it doesn’t really work as well. I used round head screws as i said and they worked really well.
Thank you for the update!
Don B
Thanks Paul
I always enjoy hearing a little more about George, obviously a huge figure in your life.
I noticed that one of your schools involves making a trestle style coffee table. As I live a little too far away to attend one of these classed I was hoping the plans for this table has been published somewhere. Is this the case? if so where?
The trestle table was a woodworkingmasterclasses.com project from 2015 https://woodworkingmasterclasses.com/videos/trestle-table-project-info/
I’m sorry, but you mentioned:
“Do not add glue to the box bottom. We must allow the bottom to expand and contract for the rest of its life otherwise it may split through shrinkage.”
While I understand this, what I don’t understand is why in other box projects you did glued the bottom. For instance, in the Dovetail Caddy project. And I think also in the Desktop Organiser, if I remember it.
So, I’m a little bit confused. Should we, or shouldn’t we glue the bottom of boxes?
Was there a different criteria in this specific project?
Thank you
It’s to do with the width of the panel. I work on the maxim that if is narrower than say six inches, gluing should be no problem, anything wider, let it fly. There again, all panels in grooves or with stops should be allowed to float with no gluing required because they are solely held in place on both sides and the ends by the retainer strips (or the groove if used) and therefore require no gluing.
Ah, now I understood! Thanks! And is it necessary to leave any gap between the sides of bottom/panel and the sides of the box, to allow the expansion and contraction to take place?
Hi Paul
Just tried to download the cutting list for the box from your UTUBE video link. Tried several time but get the same error that I am not checking the human box, but it never appears. Is there a bug?
We tested it our end and through another not connected to us and it downloaded fine, Keith.
Cheers Paul
Just tried again and it worked fine. There must have been an intermittent glitch between me and your server earlier. I had tried it several times but got the same error message.Thanks for taking the time.
Keith
I can’t believe anyone would voice criticism of any of Paul’s builds. I appreciate his artistry, skill, and his methods. I am a woodworker (retired), and learn something every time Paul builds something. I have made a few of his projects, the box above, and another box he did a while back. I appreciate his skill with handsaws, hand planes, and chisels.
As an old Mark Twain saying goes, ““It’s better to keep your mouth shut and appear stupid than open it and remove all doubt”.
Paul, thank you so much for this tutorial. I have made 3 boxes for gifts and I am incredibly pleased with the finished result. Beautiful design and construction!